Welcome to the Heart of Southern Comfort: No Bake Banana Pudding
There’s something profoundly comforting about a bowl of no bake banana pudding. It’s not just a dessert; it’s a vessel of sweet memories, tender moments, and the laughter shared around a family table. This no bake banana pudding recipe captures the essence of my childhood in Louisiana, where the kitchen was a sanctuary filled with love and tradition. With layers of creamy pudding, fresh bananas, and delightful wafer cookies, this dessert brings joy to any occasion, be it a summer picnic or a cozy family gathering. Let’s dive into this heartwarming recipe that’s as easy to make as it is delightful to eat.
Why You’ll Love This Recipe
- Quick and Easy: With just five ingredients and no baking required, you can whip up this dessert in about 20 minutes, leaving you plenty of time for family and friends.
- Perfect for Hot Days: This recipe is a lifesaver during warm weather. It’s refreshing, light, and doesn’t require heating up the kitchen.
- Kid-Friendly Fun: Involve your little helpers! They’ll love layering the ingredients and getting their hands messy with the delicious whipped cream.
- Rich in Flavor: The combination of creamy vanilla pudding and fresh bananas creates a flavor explosion that’s indulgent yet comforting.
- Tradition Meets Modernity: This classic Southern dessert is a nostalgic reminder of family gatherings, but with a modern twist that makes it accessible to everyone.
Ingredients Breakdown
Gathering the right ingredients is essential for this banana pudding recipe no bake. Here’s what you’ll need:
- 5.1 oz Instant Vanilla Pudding Mix: This is the foundation of your pudding. For an even richer flavor, consider using a premium brand.
- 3 cups Cold Milk: Always use cold milk to ensure your pudding thickens properly.
- 4 Bananas: Sliced into ½ inch pieces. Make sure they’re ripe but firm for the best texture.
- 8 oz Whipped Topping: You can use store-bought or make your own for a fresher taste. Homemade whipped cream can elevate the dessert.
- 15 oz Wafer Cookies: These provide the perfect crunch and sweetness. Vanilla wafers are traditional, but feel free to experiment with chocolate or other flavors.
Step-by-Step Instructions
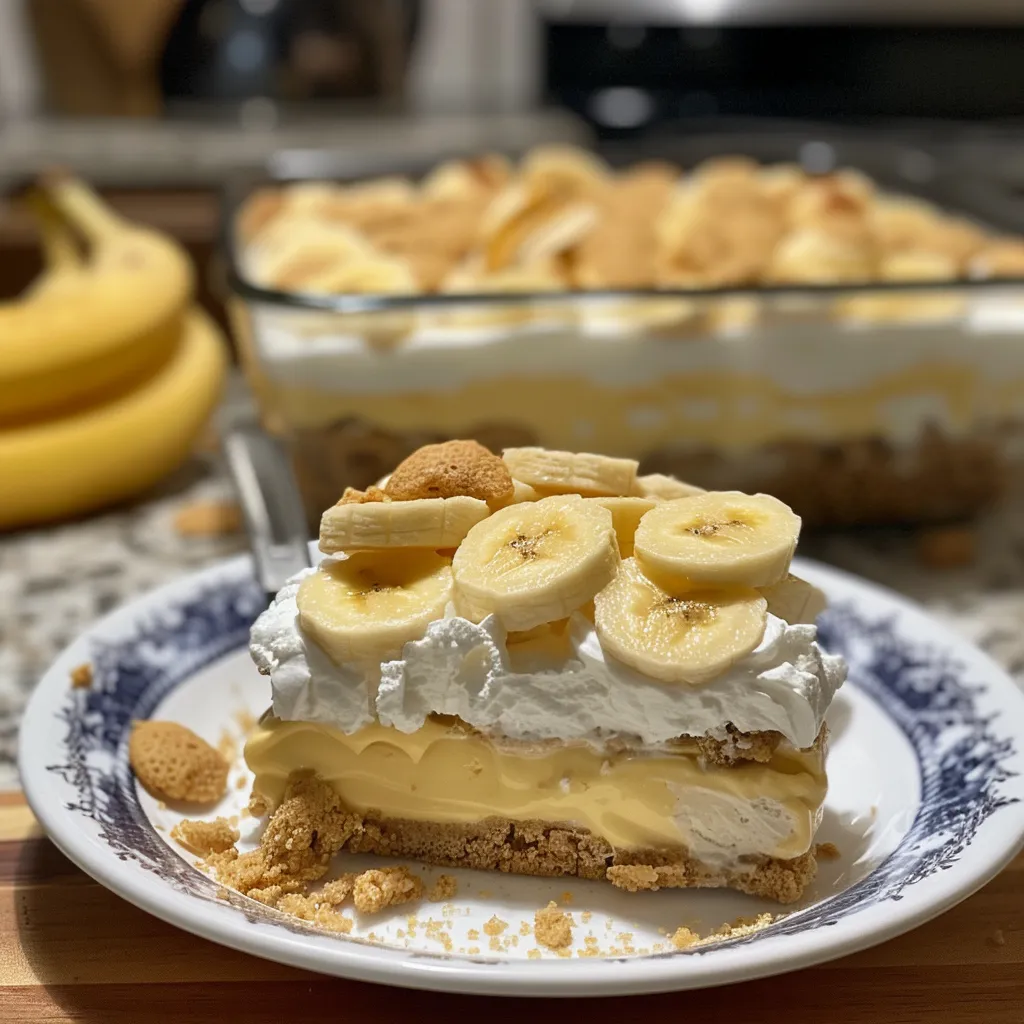
Follow these simple steps to create your masterpiece:
- Prepare: Gather your ingredients along with a 9×13 inch baking dish, a whisk, and a large bowl.
- Combine: In a large bowl, whisk together the pudding mix and cold milk until smooth and lump-free. Fold in half of the whipped topping.
- Layer the Wafers: Take six cookies out of the box and set them aside. Line the bottom of the baking dish with the remaining cookies, placing them side by side.
- Add Bananas: Layer the banana slices over the cookies, then top with half of the pudding mixture. Smooth it out with a spoon.
- Repeat Layers: Continue the layering process with wafers, bananas, and pudding until you’ve used all the ingredients. Finish with the remaining whipped topping.
- Top Off: Crush the reserved cookies and sprinkle them over the top. Add any leftover banana slices for decoration.
Expert Tips for Success
- Use Fresh Ingredients: Fresh bananas and quality pudding mix make a world of difference in taste.
- Chill Time is Critical: Allow the pudding to chill for at least four hours before serving. This helps the flavors meld beautifully.
- Preventing Brown Bananas: If you want to keep your bananas from browning too quickly, sprinkle a little lemon juice over them before layering.
- Texture Matters: For a creamier texture, use whole milk instead of skim or low-fat.
- Whipped Topping Tip: If making your own whipped cream, use chilled equipment for the best results.
- Layering Technique: Be gentle when layering to avoid crushing the bananas or wafers.
- Serving Style: Serve in individual cups for a fun twist, perfect for parties!
- Experiment with Flavors: Don’t hesitate to add a splash of vanilla extract or a sprinkle of cinnamon for extra flavor.
Common Mistakes and Troubleshooting
Even the best of us can make mistakes in the kitchen. Here are a few common pitfalls and how to avoid them:
- Overmixing the Pudding: Mixing too vigorously can introduce air, leading to a less creamy texture. Mix gently until just combined.
- Using Overripe Bananas: While ripe bananas are best, too mushy bananas will turn into mush in the pudding. Aim for a firm texture.
- Not Chilling Long Enough: Skipping the chill time can result in a runny pudding. Patience is key!
Delicious Variations
Want to switch things up? Here are a few variations to try:
- Chocolate Banana Pudding: Substitute chocolate pudding mix for vanilla for an indulgent twist.
- Peanut Butter Banana Pudding: Add a layer of peanut butter between the banana and pudding layers for a delightful surprise.
- Berry Banana Pudding: Layer in some fresh berries for a burst of color and flavor.
- Nutty Crunch: Add chopped nuts like pecans or walnuts for added texture and flavor.
Storage and Make-Ahead Instructions
This dessert is perfect for making ahead of time. Here are some storage tips:
- Refrigeration: Store your banana pudding in the refrigerator for up to 3 days. Cover it tightly with plastic wrap to prevent it from absorbing unwanted odors.
- Freezing: While it’s not ideal to freeze banana pudding, you can freeze the layers separately and assemble just before serving.
- Make-Ahead: You can prepare the pudding a day in advance; just be sure to add bananas closer to serving time to keep them fresh.
Frequently Asked Questions
Here are some common questions about this no bake banana pudding dessert:
- How long does no bake banana pudding last in the fridge? Typically, it lasts for about 3 days before the bananas start to brown.
- Can I use almond milk instead of regular milk? Yes, but it may alter the flavor slightly. Choose a creamy, unsweetened variety for best results.
- Can I make this dessert gluten-free? Absolutely! Use gluten-free wafer cookies to accommodate dietary needs.
- Can I use fresh whipped cream instead of whipped topping? Yes, fresh whipped cream can enhance the flavor and texture.
- What if my pudding isn’t thickening? Ensure you’re using cold milk and that it’s mixed well. If still thin, let it sit in the fridge longer.
- Can I add other fruits? Yes, feel free to add strawberries or peaches for a delightful twist!
- Is this dessert suitable for kids? Absolutely! It’s a fun and easy recipe that kids love to help with.
- How do I know when the pudding is ready to serve? The pudding should be set and chilled, with a creamy texture before serving.
Nutrition Tips and Dietary Adaptations
This banana pudding dessert can be adapted to fit various dietary preferences:
- Lower Sugar: Use sugar-free pudding mix and whipped topping to reduce sugar intake.
- Vegan Option: Substitute with plant-based milk and coconut whipped cream.
- Protein Boost: Mix in a scoop of protein powder into the pudding for a nutritious twist.
Equipment Recommendations
Here’s what you’ll need for this recipe:
- 9×13 inch Baking Dish: Perfect for layering and serving.
- Large Mixing Bowl: For combining pudding and milk.
- Whisk: Essential for mixing the pudding until smooth.
- Spatula: For spreading layers evenly.
Serving Suggestions
Serve this delightful no bake banana pudding with:
- Fresh Mint: A sprig of mint adds a lovely touch and freshness.
- Chocolate Shavings: For a decadent finish, sprinkle some chocolate shavings on top.
- Additional Fruit: Serve with extra banana slices or seasonal berries for a pop of color.
In conclusion, making this no bake banana pudding is more than just following a recipe; it’s about creating memories and sharing love through food. As you gather your ingredients and bring this dessert to life, remember that every layer tells a story. Enjoy every moment spent in the kitchen, and may each bite carry you back to cherished times around the family table. Happy cooking!
No Bake Banana Pudding Dessert
Ingredients
Dairy & Pudding
- 5.1 oz Instant Vanilla Pudding Mix
- 3 cups Milk (cold)
- 8 oz Whipped Topping
Fruits & Cookies
- 4 Bananas Bananas (sliced into ½" pieces)
- 15 oz Wafer Cookies
Instructions
- Combine pudding mix and milk in a large bowl until smooth, then fold in half of the whipped topping.
- Arrange cookies in a 9x13" dish to form the base layer.
- Add a layer of banana slices over the cookies, then spread half of the pudding mixture on top.
- Repeat layers with remaining cookies, bananas, pudding, and whipped topping.
- Crush remaining cookies and sprinkle on top; add leftover banana slices if desired. Chill before serving.