Author

daniel

Browsing

As the leaves begin to change and the air turns crisp, there’s a special warmth that comes from the kitchen. Nothing captures the essence of autumn quite like a slice of Pumpkin Spice Latte Cake. This delightful recipe combines the rich flavors of pumpkin, aromatic spices, and the invigorating essence of coffee, creating a cake that’s perfect for sharing with loved ones or simply savoring on a cozy afternoon. Let’s embark on this culinary journey together, where each bite tells a story of warmth, nostalgia, and love.

Why You’ll Love This Recipe

  • Delicious Flavor Fusion: The harmony of pumpkin, spices, and coffee creates a comforting taste that speaks to the soul.
  • Easy to Follow: With straightforward steps, this recipe is perfect for both novice bakers and seasoned pros.
  • Moist and Tender Texture: The combination of pumpkin puree and buttermilk ensures the cake remains soft and luscious.
  • Perfect for Any Occasion: Whether it’s a festive gathering or a quiet evening at home, this cake fits right in.
  • Make Ahead Capability: Prepare in advance for effortless entertaining or last-minute cravings.

Ingredients Breakdown

Let’s gather our ingredients and get ready to create some magic! Here’s what you’ll need:

  • 2 1/4 cups (281 g) all-purpose flour: Spooned and leveled for accuracy.
  • 1 tbsp pumpkin pie spice: A blend of cinnamon, nutmeg, and ginger to warm your heart.
  • 1 1/2 tsp baking powder: To help your cake rise beautifully.
  • 1/4 tsp baking soda: For added lift.
  • 1/2 tsp salt: Enhances the flavors.
  • 10 tbsp (140 g) unsalted butter, softened: Adds richness.
  • 1 1/2 cups (300 g) granulated white sugar: Sweetness to balance the spices.
  • 2 eggs, at room temperature: Helps in creating a smooth batter.
  • 1 tsp vanilla extract: A hug of warmth in every bite.
  • 1/2 cup (120 ml) buttermilk, at room temperature: Keeps the cake moist.
  • 1 cup (244 g) canned pumpkin puree, at room temperature: The star ingredient!
  • 1/4 cup (60 ml) espresso or strong coffee: Infuses a delightful coffee flavor.
  • 1/3 cup (80 ml) whole milk: For the perfect consistency.
  • 1/2 cup (150 g) sweetened condensed milk: Adds creaminess and sweetness.
  • 1/4 tsp pumpkin pie spice: For the frosting.
  • 1 cup (224 g) unsalted butter, softened: The base of the creamy frosting.
  • 8 oz (226 g) cream cheese, cold: For a silky texture in the frosting.
  • 2 cups (260 g) powdered sugar: Sweetness for the frosting.
  • 1 1/2 tsp vanilla extract: Enhances the frosting flavor.
  • 2 tsp instant espresso powder: For an extra coffee kick.
  • 1 1/2 tsp pumpkin pie spice: To make the frosting sing.

Pro Tips for Baking Success

  • Room Temperature Ingredients: Make sure your eggs and buttermilk are at room temperature for a smoother batter.
  • Don’t Overmix: When combining wet and dry ingredients, mix just until incorporated to keep the cake light and fluffy.
  • Proper Oven Temperature: Ensure your oven is preheated to the correct temperature for even baking.
  • Use Quality Ingredients: Fresh spices and real pumpkin puree make a noticeable difference in flavor.
  • Check for Doneness: Use a toothpick to check if the cake is done; it should come out clean or with a few moist crumbs.
  • Cool Completely: Allow the cake to cool fully before frosting to prevent melting.
  • Use a Serrated Knife: When cutting the cake, a serrated knife will give you the cleanest slices.
  • Chill the Frosting: If your frosting is too soft, refrigerate it briefly to thicken before spreading.

Common Mistakes and Troubleshooting

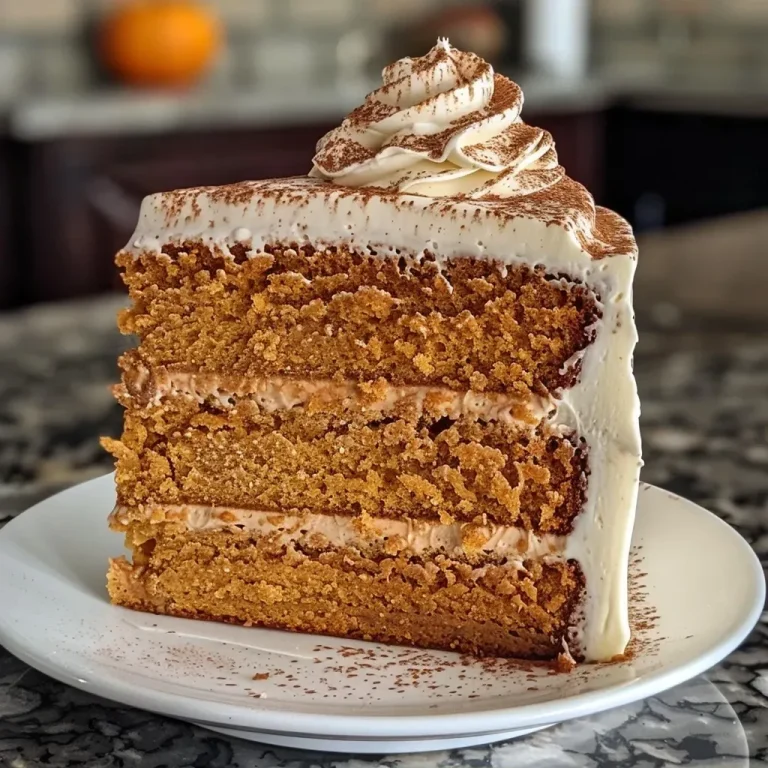
Side view of a decadent Pumpkin Spice Latte Cake slice, highlighting its creamy frosting and texture.

Even the best bakers encounter hiccups! Here are some common mistakes and how to avoid them:


5-Speed Electric Hand Mixer

★ Recommended Kitchen Tool

5-Speed Electric Hand Mixer

Make this recipe even easier with a quality 5-Speed Electric Hand Mixer — a must-have kitchen staple!


🛒 See Deals on Amazon →

As an Amazon Associate, we earn from qualifying purchases.
  • Dry Cake: This can happen if you use too much flour. Always spoon and level your flour for accuracy.
  • Dense Texture: Overmixing can lead to a heavy cake. Mix just until combined.
  • Frosting Issues: If your frosting is too runny, add more powdered sugar; if too thick, add a splash of milk.
  • Crumbly Cake: Ensure you’re using the right measurements and that your ingredients are fresh.

Delicious Variations

Feel free to make this recipe your own! Here are some delightful variations to try:

  • Gluten-Free Pumpkin Spice Latte Cake: Substitute all-purpose flour with a gluten-free blend.
  • Vegan Version: Use flax eggs and plant-based butter and cream cheese.
  • Chocolate Pumpkin Spice Cake: Add cocoa powder to the dry ingredients for a chocolate twist.
  • Nutty Addition: Fold in chopped walnuts or pecans for added texture and flavor.

Storage and Make-Ahead Instructions

This cake can be made ahead of time and stored for later enjoyment. Here’s how to keep it fresh:

  • Room Temperature: Store the cake in an airtight container at room temperature for up to 3 days.
  • Refrigeration: If you need to store it longer, keep it in the fridge for up to a week.
  • Freezing: Wrap individual slices in plastic wrap and foil to freeze for up to 3 months. Thaw in the fridge before serving.

Frequently Asked Questions

Here are some common questions about this delightful cake:

  • Can I use fresh pumpkin instead of canned? Yes, just ensure it’s cooked and pureed until smooth.
  • Is it necessary to use espresso powder? While it enhances the flavor, you can substitute it with additional coffee or omit it.
  • What can I serve with this cake? It pairs beautifully with whipped cream or a scoop of vanilla ice cream.
  • Can I make this cake in advance? Absolutely! It stores well and actually tastes better after a day.
  • How do I know when the cake is done? The edges should be lightly browned, and a toothpick inserted in the center should come out clean.
  • Can I use a different frosting? Yes! Cream cheese frosting is traditional, but you can use chocolate or vanilla frosting instead.
  • Is this cake gluten-free? Use a gluten-free flour blend to make it suitable for gluten-free diets.
  • What’s the best way to serve it? Slice and serve at room temperature for the best flavor and texture.

Nutrition Tips and Dietary Adaptations

To make this cake even more health-conscious, consider these tips:

  • Reduce Sugar: Substitute some sugar with applesauce or a sugar alternative.
  • Whole Grain Option: Use whole wheat flour for added fiber.
  • Dairy-Free Version: Use coconut milk and vegan butter for a dairy-free cake.

Equipment Recommendations

Having the right tools can make a world of difference. Here’s what I recommend:

  • Mixing Bowls: A set of various sizes for mixing wet and dry ingredients.
  • Measuring Cups and Spoons: Invest in a reliable set for accurate measurements.
  • Electric Mixer: A stand or hand mixer for easy creaming of butter and sugar.
  • 9-inch Round Cake Pans: Ensures even baking and easy removal.
  • Cooling Rack: Necessary for cooling the cake properly before frosting.

Serving Suggestions

When it comes to serving your Pumpkin Spice Latte Cake, think about these delightful ideas:

  • Top with Whipped Cream: A dollop of freshly whipped cream adds a light, airy touch.
  • Garnish with Spices: Sprinkle cinnamon or nutmeg on top for a beautiful presentation.
  • Pair with Coffee: Serve alongside a cup of your favorite coffee or tea for a cozy experience.

As you prepare this Pumpkin Spice Latte Cake, remember that cooking is more than just a series of steps; it’s about sharing moments, creating memories, and filling your home with love. Enjoy the process, savor the flavors, and share it with those you cherish. Here’s to warm kitchens, fragrant spices, and cakes that wrap us in comfort! Happy baking!

Pumpkin Spice Latte Cake

Prep Time 20 minutes
Cook Time 35 minutes
Total Time 55 minutes
Servings 12 pieces
Calories 350
A moist and flavorful cake infused with pumpkin and warm spices, perfect for fall celebrations.

Ingredients

Flour

  • 2 1/4 cups all purpose flour, spooned and leveled

Spices

  • 1 tbsp pumpkin pie spice

Baking Agents

  • 1 1/2 tsp baking powder
  • 1/4 tsp baking soda

Salt

  • 1/2 tsp salt

Butter

  • 10 tbsp unsalted butter, softened

Sugar

  • 1 1/2 cups granulated white sugar

Eggs

  • 2 eggs at room temperature

Vanilla Extract

  • 1 tsp vanilla extract

Buttermilk

  • 1/2 cup buttermilk, at room temperature

Pumpkin Puree

  • 1 cup canned pumpkin puree, at room temperature

Espresso/Strong Coffee

  • 1/4 cup espresso or strong coffee

Milk

  • 1/3 cup whole milk

Sweetened Condensed Milk

  • 1/2 cup sweetened condensed milk

Cream Cheese

  • 8 oz cream cheese, cold

Powdered Sugar

  • 2 cups powdered sugar

Vanilla Extract (Frosting)

  • 1 1/2 tsp vanilla extract

Espresso Powder

  • 2 tsp instant espresso powder

Pumpkin Pie Spice (Frosting)

  • 1 1/2 tsp pumpkin pie spice

Instructions 

  • Preheat oven to 350°F (175°C). Mix dry ingredients and wet ingredients separately, then combine and bake for 35 minutes.
  • Allow cake to cool completely before frosting.
  • Prepare frosting by beating cream cheese, powdered sugar, vanilla, espresso, and spices until smooth.
  • Spread frosting over cooled cake and serve.
Notes

For best flavor, use fresh spices and high-quality pumpkin puree.
Calories: 350kcal
Cost: $15
Course: Dessert
Cuisine: American
Keyword: cake, Pumpkin, spice

Welcome to the Heart of Fall: Discover Mini Cinnamon Sugar Pumpkin Donut Muffins!

As the leaves turn and the air fills with the warm spices of autumn, there’s nothing quite like the comfort of freshly baked goods. These Mini Cinnamon Sugar Pumpkin Donut Muffins embody the essence of the season—soft, spiced, and lovingly made. In this recipe, you’ll learn to create delightful treats that not only taste incredible but also evoke cherished memories of family gatherings and cozy afternoons in the kitchen.

Imagine the smell of cinnamon and pumpkin wafting through your home, wrapping around you like a favorite blanket. Whether you’re baking for a special occasion or simply to satisfy a craving, these muffins will bring a smile to your face and warmth to your heart.

Why You’ll Love This Recipe

  • Quick and Easy: This recipe is straightforward, making it perfect for bakers of all skill levels. You can whip up a batch in no time, using simple ingredients that you likely already have at home.
  • Deliciously Moist: Thanks to the pumpkin puree, these muffins are incredibly moist, ensuring that each bite is tender and flavorful. They won’t last long on the table!
  • Perfectly Spiced: The blend of pumpkin pie spice and cinnamon creates a warm, inviting flavor profile that captures the essence of fall.
  • Versatile Treat: Enjoy them for breakfast, as a snack, or even as a dessert. They pair beautifully with coffee, tea, or a glass of milk.
  • Family-Friendly: This recipe is fun to make with kids! Let them help mix the batter and roll the muffins in cinnamon sugar for a delightful kitchen experience.

Ingredients You’ll Need

To recreate these lovely muffins, gather the following ingredients:


Cake Decorating Set

★ Recommended Kitchen Tool

Cake Decorating Set

Make this recipe even easier with a quality Cake Decorating Set — a must-have kitchen staple!


🛒 Shop This Tool →

As an Amazon Associate, we earn from qualifying purchases.
  • ¾ cup (180ml) pure pumpkin puree: Adds moisture and that unmistakable fall flavor.
  • ½ cup (110g) packed light brown sugar: Provides a deep caramel sweetness and helps keep the muffins soft.
  • 1 large egg (at room temperature): Acts as a binder and contributes to the perfect tender crumb.
  • ¼ cup (60ml) sunflower oil: You can substitute with another neutral oil, like canola or vegetable oil.
  • ½ teaspoon (5ml) pure vanilla extract: Enhances the overall flavor of the muffins.
  • 1 ¼ cups (180g) all-purpose flour: The base of our muffin batter.
  • ¾ teaspoon pumpkin pie spice: For that classic fall flavor.
  • ¾ teaspoon baking powder: To help the muffins rise.
  • ¼ teaspoon baking soda: Works alongside baking powder for the perfect lift.
  • ¼ teaspoon salt: Balances the sweetness.
  • ¼ cup (60ml) whole milk: Adds richness to the batter.
  • ⅓ cup (65g) granulated sugar: Used for the cinnamon sugar coating.
  • 1 tsp ground cinnamon: Essential for that cozy flavor.
  • 3 tbsp (42g) unsalted butter, melted: For brushing the muffins before rolling in sugar.

Step-by-Step Instructions

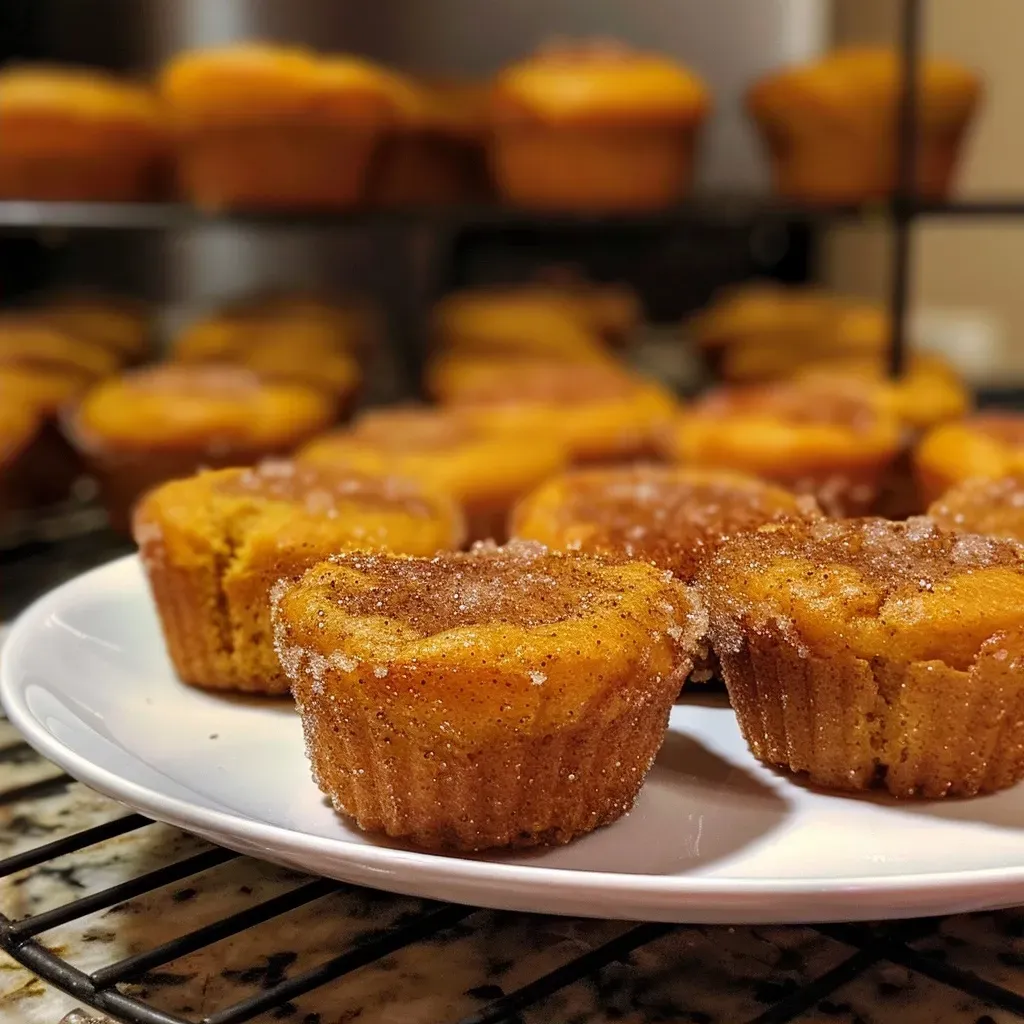
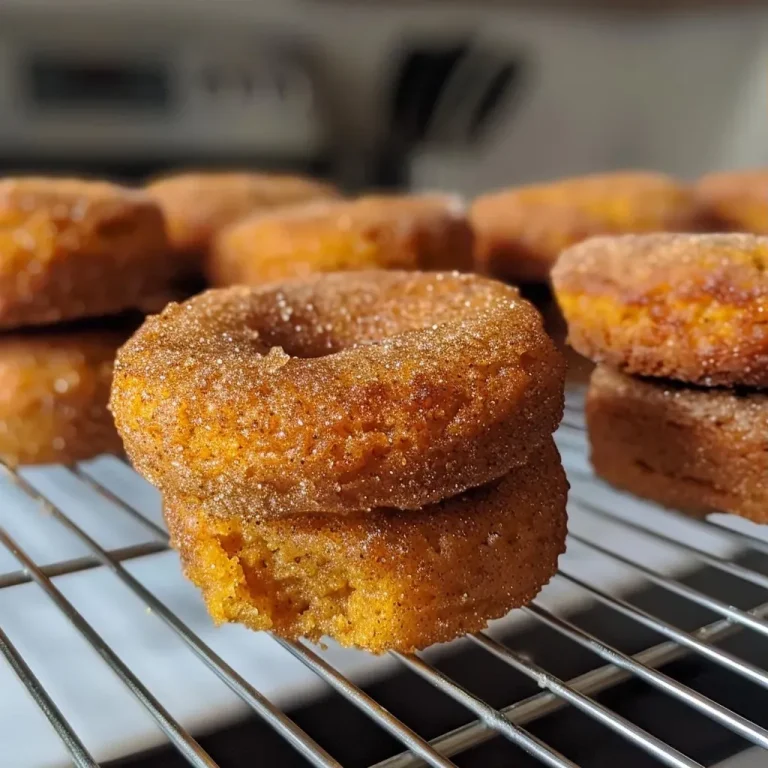
Side angle of fluffy mini cinnamon sugar pumpkin muffins with a tempting glaze.

Follow these easy steps to create your Mini Cinnamon Sugar Pumpkin Donut Muffins:

  1. Preheat your oven: Set your oven to 350°F (175°C). Lightly spray a 24-count mini muffin pan with nonstick spray or grease it with soft butter. Set aside.
  2. Mix dry ingredients: In a large bowl, whisk together the flour, pumpkin pie spice, baking powder, baking soda, and salt until evenly blended.
  3. Combine wet ingredients: In a separate medium bowl, whisk together the pumpkin puree, brown sugar, egg, oil, and vanilla until smooth.
  4. Bring it all together: Make a well in the center of the dry ingredients and pour in the wet mixture. Stir gently with a spatula until just combined; the batter will be lumpy. Add the milk and fold until evenly mixed, but avoid over-mixing.
  5. Fill muffin cups: Using a 1.25 oz cookie scoop or two spoons, fill each muffin cup with batter, filling them all the way to the top.
  6. Bake: Bake for 10-15 minutes, or until a toothpick inserted into the center comes out clean. Allow the muffins to cool in the pan for 20 minutes.
  7. Make the cinnamon sugar: In a small bowl, mix together granulated sugar and cinnamon. Lightly brush the cooled muffins with melted butter, then roll them in the cinnamon sugar mixture until evenly coated.

Pro Tips for Perfect Muffins

  • Room Temperature Ingredients: Ensure your egg and milk are at room temperature for better blending and texture.
  • Don’t Overmix: A few lumps in the batter are okay. Overmixing can lead to dense muffins.
  • Use Fresh Ingredients: Make sure your baking powder and spices are fresh for the best rise and flavor.
  • Watch the Bake Time: Ovens can vary. Start checking at the 10-minute mark to avoid overbaking.
  • Cool Properly: Allow muffins to cool in the pan for a few minutes before transferring to a wire rack to prevent sogginess.
  • Experiment with Mix-Ins: Add chocolate chips, nuts, or dried fruit to customize your muffins.
  • Keep an Eye on the Sugar Coating: These muffins are best enjoyed on the same day when the cinnamon sugar is fresh and crunchy.
  • Storing Leftovers: Cover loosely to allow airflow and keep the muffins from getting too moist.

Common Mistakes and Troubleshooting

Here are a few common pitfalls to watch out for:

  • Dry Muffins: This can happen if you overmix the batter or use too much flour. Use a light hand when mixing!
  • Flat Muffins: Ensure your baking powder is fresh and that the oven is preheated properly.
  • Uneven Baking: Make sure to rotate your muffin pan halfway through baking to promote even cooking.
  • Moisture Issues: If your muffins are too moist, try reducing the milk slightly or ensuring that your pumpkin puree isn’t too watery.

Variations to Try

Feel free to put your own spin on these muffins:

  • Chocolate Chip Pumpkin Muffins: Fold in ½ cup of chocolate chips for a sweet twist.
  • Nuts for Crunch: Add ¼ cup of chopped pecans or walnuts for added texture.
  • Maple Glaze: Drizzle a simple maple glaze over the top instead of rolling in cinnamon sugar.
  • Spiced Up: Increase the pumpkin pie spice for a bolder flavor or add in some ginger for a spicy kick.

Storage and Make-Ahead Instructions

To enjoy your muffins later:

  • Room Temperature: Store leftover muffins at room temperature for up to 1 day. Cover loosely to maintain texture.
  • Refrigerator: For longer storage, refrigerate them for up to 3 days. Just remember to cover them well!
  • Freezing: Freeze muffins in an airtight container or zip-top bag for up to 3 months. Thaw at room temperature or gently reheat.

FAQs

Here are some common questions about this recipe:

  • Can I use canned pumpkin puree? Absolutely! Canned pumpkin is a fantastic time-saver and works perfectly in this recipe.
  • What can I use instead of brown sugar? You can substitute with white sugar, but the flavor will be slightly different—less caramel-like.
  • Can I make these muffins gluten-free? Yes, you can use a gluten-free all-purpose flour blend for a gluten-free version.
  • How do I know when the muffins are done? Insert a toothpick into the center; if it comes out clean, they’re ready!
  • Can I skip the cinnamon sugar coating? While it adds a lovely finishing touch, you can enjoy these muffins plain or with a dusting of powdered sugar.
  • How do I make these muffins dairy-free? Substitute whole milk with almond milk or coconut milk and use dairy-free butter.
  • Why did my muffins sink? This could be due to overmixing or too much liquid. Ensure the ratios are correct!
  • Is it necessary to let them cool before eating? While they are delicious warm, letting them cool allows the flavors to settle and the sugar to adhere better.

Nutritional Tips and Dietary Adaptations

If you’re mindful of dietary needs, here are some adaptations:

  • Reduce Sugar: Cut down on the sugar for a healthier option. You can also use natural sweeteners like honey or maple syrup.
  • Add Fiber: Incorporate oats or flaxseed meal into the batter for added nutrition.
  • Use Whole Wheat Flour: Substitute part of the all-purpose flour with whole wheat flour for a nuttier flavor and more fiber.

Equipment Recommendations

To make your baking experience smoother, consider the following tools:

  • Mini Muffin Pan: A non-stick mini muffin pan is essential for easy release and even baking.
  • Mixing Bowls: Use large and medium-sized bowls for mixing wet and dry ingredients separately.
  • Whisk: A good whisk is crucial for well-blended batter.
  • Cookie Scoop: A cookie scoop helps in evenly portioning the batter into muffin cups.
  • Cooling Rack: A wire cooling rack is important for letting the muffins cool evenly.

Serving Suggestions

These muffins shine on their own, but you can elevate the experience with:

  • Fresh Fruit: Serve alongside slices of apple or pear for a delightful contrast.
  • Spiced Tea or Coffee: Pair with a cup of chai or pumpkin spice latte for a cozy treat.
  • Yogurt: A dollop of vanilla yogurt on the side adds creaminess and balances the sweetness.
  • Ice Cream: For a decadent dessert, serve warm muffins with a scoop of vanilla ice cream.

As you gather around the table with loved ones, let these Mini Cinnamon Sugar Pumpkin Donut Muffins be more than just a recipe; let them be a part of your autumn traditions, a way to connect, share, and create memories that will last a lifetime. Happy baking!

Mini Cinnamon Sugar Pumpkin Donut Muffins

Prep Time 10 minutes
Cook Time 15 minutes
Total Time 25 minutes
Servings 12 muffins
Calories 150
Delight in these moist pumpkin muffin donuts coated with cinnamon sugar, perfect for a quick treat or breakfast.

Ingredients

Dry ingredients

  • 180 ml pure pumpkin puree
  • 110 g packed light brown sugar
  • 1 large egg (at room temperature)
  • 60 ml sunflower oil (or other neutral liquid oil)
  • 5 ml pure vanilla extract
  • 180 g all-purpose flour
  • 3.75 g pumpkin pie spice
  • 3.75 g baking powder
  • 1.25 g baking soda
  • 1.25 g salt
  • 60 ml whole milk
  • 65 g granulated sugar
  • 1 tsp ground cinnamon
  • 42 g unsalted butter (melted)

Instructions 

  • Preheat oven to 350°F and prepare a mini muffin pan.
  • Mix dry ingredients in a large bowl; whisk to combine.
  • Whisk wet ingredients in a separate bowl, then combine with dry, folding until just mixed. Add milk and fold gently.
  • Divide batter into muffin cups and bake for 10-15 minutes. Cool on a wire rack.
  • Mix cinnamon and sugar. Brush muffins with melted butter, then roll in cinnamon sugar.

Notes

Enjoy the muffins fresh for the best cinnamon sugar crunch.
Calories: 150kcal
Cost: $8
Course: Breakfast, Snack
Cuisine: American
Keyword: Cinnamon, Muffins, Pumpkin

Embrace the Warmth of Honey Wheat Dinner Rolls

There’s something incredibly soothing about the smell of fresh bread wafting through the kitchen, a scent that evokes memories of family gatherings and laughter around the dinner table. These Honey Wheat Dinner Rolls are not just a recipe; they are a vessel for connection, comfort, and love—an invitation to gather close and share stories. With simple ingredients and straightforward steps, you can create these golden beauties that are perfect for any meal, whether it’s a Sunday dinner or a cozy weeknight meal.

Why You’ll Love This Recipe

These rolls are more than just a side dish; they carry the heart and soul of home cooking. Here’s why they will quickly become a staple in your kitchen:

  • Wholesome Ingredients: Made with whole wheat flour, these rolls are packed with fiber and nutrients, making them a healthier choice.
  • Natural Sweetness: Honey adds a delightful sweetness that enhances the flavor without being overpowering.
  • Soft Texture: The rolls are soft and pillowy, perfect for sopping up gravy or enjoying with butter.
  • Easy to Make: With just a few simple steps, you can create bakery-quality rolls in your own home.
  • Versatile Serving Options: Serve them alongside soups, stews, or as a base for sliders—the possibilities are endless!

Ingredients You’ll Need

To create these delicious Honey Wheat Dinner Rolls, gather the following ingredients:


Digital Kitchen Scale

★ Recommended Kitchen Tool

Digital Kitchen Scale

Make this recipe even easier with a quality Digital Kitchen Scale — a must-have kitchen staple!


🛒 Check Price on Amazon →

As an Amazon Associate, we earn from qualifying purchases.
  • 2 cups whole wheat flour: Provides fiber and a nutty flavor.
  • 1 cup all-purpose flour: This helps achieve a light texture.
  • 2 1/4 tsp instant yeast: The key to a good rise.
  • 3 tbsp honey: Adds sweetness and moisture.
  • 1 tsp salt: Enhances the flavors.
  • 1 cup warm milk (110°F/43°C): Activates the yeast.
  • 2 tbsp melted butter: For richness and flavor.
  • 1 egg (optional): Adds extra richness and color.

How to Make Honey Wheat Dinner Rolls

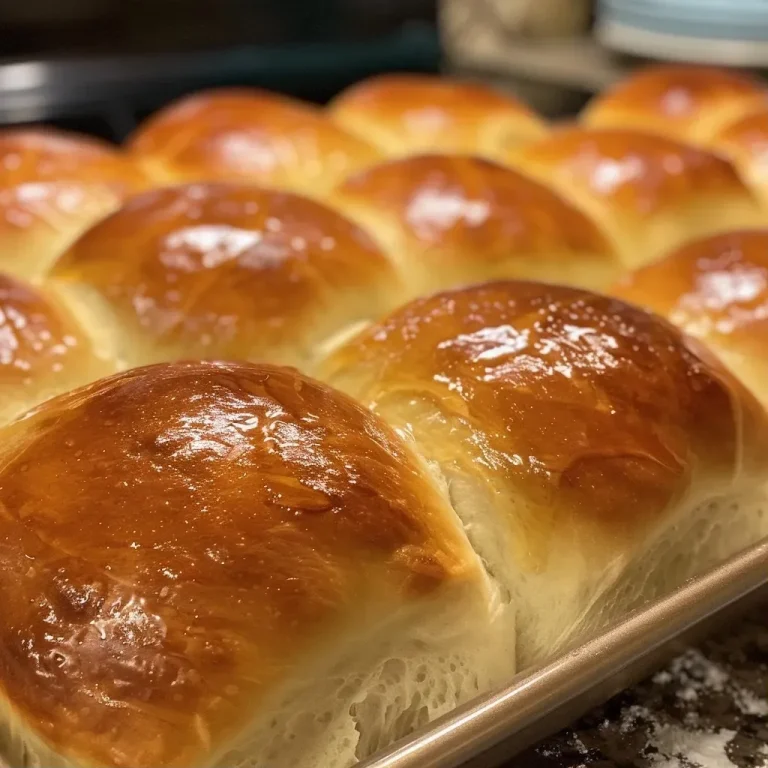
Side view of fluffy honey wheat dinner rolls with a shiny golden crust.

Here’s how to bring these rolls to life:

Step 1: Combine & Knead

In a large mixing bowl, combine the whole wheat flour, all-purpose flour, instant yeast, and salt. Stir in the honey, warm milk, melted butter, and the optional egg. Knead the dough by hand for about 8 minutes until it forms a smooth and elastic texture.

Step 2: Rise

Place the dough in a lightly greased bowl, cover it with a clean cloth, and allow it to rise in a warm place for about 1 hour, or until it has doubled in size.

Step 3: Shape Rolls

Once the dough has risen, punch it down gently to release air. Divide the dough into small portions and shape them into balls. Place the rolls into a lightly greased baking pan, cover, and let them rise for another 30 minutes.

Step 4: Bake

Preheat your oven to 375°F (190°C). Bake the rolls for about 15–18 minutes, or until they are golden brown. Brush the tops with melted butter while they are still warm for an extra touch of flavor.

Step 5: Serve

Enjoy these soft, slightly sweet rolls with dinner, or savor them on their own with a smear of butter or your favorite jam.

Pro Tips for Making Honey Wheat Dinner Rolls

To ensure your rolls turn out perfectly, consider these expert tips:

  • Use Room Temperature Ingredients: Ensure your milk and egg are at room temperature to help activate the yeast more effectively.
  • Don’t Rush the Rise: Allow the dough to rise until it has doubled. This is crucial for achieving a light, airy roll.
  • Check Yeast Freshness: If your yeast is expired, the rolls may not rise properly. Always check the expiration date.
  • Keep the Dough Moist: If the dough feels too sticky, add a little more flour, but avoid overdoing it as this can make the rolls dense.
  • Experiment with Flavors: Add herbs or spices to the dough for a unique twist—think garlic or rosemary for savory rolls.
  • Brush with Butter: Brushing the rolls with melted butter not only adds flavor but also gives them a beautiful shine.
  • Store Properly: Keep the rolls in an airtight container at room temperature to maintain softness.
  • Try Different Shapes: You can shape the dough into knots or rolls; get creative!

Common Mistakes and Troubleshooting

Even the best cooks can encounter hiccups. Here are some common mistakes and how to fix them:

  • Dough Doesn’t Rise: This could be due to inactive yeast. Ensure your yeast is fresh and that the milk is warm, not hot.
  • Rolls Turn Out Dense: This may be from too much flour or not kneading enough. Aim for a smooth, elastic dough.
  • Burnt Tops: If the rolls brown too quickly, cover them loosely with foil halfway through baking.
  • Sticky Dough: If your dough is too sticky, sprinkle a bit of flour while kneading, but try to avoid adding too much.

Variations on Honey Wheat Dinner Rolls

Feel free to get creative! Here are some delicious variations to consider:

  • Garlic Herb Rolls: Add minced garlic and dried herbs to the dough for a savory twist.
  • Cheesy Rolls: Fold in shredded cheese before shaping the rolls for a cheesy delight.
  • Sweet Cinnamon Rolls: Add cinnamon and a sprinkle of sugar for a sweet version.
  • Whole Wheat Cinnamon Raisin Rolls: Incorporate raisins and cinnamon for a delightful breakfast treat.

Storage and Make-Ahead Instructions

To enjoy your rolls later:

  • Storing: Keep in an airtight container at room temperature for up to 3 days.
  • Freezing: Freeze the rolls in a freezer-safe bag for up to 3 months. Thaw at room temperature or reheat in the oven.
  • Make-Ahead: You can prepare the dough a day in advance and let it rise in the refrigerator overnight. Just shape and bake the next day!

FAQs about Honey Wheat Dinner Rolls

Here are some frequently asked questions that might help you on your baking journey:

  • Can I use all-purpose flour instead of whole wheat? Yes, but the rolls will be less nutritious and have a different flavor.
  • What if I don’t have honey? You can substitute with brown sugar or maple syrup.
  • Can I use active dry yeast instead of instant yeast? Yes, but you’ll need to activate it in warm water first.
  • How can I tell when the rolls are done baking? They should be golden brown and sound hollow when tapped on the bottom.
  • Can I add seeds or nuts? Absolutely! Feel free to sprinkle in some sesame seeds or chopped nuts for added crunch.
  • What’s the best way to reheat frozen rolls? Place them in a warm oven for a few minutes or microwave them briefly.
  • Can I make this recipe vegan? Yes, substitute the milk with a non-dairy alternative and omit the egg.
  • How do I get the rolls to be extra fluffy? Ensure you knead the dough well and allow it to rise fully.

Nutritional Tips and Dietary Adaptations

Here are some tips to adapt the recipe to your dietary needs:

  • Gluten-Free: Use a gluten-free all-purpose flour blend.
  • Low Sugar: Reduce honey to 1 tablespoon or replace with a sugar substitute.
  • Higher Protein: Consider adding protein powder or using a higher protein flour.

Essential Equipment Recommendations

For this recipe, you will need:

  • Mixing Bowl: A large bowl for combining ingredients.
  • Measuring Cups and Spoons: Precision is key in baking!
  • Bench Scraper: Helpful for dividing dough.
  • Baking Pan: A 9×13 inch pan or round cake pans work well.
  • Kitchen Towel: To cover the dough while it rises.

Serving Suggestions

These Honey Wheat Dinner Rolls can be served in numerous ways:

  • As a Side: Pair them with soups, stews, or salads.
  • For Breakfast: Serve warm with butter and jam.
  • As Sliders: Use them as a base for sliders or mini sandwiches.

In conclusion, these Honey Wheat Dinner Rolls are more than just a recipe; they are a way to bring loved ones together. Sharing a meal is one of the simplest ways to show love and create lasting memories. So roll up your sleeves, gather your ingredients, and let the warmth of home cooking fill your kitchen. Happy baking!

Honey Wheat Dinner Rolls

Prep Time 15 minutes
Cook Time 18 minutes
Total Time 33 minutes
Servings 12 rolls
Calories 150
Soft, slightly sweet dinner rolls made with whole wheat and honey, perfect for any meal.

Ingredients

Dough

  • 2 cups whole wheat flour
  • 1 cup all-purpose flour (plus more if needed)
  • 2 1/4 tsp instant yeast
  • 3 tbsp honey
  • 1 tsp salt
  • 1 cup warm milk (110°F/43°C)
  • 2 tbsp melted butter (plus more for brushing)
  • 1 egg optional, helps with richness

Instructions 

  • Mix flours, yeast, and salt. Add honey, warm milk, melted butter, and optional egg. Knead until smooth (~8 min).
  • Let dough rise in a greased bowl, covered, for about 1 hour or until doubled.
  • Divide dough into small balls, place in a greased pan, cover, and let rise for 30 minutes.
  • Bake at 375°F (190°C) for 15–18 minutes until golden. Brush with butter while warm.
  • Serve warm for soft, sweet dinner rolls.

Notes

For softer rolls, brush with butter immediately after baking.
Calories: 150kcal
Cost: $12
Course: Side Dish
Cuisine: American
Keyword: Bread, Honey, wheat

Embrace the Warmth of Family with Sausage Stuffed Butternut Squash

There’s a special kind of magic that happens when you gather around the dinner table, sharing stories and laughter over a meal made with love. This sausage stuffed butternut squash recipe encapsulates that warmth, combining savory flavors of Italian sausage with the sweetness of apples and the earthiness of fresh herbs. Perfect for fall dinners or holiday gatherings, this dish not only nourishes the body but also feeds the soul, creating memories that linger long after the last bite.

Why You’ll Love This Recipe

  • Deliciously Balanced Flavors: The combination of savory sausage, sweet apples, and nutty pecans creates a delightful contrast that excites the taste buds.
  • Wholesome Ingredients: Packed with fresh vegetables and herbs, this recipe offers a healthy twist, making it suitable for those on a paleo or Whole30 diet.
  • Customizable Options: With a variety of substitutions and variations suggested, you can adapt the dish to suit your family’s preferences or dietary needs.
  • Easy to Prepare: This dish comes together in just a few simple steps, making it perfect for busy weeknights or special occasions.
  • Great for Leftovers: The flavors deepen as it sits, making it an excellent option for meal prep or enjoying the next day.

Ingredients You’ll Need

Gather these simple ingredients to create your delicious stuffed butternut squash:

  • 2 medium/large butternut squash: Choose ones that feel heavy for their size and have a smooth, unblemished skin.
  • 3 tablespoons avocado oil (or olive oil): Use this for roasting and sautéing.
  • Sea salt and black pepper: Essential for enhancing flavors throughout the dish.
  • 1 pound bulk Italian sausage: A flavorful choice, but feel free to substitute with turkey sausage for a lighter option.
  • 1 medium onion (diced): Adds sweetness and depth to the filling.
  • 3 cloves garlic (minced): A must for aromatic richness.
  • 1 tablespoon fresh sage leaves (minced): Complements the sausage beautifully.
  • 1 tablespoon fresh rosemary leaves (minced): Adds a fragrant touch.
  • 1 tablespoon fresh thyme leaves (minced): Provides an earthy flavor.
  • 3 cups kale (chopped): A nutritious addition that wilts nicely into the filling.
  • 1 medium apple (chopped, such as honeycrisp or pink lady): For a hint of sweetness.
  • 1 cup pecans (chopped): Adds a delightful crunch.
  • 1/2 cup dried cranberries (apple juice sweetened): A touch of tartness to balance the dish.
  • Sea salt and black pepper (to taste): Adjust as needed based on your seasoning preferences.

How to Make Sausage Stuffed Butternut Squash

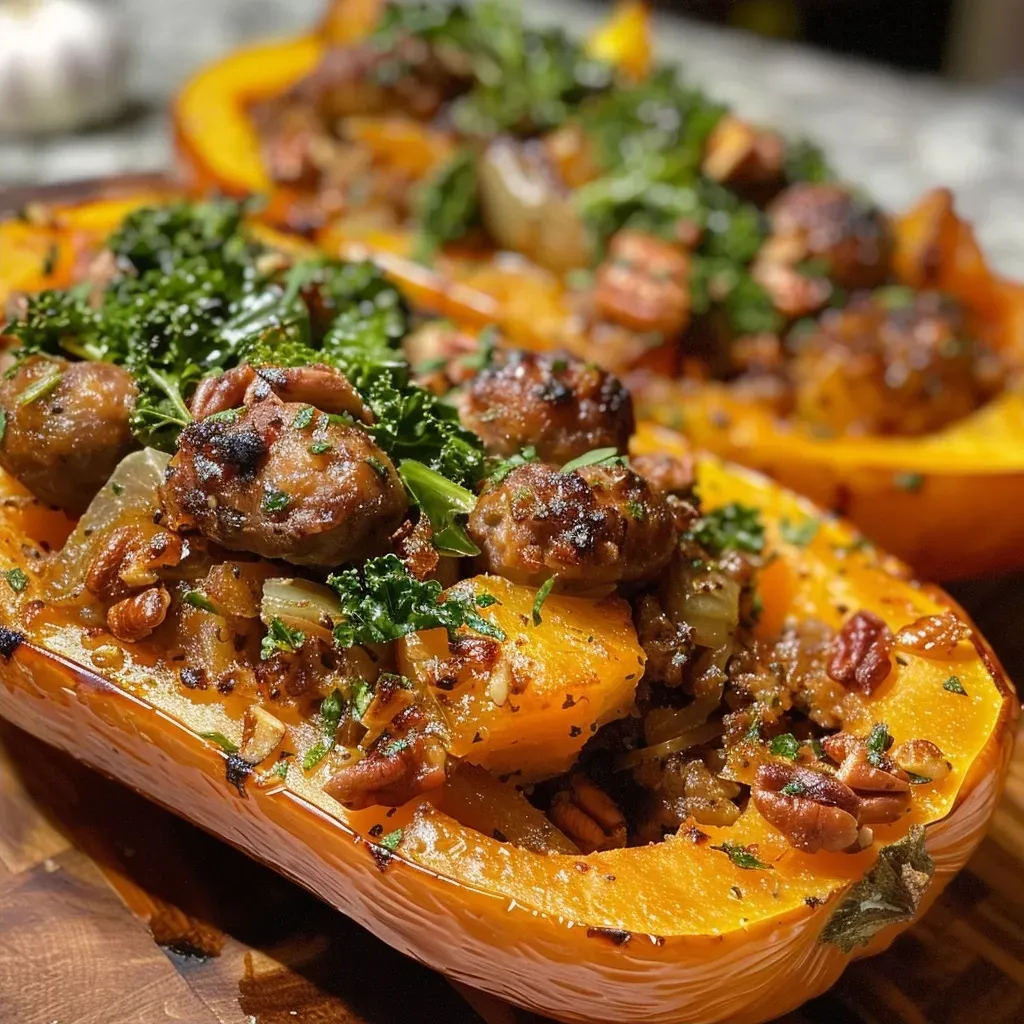
Side view of a sliced butternut squash showcasing its sausage stuffing and garnishes.

Follow these simple steps to create a dish that will be the star of your table:


Meal Prep Container Set

★ Recommended Kitchen Tool

Meal Prep Container Set

Make this recipe even easier with a quality Meal Prep Container Set — a must-have kitchen staple!


🛒 Shop This Tool →

As an Amazon Associate, we earn from qualifying purchases.
  1. Preheat your oven to 425°F and line a large baking sheet with parchment paper.
  2. Prepare the butternut squash: Cut each squash in half lengthwise, scoop out the seeds and strings, drizzle with 2 tablespoons of oil, and sprinkle generously with sea salt and pepper. Place them cut-side down on the baking sheet and roast for about 40 minutes until softened.
  3. Cook the filling: In a large skillet over medium heat, add the remaining tablespoon of oil and crumble in the sausage. Cook until it’s about 3/4 done. Add onions and garlic, cooking for 2 minutes until soft. Stir in fresh herbs and cook for an additional minute.
  4. Add vegetables and nuts: Mix in the kale, apples, and pecans, cooking for another minute or two until just softened. Remove from heat, stir in cranberries, and season to taste.
  5. Stuff the squash: Once the squash has cooled slightly, scoop out a bit of the flesh (leaving a 3/4″ border) and mix it into the filling. Spoon the filling generously into each squash half.
  6. Broil for a finish: Place the stuffed squash under the broiler for 2-4 minutes until the tops are golden brown. Garnish with extra fresh herbs if desired, and enjoy!

Pro Tips for the Best Stuffed Butternut Squash

  • Choose the right squash: Look for firm, heavy squashes with smooth skin for the best flavor and texture.
  • Don’t rush the roasting: Giving the squash enough time to roast ensures it becomes beautifully tender and caramelized.
  • Customize your filling: Feel free to incorporate seasonal vegetables like spinach or mushrooms for added nutrition.
  • Get creative with spices: Try adding a pinch of nutmeg or cinnamon to the filling for an extra layer of flavor.
  • Perfect leftovers: Store in an airtight container in the fridge for up to 4 days, and enjoy reheating in the oven.
  • Make ahead: Prepare the filling in advance and stuff the squash just before baking to save time.
  • Garnish wisely: A sprinkle of fresh parsley or a dollop of sour cream can elevate the dish before serving.

Common Mistakes and Troubleshooting

Here are a few pitfalls to avoid when making your stuffed butternut squash:

  • Overcooking the squash: Keep an eye on the roasting time; overcooked squash can become mushy.
  • Not seasoning enough: Be generous with seasonings; under-seasoned filling can taste bland.
  • Skipping the broiler step: Broiling adds a lovely crisp finish that enhances the overall dish.
  • Ignoring texture: Make sure the filling has a good mix of ingredients for varied texture and flavor in every bite.

Variations on Sausage Stuffed Butternut Squash

Mix things up with these creative variations:

  • Vegetarian Delight: Substitute the sausage with lentils or black beans for a wholesome vegetarian option.
  • Sweet and Savory: Add a tablespoon of maple syrup to the filling for a touch of sweetness.
  • Spicy Kick: Mix in some diced jalapeños or a dash of cayenne pepper for heat.
  • Cheesy Twist: Sprinkle some shredded cheese over the top before broiling for a gooey, cheesy finish.

Storage and Make-Ahead Instructions

This dish is perfect for meal prep or making ahead of time:

  • Refrigerate: Store leftovers in an airtight container in the fridge for up to 4 days.
  • Freeze: If you want to make it ahead, freeze the stuffed squash for up to 3 months. Thaw in the refrigerator before reheating.
  • Reheat: Warm the stuffed squash in the oven at 350°F until heated through, about 20-25 minutes.

Frequently Asked Questions

  • Can I use acorn squash instead of butternut?: Absolutely! Acorn squash has a similar texture and flavor profile.
  • Is this dish healthy?: Yes, it’s packed with nutrients from the squash, kale, and apples, while being low in carbs.
  • Can I prep this dish the night before?: Yes, prepare the filling and stuff the squash, then cover and refrigerate until ready to bake.
  • What type of sausage should I use?: You can use Italian sausage, chicken sausage, or even a vegetarian option depending on your preference.
  • Can I add other vegetables?: Definitely! Feel free to incorporate spinach, mushrooms, or bell peppers into the filling.
  • How do I know when the squash is done?: It should be tender when pierced with a fork and slightly caramelized on the edges.
  • How do I serve it?: Serve warm, garnished with fresh herbs or a dollop of yogurt for a refreshing touch.
  • What can I serve alongside this dish?: A light salad or some roasted vegetables make excellent companions.

Nutritional Tips and Dietary Adaptations

This stuffed butternut squash not only satisfies the palate but can also be tailored to fit your dietary needs:

  • Low Carb Option: Skip the apples and cranberries for a lower sugar version.
  • Gluten-Free: This recipe is naturally gluten-free, making it suitable for those with gluten sensitivities.
  • Whole30 Compliant: All ingredients fit within Whole30 guidelines, making it a great choice for your meal plan.

Equipment Recommendations

To prepare this delightful dish, you’ll need:

  • Sharp knife: For cutting the squash easily.
  • Baking sheet: A rimmed baking sheet is ideal for roasting the squash.
  • Skillet: A large skillet for cooking the sausage and vegetables.
  • Parchment paper: To line the baking sheet for easy cleanup.

Serving Suggestions

Enhance your meal with these serving ideas:

  • Fresh Herbs: Garnish with fresh parsley or thyme for a burst of color and flavor.
  • Side Salad: A simple green salad with a light vinaigrette complements the richness of the squash.
  • Hot Sauce: For those who like a bit of heat, a drizzle of hot sauce adds a zesty touch.

Conclusion

Cooking is more than just combining ingredients; it’s about creating memories and sharing love. This sausage stuffed butternut squash recipe is a testament to that spirit, inviting you to gather around the table with your loved ones. Whether it’s a cozy weeknight dinner or a festive holiday meal, this dish is sure to bring warmth and joy to your home. So grab your ingredients, roll up your sleeves, and let’s get cooking!

Sausage Stuffed Butternut Squash {Paleo, Whole30}

Prep Time 15 minutes
Cook Time 45 minutes
Total Time 1 hour
Servings 4 servings
Calories 450
A flavorful and hearty paleo and Whole30-friendly dish featuring roasted butternut squash filled with savory sausage, herbs, and seasonal produce.

Ingredients

Vegetables and Fruits

  • 2 med/large butternut squash
  • 1 medium onion (diced)
  • 1 medium apple (chopped (honeycrisp or pink lady))
  • 3 cloves garlic (minced)
  • 1 Tbsp fresh sage leaves (minced)
  • 1 Tbsp fresh rosemary leaves (minced)
  • 1 Tbsp fresh thyme leaves (minced)
  • 3 cups kale (chopped)
  • 1 medium apple (chopped (honeycrisp or pink lady))
  • 1 cup pecans (chopped)
  • 1/2 cup dried cranberries (apple juice sweetened)
  • 1 lb Bulk Italian sausage
  • 3 Tbsp avocado oil (or olive oil, divided)
  • Sea salt and black pepper to taste

Instructions 

  • Preheat oven to 425°F (220°C). Cut butternut squash in half lengthwise, scoop out seeds, drizzle with 2 Tbsp oil, season with salt and pepper, and roast for 40 minutes.
  • Cook sausage in a skillet until 3/4 done. Add onions and garlic, cook 2 minutes, then stir in herbs. Mix in kale, apples, and pecans, cook briefly, then add cranberries and season to taste.
  • Cool roasted squash slightly, scoop out flesh leaving a 3/4" border. Fill with sausage mixture, then broil until golden, about 2-4 minutes. Garnish with herbs and serve.

Notes

Ensure to leave a border when scooping out the squash to prevent tearing.
Calories: 450kcal
Cost: $15
Course: Main Course
Cuisine: American
Keyword: butternut squash, paleo, Sausage

Whispers of Home: A Journey into Banana Cinnamon Chip Muffins

Welcome to a culinary embrace that captures the essence of home! These Banana Cinnamon Chip Muffins are more than just a treat; they are a heartfelt connection to memories, warmth, and loved ones gathered around the kitchen. Bursting with ripe bananas, sweet cinnamon chips, and a sprinkle of nostalgia, this recipe invites you to create lasting moments and delicious flavors. Let’s dive into the delightful world of these muffins that are perfect for sharing during holiday breakfasts or any time you crave a taste of home.

Why You’ll Love This Recipe

  • Incredible Flavor: The combination of ripe bananas and cinnamon chips creates a symphony of flavors that dance on your taste buds.
  • Easy to Make: This recipe is straightforward, perfect for both novice and seasoned bakers, ensuring a stress-free experience.
  • Perfect for Any Occasion: Whether for breakfast, brunch, or an afternoon snack, these muffins are versatile and delightful.
  • Great for Freezing: These muffins freeze beautifully, making them a perfect make-ahead treat for busy mornings.
  • Customizable: With various variations and substitutions, you can tailor the muffins to fit your dietary needs or flavor preferences.

Ingredient Breakdown

Let’s explore the key ingredients in this recipe and some substitutions that can still bring the love and flavor to your table.

  • All-Purpose Flour: We recommend using unbleached all-purpose flour for its superior texture. You can substitute with a gluten-free blend if needed.
  • Granulated Sugar: This recipe calls for granulated sugar, but feel free to use brown sugar for a richer flavor.
  • Cinnamon: Cinnamon is not just a spice; it’s a hug in powdered form. Adjust the amount to your taste!
  • Ripe Bananas: Use the ripest bananas possible for maximum sweetness and flavor. If you don’t have ripe bananas, you can ripen them quickly in the oven.
  • Cinnamon Chips: These are the star of the show! If you can’t find cinnamon chips, you can use chocolate chips or a blend of both.
  • Pecans: Chopped pecans add a lovely crunch. If you have nut allergies, feel free to omit them or substitute with sunflower seeds.
  • Butter: Unsalted butter is best for controlling the salt content, but you can use coconut oil for a dairy-free option.

Pro Tips for Perfect Muffins

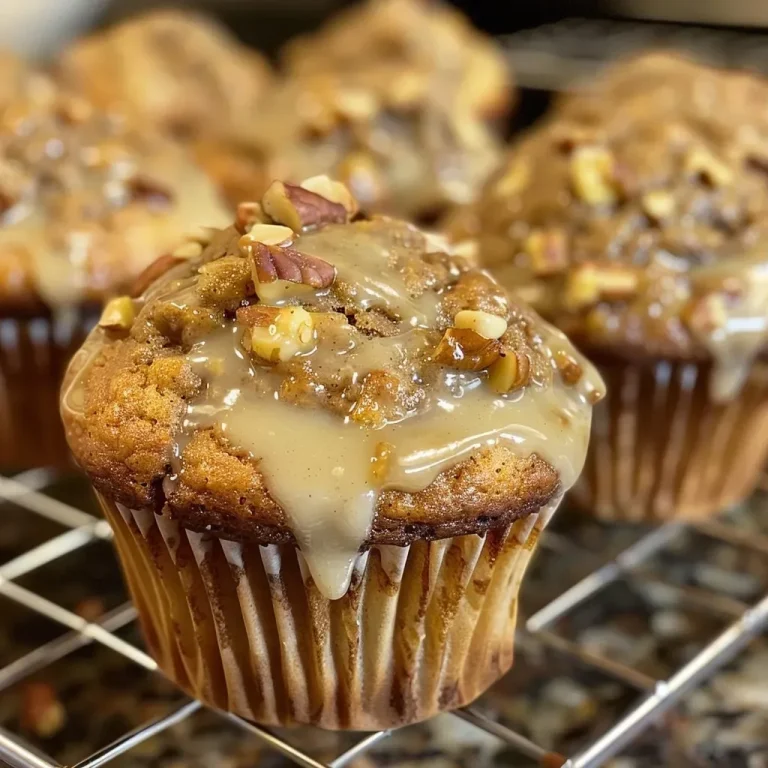
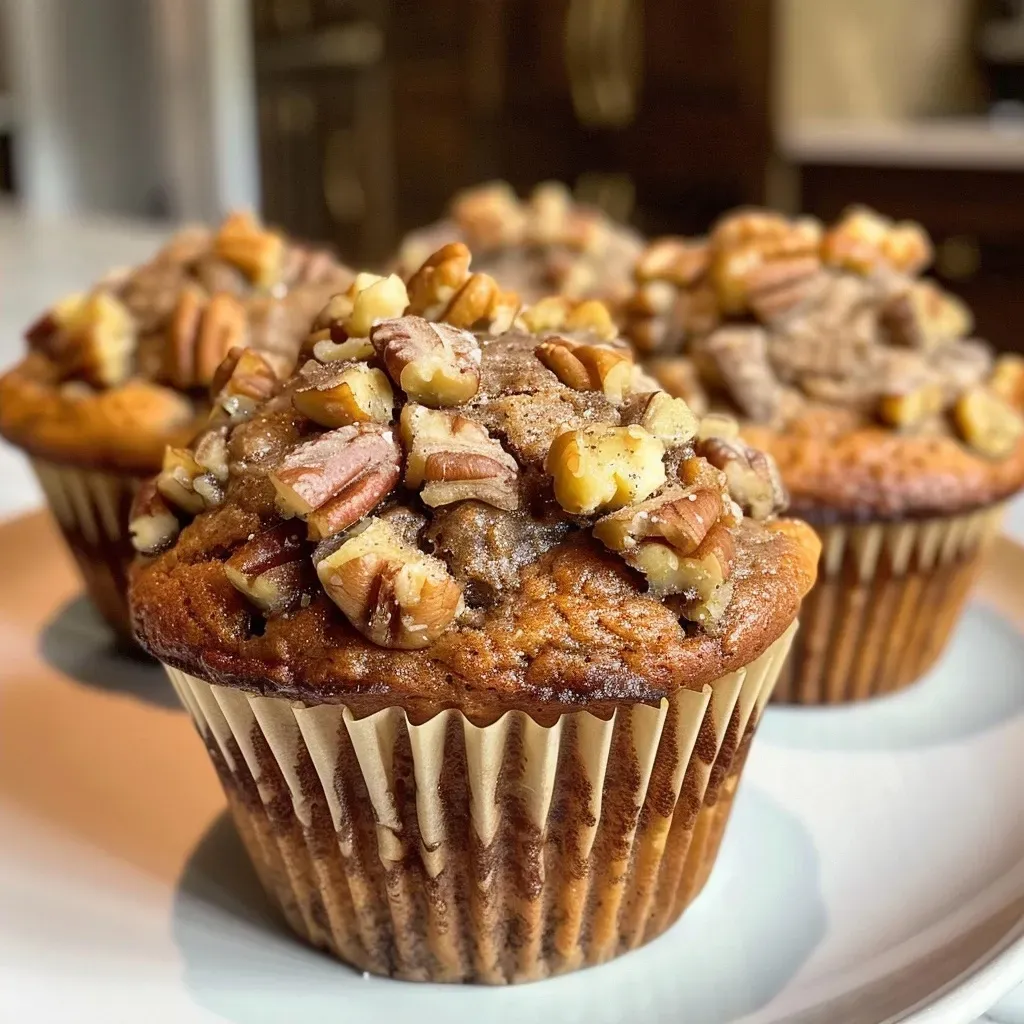
A detailed shot of freshly baked Banana Cinnamon Chip Muffins with visible chunks of banana and cinnamon chips.

Here are some expert insights to ensure your muffins turn out perfectly every time:


Cake Decorating Set

★ Recommended Kitchen Tool

Cake Decorating Set

Make this recipe even easier with a quality Cake Decorating Set — a must-have kitchen staple!


🛒 View on Amazon →

As an Amazon Associate, we earn from qualifying purchases.
  • Don’t Overmix: Gently fold the ingredients together to avoid tough muffins. Overmixing activates the gluten in the flour.
  • Room Temperature Ingredients: Ensure your eggs and butter are at room temperature to create a smooth batter.
  • Oven Thermometer: An oven thermometer can help you bake at the correct temperature, ensuring even baking.
  • Dividing the Batter: Use an ice cream scoop for even muffin portions, making sure they’re consistent in size.
  • Check for Doneness: A toothpick inserted into the center should come out clean. If it has batter on it, give them a few more minutes.
  • Cool Muffins Properly: Allow the muffins to cool in the pan for a few minutes before transferring them to a wire rack to cool completely.
  • Experiment with Spices: Add a pinch of nutmeg or ginger to the batter for an extra layer of warmth and depth in flavor.
  • Storing Muffins: Store in an airtight container at room temperature for up to three days or in the freezer for up to three months.

Common Mistakes and Troubleshooting

Even the most experienced bakers can face challenges. Here are some common mistakes and how to avoid them:

  • Muffins Are Dense: This can happen if you overmix the batter. Remember, gentle folding is key!
  • Burnt Tops: If your muffin tops are browning too quickly, cover them with foil for the last few minutes of baking.
  • Too Dry: If your muffins are dry, ensure you measure your flour correctly. Use the spoon-and-level method to avoid packing flour.
  • Not Rising Enough: Check that your baking powder is fresh and active. Old leavening agents can lead to flat muffins.

Delicious Variations

Here are some fun ways to switch things up with this recipe:

  • Chocolate Chip Banana Muffins: Replace half of the cinnamon chips with chocolate chips for a delightful twist.
  • Banana Nut Muffins: Add more chopped pecans or walnuts for an extra crunch.
  • Coconut Banana Muffins: Incorporate shredded coconut for a tropical flair.
  • Gluten-Free Banana Muffins: Use a gluten-free flour blend and check your baking powder for gluten-free status.

Storage and Make-Ahead Instructions

These muffins are perfect for meal prep! Here’s how to store them:

  • Room Temperature: Store in an airtight container for up to three days.
  • Refrigeration: For longer storage, keep them in the fridge for up to a week.
  • Freezing: Freeze muffins by wrapping them in plastic wrap and placing them in a zip-top bag. Thaw at room temperature or reheat in the microwave.

Frequently Asked Questions

Here are some common questions about Banana Cinnamon Chip Muffins:

  • How long do these muffins last? They can be stored at room temperature for up to 3 days or in the freezer for up to 3 months.
  • Can I use frozen bananas? Yes! Just thaw and mash them before adding to the batter.
  • What can I use instead of eggs? You can replace one egg with 1/4 cup of unsweetened applesauce or a flax egg.
  • How do I know when the muffins are done? Insert a toothpick into the center; it should come out clean or with a few crumbs attached.
  • Can I make mini muffins? Absolutely! Adjust the baking time to around 12-15 minutes for mini muffins.
  • Can I add other mix-ins? Yes! Feel free to add dried fruit, chocolate chips, or other nuts as desired.
  • Is it okay to double the recipe? Yes, simply double all ingredients and use two muffin tins.
  • What’s the best way to serve these muffins? Warm, with a pat of butter or a drizzle of honey, for that extra touch of love!

Nutritional Tips and Dietary Adaptations

Here are some tips to make this recipe fit your nutritional needs:

  • Low Sugar Option: Reduce the sugar by half and add a bit more ripe banana for sweetness.
  • Dairy-Free: Substitute the butter with coconut oil and use a dairy-free half-and-half.
  • Whole Wheat Version: Swap half of the all-purpose flour with whole wheat flour for added fiber.

Essential Equipment Recommendations

To ensure your baking experience is seamless, here are some must-have tools:

  • Muffin Tin: A standard 12-cup muffin tin is perfect for this recipe.
  • Mixing Bowls: Have a set of mixing bowls for combining your ingredients.
  • Whisk: A sturdy whisk is essential for mixing your wet ingredients.
  • Ice Cream Scoop: For even muffin portions, an ice cream scoop is invaluable.
  • Cooling Rack: To cool your muffins properly and prevent sogginess.

Serving Suggestions

To elevate your muffin experience, consider serving them with:

  • Butter: A spread of butter adds richness and a comforting touch.
  • Honey or Maple Syrup: Drizzle some honey or maple syrup for a touch of sweetness.
  • Fresh Fruit: Serve with slices of banana or berries for a refreshing contrast.

As we wrap up this heartwarming journey into the world of Banana Cinnamon Chip Muffins, remember that cooking is about sharing love and creating memories. So gather your loved ones, mix up this batter, and bake your way to delightful moments around the table. Here’s to the warmth of home and the joy of baking together!

Banana Cinnamon Chip Muffins

Prep Time 15 minutes
Cook Time 25 minutes
Total Time 40 minutes
Servings 12 muffins
Calories 250
Deliciously moist muffins packed with ripe bananas, cinnamon chips, and crunchy pecans, perfect for breakfast or a snack.

Ingredients

Dry ingredients

  • 2.5 cups UNBLEACHED all-purpose flour (bleached flour toughens baked goods)
  • 0.67 cup granulated sugar
  • 2 tsp. baking powder
  • 0.5 tsp. sea salt
  • 1 tsp. cinnamon

Wet ingredients

  • 3-4 large ripe bananas (mashed)
  • 1 large egg
  • 0.5 cup unsalted butter (1 stick)
  • 1 tsp. vanilla extract
  • 0.25 cup half-and-half (or whipping cream)

Add-ins

  • 1 cup cinnamon chips
  • 1 cup pecans (chopped) (measure after chopping)
  • 1 cup cinnamon chips (for topping)

Instructions 

  • Preheat oven to 425°F (220°C).
  • Mix sugar, baking powder, salt, cinnamon, bananas, egg, butter, vanilla, and cream in a bowl.
  • Add flour, pecans, and 1 cup of cinnamon chips; stir gently until just combined.
  • Spoon batter into muffin tins, sprinkle with cinnamon chips, and bake at 425°F for 5 minutes, then reduce to 350°F and bake for 20 minutes.
  • Cool before serving.

Notes

For best results, use ripe bananas and measure pecans after chopping.
Calories: 250kcal
Cost: $15
Course: Breakfast
Cuisine: American
Keyword: Banana

Welcome to a Culinary Celebration: A Journey with Crispy Flatbread

Gather around, dear friends, as we embark on a delightful journey through flavors and memories with a recipe that brings us together. This Crispy Flatbread topped with luscious Brie cheese, vibrant cranberries, and crunchy toasted walnuts, all drizzled with a hint of hot honey, is more than just a dish; it’s a story waiting to be shared. Whether you’re hosting friends or enjoying a cozy evening at home, this recipe is sure to bring smiles and warmth to your table.

Cooking is an act of love, and this flatbread embodies that spirit. Let’s dive into the details of making this delectable dish that is perfect for gatherings and cherished moments.

Why You’ll Love This Crispy Flatbread Recipe

This Crispy Flatbread is not just a meal; it’s a celebration of flavors and textures that will leave your guests raving. Here are just a few reasons to fall in love:


Cake Decorating Set

★ Recommended Kitchen Tool

Cake Decorating Set

Make this recipe even easier with a quality Cake Decorating Set — a must-have kitchen staple!


🛒 View on Amazon →

As an Amazon Associate, we earn from qualifying purchases.
  • Quick and Easy: Despite its gourmet appearance, you can have this on the table in under 20 minutes, making it a perfect last-minute appetizer.
  • Flavor Harmony: The salty richness of the Brie perfectly complements the tartness of the cranberries and the sweet kick of hot honey.
  • Textural Delight: Enjoy the crispness of the flatbread, the gooey melt of the cheese, and the satisfying crunch of walnuts.
  • Customizable: This recipe is versatile and allows you to play with various toppings and flavors, making it suitable for every palate.
  • Perfect for Sharing: Slice it into shareable pieces, making it a wonderful appetizer for parties or family gatherings.

Ingredient Breakdown

Let’s take a closer look at the stars of our recipe, their roles, and some possible substitutions to suit your tastes:

  • Flatbreads or Naan: You can use store-bought flatbreads for convenience or make your own. Looking for a gluten-free option? Try cauliflower flatbreads or gluten-free naan.
  • Brie Cheese: This recipe shines with creamy Brie, but feel free to substitute with Camembert or even a sharp cheddar for a different flavor profile.
  • Dried Cranberries: For a twist, use dried cherries or apricots, which add a unique sweetness.
  • Toasted Walnuts: Pecans or almonds can be used instead, offering their own delightful crunch.
  • Olive Oil: A light drizzle of truffle oil can elevate the dish to gourmet status.
  • Hot Honey: If you prefer mild sweetness, regular honey with a pinch of chili flakes will do the trick.
  • Fresh Thyme: Rosemary or oregano can bring a lovely herbaceous note to your flatbread.
  • Sea Salt Flakes: These are optional but add a beautiful finishing touch that enhances the flavor.

Exact Recipe Measurements

Side angle of flatbread featuring melted brie, dried cranberries, and chopped walnuts, with a honey glaze.

Here’s what you’ll need to create this glorious dish:

  • 2 flatbreads or naan (about 250 g total)
  • 4 oz (115 g) Brie cheese, sliced
  • ¼ cup (30 g) dried cranberries
  • ¼ cup (30 g) toasted walnuts, roughly chopped
  • 1 tbsp (15 ml) olive oil
  • 1 tbsp (15 ml) hot honey (or regular honey + pinch of chili flakes)
  • ½ tsp (2 g) fresh thyme leaves
  • Optional: sea salt flakes for finishing

Step-by-Step Directions

Let’s get cooking! Follow these simple steps to create your crispy flatbread:

  1. Preheat your oven to 400°F (200°C) and line a baking sheet with parchment paper.
  2. Brush each flatbread lightly with olive oil and place them on the prepared baking sheet.
  3. Evenly arrange the Brie slices over the flatbreads.
  4. Sprinkle the dried cranberries and toasted walnuts on top.
  5. Bake in the oven for 8–10 minutes, or until the Brie is bubbly and the edges of the flatbread are golden brown and crisp.
  6. Once out of the oven, drizzle generously with hot honey.
  7. Sprinkle with fresh thyme and a pinch of sea salt, if desired.
  8. Slice into shareable pieces and serve warm.

Pro Tips for Perfect Flatbreads

Enhance your flatbread experience with these expert insights:

  • Choose quality ingredients: The flavor of your flatbread hinges on the quality of your cheese and honey, so opt for the best you can find.
  • Don’t overcrowd: Allow space for the toppings to shine. A crowded flatbread might end up soggy.
  • Keep an eye on the oven: Ovens vary, so check your flatbread a minute or two early to prevent burning.
  • Let it rest: Allow the flatbread to cool for a minute before slicing; this helps keep the toppings intact.
  • Experiment with toppings: Don’t hesitate to customize your flatbread with seasonal fruits, cheeses, or even a drizzle of balsamic reduction.
  • Serve immediately: Flatbreads are best enjoyed fresh out of the oven when they are at their crispiest.

Common Mistakes and Troubleshooting

To ensure your flatbread turns out perfectly, here are some pitfalls to avoid:

  • Underbaking: If the cheese isn’t bubbly and the edges aren’t golden, your flatbread may need more time in the oven.
  • Overbaking: Keep a close watch to avoid burnt edges; the ideal flatbread should be golden and crispy, not charred.
  • Soggy bottom: Make sure to pre-bake the flatbread for a couple of minutes if using very moist toppings.
  • Too many toppings: Stick to a balanced amount; too many can weigh down the flatbread and make it soggy.

Flavor Variations to Try

Feeling adventurous? Here are some delightful variations to consider:

  • Spicy Mediterranean: Add sliced jalapeños and feta cheese for a spicy twist.
  • Sweet & Savory: Swap the hot honey for maple syrup and add crispy bacon bits.
  • Garden Fresh: Load your flatbread with roasted vegetables like zucchini, bell peppers, and cherry tomatoes.
  • Herb Infusion: Mix in a variety of fresh herbs like basil, dill, or parsley for added freshness and aroma.

Storage and Make-Ahead Instructions

This crispy flatbread is best enjoyed fresh, but you can prepare components ahead of time:

  • Make Ahead: Assemble your flatbreads without baking and store them covered in the fridge for up to 24 hours. Bake when ready to serve.
  • Storing Leftovers: If you have leftovers, store them in an airtight container in the fridge for up to 2 days. Reheat in the oven to restore crispiness.

Comprehensive FAQ

Here are some frequently asked questions to guide you:

  • Can I use a different type of cheese? Absolutely! Feel free to experiment with different cheeses like goat cheese or mozzarella.
  • Is this a gluten-free recipe? You can make it gluten-free by using gluten-free flatbreads or wraps.
  • Can I make this vegan? Yes! Substitute the cheese with a plant-based alternative and use maple syrup instead of honey.
  • What can I serve with this flatbread? This dish pairs wonderfully with a fresh salad or a selection of dips.
  • Can I freeze the flatbread? It’s best fresh, but you can freeze unbaked flatbreads for later use.
  • How do I make it spicier? Incorporate chili flakes or diced fresh chilies into your toppings for an extra kick.
  • What type of flatbread works best? Naan and pita are great choices, but use any flatbread you enjoy!
  • How do I know when it’s done baking? Look for bubbly cheese and golden edges; that’s your cue to take it out!

Nutrition Tips and Dietary Adaptations

This dish can be made healthier by opting for whole grain flatbreads and reducing the amount of cheese. Additionally, consider these adaptations:

  • Low-fat cheese: Use a lower-fat version of Brie to cut down on calories.
  • Increased fiber: Whole grain flatbreads provide more fiber than traditional white bread.
  • Nut-free: Omit walnuts if you’re serving someone with nut allergies and add seeds for crunch instead.

Essential Equipment Recommendations

A few handy tools will make your cooking experience smoother:

  • Baking Sheet: A sturdy, rimmed baking sheet is perfect for catching any drips.
  • Parchment Paper: Helps prevent sticking and makes cleanup a breeze.
  • Pastry Brush: Essential for evenly applying olive oil to your flatbreads.

Serving Suggestions

Make your flatbread feast even more special with these serving ideas:

  • Pair with a refreshing drink: A chilled glass of white wine or sparkling water will complement the flavors beautifully.
  • Accompany with dips: Serve with your favorite hummus or a tangy yogurt dip for added flavor.
  • Garnish beautifully: Scatter some fresh herbs over the top just before serving for that extra touch of elegance.

Conclusion

Cooking is a journey of love and memory, and this Crispy Flatbread topped with Brie, cranberries, and toasted walnuts is a dish that encapsulates those very sentiments. So gather your loved ones, share stories, and create new memories around the table with this heartwarming recipe. Remember, every bite is a reminder of the bonds we share and the joy of cooking together. Happy cooking, and may your gatherings be filled with laughter and love!

Crispy Flatbread with Brie, Cranberries & Toasted Walnuts with a Hot Honey Drizzle

Prep Time 10 minutes
Cook Time 10 minutes
Total Time 20 minutes
Servings 4 pieces
Calories 350
A delicious appetizer featuring crispy flatbread topped with creamy Brie, tart cranberries, toasted walnuts, and finished with a sweet and spicy hot honey drizzle.

Ingredients

Flatbreads

  • 2 pieces flatbreads or naan (about 250 g total)
  • 4 oz Brie cheese (sliced)
  • 0.25 cup dried cranberries
  • 0.25 cup toasted walnuts (roughly chopped)
  • 1 tbsp olive oil
  • 1 tbsp hot honey (or honey + chili flakes)
  • 0.5 tsp fresh thyme leaves

Optional: sea salt flakes

Instructions 

  • Preheat oven to 400°F (200°C) and line a baking sheet with parchment.
  • Brush flatbreads with olive oil and place on baking sheet.
  • Top with Brie slices, cranberries, and walnuts.
  • Bake for 8–10 minutes until Brie is bubbly and edges are golden.
  • Drizzle with hot honey, sprinkle thyme and sea salt if desired, then serve warm.

Notes

For extra flavor, toast the walnuts beforehand and use high-quality Brie.
Calories: 350kcal
Cost: $15
Course: Appetizer
Cuisine: American
Keyword: Brie, cranberries, flatbread

Welcome to the Heart of Comfort: Discovering Peanut Butter Chickpea Blondies

Imagine the warm embrace of a freshly baked treat, the sweet scent of peanut butter wafting through your kitchen, and the delightful surprise of chickpeas hidden within. These Peanut Butter Chickpea Blondies are not just a recipe; they’re a celebration of comfort, community, and the joy of sharing something truly special. With rich flavors and a fudgy texture, you’ll never guess they’re made with chickpeas! Let’s dive into why these blondies are the perfect indulgence for any occasion.

Why You’ll Love This Recipe

Every recipe tells a story, and this one is filled with love and nostalgia. Here are just a few reasons why you’ll adore these blondies:

  • Healthy Ingredients: Made with chickpeas and peanut butter, these blondies are packed with protein and fiber, making them a wholesome treat.
  • Fudgy Texture: The combination of peanut butter and chickpeas creates a delectable fudgy base that melts in your mouth.
  • Simple to Make: With just a handful of ingredients and easy steps, you can whip up these blondies in no time.
  • Customizable: Feel free to add your favorite mix-ins, whether it’s dark chocolate chips or nuts, to make this recipe your own.
  • Perfect for Sharing: Slice them up and share with friends and family, and watch their faces light up with delight!

Ingredients Breakdown and Substitutions

To create these delightful Peanut Butter Chickpea Blondies, you’ll need the following ingredients:


Silicone Baking Cups Set

★ Recommended Kitchen Tool

Silicone Baking Cups Set

Make this recipe even easier with a quality Silicone Baking Cups Set — a must-have kitchen staple!


🛒 Check Price on Amazon →

As an Amazon Associate, we earn from qualifying purchases.
  • 1 (15 oz can) of chickpeas: Unsalted is best for a balanced flavor. Rinse and pat dry to remove excess sodium.
  • ½ cup creamy all-natural peanut butter: Opt for a natural variety without added sugars or oils for the best results.
  • 2 tsp vanilla extract: This adds a beautiful aroma and enhances the overall flavor.
  • ⅓ cup real maple syrup: For sweetness and moisture; you can substitute with agave nectar if needed.
  • ¼ cup granulated sugar or coconut sugar: Adjust sweetness to your preference.
  • ⅓ cup almond flour or oat flour: Both work well, but oat flour can be a great gluten-free option.
  • ¼ tsp baking soda and baking powder: These help the blondies rise and create that soft texture.
  • ½ tsp salt: Omit if using salted chickpeas.
  • ¾ cup chocolate chips: Dark chocolate chips provide a lovely contrast to the sweetness.

Expert Tips for the Best Blondies

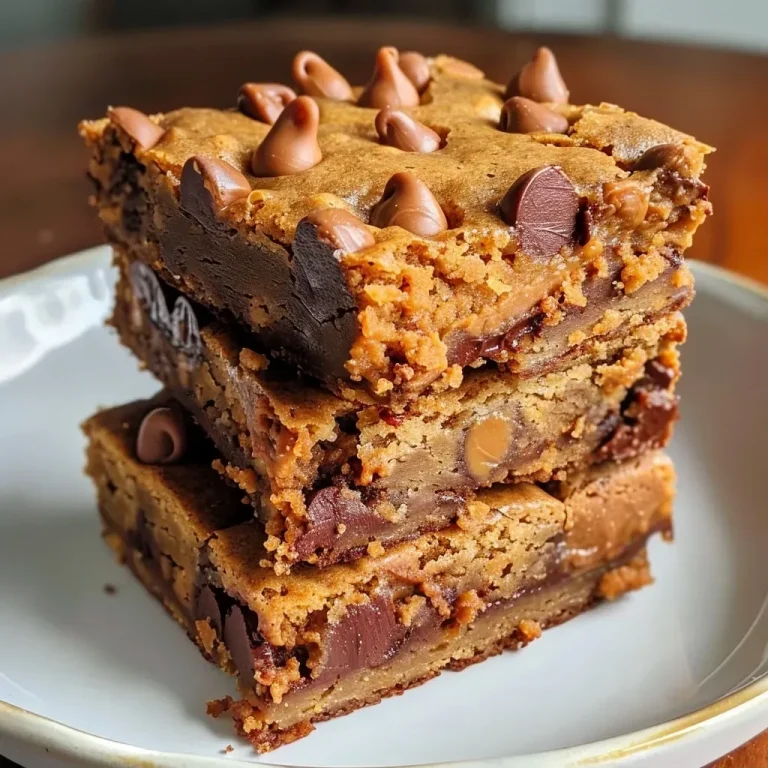
Side view of moist blondies made with chickpeas and peanut butter.

To ensure your Peanut Butter Chickpea Blondies turn out perfectly every time, follow these pro tips:

  • Blend Thoroughly: Make sure to blend the chickpeas until completely smooth to achieve that fudgy consistency.
  • Room Temperature Ingredients: Let your ingredients come to room temperature before mixing for better incorporation.
  • Don’t Overbake: Keep an eye on your blondies while baking; they’re done when a toothpick inserted in the center comes out clean but moist.
  • Chill Before Cutting: Allow them to cool for at least 20 minutes; this helps them set and prevents crumbling when sliced.
  • Experiment with Flavors: Add spices like cinnamon or nutmeg for a warm, cozy flavor profile.
  • Mix-In Magic: Consider adding chopped nuts, raisins, or dried cranberries for added texture and taste.
  • Storage Tips: Keep them sealed in an airtight container at room temperature for up to a week or refrigerate for longer freshness.
  • Freezing for Later: Slice and freeze individual blondies, then pop them in the microwave for a quick treat!

Avoiding Common Mistakes

Even the best cooks can run into issues, so here are some common mistakes to avoid:

  • Under-blending: Not blending the chickpeas enough can lead to a grainy texture; aim for a smooth batter.
  • Skipping the Dry Ingredients: Be sure to include both baking soda and baking powder for the right rise.
  • Using Cold Ingredients: Cold peanut butter or eggs can lead to uneven mixing; always use room temperature.
  • Not Prepping the Pan: Don’t skip greasing or lining your pan—this makes removal and cleanup a breeze!

Delicious Variations to Try

Feel free to switch things up with these fun variations:

  • Nutty Addition: Add chopped walnuts or pecans for an extra crunch.
  • Seed Butter Swap: Use almond or sunflower seed butter for a different flavor profile.
  • Choco-Mint Bliss: Add a few drops of peppermint extract and chocolate chips for a refreshing twist.
  • Fruit Fusion: Incorporate mashed bananas or apple sauce for a fruity flavor and added moisture.

Storing and Making Ahead

These blondies are perfect for making ahead of time. Here’s how to store them:

  • Room Temperature: Keep in an airtight container for up to a week.
  • Refrigeration: Store in the fridge for up to two weeks to maintain freshness.
  • Freezing: Individually wrap blondies in plastic wrap and place them in a freezer-safe bag for up to three months.

Frequently Asked Questions

Here are some common questions about making Peanut Butter Chickpea Blondies:

  • Can I make these blondies vegan? Yes, just ensure your chocolate chips are dairy-free.
  • What if I don’t have chickpeas? You can use any white beans, like cannellini or navy beans, as a substitute.
  • How do I know when they’re done baking? A toothpick should come out clean but moist; don’t overbake!
  • Can I make these gluten-free? Absolutely! Just use gluten-free flour alternatives like almond or oat flour.
  • What can I serve them with? They pair beautifully with a scoop of vanilla ice cream or a dollop of whipped cream.
  • How much protein is in each blondie? Each blondie contains approximately 5 grams of protein.
  • Can I add protein powder? Yes, you can substitute a bit of flour with protein powder for an extra boost.
  • Do they need to be refrigerated? They can be kept at room temperature but refrigerating them helps to prolong freshness.

Equipment Recommendations

Here are some tools that will make your baking experience smoother:

  • Food Processor: Essential for blending the chickpeas and other ingredients until smooth.
  • 8″ x 8″ Baking Pan: A standard size for this recipe; ensure it’s well-greased or lined with parchment paper.
  • Mixing Bowls: Have a few different sizes on hand for mixing and folding in ingredients.
  • Measuring Cups and Spoons: Accurate measurements are key to great baking!
  • Cooling Rack: Helps cool the blondies evenly and prevents sogginess.

Serving Suggestions

To elevate your blondies, consider these serving ideas:

  • Warm with Ice Cream: Serve these warm with a scoop of vanilla ice cream for a decadent dessert.
  • Drizzle with Chocolate: A simple drizzle of melted chocolate on top adds an elegant touch.
  • Pair with Fresh Fruit: Sliced strawberries or raspberries complement the sweetness beautifully.
  • Garnish with Nuts: Sprinkle some chopped nuts on top for extra texture and flavor.

A Sweet Conclusion

These Peanut Butter Chickpea Blondies are more than just a treat; they encapsulate the warmth and love found in every kitchen. With their unique blend of ingredients and flavors, they remind us that cooking can be a joyful act of sharing, just like the memories we create around our family tables. So gather your loved ones, whip up a batch, and savor every fudgy bite together!

Peanut Butter Chickpea Blondies

Prep Time 10 minutes
Cook Time 25 minutes
Total Time 35 minutes
Servings 9 pieces
Calories 180
Delicious and healthy blondies made with chickpeas and peanut butter, perfect for a quick treat.

Ingredients

Canned Chickpeas

  • 1 can chickpeas (15oz) (unsalted preferred)
  • 0.5 cup creamy all-natural peanut butter
  • 2 tsp vanilla extract
  • 0.33 cup real maple syrup
  • 0.25 cup granulated sugar (or coconut sugar)
  • 0.33 cup almond flour (or oat flour)
  • 0.25 tsp baking soda
  • 0.25 tsp baking powder
  • 0.5 tsp salt (omit if using salted chickpeas)
  • 0.75 cup chocolate chips

Instructions 

  • Preheat oven to 350°F (175°C) and prepare baking tin.
  • Drain chickpeas, rinse, and pat dry.
  • Blend chickpeas, peanut butter, vanilla, syrup, sugar, flour, baking soda, powder, and salt until smooth.
  • Fold in half of the chocolate chips.
  • Spread batter in tin, top with remaining chips, and bake 20-25 mins.
  • Cool for 20 minutes before slicing and serving.

Notes

Use natural peanut butter for best flavor and texture.
Calories: 180kcal
Cost: $8
Course: Dessert
Cuisine: American
Keyword: Chickpeas

Embrace the Cozy Vibes of Fall with Pumpkin Spice Bread

As the leaves begin to turn and the air fills with the warm scents of cinnamon and nutmeg, there’s no better way to celebrate the season than by baking a loaf of pumpkin spice bread. This recipe for Cinnamon Sugar-Topped Pumpkin Spice Bread is not just about creating a delicious treat; it’s about filling your home with the heartwarming aromas that evoke memories of family gatherings and cozy afternoons. Whether you’re sharing it with loved ones or savoring a slice with your morning coffee, this bread is a delightful reminder of the love and care that goes into every homemade dish.

Why You’ll Love This Recipe

This pumpkin bread isn’t just another recipe; it’s an experience that encapsulates the essence of fall. Here are just a few reasons to adore this bread:

  • Moist and Tender: The blend of pumpkin puree and sugars creates a super soft texture that melts in your mouth.
  • Perfect for Sharing: This recipe yields three mini loaves, making it easy to share with friends or save for later.
  • Easy to Make: With simple ingredients and straightforward steps, even novice bakers can enjoy success.
  • Customizable: The recipe is flexible, allowing for various add-ins and substitutions to suit your taste.
  • Perfect for Any Occasion: Whether it’s a cozy family breakfast or a festive gathering, this bread fits right in.

Ingredients Breakdown

Let’s dive into the components that make this recipe so special. Understanding your ingredients can help you make informed substitutions if needed:


Digital Kitchen Scale

★ Recommended Kitchen Tool

Digital Kitchen Scale

Make this recipe even easier with a quality Digital Kitchen Scale — a must-have kitchen staple!


🛒 View on Amazon →

As an Amazon Associate, we earn from qualifying purchases.
  • All-Purpose Flour: Provides the structure. For a gluten-free option, substitute with a 1:1 gluten-free flour blend.
  • Baking Powder: This is your leavening agent, ensuring your bread rises beautifully.
  • Pumpkin Pie Spice: A blend of warming spices that brings out the essence of fall. You can make your own mix using cinnamon, nutmeg, and cloves.
  • Salt: Enhances flavor; adjust to taste.
  • Granulated Sugar: Sweetens the bread; brown sugar adds moisture and a slight caramel flavor.
  • Pumpkin Puree: The star of the show, adding moisture and that rich, pumpkin flavor. Avoid pumpkin pie filling, which contains added spices and sugars.
  • Vegetable Oil: Keeps the bread moist. You can substitute with melted coconut oil for a tropical twist.
  • Milk: Adds richness. Any variety works, including almond or oat milk for a dairy-free option.
  • Molasses: Adds depth of flavor and a hint of sweetness. You can replace it with honey or agave syrup if desired.
  • Vanilla Extract: A must-have for that warm, comforting aroma.
  • Cinnamon and Sugar Topping: This decadent topping transforms your bread into a delightful treat.

How to Make Pumpkin Spice Bread

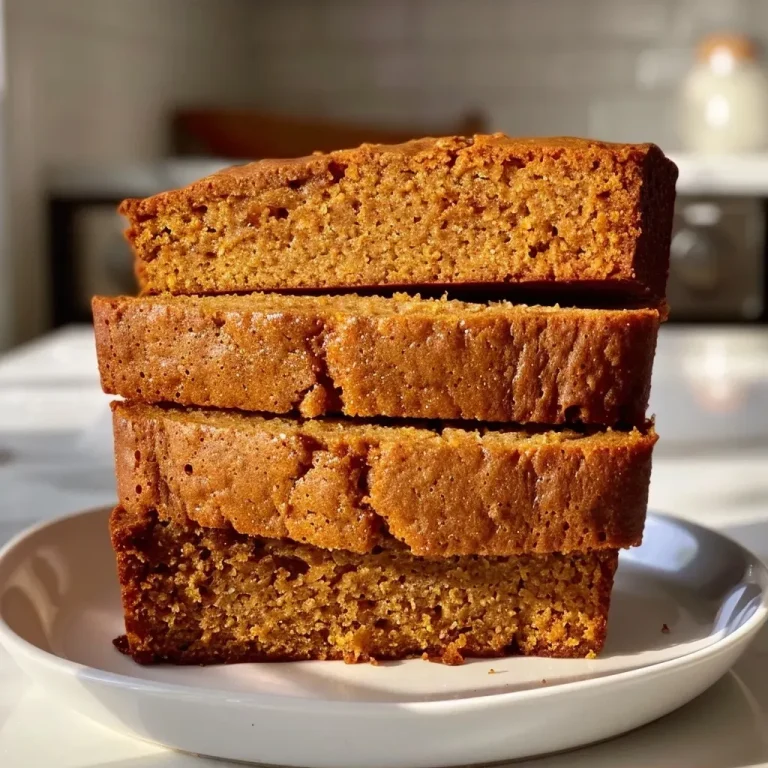
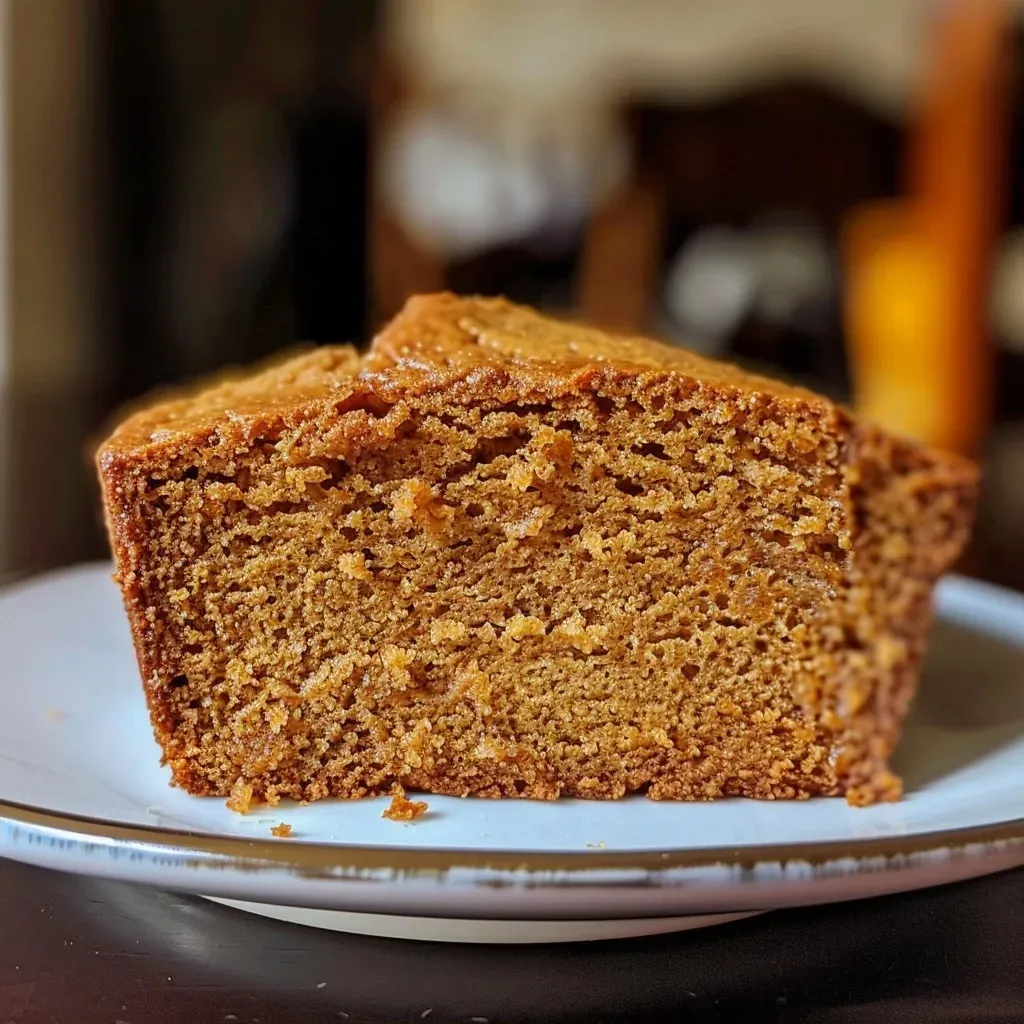
Close-up of moist pumpkin spice bread with a glistening cinnamon sugar topping, sliced for detail.

Follow these simple steps to create your own Cinnamon Sugar-Topped Pumpkin Spice Bread:

  1. Preheat the Oven: Preheat your oven to 400°F. Prepare three mini loaf pans by spraying them with floured cooking spray or greasing and flouring them.
  2. Mix Dry Ingredients: In a large bowl, whisk together the flour, baking powder, pumpkin pie spice, and salt.
  3. Combine Wet Ingredients: In another bowl, mix the sugars, pumpkin puree, oil, milk, molasses, and vanilla until well combined.
  4. Combine Mixtures: Pour the wet ingredients into the dry ingredients. Stir gently until just combined—avoid overmixing.
  5. Fill the Pans: Divide the batter evenly among the three prepared pans, filling each about two-thirds full.
  6. Add Toppings: Sprinkle each loaf with a tablespoon of sugar and half a teaspoon of cinnamon.
  7. Bake: Place the pans on a baking sheet for easier handling. Bake for 40-43 minutes, or until a toothpick inserted in the center comes out clean with a few moist crumbs.
  8. Cool: Allow the bread to cool in the pans for about 15 minutes before transferring to a wire rack to cool completely.

Pro Tips for Perfect Pumpkin Spice Bread

Here are some of my best tips to ensure your bread turns out perfectly every time:

  • Room Temperature Ingredients: Ensure your eggs and milk are at room temperature for better mixing and a lighter texture.
  • Don’t Overmix: Mix just until combined to keep the bread light and fluffy.
  • Check Doneness Early: Every oven is different; start checking for doneness at 30 minutes.
  • Cover with Foil: If the tops are browning too quickly, tent with aluminum foil to prevent burning.
  • Use a Toothpick: Insert a toothpick in the center to check for doneness—it should come out clean or with a few crumbs.
  • Experiment with Add-ins: Try adding nuts, chocolate chips, or dried fruits for extra flavor and texture.
  • Let it Sit: Allow the bread to cool completely before slicing to improve texture.
  • Store Properly: Keep in an airtight container to maintain moisture.

Common Mistakes and Troubleshooting

Even the best bakers make mistakes. Here’s how to avoid common pitfalls:

  • Dense Bread: This can happen if you overmix the batter. Be gentle!
  • Dry Bread: Ensure you’re measuring your flour correctly; too much flour can make the bread dry.
  • Burnt Tops: If the tops are browning too quickly, cover with foil as mentioned earlier.
  • Not Rising: Make sure your baking powder is fresh for proper leavening.

Delicious Variations to Try

Feeling adventurous? Here are some fun ways to customize your pumpkin spice bread:

  • Chocolate Chip Pumpkin Bread: Fold in a cup of chocolate chips for a sweet surprise.
  • Nuts and Seeds: Add chopped walnuts, pecans, or pumpkin seeds for a crunchy texture.
  • Spiced Muffins: Use the same batter to make delicious muffins instead of loaves.
  • Gluten-Free Version: Substitute all-purpose flour with a gluten-free blend for a safe option.

Storage and Make-Ahead Instructions

Want to enjoy your moist pumpkin bread later? Here’s how to store it:

  • Room Temperature: Store in an airtight container for up to 3 days.
  • Refrigeration: For longer storage, keep it in the fridge for up to a week.
  • Freezing: Wrap in plastic wrap and foil, then freeze for up to 3 months. Thaw in the fridge overnight before serving.

Frequently Asked Questions

Here are some common questions about this delightful recipe:

  • Can I use fresh pumpkin? Yes! Cook and puree fresh pumpkin for a vibrant flavor.
  • What can I substitute for pumpkin puree? Applesauce works well in a pinch, though it will alter the flavor slightly.
  • Can I make this in a larger loaf pan? Yes, adjust the baking time to about 60-70 minutes.
  • Is this recipe vegan-friendly? Yes, substitute the eggs with flax eggs and use plant-based milk.
  • How do I know when it’s done? A toothpick inserted in the center should come out clean or with a few crumbs.
  • What’s the best way to serve it? Enjoy it plain, or spread with butter or cream cheese for extra richness.
  • Can I add spices? Absolutely! Feel free to add nutmeg, cloves, or ginger for a spicier flavor.
  • How do I store leftover bread? Keep it in an airtight container at room temperature or refrigerate.

Nutritional Insights and Dietary Adaptations

For those keeping an eye on their diet, here are some nutritional tips:

  • Lower Sugar: Reduce the sugar amount by one-third without sacrificing taste.
  • Whole Wheat Flour: Substitute half of the all-purpose flour with whole wheat flour for added fiber.
  • Oil Alternatives: Use applesauce or mashed banana instead of oil for a lower-fat option.

Essential Equipment for Baking

Having the right tools can make your baking experience smoother:

  • Mini Loaf Pans: Perfect for creating individual servings of pumpkin bread.
  • Mixing Bowls: A set of various sizes will help you manage different ingredients.
  • Whisk: Essential for mixing dry and wet ingredients thoroughly.
  • Spatula: For folding ingredients together without overmixing.

Serving Suggestions

Your pumpkin spice bread is delicious on its own, but here are a few ideas to elevate your serving experience:

  • With Coffee: Enjoy a slice with your morning brew for the perfect start to your day.
  • As a Dessert: Serve warm with a scoop of vanilla ice cream for a delightful treat.
  • Brunch Staple: Pair with fruit and yogurt for a well-rounded brunch spread.

Conclusion

Baking is more than just a culinary task; it’s a way to create memories and share love with those around you. This Cinnamon Sugar-Topped Pumpkin Spice Bread encapsulates the warmth of fall, making it an ideal treat for any occasion. So gather your ingredients, invite a friend or family member into the kitchen, and enjoy the process of creating something truly special. Remember, in the world of cooking, it’s not just about the final product but the love and memories you build along the way. Happy baking!

Cinnamon Sugar-Topped Pumpkin Spice Bread

Prep Time 15 minutes
Cook Time 40 minutes
Total Time 55 minutes
Servings 3 loaves
Calories 250
A moist and flavorful pumpkin bread topped with cinnamon and sugar, perfect for fall treats or breakfast.

Ingredients

Dry ingredients

  • 1 1/4 cups all-purpose flour
  • 2 teaspoons baking powder
  • 1 tablespoon pumpkin pie spice
  • 1/4 teaspoon salt (or to taste)

Wet ingredients

  • 3/4 cup granulated sugar
  • 1/4 cup light brown sugar (packed)
  • 3/4 cup pumpkin puree (not pumpkin pie filling)
  • 1/3 cup vegetable oil (canola or liquid coconut oil)
  • 1/4 cup Silk Unsweetened Vanilla Almondmilk (or your preferred milk)
  • 2 tablespoons mild or medium molasses
  • 2 teaspoons vanilla extract
  • 3 tablespoons granulated sugar (divided 3 ways)
  • 1 1/2 teaspoons cinnamon (divided 3 ways)

Instructions 

  • Preheat oven to 400°F (200°C). Grease three mini loaf pans.
  • Mix dry ingredients in a large bowl. Whisk wet ingredients in a separate bowl.
  • Combine wet and dry ingredients until just mixed. Divide batter into pans.
  • Sprinkle 1 tablespoon sugar and 1/2 teaspoon cinnamon over each loaf. Bake 40 minutes.
  • Cool in pans for 15 minutes, then transfer to wire rack to cool completely.

Notes

Start checking for doneness at 30 minutes to prevent overbaking.
Calories: 250kcal
Cost: $15
Course: Breakfast, Snack
Cuisine: American
Keyword: Pumpkin, spice

Sweet Memories: A Cherished Recipe for Chocolate Peppermint Crinkle Cookies

Welcome to a nostalgic journey where warmth and love fill the kitchen with the delightful aroma of freshly baked cookies. These Chocolate Peppermint Crinkle Cookies are not just treats; they are a heartfelt reminder of family gatherings and festive celebrations. As I fondly recall my grandmother’s kitchen, I invite you to create sweet memories with this gluten-free and vegan recipe that captures the essence of togetherness.

Why You’ll Love This Recipe

There’s something special about sharing a cookie that’s been crafted with care. Here are five reasons why these cookies will become a favorite in your home:

  • Perfectly Balanced Flavors: The rich chocolate combined with refreshing peppermint creates a harmonious taste that’s both indulgent and invigorating.
  • Gluten-Free Goodness: Made with gluten-free flours, these cookies ensure that everyone at your table can enjoy them without worry.
  • Vegan-Friendly: With simple substitutions, these cookies embrace a compassionate approach to baking, making them accessible to all.
  • Quick and Easy: From mixing ingredients to baking, this recipe takes about 30 minutes, allowing you to whip up a batch in no time.
  • Shareable and Gift-Worthy: Whether for a holiday gathering or a thoughtful gift, these cookies are perfect for sharing love and joy with others.

Ingredients Breakdown

Let’s dive into the heart of this recipe. Each ingredient plays a crucial role in bringing these cookies to life. Here’s what you need:


Cake Decorating Set

★ Recommended Kitchen Tool

Cake Decorating Set

Make this recipe even easier with a quality Cake Decorating Set — a must-have kitchen staple!


🛒 Check Price on Amazon →

As an Amazon Associate, we earn from qualifying purchases.
  • 1 Cup Gluten-Free All Purpose Flour: A versatile base that keeps the cookies light and fluffy.
  • 1/2 Cup Millet Flour: Adds a subtle nutty flavor and extra nutrition.
  • 1/2 Cup Unsweetened Cocoa Powder: The star of the show that provides rich chocolate flavor.
  • 1/2 Cup Granulated Erythritol (or preferred granulated sugar): A healthier sweetener option that keeps the cookies low in calories.
  • 1 TB Psyllium Husk Powder: This ingredient acts as a binding agent, making our cookies wonderfully chewy.
  • 1 Tsp Baking Powder: Helps the cookies rise and become fluffy.
  • 1 Tsp Pure Peppermint Extract: Infuses that refreshing peppermint flavor that we love during the holidays.
  • 1/2 Tsp Pure Madagascar Bourbon Vanilla Extract: A touch of vanilla complements the chocolate beautifully.
  • 1/2 Cup + 2 TB Unsweetened Applesauce: Acts as an egg substitute, keeping the cookies moist and tender.
  • 2 TB Vegan/Soy-Free Butter (melted): Adds richness and a delightful texture.
  • 2 TB Unsweetened Non-Dairy Milk: Helps to bring the dough together.
  • Outer Coating:
  • 3 Peppermint Candy Canes (crushed): Adds a festive crunch and beautiful presentation.
  • 1/2 Cup Powdered Erythritol: For rolling the cookies, creating that signature crinkle effect.

Step-by-Step Instructions

Side view of delicious chocolate peppermint crinkle cookies, featuring a cracked exterior dusted with crushed candy canes.

Now that we have our ingredients ready, let’s make some magic happen in the kitchen!

  1. Preheat the oven to 350° F (175° C). This ensures our cookies bake evenly and achieve that perfect crinkle.
  2. Mix the ingredients: In a large bowl, combine all cookie ingredients to form a wet dough. Don’t be shy; use your hands to mix it well!
  3. Shape the cookies: Roll the dough into about 14-16 balls (approximately one heaping tablespoon each) and place them on a prepared baking sheet lined with parchment paper.
  4. Coat the cookies: In a large plastic bag, combine the crushed candy canes and powdered erythritol. Add half of the cookie balls to the bag, seal it, and shake to coat. Repeat with the remaining dough balls.
  5. Flatten the cookies: Place the coated balls back on the baking sheet and gently press them down with your fingers to flatten slightly.
  6. Bake for 10-12 minutes. Keep an eye on them, as they should be set but still soft in the center. Let them cool on the baking sheet for a few minutes before transferring to a wire rack.

Pro Tips for Perfect Cookies

Here are some expert insights to ensure your cookies turn out just right:

  • Measure accurately: Use a kitchen scale for precision, especially when working with gluten-free flour, as weights can vary.
  • Room temperature ingredients: Allow your ingredients like butter and milk to be at room temperature for better mixing.
  • Don’t overmix: Gently combine your ingredients to avoid tough cookies.
  • Chill the dough: If your kitchen is warm, consider chilling the dough for 20-30 minutes to prevent spreading.
  • Watch the baking time: Every oven is different; keep an eye on your cookies to avoid overbaking.
  • Use parchment paper: This helps prevent sticking and makes cleanup a breeze.
  • Experiment with flavors: Try adding a hint of espresso powder for a mocha twist or orange zest for a citrusy lift.
  • Store properly: Keep cookies in an airtight container at room temperature for up to a week for optimal freshness.

Common Mistakes and Troubleshooting

Don’t let small missteps ruin your cookie-making joy! Here are some common mistakes and how to fix them:

  • Cookies are too dry: This can happen if you over-measure your flour. Always spoon and level flour instead of scooping directly from the bag.
  • Cookies spread too much: If your dough is too warm, chill it before baking to help maintain shape.
  • Crinkles aren’t visible: Ensure you coat the cookies well with powdered erythritol and candy cane mixture.
  • Too sweet: Adjust the sweetness by using less erythritol or adding a pinch of sea salt to balance flavors.

Delicious Variations

While the classic recipe is delightful, feel free to switch it up! Here are four variations to inspire your creativity:

  • Mint Chocolate Chip: Add 1/2 cup of dairy-free chocolate chips to the dough for extra chocolatey goodness.
  • Spicy Peppermint: Incorporate a pinch of cayenne pepper for a surprising kick that complements the chocolate and peppermint.
  • Nutty Addition: Stir in 1/2 cup of finely chopped nuts, like pecans or walnuts, for added texture and flavor.
  • Frosted Delight: After baking, top the cookies with a drizzle of vegan chocolate ganache for a decadent finish.

Storage and Make-Ahead Instructions

Planning ahead? Here’s how to store and prepare your cookies for any occasion:

  • Room Temperature: Store cookies in an airtight container for up to a week to maintain freshness.
  • Freezer Friendly: Freeze unbaked cookie dough balls on a baking sheet, then transfer to a freezer-safe bag. Bake from frozen, adding a minute or two to the baking time.
  • Make Ahead: You can prepare the dough a day in advance, refrigerate it, and bake fresh cookies when the craving strikes!

Frequently Asked Questions (FAQ)

Here are some common questions to help guide your baking experience:

  • Can I use regular flour instead of gluten-free? Yes, but the texture may differ. Gluten-free flour blends are formulated to mimic the properties of wheat flour.
  • Is there a substitute for erythritol? You can use coconut sugar or regular granulated sugar, but be mindful of the calorie content.
  • How can I make these cookies more festive? Consider adding colorful sprinkles or using holiday-themed cookie cutters for fun shapes.
  • What can I use instead of applesauce? You may replace it with mashed banana or a flaxseed egg (1 tablespoon ground flaxseed mixed with 2.5 tablespoons water).
  • Are these cookies nut-free? Yes, as long as you ensure that your chosen ingredients are certified nut-free.
  • Can I add different extracts? Absolutely! Almond extract or orange extract can provide a unique twist.
  • Can I make these cookies without peppermint? Yes, simply omit the peppermint extract for a classic chocolate crinkle cookie.
  • How do I know when the cookies are done? They should be set at the edges and slightly soft in the center. They will firm up as they cool.

Nutritional Tips and Dietary Adaptations

As we enjoy these cookies, it’s essential to be mindful of their nutritional content. Here are some tips to adapt this recipe to fit various dietary needs:

  • Low-Carb Option: Stick to erythritol and avoid high-carb add-ins like chocolate chips.
  • High-Protein Boost: Add protein powder to the dough for a nutritional lift.
  • Low-Fat Version: Reduce the amount of vegan butter and replace it with unsweetened applesauce to lower fat content.
  • Allergy-Friendly: Ensure all ingredients are allergy-friendly, especially when serving to guests.

Equipment Recommendations

To make your baking experience smooth and enjoyable, here are some essential tools:

  • Mixing Bowls: A set of various sizes for easy ingredient mixing.
  • Baking Sheet: A sturdy sheet will help cookies bake evenly.
  • Parchment Paper: Keeps cookies from sticking and makes cleanup easier.
  • Cookie Scoop: Helps portion out cookie dough uniformly for consistent baking.

Serving Suggestions

Now that your cookies are baked and cooled, it’s time to enjoy them! Here are some delightful serving suggestions:

  • With Hot Cocoa: Pair these cookies with a warm mug of cocoa for a cozy treat.
  • As a Gift: Package them in a decorative tin or box with a handwritten note for a personal touch.
  • At a Gathering: Serve them on a festive platter alongside other holiday treats for a delightful dessert table.

As you gather around with family and friends, these Chocolate Peppermint Crinkle Cookies will surely become a cherished part of your holiday traditions. Remember, cooking is about sharing love and creating memories. Enjoy every bite, and may your kitchen be filled with laughter and joy!

Chocolate Peppermint Crinkle Cookies (Gluten-Free, Vegan, Allergy-Free)

Prep Time 10 minutes
Cook Time 12 minutes
Total Time 22 minutes
Servings 14 cookies
Calories 150
Delight in these gluten-free, vegan peppermint crinkle cookies with a rich chocolate flavor and a festive coating of crushed peppermint candies.

Ingredients

cookie ingredients

  • 1 cup Gluten-Free All Purpose Flour
  • 1/2 cup Millet Flour
  • 1/2 cup Unsweetened Cocoa Powder
  • 1/2 cup Granulated Erythritol (or preferred granulated sugar)
  • 1 TB Psyllium Husk Powder
  • 1 tsp Baking Powder
  • 1 tsp Pure Peppermint Extract
  • 1/2 tsp Pure Madagascar Bourbon Vanilla Extract
  • 1/2 cup Unsweetened Applesauce
  • 2 TB Vegan/Soy-Free Butter (melted)
  • 2 TB Unsweetened Non-Dairy Milk

Outer Coating

  • 3 peppermint candies Peppermint Candy Canes (crushed)
  • 1/2 cup Powdered Erythritol

Instructions 

  • Preheat oven to 350°F (175°C).
  • Mix all cookie ingredients to form a wet dough.
  • Form 14-16 balls, coat with crushed peppermint mixture, then flatten slightly.
  • Bake for 10-12 minutes, then cool.

Notes

Store in an airtight container for freshness.
Calories: 150kcal
Cost: $15
Course: Dessert
Cuisine: American
Keyword: gluten free, peppermint, Vegan

As the holiday season approaches, there’s a special warmth that fills the air, often brought to life by the aromas wafting from our kitchens. This year, let’s make memories together by preparing a dish that embodies love and tradition: Wild Rice Stuffing. This delightful blend of flavors, featuring the heartiness of wild rice and the sweetness of cranberries and apples, promises to be the star of your festive table.

In this article, we’ll explore not only how to make this beautiful dish, but also why it’s a cherished recipe that you’ll want to pass down through generations. With over 1500 words filled with love, insights, and practical tips, we’ll ensure your Wild Rice Stuffing stands out this holiday season.

Why You’ll Love This Recipe

  • Rich Flavor Profile: The combination of wild rice, apples, and spices creates a dish bursting with flavors that dance on your palate.
  • Easy to Prepare: With just a few steps and simple ingredients, you can whip up this stuffing in no time, allowing you to focus on family and fun.
  • Healthier Option: Packed with nutrients from vegetables and whole grains, this stuffing is a wholesome side dish that everyone can enjoy.
  • Versatile Serving: Perfect alongside turkey, ham, or as a standalone vegetarian dish, this stuffing complements a variety of meals.
  • Make-Ahead Friendly: Prepare it a day in advance and simply reheat it before serving, saving you time and stress on the big day.

Ingredients Breakdown

Gather these ingredients to create a stuffing that not only tastes amazing but also brings a touch of nostalgia to your holiday gathering.


Meal Prep Container Set

★ Recommended Kitchen Tool

Meal Prep Container Set

Make this recipe even easier with a quality Meal Prep Container Set — a must-have kitchen staple!


🛒 View on Amazon →

As an Amazon Associate, we earn from qualifying purchases.
  • 210g USA Wild Rice: This nutty grain is the foundation of your stuffing—its unique texture sets the stage for the other ingredients.
  • 480ml Chicken or Vegetable Stock: Enhances the flavor of the rice, making it rich and savory. For a vegetarian option, choose vegetable stock.
  • 15g Unsalted Butter: Adds a creamy richness to the sautéed vegetables, but feel free to substitute with olive oil for a dairy-free version.
  • 15ml Garlic-Infused Olive Oil: Infuses the dish with a warm, aromatic flavor that elevates each bite.
  • 1 Medium Apple (peeled, cored, and diced): The sweetness of the apple contrasts beautifully with the savory elements, adding a delightful twist.
  • 4 Celery Stalks (diced): Provides a crunchy texture and refreshing taste to balance the dish.
  • 4 Spring Onions (chopped): Adds a mild onion flavor that’s essential for depth.
  • Salt and Freshly Ground Pepper (to taste): Essential for seasoning, adjusting these to your personal taste can make all the difference.
  • 1 tbsp Fresh Sage (finely chopped): This herb adds an earthy flavor that’s perfect for the holiday season.
  • 2 tsp Fresh Rosemary (finely chopped): Enhances the aromatic quality of the stuffing.
  • Pinch of Nutmeg: A little goes a long way in adding warmth and comfort to the dish.
  • 75g Dried Cranberries: These provide a sweet and tart burst that complements the savory flavors.
  • 60g Chopped Pecans: Adds crunch and a nutty flavor that enhances the stuffing’s texture.

How to Prepare Wild Rice Stuffing

Let’s dive into the steps to prepare this delightful dish. Follow along, and soon you’ll have a warm, savory stuffing ready to share.

Step 1: Cooking the Wild Rice

In a stock pot over medium heat, bring the chicken or vegetable broth to a simmer. Add the USA Wild Rice and reduce the heat to low. Cook the rice until tender, which takes about 30 minutes. This process is vital for achieving the perfect texture and flavor.

Step 2: Sautéing the Vegetables

In a medium fry pan, heat the garlic-infused olive oil and unsalted butter over medium-low heat until shimmering. Add the diced apples, celery, and spring onions and cook for 2-3 minutes until they begin to soften. Season generously with salt and pepper to enhance the flavors.

Step 3: Combining and Baking

Stir in the fresh herbs (sage and rosemary) along with a pinch of nutmeg to the sautéed vegetables and cook until tender. Combine this mixture with the cooked wild rice, adding in the dried cranberries and chopped pecans. Adjust seasoning as needed.

Step 4: Serve and Enjoy

Serve warm, topped with additional fresh sage for a beautiful presentation. This stuffing is not just a side dish; it’s a **celebration of flavors and memories**.

Expert Tips for Success

Detailed angle of Wild Rice Christmas Stuffing highlighting diced apples, celery, and pecans.
  • Rinse the Rice: Always rinse your wild rice before cooking to remove excess starch, ensuring a fluffier texture.
  • Chop Uniformly: Cut vegetables into similar sizes for even cooking and a harmonious texture.
  • Don’t Overcrowd the Pan: When sautéing, avoid overcrowding as it can lead to steaming instead of browning.
  • Adjust Seasoning: Taste as you go! Adjust salt, pepper, and herbs to suit your preferences.
  • Experiment with Nuts: Feel free to substitute pecans with walnuts or almonds for a different flavor profile.
  • Make it Vegetarian: Use vegetable stock and omit butter for a fully vegetarian version.
  • Storage Tips: Store leftovers in an airtight container in the fridge for up to 4 days, or freeze for longer storage.
  • Reheat Gently: When reheating, add a splash of broth to maintain moisture and avoid drying out.

Common Mistakes and Troubleshooting

  • Overcooked Rice: Watch the cooking time closely; overcooked wild rice can become mushy.
  • Too Dry: If your stuffing comes out dry, it may need more broth or a touch of butter mixed in.
  • Flavorless Dish: Don’t skimp on seasoning! The right amount of salt and herbs is essential for depth.
  • Too Much Liquid: If the stuffing is too wet, bake it uncovered for a few minutes to help absorb excess moisture.

Variations to Try

While this Wild Rice Stuffing is a classic, feel free to customize it to your taste or dietary needs!

  • Fruit Medley: Add chopped dried apricots or raisins for a delightful sweetness.
  • Savory Sausage: Incorporate cooked sausage for a heartier stuffing that packs a punch.
  • Mushroom Delight: Sauté mushrooms with the vegetables for an earthy addition.
  • Herb-Infused: Experiment with different herbs, such as thyme or dill, to create unique flavor profiles.

Storage and Make-Ahead Instructions

This stuffing can be prepared ahead of time, making your holiday cooking a breeze. Here’s how:

  • Make Ahead: Prepare the stuffing up to 24 hours in advance. Store in the refrigerator in a covered dish.
  • Freezing: Freeze cooked stuffing in an airtight container for up to 3 months. Thaw overnight in the refrigerator before reheating.
  • Reheating: Reheat in the oven covered with foil at 350°F (175°C) until warmed through, about 20-30 minutes.

Frequently Asked Questions (FAQs)

  • Can I use brown rice instead of wild rice? Absolutely! Just adjust the cooking time, as brown rice takes longer to cook.
  • Is this stuffing gluten-free? Yes, as long as you use gluten-free broth and ingredients, this stuffing is a great gluten-free option.
  • Can I make this stuffing vegan? Yes! Substitute butter with olive oil and use vegetable stock to make it completely vegan.
  • What can I substitute for pecans? Walnuts or sunflower seeds can provide a similarly crunchy texture.
  • How do I know when the rice is done? The rice should be tender but still chewy; if it’s too soft, it’s overcooked.
  • Can I add more vegetables? Certainly! Feel free to add bell peppers, carrots, or even spinach for more nutrition.
  • How do I serve this dish? Serve warm, garnished with fresh herbs, as a side dish to your main course.
  • Can I double this recipe? Yes, simply double the ingredients and ensure you have a large enough pot to cook the rice.

Nutrition Tips and Dietary Adaptations

This Wild Rice Stuffing not only tastes great but can also be adapted to fit various dietary needs. Here are some tips:

  • Whole Grains: Wild rice is a nutritious whole grain, rich in protein and fiber, making it a healthy choice.
  • Low Sodium Option: Use low-sodium broth and limit added salt for a heart-healthy version.
  • Vegetarian/Vegan Options: Easily alter this recipe to cater to vegetarian or vegan diets without sacrificing flavor.

Equipment Recommendations

To make this recipe hassle-free, here are some kitchen tools that can be helpful:

  • Stock Pot: A large pot is essential for cooking the wild rice properly.
  • Fry Pan: Use a medium-sized fry pan for sautéing vegetables evenly.
  • Measuring Cups and Spoons: Accurate measurements ensure the best flavor and texture.
  • Wooden Spoon: Great for stirring without scratching your cookware.

Serving Suggestions

This Wild Rice Stuffing pairs beautifully with:

  • Roast Turkey: A classic combination for any holiday feast.
  • Honey Glazed Ham: The sweetness of the ham complements the stuffing perfectly.
  • Vegetarian Main Dishes: Serve it alongside stuffed bell peppers or a hearty vegetable casserole for a delightful vegetarian meal.
  • Salads: A crisp green salad can balance out the richness of the stuffing.

Conclusion

As we gather around the table this holiday season, let this Wild Rice Stuffing remind us of the love and traditions we cherish. Each bite is a celebration of family and community, a dish that carries not just flavors but memories. I hope you find joy in preparing this recipe and that it brings warmth to your home, just as it has to mine. Happy cooking!

Wild Rice Christmas Stuffing

Prep Time 10 minutes
Cook Time 30 minutes
Total Time 40 minutes
Servings 6 servings
Calories 350
A flavorful and festive stuffing featuring wild rice, herbs, cranberries, and pecans, perfect for holiday gatherings.

Ingredients

Main

  • 210 g USA Wild Rice
  • 480 ml chicken or vegetable stock
  • 15 g unsalted butter
  • 15 ml garlic-infused olive oil
  • 1 medium apple, peeled, cored, and diced
  • 4 stalks celery, diced ((120–150 g))
  • 4 spring onions chopped
  • to taste Salt and freshly ground pepper
  • 1 tbsp fresh sage, finely chopped (plus more for garnish)
  • 2 tsp fresh rosemary, finely chopped ((about 2 g))
  • a pinch nutmeg
  • 75 g dried cranberries
  • 60 g chopped pecans

Instructions 

  • Simmer wild rice in broth until tender, about 30 minutes.
  • Cook apples, celery, and scallions in olive oil and butter for 2-3 minutes.
  • Stir in herbs, nutmeg, salt, and pepper; cook until fragrant.
  • Combine cooked rice with apple and herb mixture, then stir in cranberries and pecans.
  • Adjust seasoning; serve warm garnished with extra sage.

Notes

For added flavor, toast the pecans lightly before adding.
Calories: 350kcal
Cost: $15
Course: Side Dish
Cuisine: American
Keyword: wild rice