
![['Close-up view of golden-brown mini pumpkin hand pies on a white plate.', 'Side view of freshly baked mini pumpkin hand pies with a flaky crust.', 'Juicy mini pumpkin hand pies filled with a vibrant orange pumpkin mixture.', 'Delicious mini pumpkin hand pies dusted with cinnamon sugar on a rustic table.']](https://quickflavorfix.com/wp-content/uploads/2026/07/mini-pumpkin-hand-pies_1_U1.webp "Nostalgic Mini Pumpkin Hand Pies: A Slice of Autumn in Every Bite")
Welcome to the World of Mini Pumpkin Hand Pies
As the leaves turn and the air becomes crisp, there’s something undeniably comforting about the aroma of pumpkin spices wafting through the kitchen. These mini pumpkin hand pies are more than just a delightful treat; they’re a heartfelt reminder of cozy family gatherings and cherished memories. Made with love and care, each bite offers a perfect blend of creamy pumpkin filling wrapped in a flaky crust, creating a delicious experience that captures the essence of autumn.
Why You’ll Love This Recipe
Embrace the season with these charming hand pies. Here are five reasons why this recipe will become a favorite in your home:
- Perfect for Sharing: These mini pumpkin hand pies are ideal for gatherings, allowing everyone to enjoy a personal-sized treat.
- Simple Yet Delicious: With easy-to-follow steps and common ingredients, you’ll create a delightful dessert without stress.
- Customizable: You can easily adapt the filling or crust to fit your dietary needs, making them suitable for everyone.
- Make-Ahead Friendly: These hand pies can be prepared in advance and frozen, ensuring you always have a sweet option on hand.
- Kid-Friendly Fun: Get the little ones involved in the kitchen! They’ll love helping to cut out shapes and fill the pies.
Ingredients You’ll Need
Gathering the right ingredients is the first step towards creating delicious mini pumpkin hand pies. Here’s what you’ll need:

★ Recommended Kitchen Tool
Professional Chef Knife Set
Make this recipe even easier with a quality Professional Chef Knife Set — a must-have kitchen staple!
- 1 box store-bought pie dough: Contains 2 sheets; for a gluten-free option, consider using a gluten-free pie crust.
- 4 oz cream cheese: Make sure it’s at room temperature for easy mixing.
- 1/2 cup light brown sugar: Packed to enhance the sweetness and depth of flavor.
- 1/2 cup pumpkin puree: Fresh or canned works, but make sure it’s pure pumpkin, not pie filling.
- 1/2 tsp pumpkin pie spice: A warm blend that captures the essence of fall.
- Pinch of salt: To balance the sweetness.
- 1 large egg: For egg wash, which gives the pies a golden finish.
- 1/2 cup granulated sugar: For sprinkling on top for added sweetness and crunch.
- 1 tsp ground cinnamon: To dust the tops, enhancing both flavor and appearance.
Step-by-Step Instructions
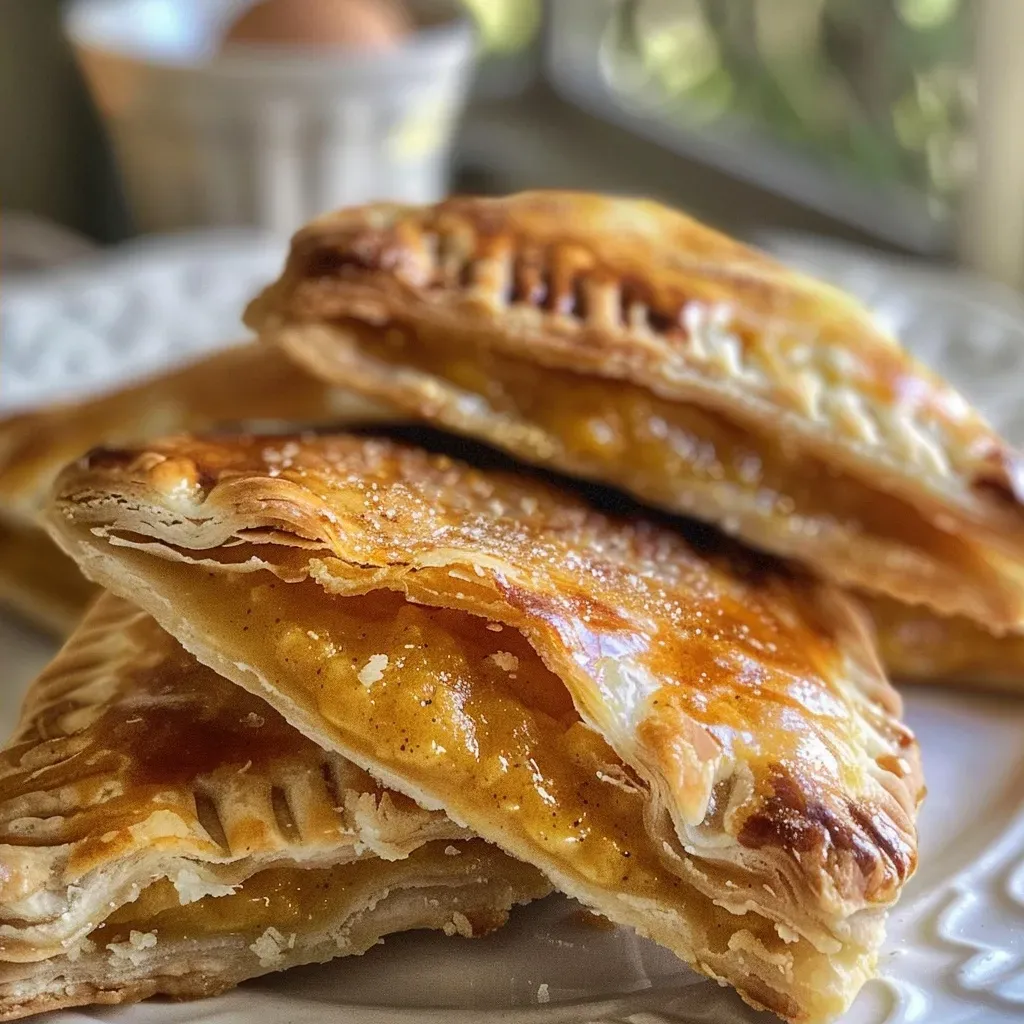
Now let’s dive into the heart of the matter—making these delightful hand pies. Follow these steps to create your own batch:
- Remove the pie dough from the refrigerator and allow the sheets to come to room temperature while you prepare the filling.
- In a bowl, mash together the cream cheese and brown sugar with a fork until smooth.
- Incorporate half of the pumpkin puree into the mixture. Once combined, add the remaining pumpkin puree along with the pumpkin pie spice and a pinch of salt.
- Preheat your oven to 400°F (200°C) and line a large baking sheet with parchment paper.
- Lightly dust your work surface with flour and roll out one of the pie sheets. Smooth out any wrinkles with a rolling pin.
- Using a pumpkin-shaped cookie cutter or a homemade template, cut out pumpkin shapes from the dough. Roll out scraps to cut additional shapes, aiming for about 10 pumpkins per sheet.
- Transfer the cutouts to the refrigerator while you prepare the second sheet.
- On the baking sheet, place half of the pumpkin cutouts evenly spaced apart. If there’s leftover dough, keep it in the fridge for later.
- Fill each pumpkin with a tablespoon of the filling, leaving a small border around the edges.
- Beat the egg with 2 teaspoons of water, then brush the edges of each filled pumpkin with the egg wash.
- Cut slits in the remaining pumpkin shapes to create vents and place them over the filled ones. Press to seal, then crimp the edges with a fork.
- Brush the tops with egg wash and sprinkle with cinnamon sugar.
- Bake for 12-14 minutes, until golden brown. Allow to cool for about 5 minutes before transferring to a cooling rack.
Pro Tips for Perfect Mini Pumpkin Hand Pies
Let’s ensure your hand pies are just as delightful as intended. Here are some expert insights:
- Chill the Dough: For flakier crusts, refrigerate your pie dough before rolling it out.
- Don’t Overfill: Stick to about one tablespoon of filling to prevent leakage during baking.
- Seal Well: Press firmly and crimp edges to keep the filling from escaping while baking.
- Temperature Matters: Ensure your oven is preheated fully for even baking.
- Experiment with Spices: Feel free to adjust spices in the filling to match your family’s taste preferences.
- Use Parchment Paper: This will help prevent sticking and makes cleanup a breeze.
- Brush with Milk: Instead of egg wash, milk can add a nice sheen to the crust.
- Stay Vigilant: Every oven is different; keep an eye on your pies to avoid over-baking.
Common Mistakes and Troubleshooting
Even the best of us can make mistakes in the kitchen. Here are some common pitfalls and how to avoid them:
- Leaking Filling: Make sure to properly seal the edges and avoid overfilling.
- Hard Crust: If overworked, the dough can become tough. Handle it gently.
- Burnt Tops: If the tops brown too quickly, cover them with aluminum foil to shield from direct heat.
- Filling Too Runny: If your filling is too runny, consider adding a bit more cream cheese or an extra pinch of cornstarch.
Variations to Try
Feel free to get creative with your mini pumpkin hand pies. Here are some variations:
- Apple Pumpkin Combo: Mix in some grated apples for a delightful twist.
- Chocolate Chip Delight: Add chocolate chips to the filling for a sweet surprise.
- Nutty Crust: Substitute part of the pie crust with crushed nuts for added flavor.
- Spiced Up Filling: Incorporate cayenne or nutmeg for a little heat or extra warmth.
Storage and Make-Ahead Instructions
Planning ahead can save you time and stress. Here’s how to prepare and store your hand pies:
- Freezing Before Baking: Assemble the pies, then freeze them on a baking sheet. Once frozen, transfer to a freezer-safe bag. Bake from frozen, adding a few extra minutes to the baking time.
- Storing Baked Pies: Keep baked pies in an airtight container in the fridge for up to 3 days.
- Reheating: To enjoy leftovers, reheat in a 350°F (175°C) oven until warm, about 10 minutes.
Frequently Asked Questions
Still have questions? Here are some common inquiries about mini pumpkin hand pies:
- Can I use fresh pumpkin instead of canned? Yes! Just ensure it’s cooked and pureed to a smooth consistency.
- How do I make these gluten-free? Use a gluten-free pie crust, and check your filling ingredients for gluten content.
- What can I serve with these hand pies? They pair beautifully with a scoop of vanilla ice cream or a dollop of whipped cream.
- How long do these hand pies last? Stored in an airtight container, they will last up to 3 days in the fridge.
- Can I make the filling ahead of time? Absolutely! The filling can be made a day in advance and stored in the fridge.
- What is the best way to reheat them? Oven reheating is best to maintain the crust’s crispiness; avoid the microwave.
- Can I add nuts to the filling? Yes! Chopped pecans or walnuts can add a delightful crunch.
- How do I prevent soggy crusts? Ensure the filling isn’t too wet, and bake until golden and crisp.
Nutritional Tips and Dietary Adaptations
For those mindful of dietary preferences, here are some tips:
- Reduced Sugar: Substitute some sugar with a natural sweetener like stevia or monk fruit.
- Vegan Option: Use vegan cream cheese and an egg substitute for the wash.
- Lower Fat: Swap full-fat cream cheese with a lighter version or Greek yogurt for a healthier twist.
Equipment Recommendations
Having the right tools can make all the difference in your baking experience:
- Rolling Pin: Essential for smoothing out your dough.
- Cookie Cutters: Pumpkin-shaped cutters add a festive touch; a glass can also work in a pinch.
- Baking Sheet: A sturdy, rimmed baking sheet ensures even cooking.
- Parchment Paper: Prevents sticking and simplifies cleanup.
Serving Suggestions
Ready to serve your mini pumpkin hand pies? Here are some ideas:
- Dust with Powdered Sugar: A light sprinkle adds a sweet touch.
- Pair with Hot Beverages: Serve with spiced cider or coffee for a cozy pairing.
- Create a Dessert Platter: Arrange with other fall treats for a beautiful presentation at gatherings.
Conclusion
As you gather around the table to enjoy these nostalgic mini pumpkin hand pies, remember that each bite is a celebration of love, tradition, and the warmth of home. Share them with family and friends, and create new memories that will linger long after the last crumb is gone. Happy baking, and may your kitchen always be filled with joy and delicious aromas!
Mini Pumpkin Hand Pies
Ingredients
Dough
- 1 box store bought pie dough (containing 2 sheets)
- 4 oz cream cheese (room temp)
- 0.5 cup light brown sugar (packed)
- 0.5 cup pumpkin puree
- 0.5 tsp pumpkin pie spice
- pinch salt
- 1 large egg
- 0.5 cup granulated sugar
- 1 tsp ground cinnamon
Instructions
-
Allow pie dough to come to room temperature and prepare filling by mixing cream cheese and brown sugar until smooth.
-
Mix in half of the pumpkin puree, then add remaining pumpkin, spices, and salt.
-
Preheat oven to 400°F (200°C). Roll out dough, cut out pumpkin shapes, and refrigerate scraps.
-
Fill pumpkin shapes with a tablespoon of filling, cut slits on vented pumpkins, seal with top shapes, and brush with egg wash.
-
Sprinkle with cinnamon sugar and bake for 12-14 minutes. Cool before serving.

![['A close-up side view of rich sea salt caramel brownies with a glossy top layer.', 'Decadent sea salt caramel brownies displayed with drizzling caramel on top.', 'A detailed side view showcasing the moist texture and caramel drizzle on brownies.', 'An enticing image of brownies featuring sea salt caramel and a shiny surface.']](https://quickflavorfix.com/wp-content/uploads/2026/07/sea-salt-caramel-brownies_1_U1-150x150.webp)
![['Close-up view of juicy Air Fryer sweet potato cubes on a plate.', 'Side view of crispy golden-brown sweet potato cubes freshly cooked in an air fryer.', 'A vibrant display of cubed sweet potatoes, seasoned and ready to eat.', 'Deliciously cooked sweet potato cubes with a crispy exterior and soft interior.']](https://quickflavorfix.com/wp-content/uploads/2026/07/u6426281249_close_up_photo_side_view_from_reddit._taken_with__37ae3767-26c1-4deb-8472-216d069a5172_0-150x150.webp)