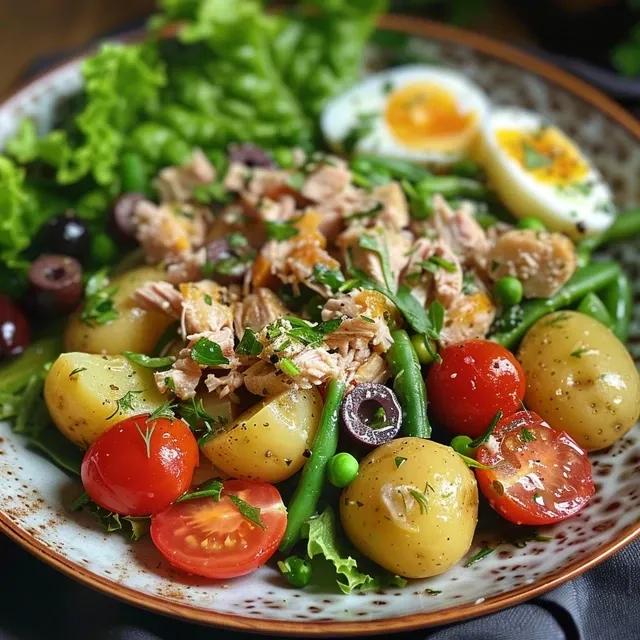
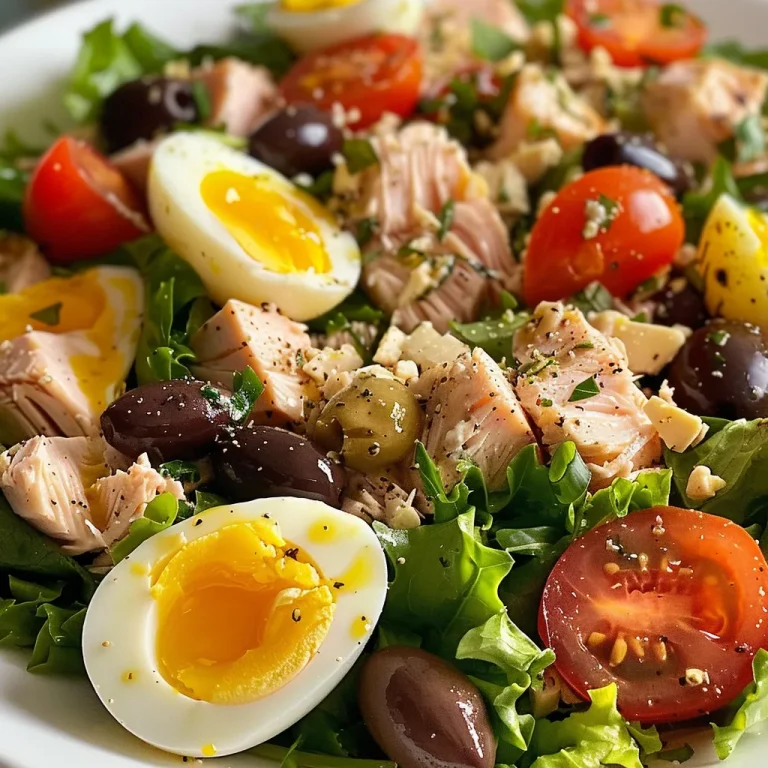
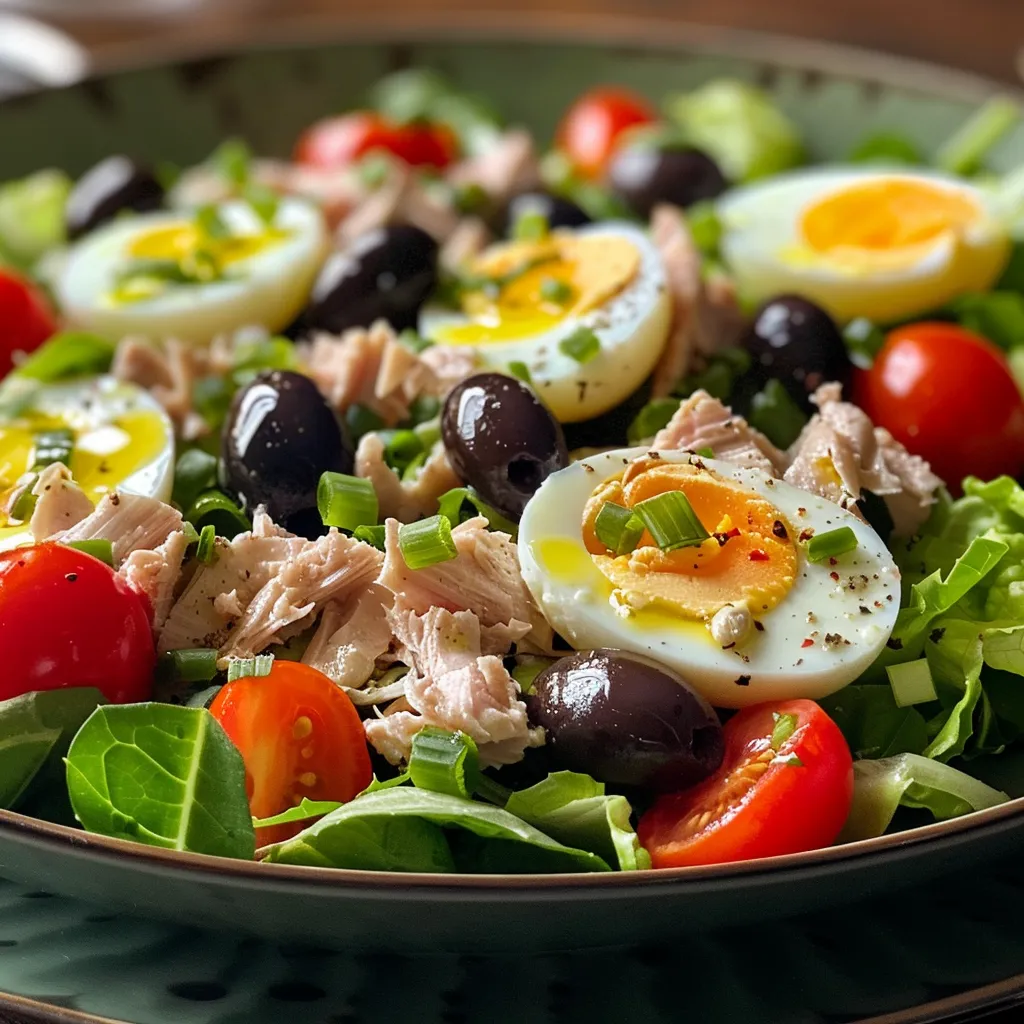
Author

daniel

Browsing

Rediscovering the Heart of Cooking: The Classic Waldorf Salad

In our bustling lives, it’s easy to forget the simple joys that food can bring us. The Classic Waldorf Salad is not merely a dish; it’s a cherished memory, a tapestry woven from apples and walnuts, the creaminess of mayonnaise, and the laughter shared around a family table. This refreshing salad combines the tartness of green apples with the sweetness of red ones, creating a delightful balance that will make your taste buds dance. Join me on this culinary journey as we explore how to make this beloved recipe that brings us together, one bite at a time.

Why You’ll Love This Classic Waldorf Salad

This timeless dish is more than just a salad; it’s a celebration of flavors and textures that evoke nostalgia. Here are just a few reasons to embrace the Waldorf Salad:

  • Simple Ingredients: With just a few pantry staples like apples, walnuts, and mayonnaise, you can create something truly special.
  • Perfect for Any Occasion: Whether it’s a family gathering, a picnic, or a holiday meal, this salad fits right in.
  • Customizable: Adjust the recipe to your taste by adding fruits, nuts, or even a splash of citrus.
  • Health Benefits: Packed with fresh fruits and nuts, this dish is not only delicious but also nutritious.
  • Rich in Tradition: Embrace the history of this classic dish, which has been enjoyed for generations.

Ingredient Breakdown for the Classic Waldorf Salad

Let’s dive into the ingredients that make this salad shine. Here’s what you’ll need:

  • 1/4 cup mayonnaise: Traditional choice for creaminess; feel free to substitute with Greek yogurt for a healthier twist.
  • 1/4 cup sour cream or plain Greek yogurt: Adds richness; yogurt will also lend a bit of tartness.
  • 1 tablespoon honey: Sweetness to balance the vinegar’s acidity; maple syrup can be a lovely alternative.
  • 1 tablespoon lemon juice: Freshly squeezed for brightness; if you want to omit the lemon juice, consider a splash of apple cider vinegar instead.
  • 1/2 teaspoon salt: Enhances flavors; adjust according to your taste.
  • 1/4 teaspoon ground black pepper: Adds a hint of warmth and complexity.
  • 1 tart green apple (like Granny Smith): Provides a refreshing crunch and tartness.
  • 1 sweet red apple (like Honeycrisp or Fuji): Adds sweetness and color.
  • 1 cup diced celery (about 2 stalks): For crunch and flavor.
  • 1 cup seedless red grapes, halved: Sweet bursts of juiciness.
  • 1/2 cup toasted walnuts or pecans, roughly chopped: For that essential nutty flavor.
  • Lettuce leaves for serving (optional): Create a beautiful presentation.

Steps to Create Your Waldorf Salad

Now that you have your ingredients, let’s get cooking! Follow these simple steps:

  1. In a large bowl, whisk together the mayonnaise, sour cream, lemon juice, honey, salt, and pepper until smooth and creamy.
  2. Add the diced apples, diced celery, halved grapes, and chopped toasted nuts. Stir well until everything is coated with the dressing.
  3. Cover and chill for at least 1 hour to allow the flavors to meld together.
  4. When ready to serve, lay a bed of fresh lettuce leaves on a platter and spoon the Waldorf salad on top. Garnish with additional chopped nuts if desired.
  5. Enjoy the smiles and memories this dish brings to your table!

Pro Tips for the Perfect Waldorf Salad

To elevate your Waldorf Salad, consider these expert insights:

  • Fresh is Best: Use the freshest apples and grapes to ensure optimal flavor and crunch.
  • Toast Your Nuts: Toasting walnuts or pecans enhances their flavor and adds an irresistible crunch.
  • Chill Before Serving: Allowing the salad to chill helps the flavors meld together beautifully.
  • Mix and Match: Feel free to add dried cranberries or raisins for added sweetness and texture.
  • Experiment with Dressings: Try Greek yogurt alone or a mix of yogurt and mayo for a different taste.
  • Use Seasonal Fruits: Depending on the time of year, you can incorporate seasonal fruits like pears or berries for a twist.
  • Mind Your Apples: Choose apples that won’t brown quickly; toss them in a bit of lemon juice if preparing ahead.
  • Presentation Matters: Serve in a clear bowl to showcase the bright colors of the ingredients.

Avoiding Common Mistakes

Even the best chefs can hit a snag. Here are some common pitfalls and how to avoid them:

  • Over-Mixing: Be gentle when combining ingredients to keep the apples and grapes intact.
  • Too Much Dressing: Use just enough dressing to coat the ingredients; excess dressing can make the salad soggy.
  • Not Chilling: Don’t skip the chilling step; it really helps the flavors develop.
  • Using Brown Apples: Prevent oxidation by selecting fresh apples and adding a splash of lemon juice.

Delicious Variations on the Classic Waldorf Salad

Want to make this recipe your own? Here are some delightful variations:

  • Fruit-Forward: Add sliced strawberries or blueberries for a summer twist.
  • Nut-Free Version: Omit nuts and replace them with crunchy sunflower seeds.
  • Protein-Packed: Incorporate shredded chicken or turkey for a heartier salad.
  • Herb-Infused: Toss in fresh herbs like mint or basil for an aromatic lift.

Storage and Make-Ahead Instructions

Planning ahead? Here’s how to store your Waldorf Salad:

  • Refrigerate: Store in an airtight container for up to 3 days in the refrigerator.
  • Make-Ahead: Prepare the dressing and chop the fruits separately. Combine them just before serving to maintain freshness.

Frequently Asked Questions

Here are some common queries about the Classic Waldorf Salad:

  • Can I use different nuts? Yes, feel free to substitute with pecans, almonds, or even hazelnuts!
  • Is this salad gluten-free? Absolutely! All ingredients are naturally gluten-free.
  • How can I make it vegan? Replace mayo and yogurt with plant-based alternatives and use maple syrup instead of honey.
  • What can I serve with Waldorf Salad? It pairs beautifully with grilled chicken, fish, or as part of a picnic spread.
  • Can I add cheese? Crumbled feta or goat cheese can add a delicious creaminess to the salad.
  • How do I prevent the apples from browning? Toss them in a little lemon juice before mixing them into the salad.
  • Can I add dried fruits? Yes! Dried cranberries or raisins can add a sweet touch.
  • Is it suitable for meal prep? Yes, just keep the dressing separate until you’re ready to serve.

Nutritional Tips and Dietary Adaptations

This Waldorf Salad can be part of a balanced diet. Here are some tips:

  • Low-Fat Option: Use low-fat mayo and Greek yogurt to cut down on calories.
  • Increasing Fiber: Incorporate more fruits and nuts to boost fiber content.
  • Watch the Sugar: If you’re watching sugar intake, reduce or omit the honey.
  • Heart Health: The nuts provide healthy fats; remember to enjoy in moderation.

Essential Equipment for Making Waldorf Salad

Here’s what you’ll need:

  • Mixing Bowl: A large bowl for combining your salad ingredients.
  • Whisk: Essential for mixing the dressing until smooth.
  • Sharp Knife: To chop apples and celery with ease.
  • Cutting Board: A stable surface for all your chopping needs.

Serving Suggestions

Present your Waldorf Salad beautifully:

  • On a Platter: Serve on a large platter over a bed of fresh lettuce for a stunning display.
  • In Individual Bowls: For a personal touch at gatherings.
  • Garnished: Add extra nuts or fresh herbs on top just before serving for a pop of color.

As we gather around our tables, let’s cherish the love and stories that each recipe brings. The Classic Waldorf Salad is more than a dish; it’s a celebration of family, tradition, and memories that we hold dear. So, gather your loved ones, share this delightful salad, and let the warmth of togetherness fill your home. Bon appétit!

Classic Waldorf Salad

Prep Time 15 minutes
Total Time 15 minutes
Servings 4 servings
Calories 250
A refreshing and crunchy salad combining apples, celery, grapes, and nuts, dressed in a creamy mixture.

Ingredients

Dressing

  • 1/4 cup mayonnaise
  • 1/4 cup sour cream or plain Greek yogurt
  • 1 tablespoon honey
  • 1 tablespoon lemon juice
  • 1/2 teaspoon salt
  • 1/4 teaspoon ground black pepper
  • 1 tart green apple green apple (e.g., Granny Smith)
  • 1 sweet red apple red apple (e.g., Honeycrisp or Fuji)
  • 1 cup diced celery (2 stalks)
  • 1 cup seedless red grapes, halved
  • 1/2 cup toasted walnuts or pecans, roughly chopped

Lettuce leaves for serving (optional)

Instructions 

  • Whisk mayonnaise, sour cream, lemon juice, honey, salt, and pepper until smooth.
  • Add apples, celery, grapes, and nuts; stir to coat.
  • Chill for 1 hour, then serve over lettuce if desired.
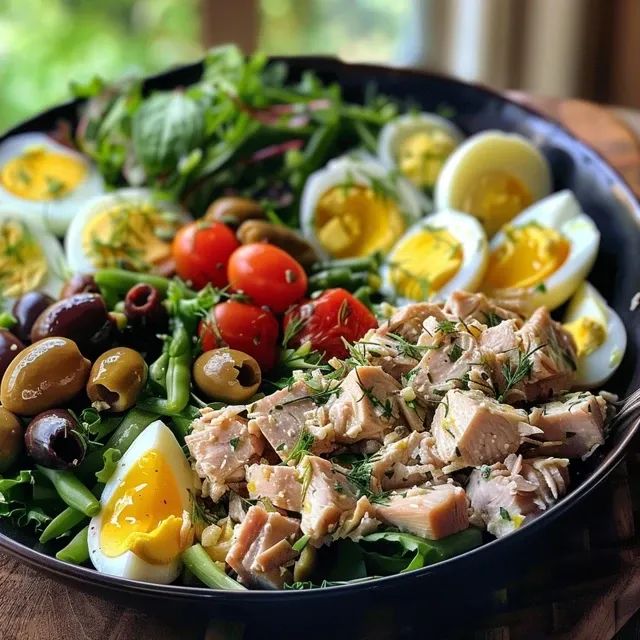
Notes

For extra crunch, add more nuts or grapes.
Calories: 250kcal
Cost: $12
Course: Salad
Cuisine: American
Keyword: apple, Fruit, Nuts

Introducing the Hearty Casserole That Wraps You in a Warm Embrace

When the chill of evening settles in and you crave something that not only fills your belly but also warms your heart, look no further than my Hearty Casserole. This dish is more than just a meal; it’s a comforting hug that brings together flavors and memories, reminding us of cozy family gatherings and the love shared around the table. With every bite, you’ll experience flavors that transport you to a time when meals were not just about nutrition, but about connection, warmth, and joy. Let’s dive into why you’ll love this recipe!

Why You’ll Love This Recipe

  • Comfort food at its best: This casserole combines rich, hearty ingredients that create a satisfying dish perfect for any family gathering.
  • Easy to prepare: With straightforward steps and common ingredients, this recipe ensures that anyone, regardless of cooking skill, can create a delightful meal.
  • Customizable flavors: You can easily tweak this recipe to suit your taste, making it a versatile option for everyone at the table.
  • Make-ahead option: Prepare it in advance and simply pop it in the oven when you’re ready to eat, allowing you to enjoy time with your loved ones.
  • Leftovers taste even better: This casserole is perfect for meal prep, as it stores well and the flavors deepen after a night in the fridge.

Ingredients Breakdown

Before we get started, let’s take a closer look at the ingredients that will make this casserole shine. Remember, cooking is about sharing and love, so feel free to substitute based on your personal preferences or what you have on hand.

  • Protein: Use ground beef, turkey, or even lentils for a vegetarian option.
  • Vegetables: A mix of bell peppers, onions, and carrots adds sweetness and nutrition. You can also toss in frozen peas or corn if you prefer.
  • Starch: Classic egg noodles or rice can be used; both provide a comforting base to the casserole.
  • Cheese: Cheddar is a favorite, but feel free to mix it up with mozzarella or pepper jack for a kick.
  • Broth: Chicken or vegetable broth works perfectly to keep the casserole moist and flavorful.

Steps to Make Your Casserole

Now that you have your ingredients, let’s get into the nitty-gritty of creating this beautiful dish.

  1. Preheat your oven to 350°F (175°C).
  2. Cook the protein: In a large skillet, brown your choice of protein over medium heat. Season with salt and pepper.
  3. Add the vegetables: Once the protein is browned, toss in your chopped vegetables. Sauté until they start to soften, about 5-7 minutes.
  4. Mix in the starch: Stir in cooked egg noodles or rice, followed by the cheese, and pour in the broth. Mix everything until well combined.
  5. Transfer to a baking dish: Spoon the mixture into a greased casserole dish and sprinkle additional cheese on top for a golden finish.
  6. Bake: Cover with foil and bake for 25 minutes. Remove the foil and bake for an additional 15 minutes, or until bubbly and golden.

Pro Tips for the Perfect Casserole

  • Don’t overcook the protein: It will continue to cook in the oven, so aim for it to be just browned.
  • Layer flavors: Adding spices like garlic powder or Italian seasoning can elevate the dish.
  • Experiment with cheese: Mixing different types of cheese adds depth of flavor.
  • Use fresh herbs: Garnish with parsley or chives for a fresh finish.
  • Be mindful of moisture: If using frozen vegetables, thaw and drain excess water to prevent a soggy casserole.
  • Test for doneness: Make sure the casserole is bubbling and the cheese is melted to ensure it’s ready.
  • Let it rest: Allow the casserole to sit for 10 minutes before serving; this helps the flavors meld.
  • Pair it with a salad: A fresh side salad balances the richness of the casserole.

Common Mistakes and Troubleshooting

Even the best chefs make mistakes in the kitchen! Here are some common pitfalls and how to avoid them:

  • Overcooking: Keep an eye on your casserole in the oven. If it browns too quickly, cover it with foil.
  • Soggy texture: Ensure your vegetables are not too watery. If using canned veggies, drain them well.
  • Flavorless dish: Always taste and adjust seasoning as you go. Don’t be afraid to add a little more salt or spices!
  • Sticking to the dish: Grease your casserole dish thoroughly to prevent sticking.

Variations to Keep it Exciting

While this recipe is a classic, feel free to change it up! Here are some variations to keep your casserole nights fresh:

  • Mexican twist: Add black beans, corn, and taco seasoning for a fiesta in a dish.
  • Italian inspiration: Incorporate marinara sauce and Italian sausage along with mozzarella cheese.
  • Vegetable-packed: Load it up with seasonal vegetables like zucchini, spinach, or mushrooms.
  • Breakfast style: Swap out the meat for scrambled eggs and add breakfast potatoes for a brunch delight.

Storage and Make-Ahead Instructions

This casserole is perfect for meal prep! Here’s how to store and reheat:

  • Refrigerate: Store leftovers in an airtight container for up to 4 days.
  • Freeze: You can freeze before baking! Assemble the casserole, cover tightly, and store in the freezer for up to 3 months. Thaw overnight in the fridge before baking.
  • Reheat: When ready to enjoy, bake at 350°F for 20-30 minutes, or until heated through.

Frequently Asked Questions

Still have questions? Here are some common inquiries about the Hearty Casserole:

  • Can I use different types of meat? Yes! Ground chicken or even plant-based proteins work well.
  • What can I substitute for cheese? Nutritional yeast is a great dairy-free alternative.
  • Is this casserole gluten-free? Use gluten-free pasta or rice to make it suitable for gluten-free diets.
  • How can I make it spicier? Add jalapeños or hot sauce to kick up the heat!
  • Can I add beans? Absolutely! Beans add protein and fiber; just rinse and drain canned beans before adding.
  • What sides pair well with this casserole? A simple green salad or garlic bread complements it wonderfully.
  • Can I make it vegetarian? Yes! Substitute meat with more vegetables or lentils for a hearty vegetarian option.
  • How long does it take to bake? Typically, it takes about 40 minutes total – 25 covered and 15 uncovered.

Nutritional Tips and Dietary Adaptations

This casserole is not just about comfort; it can be adapted to fit various dietary needs:

  • Low-carb option: Substitute traditional pasta with zucchini noodles or cauliflower rice.
  • Protein-packed: Add chickpeas or quinoa for an extra boost of protein and fiber.
  • Low-fat version: Use lean ground meat and reduced-fat cheese to cut down on calories.

Equipment Recommendations

To create this casserole, you’ll need a few essential tools:

  • Large skillet: For browning the protein and sautéing the vegetables.
  • Casserole dish: A 9×13 inch dish works perfectly, but any oven-safe dish will do.
  • Mixing spoon: A sturdy spoon helps combine all your ingredients evenly.

Serving Suggestions

When it comes to serving your Hearty Casserole, presentation matters! Here are a few simple tips:

  • Garnish: Top with freshly chopped herbs like parsley or basil for a pop of color.
  • Serving size: Cut into generous squares and serve with a side of your favorite bread or salad.
  • Offer toppings: Set out sour cream, avocado, or extra cheese for guests to customize their servings.

Final Thoughts

As you gather around the table to enjoy this Hearty Casserole, remember that cooking is about more than just feeding your body; it’s about nourishing your soul. Each bite is a reminder of home, love, and the special moments shared with family and friends. So, roll up your sleeves, embrace the process, and enjoy the warmth that fills the room. Happy cooking, and don’t forget to share your thoughts in the comments below!

Classic Spaghetti Carbonara

Prep Time 10 minutes
Cook Time 15 minutes
Total Time 25 minutes
Servings 4 servings
Calories 550
A quick and creamy Italian pasta dish made with eggs, cheese, pancetta, and pepper. Perfect for a comforting weeknight dinner.

Ingredients

Pasta

  • 400 grams spaghetti

Sauce

  • 150 grams pancetta or bacon, diced
  • 3 large eggs
  • 1 cup grated Parmesan cheese
  • 1 teaspoon black pepper, freshly ground

Instructions 

  • Cook spaghetti in boiling salted water until al dente, then drain.
  • Cook pancetta in a skillet until crispy.
  • Whisk eggs and Parmesan in a bowl.
  • Combine hot pasta with pancetta, then remove from heat and stir in egg mixture.
  • Season with black pepper and serve immediately.

Notes

Use fresh eggs for best flavor and texture.
Calories: 550kcal
Cost: $12
Course: Main Course
Cuisine: Italian
Keyword: Pasta

Welcome to the Heart of the Kitchen: A Flavorful Journey with Tuna Nicoise Salad

Cooking is a symphony of flavors, memories, and togetherness, and nothing embodies this more than the classic Tuna Nicoise Salad. This dish is a heartfelt reflection of my Southern roots, where each ingredient tells a story, and every bite evokes the warmth of family gatherings. In this comprehensive guide, we’ll explore the beauty of this salad, breaking down the elements that make it a perfect dish for any occasion, especially when shared with those you love.

Here, we’ll dive deep into the essence of the Tuna Nicoise Salad, highlighting its vibrant components—from the tender potatoes to the crisp green beans and rich olives. You’ll not only learn how to prepare this delightful salad but also discover tips, variations, and the heartfelt memories that elevate it from just a meal to a cherished tradition.

Why You’ll Love This Recipe

  • Fresh and Flavorful: The combination of fresh vegetables and high-quality tuna creates a delightful contrast of textures and flavors.
  • Quick and Easy: With simple ingredients and straightforward steps, you can prepare this salad in under an hour.
  • Versatile Dish: Perfect as a light lunch, impressive dinner, or as part of a festive gathering, this salad suits any occasion.
  • Healthy and Nutritious: Packed with protein, healthy fats, and essential vitamins, this meal supports a balanced diet.
  • Rich in Memories: Each serving is a reminder of family dinners and shared moments, making every bite feel special.

Ingredients Breakdown

To create a Tuna Nicoise Salad that sings with flavor and authenticity, let’s take a closer look at the ingredients you’ll need:

  • Tuna: 2 (5-ounce) cans of high-quality tuna packed in olive oil. Opt for brands that prioritize sustainability for the best flavor.
  • Potatoes: 1 pound of small Yukon Gold potatoes, quartered. Their buttery texture holds up beautifully in the salad.
  • Green Beans: 8 ounces of fresh green beans, trimmed. These add a lovely crunch and vibrant color.
  • Eggs: 4 large eggs, perfectly cooked to add creaminess and protein.
  • Salad Greens: 2 cups of mixed salad greens for a fresh base.
  • Cherry Tomatoes: 1 cup, halved, bringing sweetness and juiciness to the plate.
  • Kalamata Olives: 1/2 cup, pitted, for a salty punch.
  • Red Onion: 1/4 cup, thinly sliced, offering a mild sharpness.
  • Capers: 2 tablespoons, drained, to add a briny depth.
  • Vinaigrette: Made from 1/4 cup extra virgin olive oil, 3 tablespoons fresh lemon juice, 1 tablespoon Dijon mustard, 1 small minced garlic clove, 1/2 teaspoon honey, and salt and pepper to taste.
  • Fresh Herbs: 2 tablespoons chopped parsley and 1 tablespoon chopped dill for a fragrant finish.

Ingredient Substitutions

  • Tuna: Substitute with grilled chicken or chickpeas for a different protein.
  • Greens: Spinach or arugula can replace mixed greens for a peppery kick.
  • Olives: Use green olives or capers for a tangy alternative.
  • Potatoes: Sweet potatoes can be used for a sweeter flavor profile.

Step-by-Step Instructions

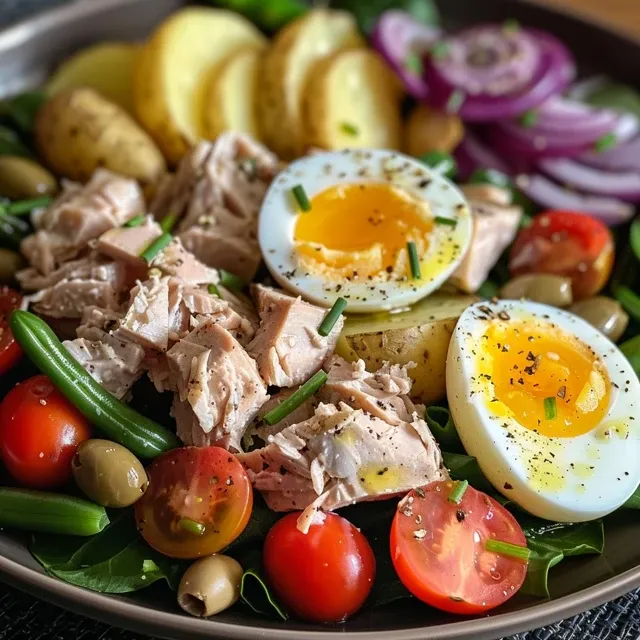
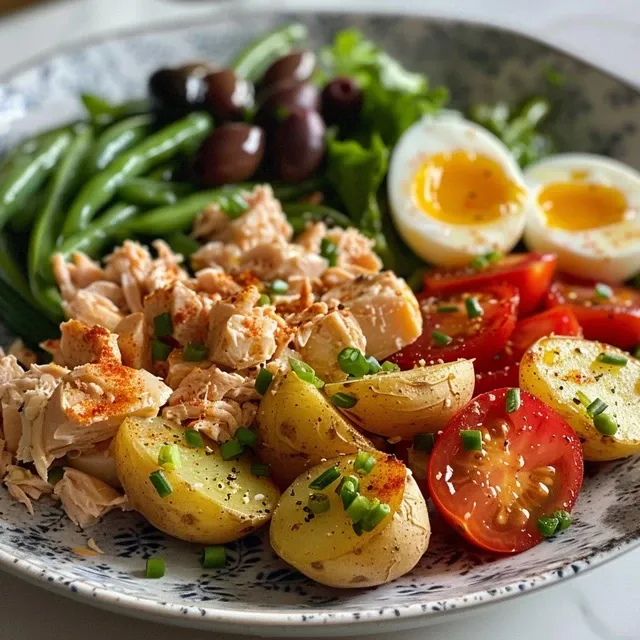
Close-up of a colorful Tuna Nicoise salad showcasing fresh ingredients.

Now that we have our ingredients ready, let’s walk through the steps to create the Tuna Nicoise Salad:

  1. Begin by placing the quartered Yukon Gold potatoes in a large pot and covering them with cold water by about two inches. Add a generous tablespoon of salt to the water.
  2. Bring the water to a gentle boil over medium-high heat, then reduce to a simmer and cook for 12-15 minutes until the potatoes are tender but still hold their shape.
  3. Prepare an ice bath in a large bowl nearby. Once cooked, drain the potatoes and immediately transfer them to the ice bath.
  4. While the potatoes cool, bring a medium saucepan of salted water to a rolling boil for the green beans. Add the trimmed green beans and cook for exactly 3-4 minutes.
  5. Use a slotted spoon to transfer the green beans to the ice bath with the potatoes.
  6. Gently lower the four eggs into the boiling water and cook for exactly 7 minutes. Transfer the cooked eggs to the ice bath alongside the vegetables.
  7. Assemble the mixed salad greens on your serving platter.
  8. Artfully scatter the cooled, quartered potatoes around the perimeter, followed by the bright green beans.
  9. Drain the tuna from its olive oil, flake it with a fork into chunks, and arrange it on the platter.
  10. Peel the cooked eggs and slice them in half, placing them among the other ingredients.
  11. Scatter the cherry tomato halves, Kalamata olives, thinly sliced red onion, and capers throughout the salad.
  12. Drizzle about three-quarters of the vinaigrette over the assembled salad and sprinkle with freshly chopped herbs and black pepper.
  13. Allow the salad to rest for about 5 minutes before serving.

Pro Tips for Perfection

  • Perfectly Cooked Potatoes: To ensure your potatoes are tender but not mushy, test them with a fork after 12 minutes.
  • Refreshing Greens: Rinse your greens under cold water and dry them thoroughly for the best texture.
  • Chill Your Ingredients: Using an ice bath for the beans and eggs locks in the vibrant colors and crispness.
  • Flavor Infusion: Allow the salad to sit with the vinaigrette for a few minutes before serving to enhance the flavors.
  • Quality Counts: Use high-quality ingredients, especially for the tuna and olive oil, to elevate the dish.
  • Dress Just Before Serving: To maintain the freshness of the greens, dress the salad right before you serve it.
  • Experiment with Textures: Consider adding toasted nuts or seeds for added crunch.
  • Personal Touches: Don’t hesitate to add your favorite seasonal vegetables to make it your own.

Avoiding Common Mistakes

Even the best intentions can lead to mishaps in the kitchen. Here are some common mistakes and how to avoid them:

  • Overcooking the Eggs: Aim for a 7-minute cook time for a perfectly set yolk without being hard-boiled.
  • Overcooked Vegetables: Keep an eye on your green beans; they should be vibrant and crisp, not mushy.
  • Too Much Dressing: Start with less vinaigrette and add more as needed to avoid sogginess.
  • Ignoring Seasoning: Don’t forget to season your vegetables and tuna with salt and pepper to enhance their flavors.

Variations to Try

One of the beauties of the Tuna Nicoise Salad is its versatility. Here are some delicious variations to consider:

  • Seared Tuna Nicoise: Replace canned tuna with seared fresh tuna steaks for a gourmet twist.
  • Vegetarian Nicoise: Use chickpeas and avocado instead of tuna for a hearty vegetarian option.
  • Grilled Vegetable Nicoise: Add grilled bell peppers, zucchini, and asparagus for a smoky flavor.
  • Spicy Nicoise: Incorporate sliced jalapeños or a dash of hot sauce into the vinaigrette for a kick.

Storage and Make-Ahead Instructions

This salad can be made ahead of time, making it a perfect choice for gatherings:

  • Make-Ahead: Prepare all components in advance and store separately in the refrigerator. Assemble just before serving.
  • Storage: Store leftovers in an airtight container in the fridge for up to 2 days. Note that the texture may change slightly.

Nutritional Insights

This Tuna Nicoise Salad is not just delicious; it’s also packed with nutrients:

  • High in Protein: Tuna and eggs provide a great source of protein, essential for muscle repair.
  • Rich in Omega-3 Fatty Acids: The olive oil and tuna contribute heart-healthy fats.
  • Vitamins and Minerals: Fresh vegetables provide a range of vitamins, minerals, and antioxidants, supporting overall health.
  • Low in Carbs: This salad is lower in carbohydrates, making it suitable for various dietary preferences.

Equipment Recommendations

To make your cooking experience seamless, consider having these tools on hand:

  • High-Quality Chef’s Knife: For chopping vegetables with ease.
  • Large Pot: Essential for boiling potatoes and beans.
  • Medium Saucepan: Used for cooking the eggs perfectly.
  • Ice Bath Bowl: To quickly cool your vegetables and eggs.
  • Serving Platter: For beautifully presenting your salad.

Serving Suggestions

When it comes to serving your Tuna Nicoise Salad, consider these delightful options:

  • Serve Family-Style: Present the salad on a large platter for a communal dining experience.
  • Pair with Crusty Bread: A slice of fresh baguette or rustic bread complements the salad beautifully.
  • Garnish with Extra Herbs: Add a sprinkle of fresh herbs like basil or chives for an aromatic touch.
  • Wine Pairing: A crisp white wine, such as Sauvignon Blanc, enhances the freshness of the dish.

Frequently Asked Questions

Here are some common questions about making Tuna Nicoise Salad:

  • Can I use frozen green beans? Yes, just make sure to thaw and drain them before adding to the salad.
  • How do I make this salad vegan? Substitute tuna with chickpeas and eggs with avocado or tofu.
  • Can I prepare the vinaigrette in advance? Absolutely! Store it in the refrigerator for up to a week.
  • What if I don’t have Dijon mustard? You can use regular mustard or omit it altogether.
  • How can I make this dish gluten-free? This recipe is naturally gluten-free, just ensure your ingredients are certified gluten-free.
  • Is there a way to add more flavor to the potatoes? Try adding herbs like rosemary or thyme to the boiling water.
  • Can I make this salad without eggs? Yes, simply omit the eggs or substitute with extra avocado for creaminess.
  • How long will this salad keep in the fridge? It’s best enjoyed fresh, but leftovers can be stored for up to 2 days.

In conclusion, the Tuna Nicoise Salad is more than just a meal; it’s a celebration of flavor, texture, and cherished moments shared around the table. So gather your loved ones, embrace the joy of cooking, and let this recipe warm your hearts and souls. Remember, every dish you create carries a piece of your story, and this salad is a beautiful chapter in the book of your culinary journey.

Happy cooking, and may your kitchen always be filled with love and laughter!

Tuna Nicoise Salad

Prep Time 15 minutes
Cook Time 20 minutes
Total Time 35 minutes
Servings 4 servings
Calories 450
A vibrant and satisfying French-inspired salad featuring tuna, potatoes, green beans, and fresh herbs, perfect for a light yet hearty meal.

Ingredients

Canned Tuna

  • 2 cans high-quality tuna packed in olive oil
  • 1 pound small Yukon Gold potatoes, quartered
  • 8 ounces fresh green beans, trimmed
  • 4 large eggs
  • 2 cups mixed salad greens
  • 1 cup cherry tomatoes, halved
  • 1/2 cup Kalamata olives, pitted
  • 1/4 cup thinly sliced red onion
  • 2 tablespoons capers, drained
  • 1/4 cup extra virgin olive oil
  • 3 tablespoons fresh lemon juice
  • 1 tablespoon Dijon mustard
  • 1 small garlic clove, minced
  • 1/2 teaspoon honey
  • to taste Salt and freshly ground black pepper
  • 2 tablespoons chopped fresh parsley
  • 1 tablespoon chopped fresh dill

Instructions 

  • Boil potatoes in salted water for 12-15 minutes until tender, then transfer to an ice bath.
  • Cook green beans in boiling salted water for 3-4 minutes, then transfer to the ice bath.
  • Boil eggs for 7 minutes, then peel and halve them.
  • Arrange greens on a platter, add cooled potatoes, green beans, tuna, eggs, tomatoes, olives, red onion, and capers. Drizzle with vinaigrette and garnish with herbs.

Notes

Use high-quality tuna for best flavor. Adjust salt and pepper to taste.
Calories: 450kcal
Cost: $15
Course: Salad
Cuisine: French
Keyword: Tuna

Gathering Around the Table: The Heartwarming Chicken Caesar Pasta Salad

There’s something truly special about gathering around the table with loved ones, sharing stories and laughter over a delicious meal. This Chicken Caesar Pasta Salad is more than just a recipe; it’s a celebration of family, tradition, and the joy of cooking together. With its tender chicken, fresh greens, and zesty dressing, this dish brings a taste of the South to your dining table. Perfect for any occasion, from casual dinners to festive gatherings, you will discover just how easy it is to whip up this delightful salad that promises to be a crowd-pleaser!

Why You’ll Love This Recipe

  • Quick and Easy: This salad comes together in under 30 minutes, making it a fantastic option for busy weeknights or last-minute gatherings.
  • Versatile Ingredients: You can customize the salad with your favorite vegetables or proteins, ensuring everyone at the table is satisfied.
  • Leftover Friendly: This Chicken Caesar Pasta Salad tastes even better the next day, making it a perfect dish for meal prep.
  • Rich in Flavor: The combination of creamy Caesar dressing, crunchy croutons, and savory Parmesan creates a symphony of flavors in every bite.
  • Family Tradition: Bring a piece of my Louisiana heritage into your kitchen, where every recipe is infused with love and warmth.

Ingredients Breakdown

Let’s gather our ingredients for this Chicken Caesar Pasta Salad. Here’s what you’ll need:

  • 2 cups cooked pasta: Penne or rotini work great. Feel free to use whole wheat or gluten-free pasta for a healthier option.
  • 2 cups cooked, shredded chicken: Use leftover rotisserie chicken for convenience, or grill your own for a fresh touch.
  • 1 cup Romaine lettuce: Chopped into bite-sized pieces. Crisp iceberg lettuce can be substituted if desired.
  • 1/2 cup Parmesan cheese: Grated, for that rich, nutty flavor. You can also use Pecorino Romano for a sharper taste.
  • 1/2 cup Caesar dressing: Store-bought or homemade; the creaminess is essential!
  • 1/4 cup croutons: For that satisfying crunch. You can make your own by toasting cubes of bread in olive oil and garlic.
  • Salt and pepper: To taste, enhancing all those wonderful flavors in the salad.

Pro Tips for Making the Perfect Salad

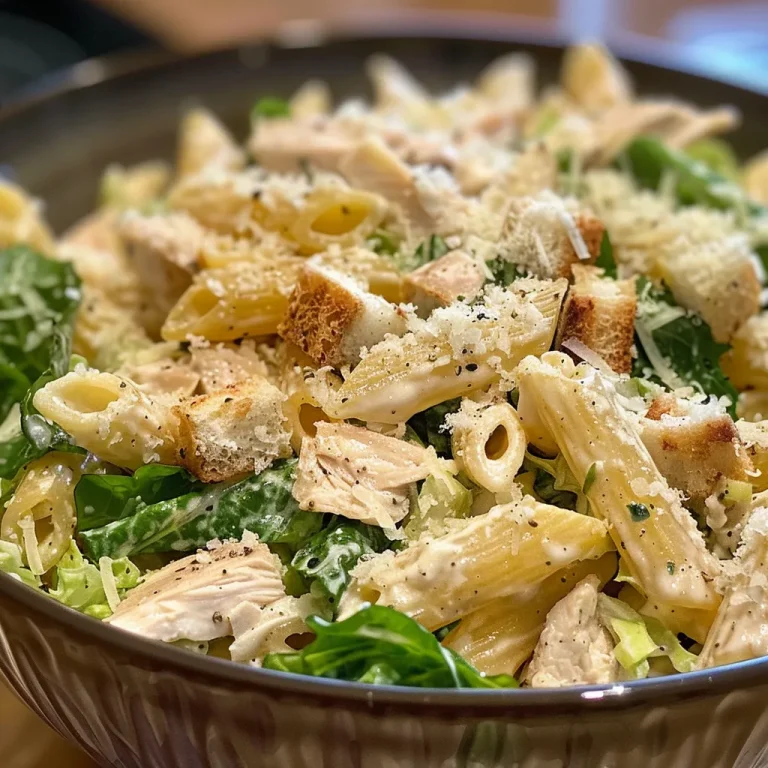
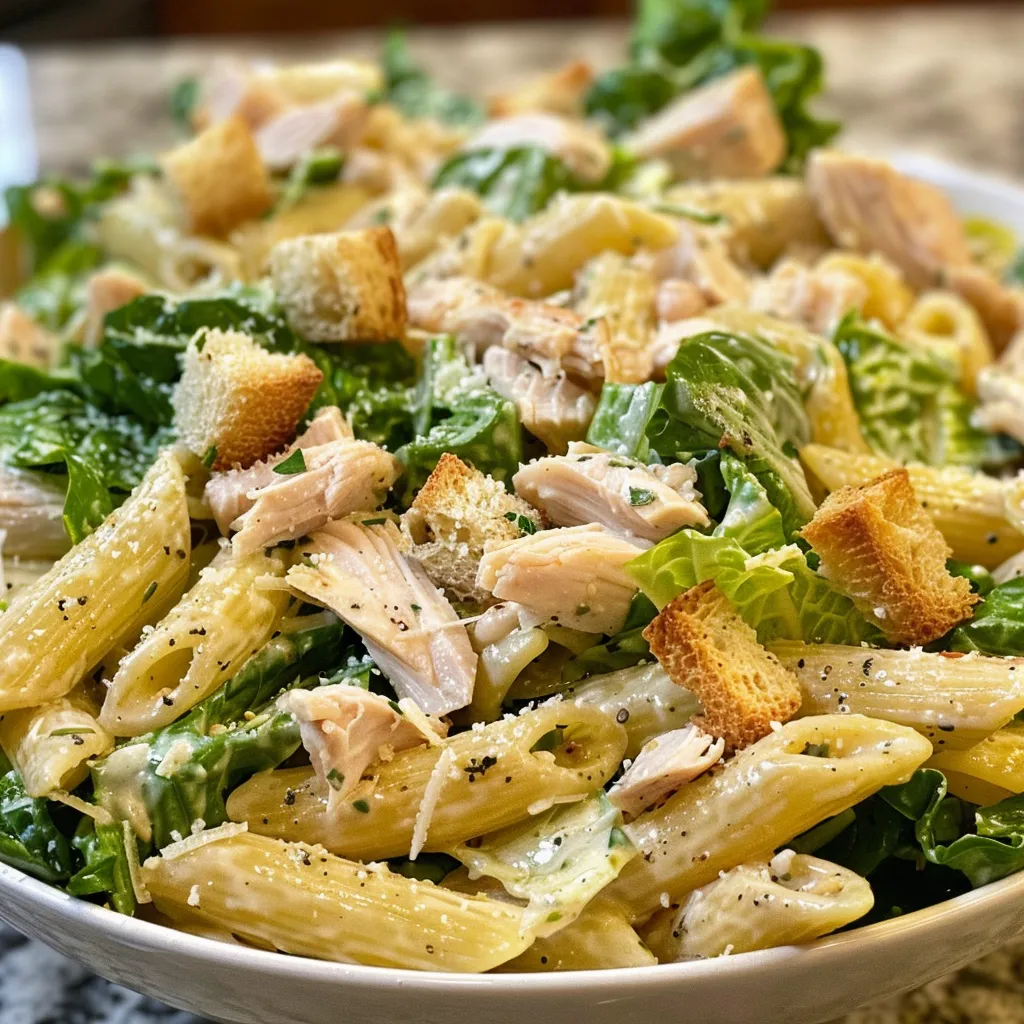
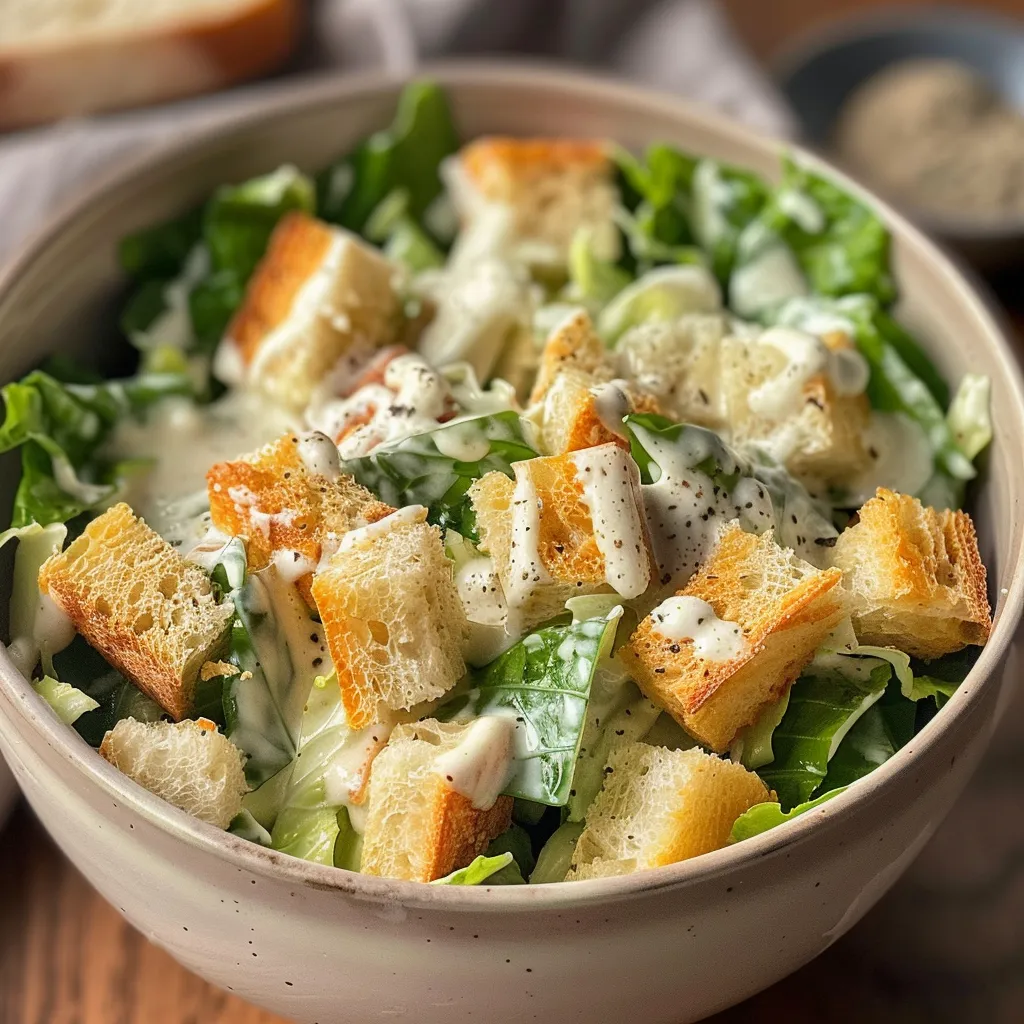
Tasty Chicken Caesar Pasta Salad featuring chopped Romaine, Parmesan cheese, and Caesar dressing.
  • Cook the Pasta Al Dente: This ensures that the pasta holds its shape and doesn’t become mushy when mixed with the dressing.
  • Chill Before Serving: Allowing the salad to chill for about 30 minutes in the fridge helps the flavors meld beautifully.
  • Don’t Overdo the Dressing: Start with a little and add more as needed to avoid a soggy salad.
  • Mix Gently: When combining ingredients, stir gently to keep the pasta and chicken intact.
  • Fresh Ingredients Matter: Use fresh Romaine and high-quality Parmesan for the best flavor.
  • Consider Adding More Veggies: Try adding cherry tomatoes, cucumbers, or bell peppers for extra crunch and color.
  • Make It Ahead: Prepare the salad a few hours in advance, just add croutons right before serving.
  • Customize Your Protein: Swap chicken for grilled shrimp or even roasted chickpeas for a vegetarian version.

Avoid Common Mistakes

Even the best cooks can stumble in the kitchen. Here are a few common pitfalls and how to avoid them:

  • Overcooking Pasta: Keep an eye on your pasta as it cooks; a quick taste test helps ensure it’s just right.
  • Using Stale Croutons: Always use fresh, crunchy croutons for that delightful texture contrast.
  • Too Much Dressing: Start with less; you can always add more, but you can’t take it away!
  • Not Letting it Chill: Skipping the chill time means missing out on those beautifully blended flavors.

Delicious Variations

Feeling adventurous? Here are some delightful variations to try:

  • Caesar Pasta Salad with Shrimp: Substitute chicken with grilled shrimp for a seafood twist.
  • Vegetarian Delight: Replace meat with roasted chickpeas and add extra veggies like bell peppers and zucchini.
  • Buffalo Chicken Caesar: Toss in some buffalo sauce for a spicy kick, perfect for those who love heat!
  • Italian Twist: Add olives and sun-dried tomatoes for a Mediterranean flair.

Storage and Make-Ahead Instructions

This Chicken Caesar Pasta Salad is perfect for meal prepping! Here’s how to store it:

  • Refrigerate: Store in an airtight container in the fridge for up to 3 days.
  • Make Ahead: Prepare the salad without the croutons and dressing, then add them just before serving to keep everything crisp.
  • Freezing: Not recommended, as the texture of the pasta and vegetables may suffer when thawed.

Frequently Asked Questions

1. Can I use rotisserie chicken for this salad?

Absolutely! Rotisserie chicken is a great time-saver and adds delicious flavor.

2. Is there a vegetarian version of Chicken Caesar Pasta Salad?

Yes! Simply replace the chicken with roasted chickpeas and use a vegetarian Caesar dressing.

3. How long does this salad last in the fridge?

It can last for about 3 days when stored in an airtight container.

4. What type of pasta works best for this recipe?

Penne or rotini are excellent choices as they hold the dressing and ingredients well.

5. Can I add other vegetables to the salad?

Of course! Feel free to add your favorite veggies, like cucumbers or cherry tomatoes, for extra flavor.

6. How can I make this salad healthier?

Use whole grain pasta and swap regular Caesar dressing for a lighter version or homemade dressing.

7. Can I prepare this salad ahead of time?

Yes! Just keep the dressing and croutons separate until you’re ready to serve.

8. What do I serve with this Chicken Caesar Pasta Salad?

This salad pairs wonderfully with grilled meats, garlic bread, or a light soup.

Nutritional Tips and Dietary Adaptations

This Chicken Caesar Pasta Salad can be adapted to fit various dietary needs:

  • Gluten-Free: Use gluten-free pasta options available in most stores.
  • Dairy-Free: Swap out Parmesan cheese with nutritional yeast for a cheesy flavor without dairy.
  • Low-Carb: Use spiralized zucchini instead of pasta for a fresh, low-carb alternative.

Essential Equipment for Success

Here’s what you’ll need to create this delicious salad:

  • Large Mixing Bowl: A must-have for combining all your ingredients.
  • Measuring Cups and Spoons: Accurate measurements help ensure consistent results.
  • Sharp Knife: For chopping vegetables and shredding chicken efficiently.
  • Cutting Board: A stable surface to prepare your ingredients.

Serving Suggestions

This Chicken Caesar Pasta Salad shines on its own, but here are a few delicious ways to serve it:

  • As a Standalone Meal: It’s hearty enough to be a complete meal.
  • Alongside Grilled Chicken: For extra protein, serve it with grilled chicken or fish.
  • With Garlic Bread: A side of garlic bread complements the salad beautifully.
  • At Potlucks: Bring it to gatherings, and watch it disappear!

Gather your loved ones, roll up your sleeves, and let’s create this Chicken Caesar Pasta Salad together! Cooking isn’t just about food; it’s about sharing stories, creating memories, and spreading love. Enjoy every bite, knowing that you’ve brought a little piece of home to your table.

Chicken Caesar Pasta Salad

Prep Time 10 minutes
Cook Time 10 minutes
Total Time 20 minutes
Servings 4 servings
Calories 450
A quick and delicious salad combining pasta, shredded chicken, and classic Caesar flavors for a satisfying meal.

Ingredients

Pasta

  • 2 cups cooked pasta (penne or rotini)

Chicken

  • 2 cups cooked, shredded chicken

Vegetables

  • 1 cup Romaine lettuce, chopped

Cheese

  • 1/2 cup Parmesan cheese, grated

Dressing

  • 1/2 cup Caesar dressing

Croutons

  • 1/4 cup croutons

Seasoning

  • to taste Salt and pepper

Instructions 

  • Combine cooked pasta, shredded chicken, and chopped Romaine in a large bowl.
  • Add Parmesan cheese and Caesar dressing, then toss gently.
  • Season with salt and pepper to taste.
  • Top with croutons and serve immediately or chill for 30 minutes.

Notes

For extra flavor, add a squeeze of lemon or fresh herbs.
Calories: 450kcal
Cost: $12
Course: Salad
Cuisine: American
Keyword: Caesar, Chicken, Pasta

Welcome to the Heart of the Kitchen: A Refreshing Waldorf Salad

As we gather around the table, sharing stories and laughter, nothing embodies the warmth of home quite like a classic Waldorf Salad. This delightful dish marries the crunch of fresh apples and celery with the sweetness of grapes, all wrapped in a creamy mayonnaise dressing. It’s not just a salad; it’s a celebration of flavors and memories, perfect for family gatherings or a cozy dinner party. In this article, we’ll explore everything you need to know to make the perfect Waldorf Salad that will transport you back to cherished moments spent in the kitchen.

Why You’ll Love This Recipe

This Waldorf Salad is not just a dish; it’s a blend of love and nostalgia. Here are a few reasons why you’ll adore it:

  • Easy to Make: With just a handful of ingredients, this salad comes together in no time, making it a perfect dish for busy days.
  • Rich in Flavor: The combination of apples and grapes adds a delightful sweetness, while the walnuts provide a satisfying crunch.
  • Versatile: Whether you’re serving it as a side dish or a light lunch, this salad fits any occasion beautifully.
  • Nutrient-Rich: Packed with vitamins and minerals from fresh fruits and vegetables, this salad is as healthy as it is delicious.
  • Shareable Memories: Each bite is a reminder of family gatherings, making it a perfect dish to share with loved ones.

Ingredients You’ll Need for the Waldorf Salad

Let’s gather the ingredients that will bring this refreshing dish to life:

  • 2 Red Apples: Choose crisp varieties like Fuji or Gala for the best flavor.
  • 1 Cup Celery (Chopped): Adds a refreshing crunch and a hint of earthiness.
  • 1 Cup Red Grapes (Halved): Sweet and juicy, these grapes elevate the salad’s flavor.
  • ½ Cup Walnuts (Roughly Chopped): For that delightful crunch and nutty flavor.
  • 1 Baby Gem Lettuce: A crisp base that adds a touch of elegance.
  • ½ Cup Mayonnaise: The creamy binder that holds everything together.
  • 1 Tbsp Lemon Juice: For a hint of acidity that brightens the flavors.
  • Salt and Pepper (to taste): Essential for enhancing the natural flavors.

How to Make This Salad Perfectly

Step-by-Step Instructions

Let’s dive into the process of making this classic salad:

  • Prepare the Ingredients: Start by washing and chopping the apples, celery, and grapes. Halve the grapes for easy eating.
  • Toast the Walnuts: In a dry skillet, toast the walnuts on medium heat for about 5 minutes, stirring frequently until fragrant. This step brings out their natural oils and enhances their flavor.
  • Make the Dressing: In a small bowl, whisk together the mayonnaise and lemon juice until smooth. Adjust the seasoning with salt and pepper.
  • Combine the Salad: In a large mixing bowl, combine the apples, celery, grapes, and walnuts. Pour the dressing over the salad and gently toss to combine.
  • Serve on Lettuce Leaves: For an elegant presentation, serve the salad on a bed of baby gem lettuce leaves.

Expert Tips for Perfecting Your Waldorf Salad

To elevate your salad-making game, consider these expert tips:

  • Choose Fresh Ingredients: The key to a delicious Waldorf Salad is using the freshest fruits and vegetables.
  • Vary Your Apples: Mixing different types of apples can add depth to the flavor and texture.
  • Adjust the Dressing: If you prefer a lighter salad, reduce the mayonnaise or substitute with Greek yogurt for a tangy twist.
  • Chill Before Serving: Letting the salad chill in the fridge for about 30 minutes allows the flavors to meld beautifully.
  • Make it Ahead: You can prepare the ingredients a day in advance and assemble them just before serving.

Common Mistakes and Troubleshooting

Even the best chefs make mistakes! Here’s how to avoid common pitfalls:

  • Overripe Fruit: Ensure your apples and grapes are fresh and crisp to maintain the salad’s texture.
  • Too Much Dressing: Start with a little dressing and add more if needed to avoid a soggy salad.
  • Skimping on Walnuts: Don’t skip the walnuts! They provide essential crunch and flavor that balances the salad.

Variations to Try

Feel free to add your own twist to the classic Waldorf Salad with these exciting variations:

  • Chicken Waldorf Salad: Add diced cooked chicken for a heartier meal.
  • Vegan Option: Substitute the mayonnaise with a vegan alternative or tahini for a creamy dressing.
  • Fruit Medley: Incorporate other fruits like pears or dried cranberries for added sweetness.
  • Herbed Twist: Add fresh herbs like mint or parsley to bring a refreshing note to the salad.

Storage and Make-Ahead Instructions

This salad is fantastic for meal prep! Here’s how to store and enjoy it later:

  • Refrigeration: Store leftovers in an airtight container in the fridge for up to 3 days.
  • Make Ahead: Prepare the ingredients a day in advance, but wait to mix them until just before serving to keep everything fresh and crunchy.

Frequently Asked Questions

Here’s a collection of common questions to help you navigate your Waldorf Salad journey:

  • Can I use green apples? Yes! Green apples like Granny Smith will add a tart flavor, which contrasts nicely with the sweetness of the grapes.
  • Is there a gluten-free option? Absolutely! This salad is naturally gluten-free; just ensure your mayonnaise is gluten-free.
  • Can I use a different nut? Yes! Pecans or almonds can make delightful substitutes for walnuts.
  • What can I serve with this salad? This salad pairs beautifully with grilled chicken, fish, or as a side for any holiday meal.
  • How do I prevent browning in apples? Toss the chopped apples with a little lemon juice to keep them fresh and vibrant.
  • Is this salad suitable for meal prep? Yes! Just keep the dressing separate until you’re ready to serve.
  • What’s the best way to chop celery? Cut celery into thin slices or small dices for a pleasant crunch throughout the salad.
  • Can I add cheese to this salad? A sprinkle of crumbled feta or goat cheese can add a lovely tanginess to the salad.

Nutritional Tips and Dietary Adaptations

This Waldorf Salad can be tailored to fit various dietary needs:

  • Low-Calorie Version: Use Greek yogurt instead of mayonnaise for a lighter dressing.
  • Nut-Free Option: Simply omit the walnuts or replace them with sunflower seeds for a similar crunch without the nuts.
  • Whole Food Focus: Stick to organic ingredients to maximize the flavors and nutrients.

Essential Equipment for Making Waldorf Salad

Gather these handy tools to make your salad-making process smoother:

  • Sharp Knife: For slicing the apples and celery cleanly.
  • Cutting Board: A stable surface for chopping.
  • Mixing Bowl: A large bowl to combine all your ingredients.
  • Whisk: For mixing the dressing seamlessly.

Serving Suggestions

Presentation can elevate your Waldorf Salad experience:

  • Plate it Up: Serve individual portions on small plates for an elegant touch.
  • Garnish: A sprinkle of fresh herbs or extra walnuts on top can add visual appeal.
  • Pair with Drinks: A light white wine or sparkling water complements the salad beautifully.

Conclusion: Celebrate Togetherness with Waldorf Salad

As you gather with friends and family, let this Waldorf Salad be the centerpiece of your meal—a delightful blend of flavors and textures that spark joy and conversation. Remember, cooking is about creating memories and sharing love. So, roll up your sleeves, embrace the process, and enjoy every bite of this comforting dish. Happy cooking, and may your kitchen be filled with laughter and warmth!

The Best Waldorf Salad Recipe

Prep Time 15 minutes
Total Time 15 minutes
Servings 4 people
Calories 350
A classic and refreshing salad combining crisp apples, crunchy celery, juicy grapes, and walnuts, all coated in creamy mayonnaise dressing.

Ingredients

group

  • 2 pieces red apple
  • 1 cup celery (chopped)
  • 1 cup red grapes (halved)
  • ½ cup walnuts (roughly chopped)
  • 1 baby gem lettuce baby gem lettuce
  • ½ cup mayonnaise
  • 1 tbsp lemon juice
  • to taste salt
  • to taste pepper

Instructions 

  • Chop the apples and celery, then halve the grapes.
  • In a large bowl, combine apples, celery, grapes, walnuts, and chopped lettuce.
  • In a small bowl, mix mayonnaise with lemon juice, salt, and pepper.
  • Pour the dressing over the salad and toss gently to combine.
  • Serve immediately or chill before serving.

Notes

For added flavor, sprinkle with a little cinnamon or add some chopped fresh herbs.
Calories: 350kcal
Cost: $12
Course: Salad
Cuisine: American
Keyword: Waldorf

When it comes to homemade Caesar dressing, nothing beats the warmth and richness of a recipe passed down through generations. This creamy Caesar dressing combines the perfect balance of savory flavors and tangy notes, creating a dressing that not only elevates your salads but also evokes fond memories around the dinner table. Whether you’re drizzling it over crisp greens or using it as a dip for fresh vegetables, this recipe is bound to bring family and friends together. Let’s dive into why this homemade Caesar dressing is a must-try!

Why You’ll Love This Recipe

This creamy Caesar dressing is more than just a condiment; it’s a celebration of flavor and tradition. Here are five reasons why you’ll adore making this recipe:

  • Quick and Easy: You can whip this dressing up in just 10 minutes, perfect for last-minute gatherings or weeknight dinners.
  • Versatile Use: Not only is it great for salads, but you can also use it as a dip, sandwich spread, or even in pasta salads!
  • Customizable Flavors: Adjust the ingredients to suit your palate; add more garlic for a punch or a touch of honey for sweetness.
  • Fresh Ingredients: You don’t need any preservatives or artificial flavors; just wholesome ingredients that you likely already have at home.
  • Family Tradition: Each bite carries a story, connecting generations through the love of food.

Ingredient Breakdown and Substitutions

To make the best homemade Caesar dressing, you’ll need the following ingredients:

  • ½ cup mayonnaise: For a creamy base, you can substitute with Greek yogurt for a lighter version.
  • 1 tablespoon fresh lemon juice: Fresh is best, but bottled lemon juice works in a pinch.
  • 1 teaspoon Dijon mustard: Adds a nice tang; you can swap it with yellow mustard if that’s what you have.
  • 1 clove garlic (finely minced): Fresh garlic gives the best flavor, but garlic powder can be used if you’re out.
  • 1 teaspoon anchovy paste: Essential for that umami kick! You can omit it for a vegetarian option but consider using capers instead.
  • ¼ cup grated Parmesan cheese: Freshly grated is preferred, but pre-grated works too.
  • 1 teaspoon Worcestershire sauce: This adds depth; substitute with soy sauce for a vegan option.
  • 2 tablespoons olive oil: Extra virgin olive oil is ideal, but any neutral oil will do.
  • Salt and pepper to taste: Always use freshly cracked black pepper for the best flavor.

Step-by-Step Directions to Make It Right

Follow these simple steps to create your creamy homemade Caesar dressing:

  1. In a medium mixing bowl, add ½ cup mayonnaise.
  2. Add 1 tablespoon lemon juice and 1 teaspoon Dijon mustard to the bowl.
  3. Stir in 1 finely minced clove of garlic and 1 teaspoon anchovy paste.
  4. Add ¼ cup grated Parmesan cheese and 1 teaspoon Worcestershire sauce.
  5. Slowly drizzle in 2 tablespoons olive oil while stirring or whisking.
  6. Mix until the dressing is smooth and creamy.
  7. Taste and season with a pinch of salt and black pepper as needed.
  8. Chill in the refrigerator for 30 minutes before serving if possible.
  9. Stir before using.
  10. Store in an airtight container in the fridge for up to 5 days.

Pro Tips for the Best Caesar Dressing

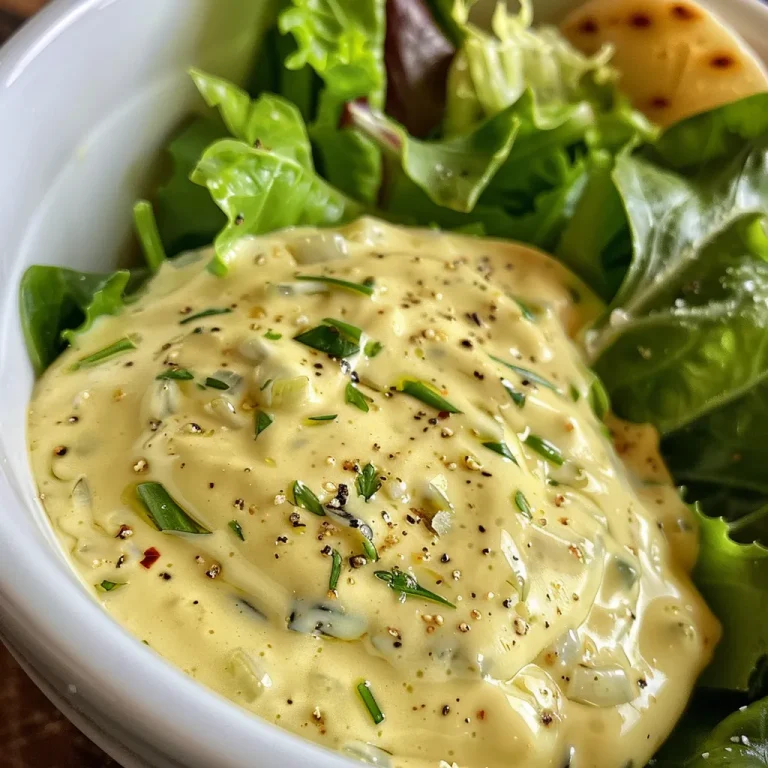
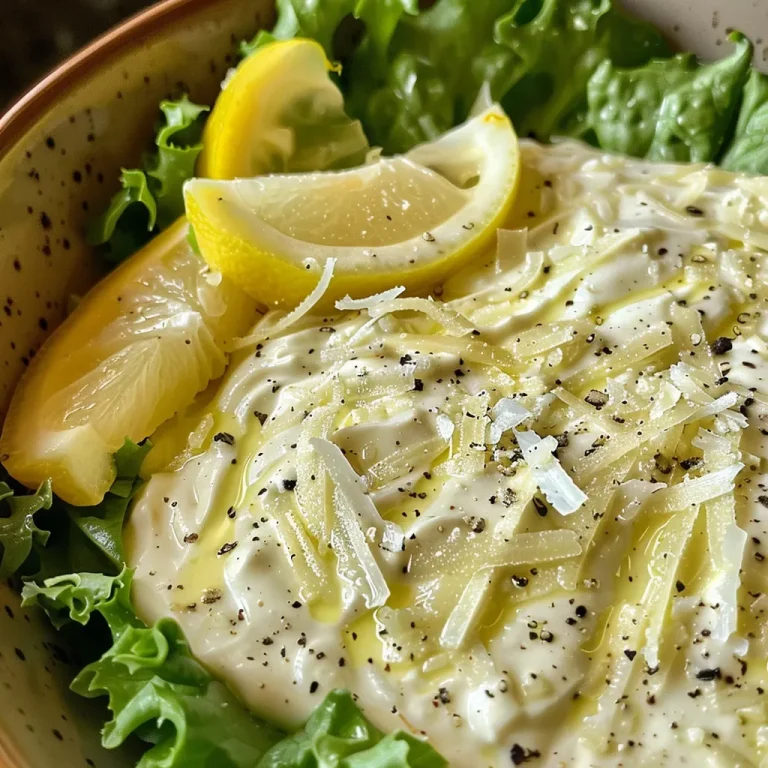
Delicious Caesar dressing in a bowl, showcasing its creamy consistency and ingredients.

To elevate your Caesar dressing to the next level, consider these expert tips:

  • Chill Before Serving: Allow the dressing to chill in the refrigerator for optimal flavor development.
  • Adjust Thickness: If you prefer a thinner dressing, whisk in a little water or more lemon juice.
  • Experiment with Herbs: Add fresh herbs like parsley or basil for an aromatic touch.
  • Use Quality Ingredients: The better the ingredients, the better your dressing will taste. Opt for fresh lemons and high-quality Parmesan.
  • Fresh Garlic: Always opt for fresh garlic over powdered for a punchy flavor.
  • Storage: Store the dressing in a glass jar for easy pouring and to keep it fresh longer.
  • Double the Recipe: If you love it, make a bigger batch! It keeps well.
  • Don’t Skip the Anchovies: They might sound intimidating, but they’re essential for that classic Caesar flavor.

Common Mistakes and Troubleshooting

Here are common pitfalls to avoid and how to troubleshoot them:

  • Too Salty: If your dressing is too salty, add a little more mayonnaise or a splash of lemon juice to balance it out.
  • Not Creamy Enough: If your dressing isn’t creamy, add more mayonnaise incrementally until you reach your desired consistency.
  • Overpowering Garlic: If it’s too garlicky, balance it with a touch more mayonnaise or some honey.
  • Separation Issues: If the dressing separates, just give it a good whisk before serving.

Variations to Try

There’s plenty of room for creativity with this Caesar dressing. Here are some variations to consider:

  • Vegan Caesar Dressing: Substitute mayonnaise with silken tofu or cashew cream and omit the anchovy paste.
  • Spicy Caesar Dressing: Add a dash of hot sauce or a pinch of cayenne pepper for some heat.
  • Herbed Caesar Dressing: Mix in fresh herbs like dill or tarragon for a refreshing twist.
  • Chipotle Caesar Dressing: Incorporate chipotle in adobo sauce for a smoky flavor.

Storage and Make-Ahead Instructions

This Caesar dressing can be made ahead of time, making it a great option for meal prep:

  • Make-Ahead: Prepare it up to a week in advance to save time on meal prep.
  • Storage: Store in an airtight container in the refrigerator for up to 5 days. Always give it a good stir before each use.

Frequently Asked Questions

Here are some common questions about homemade Caesar dressing:

  • Can I use Greek yogurt instead of mayonnaise? Yes, it will give the dressing a tangier flavor and reduce calories.
  • Is anchovy paste necessary? While it adds depth, you can omit it for a vegetarian version.
  • How long can I store the dressing? In an airtight container, it should last up to 5 days in the fridge.
  • Can I freeze Caesar dressing? It’s not recommended, as the texture may change after thawing.
  • What can I serve with Caesar dressing? It’s perfect for salads, roasted vegetables, or as a dip for chicken wings!
  • How can I make it lighter? Use Greek yogurt and reduce the oil for a healthier dressing.
  • Can I add other ingredients? Absolutely! Feel free to experiment with herbs, spices, or even avocado.
  • Is it gluten-free? Yes, as long as you check your Worcestershire sauce for gluten-containing ingredients.

Nutritional Tips and Dietary Adaptations

For those watching their diet, here are some tips to adapt your Caesar dressing:

  • Lower Calorie: Substitute mayonnaise with plain Greek yogurt.
  • Dairy-Free: Use a vegan mayonnaise and omit the cheese.
  • Low-Sodium: Look for low-sodium soy sauce as a substitute for Worcestershire sauce.
  • Rich in Flavor: Adding nutritional yeast can give a cheesy flavor without dairy.

Equipment Recommendations

Having the right tools makes all the difference. Here’s what I recommend:

  • Mixing Bowl: A medium-sized bowl is perfect for whisking ingredients together.
  • Whisk: A good whisk helps to emulsify your dressing smoothly.
  • Storage Container: Use a glass jar with a lid for easy storage and pouring.
  • Measurement Cups and Spoons: Accurate measurements ensure consistency in flavor.

Serving Suggestions

Now that you have your dressing, here are some delightful ways to serve it:

  • Classic Caesar Salad: Toss romaine lettuce with croutons, Parmesan, and freshly cracked black pepper.
  • Veggie Platter: Serve with a colorful array of raw veggies for dipping.
  • Grilled Chicken Salad: Drizzle over grilled chicken and mixed greens for a hearty meal.
  • Pasta Salad: Use as a dressing for a refreshing pasta salad with vegetables.

With this creamy homemade Caesar dressing, you’re not just creating a salad condiment; you’re making memories. So gather your loved ones around the table, share a meal, and enjoy the flavors of love and tradition. Happy cooking!

Creamy Homemade Caesar Dressing

Prep Time 10 minutes
Total Time 10 minutes
Servings 4 tablespoons
Calories 150
A rich and flavorful Caesar dressing made from simple ingredients, perfect for salads or dipping.

Ingredients

Mayonnaise

  • ½ cup mayonnaise

Lemon juice

  • 1 tablespoon fresh lemon juice

Dijon mustard

  • 1 teaspoon Dijon mustard

Garlic

  • 1 clove garlic (finely minced)

Anchovy paste

  • 1 teaspoon anchovy paste

Parmesan cheese

  • ¼ cup grated Parmesan cheese

Worcestershire sauce

  • 1 teaspoon Worcestershire sauce

Olive oil

  • 2 tablespoons olive oil

Salt and pepper

  • to taste Salt and pepper

Instructions 

  • Combine mayonnaise, lemon juice, Dijon mustard, garlic, and anchovy paste in a bowl.
  • Stir in Parmesan cheese and Worcestershire sauce.
  • Slowly whisk in olive oil until smooth and creamy. Season with salt and pepper.
  • Chill for 30 minutes before serving. Stir before use.

Notes

Adjust seasoning to taste and refrigerate leftovers promptly.
Calories: 150kcal
Cost: $8
Course: dressing
Cuisine: American
Keyword: Caesar, dressing, Mayonnaise

Welcome to the heartwarming world of Caesar Salad, where each crisp leaf of romaine lettuce and sprinkle of Parmesan cheese tells a story of family gatherings and cherished moments. Growing up in Louisiana, I learned that cooking is not merely about technique, but about the love and memories we share. This Classic Caesar Salad is an embodiment of that philosophy—a delightful dish that’s perfect for sharing with loved ones, reminding us that simplicity and flavor are the ultimate celebration of food.

Why You’ll Love This Recipe

  • Quick and Easy Preparation: This Caesar Salad comes together in just 15 minutes, making it an ideal choice for busy weeknights or last-minute gatherings.
  • Fresh Ingredients: Using fresh romaine lettuce and high-quality Parmesan cheese elevates the flavor and texture, transforming this salad into a culinary delight.
  • Customizable to Your Taste: Whether you want to add grilled chicken for extra protein or swap out the dressing for something zesty, this salad is easily adaptable.
  • A Family Favorite: This recipe has been passed down through generations, making it a beloved dish at family gatherings and celebrations.
  • Perfect for Any Occasion: Whether you’re having a cozy dinner or hosting a dinner party, this Caesar Salad is sure to impress your guests.

Detailed Ingredient Breakdown

To create the perfect Classic Caesar Salad, let’s explore the ingredients and their roles in this beloved dish:

  • 1 head of romaine lettuce: The base of your salad. Crisp and refreshing, it provides the perfect crunch.
  • ½ cup freshly grated Parmesan cheese: Adds a rich and nutty flavor, enhancing the salad’s overall taste.
  • 1 cup homemade or store-bought croutons: Provides texture and heartiness. Feel free to make your own for a personal touch!
  • ½ cup mayonnaise: This is the backbone of your dressing, offering creaminess and depth.
  • 2 tablespoons lemon juice: A splash of acidity that brightens the flavors and balances the richness.
  • 1 tablespoon Dijon mustard: Adds a subtle kick that rounds out the dressing.
  • 1 teaspoon Worcestershire sauce: A secret ingredient that deepens the flavor profile.
  • Salt and pepper to taste: Essential for seasoning and bringing all the flavors together.

Pro Tips to Elevate Your Caesar Salad

  • Use Day-Old Bread for Croutons: Stale bread works best for croutons, as it holds up better when toasted and adds a delightful crunch.
  • Experiment with Cheese: For a twist, try using Pecorino Romano cheese alongside or instead of Parmesan for a sharper flavor.
  • Make Your Own Dressing: Homemade dressing not only tastes better but also allows you to control the ingredients, ensuring a fresher flavor.
  • Chill Your Lettuce: Keeping your lettuce chilled before assembling the salad enhances its crispness.
  • Add Protein for a Complete Meal: Grilled shrimp, chicken, or even chickpeas can turn this salad into a satisfying main course.
  • Adjust the Lemon Juice: Depending on your taste, feel free to adjust the lemon juice for more or less acidity.
  • Mix in Fresh Herbs: Adding fresh basil or parsley can introduce a wonderful aroma and additional layers of flavor.
  • Toss Just Before Serving: To maintain the crispness, toss the salad with dressing just before serving.

Common Mistakes and Troubleshooting

Even the best of us can encounter hiccups while preparing our favorite dishes. Here are some common mistakes and how to avoid them:

  • Using Wilted Lettuce: Always choose fresh, crisp romaine. Wilted lettuce can ruin the entire salad.
  • Overdressing Your Salad: Less is often more. Start with a small amount of dressing and add more as needed to prevent sogginess.
  • Neglecting Seasoning: Don’t forget to taste and season your salad appropriately. A pinch of salt can make a world of difference.
  • Making Croutons Too Soft: Ensure your croutons are golden brown and crunchy. If they’re soft, they’ll lose their texture once added to the salad.

Variations of Caesar Salad

While the Classic Caesar Salad is a beloved recipe, don’t hesitate to explore variations that suit your taste:

  • Grilled Chicken Caesar Salad: Top your salad with juicy grilled chicken breasts for a heartier meal.
  • Seafood Caesar Salad: Add grilled shrimp or crab for a delightful seafood twist.
  • Vegan Caesar Salad: Substitute mayonnaise with a vegan dressing and use nutritional yeast instead of Parmesan for a dairy-free option.
  • Caesar Pasta Salad: Toss cooked pasta into your Caesar Salad for a filling twist that combines two favorites.

Storage and Make-Ahead Instructions

For those busy days when you want to prepare ahead, here’s how to store your Caesar Salad:

  • Make-Ahead Salad: Prepare the ingredients separately (dressing, croutons, and lettuce) and store them in airtight containers. Combine them just before serving for maximum freshness.
  • Storage: If you have leftovers, store the salad in the refrigerator, keeping the dressing separate. It can last for up to 2 days, but the lettuce may become soggy.

Comprehensive FAQ

Here are some frequently asked questions about Caesar Salad:

  • What is the history of Caesar Salad?: The salad is believed to have been invented in the 1920s by Italian immigrant Caesar Cardini in Tijuana, Mexico.
  • Can I make Caesar Salad ahead of time?: Yes, but it’s best to prepare the ingredients separately and mix them just before serving to keep the lettuce crisp.
  • Is Caesar Salad healthy?: While Caesar Salad can be high in calories due to the dressing and cheese, it can be made healthier by using lighter dressing and adding more veggies.
  • Can I customize my Caesar Salad?: Absolutely! Feel free to add proteins, vegetables, or even swap the dressing to suit your taste.
  • What can I serve with Caesar Salad?: Caesar Salad pairs wonderfully with grilled meats, seafood, or as a side alongside pasta dishes.
  • Can I use store-bought dressing?: Yes, store-bought Caesar dressing can save time, but homemade dressing truly enhances the flavor.
  • How do I make croutons?: Simply toss cubed bread with olive oil, garlic powder, and seasonings, then bake until golden.
  • What’s the best way to cut romaine lettuce?: Wash and dry the lettuce, then tear it into bite-sized pieces for a rustic touch.

Nutrition Tips and Dietary Adaptations

While enjoying your Caesar Salad, consider these nutrition tips:

  • Balance Your Plate: Pair your salad with a protein source and whole grains to create a well-rounded meal.
  • Dairy-Free Option: Use alternative cheeses or nutritional yeast to maintain flavor without dairy.
  • Low-Calorie Dressing: For a lighter version, consider yogurt-based dressings or simply using lemon juice and olive oil.

Equipment Recommendations

Here are a few handy tools that will make your salad preparation easier:

  • Salad Spinner: Essential for drying your lettuce thoroughly, ensuring your salad remains crisp.
  • High-Quality Knife: For slicing and chopping your ingredients with ease.
  • Mixing Bowls: Have a couple of different sizes on hand for mixing various components.
  • Whisk: A good whisk is crucial for emulsifying your dressing ingredients.

Serving Suggestions

To present your Caesar Salad with love:

  • Chilled Plates: Serve on chilled plates for an elegant touch.
  • Garnish with Extra Cheese: A sprinkle of fresh Parmesan on top elevates the visual appeal.
  • Accompany with Fresh Bread: Serve with crusty bread or garlic knots to complete the meal.

In closing, this Classic Caesar Salad not only delights the palate but also brings warmth and nostalgia to the table. Remember, cooking is about love, community, and the memories we create together. So, gather your loved ones, share stories, and savor every bite of this timeless dish. Happy cooking!

Classic Caesar Salad

Prep Time 10 minutes
Cook Time 5 minutes
Total Time 15 minutes
Servings 4 servings
Calories 350
A timeless salad featuring crisp romaine, tangy dressing, and crunchy croutons, perfect for a quick and satisfying meal.

Ingredients

Main ingredients

  • 1 head romaine lettuce
  • 0.5 cup Parmesan cheese (freshly grated)
  • 1 cup croutons (homemade or store-bought)
  • 0.5 cup mayonnaise
  • 2 tablespoons lemon juice
  • 1 tablespoon Dijon mustard
  • 1 teaspoon Worcestershire sauce
  • to taste Salt and pepper

Instructions 

  • Wash, dry, and tear lettuce; place in a large bowl.
  • Mix mayonnaise, lemon juice, mustard, Worcestershire, salt, and pepper for dressing.
  • Add croutons and half Parmesan to lettuce; drizzle with dressing and toss.
  • Transfer to plates and top with remaining Parmesan.
  • Serve immediately.

Notes

For extra flavor, add anchovies or grilled chicken.
Calories: 350kcal
Cost: $12
Course: Salad
Cuisine: American
Keyword: Caesar, Lettuce

Welcome to a World of Flavor: Caesar Dressing Reimagined

There’s something deeply comforting about a well-crafted Caesar dressing. It’s a staple that brings memories of summer barbecues and family gatherings, where salads were tossed with laughter and love. In this guide, we’ll explore a healthy Caesar dressing that not only elevates your salads but also nourishes your soul. Using creamy Greek yogurt and the vibrant zest of lemon, this dressing is a revelation that embraces every leaf of lettuce it touches.

Whether you’re preparing a simple weeknight dinner or hosting a festive gathering, this Caesar salad dressing recipe is versatile enough to shine in any setting. Let’s dive into the details and discover why you’ll love making this dressing at home!

Why You’ll Love This Recipe

  • Healthier Option: By incorporating Greek yogurt, this dressing gives you a creamy texture without the excess calories of traditional recipes.
  • Quick and Easy: With just a few simple ingredients, you can whip this dressing up in under 10 minutes, making it perfect for busy weeknights.
  • Flavor Packed: The combination of garlic, lemon, and parmesan creates a bright, zesty flavor that enhances any salad.
  • Customizable: Adjust the ingredients to suit your taste or dietary needs, making it suitable for everyone at your table.
  • Perfect for Meal Prep: This dressing stores well, allowing you to prepare it ahead of time for quick access during the week.

Ingredients You’ll Need

Here’s what you’ll need to create this delicious healthy Caesar dressing:

  • 1/2 cup Greek yogurt: Provides a creamy base while boosting protein content.
  • 2 tablespoons olive oil: Adds richness and depth to the flavor.
  • 1/4 cup lemon juice: Brightens the dressing and balances the flavors.
  • 1 teaspoon lemon zest: Enhances the lemon flavor with a fresh, aromatic touch.
  • 2 cloves of garlic (minced): Infuses the dressing with a bold, savory kick.
  • 1/4 cup parmesan cheese (finely grated): Adds a salty, nutty element that rounds out the flavors.
  • 1 teaspoon Dijon mustard: Provides a subtle tang and helps emulsify the dressing.
  • 1/4 teaspoon Worcestershire sauce: Gives it that classic Caesar flavor profile.
  • Salt and pepper (to taste): Essential for seasoning to your personal preference.

How to Make This Dressing

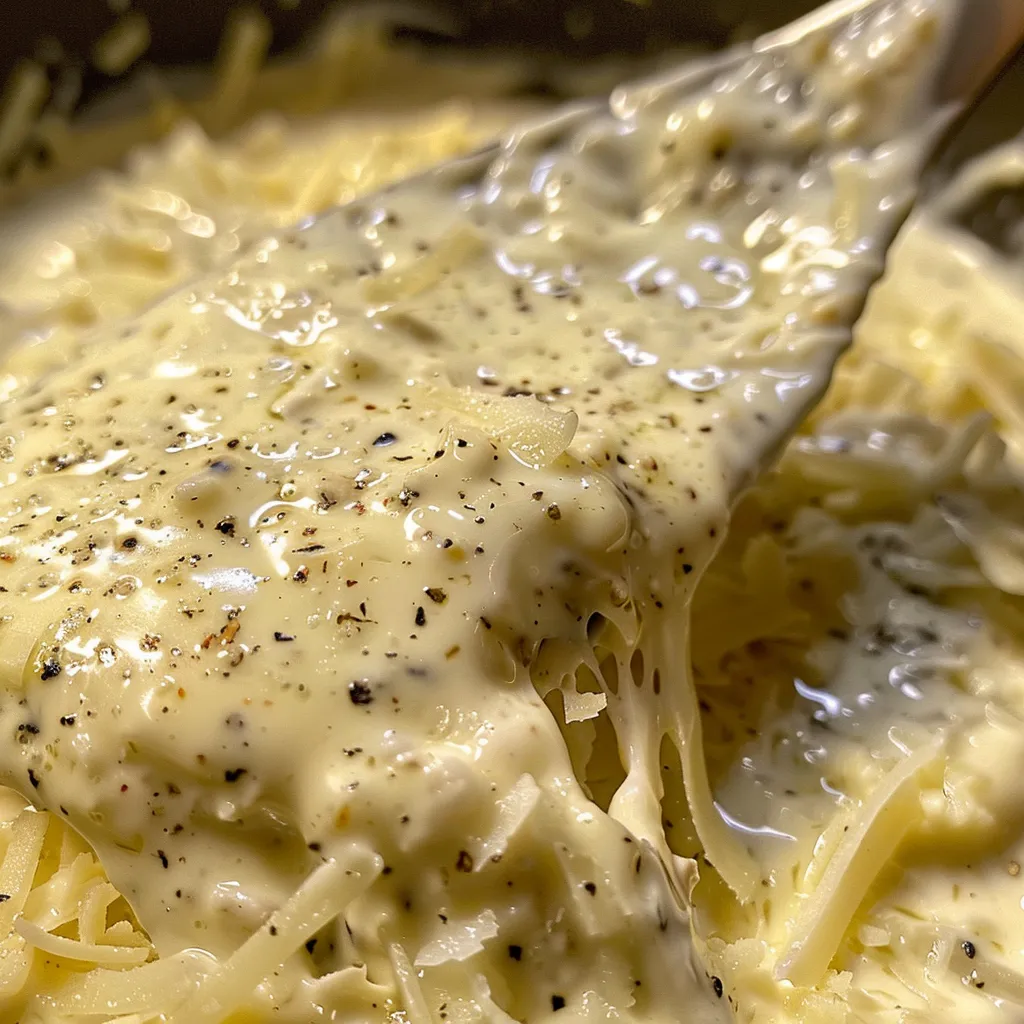
A vibrant bowl of Healthy Caesar Dressing with visible garlic and herbs, ready to serve.

Crafting your Caesar dressing is as simple as can be:

  1. Add all ingredients to a bowl and whisk vigorously until well combined. Alternatively, you can blend them in a food processor for a super-smooth texture.
  2. Transfer the dressing to an airtight container and store it in the refrigerator until ready to use.

Pro Tips for the Perfect Caesar Dressing

  • Fresh Ingredients: Always use fresh garlic and freshly grated parmesan for the best flavor.
  • Balance the Flavors: Adjust the lemon juice and Worcestershire sauce to suit your taste; some may prefer a tangier dressing.
  • Chill Before Serving: Letting the dressing sit in the refrigerator for at least 30 minutes allows the flavors to meld beautifully.
  • Experiment with Herbs: Adding fresh herbs like parsley or basil can elevate the flavor profile even further.
  • Boost the Protein: Mix in some Greek yogurt or silken tofu to increase protein content if desired.
  • Don’t Skip the Mustard: It’s key for emulsification, ensuring a smooth and creamy dressing.
  • Try Different Oils: Experiment with flavored oils, such as garlic or chili-infused, for an unexpected twist.
  • Store Properly: Use a mason jar or airtight container to keep the dressing fresh and flavorful for up to a week.

Common Mistakes and Troubleshooting

Even the best chefs make mistakes! Here are some common pitfalls to avoid:

  • Too Thick: If your dressing is thicker than desired, simply whisk in a little water or additional lemon juice to loosen it up.
  • Too Salty: If you find it overly salty, add a little more Greek yogurt or lemon juice to balance it out.
  • Overpowering Garlic: If the garlic flavor is too strong for your taste, reduce the amount next time or roast the garlic before using it for a milder flavor.
  • Not Enough Zing: If the dressing lacks brightness, add more lemon juice or zest until you achieve the desired flavor.

Variations of Caesar Dressing to Try

Feel free to get creative! Here are some variations to consider:

  • Spicy Caesar Dressing: Add a splash of hot sauce or a pinch of cayenne pepper for a kick of heat.
  • Vegan Caesar Dressing: Substitute Greek yogurt with silken tofu and omit the parmesan for a dairy-free version.
  • Herbed Caesar Dressing: Blend in fresh herbs like dill or basil for a refreshing twist.
  • Smoky Caesar Dressing: Incorporate a touch of smoked paprika for a depth of flavor that’s hard to resist.

Storage and Make-Ahead Instructions

This dressing is perfect for making ahead of time. Here’s how to store it:

  • Transfer to an airtight container and refrigerate. It will stay fresh for up to one week.
  • For best results, give it a good shake or stir before using, as the ingredients may separate over time.

Frequently Asked Questions

  • How long does homemade Caesar dressing last? Homemade dressing can last up to a week when stored properly in the refrigerator.
  • Can I freeze Caesar dressing? Freezing is not recommended due to the separation of ingredients; it’s best enjoyed fresh.
  • Is this dressing gluten-free? Yes, this recipe is gluten-free as long as you ensure your Worcestershire sauce is gluten-free.
  • Can I use low-fat yogurt? Absolutely! Low-fat Greek yogurt works well for a lighter option.
  • What can I serve this dressing with? This dressing pairs beautifully with romaine lettuce, grilled chicken, or as a dip for fresh veggies.
  • Can I make this dressing without garlic? Yes, you can omit the garlic, but it will lose some of its classic flavor.
  • How do I make it creamier? For a creamier texture, increase the amount of Greek yogurt used or blend in some avocado.
  • What’s the best way to use leftover dressing? Use it as a dip for veggies, a spread for sandwiches, or drizzle it over roasted vegetables.

Nutritional Tips and Dietary Adaptations

This healthy Caesar dressing is not only lower in calories but also packed with protein, thanks to the Greek yogurt. Here’s how it stands nutritionally:

  • Low Calorie: Compared to traditional Caesar dressings, this version is significantly lower in calories, making it a guilt-free choice.
  • Protein-Rich: Greek yogurt adds protein, which can help keep you fuller for longer.
  • Customizable for Diets: Easily adapt this dressing to fit keto, paleo, or vegan diets with simple substitutions.

Equipment Recommendations

To make this dressing, you’ll need:

  • Mixing Bowl: A good-sized bowl for whisking the ingredients together.
  • Whisk or Food Processor: A whisk for manual mixing or a food processor for a smoother consistency.
  • Airtight Container: To store your dressing and keep it fresh in the fridge.

Serving Suggestions

Now that you’ve perfected your dressing, here are some delightful ways to enjoy it:

  • Drizzle over a classic Caesar salad with crunchy croutons and fresh romaine leaves.
  • Use as a dip for fresh vegetables or shrimp cocktail.
  • Spread on a sandwich or wrap for an added zing.
  • Serve with grilled chicken or fish for a flavorful finishing touch.

With this creamy Caesar dressing, you can elevate your meals and create lasting memories around your table. Remember, cooking is about love and sharing, so gather your loved ones and enjoy the delightful flavors together. Happy cooking!

Healthy Caesar Dressing

Prep Time 10 minutes
Total Time 10 minutes
Servings 4 tablespoons
Calories 60
A light and creamy Caesar dressing made with Greek yogurt, perfect for salads and wraps.

Ingredients

Base

  • 0.5 cup Greek yogurt
  • 2 tablespoons olive oil
  • 0.25 cup lemon juice
  • 1 teaspoon lemon zest
  • 2 cloves garlic (minced)
  • 0.25 cup parmesan cheese (finely grated)
  • 1 teaspoon Dijon mustard
  • 0.25 teaspoon Worcestershire sauce
  • to taste Salt and pepper

Instructions 

  • Add all ingredients to a bowl and whisk vigorously until combined.
  • Transfer to an airtight container and refrigerate.

Notes

Adjust salt and pepper to taste for best flavor.
Calories: 60kcal
Cost: $8
Course: dressing
Cuisine: Healthy
Keyword: Caesar, dressing, Greek yogurt

Welcome to the Heart of the Kitchen: A Celebration of Niçoise Salad

In the bustling world of cooking, few dishes capture the essence of love, tradition, and simplicity quite like a Niçoise salad. Born from the sunny shores of Nice, France, this delightful dish is a colorful tapestry of fresh ingredients, and it speaks to the heart of home cooking. Imagine gathering your loved ones around the table, sharing stories and laughter over a vibrant bowl of salad, where every bite is a reminder of cherished moments. That’s the beauty of the Light Canned Tuna Niçoise Salad—a perfect blend of flavors and memories that brings everyone closer together.

Why You’ll Love This Recipe

This Niçoise salad is not just a meal; it’s an experience. Here are some compelling reasons to fall in love with this dish:

  • Quick and Easy Preparation: With minimal cooking required, you can whip up this salad in no time, perfect for busy weeknights or last-minute gatherings.
  • Fresh and Flavorful: Each bite bursts with freshness from the vibrant vegetables, tender potatoes, and rich olives, making it a satisfying choice for any palate.
  • Health-Conscious Delight: Packed with protein from the tuna and nutrients from the veggies, this salad is a wholesome option that doesn’t skimp on flavor.
  • Make-Ahead Friendly: Prep the ingredients ahead of time, and assemble just before serving. Ideal for meal prep or entertaining guests!
  • A Canvas for Creativity: Feel free to customize with your favorite ingredients or seasonal vegetables, making it a versatile dish for any occasion.

Your Essential Ingredients Breakdown

Let’s dive into the heart of the recipe—the ingredients. Here’s what you’ll need to bring this Niçoise salad to life, along with some helpful substitutions if you’re looking to mix things up:

  • 8 small baby potatoes: These tender gems form the base of your salad. If unavailable, use Yukon gold or red potatoes, cut into smaller pieces.
  • 120g green beans (4 oz), ends trimmed: Crisp and vibrant, these beans add a lovely crunch. Feel free to substitute with blanched asparagus or snap peas.
  • 2 tomatoes, each sliced into 8-10 wedges: Juicy and sweet, they brighten up the dish. Cherry tomatoes can work too; just halve them!
  • 1/2 romaine lettuce, torn into large pieces: For a refreshing base, romaine is perfect. You can also use mixed greens or spinach for a twist.
  • 3 hard-boiled eggs, peeled and cut into quarters: A classic topping that adds richness. If you prefer a different protein, consider chickpeas or avocado!
  • 3/4 cup whole black olives (100g): The briny flavor of olives is essential. Opt for Kalamata or Niçoise olives for authenticity.
  • 250-300g canned tuna in oil (8-10 oz), drained and chunked: Tuna is the star here! Choose high-quality canned tuna for the best flavor.
  • 1 1/2 tablespoons lemon juice: Freshly squeezed lemon juice brightens the flavors; bottled juice works in a pinch but isn’t as vibrant.
  • 4 tablespoons extra virgin olive oil: A good-quality olive oil elevates the dressing. Experiment with flavored oils for a unique touch.
  • 1 small garlic clove, minced: Garlic adds depth; for a milder taste, use roasted garlic or omit altogether.
  • 1/4 teaspoon salt: Essential for enhancing flavors. Adjust to taste based on your dietary needs.
  • 1 teaspoon Dijon mustard: This adds a lovely tang. If you don’t have Dijon, yellow mustard can work in a pinch.
  • Pinch of black pepper: Freshly cracked pepper makes a delightful finishing touch.

Pro Tips for Perfecting Your Niçoise Salad

Tasty Light Canned Tuna Nicoise Salad showcasing a blend of greens, vegetables, and tuna.

Creating a stellar Niçoise salad is all about the details. Here are some expert insights to ensure your dish shines:

  • Blanching Green Beans: To achieve a bright green color and crisp texture, blanch the green beans in boiling salted water for about 2-3 minutes, then quickly transfer them to an ice bath.
  • Layering Flavors: Assemble the salad in layers for an eye-catching presentation. Start with the greens, followed by the potatoes, then the beans, olives, tuna, and eggs on top.
  • Chill Before Serving: Allow the salad to rest in the refrigerator for 30 minutes before serving. This melds the flavors beautifully.
  • Don’t Skimp on Olive Oil: Quality olive oil is key to a great dressing. It should taste good on its own, as it will enhance all the other ingredients.
  • Adjust Seasoning: Taste your salad before serving and adjust the seasoning as needed. A little extra salt or lemon juice can go a long way!
  • Keep It Fresh: Use the freshest ingredients possible. The quality of your produce will directly impact the taste of your salad.
  • Make It a Meal: Serve with crusty bread or a side of quinoa for a heartier meal that satisfies.
  • Experiment with Textures: Add toasted nuts or seeds for crunch or creamy feta for richness. Your salad, your rules!

Avoiding Common Mistakes

Even the best cooks can run into a few hiccups. Here are some common pitfalls to avoid when preparing your Niçoise salad:

  • Overcooking the Eggs: For perfect hard-boiled eggs, cook for about 9-12 minutes. Overcooking can lead to a greenish yolk and rubbery texture.
  • Not Salting the Cooking Water: Salt the water when boiling potatoes and green beans to enhance their natural flavors.
  • Skipping the Dressing: A good dressing is crucial! Don’t forget to whisk together the lemon juice, olive oil, garlic, mustard, salt, and pepper before adding it to the salad.
  • Assembling Too Early: If making ahead, store components separately and dress just before serving to keep ingredients fresh and vibrant.
  • Using Low-Quality Tuna: Invest in good canned tuna—your salad will taste so much better with quality fish.

Delightful Variations to Try

While the classic Niçoise salad is beloved, don’t hesitate to explore these variations for a fresh take:

  • Vegan Niçoise: Swap canned tuna for chickpeas or marinated tofu, and use avocado for creaminess.
  • Grilled Niçoise: Grill the potatoes and green beans for a smoky flavor that adds depth to the dish.
  • Spicy Niçoise: Add sliced jalapeños or a drizzle of sriracha to the dressing for a kick.
  • Herbed Niçoise: Incorporate fresh herbs like basil, parsley, or dill into the salad for an aromatic twist.

Storage and Make-Ahead Instructions

Planning ahead? Here’s how to store your salad components to maintain freshness:

  • Prep Ahead: You can prepare the potatoes, green beans, and dressing a day before serving. Store them in airtight containers in the refrigerator.
  • Assemble Just Before Serving: Keep the salad components separate until just before meal time to prevent sogginess.
  • Leftovers: If you have leftovers, store them in an airtight container for up to 2 days. The flavors will deepen, but the greens may wilt.

Frequently Asked Questions

Here are some commonly asked questions about Niçoise salad that might help you in your cooking journey:

  • Can I use fresh tuna instead of canned? Absolutely! Just sear the fresh tuna for a few minutes on each side before adding it to the salad.
  • What can I substitute for olives? Capers or pickles can work as a tangy alternative if you’re not a fan of olives.
  • Is it necessary to use Dijon mustard? While it adds a nice tang, you can omit it or use a different mustard if desired.
  • How do I make this salad gluten-free? This salad is naturally gluten-free as long as you use gluten-free mustard and check your canned tuna for any gluten-containing additives.
  • Can I add more vegetables? Absolutely! Feel free to add bell peppers, radishes, or artichokes for extra flavor and color.
  • What’s the best way to serve this salad? Serve it chilled or at room temperature on a large platter for a family-style meal.
  • Can I use frozen green beans? Yes, frozen green beans can be used; just thaw and blanch them before adding to the salad.
  • How can I make this salad more filling? Add cooked grains like quinoa or farro for a heartier version!

Nutrition Tips and Dietary Adaptations

This Niçoise salad is not only delicious but also nutritious. Here’s how to enhance its health benefits:

  • Increase Fiber: Add more vegetables like carrots or bell peppers to boost fiber content.
  • Healthy Fats: The salad is rich in omega-3 fatty acids from tuna and healthy fats from olive oil, making it heart-friendly.
  • Low Carb Option: Skip the potatoes and double the amount of greens for a low-carb version.

Essential Equipment for Your Salad Preparation

To create the perfect Niçoise salad, having the right tools can make all the difference:

  • Cutting Board and Knife: Essential for chopping vegetables and slicing ingredients.
  • Large Pot: For boiling the potatoes and blanching the green beans.
  • Mixing Bowls: Use various sizes to prepare and combine ingredients easily.
  • Whisk: For blending the dressing ingredients smoothly.
  • Salad Tongs: To serve the salad elegantly and toss the ingredients together.

Serving Suggestions

To elevate your dining experience, consider these serving ideas:

  • Pair with Crusty Bread: A loaf of French baguette or sourdough complements the salad beautifully.
  • Wine Pairing: A chilled rosé or crisp white wine enhances the meal’s flavors.
  • Side Dishes: Serve with a light soup or roasted vegetables for a complete meal.

Final Thoughts: A Dish to Cherish

A Light Canned Tuna Niçoise Salad is more than just a recipe; it’s a celebration of love, family, and community. Each ingredient tells a story, and every bite brings back memories of shared meals and laughter. Whether you’re making it for a casual lunch or a festive gathering, this salad is sure to warm hearts and fill bellies. Gather your loved ones, share your stories, and let this salad be a part of your cherished moments around the table.

Light Canned Tuna Nicoise Salad

Prep Time 15 minutes
Cook Time 20 minutes
Total Time 35 minutes
Servings 4 servings
Calories 450
A fresh and vibrant salad combining tender potatoes, green beans, tomatoes, eggs, olives, and tuna, perfect for a quick and healthy meal.

Ingredients

Vegetables

  • 8 small baby potatoes
  • 120 g green beans (ends trimmed)
  • 2 pieces tomatoes (each sliced into 8-10 wedges)
  • 1/2 head romaine lettuce (torn into large pieces)

Eggs

  • 3 pieces hard-boiled eggs (peeled and quartered)

Olives

  • 3/4 cup whole black olives ((100g))

Canned Tuna

  • 250-300 g canned tuna in oil (drained and chunked)
  • 1 1/2 tablespoons lemon juice
  • 4 tablespoons extra virgin olive oil
  • 1 small garlic clove (minced)
  • 1/4 teaspoon salt
  • 1 teaspoon dijon mustard
  • Pinch black pepper

Instructions 

  • Boil baby potatoes until tender, then drain.
  • Blanch green beans in boiling water for 2-3 minutes, then drain and cool.
  • Arrange potatoes, green beans, tomatoes, lettuce, eggs, olives, and tuna on a platter.
  • Whisk together lemon juice, olive oil, minced garlic, salt, mustard, and pepper to make dressing.
  • Drizzle dressing over the salad and serve immediately.

Notes

Use high-quality canned tuna for best flavor.
Calories: 450kcal
Cost: $12
Course: Salad
Cuisine: French
Keyword: Tuna

A Celebration of Simplicity: Discover the Joy of Niçoise Salad

Welcome to a culinary journey that invites you to savor not just flavors but also memories. The Niçoise Salad is more than a dish; it’s a heartfelt connection to the Mediterranean, where every ingredient tells a story. Whether you’re reminiscing about sun-soaked afternoons in Nice or simply looking for a vibrant meal to share with loved ones, this Niçoise Salad recipe captures the essence of togetherness. In this article, we’ll explore the details of creating a delightful Niçoise Salad that’s packed with fresh greens, rich flavors, and a dash of nostalgia.

In this comprehensive guide, you’ll find everything you need to know about crafting the perfect Niçoise Salad, from ingredient breakdowns to expert tips. Let’s dive in and explore why this salad is a cherished classic!

Why You’ll Love This Recipe

  • Rich in Flavor: The combination of fresh greens, tuna, and a tangy vinaigrette creates a symphony of flavors that dance on your palate.
  • Healthy and Nutritious: With ingredients like eggs and olives, this salad is packed with protein and healthy fats, making it a satisfying choice.
  • Quick and Easy: Perfect for busy weeknights, this salad comes together in just 30 minutes, giving you more time to enjoy with family.
  • Customizable: This recipe invites you to put your own spin on it, whether by adding seasonal vegetables or switching up the proteins.
  • Perfect for Sharing: This salad is a feast for the eyes and the stomach, making it ideal for gatherings and celebrations.

Ingredients and Substitutions

Here’s what you’ll need to create your Niçoise Salad, along with some suggested substitutions if you’re missing an ingredient:

  • 6 cups green leaf lettuce or any mixed greens: Feel free to use arugula or spinach for a peppery note.
  • 3 large eggs (hard-boiled and peeled): If you’re short on time, you can use pre-packaged hard-boiled eggs.
  • 5 ounces canned tuna in olive oil (drained): Fresh tuna or even grilled chicken can be great alternatives.
  • 1 ¾ cups cherry tomatoes (halved): Substitute with grape tomatoes or even diced regular tomatoes.
  • ½ cup pitted black olives: Kalamata olives add a richer flavor, or you can skip them entirely if you prefer.
  • 1 green onion (sliced into rounds): Chopped red onion can add a sharper taste.
  • 1 tablespoon chopped anchovy fillets: These can be omitted for a milder flavor, but they do add depth!
  • 3 tablespoons olive oil: Use avocado oil for a different twist.
  • Salt and black pepper (to taste): Always season to your liking!

Step-by-Step Instructions

A detailed look at a Niçoise salad filled with greens, vegetables, and proteins including tuna and anchovies on a white plate.

Creating this Niçoise Salad is as simple as it is rewarding. Follow these steps to bring your salad to life:

  • Prep the Base: Tear or chop the greens into bite-size pieces and toss them into a big salad bowl.
  • Add the Tomatoes: Wash and slice the cherry tomatoes in half, then add them to the bowl with the greens.
  • Olives and Onion Time: Toss in the black olives and thinly sliced green onion for a little bite and briny goodness.
  • Get Anchovy with It: Chop up the anchovies and sprinkle them in. Don’t skip this—they bring the umami magic.
  • Dress It Up: Drizzle in the olive oil and sprinkle with salt. Gently toss everything to combine and evenly coat the ingredients—do this before adding the tuna and eggs so they stay pretty on top.
  • Tuna Time: Gently place the drained tuna on top of the salad. Keep it in chunks for maximum drama.
  • Finish with Eggs: Slice the hard-boiled eggs in half or quarters and place them artfully (or casually—your call) around the salad.
  • Final Touch: Add a crack of black pepper and a final splash of olive oil if you’re feeling generous. Serve immediately and act like you’re dining beachside in Nice.

Pro Tips for the Perfect Niçoise Salad

Elevate your Niçoise Salad with these expert insights:

  • Use Fresh Ingredients: Whenever possible, opt for fresh, seasonal produce to enhance flavor.
  • Don’t Overdress: Less is more when it comes to dressing; you want to taste the ingredients!
  • Chill Your Ingredients: For a refreshing salad, chill your greens and tuna beforehand.
  • Layer Wisely: Arrange your salad in layers for a beautiful presentation.
  • Experiment with Proteins: Try smoked salmon or grilled shrimp for a twist on the classic.
  • Make It Vegan: Use chickpeas or tofu in place of tuna and skip the eggs for a plant-based option.
  • Vinaigrette Variations: Add herbs or a splash of lemon juice to your dressing for added zing.
  • Make Ahead: You can prep the salad components in advance, just keep dressing separate until serving.

Common Mistakes and Troubleshooting

Even the best cooks can make mistakes. Here’s how to avoid some common pitfalls:

  • Overcooked Eggs: Aim for a firm yet creamy yolk; about 9-10 minutes in boiling water should do it.
  • Too Much Dressing: Start with a little and add more if needed; it’s easier to add than to take away!
  • Soggy Greens: Always dry your greens thoroughly after washing to maintain crispness.
  • Uneven Flavor: Toss your salad gently to distribute ingredients and dressing evenly.

Variations to Try

Feel free to get creative with these fun twists on the classic Niçoise Salad:

  • Mediterranean Twist: Add feta cheese and roasted red peppers for a Greek-inspired version.
  • Grilled Veggie Niçoise: Incorporate grilled zucchini and bell peppers for a smoky flavor.
  • Quinoa Niçoise: Substitute quinoa for greens to add a hearty, gluten-free option.
  • Asian-Inspired: Drizzle with sesame oil and add edamame for an exciting fusion dish.

Storage and Make-Ahead Instructions

You can enjoy your Niçoise Salad fresh or save it for later. Here’s how to store it properly:

  • Refrigeration: Store leftover salad in an airtight container in the fridge for up to 2 days.
  • Keep Dressings Separate: If making ahead, store dressing separately to prevent sogginess.
  • Prep Ingredients: You can chop and prepare your ingredients a day ahead and assemble just before serving.

Comprehensive FAQ

Here are some of the most frequently asked questions about Niçoise Salad:

  • Can I use different greens? Yes, any leafy greens work well, but sturdier greens hold up better.
  • Is this salad gluten-free? Yes, all the ingredients are naturally gluten-free!
  • Can I add fruits? Absolutely! Consider adding slices of avocado or even fruits like peaches for sweetness.
  • How do I make a homemade vinaigrette? Combine olive oil, vinegar, mustard, salt, and pepper, whisk until emulsified.
  • What’s the best type of tuna to use? Opt for high-quality canned tuna packed in olive oil for the best flavor.
  • Is Niçoise Salad traditionally served cold? Yes, it’s best enjoyed chilled or at room temperature.
  • Can I make this salad vegan? Definitely! Swap out tuna for chickpeas or lentils and omit the eggs.
  • How do I prevent browning of the avocado? Squeeze a little lemon juice on it to keep it fresh!

Nourishing Tips and Dietary Adaptations

This Niçoise Salad is not only delicious but can also be adapted to fit various dietary needs:

  • For a lower calorie option: Use less olive oil and more vinegar in your dressing.
  • High-protein variation: Add more eggs or use a protein-rich grain like quinoa.
  • For paleo diets: Ensure all ingredients are whole and avoid any processed items.

Equipment Recommendations

To make your salad-making process smooth and enjoyable, consider using:

  • Large Salad Bowl: Essential for mixing and serving your salad.
  • Sharp Knife: For chopping and slicing your ingredients with ease.
  • Cutting Board: A sturdy surface to prepare your vegetables.
  • Whisk: Perfect for mixing your vinaigrette to achieve that creamy texture.

Serving Suggestions

When it’s time to serve your Niçoise Salad, consider these delightful pairings:

  • Crusty French Bread: A slice of fresh baguette is perfect for sopping up any extra dressing.
  • Chilled White Wine: A crisp Sauvignon Blanc complements the flavors beautifully.
  • Fruit Salad: A light fruit salad can cleanse the palate post-meal.

As we’ve walked through the nuances of crafting a beautiful Niçoise Salad, remember that cooking is about more than just following a recipe; it’s about creating connections and sharing stories. So gather your loved ones, put on some music, and let the aromas of your kitchen fill the air with warmth and love. Bon appétit!

Niçoise Salad

Prep Time 15 minutes
Cook Time 10 minutes
Total Time 25 minutes
Servings 4 servings
Calories 350
A vibrant and classic French salad featuring fresh greens, tuna, eggs, and briny olives, perfect for a light yet satisfying meal.

Ingredients

greens

  • 6 cups green leaf lettuce or mixed greens
  • 3 large eggs (hard-boiled and peeled)
  • 5 ounces canned tuna in olive oil (drained)
  • 1 ¾ cups cherry tomatoes (halved)
  • ½ cup pitted black olives
  • 1 green onion sliced into rounds
  • 1 tablespoon chopped anchovy fillets
  • 3 tablespoons olive oil
  • to taste Salt Salt
  • to taste Black pepper Black pepper

Instructions 

  • Tear or chop greens and toss into a large bowl.
  • Add halved cherry tomatoes, black olives, sliced green onion, and chopped anchovies. Toss gently.
  • Drizzle with olive oil, season with salt, and toss to coat.
  • Place drained tuna on top and arrange halved eggs around the salad.
  • Finish with black pepper and a splash of olive oil. Serve immediately.

Notes

Use high-quality canned tuna for best flavor.
Calories: 350kcal
Cost: $15
Course: Salad
Cuisine: French
Keyword: Eggs, Olives, Tuna