Author

daniel

Browsing

Gather ‘Round: A Timeless Classic Macaroni Salad Recipe

Nothing brings people together quite like a hearty bowl of **Classic Macaroni Salad**. This creamy delight is more than just a recipe; it’s a tradition, a celebration of flavors, and a way to make memories with family and friends. Whether it’s a summer picnic, a family reunion, or a simple weeknight dinner, this dish is guaranteed to evoke feelings of warmth and nostalgia. Let’s dive into why this recipe is essential for your kitchen and how to make it your own.

Why You’ll Love This Recipe

  • Quick and Easy: This macaroni salad can be whipped up in just 30 minutes, making it a go-to for last-minute gatherings.
  • Versatile Ingredients: With a base of elbow macaroni, you can easily customize this salad with your favorite vegetables or protein.
  • Perfect for Meal Prep: It keeps well in the fridge for up to three days, allowing for easy lunches throughout the week.
  • Kid-Friendly: Its creamy texture and mild flavors make it a favorite among children, ensuring it’s a hit with the whole family.
  • A Crowd-Pleaser: This recipe is sure to impress at any gathering, making it one of my favorite dishes to bring to potlucks.

Ingredients Breakdown

To create this delightful salad, you’ll need the following ingredients:

  • 2 cups dry elbow macaroni: Cooked, rinsed, and drained to ensure the perfect texture.
  • ⅓ cup diced celery: Adds a satisfying crunch and freshness.
  • ¼ cup minced red onion: Soaked in cold water for 5 minutes to mellow its sharpness.
  • ¾ cup shredded carrots: For a pop of color and sweetness.
  • 1 Tablespoon minced flat-leaf parsley: A sprinkle of green to brighten the dish.
  • ½ cup diced vine-ripened tomato (optional): Adds juiciness and a hint of acidity.
  • ½ cup prepared mayonnaise: The creamy base that ties it all together.
  • ¾ teaspoon dried mustard: Enhances the flavor profile with a subtle tang.
  • 1 ½ teaspoons sugar: Balances the acidity from the vinegar.
  • 1 ½ Tablespoons cider vinegar: Provides a delightful tanginess.
  • 3 Tablespoons sour cream: Adds an extra layer of creaminess.
  • ½ teaspoon kosher salt (plus more to taste): Essential for enhancing all the flavors.
  • Freshly ground black pepper: For seasoning to taste.

Pro Tips for the Best Macaroni Salad

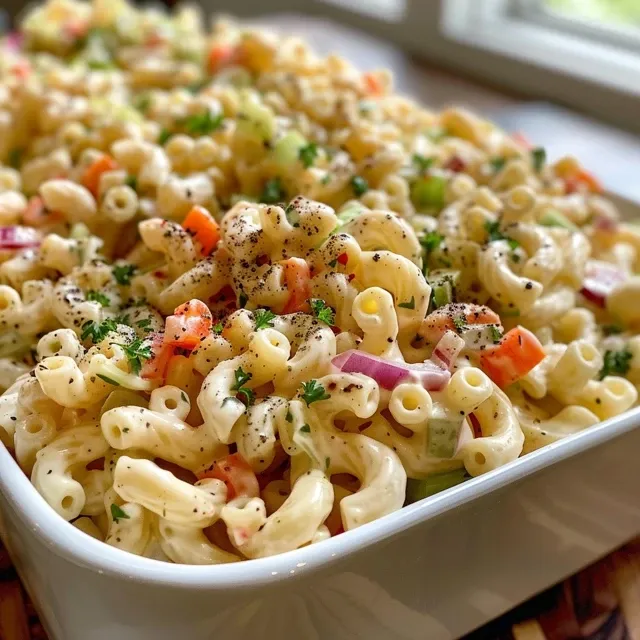
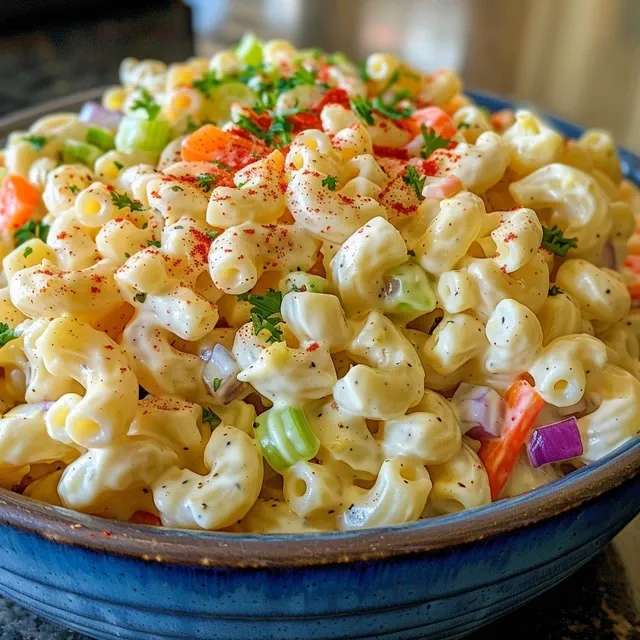
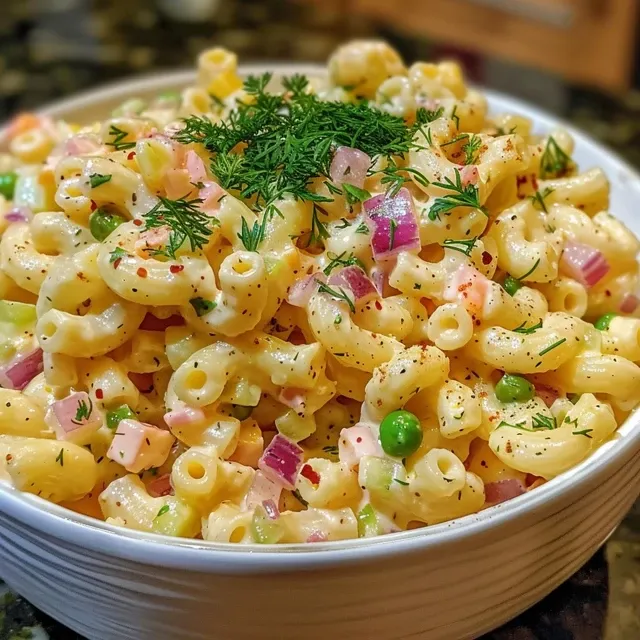
Side view of a bowl of Classic Macaroni Salad, featuring elbow macaroni and chopped vegetables.

Here are some expert insights to elevate your macaroni salad:

  • Cook the pasta just right: Follow the package instructions, but aim for al dente to prevent mushy noodles.
  • Chill the salad: Allow it to rest in the refrigerator for at least an hour before serving. This helps the flavors meld beautifully.
  • Customize your veggies: Feel free to add red pepper, peas, or even chopped pickles for added crunch and flavor.
  • Make it a meal: Add diced cooked chicken or tuna to turn this side dish into a satisfying main course.
  • Adjust the dressing: If you prefer a lighter salad, reduce the mayonnaise and sour cream, or substitute with Greek yogurt.
  • Season generously: Taste and adjust the salt and pepper before serving to ensure it’s well-seasoned.
  • Use whole wheat pasta: For a healthier option, switch to whole wheat elbow macaroni or rotini noodles.
  • Don’t skip soaking the onions: This simple step makes a world of difference in flavor.

Common Mistakes and Troubleshooting

Even the best cooks can run into a few hiccups. Here’s how to avoid common pitfalls:

  • Overcooking pasta: It’s easy to lose track of time. Be vigilant to keep your pasta al dente.
  • Not rinsing the pasta: Rinsing helps cool the pasta down and prevent it from sticking together.
  • Not letting it chill: Rushing to serve can rob the salad of its full flavor potential.
  • Too much dressing: Start with less and add more as needed to avoid a soggy salad.

Delicious Variations

There are endless possibilities to make this macaroni salad your own:

  • Italian Macaroni Salad: Add sliced salami, mozzarella balls, and a splash of Italian dressing.
  • Spicy Macaroni Salad: Mix in diced jalapeños or a spoonful of hot sauce for a kick.
  • Garden Macaroni Salad: Incorporate a medley of seasonal vegetables like bell peppers, cucumbers, and peas.
  • Herbed Macaroni Salad: Experiment with fresh herbs such as dill, basil, or chives for a fresh twist.

Storage and Make-Ahead Instructions

This macaroni salad is perfect for meal prep:

  • Storing: Keep it in an airtight container in the fridge for up to 3 days. The flavors improve as it sits!
  • Make-ahead: Prepare the salad a day in advance, allowing it to chill overnight for the best flavor.

Frequently Asked Questions

Here are some common queries about macaroni salad:

  • How long does macaroni salad last?
    This salad can last up to 3 days in the refrigerator when stored properly.
  • Can I make macaroni salad ahead of time?
    Absolutely! It’s even better when made a day in advance.
  • Should I rinse macaroni after cooking?
    Yes, rinsing helps cool the pasta and prevents it from becoming gummy.
  • What can I add for extra protein?
    Consider adding diced ham, chicken, or canned tuna for a hearty twist.
  • Can I use a different pasta shape?
    Definitely! Rotini or shell pasta can work beautifully in this salad.
  • Is this recipe suitable for vegans?
    To make it vegan, substitute mayonnaise with a plant-based version and use a dairy-free sour cream.
  • How do I make it gluten-free?
    Use gluten-free pasta for a delicious alternative without sacrificing flavor.
  • Can I freeze macaroni salad?
    It’s not recommended, as the texture can become grainy upon thawing.

Nutrition Tips and Dietary Adaptations

This classic macaroni salad can be tailored to fit various dietary needs:

  • Lower calories: Use reduced-fat mayonnaise and Greek yogurt to cut calories without sacrificing flavor.
  • Gluten-free option: Opt for gluten-free pasta to accommodate those with gluten sensitivities.
  • Vegetable-packed: Increase the veggie content for added fiber and nutrients. Think spinach, broccoli, or even avocado!

Equipment Recommendations

To make this recipe, you’ll need:

  • Large pot: For boiling the macaroni.
  • Colander: To drain and rinse the pasta.
  • Mixing bowls: One large for the salad and one small for the dressing.
  • Whisk: To combine the dressing ingredients smoothly.

Serving Suggestions

This macaroni salad is incredibly versatile and pairs well with:

  • Grilled meats: Serve alongside BBQ chicken or burgers for a classic summer meal.
  • Sandwiches: It’s a perfect side for ham or turkey sandwiches.
  • Picnics: Pack it for outdoor gatherings—it’s always a hit!

In Conclusion

This **Classic Macaroni Salad** is not just a recipe; it’s a cherished family tradition that brings joy and comfort to the table. With its creamy texture, customizable ingredients, and easy preparation, it’s a dish that invites everyone to gather round and share a meal together. So, grab your ingredients, let’s make some memories, and enjoy the delicious flavors of home!

Classic Macaroni Salad Recipe

Prep Time 10 minutes
Cook Time 10 minutes
Total Time 20 minutes
Servings 4 servings
Calories 350
A creamy and flavorful macaroni salad perfect for picnics and gatherings, combining fresh vegetables with a tangy dressing.

Ingredients

Dry Pasta

  • 2 cups dry elbow macaroni (cooked, rinsed and drained)

Vegetables

  • cup diced celery
  • ¼ cup minced red onion (soaked in cold water for 5 minutes, drained)
  • ¾ cup shredded carrots
  • 1 Tablespoon minced flat-leaf parsley
  • ½ cup diced vine ripened tomato (optional)

Dressing

  • ½ cup prepared mayonnaise
  • 3 Tablespoons sour cream
  • Freshly ground black pepper

Instructions 

  • Cook the macaroni as instructed, then drain and rinse.
  • Combine cooked macaroni with vegetables and parsley.
  • Whisk together mayonnaise, mustard, sugar, vinegar, sour cream, and salt to make dressing.
  • Pour dressing over salad and mix well.
  • Season with salt and pepper, then chill before serving.

Notes

Store in the refrigerator for up to 3 days for best freshness.
Calories: 350kcal
Cost: $15
Course: Salad
Cuisine: American
Keyword: Macaroni, Salad

Discover the Heartwarming Flavors of Sumac Potato Salad

There’s something magical about sharing a meal that brings back cherished memories and bonds loved ones together. This Sumac Potato Salad is not just a dish; it’s a celebration of togetherness, nostalgia, and the joy of cooking. With its tender potatoes, vibrant colors, and zesty flavors, this potato salad embodies the essence of love and warmth that fills our homes. Whether served at a family gathering, a picnic in the park, or a casual weekday dinner, this salad is a delightful way to express care and connection. Let’s dive into the recipe, the ingredients that make it special, and the reasons why you’ll absolutely adore it.

Why You’ll Love This Recipe

Here are just a few reasons that make this Sumac Potato Salad a must-try:

  • Inviting Flavor Profile: The combination of sumac, olives, and capers creates a tangy, vibrant taste that awakens the senses and adds depth to every bite.
  • Easy to Prepare: With simple ingredients and straightforward steps, this salad can be whipped up in no time, making it perfect for busy weeknights or unexpected guests.
  • Versatile Dish: This salad pairs well with grilled meats, can be served as a light lunch, or even enjoyed on its own as a wholesome snack.
  • Healthy Ingredients: Packed with nutrients from fresh vegetables and wholesome fats, it’s a guilt-free indulgence that nourishes both body and soul.
  • Perfect for Meal Prep: This salad can be made ahead of time and stored in the fridge, allowing the flavors to meld beautifully, making it a great option for meal prep.

Ingredients You’ll Need

To make this delicious Sumac Potato Salad, gather the following ingredients:

  • 4-5 medium potatoes (Yukon gold or red potatoes work best for their buttery texture and ability to hold shape)
  • 1 small red onion (thinly sliced for a sweet, mild flavor)
  • ½ cup black olives (chopped for a briny kick)
  • 3 small pickles (chopped, adding a crunchy tang)
  • ¼ cup capers (for a burst of flavor)
  • ⅓ cup chopped parsley (fresh herbs brighten the dish)
  • 5-6 sun-dried tomatoes (chopped, for a sweet and savory touch)
  • 2 tbsp olive oil (for richness)
  • 2 tbsp balsamic vinegar (adding a sweet and tangy depth)
  • 1 tbsp sumac (the star spice, giving a lemony brightness)
  • ½ tsp chili flakes (for a gentle heat)
  • Salt to taste

How to Make This Sumac Potato Salad

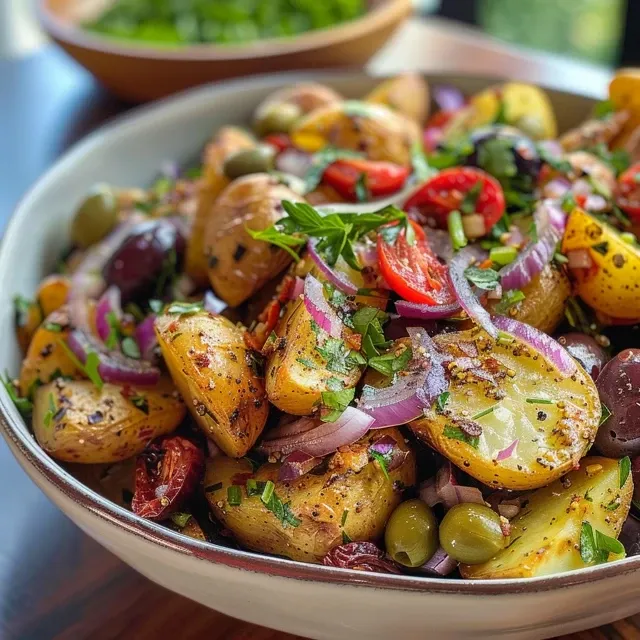
A delicious Sumac Potato Salad, showcasing various ingredients.

Follow these simple steps to create a salad that whispers tales of togetherness:

  1. Boil the Potatoes: In a large pot, bring salted water to a boil. Add whole, unpeeled potatoes and cook until just tender, about 20 minutes. Drain and let them cool slightly before peeling and chopping into bite-sized cubes.
  2. Mix the Ingredients: In a large mixing bowl, combine the chopped potatoes, sliced red onion, parsley, pickles, black olives, capers, and sun-dried tomatoes. Gently toss to mix the flavors.
  3. Make the Dressing: Drizzle the olive oil and balsamic vinegar over the salad. Add salt, chili flakes, and sumac for that signature tang. Toss gently to coat the potatoes without breaking them.
  4. Taste and Adjust: Give the salad a taste and adjust the seasoning with more balsamic vinegar, salt, or chili flakes as desired.
  5. Serve and Enjoy: This salad is best served chilled or at room temperature. Enjoy it as a side or a light meal!

Pro Tips for the Perfect Salad

To elevate your Sumac Potato Salad experience, consider these expert tips:

  • Choose the Right Potatoes: Yukon gold or red potatoes are ideal as they hold their shape well and provide a creamy texture.
  • Don’t Skip the Sumac: This spice is crucial for its tangy flavor. If you can’t find it, a mix of lemon zest and a pinch of salt can be a substitute.
  • Fresh Herbs are Key: Fresh parsley adds a burst of flavor; dried herbs won’t give the same brightness.
  • Adjust to Your Taste: Feel free to modify the ingredient amounts based on your preferences. Love olives? Add more!
  • Chill Before Serving: Letting the salad sit in the fridge for at least an hour helps the flavors meld beautifully.
  • Experiment with Additions: Consider adding roasted bell peppers, feta cheese, or even avocado for a creamy twist.
  • Make Ahead: Prepare this salad a day in advance. It tastes even better the next day as the flavors deepen.
  • Use Quality Olive Oil: A good-quality olive oil enhances the flavor of the dressing, adding richness and depth.

Common Mistakes and Troubleshooting

Here are some common pitfalls to avoid while making your Sumac Potato Salad:

  • Overcooking Potatoes: Ensure the potatoes are tender but not mushy. They should hold their shape after boiling.
  • Skipping the Cooling Step: Allow the potatoes to cool before mixing; this prevents the dressing from becoming too warm and greasy.
  • Not Tasting Before Serving: Always taste your salad before serving to adjust flavors as needed.
  • Forgetting to Toss Gently: Toss the salad gently to avoid breaking the potatoes. You want them to remain intact.

Variations to Try

Here are a few delightful variations of the Sumac Potato Salad to keep things interesting:

  • Greek-Inspired: Add crumbled feta cheese and chopped cucumbers for a refreshing twist.
  • Spicy Kick: Incorporate diced jalapeños or a dash of hot sauce for a spicy version.
  • Herbed Delight: Mix in fresh dill or mint along with the parsley for an aromatic touch.
  • Roasted Veggie Blend: Toss in roasted bell peppers, zucchini, or asparagus for added texture and flavor.

Storage and Make-Ahead Instructions

This Sumac Potato Salad can be made in advance, making it a great choice for gatherings:

  • Refrigerator: Store the salad in an airtight container in the fridge for up to 3 days. The flavors will deepen over time.
  • Freezer: While it’s best fresh, if you have leftovers, you can freeze it for up to a month. Just note that the texture may change slightly.
  • Make-Ahead: Prepare the salad a day before your event for the best flavor, allowing the ingredients to marinate together.

Frequently Asked Questions

Here are some common questions about the Sumac Potato Salad:

  • Can I use other types of potatoes? Absolutely! While Yukon gold and red potatoes are preferred, you can use any waxy variety.
  • Is this salad gluten-free? Yes, all the ingredients used are gluten-free, making this salad suitable for those with gluten sensitivities.
  • Can I make it vegan? Yes, this recipe is entirely vegan as it contains no animal products.
  • What should I serve it with? This salad pairs beautifully with grilled meats, sandwiches, or can be enjoyed on its own.
  • How can I adjust the tanginess? You can increase or decrease the amount of balsamic vinegar and sumac to suit your taste preference.
  • Can I add protein to this salad? Yes! Chickpeas or diced grilled chicken can be added for extra protein.
  • What’s the best way to chop the potatoes? Once cooled, chop them into uniform bite-sized pieces for even flavor distribution.
  • How do I enhance the flavor? Let the salad sit for at least an hour before serving to allow the flavors to meld.

Nutritional Tips and Dietary Adaptations

This Sumac Potato Salad is not only delicious but also nutritious. Here are some tips to make it even healthier:

  • Low-Calorie Option: Substitute olive oil with a light vinaigrette to reduce calories.
  • Boost Fiber: Add more vegetables like carrots or green beans for an extra fiber boost.
  • Low-Sodium Version: Use low-sodium olives and capers to reduce the salt content.
  • Whole Foods Focus: Choose organic ingredients when possible for a cleaner dish.

Essential Equipment for This Recipe

To make this Sumac Potato Salad effectively, you’ll need:

  • Large Pot: For boiling the potatoes.
  • Mixing Bowl: A large bowl to combine all the ingredients.
  • Cutting Board and Knife: For chopping the vegetables.
  • Measuring Cups and Spoons: To accurately measure your ingredients.

Serving Suggestions

When it comes to serving this Sumac Potato Salad, consider these ideas:

  • Picnic Delight: Serve it chilled alongside grilled burgers and hot dogs for a perfect picnic.
  • Family Gatherings: Pair it with roasted chicken or grilled shrimp at your next family gathering.
  • Light Lunch: Enjoy it as a light lunch with some crusty bread or whole-grain pita.
  • Brunch Buffet: This salad fits perfectly on a brunch table alongside quiches and fruit salads.

As you gather around the table with family and friends, let this Sumac Potato Salad be a reminder of the beauty and joy that food brings into our lives. With each bite, you’ll taste the love and togetherness that make every meal a cherished memory. So, roll up your sleeves, pour your heart into this recipe, and celebrate the art of cooking with those you love the most. Happy cooking!

Sumac Potato Salad

Prep Time 10 minutes
Cook Time 20 minutes
Total Time 30 minutes
Servings 4 servings
Calories 250
A vibrant and tangy potato salad featuring sumac, perfect for a refreshing side dish or light meal.

Ingredients

Potatoes

  • 4-5 medium potatoes (Yukon gold or red)
  • 1 small red onion (thinly sliced)
  • ½ cup black olives (chopped)
  • 3 small pickles (chopped)
  • ¼ cup capers
  • cup chopped parsley
  • 5-6 sun dried tomatoes sun dried tomatoes (chopped)
  • 2 tbsp olive oil
  • 2 tbsp balsamic vinegar
  • 1 tbsp sumac
  • ½ tsp chili flakes
  • to taste salt

Instructions 

  • Boil whole unpeeled potatoes in salted water until tender, then cool, peel, and chop into cubes.
  • Combine potatoes, red onion, parsley, pickles, olives, capers, and sun dried tomatoes in a bowl.
  • Drizzle with olive oil and balsamic vinegar, then add sumac, chili flakes, and salt. Toss gently to coat.
  • Adjust seasoning if needed, then serve.

Notes

For extra flavor, let the salad sit for 10 minutes before serving.
Calories: 250kcal
Cost: $12
Course: Side Dish
Cuisine: Mediterranean
Keyword: Potatoes

Discover the Joy of a Wholesome Ranch Chicken Salad

Welcome to a delightful culinary journey that captures the essence of comfort and family in every bite. This Healthy Ranch Chicken Salad is more than just a meal; it’s a celebration of flavors, memories, and the joy of sharing good food with loved ones. In just a few simple steps, you can create a vibrant blend of tender chicken, fresh greens, and a creamy homemade ranch dressing that will make your family feel right at home. Whether it’s a sunny afternoon picnic or a cozy dinner at the kitchen table, this salad is perfect for any occasion.

As we dive deep into the details of this recipe, you’ll discover how to make it uniquely your own while still keeping the traditional flavors that make it so special. Let’s get started!

Why You’ll Love This Recipe

  • Comforting Flavors: This salad brings together the nostalgia of Southern cooking with fresh ingredients, making it a dish that feels like a warm hug.
  • Quick and Easy: Ready in under 30 minutes, this recipe is perfect for busy weeknights or last-minute gatherings.
  • Healthy and Filling: Packed with protein from the chicken and nutrients from the greens, this salad keeps you satisfied without feeling heavy.
  • Customizable: Whether you prefer different proteins or veggies, this recipe invites creativity—make it your own!
  • Perfect for Meal Prep: Make a big batch and enjoy it throughout the week. It’s a great choice for lunches and quick dinners.

Ingredients You’ll Need

To create this delicious ranch chicken salad, gather the following ingredients:

  • 1 pound Chicken Breast (cut into small bite-sized pieces)
  • 1 tablespoon Olive Oil
  • 4 Cups Packed Greens of choice (like spinach, arugula, or romaine)
  • ¼ Small Red Onion (sliced)
  • ¾ Cup Cherry or Grape Tomatoes (halved)
  • ½ English Cucumber (sliced or chopped)
  • 1 Avocado (sliced)
  • ⅓ Cup Corn (Fresh or canned)

For the Homemade Ranch Dressing

  • 1 Cup Plain Non-Fat Greek Yogurt
  • 2-3 Cloves Garlic (minced)
  • 2 teaspoons Lemon Juice
  • 2 tablespoons Onion (finely chopped)
  • 1 tablespoon Dijon Mustard
  • 2 tablespoons Fresh Chives (finely chopped)
  • 1 tablespoon Fresh Parsley (finely chopped)
  • 1 tablespoon Fresh Dill (finely chopped)
  • Sea Salt and Pepper, to taste

How to Make Wholesome Ranch Chicken Salad

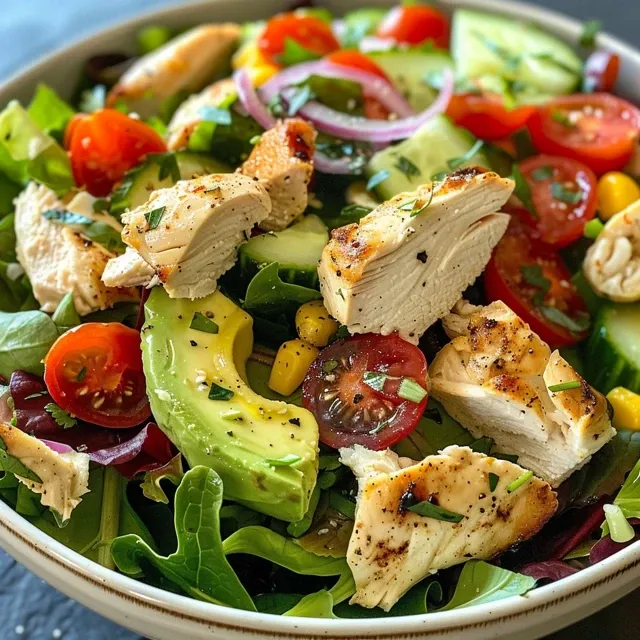
Detailed shot of Healthy Ranch Chicken Salad, highlighting the creamy dressing and fresh herbs.

Now that we have our ingredients ready, let’s bring this salad to life!

Step 1: Make the Homemade Ranch Dressing

Start by combining all the dressing ingredients in a small jar. Secure the lid and shake vigorously until the mixture is well-combined and creamy. This homemade ranch dressing is not only healthier than store-bought options, but it’s also packed with flavor.

Step 2: Marinate the Chicken

Pour about 1/3 of the homemade ranch dressing over the chicken pieces in a bowl. Allow it to marinate for at least 15 minutes. This step enhances the chicken’s flavor and tenderness. Remember to refrigerate the remaining dressing for later!

Step 3: Cook the Chicken

In a large non-stick pan, heat the olive oil over medium heat. Add the marinated chicken in a single layer. Cook for about 5-7 minutes, turning occasionally, until the chicken is golden brown and fully cooked. You want that beautiful sear for added flavor!

Step 4: Assemble Your Salad

In a large bowl, layer the greens as your base. Top with the sliced red onion, halved cherry tomatoes, cucumber, avocado, corn, and the perfectly cooked chicken. Just before serving, drizzle the remaining ranch dressing over the salad and toss gently to combine all the flavors.

Pro Tips for Making the Perfect Salad

  • Choose Your Greens Wisely: Mix and match greens for added texture and flavor—crunchy romaine pairs beautifully with tender spinach.
  • Perfect Chicken: Ensure your chicken is cooked just right—juicy and tender. Don’t overcrowd the pan to avoid steaming.
  • Fresh Herbs Matter: The freshness of herbs elevates the ranch dressing, making it bright and zesty.
  • Chill Your Dressing: Letting your dressing sit in the fridge for a bit enhances the flavors, making it even more delicious.
  • Don’t Skip the Marinade: The marinade not only flavors the chicken but also keeps it moist during cooking.
  • Balance Your Ingredients: Make sure to distribute your toppings evenly for every bite to be equally delightful.
  • Add a Crunch: Consider adding nuts or seeds for an extra crunch and nutritional boost.
  • Presentation is Key: Don’t forget to arrange your salad beautifully—it makes a difference in how much you enjoy it!

Common Mistakes and Troubleshooting

Even the best of us can make a few mistakes. Here are some common pitfalls and how to avoid them:

  • Overcooking the Chicken: Keep an eye on the cooking time to prevent dry chicken. Use a meat thermometer to check for doneness—165°F is perfect!
  • Too Much Dressing: Dress your salad lightly and adjust according to taste. You can always add more but it’s tough to take away!
  • Skipping Seasoning: Don’t forget to season the chicken and the salad! A pinch of salt and pepper can elevate the overall flavor.
  • Not Allowing the Dressing to Chill: Giving the dressing time to meld together will enhance its flavor significantly.

Variations to Try

This recipe is versatile! Here are a few fun variations:

  • Swap the Protein: Try shrimp, grilled steak, or even tofu for a vegetarian option.
  • Add More Veggies: Incorporate bell peppers, shredded carrots, or radishes for extra crunch and color.
  • Fruit Twist: Add sliced apples or dried cranberries for a touch of sweetness.
  • Cheese Lovers: Sprinkle some feta or shredded cheddar on top for a creamy finish.

Storage and Make-Ahead Instructions

This salad is great for meal prep! Here’s how to store it:

  • In the Fridge: Store the salad in an airtight container for up to 3 days. Keep the dressing separate until serving to prevent sogginess.
  • Make-Ahead: You can marinate the chicken a day in advance and keep it in the fridge. Prepare the dressing ahead of time as well!

Frequently Asked Questions

  • Can I use other greens? Absolutely! Feel free to use your favorites—kale, mixed greens, or even a spring mix work wonderfully.
  • How can I make it dairy-free? Use dairy-free yogurt for the dressing and skip any cheese toppings.
  • Can I prepare this salad for a crowd? Yes! Simply multiply the ingredients to serve more people, and consider individual servings for easy handling.
  • Is this salad kid-friendly? Yes! The creamy ranch dressing and familiar ingredients make it appealing to kids.
  • Can I freeze the salad? It’s best enjoyed fresh, but you can freeze the marinated chicken for future use. Just cook it from frozen!
  • What can I serve with it? It pairs well with crusty bread, grilled corn, or even a light soup.
  • How do I know when the chicken is done? Use a meat thermometer—165°F is the safe internal temperature for cooked chicken.
  • What if I don’t have time to marinate? You can skip the marinating step; just season the chicken well before cooking.

Nutrition Tips and Dietary Adaptations

This salad is naturally healthy, but here are some tips to boost nutrition further:

  • Add Fiber: Including legumes like chickpeas or black beans can increase the fiber content significantly.
  • Low-Calorie Dressing: Use low-fat yogurt and skip the oil in the dressing for a lighter version.
  • High-Protein Alternatives: For a higher protein salad, add boiled eggs or nuts.

Equipment Recommendations

To make this recipe, you’ll need:

  • Non-Stick Skillet: Ideal for cooking the chicken without sticking.
  • Mixing Bowls: For preparing the dressing and mixing the salad.
  • Measuring Cups and Spoons: Essential for precise ingredient measurements.
  • Jar with Lid: Perfect for shaking up the homemade ranch dressing.

Serving Suggestions

When it’s time to serve, consider these ideas:

  • Garnish with Fresh Herbs: A sprinkle of fresh herbs on top adds a beautiful touch.
  • Serve with Crusty Bread: A slice of artisan bread pairs beautifully with this salad.
  • Enjoy with a Side of Fruit: Fresh fruit salad can complement the meal perfectly.

This Healthy Ranch Chicken Salad is not only nourishing but also a reminder that the kitchen is a space for love, memories, and shared experiences. As you prepare this dish, let it be a celebration of your culinary journey, reflecting your unique story and the warmth of family gatherings. Enjoy every bite, and remember that cooking is about creating moments that matter.

Healthy Ranch Chicken Salad

Prep Time 15 minutes
Cook Time 10 minutes
Total Time 25 minutes
Servings 4 servings
Calories 350
A nutritious and flavorful chicken salad featuring a homemade ranch dressing, perfect for a quick and healthy meal.

Ingredients

Protein

  • 1 pound Chicken Breast (cut into small bite-sized pieces)
  • 1 tablespoon Olive Oil

Greens

  • 4 cups Packed Greens of choice
  • ¼ small Red Onion (sliced)
  • ¾ cup Cherry or grape tomatoes (halved)
  • ½ English Cucumber sliced or chopped
  • 1 avocado sliced
  • cup Corn (Fresh or canned)

Dressing

  • 1 cup Plain non-fat Greek yogurt
  • 2-3 cloves Garlic (minced)
  • 2 teaspoons Lemon Juice
  • 2 tablespoons Onion (finely chopped)
  • 1 tablespoon Dijon Mustard
  • 2 tablespoons Fresh chives (finely chopped)
  • 1 tablespoon Fresh parsley (finely chopped)
  • 1 tablespoon Fresh dill (finely chopped)

Seasonings

  • to taste Sea salt and pepper

Instructions 

  • Make the ranch dressing by shaking all dressing ingredients in a jar.
  • Marinate cooked chicken with about 1/3 of the dressing for at least 15 minutes.
  • Cook the chicken in a heated pan until golden and cooked through, about 5-7 minutes.
  • Assemble the salad by adding greens to a bowl, topping with remaining ingredients, then toss with dressing before serving.

Notes

For extra flavor, let the chicken marinate longer or add your favorite herbs.
Calories: 350kcal
Cost: $15
Course: Main Course, Salad
Cuisine: American
Keyword: Chicken, Healthy, Salad

Why This Grilled Chicken Caesar Salad Will Become Your Family Favorite

When it comes to sharing meals that resonate with comfort and nostalgia, nothing beats the Grilled Chicken Caesar Salad. In my Louisiana upbringing, food was a language of love, a way to connect, and a tradition to uphold. This salad embodies those memories, bringing together the crispness of fresh romaine, the tenderness of grilled chicken, and a creamy, dreamy dressing that wraps around each ingredient like a warm hug.

Not only is this recipe a feast for the senses, but it also encourages moments of togetherness around the table. Whether you’re enjoying a sunny day in the backyard or a cozy evening indoors, this salad promises to deliver both satisfaction and warmth. Let’s dive into why you’ll love this recipe and how to make it unforgettable!

Why You’ll Love This Recipe

  • Rich in Flavor: The blend of grilled chicken, creamy dressing, and fresh romaine creates a flavor explosion that is both satisfying and refreshing.
  • Quick to Prepare: In less than 30 minutes, you can have a restaurant-quality salad ready to serve, making it perfect for busy weeknights.
  • Healthy and Wholesome: Packed with lean protein from chicken and nutrient-rich greens, this salad supports a balanced diet without sacrificing taste.
  • Versatile Base: You can easily customize this salad by adding your favorite toppings or substituting ingredients to cater to different dietary needs.
  • Perfect for Sharing: This recipe is designed to feed a crowd, making it a great addition to family gatherings or potlucks.

Ingredients for Your Grilled Chicken Caesar Salad

Let’s gather our ingredients and get ready to create something special. Here’s what you’ll need:

  • 1 pound boneless, skinless chicken breasts: Trimmed for tenderness.
  • 1/4 teaspoon salt: Enhances the natural flavor of the chicken.
  • 1/2 teaspoon black pepper: Adds a mild heat.
  • 1 teaspoon garlic powder: For that savory depth.
  • 1 teaspoon onion powder: A hint of sweetness.
  • 1 teaspoon paprika: Adds a smoky note.
  • 1/2 cup nonfat Greek yogurt: A creamy base for the dressing, perfect for a healthy twist.
  • 3 tablespoons olive oil: Provides richness and helps the dressing emulsify.
  • 2/3 cup grated Parmesan cheese: Essential for that authentic Caesar flavor.
  • 8 cups romaine lettuce: Washed and chopped for a crunchy base.
  • 1 cup Caesar dressing: Store-bought or homemade, this brings it all together.
  • 2 cups croutons: For a satisfying crunch.
  • 1/3 cup shaved Parmesan cheese: For garnish, adding visual appeal and extra flavor.

Substitutions to Consider

  • Chicken: You can swap chicken for grilled shrimp or tofu for a vegetarian version.
  • Greek Yogurt: For a dairy-free option, use cashew cream or a vegan yogurt alternative.
  • Romaine Lettuce: Spinach or kale can be used if you prefer a different green.
  • Caesar Dressing: Try a tahini-based dressing for a unique twist.

How to Make the Dressing

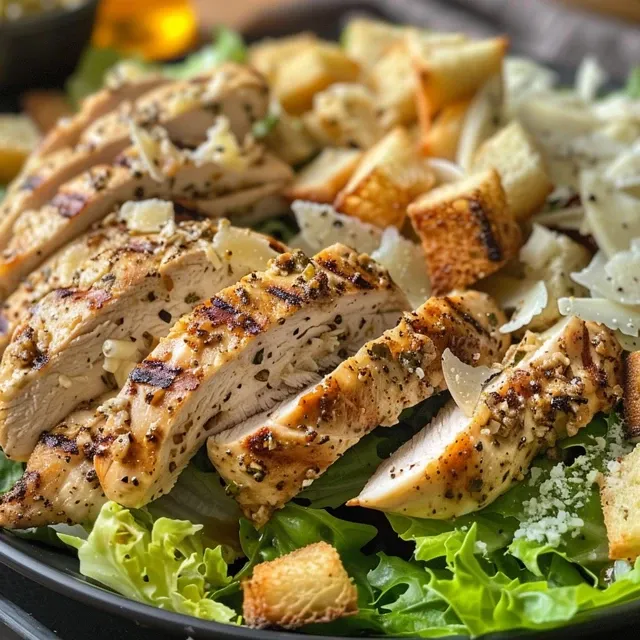
Side view of a colorful Grilled Chicken Caesar Salad with juicy grilled chicken and creamy dressing.

The dressing is where the magic happens. It’s simple yet packed with flavor. Here’s how to whip it up:

  • Combine Greek yogurt, olive oil, garlic powder, onion powder, lemon juice, Dijon mustard, black pepper, and honey in a blender.
  • Blend until smooth and creamy, adjusting the seasoning to taste. If you prefer a thinner dressing, add a splash of water or extra olive oil.
  • Set aside while you prepare the chicken and salad.

Grilling the Chicken

Now, let’s grill the chicken to perfection:

  • First, clean the chicken by trimming excess fat and gently tenderizing it using a meat mallet.
  • Mix the dry seasonings and coat the chicken evenly. Let it rest for about 5-10 minutes.
  • Preheat your grill to medium-high heat, around 375°F (190°C).
  • Spray the grill with cooking oil to prevent sticking.
  • Grill the chicken for about 5 minutes on each side, or until it reaches an internal temperature of 165°F (75°C). Let it rest before slicing.

Assembling Your Salad

With the chicken grilled and the dressing ready, let’s put this masterpiece together:

  • In a large bowl, add the chopped romaine lettuce.
  • Sprinkle in the grated Parmesan cheese and drizzle with your homemade dressing.
  • Toss everything together until evenly coated, adjusting the dressing to your preference.
  • Top with sliced grilled chicken and croutons, finishing with shaved Parmesan for a beautiful presentation.

Common Mistakes and Troubleshooting

Even the best cooks can face hiccups in the kitchen. Here are some common mistakes to avoid:

  • Overcooking Chicken: Always use a meat thermometer to ensure perfect doneness. Overcooked chicken can be dry and tough.
  • Too Much Dressing: Start with a small amount and add more as needed. You can always add more, but you can’t take it out!
  • Wilting Lettuce: Toss the salad just before serving to maintain crispness.
  • Soggy Croutons: Add croutons right before serving. They maintain their crunch this way.

Creative Variations of the Classic Caesar Salad

Want to switch things up? Here are some delightful variations:

  • Asian-Inspired Caesar: Substitute soy sauce for Dijon mustard and add sesame oil to the dressing. Top with sesame seeds and chopped green onions.
  • Spicy Chipotle Caesar: Mix in chipotle powder or adobo sauce to the dressing for a smoky, spicy kick.
  • Greek Caesar: Incorporate olives and feta cheese for a Mediterranean twist on the classic flavors.
  • Fruit and Nut Caesar: Add sliced strawberries or apples and walnuts for a refreshing, sweet crunch.

Storage and Make-Ahead Instructions

If you want to prepare this salad in advance, here’s how to store it:

  • Store the grilled chicken separately in an airtight container in the refrigerator for up to 4 days.
  • Keep the dressing in a separate jar, and it can last for about a week in the fridge.
  • Assemble the salad right before serving to ensure everything stays fresh and crunchy.

Frequently Asked Questions (FAQs)

Here are some common questions about the Grilled Chicken Caesar Salad:

  • Can I make Caesar salad dressing without anchovies? Yes! You can use Worcestershire sauce or skip it entirely for a vegetarian option.
  • What’s the best way to grill chicken? Marinating the chicken beforehand not only adds flavor but also keeps it moist while grilling.
  • Can I use different greens? Absolutely! While romaine is traditional, feel free to use kale or mixed greens.
  • How can I make this recipe gluten-free? Choose gluten-free croutons or skip them altogether.
  • Is this salad filling enough for dinner? Yes! With the protein from the chicken and the fiber from the romaine, it’s a satisfying meal.
  • Can I use bottled dressing? While homemade is best, store-bought Caesar dressing can work in a pinch.
  • How do I make this salad dairy-free? Substitute Greek yogurt with a dairy-free yogurt alternative and omit the Parmesan.
  • Can I add other proteins? Definitely! Shrimp, steak, or chickpeas can all be delicious additions.

Nutritional Tips and Dietary Adaptations

This salad can be tailored to fit various dietary needs:

  • High-Protein: Add extra chicken or beans for a protein boost.
  • Low-Carb: Skip the croutons and focus on the grilled chicken and greens.
  • Vegan: Use chickpeas for protein, a vegan yogurt for dressing, and omit cheese.
  • Heart-Healthy: Opt for olive oil in moderation and use Greek yogurt instead of mayo.

Essential Equipment for Your Recipe

Here’s what you’ll need to make this recipe successfully:

  • Grill or Grill Pan: For that perfect sear on your chicken.
  • Meat Thermometer: Ensures your chicken is cooked perfectly every time.
  • Blender or Food Processor: Essential for whipping up a smooth dressing.
  • Large Salad Bowl: Makes tossing and serving a breeze.

Serving Suggestions

This salad pairs wonderfully with a variety of sides to create a well-rounded meal:

  • Garlic Bread: Perfect for soaking up any leftover dressing.
  • Roasted Vegetables: Add seasonal veggies for extra nutrition and flavor.
  • Fresh Fruit Salad: A light and refreshing complement to the richness of the Caesar.
  • Iced Tea or Lemonade: Refreshing drinks that enhance the dining experience.

In conclusion, the Grilled Chicken Caesar Salad is more than just a recipe; it’s a gateway to creating cherished memories with loved ones. With every bite, you’ll not only taste the love and effort put into it but also feel the warmth of tradition that comes from sharing a meal together. So gather your loved ones, roll up your sleeves, and let’s make some magic happen in the kitchen!

Grilled Chicken Caesar Salad

Prep Time 15 minutes
Cook Time 20 minutes
Total Time 35 minutes
Servings 4 servings
Calories 650
A delicious and healthy salad combining tender grilled chicken with crisp romaine and creamy Caesar dressing.

Ingredients

Protein

  • 1 pound boneless, skinless chicken breasts (fat trimmed and tenderized)
  • 1/4 teaspoon salt
  • ½ teaspoon black pepper
  • 1 teaspoon garlic powder
  • 1 teaspoon onion powder
  • 1 teaspoon paprika
  • 1/2 cup nonfat greek yogurt
  • 3 tablespoons olive oil
  • 1.5 teaspoon garlic powder (additional for dressing)
  • 1.5 teaspoon onion powder (additional for dressing)
  • 2 tablespoons lemon juice (juice of half lemon)
  • 2/3 cup grated parmesan cheese
  • 3 teaspoons dijon mustard
  • 1 teaspoon black pepper
  • 1 teaspoon honey

Vegetables

  • 8 cups romaine lettuce (washed and chopped (about 3 heads))
  • 1 cup Caesar dressing
  • 2 cups croutons
  • ½ teaspoon freshly cracked pepper
  • cup shaved parmesan cheese (large shavings with vegetable peeler)

Instructions 

  • Tenderize and season the chicken, then grill for 10 minutes, flipping halfway. Rest for 5 minutes.
  • Blend dressing ingredients until smooth.
  • Chop lettuce, toss with dressing and cheeses, then top with croutons.
  • Slice chicken into strips and place on salad before serving.

Notes

Use fresh ingredients for best flavor and texture.
Calories: 650kcal
Cost: $15
Course: Salad
Cuisine: American
Keyword: Caesar, Chicken, Salad

A Warm Welcome to Southwest Quinoa Salad

Welcome to a dish that’s more than just food; it’s a celebration of life’s vibrant flavors and cherished memories. Our Southwest Quinoa Salad is a colorful masterpiece that brings together the freshness of nature with the warmth of heartfelt cooking. With every bite, you’ll find a delightful mix of textures and tastes, making this salad perfect for both everyday meals and festive gatherings. Let’s dive into the details of why you’ll love this recipe!

Why You’ll Love This Recipe

  • Quick and Easy: This salad comes together in under 30 minutes, making it an ideal choice for busy weeknights or last-minute gatherings.
  • Healthy and Nourishing: Packed with protein-rich quinoa, beans, and colorful veggies, this dish is not just a salad; it’s a nutrient powerhouse.
  • Customizable: Feel free to swap ingredients based on your tastes or what you have on hand, making it a versatile option all year round.
  • Great for Meal Prep: This salad stores well, allowing you to enjoy it throughout the week. Make a big batch and savor it for lunch or dinner!
  • Perfect for Sharing: Whether you’re hosting a family gathering or a picnic with friends, this salad is a crowd-pleaser that encourages sharing and connection around the table.

Ingredient Breakdown

Understanding the ingredients that go into your Southwest Quinoa Salad can elevate your cooking and help you make informed substitutions. Here’s a closer look at what you’ll need:

  • Quinoa: 1 cup, rinsed – This fluffy grain is the star of the show, providing a nutty flavor and a healthy dose of protein. You can use white, red, or tricolor quinoa based on your preference.
  • Water: 2 cups – This is essential for cooking the quinoa to perfection.
  • Corn Kernels: 1 cup (fresh, frozen, or canned) – Adds sweetness and a pop of color. If using canned, be sure to drain and rinse them.
  • Black Beans: 1 can (15 oz), rinsed and drained – A great source of fiber and protein that complements the quinoa beautifully.
  • Red Bell Pepper: 1, diced – Brings a crisp texture and a burst of sweetness.
  • Cherry Tomatoes: 1 cup, halved – Adds juiciness and acidity to balance the flavors.
  • Red Onion: 1/4 cup, finely chopped – Provides a sharp bite that enhances the overall taste.
  • Avocado: 1, diced – Creamy and rich, it adds a luxurious texture that brings the salad together.
  • Cilantro: 1/4 cup, chopped – Fresh and herbaceous, it brightens the dish and brings a burst of flavor.
  • Olive Oil: 1/4 cup – This healthy fat helps to meld the flavors and adds richness.
  • Lime Juice: 3 tablespoons (about 2 limes) – The zesty acidity lifts all the other flavors and adds freshness.
  • Cumin: 1 teaspoon – A warm spice that complements the other ingredients beautifully.
  • Chili Powder: 1 teaspoon – Adds a hint of heat and depth.
  • Salt and Pepper: To taste – Essential for seasoning and enhancing the flavors.

How to Make Southwest Quinoa Salad

Detailed image of a Southwest Quinoa Salad capturing its fresh vegetables and quinoa.

Creating this salad is as simple as it is rewarding! Follow these easy steps to whip up a dish that warms the heart:

  1. In a medium saucepan, combine the rinsed quinoa and water. Bring to a boil over medium-high heat.
  2. Reduce the heat to low, cover, and simmer for about 15-20 minutes, or until the quinoa is tender and has absorbed all of the water. Remove from heat and let it sit, covered, for 5 minutes. Fluff with a fork and let it cool.
  3. In a large bowl, combine the cooled quinoa, corn, black beans, red bell pepper, cherry tomatoes, red onion, avocado, and cilantro. Mix well.
  4. In a small bowl, whisk together the olive oil, lime juice, cumin, chili powder, salt, and pepper.
  5. Pour the dressing over the quinoa salad and toss gently to combine.
  6. Adjust seasoning with more salt and pepper if needed.
  7. Serve immediately, or refrigerate for an hour to allow flavors to meld.

Pro Tips for Perfecting Your Salad

  • Rinse Your Quinoa: Always rinse quinoa before cooking to remove its natural coating, called saponin, which can impart a bitter taste.
  • Cool the Quinoa: Letting the quinoa cool before mixing it with other ingredients helps maintain the crispness of the veggies.
  • Fresh Lime Juice: For the best flavor, use freshly squeezed lime juice instead of bottled lime juice.
  • Seasonal Variations: You can easily adjust the vegetables based on what’s in season; think chopped cucumbers in summer or roasted butternut squash in fall.
  • Make it Spicy: For a kick, add diced jalapeños or a dash of hot sauce to the dressing.
  • Enhance with Cheese: Crumbled feta or cotija cheese adds a creamy richness and a salty bite.
  • Let it Marinate: Allowing the salad to sit for a while before serving enhances the flavors as they meld together.
  • Add Nuts or Seeds: For extra crunch, sprinkle some toasted pumpkin seeds or walnuts just before serving.

Common Mistakes and Troubleshooting

Even the best recipes can have hiccups! Here are a few common pitfalls and how to avoid them:

  • Overcooking Quinoa: If the quinoa becomes mushy, it’s likely been overcooked. Aim for fluffy quinoa where each grain is separate.
  • Too Much Dressing: Start with a small amount of dressing and add more to taste; you can always add more, but it’s hard to take away!
  • Incorrect Seasoning: Taste as you go! Adjust salt and pepper to ensure the flavors shine.
  • Skipping the Cooling Step: Mixing warm quinoa with fresh ingredients can wilt them; always cool before combining.

Variations of Southwest Quinoa Salad

Feeling adventurous? Here are a few delightful variations to try:

  • Southwest Quinoa Bowl: Serve the salad over a bed of greens, topped with grilled chicken or shrimp for a full meal.
  • Mexican Quinoa Salad: Add black olives, corn salsa, and a sprinkle of taco seasoning for a fun twist.
  • Quinoa Tabbouleh: Swap the corn and beans for parsley, mint, and diced cucumbers for a Mediterranean flair.
  • Breakfast Quinoa Bowl: Top with a poached egg and avocado for a hearty breakfast option.

Storage and Make-Ahead Instructions

This salad is perfect for meal prep and can be stored in an airtight container in the refrigerator for up to 4 days. For best results:

  • Store the dressing separately until ready to serve to keep the salad fresh and crisp.
  • If you plan to make it ahead of time, consider adding avocado just before serving to prevent browning.

Frequently Asked Questions

Here are some common questions about making and enjoying your Southwest Quinoa Salad:

  • Can I use other grains instead of quinoa? Yes, you can substitute with farro, barley, or brown rice, but adjust cooking times accordingly.
  • Is this salad gluten-free? Yes, quinoa is naturally gluten-free, making this salad a safe choice for those with gluten sensitivities.
  • How can I make this salad vegan? This salad is already vegan-friendly, so enjoy it as is!
  • Can I freeze the salad? While quinoa freezes well, the texture of the fresh ingredients may change. It’s best consumed fresh.
  • What can I serve with this salad? It pairs wonderfully with grilled meats, fish, or as a side to your favorite protein.
  • Can I add fruit to this salad? Absolutely! Diced mango or pineapple can add a delightful sweetness to the mix.
  • What’s the best way to reheat quinoa? If you have leftovers, reheat gently on the stove with a splash of water to avoid drying it out.
  • How can I enhance the flavors? Experiment with adding different herbs or spices to the dressing for a unique twist!

Nutrition Tips and Dietary Adaptations

This Southwest Quinoa Salad is not only delicious, but it also supports various dietary needs:

  • High in Protein: Quinoa and beans provide a complete protein source, making this an excellent choice for vegetarian and vegan diets.
  • Rich in Fiber: The combination of beans, quinoa, and vegetables ensures a healthy dose of dietary fiber, which is great for digestion.
  • Low in Calories: This salad is light and nutritious, making it a great option for those watching their caloric intake.
  • Heart-Healthy Fats: The olive oil and avocado provide essential fats that are beneficial for heart health.

Equipment Recommendations

To make your cooking experience smoother, here’s a list of handy kitchen tools:

  • Medium Saucepan: For cooking quinoa perfectly.
  • Large Mixing Bowl: Ideal for combining all the fresh ingredients.
  • Whisk: For mixing your dressing effortlessly.
  • Cutting Board and Knife: Essential for chopping veggies safely and efficiently.

Serving Suggestions

When it comes to serving your Southwest Quinoa Salad, presentation matters! Here are some ideas:

  • Chilled Salad Platter: Serve in a large bowl with a sprinkle of fresh cilantro on top for a beautiful presentation.
  • Individual Bowls: Portion out into individual serving bowls for an inviting table setting.
  • Garnished with Lime Wedges: Add lime wedges around the platter for a pop of color and extra zing!

Conclusion

As we wrap up this delightful journey into the world of Southwest Quinoa Salad, I hope you feel inspired to create your own version in the kitchen. Remember, cooking is about more than just the food; it’s about the love and memories we share with those around us. So gather your loved ones, savor the vibrant flavors, and let this salad bring warmth to your table. Happy cooking!

Southwest Quinoa Salad

Prep Time 10 minutes
Cook Time 20 minutes
Total Time 30 minutes
Servings 4 servings
Calories 350
A vibrant and healthy quinoa salad packed with fresh vegetables and a zesty lime-cumin dressing, perfect for a quick lunch or side dish.

Ingredients

Grains

  • 1 cup quinoa, rinsed
  • 2 cups water

Vegetables

  • 1 cup corn kernels (fresh, frozen, or canned)
  • 1 can (15 oz) black beans, rinsed and drained
  • 1 red red bell pepper, diced
  • 1 cup cherry tomatoes, halved
  • 0.25 cup red onion, finely chopped
  • 1 avocado diced
  • 0.25 cup cilantro, chopped

Dressing

  • 0.25 cup olive oil
  • 3 tablespoons lime juice (about 2 limes)
  • 1 teaspoon cumin
  • 1 teaspoon chili powder
  • to taste salt and pepper Salt and pepper

Instructions 

  • Cook quinoa in water until tender, then let it cool.
  • Combine cooled quinoa with vegetables and cilantro in a large bowl.
  • Whisk together olive oil, lime juice, cumin, chili powder, salt, and pepper for dressing.
  • Pour dressing over salad and toss gently to combine.
  • Serve immediately or refrigerate to meld flavors.

Notes

For extra flavor, add a squeeze of fresh lime before serving.
Calories: 350kcal
Cost: $12
Course: Salad
Cuisine: Mexican
Keyword: Quinoa

Welcome to the Heart of Summer: The Ultimate Fruit Salad

As the sun shines brightly and the days grow longer, there’s nothing quite like a fresh, vibrant fruit salad to celebrate the season. This ultimate fruit salad combines juicy, colorful fruits with a zesty dressing that elevates each bite, bringing warmth and joy to family gatherings or quiet afternoons. Every spoonful takes you back to those cherished moments spent with loved ones, reminding us that the kitchen is truly a place of connection and love. Join me as we create a dish that not only tastes incredible but also embodies the spirit of summer!

Why You’ll Love This Recipe

  • Versatile and Customizable: You can mix and match your favorite fruits, ensuring that each fruit salad is unique to your taste and the season.
  • Quick to Prepare: With just a few simple steps, you can whip up a delicious fruit salad in under 20 minutes, making it the perfect last-minute addition to any meal.
  • Healthful and Nourishing: Packed with vitamins and antioxidants, this salad is a refreshing, guilt-free treat that nourishes both body and soul.
  • Perfect for Any Occasion: Whether it’s a barbecue, picnic, or a cozy family dinner, this fruit salad shines as a delightful side dish or a light dessert.
  • Family-Friendly: Kids and adults alike will love the colorful presentation and sweet flavors, making it a hit for all ages.

Ingredients

To create this ultimate fruit salad, gather the following ingredients:

  • 3 cups watermelon (peeled and cubed)
  • 2 cups red grapes
  • 4 kiwi (peeled and chopped)
  • 2 cups pineapple (peeled, cored, and chopped)
  • 2 cups strawberries (hulled and quartered)
  • 2 cups blueberries
  • 2 cups blackberries
  • ½ cup pomegranate seeds
  • 1 teaspoon lime zest
  • 2 tablespoons lime juice
  • 2 tablespoons orange juice
  • 1 tablespoon honey
  • 1 teaspoon vanilla extract

Choosing the Right Fruits

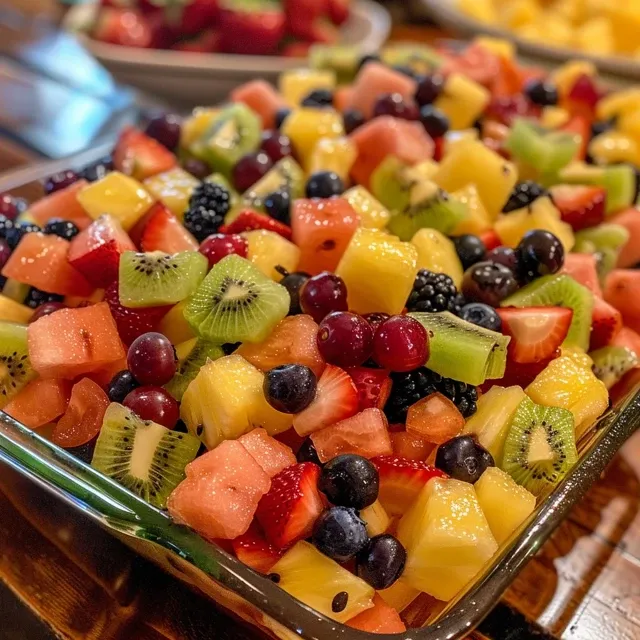
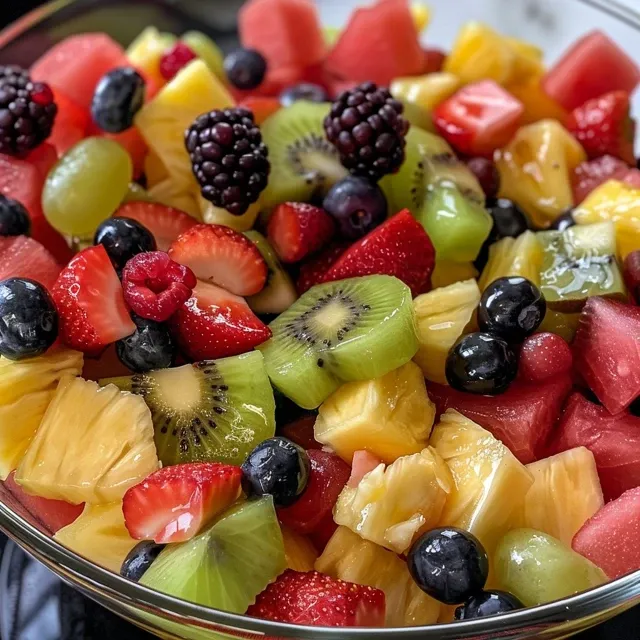
A bowl filled with a variety of fruits, showcasing bright colors and textures.

When selecting fruits for your salad, look for ones that are ripe and in season, as they will have the best flavor and texture. Here are some tips to help you:

  • Freshness is Key: Choose fruits that feel firm and smell fragrant. Avoid any bruised or overly soft fruits.
  • Color and Variety: A mix of colors not only looks appealing but also ensures a range of nutrients. Think about contrasting textures as well—crunchy apples, soft berries, and juicy melons.
  • Seasonal Selections: In summer, opt for berries, melons, and stone fruits. In fall, consider apples and pears. This recipe is versatile and can be adapted to include whatever is fresh.

How to Make the Ultimate Fruit Salad

Creating this delectable fruit salad is a breeze! Just follow these simple steps:

  1. Begin by prepping your fruit. It’s essential to cut the fruit into uniform sizes to ensure that each piece is equally coated with the dressing.
  2. In a large bowl, add your fruit and stir gently with a large spoon to combine.
  3. Next, prepare the dressing. In a small bowl, whisk together the lime zest, lime juice, orange juice, honey, and vanilla extract until well combined.
  4. Drizzle the dressing over the prepared fruit and stir gently to combine, being careful not to mash the fruit.
  5. This fruit salad can be served immediately or covered in plastic wrap and stored in the refrigerator until ready to serve.
  6. For an extra touch, garnish with fresh mint before serving.

Pro Tips for the Best Fruit Salad

  • Chill your fruits: For a refreshing experience, chill your fruits in the refrigerator for about an hour before preparing the salad.
  • Don’t overmix: Gently toss the fruit with the dressing to keep the pieces intact and appealing.
  • Experiment with herbs: Fresh mint or basil can add a unique flavor twist to your fruit salad.
  • Use a variety of textures: Combine soft fruits with crunchy ones like apples or pears for a delightful bite.
  • Make it colorful: Aim for a rainbow of fruits to make the salad visually stunning and appealing.
  • Adjust sweetness: Depending on the ripeness of your fruit, you may want to adjust the honey in the dressing to taste.
  • Incorporate nuts or seeds: For added crunch and protein, consider sprinkling some chopped nuts or seeds on top before serving.
  • Use citrus zest: Beyond lime, try adding the zest of oranges or lemons for an extra layer of flavor.

Common Mistakes and Troubleshooting

Even the best cooks can have hiccups! Here are some common pitfalls and how to avoid them:

  • Using overripe fruit: Overripe fruit can make your salad mushy. Always choose fruit that is fresh and firm.
  • Too much dressing: A little goes a long way. Start with a small amount of dressing and add more if needed.
  • Not chilling: Serving your salad warm can diminish its refreshing quality. Chill your ingredients for the best taste.
  • Skipping the zest: Adding citrus zest enhances the flavor of the dressing. Don’t skip this step!

Variations to Try

Feel free to get creative with your ultimate fruit salad. Here are some variations to inspire you:

  • Tropical Twist: Add mango, papaya, and coconut flakes for a refreshing tropical flavor.
  • Berry Delight: Use a mix of raspberries, strawberries, blueberries, and blackberries, drizzled with a berry vinaigrette.
  • Citrus Medley: Incorporate segments of orange, grapefruit, and lemon for a tangy and invigorating twist.
  • Nutty Crunch: Add a handful of chopped almonds or walnuts for an extra crunch and protein boost.

Storage and Make-Ahead Instructions

You can prepare this salad ahead of time, making it perfect for gatherings:

  • Make-ahead: Prepare the fruit and dressing separately. Combine them just before serving to maintain freshness.
  • Storage: Store leftovers in an airtight container in the refrigerator for up to 2 days. Note that some fruits may release juice and make the salad watery.

Frequently Asked Questions

Here are some common questions about making the ultimate fruit salad:

  • Can I make the fruit salad ahead of time?: Yes, but it’s best to keep the dressing separate until just before serving.
  • Can I use frozen fruit instead of fresh?: Frozen fruit can be used, but it may create extra moisture. Thaw and drain before adding to the salad.
  • Can I add sugar to the dressing?: If you prefer a sweeter dressing, add a little extra honey or sugar to taste.
  • Can I substitute other fruits for the ones listed?: Absolutely! Use any fruits you enjoy or have on hand.
  • How long will the fruit salad keep in the refrigerator?: It can last up to 2 days, but for the best flavor and texture, enjoy it fresh!
  • What can I use instead of honey?: Maple syrup or agave nectar can be great substitutes if you prefer a vegan option.
  • Can I serve this fruit salad in cups?: Yes! For parties, individual fruit salad cups are a lovely presentation.
  • What equipment do I need?: A sharp knife, cutting board, large mixing bowl, and whisk are all you need for this recipe.

Nutrition Tips and Dietary Adaptations

This fruit salad is naturally healthy, but here are some tips to enhance its nutritional value:

  • Boost Fiber: Include fruits like apples or pears, which are rich in dietary fiber.
  • Reduce Sugar: Opt for low-sugar fruits like berries to keep it light.
  • Gluten-Free and Vegan: This recipe is naturally gluten-free and can easily be made vegan by using plant-based sweeteners.

Serving Suggestions

To make your fruit salad even more special, consider these serving ideas:

  • Garnish with Fresh Herbs: A sprinkle of mint or basil adds a refreshing touch.
  • Pair with Yogurt: Serve alongside a dollop of Greek yogurt for added creaminess and protein.
  • Incorporate Granola: For a crunchy topping, add some granola or crushed nuts just before serving.

In closing, the ultimate fruit salad is not just a dish; it’s a celebration of flavors and memories, a true testament to the joy of cooking and sharing with loved ones. I hope you enjoy making this recipe as much as I enjoyed sharing it with you. May it bring warmth to your heart and smiles to your table, just as it has done for mine!

The Ultimate Fruit Salad

Prep Time 15 minutes
Total Time 15 minutes
Servings 4 servings
Calories 250
A refreshing and colorful fruit salad perfect for any occasion, combining a variety of fresh fruits with a zesty lime and orange dressing.

Ingredients

Fruits

  • 3 cups watermelon (peeled and cubed)
  • 2 cups red grapes
  • 4 pieces kiwi (peeled and chopped)
  • 2 cups pineapple (peeled, cored and chopped)
  • 2 cups strawberries (hulled and quartered)
  • 2 cups blueberries
  • 2 cups blackberries
  • ½ cup pomegranate seeds
  • 1 teaspoon lime zest
  • 2 tablespoons lime juice
  • 2 tablespoons orange juice
  • 1 tablespoon honey
  • 1 teaspoon vanilla extract

Instructions 

  • Prep the fruit by cutting into uniform pieces.
  • Combine all fruit in a large bowl.
  • Mix lime zest, lime juice, orange juice, honey, and vanilla to make the dressing.
  • Pour dressing over fruit and toss gently.
  • Serve immediately or chill before serving.
Notes

Use fresh mint for garnish if desired.
Calories: 250kcal
Cost: $15
Course: Dessert, Salad
Cuisine: International
Keyword: Fruit, Healthy

The Heart of Summer: A Classic Macaroni Salad Recipe

Ah, macaroni salad—a dish that brings back fond memories of sun-soaked picnics and family gatherings. This classic macaroni salad recipe embodies the essence of summer, with its vibrant colors and delicious flavors. It’s more than just a side dish; it’s a celebration of togetherness, a way to connect with loved ones over a shared meal. In this article, we’ll dive deep into how to create the perfect macaroni salad that not only tastes incredible but also warms the heart.

Why You’ll Love This Recipe

This macaroni salad stands out for a myriad of reasons:

  • Flavorful medley: Combining fresh vegetables with creamy dressing creates a delightful explosion of flavors in each bite.
  • Customizable: You can easily adapt this recipe to suit your taste preferences or dietary needs.
  • Make-ahead convenience: This salad tastes even better when made ahead, allowing flavors to meld beautifully.
  • Perfect for gatherings: A crowd-pleaser that’s always a hit at summer barbecues, potlucks, and family reunions.
  • Hearty and satisfying: This dish is filling, making it a great addition to any meal or served alone as a light lunch.

Ingredient Breakdown

Let’s explore the ingredients that come together to make this delicious macaroni salad. Each component plays a crucial role in crafting the perfect dish.

  • Elbow Noodles (1 lb): The classic choice for macaroni salad. You can substitute with whole grain or gluten-free pasta for a healthier option.
  • Diced Red Pepper (1 1/2 cups): Adds a pop of color and sweetness. You can also use bell peppers of any color.
  • Diced Red Onion (1 1/4 cups): Provides a sharp, tangy flavor. If you prefer a milder taste, use green onions instead.
  • Chilled Peas (1 cup): Fresh or frozen peas add a lovely texture. If you’re in a hurry, microwave them for a minute before adding.
  • Diced Celery (1 cup): For that satisfying crunch. You can replace it with chopped cucumbers for a refreshing twist.
  • Cubed Sharp Cheddar (4 oz) and Colby Jack Cheese (4 oz): These cheeses bring richness and creaminess. Feel free to swap with your favorite cheeses!
  • Olive Oil Mayonnaise (1 cup): The base of our creamy dressing. Substitute with Greek yogurt for a lighter option.
  • Distilled White Vinegar (1/4 cup): Adds acidity and brightness. Apple cider vinegar is a great alternative.
  • Dijon Mustard (2 tbsp): For a hint of tanginess. You can experiment with different mustards for varied flavor.
  • Sweet Pickle Relish (1 tbsp): This gives the salad a sweet and tangy kick. If you prefer less sweetness, reduce the amount.
  • Dill Pickles (1/4 cup): Chopped for another layer of flavor. You can use bread-and-butter pickles if you like it sweeter.
  • Dried Dill Weed (1/4 tsp): Complements the flavors beautifully. Fresh dill can also be used for extra freshness.
  • Fresh Chives (1/3 cup): Adds a delightful onion flavor. Green onions can work in their place.
  • Sea Salt and Fresh Cracked Black Pepper: To taste. Always season according to your preference.
  • Sugar (1 tsp): Balances flavors; adjust based on your sweetness preference.

Pro Tips for the Perfect Macaroni Salad

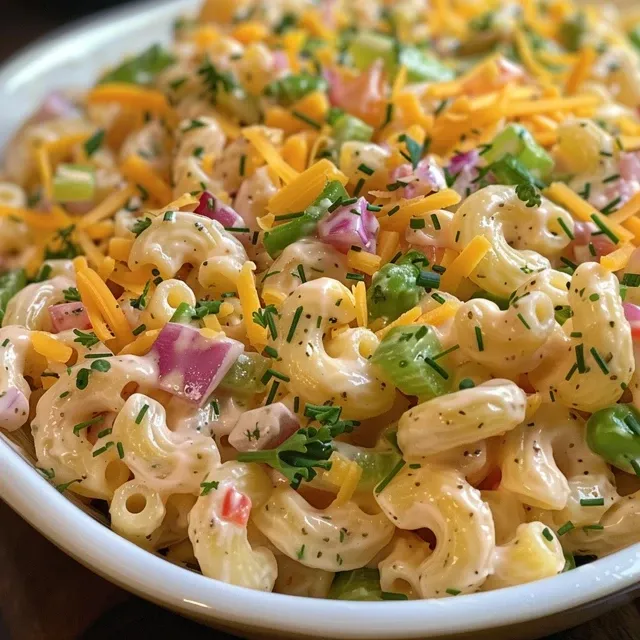
Vibrant image of a Classic Macaroni Salad loaded with red peppers, celery, and cheese cubes.

To ensure your macaroni salad turns out perfectly, consider these expert tips:

  • Chill the noodles: After cooking, toss the noodles with olive oil and chill for 1-2 hours. This prevents them from sticking together and enhances texture.
  • Customize the dressing: Experiment with the dressing ingredients; add a splash of lemon juice for added brightness.
  • Mix well: When combining the pasta and dressing, ensure everything is well coated for the best flavor in every bite.
  • Taste as you go: Adjust seasonings and sweetness while mixing to achieve your desired flavor.
  • Let it rest: Allow the salad to chill for at least 30 minutes after mixing to deepen the flavors.
  • Garnish before serving: Top your salad with fresh herbs like chives or parsley for an appealing presentation.
  • Adjust for dietary needs: Use vegan mayo or low-fat options if you have specific dietary preferences.
  • Serve at the right temperature: Macaroni salad is best served cold; keep it refrigerated until ready to enjoy.

Avoiding Common Mistakes

Even the best recipes can go awry. Here are some common pitfalls and how to troubleshoot them:

  • Overcooked noodles: Cook pasta just until al dente. If overcooked, the salad may become mushy.
  • Too much dressing: Start with less dressing and add more gradually to avoid overpowering the other flavors.
  • Unbalanced flavors: Taste and adjust seasoning as needed. A little extra salt or vinegar can make a world of difference.
  • Skipping the chill time: If you skip chilling, the flavors won’t meld, resulting in a less flavorful salad.

Delicious Variations to Try

While the classic version is delightful, don’t hesitate to explore these creative variations:

  • Italian Twist: Add sliced salami, olives, and Italian herbs for a Mediterranean flair.
  • Southwestern Style: Incorporate black beans, corn, and diced jalapeños for a spicy kick.
  • Fruit and Nut Delight: Mix in diced apples, grapes, and walnuts for a sweet and crunchy salad.
  • Vegan Version: Substitute all dairy ingredients with plant-based alternatives for a delicious vegan macaroni salad.

Storing and Make-Ahead Instructions

This macaroni salad is perfect for preparing in advance:

  • Refrigerator storage: Store in an airtight container for up to 3 days. The flavors will continue to develop!
  • Make-ahead tip: Prepare the salad a day before your gathering. Just give it a good stir before serving.

FAQs About Macaroni Salad

Here are some frequently asked questions regarding macaroni salad:

  • Can I make macaroni salad a day ahead? Yes! In fact, it tastes even better after resting overnight in the refrigerator.
  • What type of pasta is best for macaroni salad? Elbow macaroni is traditional, but you can use rotini or shells for a fun twist.
  • Can I freeze macaroni salad? It’s not recommended to freeze macaroni salad as the texture may change upon thawing.
  • What can I add for extra flavor? Fresh herbs, such as dill or parsley, or even a touch of hot sauce can enhance the flavor.
  • How do I prevent my salad from getting soggy? Ensure the noodles are fully cooled before adding the dressing, and keep the salad chilled.
  • Is macaroni salad gluten-free? You can use gluten-free pasta to make this salad suitable for a gluten-free diet.
  • Can I use yogurt instead of mayonnaise? Absolutely! Greek yogurt is a great substitute for a healthier option.
  • What’s the best way to serve macaroni salad? Serve it chilled, garnished with fresh herbs for an appealing look.

Nutritional Insights and Dietary Adaptations

This macaroni salad can cater to various dietary needs:

  • Low-calorie: Use light mayonnaise or Greek yogurt for a lighter version.
  • High-protein: Add diced chicken or chickpeas for a protein boost.
  • Vegetarian-friendly: Keep it vegetarian by using plant-based mayonnaise and omitting any meat.

Essential Equipment Recommendations

To make this macaroni salad, you’ll need a few basic kitchen tools:

  • Large pot: For boiling the pasta.
  • Colander: To drain the cooked pasta easily.
  • Mixing bowl: A large bowl to combine all ingredients.
  • Whisk: For mixing the dressing until smooth.

Serving Suggestions

Macaroni salad is incredibly versatile. Here are some ideas for serving:

  • As a side dish: Pair it with grilled meats or sandwiches for a well-rounded meal.
  • On a picnic: Pack it for outdoor gatherings, where it can shine as a refreshing dish.
  • For lunch: Enjoy it on its own or as part of a salad bowl with greens and protein.

In conclusion, this classic macaroni salad recipe is more than just a dish; it’s a heartfelt connection to summer memories, family traditions, and the simple joys of cooking. Whether you’re making it for a crowd or just for yourself, remember that each ingredient is a part of a story. So gather your loved ones, share a meal, and let the flavors of this macaroni salad bring everyone together around the table. Happy cooking!

Classic Macaroni Salad recipe

Prep Time 20 minutes
Cook Time 10 minutes
Total Time 30 minutes
Servings 8 servings
Calories 450
A creamy and flavorful macaroni salad perfect for picnics and gatherings, combining fresh vegetables, cheeses, and a tangy dressing.

Ingredients

Pasta

  • 1 lb elbow noodles
  • 1.5 cup diced red pepper
  • 1.25 cup diced red onion
  • 1 cup blanched or lightly microwaved, chilled peas
  • 1 cup diced celery
  • 4 oz cubed sharp cheddar
  • 4 oz cubed Colby jack cheese
  • 1 cup olive oil mayonnaise
  • 0.5 tbsp extra virgin olive oil (to toss noodles before chilling)
  • 0.25 cup distilled white vinegar
  • 2 tbsp Dijon mustard
  • 1 tbsp sweet pickle relish
  • 0.25 cup diced dill pickles
  • 0.25 tsp dried dill weed
  • 0.33 cup fresh diced chives
  • 0.5 tsp course sea salt
  • 0.125 tsp fresh cracked black pepper
  • 1 tsp sugar

Instructions 

  • Cook the noodles in salted water until al dente, then drain and toss with olive oil. Chill for 1-2 hours.
  • Mix mayonnaise, vinegar, mustard, relish, pickles, sugar, dill, chives, salt, and pepper to make the dressing.
  • Combine chilled noodles with vegetables and cheeses, then pour dressing over. Chill for 30 minutes before serving.

Notes

Adjust seasoning and chill thoroughly before serving for best flavor.
Calories: 450kcal
Cost: $15
Course: Salad
Cuisine: American
Keyword: Macaroni, Salad

Welcome to a Heartfelt Journey with Avocado Chicken Salad

Ah, the joy of cooking! There’s something deeply comforting about preparing a dish that not only nourishes the body but also warms the soul. Today, I invite you to join me in crafting a delightful avocado chicken salad that whispers of summer gatherings, laughter, and love. This recipe is a beautiful blend of ripe avocados, tender chicken, and vibrant vegetables—a meal that embodies the spirit of sharing.

Whether you’re planning a picnic or a cozy family dinner, this healthy avocado chicken salad is sure to become a cherished favorite. With its fresh flavors and heartfelt memories, let’s dive into the details of what makes this salad so special!

Why You’ll Love This Recipe

Here are just a few reasons why this avocado chicken salad will win over your taste buds:

  • Quick and Easy: This salad comes together in just 30 minutes, making it perfect for busy weeknights or last-minute gatherings.
  • Fresh and Flavorful: The creamy avocado pairs beautifully with the tender chicken and crunchy veggies, creating a delightful taste experience.
  • Nutritious and Wholesome: Packed with healthy fats, lean protein, and vitamins, this salad is a powerhouse of nutrition.
  • Versatile: Customize it with your favorite ingredients or leftovers, ensuring every bite is tailored to your taste.
  • Meal Prep Friendly: Make it ahead of time for easy lunches or snacks throughout the week.

Key Ingredients for the Perfect Avocado Chicken Salad

Let’s explore the ingredients that come together to create this delightful dish. Each element plays a vital role in flavor and texture.

  • Avocados: Use 2 large ripe avocados for a creamy base. Look for avocados that are slightly soft to the touch.
  • Chicken: You’ll need 2 cups of cooked chicken breast (about 2 medium breasts), diced. Feel free to use rotisserie chicken to save time!
  • Cherry Tomatoes: ½ to 1 cup of halved cherry or grape tomatoes adds a burst of sweetness.
  • Red Onion: ¼ cup of finely diced red onion provides a sharp contrast to the creaminess.
  • Celery: ¼ cup of finely diced celery adds crunch and freshness.
  • Red Bell Pepper: ¼ cup of diced red bell pepper brings color and sweetness.
  • Cilantro: 2 tablespoons of chopped fresh cilantro enhances the flavor profile with a hint of earthiness.
  • Lime Juice: 2 tablespoons of lime juice brightens the salad and keeps the avocados from browning.
  • Garlic Powder: ¼ teaspoon of garlic powder adds depth to the flavor.
  • Greek Yogurt: For added creaminess, ¼ cup of Greek yogurt is optional but highly recommended.
  • Salt and Pepper: Season to taste for that perfect flavor balance.

Step-by-Step Instructions to Make Your Salad

Side view of a delicious avocado chicken salad with bright colors and textures.

Now that we have our ingredients ready, let’s walk through the steps to create this delicious dish:

  1. If starting with raw chicken, season it with salt and pepper, then grill or bake until cooked through (internal temperature of 165°F or 74°C). Let it cool, then dice into small cubes.
  2. Cut the avocados in half, remove the pit, and scoop the flesh into a large bowl.
  3. Mash the avocado with a fork until it reaches your desired consistency (smooth or slightly chunky).
  4. Add the diced chicken, halved cherry or grape tomatoes, red onion, celery, and red bell pepper to the bowl with the mashed avocado.
  5. Sprinkle in the chopped cilantro, lime juice, garlic powder, salt, and pepper.
  6. If using, add the Greek yogurt for extra creaminess.
  7. Gently fold all ingredients together until well combined.
  8. Taste and adjust seasoning as needed, adding more lime juice, salt, or pepper to your preference.
  9. Serve immediately or chill in the refrigerator for at least 30 minutes to allow flavors to meld.

Pro Tips for the Best Avocado Chicken Salad

To ensure your salad is as delicious as possible, here are some expert tips:

  • Ripe Avocados: Choose avocados that yield slightly to gentle pressure; they should be just ripe enough for mashing.
  • Chicken Variations: For added flavor, consider marinating your chicken in lime juice and spices before cooking.
  • Mix Ingredients Gently: When folding in the ingredients, be gentle to maintain the avocado’s creaminess and avoid mashing everything into mush.
  • Chill Before Serving: Allowing the salad to chill enhances the flavors, making each bite more enjoyable.
  • Serve with Love: Presentation matters! Serve on a bed of greens or in a colorful bowl to make it visually appealing.
  • Customize: Feel free to add other favorites like diced apples, nuts for crunch, or even cooked bacon for a smoky flavor.
  • Storing Leftovers: While best enjoyed fresh, leftovers can be stored in an airtight container in the refrigerator for 1-2 days. Add a splash of lime juice before serving to refresh the flavors.
  • Experiment with Herbs: Try using fresh dill or parsley instead of cilantro for a different flavor twist.
  • Season Gradually: Start with less salt and pepper, tasting as you go; it’s easier to add than to take away!
  • Use Fresh Ingredients: Whenever possible, opt for fresh produce; it makes a world of difference in flavor.

Creative Variations to Keep Your Meals Exciting

Let’s get creative! Here are some variations to your avocado chicken salad that will keep things fresh:

  • Avocado Chicken Salad with Bacon: Add crispy bacon bits for a salty crunch.
  • Mediterranean Twist: Incorporate olives, feta cheese, and a dash of oregano for a Mediterranean flair.
  • Spicy Avocado Chicken Salad: Mix in diced jalapeños or a splash of hot sauce for some heat.
  • Avocado Chicken Salad Lettuce Wraps: Serve the salad in crisp lettuce leaves for a low-carb option.

Storing and Make-Ahead Instructions

This avocado chicken salad can be made ahead of time, making it a perfect choice for meal prep. Here’s how to store it properly:

  • Refrigerate: Store in an airtight container in the refrigerator for up to 2 days.
  • Freshening Up: If the avocados start to brown, add a little more lime juice to refresh the color and flavor.
  • Freezing: While it’s not recommended to freeze avocado chicken salad due to the texture changes, you can freeze cooked chicken separately for future meals.

Frequently Asked Questions

Here are some common questions about making avocado chicken salad:

  • Can I use canned chicken? Yes, canned chicken works in a pinch. Just drain and shred it before adding to the salad.
  • Can I double or triple the recipe? Absolutely! This salad is easy to scale to feed a crowd.
  • Can I freeze avocado chicken salad? It’s not ideal to freeze due to the avocado; however, you can freeze the chicken separately.
  • What can I substitute for Greek yogurt? You can use sour cream or a vegan yogurt alternative for a dairy-free option.
  • How do I prevent the avocado from browning? A sprinkle of lime juice helps keep the avocado vibrant and fresh.
  • Can I add fruits to the salad? Yes! Apples, grapes, or even mango can add a sweet touch.
  • What should I serve with avocado chicken salad? It pairs well with crusty bread, crackers, or on a bed of greens.
  • Is this salad gluten-free? Yes, all the ingredients are naturally gluten-free, making it suitable for those with gluten sensitivities.

Nutritional Tips and Dietary Adaptations

This avocado chicken salad is not only delicious but also packed with nutrients:

  • Healthy Fats: Avocados provide monounsaturated fats that are heart-healthy.
  • Protein Power: The chicken offers a lean source of protein that keeps you full and satisfied.
  • Fiber-Rich: The addition of vegetables ensures you get plenty of fiber, supporting digestion.
  • Dairy-Free Option: Substitute Greek yogurt with a plant-based yogurt to make it dairy-free.
  • Low-Carb Friendly: Serve in lettuce wraps or enjoy on its own for a low-carb meal.

Essential Equipment for Making This Salad

Before you get started, gather these kitchen essentials:

  • Mixing Bowl: A large bowl for combining all the ingredients.
  • Fork: For mashing the avocados to your desired consistency.
  • Cutting Board and Knife: For chopping vegetables and chicken.
  • Measuring Cups and Spoons: To ensure you’re adding the right amounts.

Serving Suggestions

Now that your salad is ready, here are some delightful ways to serve it:

  • On a Bed of Greens: Serve over fresh mixed greens or spinach for a refreshing salad.
  • In a Sandwich: Use it as a filling for sandwiches or wraps for a quick lunch.
  • With Crackers: Pair with whole-grain crackers for a satisfying snack or appetizer.
  • As a Side Dish: Perfect alongside grilled meats or as part of a summer picnic spread.

Conclusion

Cooking is an act of love, and this heartfelt avocado chicken salad is a testament to that. With each bite, you’ll be reminded of summer gatherings with family and friends, laughter echoing around the table. I hope this recipe brings you joy, warmth, and a sense of connection. So grab your ingredients, gather around the kitchen, and let the memories unfold as you create this delightful dish. Happy cooking!

Healthy Avocado Chicken Salad Recipe

Prep Time 15 minutes
Cook Time 20 minutes
Total Time 35 minutes
Servings 4 servings
Calories 350
A nutritious and delicious salad combining creamy avocados, tender chicken, and fresh vegetables, perfect for a quick lunch or light dinner.

Ingredients

Main

  • 2 large ripe avocados
  • 2 cups cooked chicken breast (diced) ((about 2 medium breasts))
  • ½ to 1 cup cherry or grape tomatoes (halved)
  • ¼ cup red onion (finely diced)
  • ¼ cup celery (finely diced)
  • ¼ cup red bell pepper (diced)
  • 2 tablespoons fresh cilantro (chopped)
  • 2 tablespoons lime juice
  • ¼ teaspoon garlic powder
  • to taste Salt and black pepper
  • ¼ cup Greek yogurt for extra creaminess

Instructions 

  • If raw, season chicken with salt and pepper, then cook until internal temperature reaches 165°F (74°C). Cool and dice.
  • Halve the avocados, remove pits, and scoop flesh into a bowl. Mash to desired consistency.
  • Add cooked chicken, tomatoes, red onion, celery, and bell pepper to the bowl.
  • Stir in cilantro, lime juice, garlic powder, salt, pepper, and Greek yogurt if using. Mix well.
  • Serve immediately or chill for 30 minutes to meld flavors.

Notes

For extra flavor, add a dash of hot sauce or additional lime juice.
Calories: 350kcal
Cost: $15
Course: Salad
Cuisine: American
Keyword: Avocado, Chicken, Healthy

Welcome to the Joy of Cooking Cowboy Cabbage

There’s something heartwarming about gathering around a table, sharing stories and laughter over a delicious meal. Today, we’re diving into a recipe that embodies that spirit—Frito Cowboy Cabbage. This dish is a delightful medley of crunchy veggies, savory beans, and a creamy chipotle dressing that brings together bold flavors in a way that feels both nostalgic and fresh. Whether you’re preparing for a family gathering, a summer picnic, or just a cozy night at home, this recipe is sure to spark joy with every bite.

In this comprehensive guide, we’ll explore everything you need to know about making Frito Cowboy Cabbage, from ingredient breakdowns and tips for success to variations that will keep your tastebuds excited. Let’s roll up our sleeves and create a dish that’s not just a meal, but a celebration of love and togetherness.

Why You’ll Love This Frito Cowboy Cabbage Recipe

This recipe is more than just a salad; it’s a vibrant experience that captures the essence of comfort food. Here are five reasons why you’ll adore it:

  • Quick and Easy Preparation: With minimal chopping and mixing required, you can whip up this dish in under 30 minutes, making it perfect for busy days.
  • Flavor Explosion: The combination of crunchy veggies, zesty chipotle dressing, and chili cheese Fritos creates a flavor profile that’s both exciting and comforting.
  • Versatile and Adaptable: Whether you want to serve it cold as a refreshing salad or warm as a cozy dish, this recipe can easily be modified to suit your preferences.
  • Budget-Friendly: Most of the ingredients are inexpensive and can be found at your local grocery store, allowing you to feed a crowd without breaking the bank.
  • Perfect for Sharing: This dish makes a generous amount, making it ideal for potlucks, gatherings, or family dinners where sharing is key.

Ingredient Breakdown and Substitutions

Let’s take a closer look at the ingredients that bring this Frito Cowboy Cabbage to life, along with some thoughtful substitutions:

  • Coleslaw Mix: This forms the crunchy base of the salad. You can also use freshly shredded cabbage if you prefer a homemade touch.
  • Black Beans: Rinsed and drained, they add protein and creaminess. If you don’t have black beans, kidney or pinto beans work wonderfully.
  • Canned Corn: Adds a touch of sweetness. Fresh corn, when in season, is a fantastic substitute.
  • Jalapeño Pepper: For a bit of heat. If you’re averse to spice, consider using a mild bell pepper instead.
  • Red Bell Pepper: Adds sweetness and color. You can also use yellow or orange bell peppers for a different twist.
  • Green Onions: These provide a fresh bite. Chives can be used if you want a milder flavor.
  • Fresh Cilantro: This herb brightens up the dish. If you’re not a fan of cilantro, parsley can be a suitable alternative.
  • Taco Seasoning and Ground Cumin: These spices add depth to the flavors. You can use homemade taco seasoning for a personal touch.
  • Chili Cheese Fritos: These provide a delightful crunch. If you want a healthier option, consider using baked tortilla chips.
  • Sour Cream and Mayonnaise: These create a creamy dressing. Greek yogurt can be a lighter alternative.
  • Fresh Lime Juice: Brightens the whole dish. Bottled lime juice can be used in a pinch, but fresh is always best.
  • Chipotle Sauce: This adds a smoky kick. If unavailable, a little smoked paprika mixed with hot sauce can do the trick.

Expert Pro Tips for Perfect Frito Cowboy Cabbage

Detailed close-up of Frito Cowboy Cabbage, highlighting black beans and jalapeños.

To help you create the best version of this dish, here are some expert insights:

  • Chill Your Ingredients: For the freshest taste, chill the coleslaw mix and dressing before assembling the salad.
  • Layer Flavors: When mixing the salad, add ingredients in layers to ensure an even distribution of flavors.
  • Freshness is Key: Use the freshest vegetables you can find to enhance the taste and texture of the salad.
  • Customize Your Crunch: Feel free to add additional crunch with nuts or seeds, like sunflower seeds or chopped almonds.
  • Adjust the Heat: If you prefer less heat, remove the seeds from the jalapeño or use fewer Fritos.
  • Make Ahead: This salad can be made in advance, but add the Fritos just before serving to maintain their crunch.
  • Garnish for Presentation: Top with extra cilantro or a squeeze of lime for a beautiful finish.
  • Serve with Love: Remember, this dish is best enjoyed when shared, so gather your loved ones around the table!

Avoiding Common Mistakes

Here are some pitfalls to watch out for when making Frito Cowboy Cabbage:

  • Overmixing: Be gentle when combining the salad with the dressing to avoid turning it into a mushy mess.
  • Adding Fritos Too Early: To keep the Fritos crunchy, always add them just before serving.
  • Skipping the Dressing: The dressing is what ties the dish together, so don’t skip it!
  • Using Old Ingredients: Fresh ingredients make a world of difference; check dates on canned goods and produce.
  • Not Tasting Before Serving: Always taste before serving to adjust seasoning and flavors to your liking.

Variations to Try

Feel free to mix things up with these creative variations:

  • Mexican Street Corn Version: Add crumbled cotija cheese and a sprinkle of chili powder for a street-corn-inspired twist.
  • Southwestern Style: Incorporate diced avocado and switch up the dressing with ranch for a different flavor profile.
  • Vegan Alternative: Use vegan mayo and plant-based sour cream to make this dish vegan-friendly.
  • Spicy Kick: Add diced serrano peppers or a dash of hot sauce to the dressing for extra heat.

Storage and Make-Ahead Instructions

This dish is perfect for meal prep or make-ahead occasions. Here’s how to store it:

  • Refrigerator: Store leftovers in an airtight container for up to 3 days. Keep Fritos separate until ready to serve.
  • Make-Ahead: Prepare the salad components and dressing separately, combining them just before serving.
  • Freezing: While not recommended due to texture changes, you can freeze the salad without the Fritos for up to a month.

Frequently Asked Questions

Here are some common questions about Frito Cowboy Cabbage:

  • Can I use regular cabbage instead of coleslaw mix? Yes, feel free to shred your own cabbage for a fresher taste.
  • Is this recipe spicy? The level of spice can be adjusted based on the amount of jalapeño and chipotle sauce used.
  • How long can I store leftovers? Leftovers can be refrigerated for up to 3 days, but the Fritos should be added just before serving.
  • Can I make this recipe gluten-free? Yes, just ensure your Fritos are gluten-free or use a suitable alternative.
  • What can I serve with this dish? Frito Cowboy Cabbage pairs well with grilled meats, tacos, or as a stand-alone meal.
  • Can I add other vegetables? Absolutely! Feel free to include diced cucumbers, shredded carrots, or any other desired veggies.
  • How can I make the dressing healthier? Substitute Greek yogurt for sour cream for a lighter option.
  • What if I can’t find chipotle sauce? You can make a homemade version using smoked paprika mixed with hot sauce.

Nutritional Tips and Dietary Adaptations

This recipe can easily accommodate various dietary needs:

  • Low-Calorie Option: Use light mayonnaise and reduced-fat sour cream to cut calories.
  • High-Protein Version: Add grilled chicken or turkey for a heartier meal.
  • Vegetarian-Friendly: The base recipe is vegetarian, but always double-check your Fritos for meat-based flavorings.
  • Low-Carb Adaptation: Substitute beans with diced zucchini and skip the Fritos for a low-carb twist.

Equipment Recommendations

To make your cooking experience seamless, here are some handy tools:

  • Large Mixing Bowl: Essential for combining all the salad ingredients together.
  • Whisk: Perfect for mixing the dressing ingredients until smooth.
  • Measuring Cups and Spoons: Ensure accuracy in your ingredients for the best results.
  • Sharp Knife and Cutting Board: For chopping veggies and preparing the fresh ingredients.

Serving Suggestions

When it comes to serving this delightful dish, consider the following:

  • Chilled or Warm: Serve it cold for a refreshing salad or warm for a cozy twist.
  • Garnish: Top with fresh cilantro or a sprinkle of lime zest for a beautiful presentation.
  • Family Style: Serve in a large bowl, allowing everyone to help themselves, creating a communal dining experience.
  • Pairing Beverages: Complement the flavors with a light beer or a refreshing iced tea.

Conclusion: A Recipe to Cherish

Frito Cowboy Cabbage is not just a dish; it’s a heartwarming reminder of the joy of cooking and sharing meals with loved ones. Each ingredient tells a story, from the crunch of fresh vegetables to the creamy chipotle dressing that ties it all together. As you gather around the table, remember that cooking is an act of love, and this recipe embodies that sentiment perfectly. So, grab your loved ones, whip up a batch, and enjoy the moments that matter most. Happy cooking!

Frito Cowboy Cabbage

Prep Time 15 minutes
Total Time 15 minutes
Servings 4 servings
Calories 350
A vibrant and crunchy cabbage salad topped with chili cheese Fritos and a smoky chipotle dressing, perfect for a quick, flavorful meal.

Ingredients

Vegetables and Beans

  • 16 ounces coleslaw mix
  • 15 ounces black beans (rinsed, drained)
  • 247.5 grams canned corn kernels (drained)
  • 1 medium jalapeño pepper (seeded and finely diced)
  • 1 small red bell pepper (seeded and finely diced)
  • 3 green onions green onions (finely sliced)
  • 0.25 cup fresh cilantro (finely chopped)
  • 1 tablespoon taco seasoning
  • 0.5 teaspoon ground cumin
  • 9.75 ounces Chili Cheese Fritos (reserving a handful for topping)
  • 0.5 cup sour cream
  • 0.5 cup mayonnaise
  • 0.25 cup fresh lime juice (about 2 limes)
  • 2 tablespoons chipotle sauce (from a can of chipotles in adobo, just the sauce)

Instructions 

  • Combine coleslaw mix, black beans, corn, jalapeño, red bell pepper, green onions, cilantro, taco seasoning, and cumin in a large bowl. Toss to combine.
  • Whisk together sour cream, mayonnaise, lime juice, and chipotle sauce in a medium bowl to make the dressing.
  • Pour the dressing over the cabbage mixture and gently stir to coat.
  • Add most of the Fritos, gently mixing to combine.
  • Top with the reserved handful of Fritos just before serving for crunch.
  • Serve immediately for best texture.

Notes

For extra flavor, chill the salad before serving.
Calories: 350kcal
Cost: $15
Course: Salad
Cuisine: American
Keyword: Cabbage, Fritos, Mexican

Discover the Joy of Easy Macaroni Salad

There’s something magical about a bowl of macaroni salad—like a warm hug from your childhood. This easy macaroni salad recipe isn’t just a dish; it’s a tapestry of flavors woven with memories and love. Whether you’re preparing for a family picnic, a summer barbecue, or just a cozy dinner at home, this salad brings people together. In this comprehensive guide, we’ll explore every nook and cranny of making this delightful dish, ensuring you can recreate it with ease and joy.

Why You’ll Love This Recipe

Making this easy macaroni salad is not just about mixing ingredients; it’s about crafting a dish that’s bursting with flavors and memories. Here are five reasons why this recipe is a must-try:

  • Quick and Simple: With minimal prep and cooking time, you can whip this salad up in no time, making it perfect for last-minute gatherings.
  • Customizable: This recipe is a blank canvas! Feel free to add your favorite ingredients or swap them out based on what you have on hand.
  • Serves a Crowd: With just a few ingredients, this salad can feed a large group, making it ideal for potlucks and picnics.
  • Fresh and Flavorful: The combination of creamy dressing and crunchy vegetables creates a delightful texture that will keep you coming back for more.
  • Perfect for Any Occasion: Whether it’s a summer barbecue, holiday feast, or just a family dinner, this macaroni salad fits any table beautifully.

Ingredients Breakdown

Let’s dive into the ingredients you’ll need to make this easy macaroni salad. Each component plays a vital role in building flavor and texture.

  • 1 lb elbow macaroni: The star of the dish, this pasta holds the dressing beautifully and provides a satisfying bite.
  • 6 oz cheddar cheese (cubed): Adds creaminess and a rich flavor. You can use sharp cheddar for more intensity.
  • 1/2 red onion (minced): Offers a subtle crunch and a hint of sharpness; consider using green onions for a milder taste.
  • 4 celery stalks (diced): Brings freshness and a satisfying crunch. If you prefer, you can substitute with diced cucumbers.
  • 1 red bell pepper (diced): For sweetness and color, it’s an essential addition that brightens up the salad.
  • 1 cup frozen peas: These add a pop of sweetness and vibrant green color. They can be substituted with other frozen vegetables like corn.
  • 1/2 cup mayo: The creamy base of the dressing, making everything come together. Greek yogurt can be a healthier alternative.
  • 1/4 cup apple cider vinegar: Adds a tangy note that balances the creaminess of the mayo.
  • 1/4 cup fresh dill: This herb infuses the salad with a fresh, aromatic flavor. If unavailable, dried dill can work too.
  • 2 tablespoons sugar: A hint of sweetness to round out the flavors. Adjust to your taste.
  • 2 tablespoons Dijon mustard: For a touch of zest, enhancing the overall flavor profile.
  • 1 teaspoon salt: Essential for seasoning—always adjust to your taste.
  • 1 teaspoon pepper: For a little heat, complementing the other flavors.

How to Make Easy Macaroni Salad

Juicy macaroni salad with elbow pasta, cheese, and diced vegetables arranged in a bowl.

Now that we have our ingredients ready, let’s get cooking! Follow these simple steps to create a macaroni salad that will become a family favorite.

  1. Cook the elbow macaroni: Boil a large pot of salted water and add the macaroni. Cook until al dente, usually about 8-10 minutes. Drain and rinse under cold water to stop the cooking process.
  2. Prepare the vegetables: While the pasta is cooking, chop your vegetables—red onion, celery, bell pepper, and thaw the peas if frozen.
  3. Make the dressing: In a separate bowl, whisk together the mayo, apple cider vinegar, dill, sugar, Dijon mustard, salt, and pepper until smooth.
  4. Combine everything: In a large mixing bowl, combine the cooked macaroni, veggies, and cubed cheese. Pour the dressing over the top and mix until everything is well-coated.
  5. Chill and serve: Cover the bowl with plastic wrap and chill in the refrigerator for at least an hour. This allows the flavors to meld beautifully.

Expert Tips for the Perfect Salad

Here are some pro tips to elevate your macaroni salad game:

  • Cook pasta properly: Avoid overcooking the macaroni. It should be al dente to maintain a pleasant texture.
  • Chill before serving: Allowing the salad to chill enhances the flavors and makes it more refreshing.
  • Adjust seasoning: Taste before serving! You can always add more salt, pepper, or vinegar to suit your preference.
  • Experiment with herbs: Fresh herbs like parsley or chives can add a lovely flavor twist.
  • Incorporate protein: For a heartier salad, consider adding diced ham, chicken, or even hard-boiled eggs.
  • Presentation matters: Garnish with extra dill or a sprinkle of paprika for a pop of color before serving.
  • Keep it fresh: Use fresh ingredients for the best flavor; frozen veggies can lose their crispness over time.
  • Consider dietary needs: Make a vegan version by substituting mayo with a plant-based alternative.

Common Mistakes and Troubleshooting

Even the best cooks make mistakes! Here’s how to troubleshoot some common issues:

  • Salad too dry: If your salad feels dry, add a splash more mayo or vinegar.
  • Overcooked pasta: This can make your salad mushy. Always aim for al dente when cooking.
  • Flavorless salad: If the flavors seem muted, try adding more dressing or seasoning to brighten it up.
  • Too much vinegar: Balance out with a bit more sugar or mayo if the acidity is overwhelming.

Delicious Variations

Don’t be afraid to get creative! Here are four easy variations to try:

  • Bacon Ranch Macaroni Salad: Mix in crumbled bacon and ranch seasoning for a smoky flavor.
  • Italian Twist: Add diced salami, olives, and Italian herbs for a Mediterranean flair.
  • Spicy Macaroni Salad: Incorporate diced jalapeños or a splash of hot sauce for a kick.
  • Fruit & Nut Delight: Toss in diced apples, grapes, and walnuts for a sweet and crunchy twist.

Storage and Make-Ahead Instructions

This macaroni salad is perfect for making ahead! Here’s how to store it:

  • Refrigeration: Store in an airtight container in the refrigerator for up to 3 days. The flavors will continue to develop.
  • Freezing: It’s not recommended to freeze macaroni salad as the texture of the pasta and veggies can change.
  • Make-Ahead Tip: Prepare the salad a day in advance to let the flavors meld together for a more delicious result.

Frequently Asked Questions

Here are some common questions about macaroni salad:

  • Can I use gluten-free pasta? Yes, gluten-free pasta works well. Just ensure to follow package instructions for cooking.
  • How long can I store macaroni salad? It lasts about 3 days in the refrigerator. Always check for freshness before serving.
  • Can I add meat to this salad? Absolutely! Diced chicken or ham can make this salad heartier.
  • Can I use yogurt instead of mayo? Yes, plain Greek yogurt is a great, healthier alternative.
  • What can I serve with macaroni salad? It pairs well with grilled meats, sandwiches, or as part of a picnic spread.
  • Is this salad suitable for potlucks? Definitely! It’s a crowd-pleaser and easy to transport.
  • Can I make it vegan? Use plant-based mayo and skip any animal products for a vegan version.
  • Should it be served cold or warm? This salad is best served cold, allowing the flavors to shine.

Nutritional Tips and Dietary Adaptations

Making a delicious macaroni salad doesn’t mean you have to compromise on nutrition. Here are some tips:

  • Whole Wheat Pasta: Opt for whole wheat elbow macaroni to increase fiber content.
  • Low-Fat Mayo: Choose low-fat or Greek yogurt for a lighter dressing.
  • Add Veggies: Feel free to increase the veggie content for more nutrients and fiber.
  • Protein Boost: Incorporate beans or chickpeas for a protein-packed salad.

Equipment Recommendations

To make the process smooth, here’s a list of essential equipment:

  • Large Pot: For boiling the macaroni.
  • Mixing Bowls: At least one large bowl for mixing the salad and a smaller one for the dressing.
  • Measuring Cups and Spoons: Essential for accurate ingredient measurements.
  • Whisk: For mixing the dressing smoothly.
  • Spatula or Large Spoon: For folding the salad ingredients together gently.

Serving Suggestions

When it’s time to serve, consider these delightful options:

  • Chilled Bowl: Serve in a chilled bowl to keep the salad fresh and cool.
  • Garnishes: A sprinkle of paprika or fresh herbs on top adds a nice touch.
  • Side Dish: This salad complements grilled meats, sandwiches, or burgers beautifully.
  • Picnic Ready: Pack it in a cooler for a perfect picnic dish that travels well.

In conclusion, this easy macaroni salad recipe is not just a side dish; it’s a journey back to fond memories, family gatherings, and the love we share through food. With its simple ingredients and heartfelt preparation, it’s bound to become a staple in your kitchen. So gather your loved ones, roll up your sleeves, and let’s make some memories around the table!

Easy Macaroni Salad

Prep Time 15 minutes
Cook Time 10 minutes
Total Time 25 minutes
Servings 6 servings
Calories 350
A quick and delicious macaroni salad perfect for picnics and gatherings. Creamy, crunchy, and flavorful, it's a crowd-pleaser!

Ingredients

Pasta

  • 1 lb elbow macaroni
  • 6 oz cheddar cheese (cubed)
  • 0.5 red onion red onion (minced)
  • 4 stalks celery stalks (diced)
  • 1 red bell pepper red bell pepper (diced)
  • 1 cup frozen peas
  • 0.5 cup mayo
  • 0.25 cup apple cider vinegar
  • 0.25 cup fresh dill
  • 2 tablespoons sugar
  • 2 tablespoons Dijon mustard
  • 1 teaspoon salt
  • 1 teaspoon pepper

Instructions 

  • Cook pasta until al dente, then rinse with cold water and drain.
  • Mix cooked pasta with cheese, onion, celery, bell pepper, and peas.
  • Combine mayo, vinegar, dill, sugar, mustard, salt, and pepper in a bowl.
  • Pour dressing over pasta mixture and toss. Chill for at least 1 hour before serving.

Notes

For extra flavor, add chopped fresh herbs or a squeeze of lemon before serving.
Calories: 350kcal
Cost: $10
Course: Salad
Cuisine: American
Keyword: Macaroni