Author

daniel

Browsing

Rediscovering the Classic Potato Salad: A Heartfelt Recipe

Nothing brings family and friends together quite like a well-made potato salad. This nostalgic dish has graced our tables for generations, bridging the gap between past and present, and reminding us of summer picnics and holiday gatherings. In this recipe, we’ll explore the secrets to creating a Classic Potato Salad that’s not just delicious but is also infused with love and memories. Gather around, as we dive into a dish that’s as comforting as a warm hug from Grandma.

Why You’ll Love This Recipe

  • Emotional Connection: This potato salad recipe is rooted in family tradition, evoking memories of shared meals and laughter.
  • Flexible Ingredients: With options to customize, you can make this salad your own, whether you prefer a classic or a modern twist.
  • Perfect for Any Occasion: Whether it’s a summer barbecue, a picnic in the park, or a holiday feast, this potato salad is a crowd-pleaser.
  • Easy to Prepare: With straightforward instructions, you can whip up this dish in no time, allowing you to focus on what truly matters—your loved ones.
  • Flavorful and Satisfying: Each bite is a delightful blend of textures and tastes, thanks to the creamy dressing and fresh ingredients.

Essential Ingredients for Potato Salad

To create this heartwarming potato salad, you’ll need the following ingredients:

  • 2 pounds red potatoes or Yukon Gold potatoes: These varieties hold their shape well and provide a creamy texture.
  • 2 1/2 teaspoons kosher salt (divided): Essential for enhancing the flavor of the potatoes.
  • 3 large eggs (optional): Adds richness and protein to the dish.
  • 2 dill pickle spears or 1/4 cup sweet pickle relish: For that tangy, briny flavor.
  • 2 medium stalks celery: Adds a crisp texture and fresh taste.
  • 1 large shallot: Provides a subtle sweetness and depth of flavor.
  • 2 medium scallions (optional): For a fresh onion flavor that brightens the salad.
  • 1/4 small bunch fresh parsley, dill, or a combination: Fresh herbs contribute vibrant flavor.
  • 1/2 cup mayonnaise: The creamy base for our dressing.
  • 1 tablespoon Dijon mustard: Adds a hint of tanginess.
  • 2 tablespoons apple cider vinegar or rice vinegar (divided): For brightness and acidity.
  • Freshly ground black pepper to taste: To season and enhance flavors.

How to Prepare the Perfect Potato Salad: Step-by-Step Guide
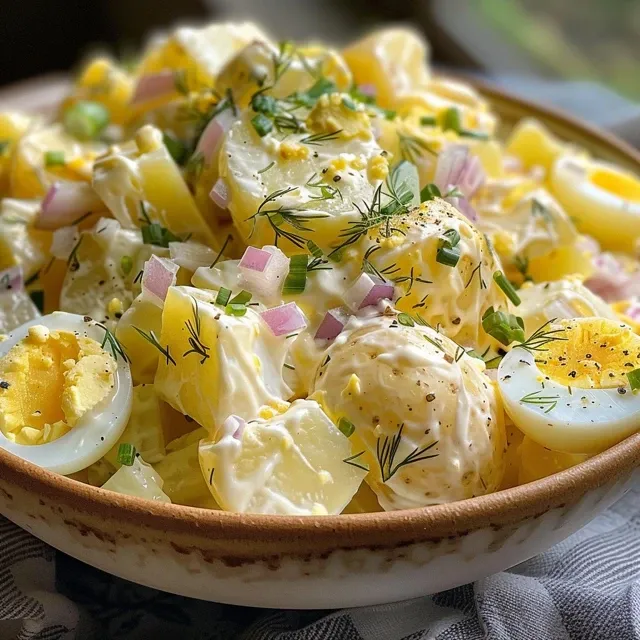
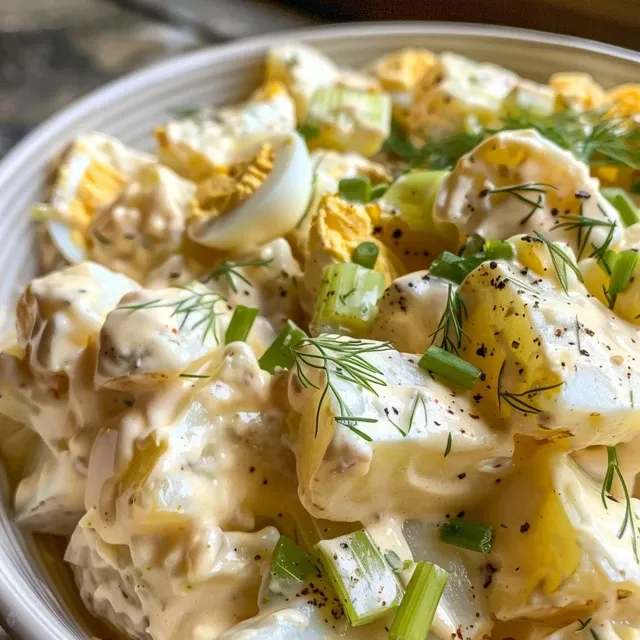
Vibrant potato salad with a rich texture, garnished with parsley and scallions.

Creating the perfect potato salad is all about technique and love. Follow these simple steps to bring your dish to life:

  1. Prep the Potatoes: Begin by cutting the potatoes into 3/4-inch chunks. Place them in a large pot, add 2 teaspoons of the kosher salt, and cover with cold water by 1 inch. This method ensures even cooking.
  2. Cook the Potatoes: Bring the pot to a boil and simmer gently until fork-tender, about 8 to 10 minutes. Avoid overcooking, which can lead to mushiness.
  3. Prepare the Other Ingredients: While the potatoes cook, prepare the eggs (if using) by peeling and dicing them. Dice the dill pickles or measure out the relish, dice the celery, mince the shallot, slice the scallions if included, and finely chop the herbs.
  4. Create the Dressing: In a separate bowl, mix the prepared ingredients with the remaining 1/2 teaspoon of kosher salt, mayonnaise, Dijon mustard, and 1 tablespoon of vinegar.
  5. Cool the Potatoes: Once the potatoes are cooked, drain them and spread them on a rimmed baking sheet. Sprinkle with the remaining 1 tablespoon of vinegar and let them cool for 15 minutes.
  6. Combine and Chill: Gently fold the cooled potatoes into the dressing mixture. Season with salt and pepper to taste, cover, and refrigerate for at least 1 hour before serving. This resting time allows the flavors to meld beautifully.

Pro Tips for the Best Potato Salad

  • Choose the Right Potatoes: Opt for waxy potatoes like Yukon Gold or red potatoes, as they maintain their shape and texture when cooked.
  • Don’t Skimp on Seasoning: Properly salting the water while boiling the potatoes ensures they’re flavorful throughout.
  • Let it Chill: Allowing the salad to sit in the fridge for a few hours or overnight enhances the flavors.
  • Experiment with Herbs: Feel free to mix and match fresh herbs to personalize your salad.
  • Make it Healthier: Substitute half the mayonnaise with Greek yogurt for a lighter version.
  • Texture Matters: For added crunch, include diced bell peppers or radishes.
  • Sweetness Balance: Adjust the sweetness by choosing between dill pickles or sweet relish based on your preference.
  • Serving Temperature: Serve your potato salad cold or at room temperature for the best flavor.

Common Mistakes and Troubleshooting

Even the best cooks can make mistakes. Here are some common pitfalls and how to avoid them:

  • Overcooking the Potatoes: This can lead to a mushy salad. Stick to the recommended cooking time and check for doneness frequently.
  • Insufficient Chilling: Serving the salad too soon can result in muted flavors. Always allow it to chill to enhance taste.
  • Too Much Dressing: Avoid drowning the potatoes in dressing; you want a delicate balance. Start with less and add more as needed.
  • Neglecting Seasoning: Don’t forget to taste and adjust seasoning before serving. A little extra salt or pepper can go a long way.

Potato Salad Variations to Try

Get creative with your potato salad! Here are some delightful variations:

  • Bacon and Blue Cheese: Add crumbled blue cheese and crispy bacon bits for a savory twist.
  • Herbed Yogurt Dressing: Replace mayonnaise with a herbed yogurt dressing for a lighter, tangy flavor.
  • Curried Potato Salad: Stir in curry powder and diced apples for a unique flavor profile.
  • Southwestern Style: Incorporate black beans, corn, and a zesty lime dressing for a refreshing summer dish.

How to Store Potato Salad: Best Practices

To keep your potato salad fresh and tasty, follow these storage tips:

  • Refrigeration: Store in an airtight container in the refrigerator for up to 3-5 days.
  • Freezing: It’s best not to freeze potato salad, as the texture may change. If you must, consume within 1-2 months.
  • Bring Back Freshness: If the salad seems dry after storage, add a touch of mayonnaise or yogurt before serving.

FAQs: Frequently Asked Questions About Potato Salad

  • Can I use other types of potatoes? Yes, but waxy potatoes are recommended for the best texture.
  • Is it necessary to add eggs? No, eggs are optional but add richness and protein if desired.
  • How long should I let it chill before serving? At least 1 hour, but overnight is even better for flavor.
  • Can I make it a day ahead? Absolutely! It often tastes better the next day as flavors meld.
  • What can I do if it’s too salty? If the salad is too salty, add additional diced potatoes to balance the flavor.
  • How do I add heat to my potato salad? Stir in diced jalapeños or a splash of hot sauce for a spicy kick.
  • Is there a vegan version? Yes, substitute mayonnaise with a vegan alternative and omit eggs.
  • Can I serve it warm? While it’s traditionally served cold, some enjoy it warm. Just be sure to adjust flavors accordingly.

Nutritional Tips and Dietary Adaptations

This potato salad can be adapted to suit various dietary needs:

  • Gluten-Free: This recipe is naturally gluten-free; just ensure your mayonnaise is also gluten-free.
  • Low-Calorie: Use Greek yogurt in place of mayonnaise for a lighter version.
  • Low-Carb: Replace potatoes with cauliflower for a low-carb alternative.

Equipment Recommendations

Having the right tools makes cooking easier:

  • Large Pot: For boiling the potatoes efficiently.
  • Colander: To drain the potatoes after cooking.
  • Mixing Bowls: For combining the salad ingredients and dressing.

Serving Suggestions

Pair your potato salad with these delightful options:

  • Grilled Meats: It complements burgers, hot dogs, and grilled chicken beautifully.
  • Bread Rolls: Serve with fresh rolls or cornbread for a complete meal.
  • Fresh Vegetables: Pair with a refreshing salad or vegetable platter.

In conclusion, this Nostalgic Potato Salad is more than just a side dish; it’s a cherished recipe that carries the warmth of family gatherings and the joy of shared meals. Whether you’re enjoying it at a picnic, a family reunion, or a cozy dinner at home, it’s a reminder that food is all about love, memories, and togetherness. So gather your loved ones, share the stories that come with each bite, and create new memories around the table. Happy cooking!

Potato Salad

Prep Time 15 minutes
Cook Time 10 minutes
Total Time 25 minutes
Servings 4 servings
Calories 250
A classic potato salad with a tangy dressing, perfect for picnics and gatherings.

Ingredients

Main

  • 2 pounds red potatoes or Yukon Gold potatoes
  • 2.5 teaspoons kosher salt (divided)
  • 3 large eggs (optional)
  • 2 spears dill pickle spears or 1/4 cup sweet pickle relish
  • 2 medium stalks celery
  • 1 large shallot
  • 2 medium scallions (optional)
  • 0.25 small bunch fresh parsley, dill, or a combination
  • 0.5 cup mayonnaise
  • 1 tablespoon Dijon mustard
  • 2 tablespoons apple cider vinegar or rice vinegar (divided)
  • to taste Freshly ground black pepper

Instructions 

  • Cut potatoes into 3/4-inch chunks, boil in salted water until fork-tender, about 8-10 minutes, then drain and cool.
  • Prepare eggs, pickles, celery, shallot, scallions, and herbs; mix with remaining salt, mayonnaise, mustard, and 1 tablespoon vinegar.
  • Drain potatoes, spread on a baking sheet, sprinkle with remaining vinegar, and let cool for 15 minutes.
  • Gently fold potatoes into the dressing, season with salt and pepper, then refrigerate for at least 1 hour before serving.
Notes

Chill the salad for better flavor; add extra herbs for freshness.
Calories: 250kcal
Cost: $15
Course: Side Dish
Cuisine: American
Keyword: Potato

Why You’ll Love This Fruit Cream Recipe

Gather around and take a moment to savor the joy that comes from sharing a delightful dessert. This Fruit Cream is not just a recipe; it’s a memory maker. Whether it’s a sunny picnic or a cozy family gathering, this creamy, vibrant dessert will bring loved ones together. Here’s why you’ll fall in love with making this fruit salad with cream:

  • Simple and Quick: With just a few ingredients, you can whip up this dessert in under 30 minutes. Perfect for last-minute gatherings!
  • Customizable: You can mix and match fruits based on your preferences or what’s in season. This recipe allows your creativity to shine!
  • Family-Friendly: Kids and adults alike will adore the sweet, creamy texture and the burst of flavors in every bite. It’s a dessert all ages can enjoy!
  • Healthier Indulgence: Packed with fresh fruits, this dessert is a nutritious way to satisfy your sweet tooth without feeling guilty.
  • Perfect for Any Occasion: Whether it’s summer barbecues, holiday gatherings, or simply a treat for yourself, this fruit cream fits right in.

Ingredients for Your Fruit Cream

Here’s what you’ll need for this Fruit Cream recipe:

  • 3/4 cup whipping cream, (chilled)
  • 1/4 cup icing sugar (sifted)
  • 1/2 teaspoon pure vanilla extract
  • 1 cup diced mangoes
  • 1 cup sliced banana
  • 1 cup diced apples
  • 1 cup green grapes, (halved)
  • 1/2 cup diced kiwi
  • 1/2 cup pomegranate arils
  • 2 tablespoons slivered pistachios
  • 2 tablespoons sliced almonds
  • 2 tablespoons raisins or cranberries
  • Few cherries (for garnishing, optional)

How to Make Your Fruit Cream – Step by Step

Creating this delightful Fruit Cream is as easy as pie! Follow these simple steps:

  1. In a sufficiently large bowl, add the chilled whipping cream, icing sugar, and vanilla extract.
  2. Using a hand mixer, beat on low speed initially to incorporate all the ingredients.
  3. Increase the speed to medium-high, and beat until soft peaks form. Remember, we don’t need stiff peaks for this recipe.
  4. Gently fold in the diced fruits and nuts (reserve some for garnishing).
  5. Mix gently using a spatula until the fruits are coated with the whipped cream. You can serve immediately or cover the bowl and refrigerate for 1 to 2 hours before serving.
  6. Transfer to serving bowls, top with the reserved fruits and nuts, and garnish with cherries, if desired.

Expert Tips for the Perfect Fruit Cream

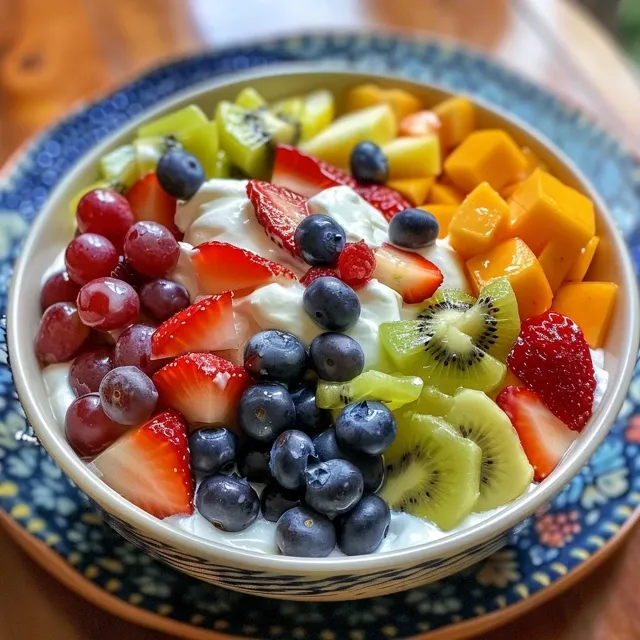
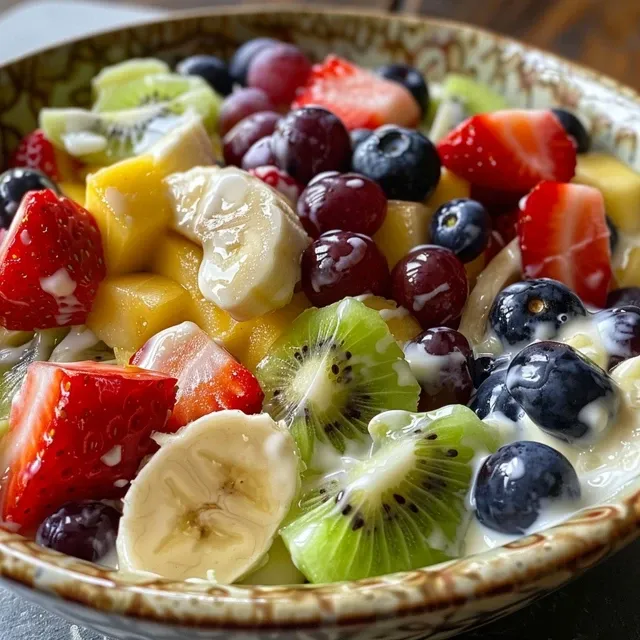
A side view of a refreshing fruit cream salad with a variety of fruits and nuts, elegantly presented.

To elevate your Fruit Cream, consider these pro tips:

  • Chill Ingredients: Ensure your whipping cream is cold for better whipping efficiency.
  • Use Fresh Fruits: Fresh, ripe fruits will enhance the flavor and texture of your dessert.
  • Don’t Overbeat: Stop beating the cream once you reach soft peaks to maintain a light texture.
  • Mix Gently: When incorporating fruits, fold gently to avoid breaking them apart.
  • Make Ahead: This dessert can be made a few hours in advance, allowing the flavors to meld beautifully.
  • Experiment with Flavors: Add a splash of fruit juice or zest for an extra flavor dimension.
  • Use Seasonal Fruits: Adapt the fruits based on what’s fresh and available; this keeps the recipe exciting!
  • Texture Play: Consider adding a bit of yogurt for a tangy twist and creamier texture.

Common Mistakes and Troubleshooting

Even the best home cooks can encounter hiccups, so here’s how to avoid common pitfalls:

  • Too Watery: If your fruit salad turns watery, try using firmer fruits like apples and bananas, and avoid overly ripe ones.
  • Overwhipped Cream: If you accidentally whip the cream too much, it can turn into butter. Watch closely and stop once you see soft peaks.
  • Fruit Oxidation: To prevent browning, toss sliced fruits like apples and bananas in a bit of lemon juice.

Delicious Variations of Fruit Cream

This Fruit Cream recipe is wonderfully adaptable. Here are some variations to try:

  • Chocolate Fruit Cream: Drizzle melted chocolate over the whipped cream for a decadent twist.
  • Nutty Fruit Cream: Add more nuts such as walnuts or pecans for a crunchy texture.
  • Vegan Fruit Cream: Substitute whipping cream with coconut cream and use maple syrup instead of icing sugar.
  • Fruit and Yogurt Cream: Mix in Greek yogurt with the whipped cream for added protein and tang.

Storage and Make-Ahead Instructions

You can easily make this Fruit Cream ahead of time. Here’s how to store it:

  • Refrigeration: Store the fruit cream in an airtight container in the refrigerator for up to 2 days. It’s best enjoyed fresh, but it can be kept for a short while.
  • Freezing**: While not ideal due to the texture changes, you can freeze the fruit cream. Thaw in the fridge before serving.

Frequently Asked Questions

Here are some common questions about making Fruit Cream:

  • What fruits can I use in fruit cream? Almost any fruit works! Popular choices include berries, stone fruits, and tropical options.
  • Can I use canned or frozen fruits? Yes, but fresh fruits provide the best texture and taste.
  • Can I make this ahead of time? Absolutely! Make it a few hours in advance for better flavor integration.
  • Can I use Greek yogurt instead of whipped cream? Yes, for a healthier option, Greek yogurt works well, but it will alter the taste and texture.
  • How long can I keep fruit salad in the fridge? It’s best to consume within 2 days for optimal freshness.
  • Can I add sweeteners? You can adjust sweetness with honey or agave syrup as per your preference.
  • Is this dessert suitable for a party? Yes! It’s visually appealing and serves well for gatherings.
  • Can I make it gluten-free? Yes, all ingredients used in this recipe are gluten-free.

Nutritional Insights

This Fruit Cream is not just delicious; it’s also nutritious! Here’s a quick look at the health benefits:

  • Vitamins and Minerals: Fruits are rich in essential vitamins like Vitamin C, potassium, and dietary fiber.
  • Natural Sugars: The sugars in the fruits provide a healthier sweetness compared to refined sugars.
  • Healthy Fats: Nuts offer healthy fats and protein, making this dessert a balanced treat.

Equipment Recommendations

To make this recipe, you’ll need:

  • Mixing Bowl: A large bowl to accommodate all the ingredients.
  • Hand Mixer: For whipping the cream quickly and efficiently.
  • Spatula: For gently folding in the fruits without mashing them.

Serving Suggestions

When it’s time to serve your Fruit Cream, consider these ideas:

  • Garnishing: Top with extra fruits, nuts, or a mint leaf for a pop of color.
  • Serving Bowls: Use clear glass bowls to showcase the colorful fruits.
  • Pairing: This dessert pairs beautifully with a scoop of vanilla ice cream or a sprinkle of granola.

As you create this Fruit Cream, remember that cooking is about love and sharing. Each bite is a celebration of memories, and every ingredient tells a story. So gather your loved ones, create this beautiful dessert, and make lasting memories around your table. Happy cooking!

Fruit Cream | Fruit Salad With Cream

Prep Time 15 minutes
Total Time 15 minutes
Servings 4 servings
Calories 250
A delightful and refreshing fruit salad topped with whipped cream and nuts, perfect for a quick dessert or snack.

Ingredients

Dairy

  • 3/4 cup whipping cream (chilled)
  • 1/4 cup icing sugar/Confectioner's sugar (sifted)
  • 1/2 teaspoon pure vanilla extract

Fruits

  • 1 cup diced mangoes
  • 1 cup sliced banana
  • 1 cup diced apples
  • 1 cup green grapes (halved)
  • 1/2 cup diced kiwi
  • 1/2 cup pomegranate arils

Nuts & Dried Fruits

  • 2 tablespoons slivered pistachios
  • 2 tablespoons sliced almonds
  • 2 tablespoons raisins/cranberries

Garnish

  • Few pieces cherries (for garnishing, optional)

Instructions 

  • In a large bowl, combine chilled cream, icing sugar, and vanilla. Beat until soft peaks form.
  • Add diced fruits and nuts, then gently mix to coat.
  • Serve immediately or refrigerate for 1-2 hours. Garnish with reserved fruits, nuts, and cherries if desired.

Notes

Use fresh, ripe fruits for best flavor and texture.
Calories: 250kcal
Cost: $10
Course: Dessert
Keyword: Cream, Fruit, Salad

A Salad That Sparks Joy: The Essence of Cucumber and Carrot

Welcome to a culinary journey that intertwines simplicity with nostalgia! Our Cucumber and Carrot Salad is not just another recipe; it’s a celebration of fresh flavors and heartfelt memories. This vibrant dish embodies the essence of sharing and love, making it perfect for any gathering. In just a few simple steps, you’ll create a salad that speaks to the soul, bringing a taste of home to your table.

As we dive into this delightful recipe, you will discover not only how to prepare it but also the reasons why this dish is a staple in many kitchens. It’s more than just a salad; it’s a way to connect with loved ones and create lasting memories.

Why You’ll Love This Recipe

This Carrot and Cucumber Salad isn’t just delicious; it brings a host of benefits that make it a favorite for many:

  • Quick and Easy: In less than 30 minutes, you can whip up this refreshing salad, making it ideal for busy weeknights or impromptu gatherings.
  • Fresh and Crunchy: The crispness of cucumbers and the sweetness of carrots combine for a delightful texture that makes each bite a joy.
  • Versatile Dish: This salad pairs beautifully with grilled meats, seafood, or can be enjoyed on its own as a light meal.
  • Healthy and Nutritious: Packed with vitamins and low in calories, this salad supports a healthy lifestyle without sacrificing flavor.
  • Customizable: Feel free to add your own twist with additional herbs or toppings to make it your own!

Ingredients Breakdown

To create this vibrant salad, gather the following ingredients:

  • 2 medium cucumbers: Choose firm, fresh cucumbers for the best crunch. You can opt for English cucumbers for a milder taste.
  • 2 large carrots: Fresh, sweet carrots bring a natural sweetness and vibrant color to your salad. Consider using heirloom varieties for added flavor.
  • ¼ cup fresh parsley or dill: These herbs add a burst of freshness and depth of flavor. Feel free to substitute with cilantro or basil for a unique twist.
  • 3 tablespoons extra virgin olive oil: A high-quality olive oil enhances the flavors and adds healthy fats.
  • Juice from 1 medium lemon: Fresh lemon juice brightens the salad and balances the flavors beautifully.
  • Salt and pepper to taste: Essential for bringing all the flavors together.

How to Prepare Your Cucumber and Carrot Salad

Fresh cucumber and carrot salad garnished with parsley, captured in detail.

Follow these straightforward steps to create your salad:

  • Step 1: Wash the cucumbers and carrots thoroughly. Slice the cucumbers into thin rounds or half-moons, depending on your preference. Peel and grate the carrots for a delightful texture.
  • Step 2: Finely chop the fresh herbs of your choice, adding a fragrant touch to the mix.
  • Step 3: In a small bowl, whisk together the olive oil, lemon juice, salt, and pepper to create a light and zesty dressing.
  • Step 4: In a large bowl, combine the sliced cucumbers, grated carrots, and chopped herbs. Drizzle with the dressing and toss gently until well-coated.
  • Step 5: Chill the salad for at least 30 minutes before serving to enhance the flavors. Trust me; the wait is worth it!

Pro Tips for the Perfect Salad

Here are some expert insights to elevate your salad experience:

  • Fresh Ingredients: Ensure that your cucumbers and carrots are fresh for the best texture and flavor.
  • Let it Chill: Allowing the salad to chill enhances the flavors, making it more refreshing.
  • Mix Up the Herbs: Experiment with different herbs like mint or chives for a unique flavor profile.
  • Garnish Wisely: Consider adding toasted nuts or seeds for an extra crunch that complements the salad.
  • Dress Before Serving: If making ahead, store the dressing separately and combine just before serving to avoid sogginess.
  • Meal Prep Friendly: This salad can be prepped in advance and stored in the fridge, making it a great option for meal prep.
  • Pair with Proteins: Serve alongside grilled chicken or shrimp for a complete meal.
  • Adjust to Taste: Don’t hesitate to adjust the seasoning and lemon juice to fit your palate.

Common Mistakes and Troubleshooting

Even the best cooks can make a few missteps. Here are some common mistakes and how to fix them:

  • Too Watery: If your salad becomes watery, try adding a pinch of salt to draw out excess moisture or drain before serving.
  • Flavorless Dressing: If the dressing lacks flavor, add more lemon juice or a pinch of sugar to balance acidity.
  • Overwhelming Herbs: If you’ve added too much herb, balance the flavor with more cucumbers and carrots.

Variations to Try

Feel free to get creative with these variations:

  • Add Protein: Incorporate grilled chicken, shrimp, or chickpeas to turn this salad into a hearty meal.
  • Cheese It Up: Crumbled feta or goat cheese adds a creamy element that pairs wonderfully with the crunchy veggies.
  • Spice It Up: Add a pinch of red pepper flakes or diced jalapeños for a kick of heat.
  • Seasonal Twist: Use seasonal vegetables like bell peppers or radishes to change up the flavor.

Storage and Make-Ahead Instructions

This salad is perfect for make-ahead meals!

  • Refrigerate: Store in an airtight container in the fridge for up to 3 days. The flavors will continue to meld together.
  • Make Ahead: Prepare the salad a day in advance, but add the dressing just before serving to maintain freshness.

Frequently Asked Questions

Here are some common questions about the Cucumber and Carrot Salad:

  • Can I use other vegetables? Absolutely! Feel free to experiment with bell peppers, radishes, or any fresh veggies you enjoy.
  • Is this salad vegan? Yes, this salad is naturally vegan and perfect for plant-based diets.
  • How can I make it gluten-free? This recipe is gluten-free as it contains no grains or gluten products.
  • Can I substitute the olive oil? Yes, you can use any light oil like avocado or sunflower oil.
  • What should I serve with it? This salad pairs well with grilled meats, sandwiches, or can be enjoyed on its own.
  • How long does it last? The salad can last up to 3 days in the fridge if stored properly.
  • Can I freeze it? It’s best enjoyed fresh, but you can freeze the components separately and mix them when ready to eat.
  • What’s the best way to cut the cucumbers? Slicing them thinly creates a great texture; try half-moons or rounds to find your favorite!

Nutrition Tips and Dietary Adaptations

This salad is not only delicious but also nutritious:

  • Low-Calorie: A great option for those watching their calorie intake.
  • Rich in Vitamins: Carrots are loaded with vitamin A, while cucumbers provide hydration and fiber.
  • Customizable for Diets: Easily adaptable for keto, paleo, or Mediterranean diets by adjusting the dressing or adding proteins.

Essential Equipment for Success

To make this salad, you’ll need:

  • A sharp knife: For precise and easy cutting of vegetables.
  • Cutting board: A sturdy surface to prepare your ingredients.
  • Mixing bowl: For combining all the ingredients and tossing the salad.
  • Whisk: To mix the dressing well and ensure it’s fully combined.

Serving Suggestions

When it comes to serving this salad, the possibilities are endless. Here are a few ideas:

  • As a Side Dish: Serve alongside grilled chicken, fish, or burgers for a refreshing contrast.
  • In a Wrap: Add to a wrap with turkey or hummus for a delightful lunch.
  • As a Snack: Enjoy it on its own for a quick, healthy snack.

In conclusion, this Cucumber and Carrot Salad is not just a recipe; it’s an invitation to gather around the table, share stories, and create cherished memories. With its vibrant colors and refreshing taste, it serves as a reminder that cooking is about love, connection, and the joy of sharing a meal with those we hold dear. So gather your ingredients, bring your family together, and make this salad a cherished part of your culinary repertoire!

Cucumber and Carrot Salad Recipe

Prep Time 10 minutes
Total Time 10 minutes
Servings 4 people
Calories 120
A fresh and vibrant salad combining crisp cucumbers, sweet carrots, and herbs, perfect for a light meal or side dish.

Ingredients

Vegetables

  • 2 medium cucumbers
  • 2 large carrots
  • 0.25 cup fresh parsley or dill
  • 3 tablespoons extra virgin olive oil
  • 1 medium lemon (juice only)
  • to taste salt and pepper

Instructions 

  • Wash and slice cucumbers; peel and grate carrots.
  • Chop herbs finely.
  • Whisk olive oil, lemon juice, salt, and pepper to make dressing.
  • Combine vegetables and herbs; toss with dressing.
  • Chill for 30 minutes before serving.

Notes

Use fresh herbs for best flavor.
Calories: 120kcal
Cost: $8
Course: Salad
Cuisine: International
Keyword: Carrot, Cucumber, Herbs

Indulge in the Heart of Summer: Caprese Salad Like Never Before

Welcome to the vibrant flavors of summer! The Caprese salad is not just a dish; it’s a celebration of fresh ingredients, echoing memories of shared meals and laughter around the family table. With juicy tomatoes, creamy bocconcini, and fragrant basil, all drizzled with a rich balsamic reduction, this salad brings warmth and joy to every bite. Ready to dive into this timeless favorite? Let’s explore how to make the best Caprese salad that will leave your loved ones asking for seconds.

Why You’ll Love This Recipe

  • Freshness at its finest: Each ingredient shines, providing a burst of flavor with every bite.
  • Simple yet elegant: Perfect for gatherings, it looks stunning on any table.
  • Quick to prepare: Whip it up in under 20 minutes, making it an ideal choice for busy days.
  • Customizable: Easily tailor it to your tastes or dietary needs.
  • A family tradition: This salad carries stories and memories, perfect for sharing and celebrating.

Ingredients Breakdown

To create the perfect Caprese salad, let’s gather our ingredients. Here’s what you need:

  • 1 pound Tomatoes: Choose any variety, but heirloom or vine-ripened are ideal for their sweetness.
  • 1/2 Cup Basil: Fresh basil leaves are essential for that aromatic touch. If you can, pick the young leaves for a sweeter flavor.
  • 1 pound Bocconcini Mozzarella: This creamy cheese complements the tomatoes beautifully. If not available, fresh mozzarella works well too.
  • 1 tbsp Olive oil: A good quality extra virgin olive oil enhances the flavors.
  • 1 tbsp Balsamic Vinegar: For that tangy finish, the best balsamic vinegar will elevate your salad.
  • Ground Pepper: Freshly cracked pepper adds a delightful kick.
  • Sea Salt: Enhances the natural flavors of the ingredients.
  • 1/2 Onion (small, cut into rings – optional): Adds a bit of crunch and flavor if desired.

Step-by-Step Instructions

Fresh Caprese salad with layers of cheese, tomatoes, and basil on a plate.

Let’s make this Caprese salad come to life!

  1. Pick the basil leaves off the stems, wash them gently, and pat dry.
  2. Wash and pat dry the tomatoes, then cut them into rounds about ½ inch thick.
  3. Sprinkle some sea salt on the tomato slices and let them sit for a few minutes to draw out the juices.
  4. Begin layering: Start with a slice of mozzarella, followed by a slice of tomato, and then a basil leaf.
  5. Drizzle with olive oil and sprinkle with ground pepper to taste.
  6. If using, layer on a few onion rings for texture.
  7. Finish by drizzling the balsamic vinegar across the salad.
  8. Serve at room temperature for the best flavor.

Pro Tips for the Ultimate Caprese Salad

  • Choose ripe tomatoes: The best Caprese salad starts with perfectly ripe tomatoes for maximum flavor.
  • Layer thoughtfully: Alternate between mozzarella, tomatoes, and basil for a beautiful presentation.
  • Use high-quality oil: A premium olive oil and balsamic vinegar can transform the dish.
  • Don’t rush the flavors: Let the salad sit for a few minutes after assembling to meld the flavors.
  • Experiment with herbs: Try adding mint or oregano for a unique twist.
  • Make it a meal: Add grilled chicken or shrimp for a heartier dish.
  • Fresh is best: Use ingredients that are in season for the most vibrant flavors.
  • Chill your ingredients: Cold ingredients will keep your salad crisp and refreshing.

Common Mistakes and Troubleshooting

Even the best chefs make mistakes! Here are some common pitfalls and how to avoid them:

  • Using underripe tomatoes: This can lead to a bland salad. Always choose ripe, juicy tomatoes.
  • Overdressing the salad: Less is more! Start with a drizzle and add more if needed.
  • Skipping the salt: A pinch of salt is essential to enhance the flavors of the tomatoes.
  • Using low-quality ingredients: Invest in good quality mozzarella and olive oil for the best flavor.

Delicious Variations to Try

If you want to switch things up, here are four delightful variations:

  • Chicken Caprese Salad: Add grilled chicken breast for protein and heartiness.
  • Caprese Pasta Salad: Toss cooked pasta with the Caprese ingredients for a filling dish.
  • Grilled Vegetable Caprese: Incorporate grilled zucchini or eggplant for a smoky flavor.
  • Caprese Skewers: Assemble mini skewers with cherry tomatoes, mozzarella balls, and basil for a fun appetizer.

Storage and Make-Ahead Instructions

If you want to prepare this salad in advance, here’s how to store it properly:

  • Assemble the salad without the dressing if you plan to make it ahead of time.
  • Store the components separately in airtight containers in the refrigerator for up to 2 days.
  • Dress the salad just before serving to keep the ingredients fresh and vibrant.

Frequently Asked Questions

  • Can I use other cheeses? Yes, feel free to experiment with burrata or feta for a different taste.
  • What is the best time to serve Caprese salad? It’s best enjoyed fresh, so serve it shortly after preparation.
  • Can I make it vegan? Absolutely! Skip the mozzarella and replace it with avocado or vegan cheese.
  • How long does Caprese salad last in the fridge? It’s best eaten within 1-2 days for optimal freshness.
  • What can I pair with Caprese salad? It pairs beautifully with grilled meats, crusty bread, or a light white wine.
  • Can I add fruits? Yes, adding sliced peaches or strawberries can bring a delightful sweetness.
  • Is Caprese salad gluten-free? Yes, it’s naturally gluten-free!
  • How do I make balsamic reduction? Simmer balsamic vinegar in a saucepan until it thickens, about 10-15 minutes.

Nutrition Tips and Dietary Adaptations

This Caprese salad is not only delicious but also packed with nutrients:

  • Low in calories: Perfect for a light meal or side dish.
  • Rich in vitamins: Tomatoes and basil provide essential vitamins A and C.
  • Healthy fats: Olive oil offers heart-healthy monounsaturated fats.
  • Gluten-free option: Naturally gluten-free, it’s suitable for many diets.

Essential Equipment for Making Caprese Salad

To make this delightful salad, you won’t need much, but here are a few essentials:

  • Sharp knife: For slicing tomatoes and mozzarella with ease.
  • Cutting board: A sturdy surface for your prep work.
  • Serving platter: A beautiful dish to showcase your salad.

Serving Suggestions

Caprese salad shines as a starter or side dish. Here are some ideas to make it the star of your meal:

  • Serve it alongside grilled meats like chicken or steak for a refreshing contrast.
  • Pair with a crusty baguette or bruschetta for a complete Italian experience.
  • Elevate your brunch by serving it with poached eggs on top for a delightful twist.

In conclusion, this Caprese salad is more than just a recipe; it’s a heartfelt dish that brings people together. With each ingredient, you’re not just creating a meal; you’re sharing love and tradition. So gather your loved ones, create this beautiful salad, and let it be a reminder that the kitchen is a place of connection, joy, and shared stories. Happy cooking!

Caprese Salad with Balsamic Reduction

Prep Time 10 minutes
Total Time 10 minutes
Servings 4 people
Calories 250
A fresh and flavorful Italian salad featuring ripe tomatoes, creamy mozzarella, basil, and a sweet balsamic glaze.

Ingredients

Vegetables

  • 1 pound Tomatoes (any variety)
  • 1/2 cup Basil leaves
  • 1 pound Bocconcini Mozzarella
  • 1 tbsp Olive oil
  • 1 tbsp Balsamic Vinegar
  • to taste Ground Pepper
  • to taste Sea Salt
  • 1/2 small onion onion (optional) (cut into rings)

Instructions 

  • Pick basil leaves, wash and dry.
  • Slice tomatoes into ½ inch rounds and season with salt.
  • Layer mozzarella, tomato, and basil on a plate.
  • Drizzle olive oil and balsamic vinegar, then season with salt and pepper.
  • Add onion rings on top if desired, then serve at room temperature.

Notes

Use ripe tomatoes for the best flavor.
Calories: 250kcal
Cost: $12
Course: Salad
Cuisine: Italian
Keyword: Basil, Mozzarella, Tomatoes

As the warm sun kisses the earth and the days stretch longer, there’s a certain magic in the air that calls for gatherings filled with laughter, stories, and of course, delicious food. This Refreshing Asian Cucumber Salad is not just a dish; it’s a celebration of flavors that brings people together. Crisp cucumbers, fragrant sesame oil, and a hint of sweetness create a dish that captures the essence of summer and evokes memories of family picnics and cozy dinners. Join me as we embark on a culinary journey that embraces simplicity and love through this delightful salad recipe.

Why You’ll Love This Recipe

This salad is more than just ingredients tossed together; it embodies the spirit of sharing and joy. Here are a few reasons why you’ll adore making this salad:

  • Incredibly Easy to Prepare: With just a few minutes of prep time, you can whip up this salad, making it perfect for those busy weeknights or last-minute gatherings.
  • Refreshing and Crisp: The freshness of the cucumbers combined with the vibrant dressing creates a refreshing crunch in every bite.
  • Versatile Ingredients: This salad is adaptable to your taste—feel free to add your favorite veggies or herbs.
  • Health-Conscious Choice: Low in calories yet packed with nutrients, it’s a guilt-free addition to any meal.
  • Perfect for Any Occasion: Whether it’s a summer picnic, family barbecue, or cozy dinner, this salad fits right in with any menu.

Essential Ingredients

To make this Asian Cucumber Salad, you’ll need the following ingredients:

  • 2 cups sliced fresh cucumbers (approximately 2 medium cucumbers): Choose crisp, firm cucumbers for the best texture.
  • 3 tbsp rice vinegar (unseasoned): This adds a tangy flavor that complements the sweetness of the cucumbers.
  • 1 tbsp sesame oil (toasted preferred): This oil brings a rich, nutty flavor that elevates the dish.
  • 2 tbsp low-sodium soy sauce: Adds depth and umami to the salad.
  • 1 tsp granulated sugar: Balances the acidity of the vinegar.
  • 1 tbsp toasted sesame seeds: For a delightful crunch and visual appeal.
  • 2 green onions, thinly sliced: Enhances the freshness of the salad.
  • Optional: pinch of chili flakes: For those who like a little heat.

Let’s Make It Together

Now that we have our ingredients lined up, let’s dive into the steps to create this refreshing salad:

  1. Wash the cucumbers thoroughly and slice them thinly into rounds.
  2. In a small bowl, whisk together rice vinegar, soy sauce, sugar, and sesame oil until well combined.
  3. Add sliced green onions and optional chili flakes to the dressing mixture; stir gently.
  4. Pour the dressing over the sliced cucumbers in a large bowl and toss until evenly coated.
  5. Cover and chill in the refrigerator for at least 30 minutes to allow flavors to meld.
  6. Just before serving, sprinkle with toasted sesame seeds for added crunch.

Pro Tips for Perfection

Side view of a colorful Asian cucumber salad with a mix of ingredients.

To elevate your salad-making skills, consider these expert tips:

  • Choose the Right Cucumbers: Persian or English cucumbers are ideal because they have fewer seeds and a thinner skin, making for a tender bite.
  • Chill Before Serving: Allowing the salad to chill enhances the flavors and crispness of the cucumbers.
  • Adjust to Your Taste: Feel free to tweak the dressing ingredients to suit your personal preference—add more vinegar for tang or soy sauce for saltiness.
  • Mix Up the Dressing: Experiment with different oils and vinegars, like olive oil or apple cider vinegar, to create your unique twist.
  • Add Fresh Herbs: Incorporating herbs like mint or cilantro can add a refreshing burst of flavor.
  • Use a Mandolin: For perfectly even slices, consider using a mandolin slicer.
  • Don’t Skip the Sesame Seeds: These tiny seeds add not only crunch but also a lovely visual touch that makes the salad appealing.
  • Serve Immediately for Best Texture: While this salad can be stored, serving it fresh ensures maximum crunchiness.

Common Mistakes and Troubleshooting

Even the best chefs make mistakes! Here are common pitfalls and how to avoid them:

  • Over-salting: Use low-sodium soy sauce to control the saltiness of the salad.
  • Too Much Dressing: Start with less dressing and add more to taste; you can always add more, but you can’t take it away!
  • Not Letting it Chill: Skipping the chilling step can lead to a less flavorful salad—give it time to let the flavors meld.
  • Using Unripe Cucumbers: Always opt for firm, ripe cucumbers for the best flavor and texture.

Creative Variations

Want to put a fun spin on this salad? Here are some variations to try:

  • Spicy Cucumber Salad: Add sliced jalapeños or a dash of Sriracha to the dressing for a spicy kick.
  • Mango Cucumber Salad: Incorporate diced ripe mango for a sweet and tropical twist.
  • Thai-Inspired Version: Add chopped peanuts and fresh cilantro along with a splash of lime juice.
  • Avocado Addition: Dice up ripe avocado for a creamy texture that complements the crisp cucumbers.

Storing and Make-Ahead Instructions

This salad is best enjoyed fresh, but if you need to make it ahead of time, here’s how to store it:

  • Preparation Ahead: You can slice the cucumbers and prepare the dressing separately a day in advance. Just combine them right before serving.
  • Storage: Store leftovers in an airtight container in the refrigerator for up to 2 days. However, the cucumbers will lose some of their crunch over time.
  • Make it a Meal: Pair this salad with grilled chicken, shrimp, or tofu for a complete meal.

Frequently Asked Questions

Here are some common questions about this refreshing salad:

  • Can I use different types of cucumbers? Yes, but the texture and taste may vary. Persian and English cucumbers are best!
  • How long can I keep this salad in the fridge? It’s best eaten within 2 days, but it can last up to 3 days if stored properly.
  • Can I make this salad vegan? Yes, this salad is naturally vegan. Just ensure the soy sauce is gluten-free if needed.
  • What can I serve with this salad? It pairs beautifully with grilled meats, seafood, or as a side to Asian-inspired dishes.
  • Can I add protein? Absolutely! Grilled chicken, shrimp, or tofu can be delicious additions.
  • What if I don’t like sesame oil? You can substitute it with olive oil, though it will change the flavor profile slightly.
  • How do I make it gluten-free? Use gluten-free soy sauce or tamari as a substitute.
  • Is this salad good for meal prep? It’s easy to prepare ahead, but for the best texture, add the dressing just before serving.

Nutritional Tips and Dietary Adaptations

This salad is not only delicious but also packed with nutritional benefits:

  • Low-Calorie Option: With cucumbers being mostly water, this salad is a great low-calorie side dish.
  • Rich in Vitamins: Cucumbers provide vitamins K and C, which are beneficial for skin health and immune function.
  • Heart-Healthy Fats: The sesame oil offers healthy fats that are good for your heart.
  • Gluten-Free Adaptation: Simply opt for gluten-free soy sauce to enjoy this dish without gluten.

Equipment Recommendations

Equip your kitchen with these essential tools to make the salad-making process seamless:

  • Sharp Knife: A good chef’s knife makes slicing cucumbers effortless.
  • Cutting Board: A sturdy cutting board provides a safe surface for chopping.
  • Mixing Bowl: A large bowl is essential for tossing the salad and dressing together.
  • Measuring Cups and Spoons: Accurate measurements ensure the perfect balance of flavors.

Serving Suggestions

To make the most of this salad, consider these serving ideas:

  • Garnish with Fresh Herbs: A sprinkle of cilantro or mint can elevate the freshness of the dish.
  • Serve with Grilled Proteins: This salad complements grilled chicken, shrimp, or tofu perfectly.
  • Pair with Asian Dishes: It’s an excellent side for stir-fries or Asian noodle dishes.
  • Presentation Matters: Serve in a beautiful bowl and garnish with extra sesame seeds for a stunning presentation.

In conclusion, this Refreshing Asian Cucumber Salad is more than just a recipe; it’s a way to connect with those you love. Cooking is an act of love, and every bite of this salad will evoke nostalgia and warmth. So gather your loved ones around the table, share stories, and enjoy the flavors that remind us of home. Thank you for sharing this journey with me, and remember, cooking is about the heart—let yours shine through every dish you create.

Refreshing Asian Cucumber Salad

Prep Time 10 minutes
Total Time 10 minutes
Servings 4 servings
Calories 80
A light and tangy cucumber salad with Asian flavors, perfect for a quick refresh.

Ingredients

Vegetables

  • 2 cups sliced fresh cucumbers (approx. 2 medium cucumbers)
  • 3 tbsp rice vinegar (unseasoned)
  • 1 tbsp sesame oil (toasted preferred)
  • 2 tbsp low-sodium soy sauce
  • 1 tsp granulated sugar
  • 1 tbsp toasted sesame seeds
  • 2 green onions green onions (thinly sliced)
  • Optional chili flakes (pinch, optional)

Instructions 

  • Wash and thinly slice cucumbers.
  • Whisk rice vinegar, soy sauce, sugar, and sesame oil until combined.
  • Add green onions and chili flakes to the dressing; stir gently.
  • Pour dressing over cucumbers and toss to coat.
  • Chill for 30 minutes. Before serving, sprinkle with sesame seeds.

Notes

This salad is best served fresh and chilled for maximum crunch and flavor.
Calories: 80kcal
Cost: $8
Course: Salad
Cuisine: Asian
Keyword: Cucumber

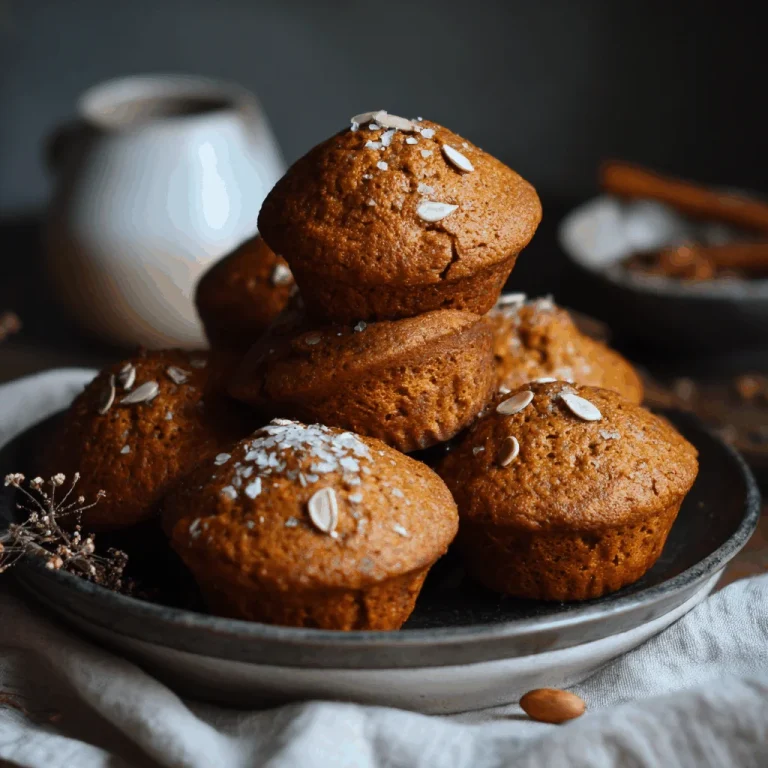
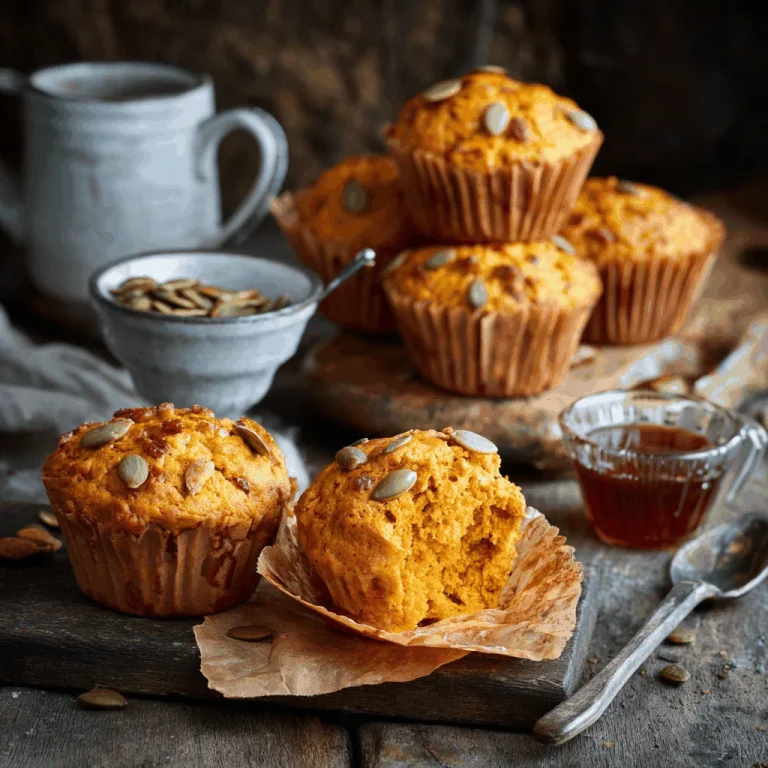
There’s something about the smell of spiced baked goods that wraps around you like a cherished memory. Growing up in a small Louisiana town, I spent countless afternoons in my grandmother’s cozy kitchen, her hands guiding mine as we kneaded dough and mixed batters. Every recipe was a lesson in love, taught with the patience of someone who knew that food was more than sustenance; it was an expression of care. Today, I want to share that warmth with you through my Spiced Baked Pumpkin Muffins. These muffins are not just a treat; they’re a reminder of the beauty of autumn, the joy of sharing, and the comfort of home.

Why You’ll Absolutely Love This Recipe

  • It’s an easy recipe, perfect for those cozy autumn afternoons when you want something homemade without the fuss.
  • The blend of cinnamon, nutmeg, ginger, and cloves is like a warm hug in muffin form.
  • These muffins are incredibly moist, thanks to the pumpkin puree, making them a delightful Autumn Treat.
  • They fill your home with the most inviting aroma, perfect for welcoming guests or just treating yourself.

Simple Ingredients for a Delicious Treat

Each ingredient in this recipe is chosen for its ability to evoke warmth and comfort. The combination of granulated and brown sugar adds depth and sweetness, while the pumpkin puree keeps the muffins moist and tender. I love using orange juice for a hint of citrus that brightens up the spices, making each bite a little surprise. And let’s not forget the spices—cinnamon, nutmeg, ginger, and cloves. They are the essence of Fall Spice Recipes, turning these muffins into a celebration of the season.

You’ll find the full ingredient list with exact measurements in the recipe card below!

Let’s Make Some Magic: Step-by-Step

Preheat your oven to 350°F (175°C) and get ready for some kitchen magic. Line a muffin tin with paper liners or lightly grease the muffin cups—whatever feels right for you. In a large mixing bowl, whisk together the dry ingredients: flour, granulated sugar, brown sugar, baking soda, salt, cinnamon, nutmeg, ginger, and cloves. This is where the magic begins, as the spices mingle and fill the air with their intoxicating aroma.

In another bowl, beat the eggs until they’re slightly frothy. Add the pumpkin puree, vegetable oil, orange juice, and vanilla extract, mixing until everything is beautifully combined. Gradually fold the wet ingredients into the dry ones, stirring gently. Remember, we’re not in a rush here; overmixing is the enemy of tender muffins.

Spoon the batter evenly into your prepared muffin tin, filling each cup about 2/3 full. Bake in your preheated oven for 18-22 minutes. You’ll know they’re done when a toothpick inserted into the center comes out clean. Let them cool in the tin for 5 minutes before transferring to a wire rack.

A Few of My Favorite Tips

Here’s a little secret: if you want to make these muffins even more special, try adding a handful of chopped pecans or walnuts to the batter. They add a delightful crunch and complement the spices beautifully. And if you’re feeling adventurous, a sprinkle of coarse sugar on top before baking gives them a lovely, sugary crust.

How I Like to Serve This

These muffins are perfect as they are, but I love serving them warm with a pat of butter melting into the nooks and crannies. Pair them with a steaming cup of coffee or a glass of chilled milk, and you’ve got yourself a moment of pure bliss. They’re also fantastic alongside a savory dish, like my **Comforting Air Fryer Meatballs That Bring Everyone Together** or **Tender Air Fryer Chicken Bites That Bring Back Family Nights**.

Storing & Reheating (If There’s Any Left!)

If you have any leftovers, store these muffins in an airtight container at room temperature for up to three days. They also freeze beautifully; just pop them in a freezer bag, and they’ll keep for a month. To reheat, simply warm them in the oven at a low temperature or give them a quick zap in the microwave. They’ll taste just as fresh as the day you baked them!

Spiced Baked Pumpkin Muffins

Prep Time 15 minutes
Cook Time 22 minutes
Total Time 37 minutes
Servings 12 muffins
Calories 200
Delight in the warm flavors of fall with these spiced baked pumpkin muffins, perfect for breakfast or a snack.

Ingredients

Dry Ingredients

  • 1.75 cups all-purpose flour
  • 1 cup granulated sugar
  • 0.5 cup packed brown sugar
  • 1 teaspoon baking soda
  • 0.5 teaspoon salt
  • 2 teaspoons ground cinnamon
  • 0.5 teaspoon ground nutmeg
  • 0.5 teaspoon ground ginger
  • 0.25 teaspoon ground cloves

Wet Ingredients

  • 2 large eggs
  • 1 can (15 ounces) pumpkin puree
  • 0.5 cup vegetable oil
  • 0.25 cup orange juice
  • 1 teaspoon vanilla extract

Instructions 

  • Preheat oven to 350°F (175°C) and prepare muffin tin.
  • Whisk dry ingredients in a large bowl.
  • Beat eggs, then mix in wet ingredients.
  • Fold wet into dry ingredients until just combined.
  • Spoon batter into muffin tin, filling 2/3 full.
  • Bake for 18-22 minutes until a toothpick comes out clean.

Notes

Store muffins in an airtight container for freshness.
Calories: 200kcal
Cost: $10.00
Course: Breakfast
Cuisine: American
Keyword: Pumpkin

There’s something about the aroma of warm spices wafting through a kitchen that feels like a warm hug from the past. Growing up in the heart of Louisiana, I spent countless afternoons in my grandmother’s cozy kitchen, learning the art of cooking with love and intention. It’s those cherished memories that inspired these Cozy Pumpkin Muffins, a delightful blend of nostalgia and simplicity. Every bite transports me back to those cherished moments, reminding me of the power food has to connect us to our roots and each other.

Why You’ll Absolutely Love This Recipe

  • It’s so easy, it feels like a little kitchen victory!
  • With just three ingredients, it’s a testament to the beauty of simplicity.
  • The warm spices and pumpkin bring a comforting aroma that wraps you in warmth.
  • Perfect for sharing with family and friends, creating new memories around the table.

Simple Ingredients for a Delicious Treat

This recipe is a love letter to the simplicity of ingredients. You’ll only need:

  • Spice cake mix: This gives our muffins their warm, aromatic base. It’s like a shortcut to flavor town!
  • Pumpkin puree: Adds moisture and a touch of sweetness, making these muffins tender and delightful.
  • Hot water: Helps to bring everything together, creating a smooth batter.

You’ll find the full ingredient list with exact measurements in the recipe card below!

Let’s Make Some Magic: Step-by-Step

Alright, my friend, let’s dive into the cozy world of baking these delightful muffins:

  1. First, preheat your oven to 425°F. Line your muffin pan with baking cups or give it a good spritz with nonstick spray.
  2. In a large bowl, mix together the spice cake mix, pumpkin puree, and hot water. Stir until just combined. You don’t want to overmix, just enough to bring everything together.
  3. Fill each muffin cavity about 3/4 full. If you’re feeling adventurous and want that bakery-style muffin, fill them to the top and add a couple more minutes to the bake time.
  4. Pop them in the oven for 5 minutes, then reduce the temperature to 350°F. Let them bake for another 10-12 minutes. You’ll know they’re done when they spring back to the touch and pass the toothpick test.
  5. Once baked, let them cool in the pan for about 10 minutes before transferring them to a wire rack to cool completely.

A Few of My Favorite Tips

Let me share a few secrets with you:

  • If you don’t have spice cake mix, use yellow cake mix and add a couple of tablespoons of pumpkin pie spice. It works like a charm!
  • These muffins pair beautifully with a dollop of whipped cream or a drizzle of maple syrup for an extra touch of indulgence.

How I Like to Serve This

I love serving these muffins warm, with a side of hot coffee or tea. They’re the perfect companion for a cozy afternoon chat or a quiet moment of reflection.

Storing & Reheating (If There’s Any Left!)

If you’re lucky enough to have any leftovers, store them in an airtight container at room temperature for up to three days. To reheat, just pop them in the microwave for 10-15 seconds, and they’ll be as good as new.

For more comforting recipes, don’t forget to check out my other favorites like the Comforting Air Fryer Meatballs That Bring Everyone Together or the Tender Air Fryer Chicken Bites That Bring Back Family Nights. These dishes are sure to bring joy and warmth to your table, just like these muffins.

3 Ingredient Pumpkin Muffins

Prep Time 10 minutes
Cook Time 15 minutes
Total Time 25 minutes
Servings 12 muffins
Calories 150
These easy 3 ingredient pumpkin muffins are moist, flavorful, and perfect for fall!

Ingredients

Dry Ingredients

  • 1 box spice cake mix (or yellow cake mix with 2 tablespoons of pumpkin pie spice)
  • 15 ounce unsweetened pumpkin puree (canned or fresh)
  • ¼ cup hot water

Instructions 

  • Preheat oven to 425° F and prepare muffin pan.
  • Mix cake mix, pumpkin puree, and hot water until combined.
  • Fill muffin cavities 3/4 full and bake for 5 minutes.
  • Reduce temperature to 350° F and bake for 10-12 minutes.
  • Cool for 10 minutes before removing from pan.

Notes

For bakery-style muffins, fill cavities all the way and bake longer.
Calories: 150kcal
Cost: $5.00
Course: Breakfast
Cuisine: American
Keyword: Pumpkin

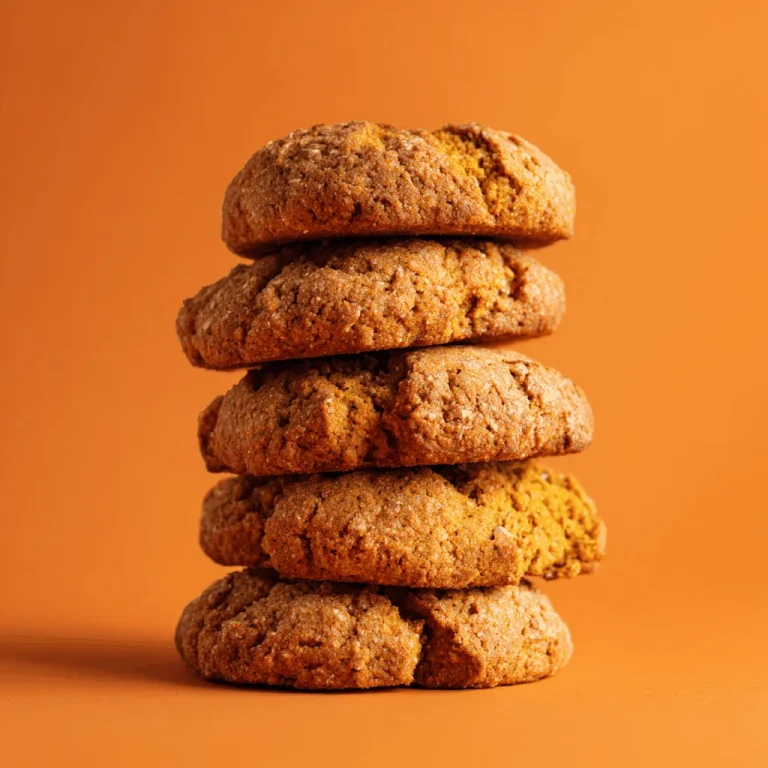
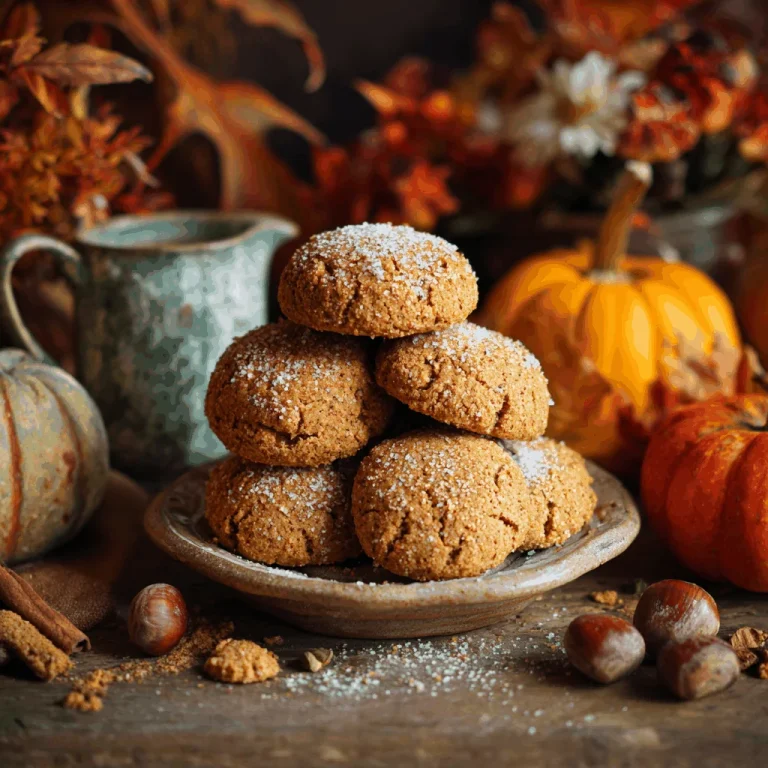
Imagine a crisp fall afternoon in a small Louisiana town, where the air is filled with the earthy scent of fallen leaves and the warm aroma of freshly baked goods. Growing up, my grandmother’s kitchen was the heart of our home, a place where love was measured not just in cups and spoons but in laughter and stories. Today, whenever I bake these Chewy Pumpkin Spice Cookies, I’m transported back to those cherished moments. These cookies aren’t just a treat; they’re a way of keeping those memories alive, a warm hug in cookie form that I now share with my own family and friends.

Why You’ll Absolutely Love This Recipe

  • It’s so easy, it feels like a little kitchen victory!
  • The perfect blend of spices and chewy texture will make you feel warm and cozy.
  • They’re a delightful way to bring the warmth of fall into your home.
  • Perfect for sharing, or enjoying with a cup of hot cider by the fire.

Simple Ingredients for a Delicious Treat

Let’s talk about these ingredients like old friends. We start with unsalted butter, browned to bring out a nutty, rich flavor that forms the base of our dough. Granulated sugar and light brown sugar add just the right sweetness, while pumpkin puree gives us that unmistakable fall flavor. The addition of pumpkin pie spice infuses each bite with warmth, while a hint of cinnamon sugar on the outside adds a delightful crunch. These ingredients come together to create a symphony of flavors that celebrate the season.

You’ll find the full ingredient list with exact measurements in the recipe card below!

Let’s Make Some Magic: Step-by-Step

First, we start by browning our butter. Heat it gently, stirring frequently until it turns a beautiful golden brown. This step is like a little kitchen dance, and you’ll know it’s ready when you catch that nutty aroma. Once cooled slightly, mix in our sugars until smooth, followed by pumpkin puree, an egg, and vanilla extract. It’s time to add our dry ingredients: flour, baking soda, baking powder, salt, and pumpkin pie spice. Stir until the dough is just combined, then let it chill in the fridge for 30 minutes. Patience, my friends, is key to achieving that perfect texture.

A Few of My Favorite Tips

Here’s a little secret: chilling the dough not only makes it easier to handle but also intensifies the flavors. When rolling your cookie balls, make sure they’re evenly sized for consistent baking. And don’t skip the cinnamon sugar coating—it adds a delightful crunch and extra layer of flavor. Finally, a sprinkle of flaky sea salt just before serving takes these cookies to the next level.

How I Like to Serve This

These cookies are divine fresh out of the oven, slightly warm, with a soft center and crispy edges. I love serving them with a cozy cup of tea or coffee. They’re perfect for an afternoon snack or a sweet ending to a hearty fall meal. Share them with friends and family, and watch as their faces light up with joy.

Storing & Reheating (If There’s Any Left!)

If you happen to have leftovers, store these cookies in an airtight container at room temperature for up to a week. For a quick reheat, pop them in the oven at 300°F for a few minutes to bring back that freshly baked taste. You can also freeze the dough balls and bake them fresh whenever the craving strikes. Just add an extra minute or two to the baking time.

For more comfort food inspiration, check out my recipes for Comforting Air Fryer Meatballs That Bring Everyone Together, or indulge in a Family Favorite Honey Garlic Air Fryer Chicken Delight. And if you’re in the mood for something to bring back those family nights, try my Tender Air Fryer Chicken Bites.

Chewy Pumpkin Spice Cookies (Easy Fall Cookie Recipe)

Prep Time 15 minutes
Cook Time 10 minutes
Total Time 25 minutes
Servings 30 cookies
Calories 150
These chewy pumpkin spice cookies are the perfect treat for fall, combining warm spices and pumpkin flavor in every bite.

Ingredients

Baking Ingredients

  • 1.125 cups unsalted butter (2 sticks and 2 tablespoons)
  • 0.5 cups granulated sugar
  • 0.75 cups light brown sugar
  • 0.25 cups pumpkin puree
  • 1 large egg
  • 1 tablespoon vanilla extract
  • 2.75 cups all-purpose flour
  • 1 teaspoon baking soda
  • 1 teaspoon baking powder
  • 1 teaspoon kosher salt
  • 1 tablespoon pumpkin pie spice
  • 3 tablespoons white sugar (for rolling)
  • 1 teaspoon ground cinnamon (for rolling)
  • flaky sea salt (optional)

Instructions 

  • Brown the butter in a saucepan over medium heat, then cool in a mixing bowl.
  • Mix in sugars, pumpkin puree, egg, and vanilla until combined.
  • Add flour, baking soda, baking powder, salt, and spice; stir until dough forms.
  • Chill dough for 30 minutes, then preheat oven to 350°F (177°C).
  • Form dough into balls and roll in cinnamon sugar before placing on a cookie sheet.
  • Bake for 8-10 minutes until golden; cool and optionally top with flaky sea salt.

Notes

For best results, chill the dough to enhance the flavors and texture.
Calories: 150kcal
Cost: $10
Course: Dessert
Cuisine: American
Keyword: Pumpkin

There’s something about the aroma of pumpkin spice that immediately takes me back to my grandmother’s kitchen, where the air was always warm and filled with the scent of something baking. This Pumpkin Spice Cookies recipe is a love letter to those cozy moments, a sweet reminder of the simple joys that come with fall baking. Every bite feels like a hug from the past, a delicious way to savor memories while creating new ones with loved ones around the table. Let’s dive into this delightful pumpkin treat that’s perfect for sharing.

Why You’ll Absolutely Love This Recipe

  • It’s a quick cookies recipe that doesn’t require hours in the kitchen. Perfect for those impromptu baking sessions!
  • The combination of white chocolate and pumpkin spice chips adds a delightful sweetness that’s irresistible.
  • These cookies capture the essence of fall, making it a must-try pumpkin spice recipe for the season.
  • They’re a hit with both kids and adults, making them ideal for any gathering.
  • With just a few simple steps, it feels like a little kitchen victory every time!

Simple Ingredients for a Delicious Treat

Let’s talk about what makes these cookies so special. The blend of pumpkin spice and white chocolate is like a dance of flavors that’s both comforting and exciting. I love using real butter for that rich, creamy texture, and the brown sugar adds a molasses depth that’s perfect for fall. The addition of pumpkin spice chips takes these cookies to a whole new level, offering little bursts of flavor in every bite.

You’ll find the full ingredient list with exact measurements in the recipe card below!

Let’s Make Some Magic: Step-by-Step

Ready to create some kitchen magic? I’m right here with you, guiding you through each step:

  • Start by preheating your oven to 375°F (190°C) and lining a baking sheet with parchment paper. This is your canvas for creating delicious art!
  • In a medium bowl, whisk together the flour, pumpkin spice, baking soda, and salt. This blend is the heart of our cookies, bringing all those flavors together.
  • In a mixer, cream the butter, brown sugar, and granulated sugar on medium speed until light and fluffy. This should take about 5 minutes, so be patient and let it work its magic.
  • Add in the vanilla and eggs, mixing until everything is beautifully combined.
  • Reduce the mixer speed to low and slowly incorporate the flour mixture. Mix until just combined, being careful not to overwork the dough.
  • Gently fold in the white chocolate chips and pumpkin spice chips until they’re evenly distributed.
  • Scoop about 2 tablespoons of dough per cookie onto the prepared baking sheet, spacing each cookie about 2 inches apart. This gives them room to spread and become golden brown.
  • Bake for 10-14 minutes, or until the edges are golden brown and centers are set. The smell will be irresistible!
  • Allow the cookies to cool on the baking sheet for a few minutes before transferring them to a wire cooling rack.

A Few of My Favorite Tips

Here are a few secrets to make these cookies even more special:

  • For an extra burst of flavor, try adding a pinch of nutmeg or cinnamon to the dough.
  • If you’re feeling adventurous, swap out the white chocolate chips for dark chocolate. It gives the cookies a richer taste.
  • These cookies freeze beautifully, so you can always have a batch ready for unexpected company.

How I Like to Serve This

I love serving these cookies with a warm cup of apple cider or a steaming mug of hot chocolate. They also make a wonderful addition to a dessert platter alongside my Comforting Air Fryer Meatballs That Bring Everyone Together or Tender Air Fryer Chicken Bites That Bring Back Family Nights. It’s all about creating a feast of flavors that bring joy and comfort.

Storing & Reheating (If There’s Any Left!)

These cookies can be stored in an airtight container at room temperature for up to a week. If you want to keep them longer, they freeze well for up to three months. Just pop them in the oven at 350°F (175°C) for a few minutes to reheat, and they’ll taste as if they were freshly baked.

So, gather your loved ones, roll up your sleeves, and let’s bake some memories together. These Pumpkin Spice Cookies are more than just a treat—they’re a celebration of the season and the love that fills our kitchens.

Pumpkin Spice Cookies

Prep Time 15 minutes
Cook Time 12 minutes
Total Time 27 minutes
Servings 24 cookies
Calories 150
Delight in the warm flavors of fall with these soft and chewy pumpkin spice cookies, loaded with white chocolate and pumpkin spice chips.

Ingredients

Dry Ingredients

  • 3 cups all-purpose flour ((360g))
  • 2 teaspoons pumpkin spice
  • 1 teaspoon baking soda
  • 1 teaspoon salt

Wet Ingredients

  • 1 cup butter, room temperature ((226g))
  • 1 cup brown sugar, packed ((200g))
  • ½ cup granulated sugar ((100g))
  • 2 large eggs, room temperature
  • 2 teaspoons vanilla extract

Mix-ins

  • 2 cups white chocolate chips ((340g))
  • 1 cup pumpkin spice chips ((170g))

Instructions 

  • Preheat oven to 375°F (190°C) and line a baking sheet with parchment paper.
  • Whisk together flour, pumpkin spice, baking soda, and salt; set aside.
  • Cream butter, brown sugar, and granulated sugar until light and fluffy.
  • Add vanilla and eggs, mix until combined, then incorporate flour mixture.
  • Fold in white chocolate and pumpkin spice chips.
  • Scoop dough onto baking sheet and bake for 10-14 minutes.

Notes

For extra flavor, add chopped nuts or a sprinkle of sea salt on top before baking.
Calories: 150kcal
Cost: $15.00
Course: Dessert
Cuisine: American
Keyword: Pumpkin

There’s a certain magic in the air when autumn whispers its arrival. It’s in the crisp, cool breeze and the way the leaves start to paint themselves in hues of gold and crimson. But for me, Daniel Perry, it’s also in the aroma of baking spices wafting through my New Orleans kitchen, carrying me back to those cherished moments in my grandmother’s kitchen in Louisiana. Today, I’m sharing a recipe that ties together those sweet memories with a touch of love: Pumpkin Spice Sugar Cookies with Cream Cheese Frosting. These cookies are more than just a treat; they’re a warm hug on a chilly day, a reminder that the best things in life are simple and filled with love.

Why You’ll Absolutely Love This Recipe

  • It’s a breeze to make, giving you that delightful sense of accomplishment in the kitchen.
  • The combination of warm spices and creamy frosting is like a cozy blanket for your taste buds.
  • Perfect for sharing with loved ones, bringing everyone together around the table.
  • A great way to use up that canned pumpkin, turning it into something truly special.

Simple Ingredients for a Delicious Treat

The beauty of these Spiced Pumpkin Cookies lies in their simplicity. With just a handful of ingredients, you can create something that feels like a celebration. The pumpkin puree gives these cookies their soft, moist texture, while the pumpkin pie spice infuses them with warmth and nostalgia. And that cream cheese frosting? It’s the crowning glory, adding a tangy sweetness that complements the spices perfectly.

You’ll find the full ingredient list with exact measurements in the recipe card below!

Let’s Make Some Magic: Step-by-Step

Let’s dive into the kitchen together. Preheat your oven to 350 degrees. In a large bowl, combine the melted butter, pumpkin puree, sugar, egg, and vanilla extract until smooth. Feel the joy as the ingredients come together, knowing you’re crafting something wonderful.

Next, fold in the flour, pumpkin pie spice, baking powder, and salt until a cookie dough forms. Wrap the bowl with plastic and let it chill in the fridge for 25 minutes. This little rest gives the flavors time to mingle and deepen.

Now, roll the dough into balls, placing them on a parchment-lined baking sheet. You should have about 12-14 cookies ready to bake their way into your heart. Pop them in the oven for 18 minutes and let the aroma fill your home.

While they bake, whip up the frosting. Blend the cream cheese and butter until smooth, then add powdered sugar and vanilla. Once the cookies are cooled, spread a generous dollop of frosting on each one and sprinkle with a touch more spice. Enjoy!

A Few of My Favorite Tips

Here’s a little secret: Chilling the dough is key to achieving that perfect, soft-baked texture. And when it comes to frosting, don’t be shy! A generous layer makes each bite heavenly.

Looking for more comforting recipes? Check out my Comforting Air Fryer Meatballs or these Tender Air Fryer Chicken Bites that will surely bring back family nights.

How I Like to Serve This

There’s nothing quite like enjoying these cookies with a cup of hot cider or a steaming mug of coffee. They’re perfect for a cozy afternoon snack or as a sweet ending to a family meal.

Storing & Reheating (If There’s Any Left!)

Store any leftover cookies in an airtight container in the refrigerator for up to a week. If you want to enjoy them warm, just pop them in the microwave for a few seconds. The frosting will soften, and the spices will awaken, bringing back that fresh-baked goodness.

Pumpkin Spice Sugar Cookies with Cream Cheese Frosting

Prep Time 25 minutes
Cook Time 18 minutes
Total Time 43 minutes
Servings 12 cookies
Calories 150
Delight in these soft and flavorful pumpkin spice sugar cookies topped with creamy frosting, perfect for fall!

Ingredients

Baking Ingredients

  • 113 g unsalted butter, melted
  • 80 g pumpkin puree
  • 200 g white sugar
  • 240 g all purpose flour
  • 1 large egg
  • 10 ml vanilla extract
  • 7.5 g pumpkin pie spice
  • 1 g baking powder
  • 2.5 g salt
  • to taste cinnamon
  • 113 g cream cheese, softened
  • 57 g unsalted butter, softened
  • 30 g powdered sugar
  • 5 ml vanilla extract

Instructions 

  • Preheat oven to 350°F.
  • Mix melted butter, pumpkin, sugar, egg, and vanilla until smooth.
  • Add flour, pumpkin pie spice, baking powder, and salt; mix to form dough.
  • Chill dough for 25 minutes, then roll into balls and place on baking sheet.
  • Bake for 18 minutes; cool and frost with cream cheese mixture.
  • Sprinkle with cinnamon or pumpkin pie spice before serving.

Notes

For extra flavor, add a pinch of nutmeg to the frosting!
Calories: 150kcal
Cost: $10.00
Course: Dessert
Cuisine: American
Keyword: Pumpkin