Author

daniel

Browsing

Embrace the Joy of Cooking: A Toast to Summer

Cooking is not just about following recipes; it’s about crafting memories, just like my grandmother did when she taught me to knead dough in our cozy Louisiana kitchen. This recipe for Cream Cheese and Macerated Strawberries on Crusty Bread captures that essence—a warm, nostalgic dish that brings people together. Imagine the vibrant colors of fresh strawberries paired with the creamy texture of cheese and the crunch of toasted bread, all creating a delightful experience that makes summer feel like it’s in every bite. Let’s dive into this simple yet exquisite recipe that celebrates the flavors of the season.

Why You’ll Love This Recipe

  • Quick and Easy: This toast comes together in under 30 minutes, making it perfect for a spontaneous brunch or an afternoon snack.
  • Fresh Ingredients: With just a handful of ingredients, you can create a dish that bursts with flavor and freshness.
  • Versatile Dish: Ideal for breakfast, brunch, or even dessert, this recipe can be enjoyed at any time of day.
  • Customizable: Feel free to experiment with different toppings or breads to suit your taste and mood.
  • Heartfelt Memories: Each bite is a reminder of sunny days and shared moments, making it a dish that warms the heart.

Ingredients Breakdown

To create this delicious toast, you’ll need the following simple ingredients:

  • 2 1/2 cups ripe strawberries: Look for bright red berries that are sweet and juicy. If the strawberries are not in season, frozen strawberries can be a good alternative, just allow them to thaw before using.
  • 1 tbsp granulated sugar: This will help macerate the strawberries, drawing out their natural juices and enhancing their sweetness.
  • 6 slices of good crusty bread: A hearty sourdough or baguette works beautifully. You can also use gluten-free bread for a gluten-free option.
  • Olive oil: For brushing the bread before toasting; it adds a lovely flavor and helps achieve that perfect crispy texture.
  • 8 oz tub cream cheese: You can substitute with vegan cream cheese or a flavored variant like herb or garlic for a twist.

Let’s Make It Together

Side angle of creamy strawberry toast with vibrant red berries.
  1. Wash the berries and remove the green tops. Cut into quarters and place them in a bowl. Toss with 1 tablespoon of sugar and let sit for 20 minutes to allow the juices to form.
  2. Preheat the oven to broil. Slice the bread into 1/2 inch thick pieces and brush the top with olive oil. Place the bread on a baking sheet, olive oil side up, and broil until golden brown—approximately 1 to 2 minutes. Keep an eye on it to prevent burning!
  3. Once the bread is toasted, spread a generous layer of cream cheese on each slice.
  4. Smash the macerated strawberries with a fork, then layer a heaping spoonful on top of the cream cheese.
  5. Serve immediately, while the bread is warm and crispy.

Pro Tips for Perfection

  • Choosing Strawberries: Opt for organic strawberries when possible, as they tend to be sweeter and more flavorful.
  • Toasting Bread: If you prefer a softer texture, skip the broiling and simply toast the bread in a toaster or pan.
  • Layering: For added texture, consider adding a sprinkle of chopped nuts or granola on top of the strawberries.
  • Presentation: Drizzle some honey or balsamic glaze over the finished toast for an elegant touch.
  • Make Ahead: Prepare the macerated strawberries a few hours in advance and store them in the fridge; they’ll become even sweeter.
  • Flavor Variations: Try adding a pinch of cinnamon to the strawberries or mixing in some fresh mint leaves for a refreshing twist.
  • Serving Size: Adjust the number of slices based on your guest count; this recipe can easily be scaled up or down.
  • Pairing: Serve with a side of Greek yogurt or a fruit salad for a complete meal.

Common Mistakes to Avoid

Even the most experienced cooks can have a hiccup now and then. Here are some common pitfalls to watch out for:

  • Overcooking the Bread: Keep a close eye on the bread while it’s broiling; it can go from golden to burnt in seconds.
  • Using Unripe Strawberries: Always select ripe, sweet strawberries for the best flavor; unripe ones can result in a less enjoyable dish.
  • Not Allowing Strawberries to Macerate: Allowing the strawberries to sit with sugar is crucial for drawing out their juices; don’t skip this step.
  • Too Much Cream Cheese: A thick layer is delightful, but too much can overwhelm the other flavors. Find a balance!

Variations to Try

  • Nut Butter Delight: Swap cream cheese with almond or peanut butter for a different flavor profile.
  • Sweet and Savory: Add crumbled bacon or prosciutto for a savory twist that balances the sweetness of the strawberries.
  • Berry Medley: Mix in other berries like blueberries or raspberries for a colorful and flavorful combination.
  • Herbed Cream Cheese: Mix fresh herbs like chives or dill into the cream cheese for a savory touch.

Storage and Make-Ahead Instructions

While this dish is best enjoyed fresh, you can prepare the components in advance:

  • Strawberries: Store macerated strawberries in an airtight container in the fridge for up to 3 days.
  • Bread: Toast the bread just before serving to maintain its crispiness.
  • Cream Cheese: Prepare herbed cream cheese a day in advance and keep it covered in the refrigerator.

Frequently Asked Questions

  • Can I use frozen strawberries? Yes, frozen strawberries can be used, just make sure to thaw and drain excess liquid before macerating.
  • What type of bread works best? A good crusty bread like sourdough or a baguette is ideal; you can also try whole grain or gluten-free alternatives.
  • How can I make this toast healthier? Use low-fat cream cheese or a vegan alternative, and opt for whole-grain or gluten-free bread.
  • What’s the best way to store leftovers? Store any leftover strawberries in an airtight container in the fridge for up to 3 days.
  • Can I add other fruits? Absolutely! Feel free to mix in other fruits like bananas or peaches for added flavor.
  • Is this recipe kid-friendly? Yes! Kids love the sweet strawberries and creamy cheese, making it a great recipe for family gatherings.
  • How can I make this dish more festive? Add a sprinkle of powdered sugar or some edible flowers for a beautiful presentation.
  • Can I prepare this in advance? You can prepare the macerated strawberries ahead of time but toast the bread fresh for the best texture.

Nutritional Tips and Dietary Adaptations

This recipe can easily be adapted for various dietary needs:

  • Low-Carb Option: Use a low-carb bread alternative and adjust the sugar.
  • Vegan Version: Substitute cream cheese with a vegan cream cheese and ensure the bread is dairy-free.
  • Nut-Free: Choose a nut-free cream cheese alternative if allergies are a concern.

Essential Equipment

To create this delightful toast, you’ll need:

  • Baking Sheet: For toasting the bread in the oven.
  • Mixing Bowl: To macerate the strawberries.
  • Fork: For smashing the strawberries.
  • Knife: To slice the bread and strawberries.

Serving Suggestions

For the ultimate experience, consider serving your Cream Cheese and Macerated Strawberry Toast with:

  • Fresh Mint Leaves: A sprinkle of mint adds a refreshing touch.
  • A Side of Yogurt: Creamy yogurt balances the sweetness and provides a lovely contrast.
  • Fresh Juice or Iced Tea: A refreshing drink complements the toast perfectly.

As you gather around the table with friends and family, remember that cooking is about more than just food; it’s about weaving stories, sharing laughter, and creating connections. Enjoy every moment spent in the kitchen, and let this Cream Cheese and Macerated Strawberry Toast be a part of your cherished memories. Happy cooking!

Cream Cheese and Macerated Strawberry Toast

Prep Time 10 minutes
Cook Time 2 minutes
Total Time 12 minutes
Servings 2 servings
Calories 350
A delightful breakfast or snack featuring toasted bread topped with creamy cheese and sweet, macerated strawberries.

Ingredients

Fruits

  • 2 1/2 cups ripe strawberries (hulled and quartered)
  • 1 tbsp granulated sugar (for macerating strawberries)

Bread

  • 6 slices good crusty bread (preferably sourdough or artisan)
  • olive oil for brushing olive oil (for brushing bread)

Dairy

  • 8 oz tub cream cheese (softened)

Instructions 

  • Wash, hull, and quarter strawberries. Toss with 1 tbsp sugar and let sit for 20 minutes.
  • Preheat oven to broil. Slice bread 1/2 inch thick, brush with olive oil, and broil until golden, about 1-2 minutes.
  • Spread cream cheese generously on toasted bread.
  • Smash strawberries with a fork and layer on top of cream cheese.
  • Serve immediately while warm.
Notes

For extra flavor, drizzle with honey or sprinkle with fresh mint.
Calories: 350kcal
Cost: $10
Course: Breakfast
Cuisine: American
Keyword: Strawberries

A Sweet Journey: Embracing No-Bake Oreo Dessert Cups

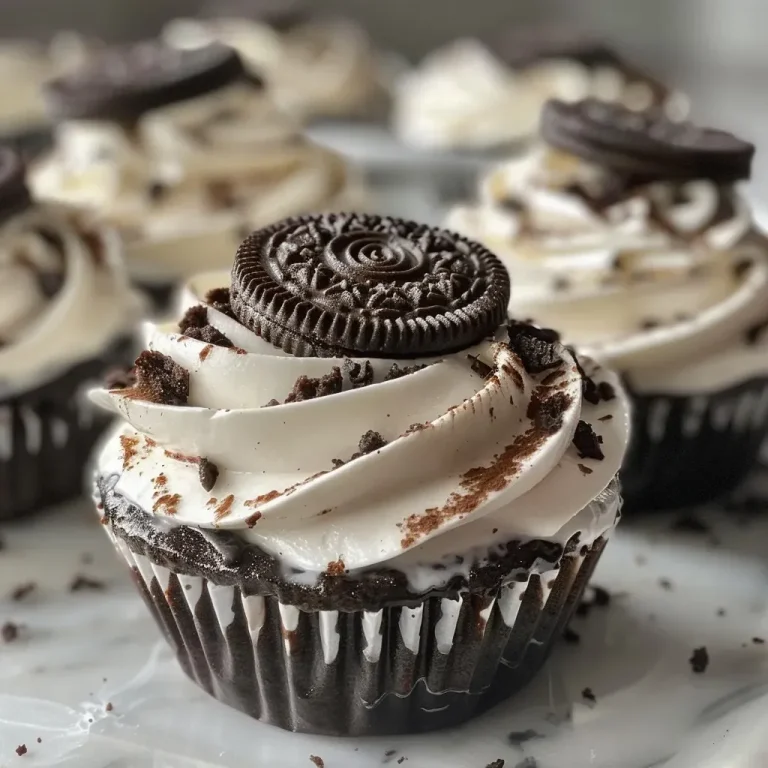
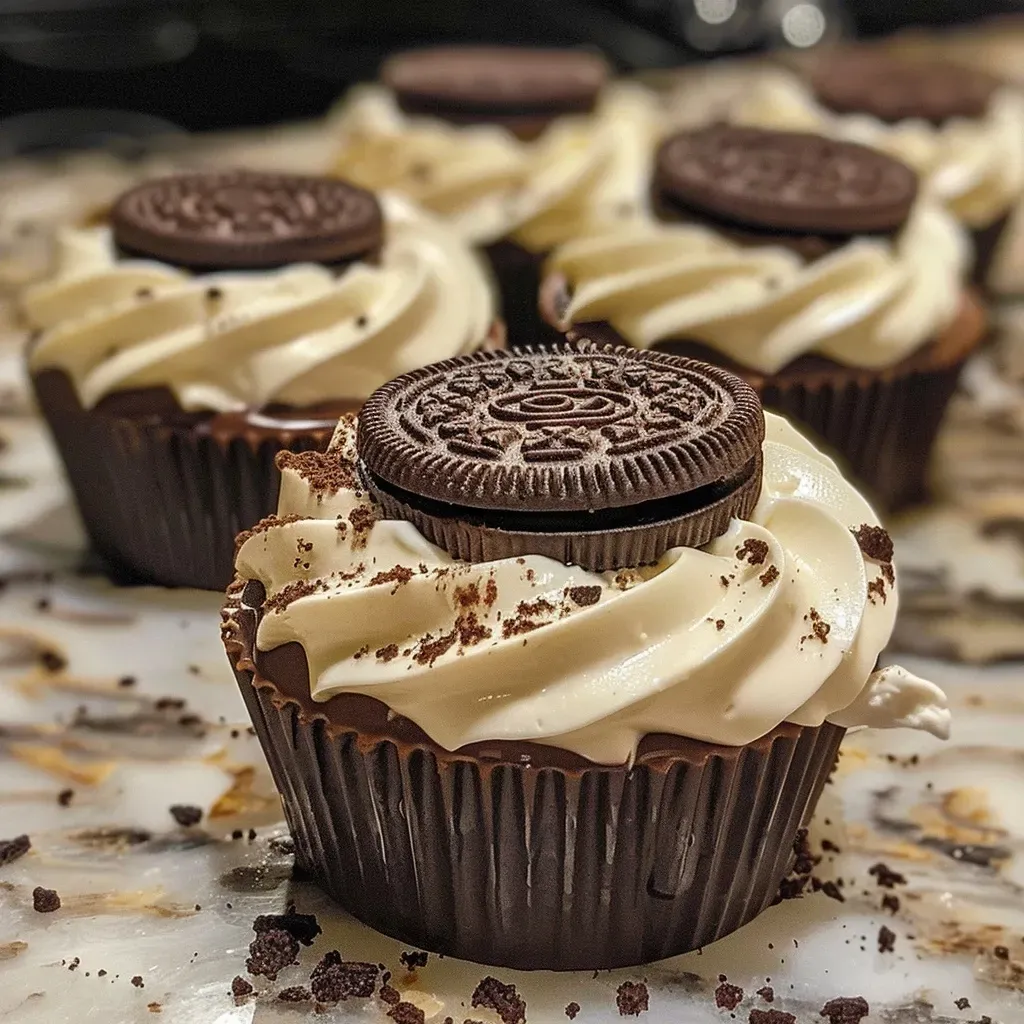
There’s something truly magical about desserts that evoke memories of family gatherings, laughter, and the joy of sharing. No-Bake Oreo Dessert Cups are one such creation that brings together the rich, nostalgic flavors of Oreos and the creamy goodness of whipped cream and cream cheese. This delightful treat not only satisfies your sweet tooth but also wraps you in the warm embrace of cherished memories, like baking with a loved one in the cozy kitchen. In this comprehensive guide, we will explore the ins and outs of making these dessert cups, ensuring that your experience is as heartwarming as the dish itself.

Why You’ll Love This Recipe

These No-Bake Oreo Dessert Cups are more than just a sweet treat; they are a celebration of flavors and textures that will leave everyone at the table smiling. Here are five reasons to love this recipe:

  • Simple Preparation: With no oven required, these dessert cups can be whipped up quickly, making them perfect for last-minute gatherings.
  • Customizable Ingredients: You can easily adjust the ingredients to suit dietary preferences or personal tastes, making them versatile for any occasion.
  • Indulgent Flavor Profile: The combination of rich cream cheese, fluffy whipped cream, and crunchy Oreo crumbs creates a delightful balance of flavors that everyone will adore.
  • Perfect for Sharing: These cups are designed to be served in individual portions, making them ideal for parties, picnics, or cozy family dinners.
  • Kid-Friendly Fun: Involve the little ones in the assembly process; they’ll love layering the ingredients and creating their own dessert masterpieces!

Ingredients Breakdown

Let’s delve into the essential ingredients that come together to create these delightful No-Bake Oreo Dessert Cups:

  • Oreos: The star of the show, providing a satisfying crunch and rich chocolate flavor.
  • Heavy Cream: This ingredient is crucial for achieving the light, airy texture of the whipped topping.
  • Cream Cheese: Adds a creamy richness with a slight tang, balancing the sweetness of the dessert.
  • Powdered Sugar: Sweetens the cream cheese mixture, enhancing the overall flavor without adding graininess.
  • Vanilla Extract: A splash of vanilla elevates the flavors, creating a warm, inviting aroma.

Step-by-Step Guide: How to Make No-Bake Oreo Dessert Cups

No-Bake Oreo Dessert Cups

Now that we have our ingredients ready, let’s walk through the simple steps to create these delightful dessert cups:

  1. Prepare the Oreo Crumble: Place Oreos in a blender or food processor and pulse until you have fine crumbs.
  2. Whip the Cream: In a chilled bowl, beat the heavy cream until stiff peaks form, creating a light and fluffy texture.
  3. Make the Cream Cheese Mixture: Blend cream cheese with powdered sugar and vanilla extract until smooth and creamy.
  4. Combine and Fold: Gently fold the whipped cream into the cream cheese mixture, ensuring a light and airy consistency.
  5. Assemble the Layers: In dessert cups, layer Oreo crumbs and cream mixture, finishing with a crumb topping for that perfect crunch.
  6. Chill and Serve: Refrigerate the assembled cups for at least 2 hours before serving, allowing the flavors to meld beautifully.

Pro Tips for Success

To ensure your No-Bake Oreo Dessert Cups turn out perfectly, consider these expert tips:

  • Use Cold Ingredients: Make sure your heavy cream is cold for optimal whipping; this helps achieve the desired fluffiness.
  • Room Temperature Cream Cheese: Allow your cream cheese to come to room temperature for easier blending and a smoother texture.
  • Layering Technique: For a visually stunning dessert, create multiple layers of Oreo crumbs and cream mixture.
  • Chill Time is Key: Don’t rush the chilling process; letting the cups sit for a few hours allows the flavors to develop.
  • Garnish Creatively: Consider topping your cups with chocolate shavings, whipped cream, or fresh berries for an added touch of elegance.

Common Mistakes and Troubleshooting

Even the best chefs make mistakes! Here are some common pitfalls and how to avoid them:

  • Overwhipping the Cream: If the cream is whipped too much, it can become grainy. Stop whipping as soon as stiff peaks form.
  • Crumb Consistency: Ensure that your Oreo crumbs are fine enough to create layers without being overly chunky.
  • Separation of Layers: If your cream mixture isn’t folded gently enough, it may deflate. Use a spatula and fold carefully.

Delicious Variations to Try

Feel free to get creative! Here are some variations to put a personal twist on your No-Bake Oreo Dessert Cups:

  • Chocolate Lovers: Use chocolate Oreos instead of regular ones for an extra chocolatey kick.
  • Nutty Delight: Add chopped nuts to the layers for added crunch and flavor.
  • Fruit Fusion: Incorporate layers of fresh fruit, like raspberries or strawberries, for a refreshing contrast.
  • Minty Fresh: Mix in a few drops of peppermint extract into the cream mixture for a minty twist.

Storage and Make-Ahead Instructions

These dessert cups can be made ahead of time, which is perfect for busy schedules:

  • Refrigeration: Store in the refrigerator for up to 3 days. Keep them covered to maintain freshness.
  • Freezing: For longer storage, freeze the assembled cups for up to a month. Thaw in the refrigerator before serving.

Frequently Asked Questions (FAQs)

Here are some common questions to help you as you prepare your No-Bake Oreo Dessert Cups:

  • Can I use regular whipped cream instead of heavy cream? Yes, but the texture may differ slightly. Heavy cream provides a richer, fluffier result.
  • How long should I let the cups chill? At least 2 hours, but overnight is even better for enhanced flavor.
  • Can I substitute cream cheese? Yes, mascarpone can be used for a different flavor profile.
  • What if my cream doesn’t whip? Ensure your bowl and beaters are completely clean and dry. Cold cream is essential for whipping.
  • Can I add other flavors to the cream? Absolutely! Feel free to mix in extracts like almond or hazelnut for unique flavors.
  • How do I prevent the layers from mixing? Ensure each layer is set before adding the next, and handle gently when assembling.
  • Are these dessert cups gluten-free? They can be made gluten-free by using gluten-free Oreos.
  • How do I enhance the presentation? Use clear cups to showcase the beautiful layers and consider garnishing with chocolate or fruit.

Nutritional Tips and Dietary Adaptations

If you’re mindful of dietary needs, here are some tips:

  • Lower Sugar: Reduce the amount of powdered sugar for a less sweet option.
  • Dairy-Free: Substitute with coconut cream and dairy-free cream cheese.
  • Low-Calorie Version: Opt for reduced-fat cream cheese and lighter whipped toppings.

Essential Equipment Recommendations

To make the process smoother, here’s a list of equipment you’ll need:

  • Blender or Food Processor: For crushing the Oreos into fine crumbs.
  • Mixing Bowls: A set of various sizes will help in preparing different components.
  • Electric Mixer: An essential tool for whipping cream and mixing the cream cheese.
  • Spatula: Useful for folding ingredients together gently.
  • Dessert Cups: Clear cups are ideal for showcasing your beautiful layers.

Serving Suggestions

When it comes time to serve, consider these ideas:

  • Family Gatherings: Set up a dessert table with an assortment of toppings and let everyone customize their own cups.
  • Picnics: Pack them in a cooler for a refreshing treat on a sunny day.
  • Movie Nights: Pair these cups with a classic film for a cozy night in.

Creating No-Bake Oreo Dessert Cups is not just about the dessert; it’s about sharing love and memories with those around you. Each layer tells a story, and every bite is a reminder of the warmth of home. So gather your loved ones, roll up your sleeves, and let the sweet journey begin. Happy cooking!

No-Bake Oreo Dessert Cups

Prep Time 20 minutes
Total Time 20 minutes
Servings 4 cups
Calories 350
A quick and delicious no-bake dessert featuring creamy layers and crunchy Oreo crumbles, perfect for any occasion.

Ingredients

Oreo Crumble

  • 20 pieces Oreos (for the crumble and layers)
  • 1 cup heavy cream Heavy cream (for whipping)
  • 4 oz cream cheese Cream cheese (softened)
  • 2 tbsp powdered sugar Powdered sugar (for sweetness)
  • 1 tsp vanilla extract Vanilla extract (for flavor)

Instructions 

  • Pulse Oreos in a food processor until fine crumbs.
  • Whip heavy cream until stiff peaks form.
  • Mix cream cheese with powdered sugar and vanilla until smooth.
  • Fold whipped cream into cream cheese mixture.
  • Layer Oreo crumbs and cream mixture in cups, top with crumbs.
  • Refrigerate for at least 2 hours before serving.

Notes

Chill the dessert cups well for best flavor and texture.
Calories: 350kcal
Cost: $10
Course: Dessert
Cuisine: American
Keyword: Oreo

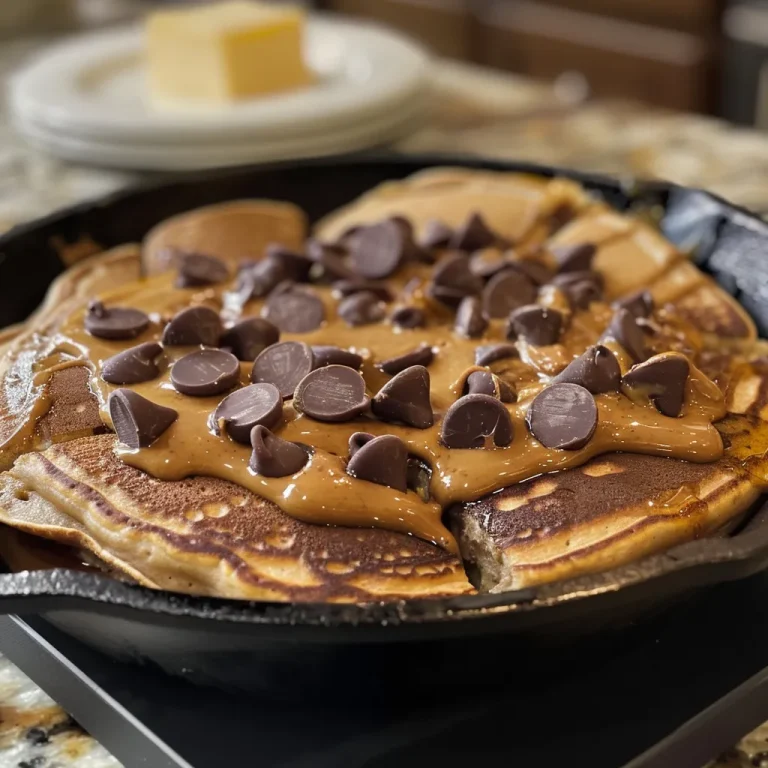
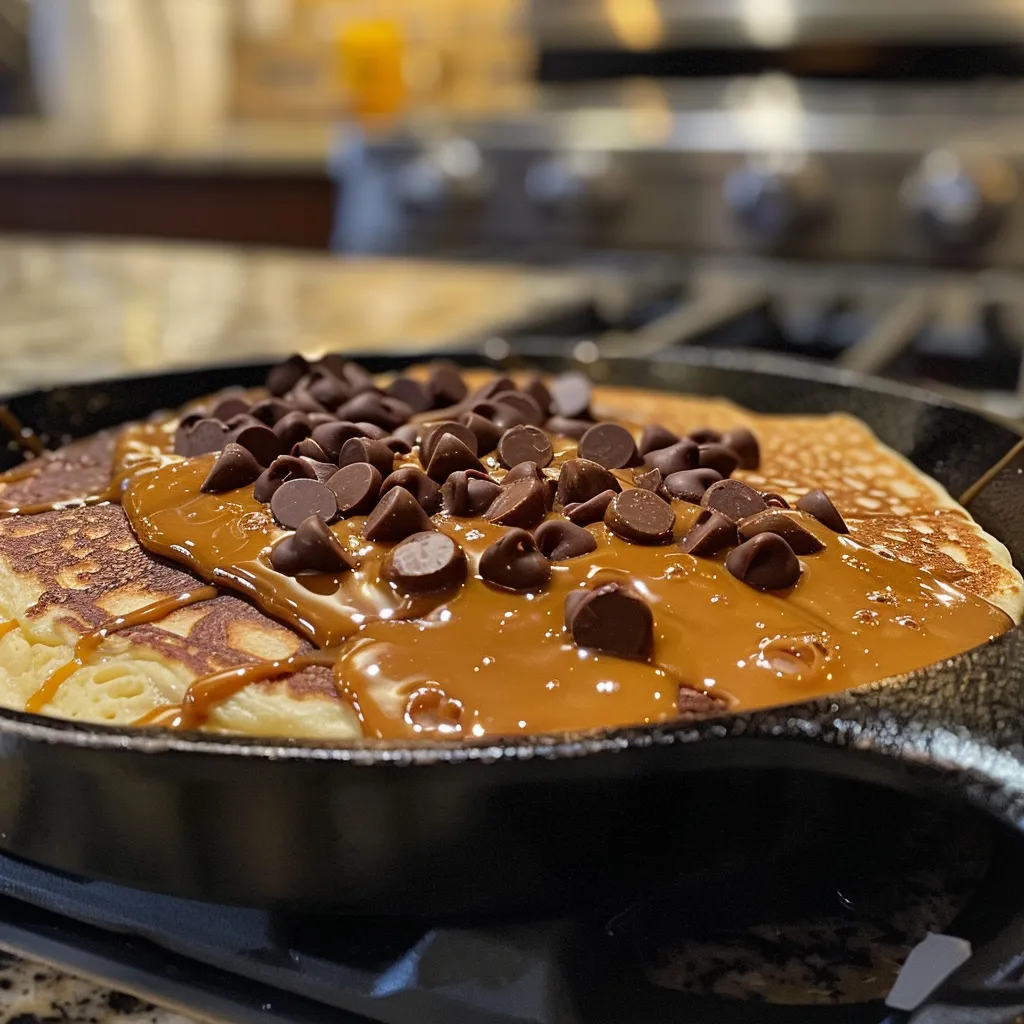
There’s something truly magical about gathering around the breakfast table with loved ones, sharing stories and laughter over a warm meal. Today, we’re diving into a delightful recipe that brings that warmth to life: the Easy Pancake Skillet. This recipe combines the nostalgia of family breakfasts with the convenience of modern cooking, making it the perfect start to your day. With chocolate chips and a dollop of peanut butter, every bite is a sweet embrace, reminding us of cherished moments spent together. Get ready to whip up a pancake that’s not only easy to make but also a joy to share!

Why You’ll Love This Recipe

This Easy Pancake Skillet is not just another recipe; it’s a gateway to connection and joy. Here are five reasons why you’ll fall in love with it:

  • Quick and Easy: With just a handful of ingredients and under 30 minutes, you can create a delicious breakfast that everyone will rave about.
  • Shareable Delight: This skillet pancake is perfect for sharing, making it ideal for family breakfasts or brunches with friends.
  • Customizable Flavors: You can easily adapt this recipe with different mix-ins like fruits, nuts, or flavored syrups to suit everyone’s taste.
  • One-Pan Wonder: Cooking everything in a cast iron skillet means less cleanup, allowing you to focus on what really matters—enjoying your meal.
  • Heartfelt Memories: Each pancake is a reminder of the love and warmth that comes from cooking together, creating lasting memories with your loved ones.

Ingredient Breakdown

Let’s gather our ingredients for this delightful Easy Pancake Skillet. Here’s what you’ll need:

  • 2 cups Kodiak Cakes mix: This protein-packed mix offers a fluffy texture and a wholesome taste. If you don’t have Kodiak Cakes, any pancake mix will do.
  • 1.5 cups water: Just enough to bring the dry ingredients together; you can substitute with milk for creamier pancakes.
  • 1/4 cup mini chocolate chips: These little bites of joy melt into the batter, adding sweetness and flavor. Try swapping with dark chocolate for a richer taste.
  • 2 tbsp natural peanut butter: Adds a nutty flavor that complements the sweetness of the pancakes. Feel free to use almond butter or any nut butter you prefer.
  • 2 tbsp butter: Essential for greasing the skillet and adding a rich flavor to your pancake.

How to Make This Easy Pancake Skillet

Ready to get cooking? Here’s a step-by-step guide to making your Easy Pancake Skillet:

  1. Preheat your oven: Set it to 350 degrees Fahrenheit. Place your cast iron skillet in the oven to heat up while it preheats.
  2. Gather your ingredients: Make sure you have everything ready to go. This step keeps your cooking smooth and enjoyable.
  3. Mix the batter: In a mixing bowl, combine 2 cups of Kodiak Cake mix with 1.5 cups of water. Stir until just combined—don’t overmix!
  4. Add chocolate chips: Gently fold in 1/4 cup of mini chocolate chips, letting them scatter throughout the batter.
  5. Prepare the skillet: Once the oven is preheated, carefully remove the skillet and melt 2 tablespoons of butter in it, ensuring it coats the entire surface.
  6. Pour and bake: Pour the batter into the hot skillet, spreading it evenly. Bake for 5 minutes, then sprinkle the remaining chocolate chips on top. Continue baking for another 7 minutes or until the pancake is golden brown and cooked through.
  7. Add the finishing touches: Remove the skillet from the oven and drizzle your all-natural peanut butter over the top. Don’t forget the syrup!
  8. Serve and enjoy: Cut into wedges and serve warm, sharing the joy with those around you!

Pro Tips for Perfect Pancakes

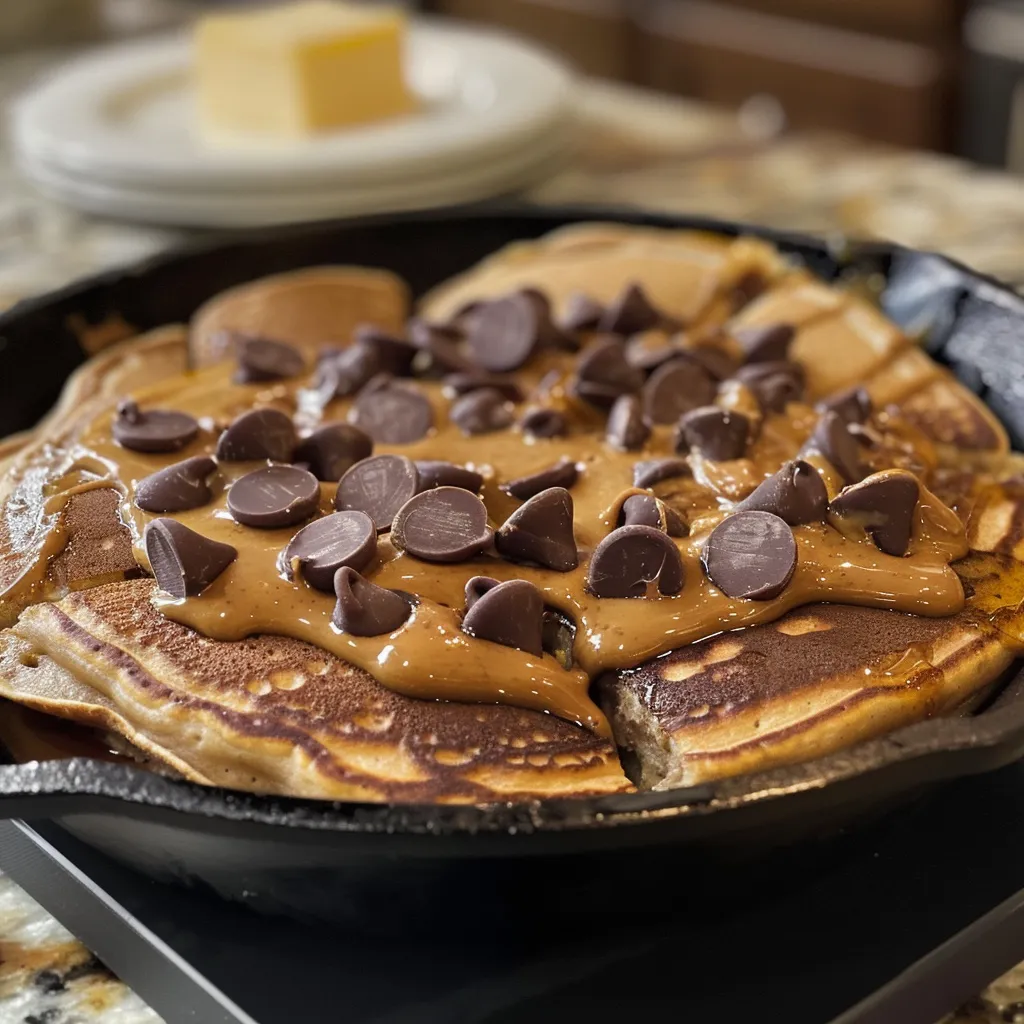
Juicy pancake skillet filled with mini chocolate chips, shot from the side.

To make your pancake experience even more delightful, consider these expert insights:

  • Don’t overmix: When combining your ingredients, stop mixing as soon as no dry flour is visible. A few lumps are perfectly fine!
  • Use a hot skillet: Ensuring your cast iron skillet is properly heated will give your pancake that golden crust.
  • Experiment with toppings: Try adding fresh fruits like blueberries or bananas, or even a sprinkle of cinnamon for added flavor.
  • Check for doneness: Insert a toothpick into the center; it should come out clean when your pancake is fully baked.
  • Adjust cooking time: Depending on your oven, you may need to tweak the baking time slightly for the best results.
  • Make it a meal prep: Prepare the batter the night before and refrigerate. Just pour it into the skillet and bake in the morning!
  • Keep it warm: If you’re serving a crowd, keep the skillet in a low oven (around 200°F) to keep pancakes warm while you cook more.
  • Use quality ingredients: Opt for high-quality butter and chocolate chips for a richer flavor.

Common Mistakes and Troubleshooting

Even the best chefs make mistakes! Here are some common pitfalls and how to avoid them:

  • Flat pancakes: This can happen if your baking powder is old or if you overmix the batter. Always check the freshness of your ingredients.
  • Burnt edges: If your skillet is too hot, the edges can burn while the center remains raw. Adjust the heat as needed.
  • Dry texture: Overbaking can lead to dry pancakes. Keep an eye on the time and check for doneness early.
  • Uneven cooking: Ensure your batter is spread evenly in the skillet for uniform cooking.

Delicious Variations

Get creative with your Easy Pancake Skillet! Here are some fun variations to try:

  • Fruit Fiesta: Add fresh berries or sliced bananas to the batter for a fruity twist.
  • Nut Lover’s Delight: Mix in chopped nuts like walnuts or pecans for a crunchy texture.
  • Spiced Pumpkin: Incorporate pumpkin puree and pumpkin spice for a seasonal treat.
  • Chocolate Lovers: Replace half the chocolate chips with cocoa powder for a rich, chocolatey pancake.

Storage and Make-Ahead Instructions

Want to enjoy your pancake skillet even after the meal? Here’s how to store and prepare ahead:

  • Refrigeration: Store leftovers in an airtight container in the fridge for up to 3 days.
  • Freezing: You can freeze slices of the pancake in a freezer-safe container for up to a month. Just reheat in the oven or microwave.
  • Make-Ahead: Prepare the batter the night before and keep it in the fridge. Just pour and bake in the morning!

Frequently Asked Questions

Here are some common questions about the Easy Pancake Skillet:

  • Can I use regular pancake mix? Yes, any pancake mix can work, though Kodiak Cakes adds extra protein.
  • What if I don’t have a cast iron skillet? You can use any oven-safe skillet, but cast iron provides the best heat distribution.
  • Can I make this gluten-free? Absolutely! Use a gluten-free pancake mix and adjust the liquid as needed.
  • How can I make this dairy-free? Substitute the butter with coconut oil and use a non-dairy milk.
  • Can I add eggs to the mix? You can add one egg for a richer texture, but it’s not necessary.
  • What’s the best way to reheat leftovers? Reheat in the oven at 350°F until warmed through, or microwave for a quick fix.
  • Can I double the recipe? Yes! Just ensure your skillet is large enough to accommodate the extra batter.
  • How do I know when it’s done? A toothpick inserted in the center should come out clean, and the top should be golden brown.

Nutritional Tips and Dietary Adaptations

For those watching their diet, here are some helpful tips:

  • Protein Boost: For an extra protein kick, consider adding a scoop of protein powder to the batter.
  • Reduce Sugar: You can cut down on added sugars by using less chocolate or opting for sugar-free chocolate chips.
  • Whole Grain Option: Substitute half of the Kodiak mix with whole wheat flour for added fiber.
  • Vegan Version: Replace eggs with flax eggs and use non-dairy milk to make this recipe vegan-friendly.

Equipment Recommendations

Here’s what you’ll need to make your Easy Pancake Skillet:

  • Cast Iron Skillet: Ideal for even cooking and a beautiful presentation.
  • Mixing Bowls: For combining ingredients smoothly.
  • Spatula: A sturdy one will help you flip the pancakes easily.
  • Oven Mitts: Safety first! Always use mitts when handling hot cookware.

Serving Suggestions

Make your pancake feast even more special with these serving ideas:

  • Top it off: Serve with whipped cream, maple syrup, or fresh fruits.
  • Pair with beverages: A hot cup of coffee or a glass of fresh orange juice complements the meal beautifully.
  • Side dishes: Consider adding crispy bacon or sausage links for a hearty breakfast.

In conclusion, this Easy Pancake Skillet is more than just a dish; it’s a heartfelt experience that brings people together. I hope you enjoy making it as much as I enjoyed sharing it with you. Remember, cooking is all about love and connection, so gather your loved ones and create beautiful memories around the table. Happy cooking!

Easy Pancake Skillet

Prep Time 10 minutes
Cook Time 12 minutes
Total Time 22 minutes
Servings 4 pieces
Calories 350
A delicious and simple pancake baked in a cast iron skillet, perfect for a quick breakfast treat.

Ingredients

Dry ingredients

  • 2 cups Kodiak Cakes mix
  • 1.5 cups water
  • 1/4 cup mini chocolate chips

Fats & toppings

  • 2 tbsp natural peanut butter
  • 2 tbsp butter (for the skillet)

Instructions 

  • Preheat oven to 350°F and place the cast iron skillet inside.
  • Mix Kodiak Cakes with water, then stir in chocolate chips.
  • Remove skillet, melt butter in it, then pour batter in.
  • Bake for 12 minutes, then drizzle peanut butter and serve.

Notes

Use a preheated cast iron skillet for best results.
Calories: 350kcal
Cost: $10
Course: Breakfast
Cuisine: American
Keyword: Pancake

Welcome to a delightful journey of flavors that takes us back to the warm, sun-kissed days of summer. Today, we’re crafting a Röda bär & vaniljprotein smoothie that combines the vibrant taste of mixed berries with the creamy richness of coconut yogurt. This smoothie is not just a treat for your taste buds; it’s a celebration of memories, love, and the joy of sharing simple, wholesome moments around the family table. So grab your blender, and let’s dive into this vibrant berry experience that whispers sweet nostalgia!

Why You’ll Love This Recipe

This smoothie is more than just a refreshing drink; it’s a blend of health, flavor, and warmth that can brighten any day. Here are some reasons you’ll adore this recipe:

  • Quick and Easy: With just a few ingredients and a blender, this smoothie comes together in under 5 minutes, making it perfect for busy mornings or a quick afternoon pick-me-up.
  • Nourishing Ingredients: Packed with antioxidants from mixed berries and protein from vanilla protein powder, this smoothie is a powerhouse of nutrition.
  • Versatile Flavor: You can easily customize this recipe to suit your taste buds or dietary preferences, ensuring everyone at the table can enjoy it.
  • Heartfelt Memories: Each sip brings back the essence of summer, evoking cherished memories of family gatherings and joyful celebrations.
  • Kid-Friendly: This smoothie is a fun way to introduce kids to healthy eating, as they’ll love its sweet and fruity flavor.

Ingredient Breakdown

Let’s take a closer look at the ingredients that make this smoothie so special, along with some suggested substitutions for those with dietary restrictions or preferences:

  • 250 ml plant milk (almond recommended): For a creamy base, almond milk works beautifully, but you can substitute with oat milk, soy milk, or coconut milk for a different flavor profile.
  • 1 frozen banana: This adds natural sweetness and a creamy texture; you can use a fresh banana, but it won’t be as creamy.
  • 150 g mixed frozen berries: A combination of strawberries, raspberries, and red currants is ideal, but feel free to use any berries you love or have on hand.
  • 2 tablespoons coconut yogurt: This adds richness and creaminess; you can swap this for any dairy-free yogurt or regular yogurt if you prefer.
  • 1 scoop Rawnice Vanilla Caramel Protein Powder: For an extra protein boost, but feel free to use any vanilla protein powder or omit it for a lighter version.

Pro Tips for the Perfect Smoothie

To ensure your smoothie turns out perfectly every time, here are some expert tips:

  • Blend in Stages: Start by blending the softer ingredients (like the banana and yogurt) before adding the frozen fruits to create a smoother texture.
  • Adjust Consistency: If your smoothie is too thick, add a splash more plant milk until you reach your desired consistency.
  • Chill Your Ingredients: Using frozen fruits not only makes the smoothie cold but also helps achieve that creamy texture—don’t skip this step!
  • Experiment with Flavors: Add a splash of vanilla extract or a pinch of cinnamon for an extra layer of flavor.
  • Use Fresh Ingredients: If possible, opt for organic fruits and high-quality protein powder to enhance the smoothie’s nutritional value.
  • Garnish Creatively: Top your smoothie with fresh berries, a sprinkle of granola, or a swirl of coconut yogurt for visual appeal and added texture.
  • Stay Hydrated: Pair your smoothie with a glass of water or herbal tea for a refreshing breakfast or snack.
  • Blend with Love: Remember, the best flavors come from the heart. So, as you blend, think of the memories you’re creating with each sip.

Avoid Common Mistakes

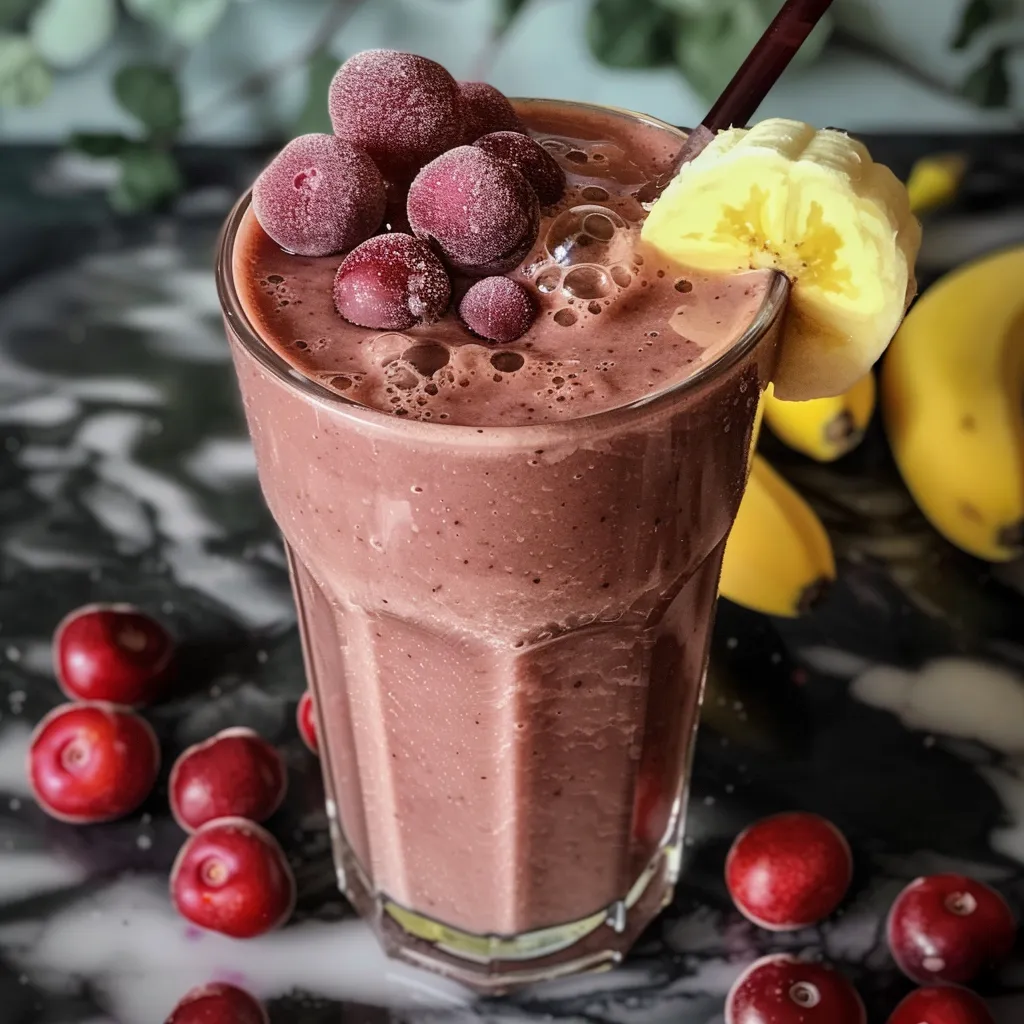
Side perspective of a creamy smoothie filled with red berries and vanilla protein.

Even seasoned smoothie makers can run into a few hiccups. Here’s how to avoid common mistakes:

  • Overloading the Blender: If you add too many ingredients at once, it can cause uneven blending. Stick to the recommended amounts.
  • Using Too Much Ice: While ice can make your smoothie cold, too much can dilute the flavors. Stick to frozen fruits for best results.
  • Neglecting Nutritional Balance: Ensure you have a good mix of carbohydrates, protein, and healthy fats to keep your smoothie nutritious.
  • Forgetting to Taste: Always taste your smoothie before serving to adjust sweetness or flavors as needed.

Delicious Variations to Try

Feeling adventurous? Here are some delightful variations to switch things up:

  • Chocolate Berry Smoothie: Add a tablespoon of cocoa powder for a rich, chocolatey twist.
  • Green Berry Smoothie: Toss in a handful of spinach or kale for added nutrients without compromising flavor.
  • Tropical Berry Smoothie: Substitute half of the berries with frozen mango or pineapple for a tropical delight.
  • Nutty Berry Smoothie: Add a tablespoon of almond butter or peanut butter for a creamy, nutty flavor.

Storage and Make-Ahead Instructions

Want to prepare ahead of time? Here’s how to store your smoothie:

  • Make-Ahead Smoothie Packs: Pre-portion your ingredients in freezer bags. When you’re ready, just blend with your plant milk and yogurt.
  • Refrigeration: If you have leftover smoothie, store it in an airtight container in the fridge for up to 24 hours. Give it a good shake before enjoying.
  • Freezing Leftovers: For longer storage, consider freezing leftover smoothie in ice cube trays. Then you can pop out a cube for a quick snack or blend into future smoothies.

Frequently Asked Questions

Curious minds often have the same questions! Here’s what you might want to know:

  • Can I use fresh berries instead of frozen? Yes, but you may need to add ice for that creamy texture.
  • Is this smoothie vegan? Absolutely! Just ensure your protein powder is plant-based.
  • Can I substitute the protein powder? Yes, you can omit it or use any protein powder you prefer.
  • How can I make this smoothie sweeter? Add a drizzle of honey, maple syrup, or a few dates if you like it sweeter.
  • What type of plant milk works best? Almond milk is great, but oat milk or coconut milk can offer different flavors.
  • Can I add greens to this smoothie? Yes, spinach or kale can be added for extra nutrition without changing the flavor much.
  • What’s the best time to enjoy this smoothie? It’s perfect for breakfast, a mid-afternoon snack, or even a post-workout recovery drink.
  • Can I make this smoothie without a blender? A high-quality immersion blender can work, but a traditional blender offers the best results.

Nutritional Tips and Dietary Adaptations

To maximize the health benefits of this smoothie, consider these tips:

  • Protein Boost: Add a handful of chia seeds or hemp seeds for extra protein and omega-3 fatty acids.
  • Fiber Rich: Incorporate oats for added fiber, helping to keep you fuller longer.
  • Low-Sugar Option: Use unsweetened plant milk and skip any additional sweeteners for a lower sugar option.
  • Allergen-Friendly: Substitute any ingredients to cater to allergies; for example, use nut-free yogurt and milk for those with nut allergies.

Equipment Recommendations

To create the perfect smoothie, you’ll need some essential equipment:

  • High-Powered Blender: A quality blender can make all the difference in achieving that smooth, creamy texture.
  • Measuring Cups and Spoons: For accurate ingredient measurements, which is key in baking and cooking.
  • Spatula: Handy for scraping down the sides of your blender to ensure everything is mixed well.

Serving Suggestions

Now that you’ve created your berry bliss smoothie, let’s talk about how to serve it:

  • Chilled Glasses: Serve in chilled glasses for an extra refreshing experience.
  • Accompanied by Snacks: Pair with some whole-grain toast or a piece of fruit for a more complete meal.
  • Garnish for Flair: A few fresh berries on top or a sprinkle of granola can make your smoothie look as good as it tastes.

As we wrap up this delightful journey of flavors, remember that cooking and sharing meals is about love, connection, and cherished memories. This Röda bär & vaniljprotein smoothie is not just a recipe; it’s a way to bring warmth and joy to your table, one sip at a time. So gather your loved ones, blend up this smoothie, and create new memories that will last a lifetime. Cheers to love, laughter, and the joy of sharing good food!

Röda bär & Vaniljprotein Smoothie

Prep Time 5 minutes
Total Time 5 minutes
Servings 1 glass
Calories 250
En näringsrik och smakrik smoothie med bär, banan och vaniljprotein för en energiboost.

Ingredients

Liquid

  • 250 ml växtmjölk (mandel)
  • 1 st fryst banan

Bärmix

  • 150 gr fryst bärmix (jordgubbar, hallon, röda vinbär)

Yoghurt

  • 2 msk kokosyoghurt

Protein Pulver

  • 1 skopa Rawnice Vanilla Caramel Protein Pulver

Instructions 

  • Lägg alla ingredienser i en snabbmixer och mixa tills du får en slät och krämig konsistens.

Notes

Anpassa mängden bär för mer sötma eller syra.
Calories: 250kcal
Cost: $8
Course: Smoothie
Cuisine: Swedish
Keyword: Bär, Frukt, Protein

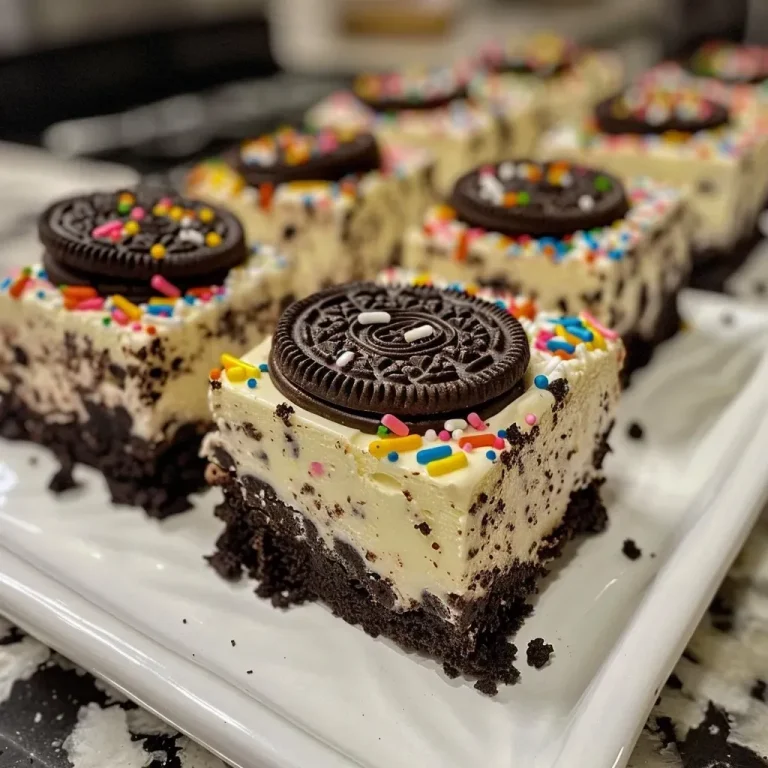
Why You’ll Love No-Bake Oreo Cheesecake Bars

There’s something magical about the way certain desserts evoke memories and bring people together. No-Bake Oreo Cheesecake Bars are one of those treats that effortlessly blend nostalgia and delight. This recipe captures the essence of family gatherings and sweet moments shared around the table. Here’s why you’ll absolutely adore making and sharing these bars:

  • Effortless Preparation: With no need for baking, these bars are incredibly easy to whip up. Just layer, chill, and serve!
  • Decadent Creaminess: The creamy cheesecake filling, combined with a crunchy Oreo crust, creates a delightful contrast that melts in your mouth.
  • Customizable: Whether you want to add mini chocolate chips or a hint of mint extract, this recipe allows for delicious variations.
  • Perfect for Any Occasion: From birthday parties to cozy family dinners, these bars are a hit for any gathering.
  • Make-Ahead Friendly: They can be made in advance, giving you more time to enjoy with loved ones.

Ingredients Breakdown

Let’s dive into the key components that make these No-Bake Oreo Cheesecake Bars so delightful. Each ingredient plays a crucial role in achieving the perfect flavor and texture.

  • Oreo Cookies: The heart of the crust. Use regular Oreos for that classic flavor, or swap in gluten-free versions if needed.
  • Unsalted Butter: This binds the crust while adding richness. Melt it and mix it with crushed Oreos.
  • Cream Cheese: Essential for the creamy filling. Make sure it’s softened for easy blending.
  • Powdered Sugar: Adds sweetness and smoothness to the cheesecake filling. Don’t skip this for that perfect balance!
  • Vanilla Extract: Enhances the flavors in the filling. A splash goes a long way!
  • Heavy Cream: Whipped to stiff peaks, it adds fluffiness and a light texture to the filling.
  • Optional Add-Ins: Mini chocolate chips, sprinkles, or a hint of mint extract can elevate your bars even further!

How to Make No-Bake Oreo Cheesecake Bars

Now that we’ve gathered our ingredients, let’s walk through the simple steps to create these delightful bars. Each step is straightforward, ensuring success every time.

  • Step 1: Make the Crust – Start by crushing 16 Oreos in a zip-top bag with a rolling pin. Mix the crushed Oreos with 6 tbsp melted butter until it resembles wet sand. Press this mixture firmly into an 8×8-inch pan. Chill in the fridge for 10–15 minutes while making the filling.
  • Step 2: Make the Cheesecake Filling – In a large bowl, beat 16 oz softened cream cheese, 1/2 cup powdered sugar, and 1 tsp vanilla until smooth. In another bowl, whip 1 1/2 cups heavy cream to stiff peaks, then gently fold it into the cream cheese mixture.
  • Step 3: Add the Oreos – Roughly chop 8 Oreos and fold them into the cheesecake filling for an extra crunch.
  • Step 4: Assemble the Bars – Pour the cheesecake filling over the chilled crust. Smooth the top with a spatula or the back of a spoon.
  • Step 5: Chill – Cover with plastic wrap and refrigerate for 2–3 hours, or preferably overnight for best results.
  • Step 6: Serve – Cut into squares, wiping your knife between slices to keep the edges clean and neat.

Expert Tips for Success

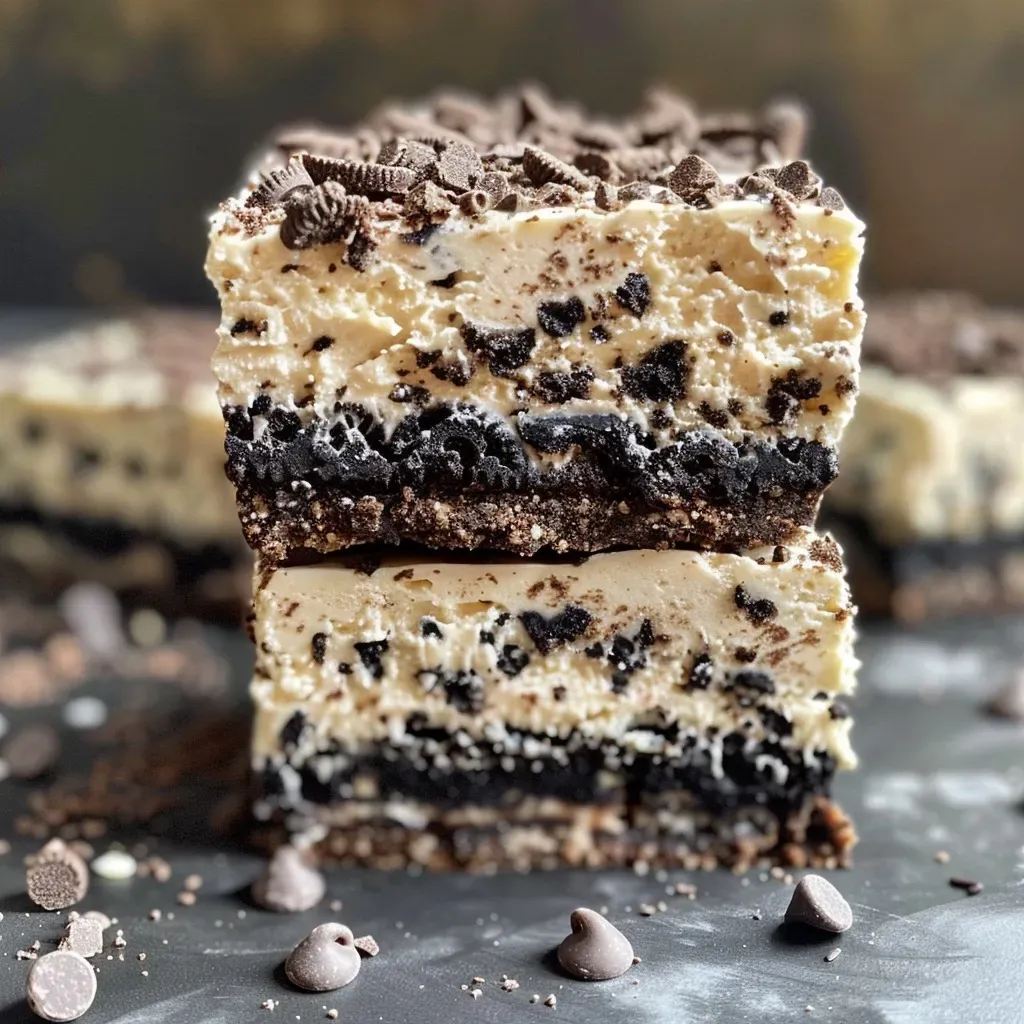
No-Bake Oreo Cheesecake Bars

To ensure your No-Bake Oreo Cheesecake Bars turn out perfectly, here are some expert insights:

  • Room Temperature Ingredients: Ensure that your cream cheese is at room temperature before mixing. This prevents lumps and creates a smooth filling.
  • Whipping Cream Technique: Whip your cream until stiff peaks form, but be careful not to over-whip, which can lead to a grainy texture.
  • Chill Time: Allowing the bars to chill overnight enhances the flavors and improves the texture.
  • No Skimping on Oreos: Use a generous amount of Oreos for both the crust and filling to maximize that iconic flavor.
  • Serve Chilled: These bars are best served cold, so keep them in the fridge until you’re ready to enjoy!
  • Presentation: Top with additional crushed Oreos or a drizzle of chocolate for an eye-catching finish.
  • Experiment with Flavors: Don’t hesitate to add unique twists like peanut butter or caramel to the filling for a different flavor profile.
  • Personalize the Size: Use a larger or smaller pan to adjust the thickness of the bars according to your preference.

Common Mistakes and Troubleshooting

Even the best of us can face challenges in the kitchen. Here are some common mistakes to avoid and tips for troubleshooting:

  • Crust Too Crumbly: If your crust falls apart when cut, try adding a little more melted butter to help it hold together.
  • Filling Too Soft: If your filling doesn’t set, it likely needs more chilling time. Refrigerate longer if necessary.
  • Lumpy Filling: Ensure your cream cheese is softened and well-beaten before mixing with other ingredients.
  • Over-whipped Cream: If your whipped cream appears grainy, it has been over-whipped. Mix in a bit more cream to salvage it.

Delicious Variations to Try

If you’re feeling adventurous, here are some delightful variations to make your No-Bake Oreo Cheesecake Bars even more exciting:

  • Mint Oreo Cheesecake Bars: Use mint-flavored Oreos for a refreshing twist and add a few drops of mint extract to the filling.
  • Peanut Butter Oreo Cheesecake Bars: Swirl in some creamy peanut butter into the filling for a rich, nutty flavor.
  • Chocolate Drizzle: Drizzle melted chocolate over the top before serving for an elegant presentation.
  • Fruit Topping: Add a layer of fresh raspberries or strawberries on top for a fruity contrast to the rich cheesecake.

Storage and Make-Ahead Instructions

These bars are perfect for preparing in advance. Here’s how to store them:

  • Refrigeration: Store leftovers in an airtight container in the fridge for up to 5 days.
  • Freezing: Cut into squares and freeze them in a single layer. Once frozen, transfer to a freezer-safe container and store for up to 2 months.
  • Thawing: When ready to enjoy, thaw in the fridge overnight for best results.

Frequently Asked Questions

Here are some common questions about making No-Bake Oreo Cheesecake Bars:

  • Can I use low-fat cream cheese? Yes, but the texture may be less creamy.
  • How long do they need to chill? For best results, chill for at least 2–3 hours, or overnight if possible.
  • Can I use other cookies for the crust? Absolutely! Try using chocolate chip cookies or graham crackers for a different flavor.
  • What’s the best way to cut these bars? Use a sharp knife and wipe it clean between cuts for neat squares.
  • Can I make these bars gluten-free? Yes, use gluten-free Oreo cookies and ensure all other ingredients are gluten-free.
  • What’s the difference between these bars and regular cheesecake? These bars are no-bake, making them lighter and easier to prepare.
  • How can I make these bars dairy-free? Substitute cream cheese and heavy cream with dairy-free alternatives.
  • Can I add fruit to the filling? Yes, feel free to fold in fresh fruit like berries for a delightful twist.

Nutritional Tips and Dietary Adaptations

For those mindful of their diet, here are some tips to adapt the recipe:

  • Healthier Sweetener: Swap powdered sugar for a natural sweetener like stevia or coconut sugar.
  • Lower Fat Options: Use reduced-fat cream cheese and light whipped cream to cut down on calories.
  • Vegan Alternatives: Explore vegan cream cheese and whipped coconut cream for a plant-based version.

Essential Equipment for Success

To make your baking experience seamless, here’s a list of equipment you’ll need:

  • Mixing Bowls: Use a set of mixing bowls for combining the crust and filling.
  • Electric Mixer: A hand or stand mixer makes whipping the cream and cream cheese a breeze.
  • Pan: An 8×8-inch square pan is perfect for creating thick, luscious bars.
  • Spatula: A rubber spatula helps in smoothing out the filling and scraping down the sides of the bowl.

Serving Suggestions

Now that your No-Bake Oreo Cheesecake Bars are ready, here are some delightful serving suggestions:

  • Garnish with Whipped Cream: Top each bar with a dollop of whipped cream for a touch of elegance.
  • Serve with Fresh Berries: Pair with strawberries or raspberries for a fresh and tangy contrast.
  • Dust with Cocoa Powder: A light dusting elevates the visual appeal and adds a rich chocolate flavor.

As you gather around the table to share these No-Bake Oreo Cheesecake Bars, remember that every slice is a piece of love and cherished memories. Enjoy the laughter, the stories, and the sweet moments they bring. Happy baking!

No-Bake Oreo Cheesecake Bars

Prep Time 20 minutes
Total Time 20 minutes
Servings 12 bars
Calories 350
Delicious and easy no-bake cheesecake bars with Oreo cookies, perfect for a quick dessert.

Ingredients

Crust

  • 24 pieces Oreo cookies
  • 6 tbsp unsalted butter (melted)

Filling

  • 16 oz cream cheese (softened)
  • 1/2 cup powdered sugar
  • 1 tsp vanilla extract
  • 1 1/2 cups heavy cream

Optional Add-ins

  • Mini chocolate chips Mini chocolate chips (optional)
  • Sprinkles Sprinkles (optional)
  • Mint extract Mint extract (optional)

Instructions 

  • Crush 16 Oreos and mix with melted butter; press into an 8×8-inch pan. Chill for 10–15 minutes.
  • Beat softened cream cheese, powdered sugar, and vanilla until smooth. Whip heavy cream to stiff peaks and fold into the cream cheese mixture.
  • Roughly chop 8 Oreos and fold into the filling. Pour over chilled crust and smooth the top.
  • Cover and refrigerate for 2–3 hours or overnight. Slice into squares and serve.

Notes

Wipe your knife between slices to keep them clean and neat.
Calories: 350kcal
Cost: $15
Course: Dessert
Cuisine: American
Keyword: cheesecake, Oreo

Welcome to a Heartwarming One-Pan Dinner Experience

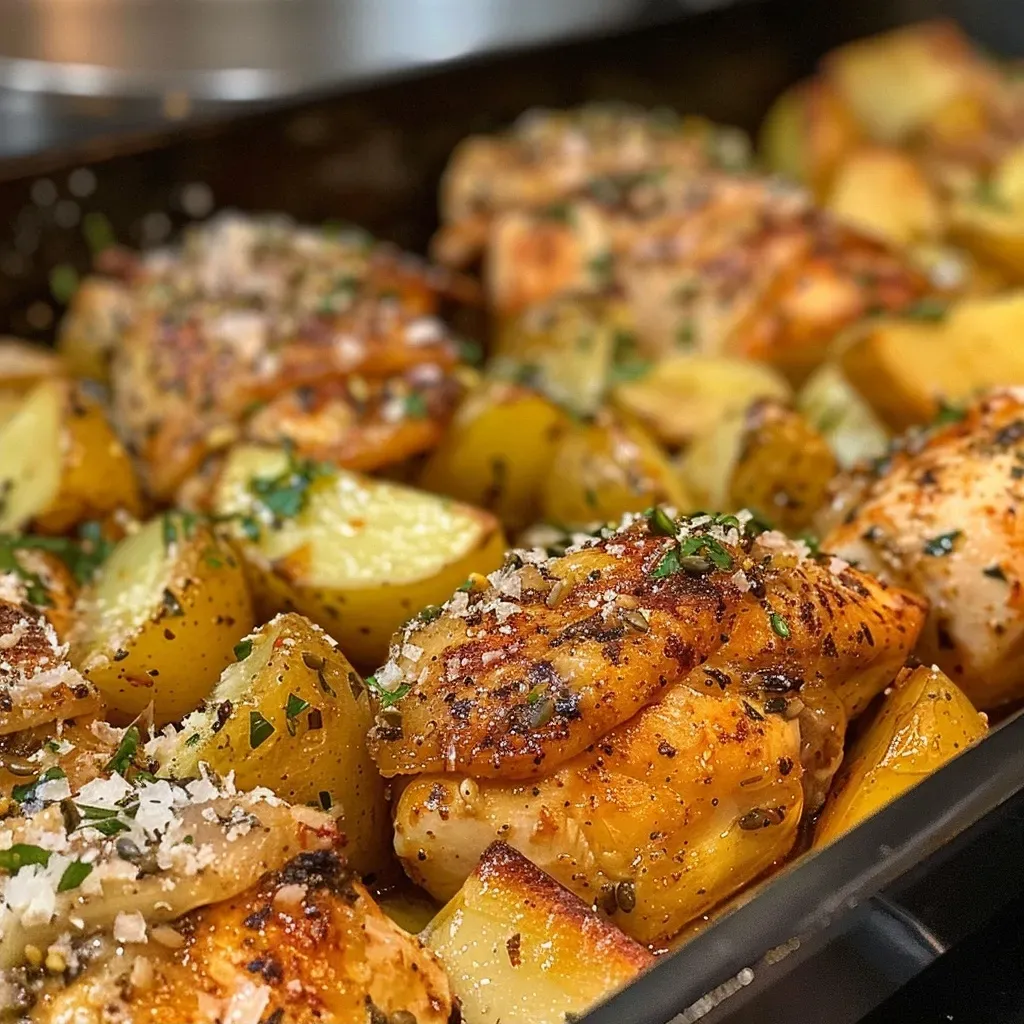
There’s something truly special about a one-pan dinner that brings back memories of gathering around the family table. The **aroma of** garlic and melted parmesan wafting through the air transports me back to my childhood in Louisiana, where cooking was a cherished tradition. Today, I invite you to dive into this comforting recipe for **Garlic Parmesan Chicken and Potatoes**. It’s simple, flavorful, and perfect for those busy weeknights when you want a meal that hugs you from the inside out.

Why You’ll Love This Recipe

  • Quick and Easy: With only a handful of ingredients and simple steps, this dish is a breeze to prepare, allowing you to spend more time with your loved ones.
  • Flavor Packed: The combination of garlic, Italian seasoning, and rich parmesan creates a depth of flavor that elevates your weeknight dinner.
  • One-Pan Convenience: Say goodbye to tedious cleanup! Everything cooks together in one pan, making it a hassle-free meal.
  • Customizable: Feel free to tweak the recipe to suit your tastes or dietary needs, adding seasonal vegetables or spices.
  • Perfect for Meal Prep: This dish stores beautifully, making it a great option for leftovers or meal prep for the week.

Ingredients: A Closer Look

To create this mouthwatering **Garlic Parmesan Chicken and Potatoes**, you’ll need the following ingredients:

  • 2 tbsp olive oil: For coating the chicken and enhancing flavor.
  • 2 lb chicken thighs: Bone-in and skin-on for juiciness and flavor.
  • 1 tbsp Italian seasoning: Use your favorite blend to add an herbaceous note.
  • 1 tsp smoked paprika: Adds a warm, smoky depth to the dish.
  • Salt and black pepper: Essential for seasoning to taste.
  • 1.5 lb potatoes: Halved Yukon gold or red potatoes work best for their creamy texture.
  • 4 cloves minced garlic: For a robust garlicky punch that ties everything together.
  • 0.5 cup grated Parmesan cheese: For that rich, cheesy finish that melts beautifully.
  • Fresh parsley: Chopped, for a pop of color and freshness as a garnish.

Step-by-Step Instructions

Mouthwatering Garlic Parmesan Chicken and Potatoes One-Pan Dinner

Ready to whip up this delightful one-pan dinner? Let’s get started!

  1. Preheat your oven to 400°F (200°C).
  2. In a bowl, whisk together olive oil, Italian seasoning, smoked paprika, salt, and black pepper.
  3. Coat the chicken thighs in the marinade, ensuring even coverage for maximum flavor.
  4. In another bowl, combine the halved potatoes, minced garlic, additional olive oil, Parmesan cheese, salt, and black pepper; toss until well coated.
  5. Spread the seasoned chicken on one side of a baking sheet and arrange the potatoes on the other side in a single layer.
  6. Bake for about 30 minutes or until the chicken reaches 165°F (75°C) and the potatoes are golden brown.
  7. Garnish with freshly chopped parsley before serving.

Pro Tips for Success

  • Even Cooking: Ensure chicken thighs are of uniform size for even cooking. Consider cutting larger ones in half.
  • Season Generously: Don’t skimp on the salt and pepper; they enhance the flavors significantly.
  • Roasting Time: Keep an eye on the chicken and potatoes; cooking times can vary based on oven performance.
  • Resting Period: Let the chicken rest for a few minutes before serving to lock in juices.
  • Garnish Wisely: A sprinkle of fresh parsley not only adds color but also a hint of freshness.

Common Mistakes and Troubleshooting

Even the best cooks encounter challenges. Here are some common mistakes to avoid:

  • Overcrowding the Pan: If you crowd the pan, the chicken won’t brown properly; ensure there’s space between each piece.
  • Undercooking Potatoes: If the potatoes are too large, they may not cook through; cut them into smaller pieces for faster cooking.
  • Skipping the Marinade: Don’t skip marinating the chicken; it’s essential for flavor!

Variations to Explore

This recipe is versatile! Here are some variations you can try:

  • Vegetable Medley: Add bell peppers, carrots, or green beans for a colorful veggie boost.
  • Herb Infusion: Experiment with different herbs like rosemary or thyme for varied flavor profiles.
  • Spicy Kick: Add a pinch of red pepper flakes to the marinade for some heat.
  • Cheesy Twist: Try mixing in a different cheese, like mozzarella or feta, for a unique taste.

Storage and Make-Ahead Instructions

This dish makes for fantastic leftovers! Here’s how to store and reheat it:

  • Refrigeration: Store leftovers in an airtight container in the fridge for up to 3 days.
  • Freezing: Freeze portions in freezer bags for up to 2 months. Thaw in the refrigerator before reheating.
  • Reheating: Reheat in the oven at 350°F (175°C) for about 15-20 minutes until warmed through, or microwave in 1-minute intervals.

Frequently Asked Questions

  • Can I use boneless chicken thighs? Yes, boneless thighs will work, but adjust the cooking time as they may cook faster.
  • What sides pair well with this dish? A simple salad or steamed green beans complement this meal beautifully.
  • Can I make this gluten-free? Yes! All the ingredients used are naturally gluten-free.
  • How can I add more garlic flavor? Consider adding roasted garlic or more minced garlic to the potatoes for an extra punch.
  • Is this recipe suitable for meal prep? Absolutely! It stores well and reheats nicely.
  • What’s the best way to check if the chicken is done? Use a meat thermometer. The internal temperature should reach 165°F (75°C).
  • Can I substitute the potatoes? Yes, sweet potatoes or cauliflower can be used as alternatives.
  • What is the best way to serve this dish? Serve it warm directly from the pan for a rustic presentation!

Nutrition Tips and Dietary Adaptations

To make this dish align with different dietary needs, here are some considerations:

  • Low-Carb: Substitute potatoes with cauliflower for a keto-friendly version.
  • Dairy-Free: Replace Parmesan with nutritional yeast or a dairy-free cheese alternative.
  • Heart-Healthy: Use skinless chicken thighs and reduce the amount of oil for a lighter option.

Recommended Equipment

Here’s what you’ll need to make this recipe:

  • Baking Sheet: A rimmed baking sheet is ideal for catching any drippings.
  • Mixing Bowls: For marinating and preparing ingredients.
  • Meat Thermometer: To ensure your chicken is cooked perfectly.

Serving Suggestions

When it comes to serving, consider these ideas:

  • Fresh Salad: A light green salad with a vinaigrette complements the richness of the dish.
  • Crusty Bread: Serve with warm bread to soak up the delicious juices.
  • Wine Pairing: A light white wine, such as Sauvignon Blanc, pairs beautifully with the garlic and parmesan flavors.

Conclusion: A Meal to Cherish

This **Garlic Parmesan Chicken and Potatoes** recipe is more than just a meal; it’s an invitation to create cherished memories around the dinner table. Whether you’re cooking for family, friends, or just for yourself, this dish wraps you in warmth and comfort. So gather your ingredients, preheat that oven, and let’s get cooking. Remember, in the kitchen, it’s all about love, laughter, and sharing a piece of our hearts with those we cherish most. Happy cooking!

Mouthwatering Garlic Parmesan Chicken and Potatoes One-Pan Dinner

Prep Time 10 minutes
Cook Time 30 minutes
Total Time 40 minutes
Servings 4 servings
Calories 650
A flavorful one-pan meal featuring tender chicken thighs and crispy potatoes, topped with Parmesan and fresh herbs for a satisfying dinner.

Ingredients

Marinade

  • 2 tbsp olive oil (for coating chicken)
  • 2 lb chicken thighs (bone-in and skin-on)
  • 1 tbsp Italian seasoning (use your favorite blend)
  • 1 tsp smoked paprika (adds a warm, smoky depth)
  • salt to taste salt
  • black pepper to taste black pepper
  • 1.5 lb potatoes (halved, preferably Yukon gold or red)
  • 4 cloves minced garlic (for garlicky punch)
  • 0.5 cup Parmesan cheese (grated)

Fresh parsley

Instructions 

  • Preheat oven to 400°F (200°C).
  • Mix olive oil, Italian seasoning, smoked paprika, salt, and black pepper; coat chicken.
  • Toss potatoes with garlic, olive oil, Parmesan, salt, and pepper.
  • Arrange chicken and potatoes on a baking sheet; bake 30 minutes.
  • Garnish with chopped parsley before serving.

Notes

Ensure chicken reaches an internal temperature of 165°F (75°C) for safety.
Calories: 650kcal
Cost: $15
Course: Main Course
Cuisine: American
Keyword: Chicken, garlic, parmesan, Potatoes

Discover the Heartwarming Chocolate Coconut Smoothie

Welcome to a delightful journey into the world of flavor and nostalgia with my favorite recipe: the Chocolate Coconut Smoothie. This isn’t just any smoothie; it’s a warm embrace from the past, a reminder of cherished moments spent in the kitchen, and a simple yet indulgent way to share love with those you hold dear. Perfect for breakfast or a sweet afternoon treat, this recipe combines rich cocoa with the tropical essence of coconut, bringing together a symphony of flavors that will transport you straight to sunny days.

Why You’ll Love This Recipe

So, what makes this Chocolate Coconut Smoothie truly special? Here are five reasons why you’ll want to whip it up today:

  • Rich in Flavor: The blend of chocolate and coconut creates a creamy, dreamy drink that satisfies your sweet tooth while keeping things wholesome.
  • Nutritious Ingredients: Packed with potassium from the banana and healthy fats from coconut, this smoothie is not only delicious but also nourishing.
  • Quick and Easy: In just a few minutes, you can blend this smoothie and enjoy it, making it a perfect choice for busy mornings.
  • Customizable: With numerous variations and substitutions, you can tailor the smoothie to fit your dietary needs and personal preferences.
  • Family-Friendly: This smoothie is a treat the whole family can enjoy, making it a great way to bond over delicious flavors.

Ingredients Breakdown

Let’s gather our ingredients and get ready to create this delightful smoothie!

  • 1 Banana: The base of our smoothie. You can use a frozen banana for extra creaminess.
  • 1/4 cup Pistachios (optional): Adds a nice crunch. Can be substituted for sliced almonds or omitted entirely.
  • 1 cup Almond milk: This provides the liquid base. Feel free to use coconut milk for more coconut flavor or any milk of choice.
  • 3 tbsp Toasted coconut chips (optional): For a lovely texture and extra coconut flavor.
  • 2 1/2 tbsp Cocoa powder: Gives the classic chocolate taste. Ensure it’s unsweetened for the best results.
  • 1 Medjool date, pitted: This natural sweetener can be substituted with maple syrup or honey to taste.
  • 1/4 tsp Vanilla: Enhances the overall flavor profile.
  • 1/4 tsp Cinnamon: Adds warmth and depth; perfect for cozy vibes.
  • 1/2 tsp Coconut oil (optional): Boosts creaminess and flavor.
  • 1/8 tsp Xanthan gum (optional): Helps thicken the smoothie, making it more luxurious.
  • 1/4 tsp Cornstarch or tapioca starch: Another thickening option if xanthan gum is unavailable.

Pro Tips for the Perfect Smoothie

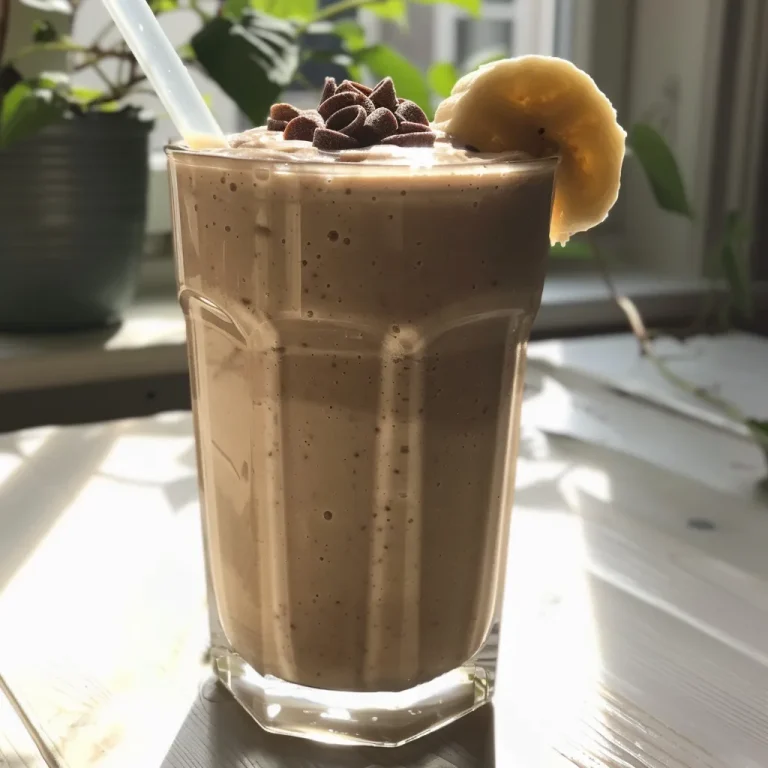
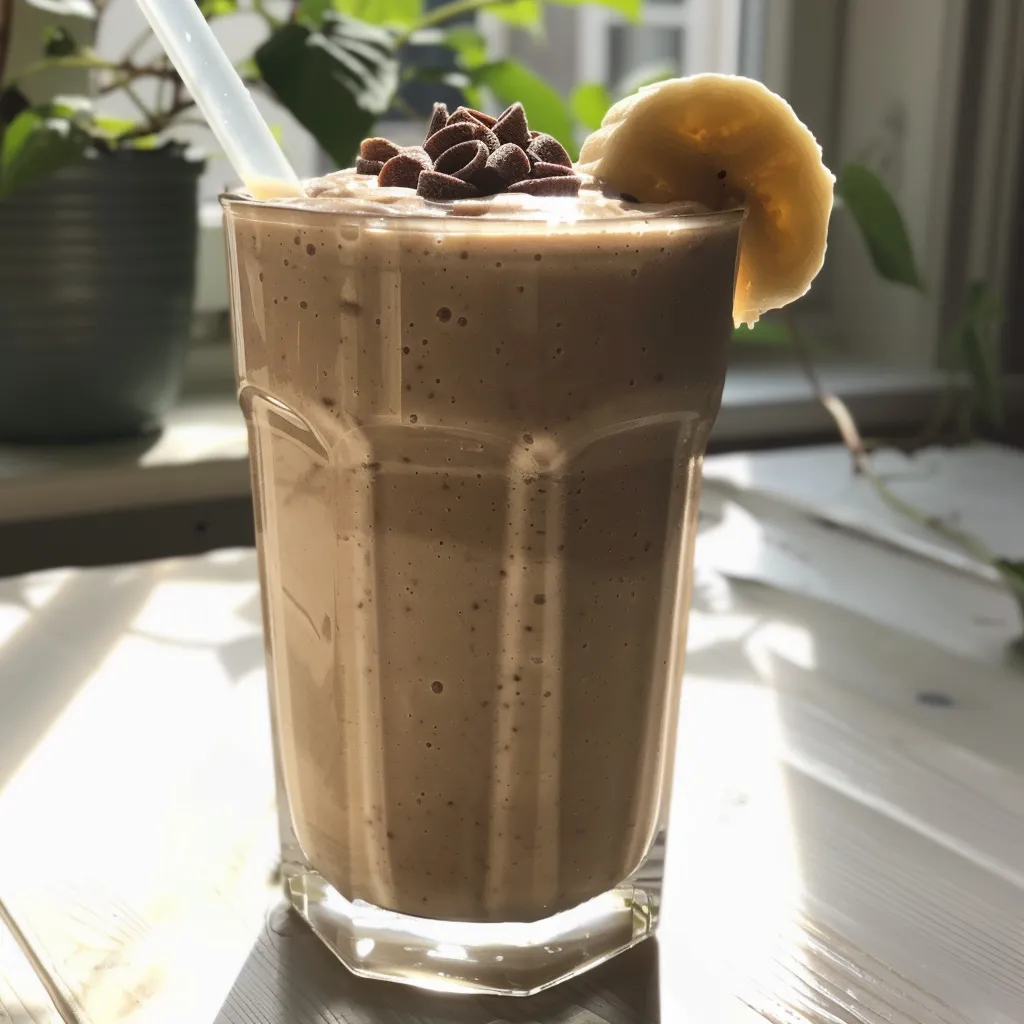
A side profile of a Chocolate Coconut Smoothie filled with chocolate tones and topped with coconut flakes in a clear glass.

Before we dive into the preparation, here are some expert insights to elevate your smoothie experience:

  • Use Frozen Bananas: If you want a thicker, creamier texture, freeze your bananas beforehand.
  • Blend Thoroughly: Ensure all ingredients are well-blended for a smooth consistency, especially if you include nuts.
  • Taste as You Go: Adjust sweetness by adding more dates or syrup based on your preference.
  • Experiment with Flavors: Try adding a tablespoon of peanut butter or almond butter for a protein boost and delicious nutty flavor.
  • Chill Your Glasses: For an even more refreshing treat, chill your glasses before pouring in the smoothie.
  • Garnish Creatively: Top with additional coconut chips, cacao nibs, or fresh fruit for a beautiful presentation.
  • Stay Mindful of Calories: If you’re watching your caloric intake, be cautious with sweeteners and high-calorie additions.
  • Prep Ahead: For quick mornings, prep your ingredients the night before, so all you need to do is blend!

Common Mistakes and Troubleshooting

Even the best of us make mistakes in the kitchen! Here are some common pitfalls to avoid when making your smoothie:

  • Too Thick?: If your smoothie turns out thicker than you’d like, simply add a bit more almond milk to reach your desired consistency.
  • Not Sweet Enough?: If the smoothie isn’t sweet enough for your liking, blend in another date or a splash of honey.
  • Flavor Flat?: If the flavors seem muted, add a pinch more vanilla or a sprinkle of salt to enhance the taste.
  • Over-Blending: Avoid blending too long, as it can make the smoothie warm. Blend just until smooth.

Delicious Variations to Try

Your Chocolate Coconut Smoothie can transform with a few simple tweaks. Here are some fun variations:

  • Peanut Butter Delight: Add 1-2 tablespoons of peanut butter for a rich, nutty twist.
  • Berry Bliss: Toss in a handful of frozen berries for a fruity addition that pairs beautifully with chocolate.
  • Protein Power: Mix in a scoop of your favorite protein powder for an extra boost, making it perfect for post-workout recovery.
  • Green Goddess: Blend in a handful of spinach or kale for added nutrients without compromising flavor.

Storage and Make-Ahead Instructions

If you want to prepare your smoothie in advance, here’s how to do it:

  • Refrigerator: Store any leftovers in an airtight container in the fridge for up to 24 hours, but be aware it may separate.
  • Freezer: You can freeze your smoothie in portion-sized containers. When ready to enjoy, let it thaw in the fridge overnight and shake well before drinking.

Frequently Asked Questions

Here are some common questions about the Chocolate Coconut Smoothie:

  • Can I use dairy milk instead of almond milk? Absolutely! Any milk of your choice will work beautifully.
  • Is this smoothie vegan? Yes, as long as you use plant-based sweeteners and dairy-free milk.
  • Can I add more ingredients? Certainly! Feel free to get creative with additional flavors or nutrients.
  • How can I make it more filling? Adding oats or protein powder can make the smoothie a more substantial meal.
  • What can I substitute for cocoa powder? You can try carob powder for a caffeine-free alternative.
  • How many servings does this recipe make? The ingredients make approximately one large serving or two smaller servings.
  • Can I make it nut-free? Yes, simply omit the nuts and use a nut-free milk alternative.
  • What’s the best time to enjoy this smoothie? It’s perfect for breakfast, a mid-afternoon snack, or dessert!

Nutritional Tips and Dietary Adaptations

This Chocolate Coconut Smoothie is not only delicious but also offers several nutritional benefits:

  • High in Fiber: Bananas and nuts provide dietary fiber, aiding digestion.
  • Rich in Antioxidants: Cocoa powder is known for its antioxidant properties, promoting overall health.
  • Healthy Fats: Coconut and nuts contribute healthy fats that can support heart health.
  • Low Sugar: By controlling the sweetener, you can keep the sugar content low while still enjoying a sweet treat.

Equipment Recommendations

To make your smoothie-making experience seamless, here’s what you’ll need:

  • High-Speed Blender: A good blender is essential for achieving that smooth consistency.
  • Measuring Cups and Spoons: Precise measurements ensure the perfect flavor balance.
  • Spatula: Great for scraping down the sides of the blender to ensure no ingredient is left behind.

Serving Suggestions

To make your smoothie even more enjoyable, consider these serving suggestions:

  • Lovely Glassware: Serve in a chilled glass for a refreshing touch.
  • Garnish with Toppings: Top with extra coconut flakes, chocolate shavings, or fresh fruit for added flair.
  • Pair with Snacks: Enjoy with whole-grain toast or a handful of mixed nuts for a balanced meal.

Conclusion

As we wrap up this delightful recipe for the Chocolate Coconut Smoothie, remember that cooking is not just about the ingredients but the love and memories we share. This smoothie is a wonderful way to connect with friends and family, bringing a taste of joy into every sip. So, gather your loved ones, blend up some goodness, and enjoy the warmth that comes with every delicious drop. Happy blending!

Chocolate Coconut Smoothie

Prep Time 5 minutes
Total Time 5 minutes
Servings 2 cups
Calories 250
A delicious and nutritious smoothie blending chocolate, coconut, and bananas for a perfect treat or snack.

Ingredients

Main

  • 1 piece Banana
  • 1/4 cup Pistachios (optional) (can be substituted for sliced almonds) (Optional)
  • 1 cup Almond milk (If smoothie is too thick you can add more)
  • 3 tbsp Toasted coconut chips (optional) (Optional)
  • 2.5 tbsp Cocoa powder
  • 1 medjool date pitted Medjool date (can be substituted for maple syrup or honey (to taste))
  • 1/4 tsp Vanilla
  • 1/4 tsp Cinnamon
  • 1/2 tsp Coconut oil (optional) (Optional)
  • 1/8 tsp Xanthan gum (or)
  • 1/4 tsp Cornstarch or tapioca starch

Instructions 

  • Blend all ingredients until smooth.
  • For pops: Blend ingredients, add thickening agent, stir, and freeze.

Notes

Adjust sweetness with additional honey or maple syrup if desired.
Calories: 250kcal
Cost: $8
Course: Beverage
Cuisine: fusion
Keyword: chocolate, coconut, Smoothie

Heartwarming Introduction to Garlic Butter Beef Bites

There’s a special warmth that fills the kitchen when you cook a meal that brings people together. This Savory Crockpot Garlic Butter Beef Bites with Potatoes recipe captures that essence perfectly. It’s more than just a dish; it’s a cozy hug served in a bowl, reminiscent of family dinners where laughter mingles with the aroma of garlic and spices. Whether it’s a chilly evening or a casual gathering, this recipe will comfort your soul and impress your loved ones.

Using a slow cooker makes this dish incredibly easy, allowing you to focus on what truly matters: sharing moments with family and friends. With tender beef bites, creamy garlic butter, and hearty potatoes, your table will be filled with love and nostalgia, just like those cherished memories of cooking alongside Grandma in the warm kitchen of my Louisiana home.

Why You’ll Love This Recipe

  • Effortless Cooking: This dish is a true set-it-and-forget-it recipe. Simply toss your ingredients in the slow cooker, and let it work its magic while you enjoy other activities.
  • Rich Flavors: The combination of garlic butter and tender beef creates a savory explosion of flavors that will have everyone asking for seconds.
  • Comfort Food at Its Best: Perfect for cozy dinners or meal prep, this dish warms you from the inside out, making it ideal for any occasion.
  • Easy Cleanup: With minimal prep and cooking in one pot, clean-up is a breeze, giving you more time to relax and enjoy your meal.
  • Customizable: This recipe offers a variety of variations to suit your taste, making it easy to adapt for any dietary needs.

Ingredients You Will Need

Gathering the right ingredients is the first step to creating a heartwarming meal. Here’s what you’ll need for this recipe:

  • 2 lbs beef chuck roast: Cut into bite-sized cubes for tenderness and flavor.
  • 1.5 lbs baby potatoes: Halved or quartered for even cooking and a lovely texture.
  • 6 tablespoons unsalted butter: Softened to create a rich garlic butter sauce.
  • 5 cloves fresh garlic: Minced to infuse the dish with aromatic flavor.
  • 1 cup beef broth: Low-sodium preferred to control saltiness.
  • 2 tablespoons Worcestershire sauce: Adds depth and umami to the dish.
  • 1 teaspoon fresh thyme: Chopped, or ½ teaspoon dried thyme for a hint of herbal flavor.
  • Salt and freshly ground black pepper: To taste, enhancing all the other flavors.
  • 1 tablespoon olive oil (optional): For browning the beef, adding a nice crust.
  • Chopped fresh parsley (optional): For garnish, adding a fresh touch to the finished dish.

Ingredient Substitutions

Don’t have all the ingredients? No problem! Here are some substitutions you can make:

  • Beef chuck roast: You can use stew meat or a different cut of beef like brisket.
  • Baby potatoes: Any small, waxy potatoes work well; you can also use carrots or parsnips for variety.
  • Unsalted butter: If you’re out, use margarine or a dairy-free alternative.
  • Beef broth: Vegetable broth can be a great substitute for a lighter flavor.

Preparation Method

Juicy garlic butter beef cubes and halved baby potatoes in a crockpot.

Now that you have your ingredients ready, let’s dive into how to make this delicious meal:

  1. Trim excess fat from the chuck roast and cut into roughly 1-inch cubes. Pat them dry with paper towels for better browning.
  2. Optional: Heat olive oil in a skillet over medium-high heat. Brown beef cubes in batches for 2-3 minutes per side until golden crust forms. Set aside.
  3. Wash and halve or quarter baby potatoes to ensure even cooking.
  4. In a small bowl, combine softened butter and minced garlic. Mash and blend until smooth to make garlic butter.
  5. Layer beef cubes in the bottom of the crockpot. Add potatoes on top.
  6. Pour beef broth and Worcestershire sauce evenly over beef and potatoes. Sprinkle with salt, pepper, and thyme.
  7. Dot garlic butter mixture evenly over beef and potatoes.
  8. Cover and cook on low for 6 to 7 hours or on high for 3 to 4 hours until beef is fork-tender and potatoes are soft but not mushy.
  9. About 30 minutes before cooking ends, gently stir to distribute garlic butter juices. Adjust seasoning with salt and pepper if needed.
  10. Serve hot, garnished with chopped fresh parsley.

Pro Tips for Perfect Garlic Butter Beef Bites

  • Brown the Beef: While optional, browning the beef adds a rich flavor and color to the dish. Don’t skip this step!
  • Even Cooking: Make sure to cut the potatoes and beef into similar sizes for even cooking and texture.
  • Thicken the Sauce: If you prefer a thicker sauce, mix a tablespoon of cornstarch with water and stir it in 30 minutes before serving.
  • Garlic Variations: Experiment with roasted garlic or add garlic powder for a different flavor profile.
  • Fresh Herbs: Add fresh herbs like rosemary or oregano for an aromatic touch.
  • Spice It Up: If you like heat, consider adding red pepper flakes to the garlic butter for a little kick.
  • Make Ahead: This dish can be prepared the night before. Just assemble everything and refrigerate until you’re ready to cook.
  • Garnishing: For a pop of color, consider topping with freshly chopped chives or scallions before serving.

Common Mistakes and Troubleshooting

Cooking is a journey, and sometimes things don’t go as planned. Here are common pitfalls and how to avoid them:

  • Overcooked Potatoes: If they turn mushy, ensure you’re cutting them to size and not exceeding cooking time.
  • Underseasoned Beef: Always taste and adjust seasoning before serving; the salt enhances the flavors.
  • Too Greasy: If your dish is greasy, try trimming more fat from the beef or using leaner cuts.
  • Flavorless Sauce: If the sauce lacks flavor, try adding more herbs or a splash of vinegar for acidity.

Variations to Try

Feel free to get creative! Here are some variations to customize your beef bites:

  • Garlic Butter Chicken: Swap beef for chicken thighs for a lighter option.
  • Vegetable Medley: Add carrots, bell peppers, or green beans for added nutrition and color.
  • Spicy Kick: Incorporate jalapeños or sriracha to the garlic butter for a spicy version.
  • Herbed Butter: Mix in fresh herbs like dill or parsley into the butter for an herbaceous twist.

Storage and Make-Ahead Instructions

Planning ahead? Here’s how to store leftovers and make this dish in advance:

  • Storing Leftovers: Keep any leftovers in an airtight container in the fridge for up to 3 days.
  • Freezing: This dish freezes well; store in a freezer-safe container for up to 3 months. Thaw overnight in the fridge before reheating.
  • Reheating: Gently reheat in the microwave or on the stovetop with a splash of broth to keep it moist.
  • Make-Ahead Prep: Prepare all ingredients the night before and store them in the fridge. Simply cook the next day!

Frequently Asked Questions

  • Can I use a different cut of beef? Yes, you can use stew meat or brisket as alternatives to chuck roast.
  • Is this recipe gluten-free? Yes, as long as you use gluten-free Worcestershire sauce.
  • Can I double the recipe? Absolutely! Just ensure your slow cooker can accommodate the increased volume.
  • What can I serve with garlic butter beef bites? This dish pairs wonderfully with rice, crusty bread, or a fresh salad.
  • How do I know when the beef is cooked? The beef should be fork-tender, easily shredding with a fork.
  • Can I cook this on high heat? Yes, cooking on high heat will take about 3 to 4 hours.
  • What if I don’t have a slow cooker? You can adapt this recipe for an oven by using a Dutch oven at a low temperature.
  • Can I add more vegetables? Certainly! Feel free to add your favorite vegetables for more nutrients.

Nutritional Information & Dietary Adaptations

This dish is not only comforting but can also be made healthier:

  • Low-Carb Option: Substitute potatoes with cauliflower for a low-carb version.
  • High-Protein: Add beans or lentils for an extra protein boost.
  • Low-Calorie: Use less butter or a butter substitute to reduce calories without sacrificing flavor.

Equipment Recommendations

To create this heartwarming dish, consider using:

  • Slow Cooker: Essential for this recipe, look for one with a timer feature for convenience.
  • Skillet: Useful for browning the beef, enhancing flavor.
  • Cutting Board and Sharp Knife: For quick and easy prep of your ingredients.
  • Measuring Cups and Spoons: Accurate measurements ensure consistent results.

Serving Suggestions

To make your meal even more special, consider these serving ideas:

  • Crusty Bread: Serve with a loaf of freshly baked bread to soak up all the delicious sauce.
  • Side Salads: A simple green salad adds a refreshing contrast to the rich flavors of the beef.
  • Wine Pairing: A robust red wine complements the hearty flavors beautifully.
  • Garnishes: Fresh herbs or a sprinkle of cheese on top adds an elegant touch.

Conclusion

Cooking is an art, and this Garlic Butter Beef Bites recipe is a canvas where you can express love and creativity. As you serve this dish, remember that it’s not just about the food but the stories and memories created around the table. Enjoy the warmth, the laughter, and the love that comes with every bite. Happy cooking!

Savory Crockpot Garlic Butter Beef Bites with Potatoes

Prep Time 15 minutes
Cook Time 7 hours
Total Time 7 hours 15 minutes
Servings 4 servings
Calories 650
Enjoy tender beef and flavorful potatoes cooked to perfection in a savory garlic butter sauce using your crockpot for an easy, hearty meal.

Ingredients

Meat

  • 2 lbs beef chuck roast, cut into bite-sized cubes (Trim excess fat)

Vegetables

  • 1.5 lbs baby potatoes, halved or quartered (Ensure even cooking)

Dairy & Oils

  • 6 tablespoons unsalted butter, softened (Make garlic butter)
  • 5 cloves fresh garlic, minced
  • 1 cup beef broth (Low-sodium preferred)
  • 2 tablespoons Worcestershire sauce
  • 1 teaspoon fresh thyme, chopped (or ½ teaspoon dried thyme)

Seasonings

  • to taste Salt and freshly ground black pepper
  • 1 tablespoon olive oil (Optional, for browning beef)

Garnish

  • for garnish Chopped fresh parsley (Optional)

Instructions 

  • Trim excess fat from beef, cut into 1-inch cubes, and brown in a skillet with olive oil if desired. Set aside.
  • Halve or quarter potatoes. Mix softened butter with minced garlic to make garlic butter.
  • Layer beef and potatoes in the crockpot. Pour broth and Worcestershire sauce over, then season with salt, pepper, and thyme. Dot with garlic butter.
  • Cover and cook on low for 6-7 hours or high for 3-4 hours until beef is tender and potatoes are soft. Stir 30 minutes before end to distribute flavors.
  • Garnish with chopped parsley and serve hot.

Notes

For extra flavor, brown the beef before adding to the crockpot.
Calories: 650kcal
Cost: $15
Course: Main Course
Cuisine: American
Keyword: beef, Potatoes, Slow Cooker

Experience the Brightness of a Strawberry Pineapple Smoothie

Welcome to a refreshing escape with a delightful Strawberry Pineapple Smoothie that captures the essence of summer in every sip. This smoothie is not just a drink; it’s a celebration of flavors and memories that come alive when blended together. Perfect for breakfast, a snack, or a shared moment with loved ones, this recipe embodies the warmth of shared experiences in the kitchen. Let’s dive deeper into why you’ll love this smoothie and how to make it a part of your daily routine.

Why You’ll Love This Recipe

  • Health Benefits: Packed with vitamins, this smoothie offers a nutritious start to your day. Strawberries and pineapples are rich in antioxidants, helping to boost your immune system.
  • Refreshing Flavor: The sweet and tangy combination of strawberries and pineapples creates a refreshing drink that’s perfect for those warm days when you crave something cool.
  • Quick and Easy to Make: With just two main ingredients, this smoothie comes together in minutes, making it an ideal choice for busy mornings.
  • Versatile Ingredients: You can customize this recipe based on what you have on hand, whether it’s swapping almond milk for yogurt or adding protein powder for an extra nutritional boost.
  • Kid-Friendly: Children will love the sweet taste, and it’s a fantastic way to sneak in some fruit into their diet.

Ingredients Breakdown

Let’s take a closer look at the ingredients that make this strawberry pineapple smoothie a joy to drink:

  • Strawberries: Fresh or frozen, strawberries bring a natural sweetness and vibrant color to your smoothie. Feel free to use organic berries for a healthier option.
  • Pineapples: Fresh pineapple adds a tropical twist, while canned pineapple (in juice, not syrup) can also work in a pinch.
  • Almond Milk: A great dairy-free option that adds creaminess. You can substitute it with any milk of your choice, such as coconut or oat milk.
  • Protein Powder (optional): For a protein boost, especially if you’re having this smoothie for breakfast, add your favorite protein powder.

How to Make a Strawberry Pineapple Smoothie

Side view of a refreshing strawberry pineapple smoothie, highlighting the texture and ingredients.

Let’s get blending! Follow these simple steps to create your delicious smoothie:

  • Combine Ingredients: In a blender, add 1 cup of strawberries and 1 cup of pineapple.
  • Add Liquid: Pour in 1 cup of almond milk (or your choice of milk) to help blend the ingredients smoothly.
  • Blend Until Smooth: Blend on high until the mixture is frosty and creamy. If you prefer a thicker texture, add more fruit or ice.
  • Taste and Adjust: Give it a taste! You can add a touch of honey or maple syrup if you like it sweeter.

Pro Tips for the Perfect Smoothie

  • Use Frozen Fruit: For an extra frosty texture, opt for frozen strawberries and pineapples, which also help keep your smoothie chilled.
  • Layer Ingredients Wisely: When blending, start with liquids at the bottom to help the blades move through the heavier ingredients more easily.
  • Add Greens: For a nutrient boost, toss in a handful of spinach or kale for added vitamins without altering the flavor significantly.
  • Experiment with Add-Ins: Try adding chia seeds, flax seeds, or nut butter for added health benefits and flavor.
  • Adjust Consistency: If your smoothie is too thick, simply add more liquid until you achieve your desired texture.
  • Chill Your Glasses: For a refreshing experience, chill your glasses in the freezer before serving.
  • Use a High-Speed Blender: A good blender will create a smoother texture, blending all ingredients evenly.
  • Make it a Meal: Consider adding oats for a more filling breakfast option.

Common Mistakes and Troubleshooting

Even the best of us encounter bumps in the road! Here are some common issues and how to fix them:

  • Too Thick: If your smoothie is too thick, add more almond milk or water to thin it out until you reach your desired consistency.
  • Too Sweet: If the smoothie is too sweet for your taste, balance it out with a squeeze of lemon juice or add a handful of spinach.
  • Not Cold Enough: If you forgot to use frozen fruit, add ice cubes to chill it down without compromising the flavor.

Variations to Try

Feeling adventurous? Here are some delightful variations to customize your smoothie:

  • Strawberry Banana Smoothie: Add a ripe banana for creaminess and sweetness.
  • Green Strawberry Pineapple Smoothie: Toss in a handful of kale or spinach for a nutritious boost.
  • Coconut Strawberry Pineapple Smoothie: Use coconut milk instead of almond milk for a tropical twist.
  • Berry Blast Smoothie: Mix in blueberries or raspberries for an extra berry flavor.

Storage and Make-Ahead Instructions

You can prepare this smoothie in advance to save time:

  • Pre-Blend Packs: Prepare smoothie packs by portioning out the fruit in zip-top bags and freezing them. When you’re ready to enjoy, just blend with almond milk.
  • Stored Smoothie: If you have leftovers, store them in the fridge for up to 24 hours. Give it a good stir or shake before drinking, as the ingredients may separate.

Frequently Asked Questions

Here are some common questions about this strawberry pineapple smoothie:

  • Can I use frozen strawberries? Yes, frozen strawberries work wonderfully and will make your smoothie extra frosty!
  • Is it possible to make this smoothie without dairy? Absolutely! Use almond milk, coconut milk, or any non-dairy milk of your choice.
  • How can I make this smoothie more filling? Add a scoop of protein powder, oats, or nut butter for extra staying power.
  • What if I don’t have pineapples? You can substitute with mango or peaches for a different fruit experience.
  • Can I make this smoothie ahead of time? Yes! Prepare the ingredients in advance and store them in the freezer for convenience.
  • How long does this smoothie last in the fridge? It’s best consumed fresh, but you can store it in the fridge for up to 24 hours.
  • Can I add vegetables to this smoothie? Yes! Spinach or kale blends well without overpowering the flavor.
  • Is this smoothie good for kids? Definitely, it’s a fun and tasty way to sneak in some fruits!

Nutritional Tips and Dietary Adaptations

This smoothie can easily adapt to various dietary needs:

  • Vegan-Friendly: Simply use plant-based milk and leave out any dairy ingredients.
  • Low-Calorie Option: Skip the sweeteners and use unsweetened almond milk for fewer calories.
  • High-Protein Option: Add a scoop of your favorite protein powder to make it a more substantial meal replacement.

Essential Equipment Recommendations

Here’s what you’ll need to whip up this delightful smoothie:

  • High-Speed Blender: For the smoothest texture, a high-speed blender is key.
  • Measuring Cups: For accurate ingredient measurements, use standard measuring cups.
  • Storage Containers: Use airtight containers for prepped smoothie packs or leftovers.

Serving Suggestions

Serve your smoothie in a chilled glass and consider these delightful accompaniment ideas:

  • Garnish with Fresh Fruit: Top with sliced strawberries or pineapple for a pop of color.
  • Pair with Whole Grain Toast: Enjoy with a piece of whole-grain toast or avocado toast for a balanced breakfast.
  • Add a Cute Straw: Use a fun straw to make sipping even more enjoyable!

Conclusion

In a world that sometimes feels overwhelming, your kitchen can be a sanctuary, a place where love and flavor combine. This Strawberry Pineapple Smoothie is a simple yet delightful way to bring a bit of sunshine into your day. Whether you’re sipping it solo or sharing with family, remember that every ingredient is an opportunity to create a memory. So gather your loved ones, blend up some joy, and let this smoothie remind you that life is about savoring every moment, one delicious sip at a time.

Strawberry Pineapple Smoothie

Prep Time 5 minutes
Total Time 5 minutes
Servings 2 cups
Calories 150
A refreshing and healthy smoothie combining the sweet flavors of strawberries and pineapples.

Ingredients

Fruits

  • 1 cup strawberries (fresh or frozen)
  • 1 cup pineapples (fresh or frozen)
  • 1 cup additional unspecified ingredient (could be yogurt, juice, or milk)

Instructions 

  • Combine strawberries and pineapples in a blender.
  • Blend until smooth and frosty.

Notes

You can add a splash of juice or yogurt for creaminess.
Calories: 150kcal
Cost: $8
Course: Beverage
Cuisine: American
Keyword: Fruit, Smoothie

Welcome to a delightful journey where flavors intertwine with cherished memories. The Creamy Vanilla Date Smoothie is not just a drink; it’s a warm embrace from the past, a sip that transports you back to the kitchen filled with love and laughter. This smoothie, with its rich sweetness and creamy texture, serves as a perfect breakfast or a refreshing afternoon treat. Let’s dive into this recipe and explore why it will become a cherished part of your family’s routine.

Why You’ll Love This Recipe

This isn’t just another smoothie recipe; it comes loaded with benefits that make it a staple in your home:

  • High Protein Boost: Packed with 25 grams of protein from vanilla protein powder, it’s perfect for starting your day right or refueling after a workout.
  • Natural Sweetness: The Medjool dates add a rich, caramel-like sweetness that’s far healthier than processed sugars.
  • Quick and Easy: With just five ingredients and a blender, you can whip this up in under 10 minutes, making it ideal for busy mornings.
  • Heartwarming Flavor: The combination of cinnamon and vanilla creates a nostalgic taste that comforts the soul.
  • Customizable: This recipe is a perfect base; you can easily adapt it with your favorite ingredients or dietary needs.

Ingredients Breakdown

Let’s take a closer look at the ingredients that make this smoothie a true delight:

  • 1 cup chilled whole milk: Provides a creamy base; you can substitute with almond milk or oat milk for a dairy-free version.
  • 3 Medjool dates, pitted: These dates add natural sweetness and thickness; if you’re short on dates, try using honey or maple syrup.
  • 1 scoop vanilla protein powder (25 g protein): Choose a high-quality protein powder that you enjoy; this forms the foundational structure of the smoothie.
  • ½ teaspoon vanilla extract: Enhances the vanilla flavor; opt for pure extract for the best results.
  • ¼ teaspoon ground cinnamon: Adds warmth and depth; feel free to adjust according to your taste.
  • ½ cup ice cubes: Ensures your smoothie is refreshingly cold and thick.

How to Make Your Creamy Vanilla Date Smoothie

Follow these simple steps to create your smoothie:

  1. Place the pitted dates in a small bowl and cover them with hot water. Let them soak for 5 minutes to soften, then drain the water completely.
  2. Pour the chilled milk into the blender first; this helps blend the ingredients smoothly.
  3. Add the softened dates, vanilla protein powder, vanilla extract, and ground cinnamon to the blender.
  4. Blend on high speed for about 40 seconds. Pause once to scrape down the sides if needed to ensure everything is well mixed.
  5. Finally, add the ice cubes and blend again for another 20 seconds until you achieve a creamy consistency.

Pro Tips for the Perfect Smoothie

A detailed view of a delicious creamy vanilla date smoothie with visible ingredients, served in a clear glass.

Want to elevate your smoothie game? Check out these expert tips:

  • Soak your dates: Soaking not only softens them for blending but also enhances their sweetness.
  • Layer your ingredients: Always add liquids first in the blender to help the blades move freely and create a smoother blend.
  • Experiment with flavors: Add a splash of almond extract or a tablespoon of peanut butter for a different twist.
  • Adjust consistency: If the smoothie is too thick, simply add more milk until your desired texture is reached.
  • Chill your glass: For an extra refreshing experience, chill your serving glass in the freezer before pouring in your smoothie.
  • Make it vegan: Use plant-based milk and vegan protein powder to keep it entirely vegan-friendly.
  • Boost nutrition: Toss in a handful of spinach or kale for added vitamins without altering the flavor significantly.
  • Serve immediately: Smoothies are best enjoyed fresh; the longer they sit, the thicker they become.

Common Mistakes and Troubleshooting

Even the best of us can have a hiccup in the kitchen. Here are some common mistakes to avoid:

  • Using hard dates: Always ensure your dates are fresh and soft for the best blending experience.
  • Skipping the soaking step: This can lead to a gritty texture; soaking makes all the difference.
  • Not blending long enough: For a smooth consistency, blend thoroughly to avoid chunks of dates or protein powder.
  • Overloading the blender: If your blender struggles, split the ingredients into batches to ensure everything blends evenly.

Variations to Try

Feeling adventurous? Here are some delightful variations you can try:

  • Chocolate Date Smoothie: Add 1 tablespoon of cocoa powder for a chocolaty twist.
  • Berry Vanilla Date Smoothie: Toss in a handful of frozen berries for a fruity explosion.
  • Green Vanilla Date Smoothie: Blend in a small handful of spinach or kale for a nutritious boost.
  • Nutty Vanilla Date Smoothie: Add a tablespoon of almond or peanut butter for extra creaminess and flavor.

Storage and Make-Ahead Instructions

Planning ahead? Here’s how to store your smoothie:

  • Make-Ahead: You can prepare the smoothie ingredients the night before, keeping them in the fridge. Just blend in the morning.
  • Storage: If you have leftovers, store your smoothie in an airtight container in the fridge for up to 24 hours. Shake or stir before drinking as it may separate.

Frequently Asked Questions

Here are some common questions about the Creamy Vanilla Date Smoothie:

  • Can I use frozen dates?: Yes, frozen dates work well; just soak them for a bit longer.
  • What if I’m allergic to nuts?: Substitute with a seed milk like sunflower seed milk.
  • Can I add protein powder?: Absolutely! This recipe already includes it, but feel free to double up if you need extra protein.
  • Is this smoothie suitable for kids?: Yes, it’s a healthy option that kids will love, especially with its sweet flavor.
  • How can I make this smoothie lower in calories?: Use non-fat milk and reduce the amount of protein powder.
  • What’s the best time to enjoy this smoothie?: It’s perfect for breakfast, a post-workout snack, or a mid-afternoon pick-me-up.
  • Can I use a different sweetener?: Yes, feel free to substitute with honey, maple syrup, or agave nectar if you prefer.
  • How do I know if my protein powder is good quality?: Look for protein powders with minimal ingredients, no added sugars, and preferably plant-based sources.

Nutrition Tips and Dietary Adaptations

This smoothie is not just delicious; it’s also packed with nutrition:

  • Protein-packed: Ideal for muscle recovery and keeping you full longer.
  • Rich in fiber: The dates provide dietary fiber, aiding digestion and promoting gut health.
  • Customizable for dietary needs: Easily make this smoothie vegan, gluten-free, or dairy-free.

Equipment Recommendations

To create your smoothie, you’ll need:

  • High-speed blender: Essential for achieving that creamy consistency without chunks.
  • Measuring cups: To ensure you get the right amount of each ingredient.
  • Small bowl: For soaking the dates.
  • Chilled glass: Serving in a chilled glass enhances the experience.

Serving Suggestions

Make your smoothie experience even more enjoyable:

  • Pair with whole grain toast: Spread some almond butter for a balanced breakfast.
  • Top with granola: For added crunch and texture, sprinkle some granola on top.
  • Serve with fresh fruit: A side of sliced bananas or berries complements the smoothie beautifully.

Final Thoughts

The Creamy Vanilla Date Smoothie is more than just a recipe; it’s an invitation to share moments of joy and comfort. Remember, cooking is about connection, love, and the stories we create together in the kitchen. So gather your loved ones, blend up this delightful smoothie, and enjoy the warm memories it brings. Cheers to good health and sweet nostalgia!

Creamy Vanilla Date Smoothie

Prep Time 10 minutes
Cook Time 5 minutes
Total Time 15 minutes
Servings 1 cup
Calories 250
A delicious and nutritious smoothie combining the natural sweetness of dates with vanilla flavor, perfect for a quick breakfast or snack.

Ingredients

Dairy

  • 1 cup chilled whole milk

Fruits

  • 3 pieces Medjool dates, pitted

Supplements

  • 1 scoop vanilla protein powder (25 g protein)

Spices & Extracts

  • ½ teaspoon vanilla extract
  • ¼ teaspoon ground cinnamon

Ice

  • ½ cup ice cubes

Instructions 

  • Soak dates in hot water for 5 minutes, then drain.
  • Pour chilled milk into the blender.
  • Add dates, protein powder, vanilla extract, and cinnamon to the blender.
  • Blend on high for 40 seconds, scraping sides if needed.
  • Add ice and blend for 20 seconds until smooth.

Notes

For a colder smoothie, use frozen ice cubes or chill the ingredients beforehand.
Calories: 250kcal
Cost: $8
Course: Breakfast, Snack
Cuisine: fusion
Keyword: Dates, Smoothie, Vanilla