Author

daniel

Browsing

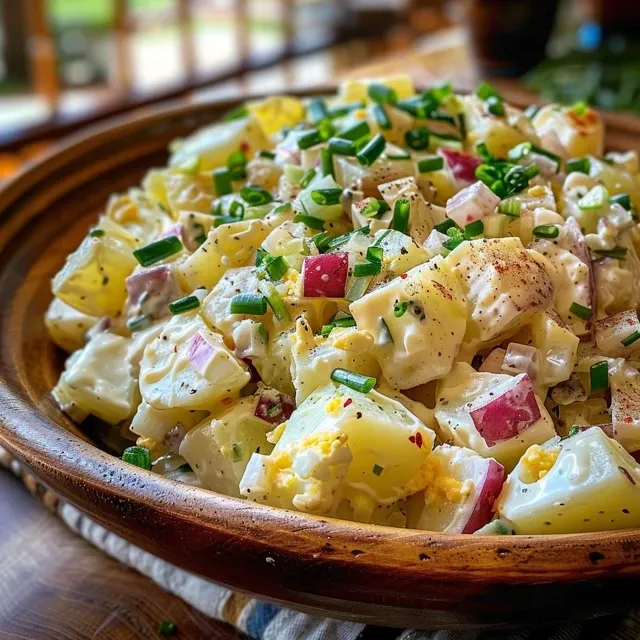
The Soul of Southern Potato Salad

Welcome to a recipe that’s more than just a dish; it’s a tradition steeped in love, laughter, and nostalgia. Our Southern Potato Salad is a celebration of flavors that brings families together around the table. This hearty salad, with its tender potatoes and zesty dressing, is the perfect addition to any gathering or a comforting meal at home. Let’s dive into this beloved recipe that carries the essence of Southern cooking right to your kitchen.

Why You’ll Love This Recipe

There’s something special about a well-made potato salad. Here are just a few reasons why this particular recipe will become a favorite:

  • Versatile Dish: Perfect as a side for barbecues, picnics, or holiday dinners, it complements a variety of main courses.
  • Easy to Make: With simple steps and common ingredients, this recipe is accessible for all skill levels.
  • Flavorful and Tangy: The combination of mayonnaise, mustard, and vinegar creates a creamy dressing with just the right punch of tanginess.
  • Customizable: Feel free to add your own twist with different vegetables or spices, making it uniquely yours.
  • Perfect for Meal Prep: This salad can be made ahead of time and actually improves in flavor when chilled overnight.

Ingredients You’ll Need

Let’s gather the ingredients to prepare this delightful salad. Here’s what you’ll need:

  • 2 pounds russet potatoes – They provide the best texture; Yukon Gold can also work.
  • 1 tablespoon kosher salt (plus an additional ¾ teaspoon) – Essential for flavor during cooking.
  • 2 tablespoons apple cider vinegar – Adds a tangy bite that enhances the potatoes.
  • ½ cup mayonnaise – For that creamy, luscious dressing.
  • ¼ cup sweet pickle relish – Introduces a touch of sweetness that balances the flavors.
  • 2 teaspoons yellow mustard – A key ingredient for that classic potato salad taste.
  • ½ teaspoon black pepper – For a hint of heat.
  • ½ teaspoon garlic powder – Infuses the salad with delightful flavor.
  • ½ cup celery (¼ inch dice) – Adds crunch and freshness.
  • 2 tablespoons diced red onion (⅛ inch dice) – For a mild onion flavor.
  • 2 tablespoons sliced green onion – Brightens up the salad with color and taste.
  • 2 large hard-boiled eggs (¼ inch dice) – Adds creaminess and richness.
  • Smoked paprika (or sweet) – For garnish and an extra layer of flavor.

Ingredient Substitutions
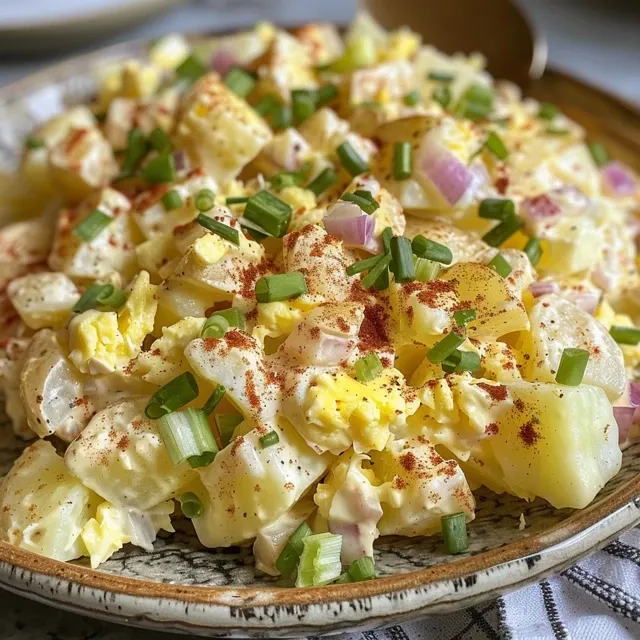
Detailed shot of Southern potato salad, emphasizing its rich texture and vibrant colors.

If you’re missing an ingredient or looking for alternatives, here are some substitutions:

  • Potatoes: Yukon Gold potatoes can be used for a creamier texture, while red potatoes maintain their shape well.
  • Mayonnaise: Greek yogurt offers a lighter option with a tangy flavor.
  • Sweet Pickle Relish: Chopped pickles or a spoonful of honey can replace relish if you prefer a different sweetness.
  • Mustard: Dijon mustard can add a fancier flavor profile.

How to Make Southern Potato Salad

Now that we have everything ready, let’s walk through the steps to make this scrumptious salad:

  • Prepare the Potatoes: Peel and dice the potatoes into ¾-inch cubes. Place them in a large saucepan and cover with cold water by 1 inch.
  • Boil the Potatoes: Bring the water to a boil over high heat. Once boiling, stir in 1 tablespoon salt, reduce heat, and simmer. Cook until fork-tender, about 8 to 10 minutes. Be careful not to overcook!
  • Marinate in Vinegar: Drain the potatoes and transfer them to a bowl. Add the vinegar and stir gently. Allow the potatoes to marinate for 20 minutes.
  • Make the Dressing: In a separate bowl, whisk together mayonnaise, relish, mustard, ¾ teaspoon salt, black pepper, and garlic powder until smooth.
  • Add the Mix-ins: To the potatoes, add the dressing, celery, red onions, green onions, and diced eggs. Mix gently until everything is well coated.
  • To Serve: Cover and refrigerate for at least 1 hour to chill. Before serving, garnish with a sprinkle of smoked paprika and additional green onions if desired.

Pro Tips for the Perfect Potato Salad

Here are some expert insights to elevate your potato salad game:

  • Use the Right Potatoes: Russet potatoes are fluffy and absorb flavors well, but Yukon Gold is creamier.
  • Don’t Skimp on the Salt: Salting the boiling water enhances the potato’s flavor from the inside.
  • Warm Potatoes: Mixing the dressing with warm potatoes helps the flavors meld beautifully.
  • Chill Time: Allowing the salad to chill for at least an hour enhances the flavors.
  • Fresh Ingredients: Use the freshest vegetables for the best flavor and texture.
  • Customize It: Feel free to experiment by adding ingredients like bacon, jalapeños, or herbs for a unique twist.
  • Taste and Adjust: Always taste as you go, adjusting seasoning and flavors to your preference.
  • Presentation Matters: A colorful presentation makes the dish more inviting; consider adding fresh herbs for garnish.

Common Mistakes and Troubleshooting

Even the best of us can run into a few hiccups in the kitchen. Here are some common mistakes and how to avoid them:

  • Overcooking Potatoes: Ensure they are fork-tender but firm. Overcooked potatoes can lead to a mushy salad.
  • Underseasoning: Don’t forget to season throughout the cooking process, especially when boiling the potatoes.
  • Skipping the Chill: Allowing the salad to chill is crucial for letting the flavors develop.
  • Ignoring Texture: Ensure a balance of creamy and crunchy elements by adding the right amount of mix-ins.

Variations of Southern Potato Salad

Your Southern Potato Salad can take many forms! Here are some fun variations to try:

  • Spicy Southern Potato Salad: Add diced jalapeños or a dash of hot sauce for a kick.
  • Bacon Potato Salad: Incorporate crispy bacon bits for a smoky flavor.
  • Herbed Potato Salad: Mix in fresh herbs like dill, parsley, or chives for a fresh twist.
  • Avocado Potato Salad: Substitute half the mayonnaise with mashed avocado for a creamy, healthy alternative.

Storage and Make-Ahead Instructions

This potato salad is perfect for meal prep! Here’s how to store it:

  • Refrigeration: Store in an airtight container in the refrigerator for up to 3 to 5 days.
  • Make-Ahead: You can prepare this salad a day in advance. It often tastes even better the next day!
  • Freezing: We don’t recommend freezing potato salad, as the texture may change once thawed.

Comprehensive FAQ

Here are some frequently asked questions about Southern Potato Salad:

  • Can I use different types of potatoes? Yes, you can use Yukon Gold or red potatoes for a different texture.
  • What can I substitute for mayonnaise? Greek yogurt or avocado can be good substitutes.
  • How long can potato salad sit out? It should not sit out for more than two hours to ensure food safety.
  • Can I add fruits to my potato salad? Some people enjoy adding diced apples or grapes for a sweet contrast.
  • What’s the best way to reheat potato salad? It’s best served cold; avoid reheating to maintain texture.
  • Can I make this vegan? Yes! Use vegan mayonnaise and skip the eggs.
  • How do I get the perfect creamy texture? Make sure to mix while the potatoes are still warm to allow the dressing to absorb better.
  • Can I add pickled vegetables? Absolutely! Pickled vegetables can add a delicious tang and complexity.

Nutritional Tips and Dietary Adaptations

This potato salad can easily be adapted to fit various dietary needs:

  • Low-Calorie Option: Swap out half the mayonnaise for Greek yogurt to reduce calories.
  • Gluten-Free: This recipe is naturally gluten-free, making it safe for those with gluten sensitivities.
  • Low-Carb Version: Substitute potatoes with cauliflower for a lighter version.

Equipment Recommendations

To make your cooking experience smoother, here are a few essential tools:

  • Large Pot: For boiling the potatoes.
  • Colander: To drain the potatoes after cooking.
  • Mixing Bowls: For preparing the dressing and mixing everything together.
  • Measuring Cups and Spoons: To ensure precision in your ingredients.

Serving Suggestions

This Southern Potato Salad shines as a side dish but can also be paired beautifully with:

  • Grilled Meats: Perfect alongside barbecue chicken or ribs.
  • Sandwiches: A delightful complement to burgers or po’ boys.
  • Picnic Staples: Great for outdoor gatherings or potlucks.

In closing, remember that cooking is all about love and sharing. This Southern Potato Salad isn’t just a recipe; it’s a way to create memories and connect with those you care about. So gather your ingredients, roll up your sleeves, and let the warmth of the kitchen embrace you. Thank you for joining me in this culinary journey—happy cooking!

Southern Potato Salad

Prep Time 15 minutes
Cook Time 10 minutes
Total Time 25 minutes
Servings 8 servings
Calories 350
A classic Southern potato salad with creamy dressing, crunchy vegetables, and a smoky paprika garnish, perfect for picnics and gatherings.

Ingredients

Potatoes

  • 2 pounds russet potatoes
  • 1 tablespoon kosher salt ((plus ¾ teaspoon))
  • 2 tablespoons apple cider vinegar
  • ½ cup mayonnaise
  • ¼ cup sweet pickle relish
  • 2 teaspoons yellow mustard
  • ½ teaspoon black pepper
  • ½ teaspoon garlic powder
  • ½ cup celery ((¼" dice))
  • 2 tablespoons diced red onion ((⅛" dice))
  • 2 tablespoons sliced green onion
  • 2 large hardboiled eggs ((¼" dice))
  • smoked paprika (or sweet ) smoked paprika

Instructions 

  • Peel and dice potatoes into ¾-inch cubes, then boil in salted water until fork-tender, about 8-10 minutes.
  • Drain potatoes, transfer to a bowl, add vinegar, and marinate for 20 minutes.
  • Whisk mayonnaise, relish, mustard, salt, pepper, and garlic powder to make the dressing.
  • Add dressing, celery, onions, and chopped eggs to the potatoes. Mix well and season to taste.
  • Refrigerate for 1 hour, then garnish with paprika and sliced green onions before serving.

Notes

For best flavor, chill the salad for at least an hour before serving.
Calories: 350kcal
Cost: $15
Course: Side Dish
Cuisine: Southern
Keyword: Potatoes

A Love Letter to Cooking: Marry Me Chicken Pasta

Welcome to a culinary journey that combines the rich flavors of Southern cuisine with the heartwarming essence of home cooking. Today, we’re diving into a dish that has become a beloved favorite in many kitchens—Marry Me Chicken Pasta. This delightful recipe is not only a feast for the eyes but also a celebration of love and togetherness, perfect for date nights or cozy family dinners. With tender chicken, a creamy sun-dried tomato sauce, and pasta that captures every bit of flavor, you’ll find yourself falling in love all over again—both with the dish and the act of cooking itself.

In just 30 minutes, you can create a meal that’s not only delicious but also deeply comforting. This recipe is a tribute to the moments spent around the table, sharing stories and laughter, making it truly special. Let me guide you through this heartwarming experience.

Why You’ll Love This Recipe

  • Quick and Easy: Ready in just 30 minutes, this dish is perfect for busy weeknights or surprise guests.
  • One-Pan Wonder: Minimal cleanup required as everything cooks in one pan, allowing you to focus on what matters most—enjoying your meal.
  • Comforting Flavors: The creamy sauce, paired with the sweetness of sun-dried tomatoes, creates a rich flavor profile that’s utterly irresistible.
  • Customizable: Easily adapt the recipe to suit your dietary needs or preferences. Whether you’re vegetarian or gluten-free, there are options for everyone.
  • Perfect for Sharing: This dish is ideal for romantic dinners or festive gatherings, ensuring that it will take center stage at your dining table.

Ingredient Breakdown

Let’s delve into the heart of our Marry Me Chicken Pasta—its ingredients. Each component plays a vital role in creating the tantalizing flavors and delightful textures that make this dish so memorable.

  • Pasta: 12 oz of your favorite pasta—whether penne, fusilli, or spaghetti, choose a shape that will hold onto the creamy sauce.
  • Chicken Breasts: 1.5 lbs of skinless, boneless chicken breasts, cut into bite-sized pieces ensure even cooking.
  • Garlic: 3 cloves, minced—an essential ingredient that adds a fragrant depth to your sauce.
  • Sun-Dried Tomatoes: 1 cup, chopped—these add a touch of sweetness and a burst of flavor that elevates the dish.
  • Heavy Cream: 1.5 cups for that luscious, creamy texture that makes every bite indulgent.
  • Chicken Broth: ½ cup to enhance the flavors and add moisture to the sauce.
  • Italian Seasoning: 1 tsp—a blend of herbs that infuses the dish with traditional Italian flavors.
  • Parmesan Cheese: ½ cup, grated—this brings a salty, nutty flavor that complements the creaminess perfectly.
  • Olive Oil: 2 tbsp for sautéing the chicken and garlic, adding richness to the dish.
  • Seasonings: Salt, pepper, and a pinch of red pepper flakes for a hint of heat.

Step-by-Step Instructions

A vibrant bowl of Marry Me Chicken Pasta showcasing its creamy texture and colorful ingredients.

Now that we have our ingredients ready, let’s move on to the cooking process. Follow these steps closely to ensure your Marry Me Chicken Pasta turns out perfect every time.

  1. In a large skillet, heat the olive oil over medium-high heat. Add the chicken pieces, seasoning with salt and pepper. Cook until golden brown and cooked through, about 5-7 minutes.
  2. Add the minced garlic to the skillet, stirring for about 1 minute until fragrant.
  3. Incorporate the sun-dried tomatoes and Italian seasoning, mixing them well with the chicken.
  4. Pour in the chicken broth and bring it to a simmer, allowing the flavors to meld together.
  5. Stir in the heavy cream and grated Parmesan cheese, continuing to cook until the sauce thickens, about 3-5 minutes.
  6. Meanwhile, cook your pasta according to package instructions, then drain and add it directly to the skillet, tossing to coat.
  7. Finish with a sprinkle of red pepper flakes and more Parmesan if desired. Serve immediately and watch everyone fall in love!

Pro Tips for the Perfect Marry Me Chicken Pasta

  • Don’t Overcook the Chicken: Aim for a golden brown color while keeping it juicy. Overcooked chicken can become dry.
  • Use Fresh Ingredients: Fresh garlic, ripe tomatoes, and high-quality cream will enhance the dish’s flavor significantly.
  • Adjust the Creaminess: If you prefer a lighter sauce, reduce the amount of heavy cream or substitute with half-and-half.
  • Experiment with Pasta Shapes: Different pasta shapes can change the texture and presentation of the dish.
  • Make it Spicy: Add more red pepper flakes if you enjoy a kick of heat.
  • Garnish Generously: Fresh basil or parsley can brighten up the dish visually and add fresh flavor.
  • Pair with Wine: A crisp white wine pairs beautifully with this creamy pasta, enhancing the overall dining experience.
  • Leftovers are Gold: This dish tastes even better the next day, as the flavors continue to develop.

Common Mistakes and Troubleshooting

Even the best chefs encounter hiccups in the kitchen. Here are some common pitfalls when making Marry Me Chicken Pasta and how to avoid them.

  • Watery Sauce: If your sauce is too thin, simmer it longer to reduce and thicken. Adding a bit more cheese can also help.
  • Burnt Garlic: Garlic burns quickly, so add it after the chicken is nearly cooked to prevent bitterness.
  • Undercooked Chicken: Ensure your chicken is cooked to an internal temperature of 165°F to avoid any food safety issues.
  • Overcooked Pasta: Cook pasta al dente, as it will continue to cook slightly when combined with the sauce.

Variations to Try

While the classic Marry Me Chicken Pasta is a showstopper on its own, here are some fun variations to keep things exciting.

  • Marry Me Chicken Orzo: Swap pasta for orzo for a fun twist that’s equally delicious and visually appealing.
  • Vegetarian Version: Replace chicken with sautéed mushrooms and zucchini for a hearty veggie alternative.
  • One-Pot Wonder: Cook everything in one pot by adding uncooked pasta to the sauce with extra broth, allowing it to absorb the flavors.
  • Spicy Shrimp Addition: Add shrimp to the mix for a seafood twist that’s just as romantic and flavorful.

Storage and Make-Ahead Instructions

Planning ahead? This dish is perfect for meal prep and can be stored for future enjoyment.

  • Refrigeration: Store leftovers in an airtight container in the fridge for up to 3 days.
  • Freezing: You can freeze the chicken and sauce (without pasta) for up to 2 months. Just thaw and reheat when ready to serve.
  • Reheating: Gently reheat on the stove over low heat, adding a splash of chicken broth or cream to loosen the sauce.

Frequently Asked Questions

  • Can I use other meats? Yes! You can substitute chicken with turkey, shrimp, or even tofu for a vegetarian option.
  • Is this recipe gluten-free? Use gluten-free pasta to make this dish suitable for gluten-sensitive diets.
  • Can I make this dish dairy-free? Substitute heavy cream with coconut milk and omit the cheese for a dairy-free version.
  • What can I serve with Marry Me Chicken Pasta? A simple green salad, garlic bread, or roasted vegetables make great sides.
  • How do I adjust the spice level? Feel free to add more or less red pepper flakes to your preference.
  • Can I prepare this ahead of time? Yes, you can make the sauce in advance and combine it with freshly cooked pasta right before serving.
  • What type of pasta works best? Any sturdy pasta will do, but penne or fettuccine are great choices for holding onto the sauce.
  • How many servings does this recipe make? This recipe serves about 4, depending on portion sizes.

Nutritional Tips and Dietary Adaptations

Cooking is about balance. Here are some tips to keep your meal healthy while enjoying the flavors:

  • Add Vegetables: Incorporate spinach, kale, or bell peppers into the dish for extra nutrients.
  • Choose Whole Grain Pasta: Opt for whole grain or chickpea pasta for added fiber and protein.
  • Portion Control: Serve with a side salad to help control portions and increase vegetable intake.
  • Mind the Cream: Use a lighter cream or yogurt for a healthier alternative without sacrificing flavor.

Equipment Recommendations

Having the right tools can make all the difference in your cooking experience. Here are my top recommendations:

  • Non-Stick Skillet: A good quality skillet ensures even cooking and prevents sticking.
  • Wooden Spoon: Perfect for stirring and mixing without scratching your cookware.
  • Measuring Cups and Spoons: Accurate measurements lead to consistent results.
  • Pasta Pot: A large pot for boiling pasta helps ensure it cooks evenly and doesn’t clump together.

Serving Suggestions

Make your dining experience even more special with these serving ideas:

  • Garnish: Fresh basil or parsley adds a pop of color and freshness on top of the creamy dish.
  • Pair with Wine: A crisp Sauvignon Blanc or a light Pinot Grigio complements the flavors beautifully.
  • Presentation: Serve in shallow bowls to showcase the vibrant colors of the pasta and sauce.

As we wrap up this culinary journey, I hope you feel inspired to create your own Marry Me Chicken Pasta masterpiece. Remember, cooking is about love, sharing, and creating memories. So gather your loved ones around the table, serve up this delightful dish, and enjoy the moments that matter most. Happy cooking!

How to Make the Best Marry Me Chicken Pasta in 30 Minutes

Prep Time 10 minutes
Cook Time 20 minutes
Total Time 30 minutes
Servings 4 servings
Calories 650
This creamy, flavorful Marry Me Chicken Pasta can be prepared in just 30 minutes, making it perfect for a quick and impressive dinner.

Ingredients

Pasta

  • 12 oz pasta

Chicken

  • 1.5 lbs chicken breasts

Garlic

  • 3 cloves garlic cloves

Sun-dried Tomatoes

  • 1 cup sun-dried tomatoes

Heavy Cream

  • 1.5 cups heavy cream

Chicken Broth

  • 1/2 cup chicken broth

Italian Seasoning

  • 1 tsp Italian seasoning

Parmesan

  • 1/2 cup grated Parmesan

Olive Oil

  • 2 tbsp olive oil

Salt, Pepper, Red Pepper Flakes

  • Salt, pepper, red pepper flakes

Instructions 

  • Cook pasta according to package instructions. Drain and set aside.
  • Sauté chicken in olive oil until cooked through. Remove and set aside.
  • In the same pan, sauté garlic and sun-dried tomatoes for 1-2 minutes.
  • Add heavy cream, chicken broth, Italian seasoning, salt, pepper, and red pepper flakes. Simmer for 5 minutes.
  • Return chicken to the pan, add Parmesan, and stir until combined. Mix in cooked pasta and serve.

Notes

For extra flavor, sprinkle additional Parmesan or fresh herbs before serving.
Calories: 650kcal
Cost: $15
Course: Main Course
Cuisine: Italian-American
Keyword: Chicken, Creamy, Pasta

The Heartwarming Story Behind Potato Salad

When we gather around the table, the dishes we share tell stories of love, tradition, and community. One such dish that often graces our gatherings is potato salad. This Easy Potato Salad recipe not only holds the promise of creamy goodness and crunchy textures but also carries with it the essence of nostalgia and warmth. Whether it’s a summer picnic, a holiday feast, or a simple weeknight dinner, this salad is a beloved staple that brings us all together. Let’s dive into how to whip up this delightful dish, ensuring every bite reminds us of home and the love we share.

Why You’ll Love This Recipe

This Easy Potato Salad recipe is not just about the ingredients; it’s about the memories and the smiles it brings. Here’s why this dish is bound to become a favorite:

  • Simple and Quick Preparation: With straightforward steps, you can have this salad ready to serve in no time, making it perfect for busy days.
  • Customizable Ingredients: Easily adapt the recipe to suit your taste preferences or dietary needs by swapping ingredients.
  • Creamy Texture: The combination of mayonnaise and hard-boiled eggs creates a rich, creamy dressing that coats the potatoes beautifully.
  • Perfect for Any Occasion: Whether it’s a barbecue, potluck, or family dinner, this potato salad complements any meal.
  • Delicious Leftovers: This salad keeps well in the refrigerator, making it a delightful treat for the next day.

The Ingredients You’ll Need

Let’s take a closer look at what goes into this comforting dish. Here’s your shopping list:

  • 3 pounds of potatoes (peeled, Yukon Gold preferred for their creamy texture)
  • 1 cup mayonnaise (for that rich, creamy base)
  • 3 hard-boiled eggs (peeled and chopped, adding protein and texture)
  • 2 stalks of celery (chopped, for a crisp crunch)
  • 1 medium onion (chopped, for a bit of zing)
  • 1/2 cup sweet pickle relish (for a touch of sweetness)
  • 1/2 teaspoon salt (or to taste, enhancing flavors)
  • 1 tablespoon mustard (preferably yellow, for a tangy kick)
  • 1/4 teaspoon black pepper (to balance the flavors)
  • 1 tablespoon fresh dill (chopped, to brighten the dish)

How to Make This Easy Potato Salad

Deliciously prepared potato salad with vibrant colors, including chopped celery and onion.

Now that we have our ingredients ready, let’s get cooking! Follow these simple steps to create a delightful potato salad:

  1. Prepare the Potatoes: Cut the potatoes into quarters and place them in a large pot. Fill the pot with cold water until it covers the potatoes by about an inch. Bring to a boil over high heat. Once boiling, add 1 tablespoon of salt and cook for 13 to 15 minutes, or until fork-tender.
  2. Make the Dressing: In a medium bowl, mix the mayonnaise, relish, mustard, salt, and pepper until smooth.
  3. Combine Ingredients: Drain the potatoes and let them cool slightly. Chop them into bite-sized chunks and place them in a large mixing bowl. Gently fold in the dressing until the potatoes are well-coated. Add the chopped eggs, celery, onions, and dill, then toss gently to combine.
  4. Chill Before Serving: Cover the salad with plastic wrap and chill in the refrigerator for at least 4 hours (or overnight) before serving to allow the flavors to meld.

Pro Tips for the Best Potato Salad

To make your potato salad truly stand out, consider these expert tips:

  • Choose the Right Potatoes: Yukon Gold potatoes provide the best texture and flavor. Avoid starchy potatoes like russets that can become mushy.
  • Hard-Boiled Eggs: For perfectly cooked eggs, place them in cold water, bring to a boil, then cover and let sit off the heat for about 12 minutes.
  • Mixing Technique: Be gentle when combining the ingredients to prevent the potatoes from breaking apart.
  • Season Well: Taste and adjust the seasoning before chilling. A little extra salt can enhance the flavors significantly.
  • Add Fresh Herbs: Fresh herbs like parsley or chives can elevate the flavor and freshness of the salad.
  • Experiment with Add-ins: Try adding cooked bacon, diced pickles, or even a splash of vinegar for an extra layer of flavor.
  • Make Ahead: This salad tastes even better the next day as it allows the flavors to develop.

Common Mistakes to Avoid

Even the best of us can make mistakes in the kitchen. Here are some common pitfalls to watch out for:

  • Overcooking the Potatoes: This can lead to a mushy texture. Check for doneness by piercing with a fork.
  • Skipping the Chill Time: Allowing the salad to chill helps the flavors meld and enhances the overall taste.
  • Too Much Dressing: Start with less and add more as needed to avoid a soggy salad.
  • Not Seasoning Enough: Don’t forget to taste and adjust the seasoning before serving.

Delicious Variations to Try

Feeling adventurous? Here are some delightful variations you can try:

  • Herbed Potato Salad: Add fresh herbs like basil, tarragon, or dill for an aromatic twist.
  • Spicy Potato Salad: Mix in some diced jalapeños or a touch of hot sauce for a kick.
  • Greek-Style Potato Salad: Substitute feta cheese for eggs and add olives and cherry tomatoes for a Mediterranean flair.
  • Mustard Potato Salad: Use a tangy mustard dressing instead of mayonnaise for a zesty alternative.

Storage and Make-Ahead Instructions

This potato salad stores beautifully, making it perfect for meal prep:

  • Refrigeration: Store in an airtight container in the refrigerator for up to 4 days. The flavors will intensify as it sits.
  • Freezing: Not recommended as the texture may change when thawed.
  • Make-Ahead: Prepare the salad a day in advance to save time and enhance flavor.

Frequently Asked Questions

Here are some common questions about potato salad that might help you:

  • Can I use other types of potatoes?
    Yes, but waxy potatoes like Yukon Gold or red potatoes are best for maintaining texture.
  • How can I make it healthier?
    Consider using Greek yogurt instead of mayonnaise or adding more veggies.
  • What can I serve with potato salad?
    This salad pairs well with grilled meats, sandwiches, or as part of a buffet spread.
  • Can I add bacon?
    Absolutely! Cooked bacon adds a delicious crunch and flavor.
  • How do I fix a too-salty salad?
    Add diced potatoes or more veggies to dilute the saltiness.
  • Is it safe to leave potato salad out?
    It should not be left out for more than 2 hours at room temperature.
  • Can I use other dressings?
    Yes! Experiment with vinaigrettes or yogurt-based dressings for different flavors.
  • What’s the best way to transport potato salad?
    Keep it chilled in an insulated container, especially on hot days.

Nutritional Insights and Dietary Adaptations

This potato salad can easily be modified to cater to various dietary preferences and needs:

  • Gluten-Free: This recipe is naturally gluten-free. Just ensure your mayonnaise is also gluten-free.
  • Dairy-Free: Substitute mayonnaise with a dairy-free alternative or make a creamy dressing using avocado.
  • Low-Carb Option: Swap potatoes for cauliflower for a lower-carb version.
  • Vegan Version: Use vegan mayonnaise and skip the eggs for a delicious plant-based salad.

Essential Equipment for Preparation

To make your potato salad, you’ll need a few essential kitchen tools:

  • Large Pot: For boiling the potatoes.
  • Mixing Bowls: For combining ingredients.
  • Cutting Board and Knife: For chopping vegetables and potatoes.
  • Measuring Cups and Spoons: To ensure precise ingredient amounts.
  • Fork or Potato Masher: For mashing or mixing the potatoes if desired.

Serving Suggestions

When it comes to serving this potato salad, think about how to make it shine:

  • Garnish: A sprinkle of fresh dill or parsley can add a beautiful touch.
  • Presentation: Serve in a colorful bowl that contrasts with the salad to make it visually appealing.
  • Pairings: This salad is excellent alongside grilled meats, sandwiches, or even on its own as a light meal.

In Conclusion

This Easy Potato Salad recipe is more than just a side dish; it’s a bridge to memories shared, moments celebrated, and love expressed through cooking. As you prepare this dish, remember that every ingredient and every step is a part of a larger story—a story of family, friends, and togetherness. So gather around that table, serve up this delightful salad, and enjoy the warmth it brings to your heart and home.

Easy Potato Salad

Prep Time 20 minutes
Cook Time 15 minutes
Total Time 35 minutes
Servings 8 servings
Calories 250
A classic and simple potato salad perfect for picnics and gatherings, combining tender potatoes with a creamy dressing and fresh herbs.

Ingredients

Potatoes

  • 3 pounds potatoes (peeled, such as Yukon gold)
  • 1 cup mayonnaise
  • 3 eggs hard boiled, peeled and chopped
  • 2 stalks celery (chopped)
  • 1 medium onion (chopped)
  • 1/2 cup sweet pickle relish
  • 1/2 teaspoon salt (or to taste)
  • 1 tablespoon mustard (regular prepared yellow mustard)
  • 1/4 teaspoon black pepper
  • 1 tablespoon dill (fresh, chopped)

Instructions 

  • Cut potatoes into quarters, boil in water with 1 tbsp salt until fork tender, about 13-15 minutes.
  • Mix mayonnaise, relish, mustard, salt, and pepper until smooth.
  • Drain potatoes, cool, then chop into bite-sized pieces. Mix with dressing, add eggs, celery, onions, dill, and toss.
  • Garnish with additional dill, cover, and chill for at least 4 hours before serving.

Notes

For best flavor, let the salad chill for several hours before serving.
Calories: 250kcal
Cost: $10
Course: Side Dish
Cuisine: American
Keyword: Potato

A Journey into Flavor: Discover the Crunchy Honeycrisp Apple Broccoli Salad

Gather ‘round the table and let’s dive into a recipe that celebrates the vibrant flavors of fresh ingredients, all while honoring the memories of home cooking. This Crunchy Honeycrisp Apple Broccoli Salad is not just a dish; it’s a heartfelt creation that combines the crispness of broccoli with the sweet, juicy bite of Honeycrisp apples, all enveloped in a creamy dressing that ties it all together. Perfect for gatherings or a simple family dinner, this salad is a reminder that food is meant to be shared, loved, and enjoyed.

Whether you’re looking to impress at your next potluck or simply want to bring a bit of cheer to your dinner table, this salad will surely become a staple in your kitchen. Let’s explore why this dish is a must-try and how you can make it shine!

Why You’ll Love This Recipe

Here are a few reasons why this Honeycrisp Apple Broccoli Salad will win your heart:

  • Flavor Harmony: The combination of sweet Honeycrisp apples and crunchy broccoli creates a delightful contrast that excites the palate.
  • Quick and Easy: Ready in under 30 minutes, it’s a perfect solution for busy weeknights or last-minute gatherings.
  • Nutritious Goodness: Packed with vitamins and fiber, this salad supports your health while satisfying your taste buds.
  • Versatile Dish: Perfect as a side dish or a light main course, it fits seamlessly into any meal.
  • Make-Ahead Friendly: This salad keeps well in the fridge, making it ideal for meal prep or easy entertaining.

Ingredients: A Closer Look

Let’s break down the ingredients needed for this delicious apple broccoli salad and explore some substitutions you might consider:

  • 4 cups Broccoli (fresh florets): This is the base of our salad, providing crunch and nutrients.
  • 2 medium Honeycrisp Apples (diced): Their sweetness is essential to balance the salad’s flavors.
  • 1 small Red Onion (finely chopped): Adds a sharp bite that enhances the overall taste.
  • 1/2 cup Sunflower Seeds (or use walnuts): These add a delightful crunch and healthy fats.
  • 1/2 cup Dried Cranberries (or raisins): For a bit of sweetness and chewiness.
  • 1 cup Greek Yogurt (or vegan yogurt): This is the creamy base for our dressing; it adds richness and tang.
  • 2 tablespoons Honey (or maple syrup for vegan): Sweetens the dressing naturally.
  • 2 tablespoons Apple Cider Vinegar (or lemon juice): Provides acidity and brightens the dish.
  • Salt and Pepper: To taste, enhancing all the flavors.

How to Prepare the Salad

An iPhone photo displaying a hearty Crunchy Honeycrisp Apple Broccoli Salad with bright green broccoli and red apple pieces.

Creating this crunchy apple broccoli salad is as simple as it is rewarding. Follow these steps for a delightful result:

  • Step 1: Prepare the Dressing: In a bowl, combine Greek yogurt, honey (or maple syrup), apple cider vinegar, salt, and pepper. Whisk until creamy and smooth.
  • Step 2: Chop and Combine: Chop the broccoli into bite-sized florets, dice the Honeycrisp apples, and finely chop the red onion. In a large mixing bowl, combine the broccoli, apples, onion, sunflower seeds, and dried cranberries.
  • Step 3: Toss and Serve: Pour the dressing over the salad mixture and gently toss until everything is well-coated. Taste and adjust seasoning as needed.

Creative Variations to Try

Let’s shake things up a bit! Here are some variations you can try to put your own spin on this salad:

  • Nut-Free Version: Skip the sunflower seeds and add crispy chickpeas for a crunchy texture.
  • Vegan Delight: Use vegan yogurt and swap honey for maple syrup to keep it plant-based.
  • Cheesy Twist: Add crumbled feta or goat cheese for a tangy flavor boost.
  • Spicy Kick: Incorporate sliced jalapeños or a pinch of red pepper flakes for a hint of heat.

Expert Tips for Success

To ensure your Honeycrisp Apple Broccoli Salad turns out perfectly, consider these insider tips:

  • Use Fresh Ingredients: Fresh broccoli and crisp apples yield the best flavor and texture.
  • Chill Before Serving: Allow the salad to chill in the fridge for at least 30 minutes before serving to let the flavors meld.
  • Don’t Overdress: Start with a smaller amount of dressing; you can always add more as needed.
  • Mind Your Apples: To prevent the apples from browning, toss them in a little lemon juice right after dicing.
  • Mix Gently: When combining the salad and dressing, use a gentle hand to avoid bruising the ingredients.
  • Check Your Seasoning: Always taste and adjust seasoning last, as the dressing can change the flavor profile.
  • Store Properly: Keep the salad in an airtight container in the fridge for up to 3 days.
  • Presentation Matters: Serve in a beautiful bowl and garnish with extra sunflower seeds for a lovely finish.

Storage and Make-Ahead Instructions

This broccoli salad is perfect for meal prep! Here’s how to store it:

  • Refrigerate: Store in an airtight container in the refrigerator for up to 3 days. The flavors will deepen as it sits, making it even more delicious!
  • Make Ahead: You can prepare the salad a day in advance. Just wait to add the dressing until you’re ready to serve to keep the ingredients crisp.

Frequently Asked Questions

Here are some common questions regarding the Crunchy Honeycrisp Apple Broccoli Salad:

  • Can I use other types of apples? Yes! While Honeycrisp gives a unique flavor, feel free to experiment with Fuji or Gala apples.
  • Is it okay to use frozen broccoli? Fresh broccoli is best for texture, but if you have frozen, make sure to thaw and drain it well.
  • Can I add protein to this salad? Absolutely! Adding grilled chicken or chickpeas can make this salad a filling meal.
  • How long does this salad last in the fridge? This salad can last up to 3 days in the refrigerator, but it’s best consumed fresh.
  • Can I serve this salad warm? While it’s traditionally served cold, you can enjoy it warm if you prefer.
  • What dressing can I use instead of yogurt? You can substitute with a vinaigrette or a creamy dressing of your choice.
  • Is this salad gluten-free? Yes, all ingredients used are naturally gluten-free.
  • What else can I add? Consider adding avocado, bell peppers, or even shredded carrots for more color and nutrition.

Nutritional Tips and Dietary Adaptations

This salad is naturally packed with nutrients! Here’s how to maximize health benefits:

  • Boost Fiber: Adding beans or lentils can increase fiber content significantly.
  • Lower Calories: Opt for low-fat yogurt or reduce the amount of honey for a lighter version.
  • Increase Healthy Fats: Add avocado or a sprinkle of chia seeds for healthy omega-3 fatty acids.

Essential Equipment for Preparation

To whip up this delightful salad, gather these kitchen essentials:

  • Chef’s Knife: For chopping vegetables and fruits.
  • Cutting Board: A sturdy board is essential for safe and efficient chopping.
  • Mixing Bowl: A large bowl for combining all ingredients comfortably.
  • Whisk: For mixing the dressing until smooth and creamy.

Serving Suggestions: Pairing Perfection

This apple broccoli salad shines on its own, but it can also be paired with:

  • Grilled Chicken: Juicy and smoky grilled chicken complements the salad beautifully.
  • Quiche: A slice of savory quiche adds warmth and richness.
  • Sandwiches: Pair it with turkey or veggie sandwiches for a light lunch.
  • Fish Tacos: The salad’s crunch is a refreshing contrast to soft tacos.

In conclusion, the Crunchy Honeycrisp Apple Broccoli Salad is a celebration of flavor, health, and nostalgia. Each bite is a reminder of the warmth shared around the family table. I hope this recipe inspires you to create memories and delicious meals in your own kitchen. Enjoy, share, and remember that every meal is a chance to spread love and joy!

Crunchy Honeycrisp Apple Broccoli Salad You'll Absolutely Love

Prep Time 15 minutes
Total Time 15 minutes
Servings 4 servings
Calories 250
This vibrant salad combines crisp Honeycrisp apples, fresh broccoli, and crunchy seeds for a refreshing and satisfying dish.

Ingredients

Main Ingredients

  • 4 cups Broccoli (fresh florets)
  • 2 medium Honeycrisp Apple (diced)
  • 1 small Red Onion (finely chopped)
  • 1/2 cup Sunflower Seeds (or use walnuts)
  • 1/2 cup Dried Cranberries (or raisins)
  • 1 cup Greek Yogurt (or vegan yogurt)
  • 2 tablespoons Honey (or maple syrup for vegan)
  • 2 tablespoons Apple Cider Vinegar (or lemon juice)
  • to taste Salt Salt
  • to taste Pepper Pepper

Instructions 

  • Combine broccoli, diced apples, and chopped red onion in a large bowl.
  • Add sunflower seeds and dried cranberries to the bowl.
  • In a small bowl, whisk together Greek yogurt, honey, and apple cider vinegar.
  • Pour the dressing over the salad and toss to combine.
  • Season with salt and pepper to taste, then serve immediately.

Notes

For extra crunch, add some chopped nuts or seeds on top before serving.
Calories: 250kcal
Cost: $15
Course: Salad
Cuisine: American
Keyword: apple, Broccoli, Healthy

Discover the Heartwarming Essence of a Summer Garden Salad

As the sun shines brightly and the days stretch longer, there’s nothing quite like a fresh and vibrant garden salad to celebrate the beauty of summer. This garden salad recipe is not just a dish; it’s a joyful gathering of flavors, colors, and memories that invites you to the table. From garden-fresh vegetables to a zesty dressing, every bite is a reminder of the warmth of family and the joy of sharing a meal together. Let’s dive into this delightful recipe that captures the essence of summer days.

Why You’ll Love This Recipe

This garden salad is more than just a combination of ingredients; it’s an experience filled with benefits that make it a perfect addition to your summer table:

  • Fresh Ingredients: Made with crisp greens, juicy tomatoes, and crunchy cucumbers, each element brings the garden’s bounty right to your plate.
  • Quick and Easy: With just a few simple steps, you can whip up this salad in under 15 minutes, leaving you plenty of time to enjoy the sunshine.
  • Customizable: Feel free to add your favorite vegetables or proteins, like grilled chicken or chickpeas, to tailor the salad to your taste.
  • Nutritious: Packed with vitamins and minerals, this salad is a guilt-free option that supports your health without sacrificing flavor.
  • Perfect for Any Occasion: Whether it’s a backyard barbecue or a family picnic, this salad fits seamlessly into any summer gathering.

Ingredient Breakdown

To create this refreshing garden salad, gather the following ingredients:

  • 1 bag of leafy greens: A mix of romaine, spinach, or arugula adds texture and flavor.
  • 1 cup cherry tomatoes, halved: These sweet gems provide bursts of color and flavor.
  • 1 cucumber, sliced: For crunch and freshness, a cucumber is a must.
  • 1 small red onion, thinly sliced: Adds a hint of sharpness that balances the sweetness of the other ingredients.
  • 1 tbsp apple cider vinegar: This adds a tangy kick to your dressing.
  • 3 tbsp extra virgin olive oil: A quality oil enhances the salad’s richness.
  • 1/2 tsp Dijon mustard: For depth of flavor in the dressing.
  • 1/2 tsp salt: To enhance all the flavors.
  • 1/2 tsp black pepper: For a touch of spice.

Feel free to substitute any ingredient based on your preference or what’s in season. For instance, switch the cucumber for bell peppers or add avocado for creaminess.

How to Make Your Garden Salad

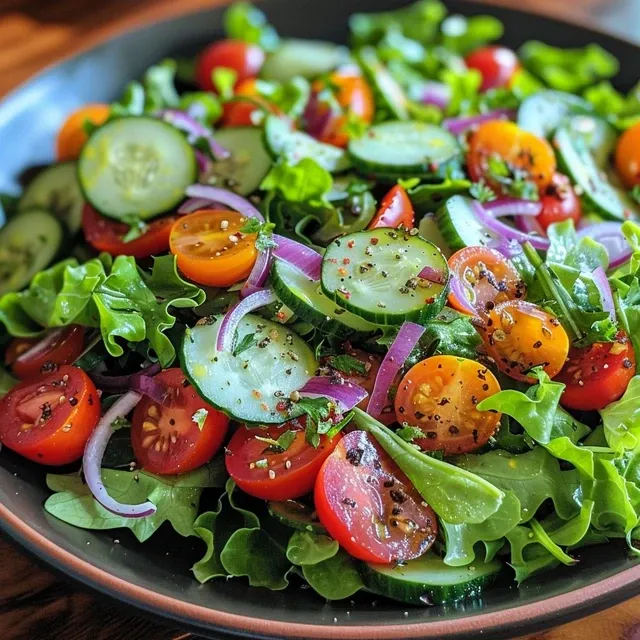
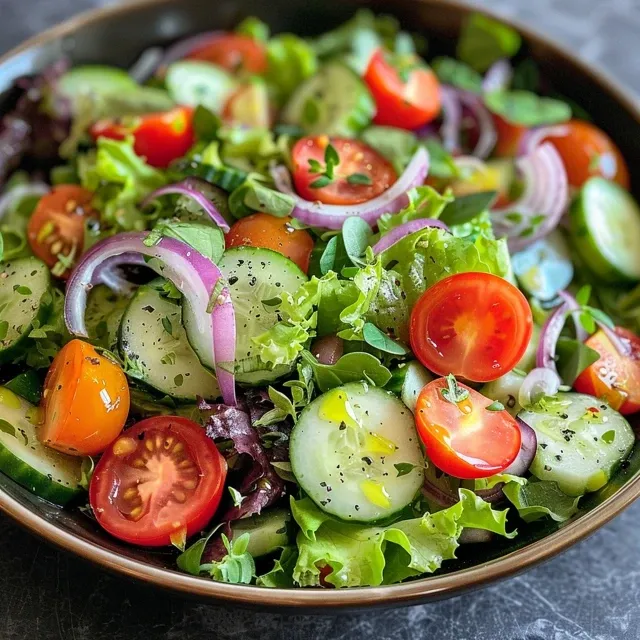
Close-up shot of a healthy garden salad with fresh vegetables and a light vinaigrette dressing.

Follow these easy steps to create your delightful garden salad:

  1. In a large bowl, combine the leafy greens, cherry tomatoes, cucumber, and red onion.
  2. In a separate bowl, whisk together the apple cider vinegar, olive oil, Dijon mustard, salt, and black pepper.
  3. Drizzle the dressing over the salad and toss to combine. Serve immediately and enjoy the bright, fresh flavors!

Pro Tips for the Perfect Garden Salad

Elevate your salad-making game with these expert insights:

  • Chill Your Greens: For extra crispness, store your leafy greens in the fridge for an hour before preparing the salad.
  • Mix Your Textures: Combine crunchy vegetables with softer ones for a delightful mouthfeel.
  • Dress Just Before Serving: To avoid soggy greens, dress your salad right before you’re ready to serve.
  • Experiment with Dressings: Try adding honey or herbs to your dressing for a unique twist.
  • Add Nuts or Seeds: Incorporating toasted almonds or sunflower seeds adds a delightful crunch and healthy fats.
  • Use Seasonal Ingredients: Opt for ingredients that are in season for the freshest and most flavorful salad.
  • Try Different Oils: Experiment with flavored oils like sesame or avocado for added depth.
  • Herbs are Your Friends: Fresh herbs like basil or parsley can enhance the flavor and freshness of your salad.

Common Mistakes and Troubleshooting

Even the best cooks encounter challenges. Here’s how to avoid common pitfalls:

  • Overdressing: Too much dressing can overwhelm the salad; start with a little and add more as needed.
  • Using Wilted Greens: Always check your greens for freshness. Wilted or brown leaves can spoil the whole salad.
  • Ignoring Flavor Balance: Include a variety of flavors—sweet, salty, and acidic—to make the salad more appealing.

Delicious Variations

Feel free to get creative! Here are some variations to inspire your salad:

  • Greek Garden Salad: Add feta cheese, kalamata olives, and a sprinkle of oregano for a Mediterranean twist.
  • Southwestern Style: Incorporate black beans, corn, avocado, and a lime vinaigrette for a vibrant flavor profile.
  • Fruit-Infused Salad: Toss in seasonal fruits like strawberries or peaches for a sweet touch.
  • Protein-Packed Salad: Add grilled chicken, shrimp, or chickpeas to make it a complete meal.

Storage and Make-Ahead Instructions

This garden salad is best enjoyed fresh, but here’s how to store it:

  • Storage: Keep leftover salad in an airtight container in the fridge for up to 2 days, but keep the dressing separate until serving.
  • Make-Ahead Tips: Prepare the salad ingredients the night before, store them separately, and combine with dressing just before serving.

Frequently Asked Questions

Here are some common questions about this garden salad:

  • Can I use different greens? Yes! Feel free to mix in spinach, kale, or any greens you prefer.
  • What can I add for protein? Grilled chicken, chickpeas, or even bacon bits are great options.
  • How long does the salad last? If stored properly, it can last for about 2 days, but it’s best enjoyed fresh.
  • Can I make the dressing ahead of time? Absolutely! The dressing can be made in advance and stored in the fridge.
  • Is this salad vegan? Yes, as long as you use a plant-based dressing and omit any cheese or meat.
  • What’s the best way to serve it? Serve it chilled, either on a platter or in individual bowls.
  • How can I make it gluten-free? This salad is naturally gluten-free; just ensure any added ingredients are gluten-free as well.
  • Can I add grains? Definitely! Quinoa or farro can add a wonderful texture and make it more filling.

Nutritional Tips and Dietary Adaptations

This garden salad is not only delicious but also adaptable to fit various dietary needs:

  • Low-Carb Option: Skip the starchy ingredients and focus on greens and proteins.
  • Dairy-Free: Omit cheese or use a dairy-free alternative.
  • Gluten-Free: Naturally gluten-free, just watch out for cross-contamination with any added ingredients.

Equipment Recommendations

To make your salad preparation smoother, consider using:

  • Chef’s Knife: For easy chopping of vegetables.
  • Cutting Board: A sturdy board for all your chopping needs.
  • Salad Spinner: To wash and dry your greens quickly and effectively.
  • Large Mixing Bowl: To combine all your ingredients comfortably.
  • Whisk: For mixing the dressing smoothly.

Serving Suggestions

This garden salad pairs beautifully with a variety of dishes. Here are some ideas:

  • Grilled Meats: Serve alongside grilled chicken, steak, or fish for a complete meal.
  • Sandwiches: It makes a great side for any sandwich, adding freshness and crunch.
  • Picnic Favorites: Perfect for outdoor gatherings, it complements burgers, hot dogs, or vegetarian fare.

In conclusion, this garden salad is not just a dish; it’s a celebration of summer’s bounty and the love shared around the dinner table. With its vibrant ingredients and customizable nature, it invites everyone to partake in a dish that nourishes both body and spirit. So gather your loved ones, enjoy the flavors, and create new memories around the table!

Garden Salad: A Fresh Summer Recipe

Prep Time 10 minutes
Total Time 10 minutes
Servings 4 people
Calories 150
A light and refreshing garden salad perfect for summer days, combining fresh vegetables with a tangy vinaigrette.

Ingredients

Leafy greens

  • 1 bag leafy greens

Cherry tomatoes

  • 1 cup cherry tomatoes, halved

Cucumber

  • 1 cucumber cucumber, sliced

Red onion

  • 1 small red onion, thinly sliced

Apple cider vinegar

  • 1 tbsp apple cider vinegar

Extra virgin olive oil

  • 3 tbsp extra virgin olive oil

Dijon Mustard

  • 1/2 tsp Dijon Mustard

Salt

  • 1/2 tsp salt

Black pepper

  • 1/2 tsp black pepper

Instructions 

  • Combine greens, tomatoes, cucumber, and onion in a bowl.
  • Whisk vinegar, olive oil, mustard, salt, and pepper in a separate bowl.
  • Pour dressing over salad and toss. Serve immediately.

Notes

Use fresh ingredients for best flavor.
Calories: 150kcal
Cost: $10
Course: Salad
Cuisine: American
Keyword: Vegetables

Discover the Joy of Caprese Salad: A Love Letter to Fresh Ingredients

Welcome to a culinary journey that celebrates the simplicity and beauty of fresh ingredients! Today, we’re diving into the world of Caprese Salad with Balsamic Glaze, a dish that embodies the essence of summer gatherings and heartfelt connections around the table. This salad isn’t just a mixture of tomatoes and mozzarella; it’s a vibrant celebration of flavors that dances on your palate, making it the perfect companion for any meal. In just five minutes, you can create a masterpiece that looks as good as it tastes, reminding us that cooking is about love, memories, and sharing moments with those we cherish.

Why You’ll Love This Recipe

  • Quick and Easy: With just a handful of ingredients and minimal prep time, this salad comes together in five minutes.
  • Vibrant Flavors: The combination of ripe tomatoes, creamy mozzarella, and fragrant basil creates a refreshing flavor profile that’s hard to beat.
  • Versatile: Perfect as a side dish, appetizer, or even a light meal, this salad fits seamlessly into any occasion.
  • Healthy and Fresh: Packed with nutrients, this dish is a guilt-free indulgence that celebrates fresh produce.
  • Customizable: With various ingredient substitutions and variations, you can make this salad your own, catering to your taste preferences.

Ingredients That Sing

To create the best Caprese Salad, you’ll need the following ingredients:

  • 4 large ripe tomatoes (heirloom if you’re feeling fancy): The star of the show—look for tomatoes that are deep in color and slightly firm to the touch.
  • 8 oz fresh mozzarella (the good stuff, not the rubbery blocks): Opt for buffalo mozzarella or fresh mozzarella packed in water for that creamy texture.
  • 1/4 cup fresh basil leaves: Fragrant and aromatic, fresh basil adds a pop of flavor that ties the dish together.
  • 2 tbsp extra virgin olive oil: A drizzle of high-quality extra virgin olive oil enhances the dish with its rich flavor.
  • 2 tbsp balsamic glaze (store-bought or homemade): This adds a touch of sweetness and acidity, balancing the flavors perfectly.
  • Salt and pepper to taste: Essential for elevating the flavors of your ingredients.

Step-by-Step Instructions

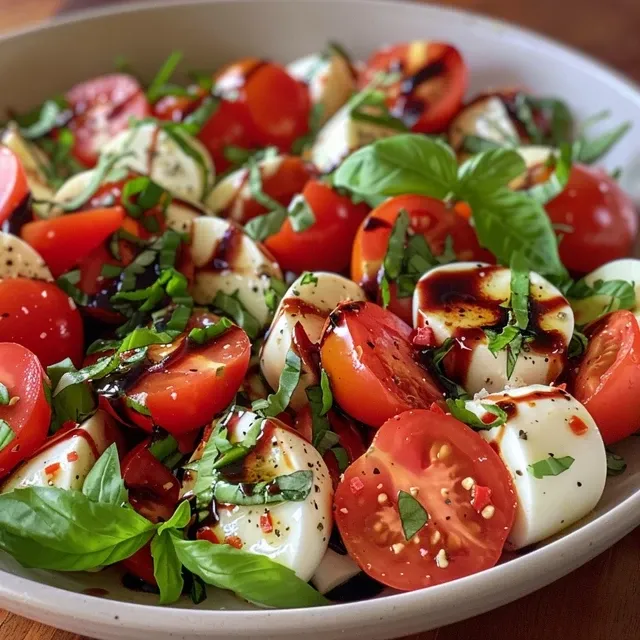
A colorful Caprese salad showcasing red tomatoes, white mozzarella, and green basil.

Creating your Caprese Salad is as simple as following these steps:

  • Slice the tomatoes and mozzarella into 1/4-inch thick rounds. Pro tip: Use a serrated knife for the tomatoes to avoid squishing.
  • Arrange them alternately on a plate, overlapping slightly for that aesthetically pleasing look.
  • Tuck basil leaves between the slices. If you’re extra, chiffonade the basil for sprinkling.
  • Drizzle with olive oil, then follow up with the balsamic glaze. Don’t drown it—less is more!
  • Season with salt and pepper. Taste. Adjust. Repeat until your heart sings.

Pro Tips for a Flawless Caprese Salad

  • Choose the Right Tomatoes: Look for vibrant, ripe tomatoes that are in season for the best flavor.
  • Quality Matters: Invest in high-quality mozzarella and olive oil. It makes a noticeable difference!
  • Fresh is Best: Use fresh basil, as dried basil simply cannot provide the same aromatic punch.
  • Presentation Counts: Layering the ingredients beautifully makes your salad more enticing.
  • Experiment with Balsamics: Try different balsamic glazes or reductions to find your favorite flavor profile.
  • Keep it Simple: Sometimes, less is more. Stick to the basics for a classic experience.
  • Make it Ahead: Prepare the ingredients a few hours in advance but assemble just before serving to maintain freshness.
  • Serve Chilled: Let your salad sit for about 15 minutes after assembling to allow the flavors to meld.

Common Mistakes to Avoid

Even the best of us can stumble in the kitchen! Here are some common pitfalls to watch out for:

  • Using Unripe Tomatoes: Always choose the ripest tomatoes for the best flavor.
  • Overdoing the Balsamic: A little goes a long way; too much can overpower the fresh ingredients.
  • Skipping Seasoning: Don’t forget to add salt and pepper; it enhances all the flavors.
  • Improper Storage: Store leftovers in an airtight container in the fridge, but consume them within a day for the best quality.

Delicious Variations

Get creative! Here are some variations you might enjoy:

  • Caprese Skewers: Assemble mini skewers with cherry tomatoes, mozzarella balls, and basil leaves for a fun appetizer.
  • Grilled Caprese Salad: Grill your tomatoes and mozzarella for a smoky flavor twist.
  • Pasta Caprese: Toss cooked pasta with the salad ingredients for a hearty meal.
  • Caprese with Avocado: Add slices of creamy avocado for a rich, indulgent touch.

Storage and Make-Ahead Instructions

If you have leftovers (which can happen, though it’s rare!), here’s how to store them:

  • Refrigerate: Keep in an airtight container for up to a day. The flavors will meld beautifully but the freshness is key!
  • Make-Ahead: You can prep ingredients a few hours in advance but hold off on combining until just before serving to maintain the texture.

Frequently Asked Questions

Here are some common questions about Caprese Salad:

  • Can I use balsamic vinegar instead of glaze?: Yes, but remember that balsamic glaze is thicker and sweeter. Adjust to taste.
  • What’s the best type of mozzarella?: Fresh mozzarella or buffalo mozzarella are ideal for the best texture and taste.
  • How do I make my own balsamic glaze?: Simmer balsamic vinegar over low heat until reduced and thickened, about 10-15 minutes.
  • Can I prepare this salad in advance?: Yes, but assemble just before serving for the freshest flavor.
  • What can I serve with Caprese Salad?: It pairs beautifully with grilled meats, crusty bread, or as part of a larger antipasto platter.
  • Is this salad gluten-free?: Yes! All the ingredients are naturally gluten-free.
  • Can I add other ingredients?: Absolutely! Feel free to add olives, arugula, or even nuts for extra texture.
  • How do I choose the best basil?: Look for vibrant green leaves without brown spots. Fresh basil should smell aromatic and strong.

Nutritional Tips and Dietary Adaptations

This Caprese Salad is not just delicious; it’s also packed with nutrients:

  • Rich in Vitamins: Tomatoes and basil are excellent sources of vitamins A and C.
  • Heart-Healthy Fats: Olive oil provides healthy fats that can benefit heart health.
  • Low in Calories: Perfect for a light meal or side, making it a great option if you’re watching your calorie intake.
  • Dietary Adaptations: For a dairy-free version, try using vegan mozzarella alternatives.

Essential Equipment

To whip up this delightful Caprese Salad, you’ll need:

  • Sharp Knife: A serrated knife works best for slicing tomatoes without squishing them.
  • Cutting Board: A good cutting board is essential for prepping your ingredients.
  • Serving Plate: Choose a beautiful plate to showcase your colorful salad.

Serving Suggestions

To elevate your dining experience, consider these serving ideas:

  • Pair with Bread: Serve with crusty Italian bread for a perfect bite.
  • Wine Suggestions: A crisp white wine like Pinot Grigio complements the salad beautifully.
  • Make it a Meal: Add grilled chicken or shrimp for a heartier offering.

In conclusion, creating a Caprese Salad with Balsamic Glaze is not just about following a recipe; it’s about embracing the joy of cooking and sharing love through food. Whether you’re enjoying this salad at a summer gathering or a quiet night in, it’s a reminder that good food brings us together. Gather your loved ones, share stories, and savor every bite. Happy cooking!

Caprese Salad with Balsamic Glaze: The 5-Minute Masterpiece

Prep Time 5 minutes
Total Time 5 minutes
Servings 4 servings
Calories 250
A quick and elegant Italian salad featuring fresh tomatoes, mozzarella, basil, and a sweet balsamic glaze.

Ingredients

Main ingredients

  • 4 large ripe tomatoes (heirloom if you’re feeling fancy)
  • 8 oz fresh mozzarella (the good stuff, not the rubbery blocks)
  • 0.25 cup fresh basil leaves
  • 2 tbsp extra virgin olive oil
  • 2 tbsp balsamic glaze (store-bought or homemade)
  • to taste Salt and pepper

Instructions 

  • Slice tomatoes and mozzarella into 1/4-inch rounds.
  • Arrange slices alternately on a plate, overlapping slightly.
  • Tuck basil leaves between slices.
  • Drizzle with olive oil and balsamic glaze.
  • Season with salt and pepper. Taste and adjust.

Notes

Use high-quality ingredients for the best flavor.
Calories: 250kcal
Cost: $15
Course: Salad
Cuisine: Italian
Keyword: Basil, Mozzarella, Tomato

Discover the Essence of Summer with a Classic Caprese Salad

There’s something magical about a fresh Caprese salad, isn’t there? This simple yet elegant dish captures the vibrant flavors of summer and brings them to your table in a way that feels both luxurious and comforting. With just a few quality ingredients—fresh mozzarella, ripe tomatoes, and aromatic basil—you can create a dish that’s not only a feast for the eyes but also a delightful treat for the palate. In this guide, we’re diving deep into the world of Caprese salad, sharing tips, variations, and stories that make this dish a cherished staple in many homes, including my own.

Why You’ll Love This Recipe

Making a Caprese salad isn’t just about tossing ingredients together; it’s about creating a beautiful experience that can evoke memories and foster connections. Here are some reasons why this recipe will capture your heart:

  • Quick and Easy: This salad can be prepared in under 15 minutes, making it perfect for last-minute gatherings.
  • Fresh Ingredients: The combination of mozzarella, tomatoes, and basil offers a burst of freshness that’s hard to resist.
  • Versatile Dish: Whether served as an appetizer, side dish, or even a light meal, it fits seamlessly into any menu.
  • Healthy and Nutritious: With wholesome ingredients, it’s a low-calorie dish packed with vitamins and nutrients.
  • Perfect for Summer: This salad celebrates the best of seasonal produce, making it a must-have for summer dining.

Ingredient Breakdown

Let’s take a closer look at the ingredients that make up this delightful Caprese salad, along with some suggested substitutions for those times when you need to adjust the recipe to fit what you have on hand.

  • Fresh Mozzarella: Use high-quality mozzarella for the best texture and flavor. If you can’t find fresh mozzarella, burrata is a delicious alternative.
  • Tomatoes: Look for ripe, juicy tomatoes, such as heirloom or vine-ripened varieties. If tomatoes are out of season, consider using cherry tomatoes for a pop of sweetness.
  • Fresh Basil: The fragrance of basil elevates the dish. If you’re out of basil, a sprinkle of fresh parsley can work in a pinch.
  • Olive Oil: A good-quality extra virgin olive oil enhances the flavors; it’s worth investing in.
  • Balsamic Glaze: This adds a sweet tang that complements the other flavors beautifully. If you don’t have balsamic glaze, a drizzle of balsamic vinegar will suffice.

Pro Tips for the Perfect Caprese Salad

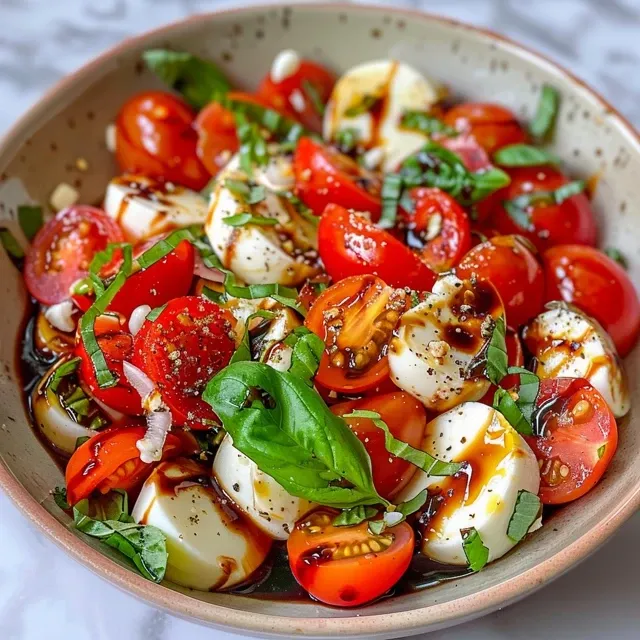
Juicy Caprese salad arranged beautifully with mozzarella, tomatoes, and a splash of olive oil.

To elevate your Caprese salad and ensure it’s as delicious as possible, consider these expert tips:

  • Layering Matters: Create a visual masterpiece by alternating layers of mozzarella, tomato, and basil for a beautiful presentation.
  • Quality Over Quantity: Use the best ingredients you can find; the difference in taste will be remarkable.
  • Let It Rest: Allow the salad to sit for a few minutes after assembling to let the flavors meld together.
  • Season Generously: Don’t skimp on salt and pepper; they enhance the freshness of the salad.
  • Dress Up or Down: Customize the dressing based on your preference; lemon juice or a sprinkle of herbs can add a refreshing twist.

Avoiding Common Mistakes

Even a simple salad can fall flat if certain mistakes are made. Here are some common pitfalls to avoid:

  • Using Subpar Ingredients: Always opt for the freshest tomatoes and mozzarella; they are the stars of the dish.
  • Overdressing: A little goes a long way when it comes to olive oil and balsamic glaze. Drizzle lightly and adjust to taste.
  • Skipping the Salt: Salt enhances the natural flavors, so don’t forget it!
  • Not Serving Immediately: For the best experience, serve your Caprese salad right after assembling it to enjoy the freshness.

Caprese Salad Variations

Want to mix things up? Here are some delightful variations on the classic Caprese salad:

  • Caprese Pasta Salad: Toss cooked pasta with mozzarella, tomatoes, basil, olive oil, and balsamic for a hearty twist.
  • Grilled Caprese Salad: Grill the tomatoes and mozzarella for a smoky flavor that adds depth to the dish.
  • Caprese Skewers: Assemble mini skewers with cherry tomatoes, mozzarella balls, and basil for a fun appetizer.
  • Avocado Caprese: Add slices of creamy avocado for an extra layer of richness and healthy fats.

Storage and Make-Ahead Instructions

If you want to prepare your Caprese salad ahead of time, here are some tips:

  • Pre-Slicing: You can slice the mozzarella and tomatoes a few hours in advance; store them in an airtight container in the fridge.
  • Assemble Just Before Serving: For the best taste, assemble the salad right before serving to keep everything fresh and vibrant.
  • Leftovers: If you have leftovers, store them in the fridge for up to two days, but note that the salad may lose some of its texture.

Frequently Asked Questions

Here are some common questions about Caprese salad that can help you along the way:

  • Can I make Caprese salad with grape tomatoes? Yes! Grape tomatoes can be a great substitute for larger tomatoes.
  • What’s the best way to cut mozzarella? Use a sharp knife or kitchen scissors to get clean cuts without squishing the cheese.
  • How do I store leftover Caprese salad? Store it in an airtight container in the fridge and consume within two days.
  • Can I add other ingredients? Absolutely! Feel free to add ingredients like olives, arugula, or even a drizzle of pesto.
  • Is Caprese salad gluten-free? Yes, all the ingredients are naturally gluten-free!
  • What’s the origin of Caprese salad? This salad hails from the island of Capri in Italy, making it a true Italian classic.
  • Can I make it vegan? Yes, substitute mozzarella with a plant-based cheese alternative.
  • What pairs well with Caprese salad? It pairs beautifully with grilled meats, crusty bread, or a light white wine.

Nutritional Information and Dietary Adaptations

This Caprese salad is not only delicious but also nutritious. Here’s a quick overview:

  • Calories: Approximately 200 calories per serving (based on the recipe).
  • Low-Carb Option: Skip the balsamic glaze for a lower-carb alternative.
  • Dairy-Free: Use a dairy-free mozzarella alternative to make this dish suitable for dairy-free diets.

Essential Equipment for Making Caprese Salad

While making a Caprese salad doesn’t require special tools, having the right equipment can make the process smoother:

  • Sharp Chef’s Knife: For cleanly slicing tomatoes and mozzarella.
  • Cutting Board: A sturdy surface for safe and easy slicing.
  • Platter or Serving Dish: To showcase your beautiful salad.

Serving Suggestions

Presenting your Caprese salad is just as important as making it. Here are some ideas for serving:

  • Family Style: Serve on a large platter for everyone to help themselves.
  • Individual Plates: Create personal servings for a more formal dining experience.
  • Pair with Crusty Bread: A slice of good bread complements the salad beautifully.

As you gather around the table to enjoy this Caprese salad, remember that it’s more than just a dish; it’s a celebration of flavors, memories, and the warmth of togetherness. May each bite remind you of the love and joy that comes from sharing meals with family and friends. Enjoy your culinary journey with this delightful recipe, and may it inspire many heartfelt gatherings in your home!

Caprese Salad

Prep Time 10 minutes
Total Time 10 minutes
Servings 4 servings
Calories 250
A fresh and simple Italian appetizer featuring ripe tomatoes, creamy mozzarella, and fragrant basil.

Ingredients

Main ingredients

  • 8 oz fresh mozzarella cheese (sliced into 8 (1 oz each) slices)
  • 2 medium red tomatoes (sliced into 8 slices)
  • 8 large basil leaves
  • 1 teaspoon olive oil
  • 1.5 teaspoons balsamic glaze
  • to taste Salt and black pepper

Instructions 

  • Arrange mozzarella, tomato slices, and basil leaves on a platter in an alternating pattern.
  • Sprinkle with salt and black pepper.
  • Drizzle with olive oil and balsamic glaze.
  • Serve immediately.

Notes

Use fresh ingredients for best flavor.
Calories: 250kcal
Cost: $10
Course: Appetizer
Cuisine: Italian
Keyword: Basil, Mozzarella, Tomato

Creating Memories with a Fresh Fruit Salad

Welcome to a delightful journey through the vibrant world of fresh fruit salads! This Fresh Fruit Salad with Creamy Dressing is not just a recipe; it’s an invitation to gather around the table and share love, laughter, and memories—all wrapped up in a bowl of colorful, juicy fruits. In every bite, you’ll discover the essence of togetherness, making it the perfect centerpiece for family gatherings and celebrations.

When I think of fruit salad, I’m reminded of summer days spent in my grandmother’s backyard, surrounded by the laughter of family and the sweet scents of ripe fruit. The simplicity of combining seasonal fruits with a luscious creamy dressing brings warmth and nostalgia, reminding us that cooking is an expression of love.

Why You’ll Love This Recipe

  • Quick and Easy: This salad is a breeze to prepare, requiring no cooking—just chop, mix, and serve!
  • Versatile Ingredients: Use your favorite fruits or whatever’s in season for a personalized touch.
  • Creamy Delight: The creamy dressing made with cream cheese and whipped cream adds a rich texture that complements the natural sweetness of the fruits.
  • Health Boost: Packed with vitamins and antioxidants, this salad is a nutritious addition to any meal.
  • Perfect for Any Occasion: Whether it’s a potluck, picnic, or family dinner, this fruit salad is sure to impress.

Ingredients Breakdown

Let’s dive into the ingredients that make this Fresh Fruit Salad truly special:

  • Oranges: 1 cup of cut-up segments (about 2 small oranges) brings a burst of citrus flavor.
  • Strawberries: 1 cup of sliced strawberries adds sweetness and vibrant color.
  • Blueberries: 1 cup of whole blueberries enhances the salad’s texture.
  • Apples: 1 cup of diced apple (peeled or unpeeled) adds crunch and natural sweetness.
  • Bananas: 1 cup of banana slices (about 1-½ bananas) provides creaminess.
  • Grapes: 1 cup of halved grapes introduces juiciness and variety.
  • Pineapple: 1 cup of diced pineapple chunks offers a tropical twist.
  • Lemon Juice: 1 tablespoon keeps the fruits fresh and bright.
  • Whipping Cream: ½ cup adds richness to the dressing.
  • Sweetener: 3 packages of Stevia or 1 tablespoon of powdered sugar sweetens the dressing to your taste.
  • Cream Cheese: 3 ounces of softened cream cheese creates a smooth texture in the dressing.
  • Lemon Zest: Zest from ½ lemon enhances the dressing with a citrusy brightness.

Pro Tips for the Perfect Fruit Salad

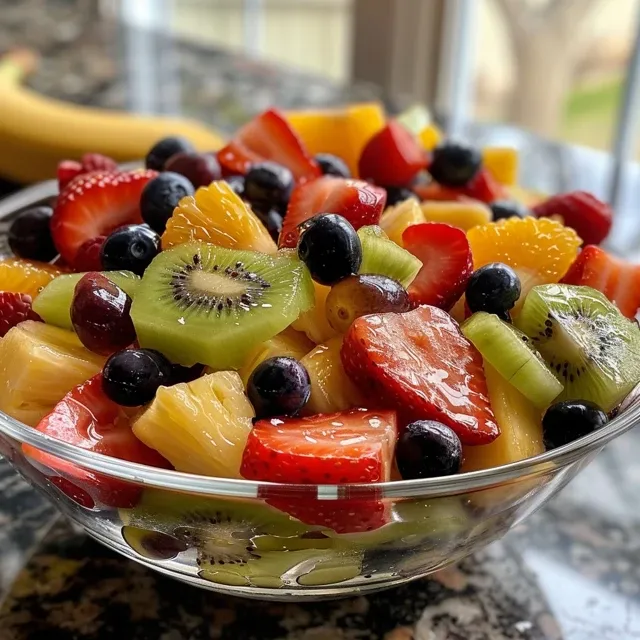
An assortment of fresh fruit pieces in a creamy dressing, showcasing a variety of textures and colors.
  • Choose Fresh Fruits: Select ripe, seasonal fruits for the best flavor and texture.
  • Prep Ahead: You can prepare the fruits a few hours in advance; just keep them covered in the refrigerator to maintain freshness.
  • Mix Gently: When combining fruits and dressing, do so gently to avoid bruising the fruits.
  • Experiment with Flavors: Don’t hesitate to add mint leaves or a splash of vanilla extract for an aromatic twist.
  • Chill Before Serving: Allow the salad to chill in the refrigerator for at least 30 minutes; the flavors meld beautifully!
  • Presentation Matters: Serve in a clear bowl to showcase the colorful fruits, making it visually appealing.
  • Use Leftovers Wisely: Any leftover salad can be blended into smoothies for a delicious treat!
  • Be Mindful of Allergies: If serving to a crowd, consider potential allergens like nuts or dairy in your ingredients.

Common Mistakes and Troubleshooting

Even the best of us can run into a few hiccups in the kitchen. Here’s how to avoid common mistakes:

  • Overripe Fruits: Always check for ripeness to avoid mushy textures.
  • Too Much Dressing: Start with a smaller amount of dressing; you can always add more if needed!
  • Fruit Oxidation: Use lemon juice to prevent apples and bananas from browning.
  • Heavy Cream Alternative: If you’re looking for a lighter option, substitute Greek yogurt for the cream cheese.

Variations to Try

Let’s get creative! Here are a few variations to make this fruit salad your own:

  • Tropical Twist: Add mango, kiwi, and coconut for a beachy vibe.
  • Berry Bliss: Swap in raspberries and blackberries for a berry-packed salad.
  • Nutty Crunch: Toss in some chopped walnuts or almonds for added texture and protein.
  • Herb Infusion: Experiment with fresh herbs—basil or mint can add a refreshing note.

Storage and Make-Ahead Instructions

This fresh fruit salad is best enjoyed the same day it’s made. However, if you need to store leftovers, place them in an airtight container in the refrigerator for up to 2 days. Note that the fruits may release some juice over time, but the flavors will still be delightful! You can prepare the fruit in advance and mix with the dressing just before serving to maintain freshness.

Frequently Asked Questions

  • Can I use frozen fruit? Yes, but let it thaw and drain excess liquid before adding to the salad.
  • How can I make this salad vegan? Substitute cream cheese with coconut yogurt and use maple syrup instead of granulated sweetener.
  • What fruits should I avoid? Fruits like bananas can brown quickly; consider adding them just before serving.
  • How can I enhance the dressing flavor? Add a splash of vanilla extract or a hint of almond extract for depth.
  • Can I make this salad spicy? A pinch of cayenne or chili powder can add an intriguing kick!
  • How do I make it sweeter? Adjust the sweetener according to your taste preferences.
  • What’s the best way to cut the fruit? Uniform sizes help with presentation and make for easier eating.
  • How long does this salad last? Ideally, enjoy within 2 days for the best flavor and texture.

Nutrition Tips and Dietary Adaptations

This Fresh Fruit Salad is naturally low in calories and high in vitamins. Here are a few tips for making it even healthier:

  • Lower Sugar: Use a sugar substitute like Stevia for a lighter option.
  • Boost Fiber: Include fruits high in fiber, like pears and figs, for added health benefits.
  • Protein-Packed: Add Greek yogurt to the dressing for a protein boost.

Equipment Recommendations

For this recipe, you’ll need:

  • Cutting Board: A sturdy surface for chopping your fruits.
  • Sharp Knife: Essential for easy and precise cutting.
  • Mixing Bowl: A large bowl for combining the salad and dressing.
  • Whisk: For mixing the creamy dressing smoothly.
  • Airtight Containers: To store any leftovers safely.

Serving Suggestions

This fruit salad pairs beautifully with grilled meats, as a side dish for picnics, or simply enjoyed on its own. Consider adding it to a brunch spread alongside pancakes or waffles for a delightful treat. Remember, the heart of this recipe lies in sharing it with loved ones, so don’t forget to pass it around the table!

As we gather around our tables, let this Fresh Fruit Salad with Creamy Dressing remind us that cooking is about nurturing relationships and creating memories. Just like the fruits in the salad, each moment is unique and should be cherished. Happy cooking, and may your kitchen be filled with love and laughter!

Best Fresh Fruit Salad with a Creamy Dressing

Prep Time 15 minutes
Total Time 15 minutes
Servings 4 servings
Calories 250
A vibrant and refreshing fruit salad topped with a creamy, sweet dressing, perfect for any occasion.

Ingredients

Fruits

  • 1 cup cut-up orange segments, 2 small oranges
  • 1 cup sliced strawberries
  • 1 cup blueberries
  • 1 cup diced apple, 1 apple peeled or unpeeled
  • 1 cup banana slices, 1-½ bananas
  • 1 cup grapes, each cut in half
  • 1 cup diced pineapple chunks
  • 1 tablespoon lemon juice
  • ½ cup whipping cream
  • 3 packages Stevia sweetener, or other sweetener, or 1 tablespoon of powdered sugar
  • 1 tablespoon lemon juice
  • 3 ounces softened cream cheese
  • lemon zest from 1/2 of a lemon lemon zest

Instructions 

  • Combine all fruits in a large bowl.
  • In a separate bowl, whisk together lemon juice, whipped cream, cream cheese, sweetener, and lemon zest until smooth.
  • Pour the creamy dressing over the fruit and gently toss to coat.
  • Chill for 10-15 minutes before serving.

Notes

Use fresh, ripe fruits for the best flavor.
Calories: 250kcal
Cost: $12
Course: Dessert, Salad
Keyword: Cream, Fruit

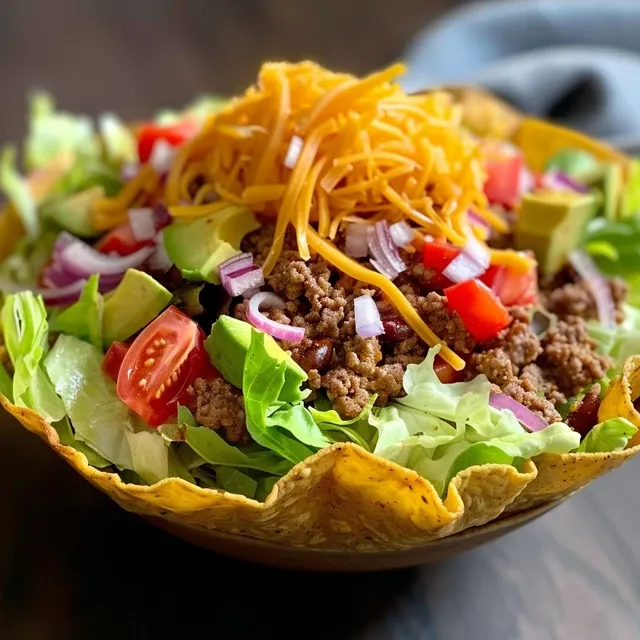
Discover the Magic of Crispy Tortilla Taco Bowls

Tortilla bowls are more than just a vessel for your favorite fillings; they are an expression of love, creativity, and togetherness. When you gather around the table to enjoy a crispy tortilla taco bowl, you’re not just sharing a meal; you’re sharing memories, laughter, and stories. With every bite, you’re reminded of the warmth of family gatherings and the joy of culinary traditions passed down through generations. In this comprehensive guide, we’ll explore how to create the perfect crispy tortilla taco bowl, ensuring that your next meal is not only delicious but also a heartfelt experience for all.

Why You’ll Love This Recipe

  • Easy to Prepare: This recipe comes together quickly, making it perfect for busy weeknights or special occasions when you want to impress your guests without the stress.
  • Customizable Ingredients: With a variety of fillings and toppings, you can tailor each bowl to your taste, accommodating dietary preferences and restrictions.
  • Fun for Everyone: Building your own taco bowl is an interactive dining experience that encourages creativity and engagement at the table.
  • Healthier Option: Baked tortilla bowls are a lighter alternative to fried versions, allowing you to enjoy your favorite dishes with less guilt.
  • Perfect for Leftovers: This recipe is a fantastic way to use up leftover ingredients, turning them into a fresh and exciting meal.

Ingredient Breakdown

Creating the perfect crispy tortilla taco bowl starts with quality ingredients. Below is a detailed breakdown of what you’ll need, along with suggestions for substitutions:

  • Ground Beef or Turkey: 1 lb of your choice. You can also substitute with chicken, tofu, or beans for a vegetarian option.
  • Taco Seasoning: 1 tbsp. Feel free to use homemade seasoning for a personal touch.
  • Iceberg Lettuce: 1 head (chopped) or use romaine hearts for a crunchier texture.
  • Refried Beans: Optional but adds creaminess and protein. Consider black beans or pinto beans as alternatives.
  • Cheese: Mexican blend, sharp cheddar, or pepper jack—choose your favorite!
  • Tomatoes: 2 diced. Cherry tomatoes are a great alternative for sweetness.
  • Red Onion: ½ diced, or use green onions for a milder flavor.
  • Avocados: 2 sliced, providing creaminess and healthy fats.
  • Cilantro: Fresh, chopped for garnish and added flavor.
  • Black Olives: Optional, but they add a savory touch.
  • Flour Tortillas: 4 large (10”). You can use whole wheat or gluten-free tortillas if needed.
  • Olive Oil or Cooking Spray: 2 tbsp to help with browning.
  • Salt: ¼ tsp to enhance flavors.
  • Sour Cream: 1 cup for creaminess, or substitute with Greek yogurt.
  • Mayonnaise: ¼ cup, mixed with chipotle for a spicy kick.
  • Chipotle Peppers in Adobo Sauce: 1-3 for heat—adjust according to your preference.
  • Garlic: 2 cloves, crushed for depth of flavor.
  • Lime Juice: 1.5 tbsp for brightness.
  • Onion Powder and Smoked Paprika: ½ tsp each to enhance flavor complexity.
  • Ground Cumin: ½ tsp for earthy notes.

How to Make Your Crispy Tortilla Bowls

A detailed view of a taco bowl made with a crunchy tortilla, topped with lettuce, sour cream, and cilantro.

Creating your crispy tortilla bowls is an easy and enjoyable process. Follow these steps for a guaranteed success:

  1. Preheat Your Oven: Set your oven to 375°F (190°C).
  2. Prepare the Tortilla Shells: Brush each tortilla with olive oil on both sides. You can also use cooking spray for a lighter option.
  3. Shape the Tortillas: Drape the tortillas over the back of an oven-safe bowl or use tortilla molds. This will create the bowl shape while baking.
  4. Bake: Place the shaped tortillas in the oven for about 10-15 minutes, or until golden and crispy. Keep an eye on them to avoid burning!
  5. While the Tortillas Bake: In a skillet, cook your ground beef or turkey over medium heat. Add taco seasoning and water, cooking until the meat is fully browned and seasoned well.
  6. Add Fillings: Once the tortillas are ready, fill them with your cooked meat, then layer on the lettuce, tomatoes, cheese, avocados, and any additional toppings you desire.
  7. Drizzle the Sauce: Mix sour cream, mayonnaise, chipotle peppers, garlic, lime juice, and spices in a bowl. Drizzle generously over your filled bowls.
  8. Garnish: Finish with fresh cilantro and black olives if using. Serve immediately and enjoy the togetherness!

Pro Tips for Perfect Tortilla Bowls

  • Use the Right Tortillas: Opt for large flour tortillas for the best shape. If you prefer a gluten-free option, look for sturdy corn tortillas, but be cautious as they can tear easily.
  • Avoid Sogginess: To prevent your bowls from getting soggy, add ingredients like beans and meat first, then layer on fresh veggies and toppings.
  • Experiment with Fillings: Get creative! Use grilled chicken, shrimp, or even roasted vegetables for unique flavors.
  • Perfect Crispiness: Bake the tortilla bowls until they are golden brown; this ensures a delightful crunch that complements the fillings.
  • Make Ahead: You can prepare the filling in advance and store it in the fridge, making dinner time a breeze.
  • Use Leftovers Wisely: These bowls are a great way to use up leftovers from other meals, transforming them into something new and exciting.
  • Don’t Overfill: To avoid spills and ensure easy eating, keep your fillings to a reasonable amount.
  • Pair with Sides: Serve your tortilla bowls with a side of chips and salsa or a fresh fruit salad to round out the meal.

Common Mistakes and Troubleshooting

Even the best cooks make mistakes. Here are some common pitfalls and how to avoid them:

  • Underbaking the Tortillas: This can lead to chewy rather than crispy bowls. Ensure you give them enough time in the oven.
  • Overfilling Your Bowls: This can cause a mess. Stick to a balanced amount of each ingredient.
  • Ignoring Flavor Balance: Make sure to season your meat and toppings well to avoid blandness. Seasoning is key!
  • Choosing the Wrong Tortilla: As mentioned, not all tortillas are created equal. Opt for ones that hold up well in the oven.

Delicious Variations to Try

Don’t be afraid to switch things up! Here are some delightful variations for your tortilla bowls:

  • Vegetarian Delight: Substitute meat with sautéed mushrooms, zucchini, and bell peppers for a vibrant veggie bowl.
  • Spicy Chicken: Use shredded spicy chicken breast instead of ground meat for a fiery kick.
  • Breakfast Bowl: Fill your tortilla bowl with scrambled eggs, cheese, and avocado for a hearty breakfast option.
  • Seafood Fiesta: Swap in shrimp or fish, seasoned with lime and spices, for a refreshing seafood twist.

Storage and Make-Ahead Instructions

If you have leftovers or want to prepare ahead, here’s how to store your tortilla bowls and their components:

  • Store Tortilla Shells: Keep baked tortilla shells in an airtight container at room temperature for up to 2 days. For longer storage, freeze them between parchment paper.
  • Store Fillings: Store meat and veggies in separate airtight containers in the refrigerator for up to 3 days.
  • Reheat Gently: When reheating, use the oven or a skillet to retain crispiness. Avoid microwaving, which can make bowls soggy.
  • Assemble Fresh: For the best texture, assemble your tortilla bowls just before serving.

Frequently Asked Questions

Here are some common questions regarding tortilla bowls:

  • Can I make tortilla bowls in advance? Yes, you can bake your tortilla shells ahead of time and store them until you’re ready to use them.
  • What can I use instead of ground beef? Ground turkey, chicken, or even plant-based options like lentils or beans work beautifully.
  • How do I make my tortilla bowls crispy? Ensure they are baked until golden and use enough oil to prevent them from drying out.
  • Can I freeze filled tortilla bowls? It’s best to freeze components separately, as assembled bowls may not hold up well once thawed.
  • What toppings work best? Fresh cilantro, diced tomatoes, avocados, and cheese are all excellent choices.
  • How can I make this recipe vegan? Use plant-based meat alternatives, dairy-free mayo, and skip the cheese.
  • What’s the best way to reheat leftover tortilla bowls? Reheat the filling separately and fill fresh tortilla bowls or crisp the shells again in the oven.
  • Can I use corn tortillas? Yes, but be cautious—they tend to break more easily. Use sturdy ones and consider baking them in molds.

Nutrition Tips and Dietary Adaptations

When creating your tortilla bowls, keep nutrition in mind:

  • Load Up on Veggies: Fill your bowl with a colorful array of fresh vegetables for added nutrients and fiber.
  • Lean Proteins: Opt for lean ground turkey or plant-based proteins to keep your meal heart-healthy.
  • Healthy Fats: Avocados and olive oil provide healthy fats that are good for your heart.
  • Portion Control: Be mindful of your portion sizes, especially with cheese and creamy dressings, to maintain balance.

Recommended Equipment

To create your crispy tortilla bowls, you’ll need a few key pieces of equipment:

  • Oven-safe Bowls: Ideal for shaping your tortillas into bowls.
  • Tortilla Molds: If you plan to make tortilla bowls often, investing in molds can simplify the process.
  • Skillet: A good non-stick skillet for browning your meat and sautéing vegetables.
  • Mixing Bowls: For combining sauces and fillings.

Serving Suggestions

When it comes to serving your crispy tortilla bowls, consider these ideas:

  • Side Dishes: Pair with a side of Mexican rice or a refreshing corn salad for a complete meal.
  • Drinks: Serve with a chilled margarita or a refreshing agua fresca to complement the flavors.
  • Family Style: Set up a taco bar where everyone can build their own bowls, fostering a fun and interactive dining experience.

In conclusion, crafting a crispy tortilla taco bowl is not just about enjoying a meal; it’s about sharing stories, creating memories, and celebrating the love that comes from cooking together. Whether it’s a simple weeknight dinner or a festive gathering, these bowls promise to bring everyone together at the table. So gather your ingredients, invite loved ones, and let the magic of food and family take center stage in your home.

Crispy Tortilla Taco Bowl

Prep Time 15 minutes
Cook Time 10 minutes
Total Time 25 minutes
Servings 4 servings
Calories 650
Enjoy a flavorful and crispy taco bowl made with seasoned ground meat, fresh vegetables, and creamy toppings, all wrapped in crispy tortillas.

Ingredients

Meat and Seasonings

  • 1 lb ground beef or turkey
  • 1 tbsp taco seasoning
  • 1 tbsp water

Vegetables and Toppings

  • 1 head iceberg lettuce (chopped)
  • Refried beans (optional) Refried beans (optional)
  • Mexican blend cheese (sharp cheddar, or pepper jack) Mexican blend cheese
  • 2 tomatoes (diced)
  • ½ red onion (diced)
  • 2 avocados (sliced)
  • Fresh cilantro (chopped) Fresh cilantro
  • Black olives (optional) Black olives (optional)
  • 4 large flour tortillas (10") large flour tortillas
  • 2 tbsp olive oil or cooking spray
  • ¼ tsp salt

Dairy and Sauces

  • 1 cup sour cream
  • ¼ cup mayonnaise
  • ¼ cup packed cilantro (chopped)
  • 1-3 chipotle peppers in adobo sauce chipotle peppers in adobo sauce
  • 1 tsp adobo sauce
  • 2 cloves crushed garlic
  • 1.5 tbsp lime juice
  • ½ tsp onion powder
  • ½ tsp smoked paprika
  • ½ tsp ground cumin

Instructions 

  • Cook ground meat with taco seasoning and water until browned.
  • Prepare toppings: chop lettuce, dice tomatoes and onion, slice avocados, and chop cilantro.
  • Warm tortillas and brush with olive oil; bake or fry until crispy.
  • Assemble bowls with meat, vegetables, cheese, olives, and toppings. Mix sour cream, mayonnaise, cilantro, chipotle peppers, adobo sauce, garlic, lime juice, and spices for sauce.
  • Serve tortillas filled with meat and toppings, drizzled with sauce.

Notes

For extra crunch, bake tortillas at 375°F (190°C) for 8-10 minutes until crispy.
Calories: 650kcal
Cost: $15
Course: Main Course
Cuisine: Mexican
Keyword: beef, Crispy, Tacos

Welcome to a Taste of Sunshine: Quick Quinoa Salad with Avocado Bliss

Ah, the joy of cooking! It’s not just about feeding ourselves; it’s about sharing warmth and love around the table. This Quick Quinoa Salad with Avocado Bliss is a vibrant dish that invites you to savor wholesome ingredients, all while nourishing both body and soul. In just 25 minutes, you can whip up this delightful salad, perfect for family gatherings or a simple, refreshing lunch. Let’s dive into the heart of this recipe and explore why it’s destined to become a staple in your kitchen.

Why You’ll Love This Quinoa Salad

This isn’t just another salad; it’s a bowl of sunshine that comes with a bounty of benefits:

  • Quick and Easy: Ready in just 25 minutes, perfect for those busy weeknights or last-minute gatherings.
  • Nutritious Powerhouse: Packed with protein from chickpeas and quinoa, this salad keeps you full without that heavy feeling.
  • Customizable Delight: Feel free to toss in your favorite veggies or nuts—this recipe embraces creativity!
  • Vegan & Gluten-Free: A dish that everyone can enjoy, accommodating various dietary needs without sacrificing flavor.
  • Fresh Flavors: The creamy avocado and zesty lemon juice create a refreshing taste that dances on your palate.

Ingredients for Quick Quinoa Salad with Avocado Bliss

Gather these simple yet nourishing ingredients to create your salad:

  • 1 cup quinoa, rinsed
  • 2 cups water
  • 1 can (15 oz) chickpeas, drained and rinsed
  • 1 ripe avocado, diced
  • 1/4 cup red onion, finely chopped
  • 1/4 cup fresh cilantro, chopped
  • 2 tbsp olive oil
  • 1 tbsp lemon juice
  • Salt and pepper to taste

How to Make This Quinoa Salad

Juicy quinoa salad with ingredients like chickpeas and diced avocado on a plate.

Let’s get cooking! Follow these steps to create your salad:

  1. Cook quinoa in water according to package instructions. Let it cool.
  2. In a large bowl, combine cooled quinoa, chickpeas, avocado, red onion, and cilantro.
  3. Drizzle with olive oil and lemon juice. Toss gently to mix.
  4. Season with salt and pepper. Serve chilled.

Pro Tips for the Best Quinoa Salad

To elevate your salad game, consider these expert insights:

  • Rinse the Quinoa: Rinsing removes the bitter saponins, enhancing the flavor and texture.
  • Perfect Avocado: Choose a ripe avocado for that creamy texture; it should yield slightly when pressed.
  • Let it Chill: Allowing the salad to chill for about 30 minutes enhances the flavors as they meld together.
  • Herb Variations: Experiment with different herbs like parsley or mint for a fresh twist.
  • Texture Additions: Add roasted nuts or seeds for crunch and added nutrition.
  • Dress it Up: A sprinkle of feta or goat cheese can add a delightful tang.
  • Batch Cooking: Prepare extra quinoa for easy weeknight meals; it can be a base for various dishes.
  • Mind the Salt: Start with a little salt, then adjust to taste to avoid overpowering the dish.

Common Mistakes and Troubleshooting

Even the most seasoned cooks can make a few missteps. Here’s how to avoid them:

  • Too Much Water: Ensure you’re using the right water-to-quinoa ratio; too much can make it mushy.
  • Overcooking: Keep an eye on the quinoa while cooking; it should be fluffy, not sticky.
  • Underseasoned: Don’t skip the salt; it brings out the flavors of the ingredients.
  • Ignoring Freshness: Always use fresh ingredients for the best taste, especially the avocado and herbs.

Delicious Variations to Try

Here are some delightful twists on the classic quinoa salad:

  • Mexican-Inspired: Add black beans, corn, lime juice, and diced jalapeños for a kick.
  • Italian Flair: Toss in sun-dried tomatoes, fresh basil, and mozzarella balls for a Mediterranean vibe.
  • Asian Fusion: Incorporate edamame, sesame oil, and a splash of soy sauce for an Asian twist.
  • Fruit Infusion: Mix in diced mango or pomegranate seeds for a burst of sweetness.

Storage and Make-Ahead Instructions

This salad is perfect for meal prep! Here’s how to store it:

  • Store leftovers in an airtight container in the fridge for up to 3 days.
  • If you make it ahead, consider keeping the avocado separate until you’re ready to serve to prevent browning.
  • This quinoa salad can be enjoyed cold or at room temperature, making it versatile for any occasion.

Frequently Asked Questions

Here are some common queries about this quinoa salad:

  • Can I use a different grain? Yes! You can substitute quinoa with farro, barley, or even brown rice.
  • Can I make this salad ahead of time? Absolutely! It tastes even better after the flavors meld for a few hours.
  • What if I’m not a fan of chickpeas? Try swapping them for black beans, kidney beans, or even diced chicken for extra protein.
  • Is there a substitute for avocado? You can use diced cucumber or even tahini for creaminess in flavor.
  • How can I make it spicy? Add chopped jalapeños or a dash of hot sauce to spice things up!
  • Can I freeze this salad? While it’s best fresh, you can freeze the quinoa and chickpeas separately for future meals.
  • What dressing pairs well? A light vinaigrette or a creamy tahini dressing complements the salad beautifully.
  • How do I adjust the serving size? This recipe is easily halved or doubled based on your needs.

Nutritional Tips and Dietary Adaptations

This quinoa salad is not only delicious but also packed with nutrients:

  • High Protein: With quinoa and chickpeas, this salad provides a great source of plant-based protein.
  • Rich in Fiber: Both quinoa and chickpeas are high in fiber, promoting digestive health.
  • Healthy Fats: The avocado and olive oil contribute heart-healthy fats that are great for your body.
  • Low Calorie: This salad is nutrient-dense yet low in calories, making it perfect for those mindful of their intake.

Essential Equipment Recommendations

To make your cooking experience smoother, here are a few kitchen essentials:

  • Quality Pot: A good pot is crucial for cooking quinoa to perfection.
  • Mixing Bowl: A large bowl allows for easy tossing of ingredients without spills.
  • Measuring Cups: Accurate measurements ensure the best results every time.
  • Knife and Cutting Board: Essential for chopping veggies and herbs with ease.

Serving Suggestions for Your Quinoa Salad

This salad can be enjoyed in various ways:

  • As a Side Dish: Pair it with grilled chicken or fish for a complete meal.
  • In a Wrap: Use it as a filling in wraps or pita bread for a quick lunch.
  • With Greens: Serve it over a bed of mixed greens for added crunch and nutrition.
  • On Its Own: It’s hearty enough to stand alone as a main dish, especially for a light dinner.

Cooking is a canvas where every dish tells a story, and this Quick Quinoa Salad with Avocado Bliss is no exception. I hope it brings you joy and connection around your family table, just as it does in mine. Happy cooking, and may your meals be filled with love!

Quick 25-Minute Quinoa Salad with Avocado Bliss

Prep Time 10 minutes
Cook Time 15 minutes
Total Time 25 minutes
Servings 4 servings
Calories 350
A fresh and vibrant quinoa salad packed with chickpeas, avocado, and herbs, perfect for a quick and healthy meal.

Ingredients

Grains

  • 1 cup quinoa, rinsed
  • 2 cups water

Legumes

  • 1 can (15 oz) chickpeas, drained and rinsed

Produce

  • 1 ripe avocado avocado, diced
  • 1/4 cup red onion, finely chopped
  • 1/4 cup fresh cilantro, chopped

Oils & Vinegars

  • 2 tbsp olive oil
  • 1 tbsp lemon juice

Seasonings

  • to taste Salt and pepper

Instructions 

  • Cook quinoa in water until tender, then let it cool.
  • Combine cooled quinoa, chickpeas, avocado, red onion, and cilantro in a large bowl.
  • Drizzle with olive oil and lemon juice, then toss gently.
  • Season with salt and pepper, then serve chilled.

Notes

For extra flavor, add a pinch of cumin or chili flakes.
Calories: 350kcal
Cost: $10
Course: Salad
Cuisine: International
Keyword: Avocado, Healthy, Quinoa