Author

daniel

Browsing

Welcome to a delightful journey through the vibrant world of fruit salad! This recipe is not just a dish; it’s a celebration of nature’s bounty and a nostalgic nod to the moments spent around a table with loved ones. In this guide, we’ll explore how to make the best fruit salad, filled with fresh flavors and sweet memories. Perfect for brunch, BBQs, or simply enjoying on a sunny afternoon, this fruit salad is sure to become a cherished favorite.

Why You’ll Love This Recipe

  • Quick and Easy: With minimal prep time of just 15 minutes, you can whip up this refreshing dish in no time. Perfect for those busy days when you need something delicious fast!
  • Health Benefits: Packed with vitamins and antioxidants, this fruit salad is a guilt-free indulgence that nourishes your body while satisfying your sweet tooth.
  • Customizable: Feel free to swap in your favorite seasonal fruits or whatever you have on hand. This recipe adapts beautifully to your preferences and the fruits of the season.
  • Beautiful Presentation: The vibrant colors of the fruits create a stunning centerpiece for any gathering, making it a feast for the eyes as well as the palate.
  • Perfect for Sharing: Fruit salad is always better when shared! Its bright flavors and cheerful look encourage everyone to gather around and enjoy.

Ingredients Breakdown

Here’s what you’ll need to make this delightful fruit salad:

  • 2 cups strawberries: Hulled and sliced for a sweet and juicy base.
  • 2 cups pineapple chunks: Fresh preferred for that tropical twist, but canned works in a pinch.
  • 2 cups seedless grapes: Halved to add a juicy pop with every bite.
  • 2 cups blueberries: These little gems are packed with antioxidants and add a lovely color.
  • 2 cups kiwi: Peeled and sliced to introduce a tart flavor that balances the sweetness.
  • 2 oranges: Peeled and segmented to bring brightness and zest.
  • 1 banana: Sliced and added just before serving for that creamy texture.
  • 3 tbsp honey: To sweeten the dressing naturally.
  • Juice of 1 fresh lime: A splash of acidity to enhance the flavors.
  • 1 tsp orange zest: For an extra layer of citrusy goodness.

Step-by-Step Instructions

Making this fruit salad is as easy as 1-2-3!

  • Wash all fruit thoroughly. Slice strawberries, halve grapes, peel and slice kiwis, and segment the oranges.
  • In a small bowl, whisk together honey, lime juice, and orange zest to create a luscious dressing.
  • In a large serving bowl, gently toss strawberries, pineapple, grapes, blueberries, kiwi, and orange segments.
  • Pour the honey-citrus dressing over the fruit mixture and toss lightly to coat.
  • Just before serving, slice the banana and gently fold it in to prevent browning.

Pro Tips for the Best Fruit Salad

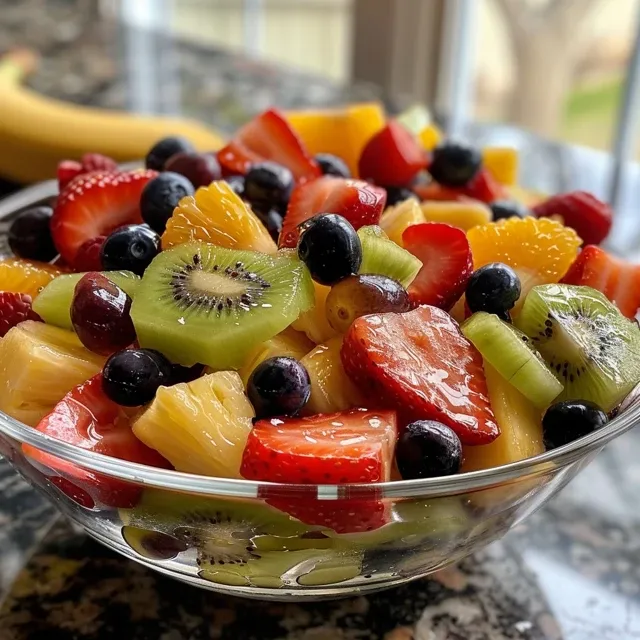
A delicious assortment of fruits displayed in a bowl, showcasing strawberries, oranges, kiwi, and banana, ready to be served.
  • Use Fresh Ingredients: Fresh fruit not only tastes better but also looks more vibrant. Try to use seasonal produce for the best flavor.
  • Mix Textures: Combine soft fruits like bananas with crunchy apples or nuts for an exciting bite.
  • Dress Before Serving: For the freshest taste, dress the salad just before serving to keep everything crisp and bright.
  • Experiment with Add-Ins: Consider adding nuts, seeds, or even yogurt for a creamier texture and added nutrition.
  • Keep It Cool: Chill your fruit salad for at least 30 minutes before serving for a refreshing treat.
  • Utilize Citrus Zest: A sprinkle of zest from limes or lemons can elevate the flavors, making the dish more aromatic.
  • Be Mindful of Ripeness: Choose fruits that are ripe but not overripe to ensure the best texture and flavor.
  • Consider a Theme: Tailor your fruit selections to match seasonal themes or holidays for added flair.

Common Mistakes and Troubleshooting

Even the best cooks can make mistakes! Here are some common pitfalls to avoid:

  • Overmixing: Gently toss your fruits to avoid bruising and mushiness.
  • Adding Bananas Too Early: Bananas brown quickly; add them last to keep your salad looking fresh.
  • Using Canned Fruit: If using canned fruit, drain it well to avoid excess liquid in your salad.
  • Not Tasting: Always taste your salad before serving; you can adjust the sweetness with more honey or acidity with lime juice.

Delicious Variations

Feeling creative? Here are some delicious variations to try:

  • Tropical Twist: Add mango, papaya, and coconut for a taste of the tropics.
  • Berry Medley: Substitute mixed berries like raspberries and blackberries for a colorful alternative.
  • Nutty Delight: Toss in some chopped walnuts or pecans for an added crunch and healthy fats.
  • Citrus Burst: Mix in grapefruit and tangerines for a refreshing citrus flavor.

Storage and Make-Ahead Instructions

This fruit salad is best enjoyed fresh, but here’s how to store it:

  • Refrigeration: Store any leftovers in an airtight container in the fridge for up to 2 days. The dressing may make the fruits a bit soggy over time.
  • Make-Ahead: You can prepare the fruit salad a few hours in advance, but add bananas just before serving to keep them fresh.

Frequently Asked Questions

  • Can I use frozen fruit? Yes, but thaw and drain it to avoid excess water in the salad.
  • What fruits work well together? Any combination of your favorite fruits works! Try to include a mix of sweet, tart, and juicy options.
  • How do I keep bananas from browning? Add them just before serving or toss them in a little lemon juice.
  • Can I make this salad vegan? Absolutely! The ingredients are naturally vegan; just ensure any honey substitute is used.
  • What can I serve with fruit salad? It pairs beautifully with yogurt, granola, or as a side for savory dishes.
  • How long does fruit salad last? Ideally, consume it within 2 days for optimal freshness.
  • Can I add a dressing? Yes, a honey-lime dressing is a great option, but feel free to get creative!
  • Is this a good option for kids? Absolutely! Kids love colorful fruit, and it’s a healthy alternative to sugary snacks.

Nutritional Tips and Dietary Adaptations

Adapting this fruit salad to fit various dietary needs is simple:

  • Low Sugar: Use less honey or substitute with a sugar-free sweetener.
  • High Protein: Add Greek yogurt or cottage cheese for a protein boost.
  • Gluten-Free: This recipe is naturally gluten-free, making it suitable for all diets.

Equipment Recommendations

To make your fruit salad experience easier, here are a few kitchen essentials:

  • Sharp Knife: A good knife will make slicing fruits quick and safe.
  • Cutting Board: A sturdy cutting board is essential for preparing your fruits.
  • Mixing Bowls: Use a large bowl for tossing and a small bowl for your dressing.
  • Measuring Cups and Spoons: Accurate measurements ensure the perfect balance of flavors.

Serving Suggestions

When it comes to serving your fruit salad, here are some delightful ideas:

  • Brunch Spread: Serve alongside pancakes or waffles for a colorful brunch.
  • BBQ Companion: This salad pairs wonderfully with grilled meats and savory dishes.
  • Picnic Treat: Pack it in a cooler for a refreshing treat on a hot day.

In conclusion, this fruit salad recipe is more than just a dish; it’s an embodiment of love, nostalgia, and the joy of sharing. With its vibrant colors and delightful flavors, it’s sure to bring smiles to your table. So gather your loved ones, make this recipe together, and create memories that will last a lifetime. Happy cooking!

The Best Fruit Salad Recipe

Prep Time 15 minutes
Total Time 15 minutes
Servings 8 servings
Calories 250
A vibrant and refreshing fruit salad perfect for any occasion, combining a variety of fresh fruits with a sweet honey-lime dressing.

Ingredients

Fruits

  • 2 cups strawberries (hulled and sliced)
  • 2 cups pineapple chunks (fresh preferred)
  • 2 cups seedless grapes (halved)
  • 2 cups blueberries
  • 2 cups kiwi (peeled and sliced)
  • 2 pieces oranges (peeled and segmented)
  • 1 piece banana (sliced, added just before serving)
  • 3 tbsp honey
  • 1 piece juice of 1 fresh lime
  • 1 tsp orange zest

Instructions 

  • Wash all fruit thoroughly. Slice strawberries, halve grapes, peel and slice kiwis, and segment the oranges.
  • Whisk together honey, lime juice, and orange zest in a small bowl.
  • Gently toss all fruits in a large bowl. Pour dressing over and toss lightly.
  • Just before serving, slice the banana and fold in gently.
Notes

This fruit salad is best enjoyed fresh and can be customized with your favorite seasonal fruits.
Calories: 250kcal
Cost: $15
Course: Dessert, Salad
Cuisine: International
Keyword: Fruit, Healthy

Why This Warm Quinoa Salad Will Nourish Your Soul

There’s something special about a warm quinoa salad that dances with flavors and embraces the heart. This recipe, steeped in nostalgic memories of my grandmother’s kitchen, combines vibrant ingredients that not only satisfy your taste buds but also nurture your spirit. As you prepare this dish, you’ll find that cooking becomes a moment of self-care, a celebration of the love that goes into every bite. In just 25 minutes, this warm quinoa salad transforms wholesome ingredients into a comforting meal that speaks to the essence of home.

Why You’ll Love This Recipe

  • Nourishing Comfort: This salad is packed with nutrients that fill you up and keep your energy flowing throughout the day.
  • Quick and Easy: Ready in just 25 minutes, it’s perfect for busy days when you crave something wholesome.
  • Versatile Ingredients: Customize it with your favorite veggies or proteins to create a meal that’s uniquely yours.
  • Perfect for Meal Prep: Make a big batch and enjoy it all week long, whether at home or on-the-go.
  • Heartfelt Flavor: Each bite carries the warmth of home, making you feel embraced by love and tradition.

Ingredients Breakdown

Let’s dive into the heart of this warm quinoa salad. Each ingredient is selected not just for flavor but for the joy it brings to your cooking experience.

  • 1 cup quinoa, rinsed: A gluten-free grain that offers protein and fiber, making it a nourishing base.
  • 2 cups water or vegetable broth: Using broth adds an extra layer of flavor—think of it as a warm hug for your quinoa.
  • 1 cup cherry tomatoes, halved: Juicy and sweet, these add a burst of freshness to your salad.
  • 1 cucumber, diced: Crisp and refreshing, cucumbers provide a delightful crunch.
  • 1 avocado, sliced: Creamy avocado adds healthy fats, making every bite feel indulgent.
  • 1/4 cup red onion, finely chopped: A little zing from red onion balances the flavors beautifully.
  • 1/4 cup fresh parsley, chopped: This herb brightens the dish and offers a touch of color.
  • 1/4 cup feta cheese (optional): For those who love a salty kick, feta brings a delightful creaminess.
  • 2 tbsp olive oil: A drizzle of quality olive oil enhances the flavors and adds richness.
  • 1 tbsp lemon juice: A squeeze of lemon brightens everything up, adding a fresh zing.
  • Salt and pepper to taste: Essential for bringing the flavors together, adjust according to your preference.

Pro Tips for a Perfect Warm Quinoa Salad

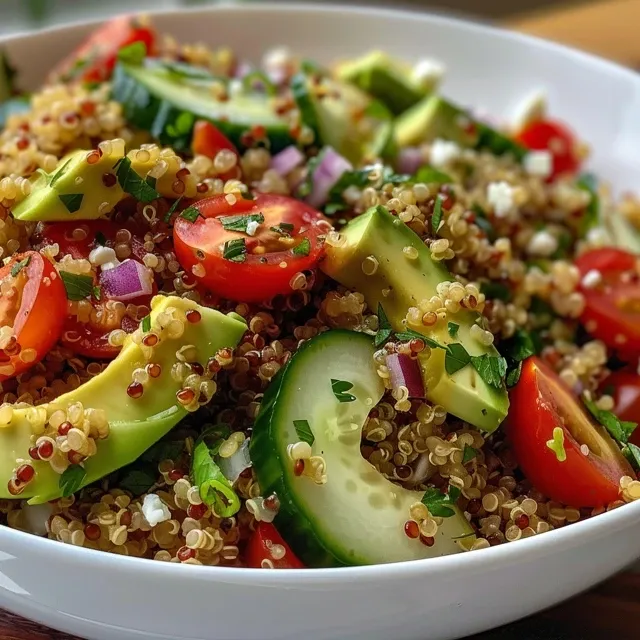
An appetizing warm quinoa salad topped with olive oil and lemon juice in a bowl.

Let’s make sure you create the best version of this salad by incorporating these expert tips:

  • Rinse Your Quinoa: Always rinse quinoa under cold water before cooking to remove its natural coating, which can taste bitter.
  • Cook in Broth: Using vegetable broth instead of water infuses extra flavor into the quinoa.
  • Let It Cool: Allow the quinoa to cool slightly before mixing to prevent wilting the vegetables.
  • Season Generously: Don’t be shy with salt and pepper; they elevate the entire dish.
  • Layer Ingredients: Add ingredients gradually to control flavors—start with the quinoa, then the vegetables, and finish with the dressing.
  • Embrace Texture: Consider adding nuts or seeds for additional crunch and nutritional benefits.
  • Make It a Meal: Add grilled chicken, chickpeas, or shrimp for a protein boost and make it a complete meal.
  • Store Properly: Keep leftovers in an airtight container in the fridge for up to 4 days.

Common Mistakes and Troubleshooting

Even the best of intentions can lead to mishaps in the kitchen. Here’s how to avoid common pitfalls:

  • Overcooking Quinoa: Follow the package instructions carefully; overcooked quinoa turns mushy.
  • Skipping the Rinse: Failing to rinse can lead to a bitter taste—always rinse before cooking.
  • Too Much Dressing: Start with a little dressing and add more as needed; you can always add, but you can’t take away!
  • Not Tasting: Always taste as you go to ensure the flavors are balanced—add more salt, pepper, or acidity as needed.

Delicious Variations to Try

This warm quinoa salad is incredibly versatile. Here are some delightful variations to keep your meals exciting:

  • Spicy Southwest Quinoa Salad: Add black beans, corn, diced jalapeños, and a sprinkle of cumin for a zesty twist.
  • Mediterranean Quinoa Salad: Toss in olives, sun-dried tomatoes, and artichoke hearts for a taste of the Mediterranean.
  • Autumn Harvest Salad: Incorporate roasted butternut squash, cranberries, and pecans for a seasonal touch.
  • Asian-Inspired Quinoa Salad: Use sesame oil, add shredded carrots, edamame, and top with sesame seeds for an Asian flair.

Storage and Make-Ahead Instructions

This warm quinoa salad holds up beautifully, making it a perfect choice for meal prep. Here’s how to store it:

  • Refrigerate: Store in an airtight container for up to 4 days. The flavors meld beautifully as it sits.
  • Freezing: You can freeze the salad without the avocado or feta. Thaw overnight in the fridge before serving.
  • Make Ahead: Prepare the quinoa and chop the vegetables ahead of time; combine them just before serving for freshness.

Comprehensive FAQ

Here are some frequently asked questions about this warm quinoa salad to guide you:

  • Can I use other grains instead of quinoa? Absolutely! Try brown rice, farro, or couscous for a different texture.
  • Is this salad gluten-free? Yes, quinoa is naturally gluten-free, making it a great choice for gluten-sensitive diets.
  • Can I make this vegan? Yes, simply omit the feta cheese and use vegetable broth for cooking.
  • How do I make this salad taste even better? Letting the salad sit for 30 minutes before serving allows the flavors to develop.
  • What can I serve this salad with? It pairs wonderfully with grilled meats, fish, or as a standalone lunch option.
  • Can I add fruit to this salad? Yes! Diced apples or berries can add a lovely sweetness and freshness.
  • How can I increase the protein content? Consider adding chickpeas, grilled chicken, or nuts for added protein.
  • What’s the best way to reheat quinoa? Warm it gently on the stove with a splash of water to keep it fluffy.

Nutrition Tips and Dietary Adaptations

This warm quinoa salad not only nourishes the soul but also supports various dietary needs:

  • High in Fiber: Quinoa is rich in dietary fiber, promoting digestive health.
  • Rich in Antioxidants: Ingredients like tomatoes and parsley are loaded with antioxidants that support your immune system.
  • Heart-Healthy Fats: Avocado and olive oil provide healthy fats essential for heart health.
  • Low Glycemic Index: Quinoa has a low glycemic index, making it a great choice for those managing blood sugar levels.

Equipment Recommendations

To prepare this warm quinoa salad, you’ll need a few essential kitchen tools:

  • Medium Saucepan: For cooking quinoa, choose a saucepan that’s the right size for your batch.
  • Chopping Board and Knife: A sturdy board and a sharp knife make chopping veggies a breeze.
  • Mixing Bowl: A large bowl is essential for combining all the ingredients without spills.
  • Measuring Cups and Spoons: Accurate measurements ensure the best flavor balance.

Serving Suggestions

Ready to enjoy your warm quinoa salad? Here are some serving suggestions to elevate your experience:

  • Serve Warm: Enjoy it warm, right after preparing, for the best flavor and texture.
  • Garnish: Top with additional herbs, a drizzle of extra olive oil, or a sprinkle of seeds for presentation.
  • Pair with Protein: Serve alongside grilled chicken, fish, or a dollop of hummus for a fulfilling meal.
  • Make It a Party Dish: This salad is perfect for potlucks—double the recipe and watch it disappear!

In conclusion, this warm quinoa salad is more than just a dish; it’s a heartfelt expression of love and care, a reminder that cooking is a way to connect with ourselves and those around us. I invite you to embrace the warmth of this recipe, share it with loved ones, and create your own beautiful memories around the kitchen table.

Warm Quinoa Salad: A 25-Minute Heartfelt Self-Care Lunch

Prep Time 10 minutes
Cook Time 15 minutes
Total Time 25 minutes
Servings 2 servings
Calories 350
This vibrant quinoa salad is quick to prepare and perfect for a nourishing, self-care lunch that combines fresh vegetables with wholesome grains.

Ingredients

quinoa

  • 1 cup quinoa, rinsed
  • 2 cups water or vegetable broth

vegetables

  • 1 cup cherry tomatoes, halved
  • 1 unit cucumber, diced
  • 1 unit avocado, sliced
  • 0.25 cup red onion, finely chopped
  • 0.25 cup fresh parsley, chopped
  • 0.25 cup feta cheese (optional)
  • 2 tbsp olive oil
  • 1 tbsp lemon juice
  • to taste Salt and pepper

Instructions 

  • Rinse quinoa and cook in water or broth, then let cool slightly.
  • Combine cooked quinoa with cherry tomatoes, cucumber, avocado, red onion, and parsley in a large bowl.
  • Drizzle with olive oil and lemon juice, then toss gently.
  • Season with salt and pepper to taste.
  • Top with feta cheese if desired and serve warm.

Notes

Feel free to add more herbs or vegetables for extra flavor.
Calories: 350kcal
Cost: $15
Course: Lunch
Cuisine: International
Keyword: Quinoa

When it comes to family gatherings, few dishes evoke as much warmth and nostalgia as a classic potato salad. This isn’t just any potato salad—it’s a beloved recipe that combines the creaminess of Yukon Gold potatoes, the heartiness of hard-boiled eggs, and the tangy sweetness of pickle relish. Each bite transports you to a sunlit afternoon, surrounded by loved ones, sharing stories and laughter over plates piled high with food. In this article, we’ll explore not just how to make this delightful dish but also why it should be the centerpiece of your next picnic or potluck.

Whether you’re a seasoned cook or just starting your culinary journey, this potato salad recipe is simple, reliable, and full of flavor. With a combination of fresh ingredients and heartfelt memories, it brings people together—after all, cooking is not just about feeding the body but nourishing the soul.

Why You’ll Love This Recipe

This potato salad isn’t just another side dish; it’s a celebration of flavors and memories. Here are five reasons to fall in love with this recipe:

  • Comforting flavors: The creamy texture of the Yukon Gold potatoes paired with the tangy dressing creates a deliciously satisfying dish.
  • Family-friendly: Kids and adults alike will adore this potato salad, making it perfect for gatherings where everyone is welcome.
  • Versatile: Great as a side for barbecues or as a light lunch on its own, this salad adapts to any occasion.
  • Make-ahead convenience: Prepare it a day in advance, allowing the flavors to meld beautifully before serving.
  • Customizable: Add your favorite herbs or spices to create a potato salad that reflects your personal taste.

Ingredient Breakdown

Let’s dive into the key ingredients that make this potato salad shine. Each component plays a vital role in creating a dish that is both nostalgic and delicious.

  • Yukon Gold potatoes: Their buttery texture holds up well, ensuring your salad remains intact. If you prefer, red potatoes can also work; they offer a firmer bite.
  • Hard-boiled eggs: These add richness and protein, making your potato salad more filling. You can choose to omit them for a lighter version.
  • Celery: This brings a delightful crunch, balancing the creaminess of the dressing. Feel free to add diced bell peppers for extra color and flavor.
  • Green onions: Their mild flavor adds freshness. Alternatively, chives can be a lovely substitute.
  • Fresh herbs: A combination of parsley and dill enhances the salad with aromatic notes. Experiment with your favorite fresh herbs for a unique twist.
  • Mayonnaise: The star of the dressing, providing creaminess. For a lighter option, substitute with Greek yogurt.
  • Sweet pickle relish: This adds a sweet tang that complements the potatoes beautifully. If you prefer a more savory flavor, consider diced pickles or capers.
  • Apple cider vinegar: A splash of acidity brightens the flavors; you can also use white vinegar for a sharper taste.
  • Yellow mustard: This adds depth and a slight kick. Adjust to your taste, or try Dijon mustard for a gourmet touch.
  • Sugar: A pinch balances the tanginess of the dressing. You can omit it if you prefer a less sweet flavor.
  • Salt and black pepper: Essential for seasoning—don’t skip this step!

Step-by-Step Instructions

Making this potato salad is as easy as pie. Follow these simple steps to create a dish that will become a cherished staple in your home.

  1. Peel the potatoes and cut them into 1-inch cubes.
  2. Add the potatoes to a large pot, covering them with 1 inch of cold salted water. Bring to a boil and cook for about 15 minutes, or until fork-tender. Drain the potatoes in a colander and let them cool completely.
  3. In a large bowl, whisk together the dressing ingredients: mayonnaise, sweet pickle relish, apple cider vinegar, yellow mustard, sugar, salt, and pepper.
  4. Add the cooled potatoes, diced hard-boiled eggs, celery, green onions, and chopped herbs to the bowl. Gently fold the mixture until just combined, being careful not to overmix.
  5. For the best flavor, refrigerate for at least two hours before serving. Enjoy your potato salad chilled or at room temperature!

Pro Tips for Perfect Potato Salad

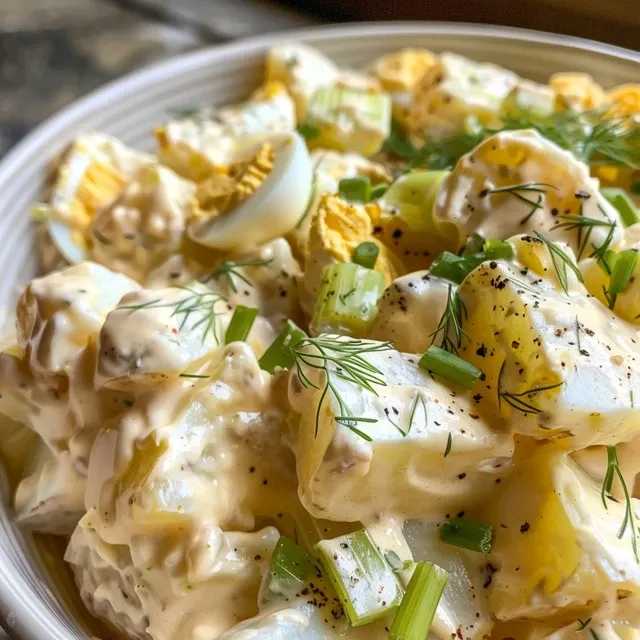
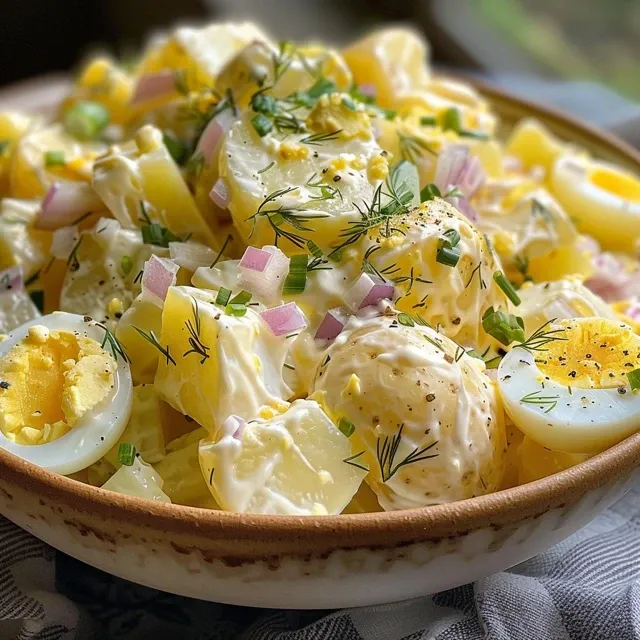
Juicy potato salad in a bowl, featuring a mix of diced celery and fresh parsley.

To elevate your potato salad to the next level, consider these expert insights:

  • Cool the potatoes: Allowing the potatoes to cool completely prevents the dressing from becoming runny.
  • Be gentle: When mixing, fold the ingredients carefully to maintain the potato chunks and avoid a mushy salad.
  • Chill time matters: Letting the salad sit in the refrigerator allows the flavors to meld beautifully, making each bite more flavorful.
  • Adjust seasoning: Always taste and adjust the seasoning before serving. You might want to add a pinch of salt or a dash more vinegar.
  • Experiment with flavors: Don’t hesitate to add bacon bits, cheese, or even avocado for a twist on the classic.
  • Make it colorful: Incorporate diced bell peppers or carrots for added color and nutrition.
  • Herb freshness: Use fresh herbs whenever possible, as they provide a vibrant flavor that dried herbs can’t match.
  • Leftover magic: Use any leftovers to make a delicious potato salad sandwich on your favorite bread.

Common Mistakes and Troubleshooting

As with any recipe, mistakes can happen. Here are common pitfalls and how to avoid them:

  • Overcooked potatoes: If the potatoes are too soft, they can disintegrate during mixing. Aim for fork-tender potatoes that hold their shape.
  • Dry salad: If your potato salad seems dry, you can add a little more mayonnaise or a splash of pickle juice to enhance moisture.
  • Too much seasoning: If you find the salad too salty or tangy, balance it with a little sugar or more potatoes.
  • Flavorless salad: If the taste is bland, it likely needs more seasoning. Don’t be afraid to adjust salt, pepper, and vinegar.
  • Not enough chilling time: Serving immediately can result in a less flavorful salad. Always aim to chill for at least two hours.

Delicious Variations

This potato salad is adaptable, allowing you to customize it to your liking. Here are some variations to consider:

  • Classic Southern Style: Add chopped hard-boiled eggs and sweet pickle relish for a sweeter flavor.
  • Herbed Potato Salad: Incorporate fresh herbs like dill, chives, or tarragon for an aromatic twist.
  • Mustard Potato Salad: Mix in a variety of mustards for a tangy, zesty flavor.
  • Vegan Potato Salad: Substitute mayonnaise with vegan mayo or Greek yogurt for a plant-based version.

Storage and Make-Ahead Instructions

This potato salad is perfect for make-ahead meals. Here’s how to store it:

  • Refrigerate: Keep in an airtight container in the refrigerator for up to 3 days.
  • Freezing: While not recommended due to texture changes, it can be frozen for up to a month. Thaw in the fridge overnight before serving.
  • Make-ahead: Prepare the salad a day in advance for the best flavor. Just remember to give it a good stir before serving.

Frequently Asked Questions

Here are answers to common questions about potato salad:

  • Can I use other types of potatoes? Yes, red potatoes or fingerlings work well, but Yukon Golds are preferred for creaminess.
  • How do I make it healthier? Substitute some mayonnaise with Greek yogurt or use a light mayo to reduce calories.
  • Can I add bacon? Absolutely! Cooked bacon bits add a delightful crunch and flavor.
  • What can I do with leftovers? Use them in sandwiches, or mix them with greens for a tasty salad.
  • How long does it last in the fridge? The potato salad can be stored in the fridge for up to three days.
  • Can I make it dairy-free? Yes, use a vegan mayo to ensure it’s dairy-free.
  • What’s the best way to serve it? Serve it chilled or at room temperature for the best taste.
  • Can I add fruits? Try adding apples or grapes for a sweet crunch in your potato salad.

Nutritional Tips and Dietary Adaptations

This potato salad can be adapted to fit various dietary needs:

  • Low-carb: Substitute potatoes with cauliflower for a lighter version.
  • Gluten-free: All ingredients listed are gluten-free, making it safe for those with gluten sensitivities.
  • Low-fat: Use low-fat mayonnaise or yogurt to cut down on calories.

Equipment Recommendations

To make your potato salad preparation seamless, consider having the following tools on hand:

  • Large pot: For boiling the potatoes.
  • Colander: To drain the potatoes after cooking.
  • Mixing bowl: A large bowl for combining the ingredients.
  • Whisk: For mixing the dressing ingredients smoothly.

Serving Suggestions

This potato salad pairs beautifully with a variety of dishes. Here are some serving suggestions:

  • Barbecue meats: Serve alongside grilled chicken, ribs, or veggie burgers.
  • Sandwiches: It makes a delightful side for sandwiches, enhancing the meal’s flavor.
  • Picnic favorites: Bring it along to picnics, potlucks, or family reunions for a guaranteed hit.

Conclusion

In the end, this potato salad is more than just a recipe—it’s a vessel for memories, laughter, and love. With its creamy texture, fresh flavors, and customizable options, it’s sure to become a staple at your family gatherings. So grab your ingredients, roll up your sleeves, and let the kitchen fill with the warm aromas of nostalgia as you prepare a dish that not only nourishes the body but also warms the heart. Enjoy every delicious bite of your homemade potato salad, and remember that cooking is about sharing and celebrating with those you love.

Potato Salad

Prep Time 15 minutes
Cook Time 15 minutes
Total Time 30 minutes
Servings 8 servings
Calories 350
A classic and creamy potato salad perfect for picnics and gatherings, combining tender potatoes with eggs, herbs, and a tangy dressing.

Ingredients

Potatoes

  • 3 pounds Yukon Gold potatoes (about 5 large)
  • 5 pieces hard-boiled eggs (diced)
  • 2 ribs celery (diced)
  • 2 green onions green onions (sliced)
  • 0.25 small bunch fresh parsley or dill (or a combination of both)
  • 1.25 cups mayonnaise
  • 0.25 cup sweet pickle relish
  • 1 tablespoon apple cider vinegar
  • 1 tablespoon yellow mustard
  • 1 tablespoon sugar
  • to taste salt and black pepper

Instructions 

  • Peel and cube the potatoes, then boil until fork-tender. Drain and cool.
  • Whisk together mayonnaise, relish, vinegar, mustard, and sugar to make the dressing.
  • Combine cooled potatoes, eggs, celery, green onions, and herbs. Toss with dressing.
  • Season with salt and pepper to taste. Serve immediately or refrigerate before serving.

Notes

For best flavor, chill the salad for at least two hours before serving.
Calories: 350kcal
Cost: $15
Course: Side Dish
Cuisine: American
Keyword: Potatoes

Welcome to the Heart of the Kitchen: A Journey with Our High-Protein Chickpea Quinoa Salad

In the bustling rhythm of life, where moments often slip through our fingers, cooking stands as a sanctuary—a place where love and memories collide. Today, we gather to explore a dish that embodies this spirit: the High-Protein Chickpea Quinoa Salad. This vibrant and nourishing salad is not just a meal; it’s a celebration of flavors, textures, and cherished connections, perfect for family gatherings or sunny picnics. As we delve into this recipe, let each ingredient remind you of the warmth of shared meals and the stories they tell.

Why You’ll Love This Recipe

This salad is a delightful blend of wholesome ingredients, and here are just a few reasons why it will become a staple in your kitchen:

  • High Protein Powerhouse: Packed with chickpeas and quinoa, this salad offers a substantial protein boost, making it perfect for vegans and vegetarians.
  • Fresh and Flavorful: With juicy tomatoes, crisp cucumbers, and zesty lemon juice, every bite bursts with fresh flavors that dance on your palate.
  • Versatile and Customizable: Whether you prefer it as a side or a main dish, this salad is easily adaptable to suit your taste and dietary preferences.
  • Meal Prep Friendly: This recipe is ideal for meal prep, allowing you to make it ahead of time and enjoy it throughout the week.
  • Heartfelt Connection: Each bowl serves not just as nourishment but as a reminder of the love and care we share around the dinner table.

Ingredient Breakdown

Let’s dive into the heart of this recipe. Here’s a detailed look at the ingredients you’ll need, along with some substitution options to suit your taste:

  • Chickpeas: 30 ounces (2 (15-ounce) cans, drained and rinsed, or 3 cups cooked). These legumes are the backbone of the salad, providing protein and creaminess.
  • Quinoa: 1 cup dry quinoa (or 4 cups cooked). This ancient grain not only adds protein but also a delightful texture.
  • Tomatoes: 5 medium Roma tomatoes, diced (about 8 ounces). Their juiciness brings a refreshing balance to the salad.
  • Cucumber: 1 long English cucumber, diced (about 3 cups). Adds a crisp crunch.
  • Red Onion: 1 1/2 cups diced (about 1 medium). For a sweet, mild bite.
  • Hemp Seeds: 1/2 cup plus 1 tablespoon (optional). A fantastic source of healthy fats and protein.
  • Cilantro: 1 cup chopped fresh cilantro for a burst of flavor.
  • Lemon Juice: 1/4 cup plus 3 tablespoons (about 3 medium lemons). Brings acidity and brightness.
  • Extra-Virgin Olive Oil: 1/4 cup plus 1/2 tablespoon (plus more for drizzling). A heart-healthy fat that enhances flavor.
  • Spices: Dash of paprika and garlic powder (optional). These spices add warmth and depth.
  • Salt: To taste. Enhances all the natural flavors.

Pro Tips for Perfecting Your Salad

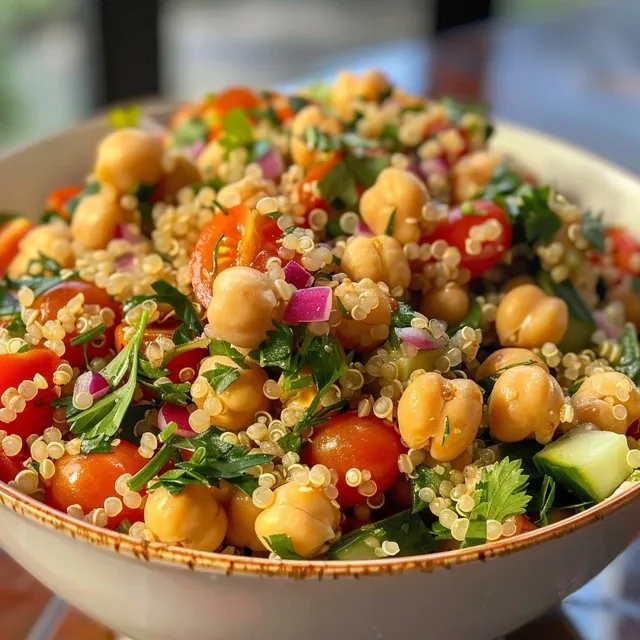
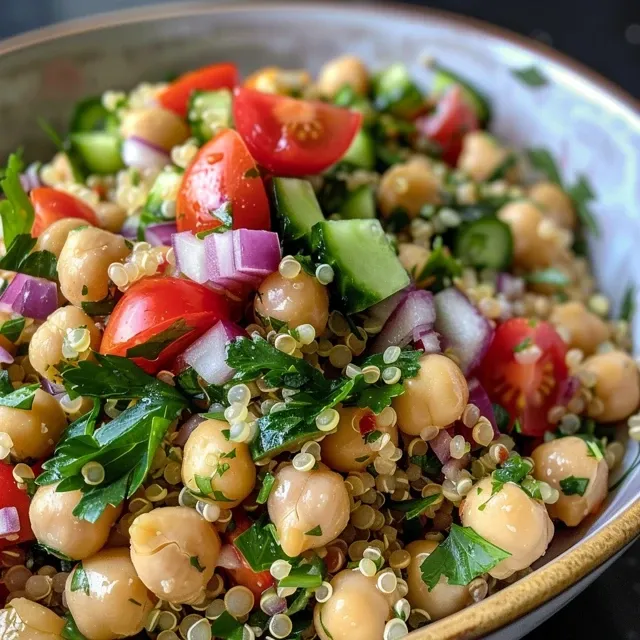
An appetizing dish of chickpea quinoa salad loaded with fresh ingredients, served in a bright bowl.

Elevate your cooking game with these expert insights:

  • Roasting Chickpeas: For an extra crunchy texture, roast your chickpeas. Toss them with olive oil and spices, then bake at 425ºF until crispy.
  • Cool Quinoa: After cooking, let your quinoa cool for 5 minutes before fluffing with a fork. This prevents wilting your fresh veggies.
  • Drain Tomatoes: If your tomatoes are extra juicy, consider draining them to avoid a soggy salad.
  • Mason Jar Prep: Layer your salad in Mason jars for easy meal prep. Start with dressing on the bottom, followed by sturdier ingredients, and finish with greens on top.
  • Play with Flavors: Feel free to add ingredients like bell peppers, corn, or avocado for added flavor and nutrition.
  • Adjust Acidity: Taste your salad before serving; you may want to adjust the lemon juice and olive oil to find your perfect balance.
  • Fresh Herbs: Experiment with fresh herbs like parsley or mint for different flavor profiles.
  • Chill Before Serving: Allow the salad to chill in the refrigerator for at least 30 minutes for flavors to meld beautifully.

Avoiding Common Mistakes

Even simple recipes can have their pitfalls. Here are some common mistakes to watch out for:

  • Overcooking Quinoa: Follow the package instructions carefully; overcooked quinoa can become mushy.
  • Skipping Seasoning: Don’t forget to season your salad generously with salt and pepper to enhance all the flavors.
  • Too Much Dressing: Start with less dressing and adjust to taste. You can always add more, but you can’t take it out!
  • Ignoring Texture: Balance the textures—crispy, crunchy, creamy—by including a variety of ingredients.
  • Serving Immediately: For the best flavor, let the salad sit for a bit to allow the ingredients to meld.

Delicious Variations to Try

Feel free to experiment with these delightful variations:

  • Greek Twist: Add feta cheese and kalamata olives for a Mediterranean flair.
  • Spicy Kick: Incorporate diced jalapeños or a splash of hot sauce for heat.
  • Nutty Goodness: Substitute hemp seeds with toasted almonds or walnuts for added crunch.
  • Sweet Addition: Toss in diced apples or raisins for a hint of sweetness that complements the savory elements.

Storage and Make-Ahead Instructions

This salad is ideal for meal prep. Here’s how to store it:

  • In the Refrigerator: Store in an airtight container for up to 5 days. The flavors will deepen as it sits.
  • For Meal Prep: Prepare individual portions in Mason jars, layering the ingredients to keep them fresh.
  • Freezing: While not ideal due to the texture of fresh vegetables, you can freeze the quinoa and chickpeas separately for later use.

Frequently Asked Questions (FAQ)

Here are some common questions and answers to help you get the most out of your salad:

  • Can I use canned quinoa? No, it’s best to cook quinoa from scratch for the best texture.
  • Is this salad gluten-free? Yes, quinoa is gluten-free, making this dish suitable for gluten-sensitive individuals.
  • Can I make this salad ahead of time? Absolutely! It’s perfect for meal prep and can be made up to 5 days in advance.
  • What can I substitute for chickpeas? White beans or lentils work well as alternatives.
  • How can I make it more filling? Add avocado or serve it over a bed of greens for extra volume.
  • Can I use dried herbs instead of fresh? Yes, but use less since dried herbs are more concentrated in flavor.
  • Is this salad suitable for a potluck? Yes! Its vibrant colors and flavors make it a crowd-pleaser.
  • What’s the best way to serve it? Serve chilled or at room temperature, and add a drizzle of olive oil just before serving for freshness.

Nutritional Tips and Dietary Adaptations

This salad is not only delicious but also packed with nutrients:

  • Protein: Each serving is rich in plant-based protein from chickpeas and quinoa, essential for muscle repair and growth.
  • Fiber: High in fiber, it promotes digestion and helps keep you full longer.
  • Vitamins: Loaded with vitamins A and C from fresh veggies, this salad supports a healthy immune system.
  • Healthy Fats: Olive oil and hemp seeds provide heart-healthy fats that are important for overall health.

Equipment Recommendations

Here’s what you’ll need to make this salad:

  • Large Pot: For cooking quinoa.
  • Mixing Bowls: To combine the ingredients.
  • Measuring Cups and Spoons: For accurate ingredient measurements.
  • Baking Sheet: If you choose to roast your chickpeas.
  • Mason Jars: For meal prep and easy storage.

Serving Suggestions

Pair your High-Protein Chickpea Quinoa Salad with:

  • Grilled Chicken: For a heartier meal, serve alongside grilled chicken or fish.
  • Flatbreads: Enjoy with warm pita or naan for a Mediterranean-inspired experience.
  • Simple Greens: A side of mixed greens drizzled with balsamic vinaigrette complements the flavors beautifully.

In every bite of this chickpea quinoa salad, you’ll discover the love and care that goes into cooking. So, gather around your table, share stories, and let this recipe become part of your culinary tradition. Thank you for joining me on this journey, and I hope this dish brings you as much joy as it has brought me. Happy cooking!

High-Protein Chickpea Quinoa Salad

Prep Time 15 minutes
Cook Time 20 minutes
Total Time 35 minutes
Servings 4 servings
Calories 450
A nutritious and flavorful salad combining chickpeas, quinoa, fresh vegetables, and herbs, perfect for a healthy meal or meal prep.

Ingredients

Main Ingredients

  • 30 ounces chickpeas (drained and rinsed) (or 3 cups cooked)
  • 1/4 cup plus 1/2 tablespoon olive oil extra-virgin olive oil (plus more for drizzling)
  • 1 cup dry quinoa (or 4 cups cooked)
  • 5 medium Roma tomatoes (diced (about 8 ounces))
  • 1 long English cucumber (diced (about 3 cups))
  • 1 1/2 cups diced red onion (about 1 medium)
  • 1/2 cup plus 1 tablespoon hemp seeds hemp seeds or hearts (optional)
  • 1 cup chopped fresh cilantro
  • 1/4 cup plus 3 tablespoons lemon juice lemon juice (about 3 medium lemons)
  • Salt to taste salt

Instructions 

  • Preheat oven to 425ºF. Dry chickpeas, toss with paprika, garlic powder, salt, and olive oil, then roast for 15 minutes. Broil for 3 minutes until crispy.
  • Cook quinoa according to package instructions; let cool.
  • Dice tomatoes and cucumber, toss with salt, and drain excess liquid.
  • Combine cooked quinoa, chickpeas, vegetables, herbs, lemon juice, and olive oil in a large bowl. Toss to combine and season with salt and pepper to taste.

Notes

For extra flavor, roast chickpeas until crispy and adjust seasoning as desired.
Calories: 450kcal
Cost: $15
Course: Salad
Keyword: Chickpeas, Quinoa, Vegetables

There’s something magical about a taco salad. It’s not just about the vibrant colors on the plate or the delightful crunch of fresh vegetables; it’s a dish steeped in tradition, a recipe that brings family and friends together around the table. In this article, I’m excited to share my cherished Taco Salad recipe, infused with a sense of nostalgia and love, perfect for cozy nights in or lively gatherings. With a blend of fresh ingredients and rich flavors, this salad is sure to become a favorite in your home.

Why You’ll Love This Recipe

Here are five heartfelt reasons why this Taco Salad will steal your heart:

  • Quick and easy to prepare: With simple steps and ready in under 30 minutes, it’s perfect for busy weeknights or last-minute gatherings.
  • Customizable ingredients: You can adjust the toppings and dressings to cater to your family’s preferences, making it a versatile dish.
  • Nutritious and filling: Packed with fresh veggies, lean ground beef, and beans, it’s a wholesome meal that satisfies without being heavy.
  • Great for meal prep: This salad holds well in the fridge, making it ideal for meal prep or leftovers.
  • A crowd-pleaser: Whether for a family dinner or a potluck, this salad is sure to impress everyone at the table.

Ingredients: A Closer Look

Let’s dive into the heart of this Taco Salad—its ingredients. Each component plays a vital role in creating a symphony of flavors:

  • 1 oz. packet taco seasoning: For a burst of flavor. You can opt for homemade seasoning using chili powder, cumin, and garlic powder.
  • 16 oz. salsa: Choose your favorite variety, whether it’s mild, medium, or spicy, to adjust the heat level.
  • 3/4 cup sour cream: Adds creaminess; Greek yogurt can be a lighter substitute.
  • 1 avocado: Creamy and rich, it complements the salad beautifully.
  • 1/8 teaspoon salt: Enhances all the flavors. Adjust to taste.
  • 1 teaspoon lime juice: Freshens up the dish; lemon juice works in a pinch.
  • 1 tablespoon olive oil: For sautéing the beef, enhancing the flavor.
  • 1 lb. ground beef: The protein base; you can use ground turkey or a plant-based option for a healthier spin.
  • 3 tablespoons cilantro: Adds a fresh, herbal note; feel free to skip if you’re not a fan.
  • 1 head iceberg or romaine lettuce: Crisp and refreshing, this is the perfect base.
  • 2 Roma tomatoes: Juicy and sweet, these add color and freshness.
  • 2 Jalapeno Peppers: For a little kick, adjust according to your heat preference.
  • 1 cup black beans: A great source of fiber and protein, they make this salad hearty.
  • 1 cup whole kernel corn: Sweet and crunchy, it rounds out the flavors.
  • 1/4 cup black olives: For a briny punch, you can use green olives if preferred.
  • 1/3 cup red onion: Adds a sharp bite; soak in water for a milder flavor.
  • 1 1/2 cups shredded Mexican cheese blend: This melty goodness ties everything together; feel free to use a dairy-free cheese.
  • 4 oz. Tortilla Chips: For crunch! You can also use homemade baked chips for a healthier option.

Step-by-Step Instructions

Now, let’s get cooking! Here’s how you can create this delightful Taco Salad:

  1. In a large skillet, heat the olive oil over medium heat. Add the ground beef and cook until browned, about 5-7 minutes.
  2. Stir in the taco seasoning and 1/2 cup of salsa. Simmer for another 5 minutes, allowing the flavors to meld.
  3. In a large bowl, combine the chopped lettuce, tomatoes, jalapenos, black beans, corn, red onion, and cilantro.
  4. Add the cooked beef mixture to the bowl. Gently toss to combine all the ingredients.
  5. In a small bowl, mix the remaining salsa, sour cream, lime juice, and salt to create a dressing.
  6. Drizzle the dressing over the salad and toss gently.
  7. Serve immediately, topped with avocado, cheese, and tortilla chips.

Pro Tips for the Perfect Taco Salad

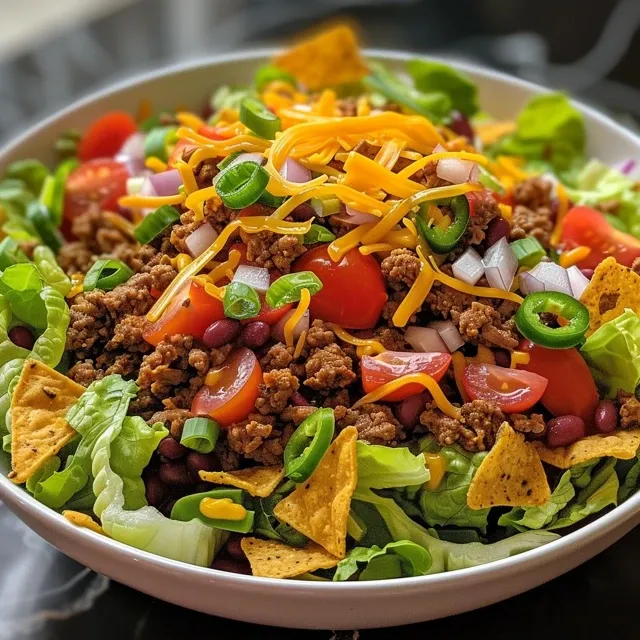
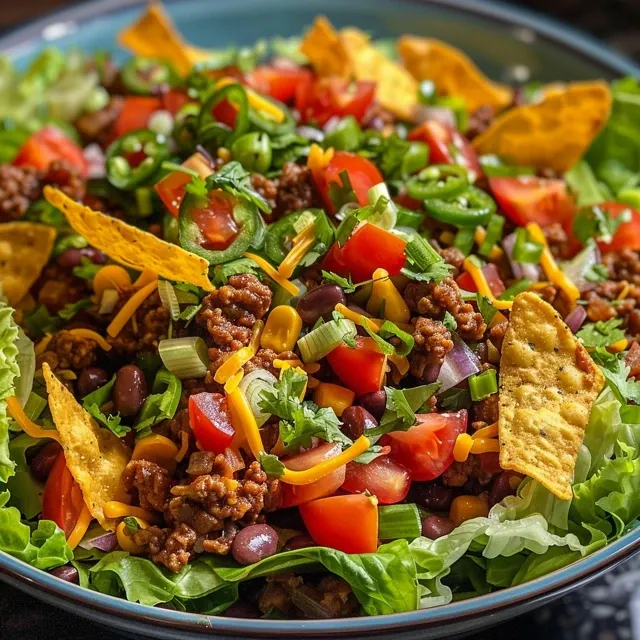
Detailed shot of a taco salad featuring layers of ingredients, including cheese and salsa.

Here are some expert insights to elevate your Taco Salad experience:

  • Use fresh ingredients: The fresher your ingredients, the more vibrant your salad will be.
  • Don’t skip the dressing: It’s essential for bringing all flavors together; drizzle generously.
  • Layer your ingredients: For a visually appealing salad, layer the ingredients rather than mixing them all together.
  • Customize it: Feel free to add other ingredients like bell peppers, corn, or even grilled chicken for added flavor.
  • Chill before serving: Letting the salad sit for a few minutes can enhance the flavors.
  • Serve with a side: Pair with a refreshing drink or a slice of cornbread for a complete meal.
  • Utilize leftovers: If you have any leftover salad, you can create a wrap with tortillas for lunch the next day.
  • Watch the heat: Adjust the number of jalapenos according to your spice tolerance.

Common Mistakes and Troubleshooting

Even seasoned home cooks can make mistakes. Here’s how to avoid common pitfalls:

  • Overcooking the beef: Keep an eye on the meat to prevent it from becoming tough. Aim for a nice brown color without burning.
  • Too soggy salad: To prevent sogginess, serve the dressing on the side or add it just before serving.
  • Forgetting to season: Always taste and adjust seasonings before serving; flavors can vary depending on the ingredients used.
  • Not using enough toppings: Don’t be shy with toppings! They add texture and flavor, so pile them high!

Delicious Variations to Try

Feeling adventurous? Here are some delightful variations of the Taco Salad:

  • Vegetarian Taco Salad: Swap the ground beef for quinoa or lentils and add extra beans and veggies.
  • Chicken Taco Salad: Use shredded rotisserie chicken for a quick and easy protein option.
  • Southwestern Taco Salad: Add blackened corn, diced bell peppers, and swap the dressing for a chipotle ranch.
  • Tex-Mex Taco Salad: Include spicy chorizo and top with jalapeno slices and avocado crema.

Storage and Make-Ahead Instructions

This Taco Salad is perfect for meal prep! Here’s how to store it:

  • In the fridge: Store the salad without the dressing in an airtight container for up to 3 days.
  • Freezing: While the salad itself doesn’t freeze well, the beef mixture can be frozen for up to 3 months. Thaw and reheat before serving.
  • Make-ahead tip: Prepare the beef mixture and chop the vegetables a day in advance for easy assembly.

Frequently Asked Questions

Here are some common questions and answers about Taco Salad:

  • Can I make this salad vegetarian? Yes! Substitute the ground beef with lentils or black beans for a hearty vegetarian option.
  • What can I use instead of taco seasoning? You can create your own blend using spices like chili powder, cumin, paprika, and garlic powder.
  • How do I make it gluten-free? Ensure that your tortilla chips and any other packaged ingredients are labeled gluten-free.
  • Can I use a different type of cheese? Absolutely! Feel free to use your favorite cheese, like cheddar or pepper jack.
  • Is this salad healthy? Yes, packed with fresh vegetables and lean protein, it makes for a nutritious meal.
  • How can I make this salad spicier? Add more jalapenos or a dash of hot sauce to the dressing for an extra kick.
  • What’s the best way to serve leftovers? You can create wraps or bowls using tortillas or lettuce leaves for a fun twist!
  • Can I add fruits? Yes! Diced mango or pineapple can bring a refreshing sweetness to your salad.

Nutrition Tips and Dietary Adaptations

Here are some tips to keep your Taco Salad nutritious:

  • Whole grains: Use whole-grain tortilla chips or wraps to increase fiber content.
  • Low-fat options: Choose low-fat sour cream or yogurt for a lighter dressing.
  • Incorporate more veggies: Add extra greens or veggies for added nutrients without many calories.
  • Mind the portion sizes: Keep an eye on portions, especially with high-calorie toppings like cheese and chips.

Equipment Recommendations

To make your Taco Salad experience even smoother, here are some recommended tools:

  • Large skillet: For cooking the ground beef.
  • Cutting board and knife: Essential for chopping vegetables.
  • Large mixing bowl: For combining all ingredients seamlessly.
  • Measuring cups and spoons: To ensure accuracy in your ingredients.

Serving Suggestions

Pair your Taco Salad with these delightful options:

  • Freshly made cornbread: A warm side that complements the flavors of the salad.
  • Chilled beverages: Serve with iced tea or a light margarita for the ultimate experience.
  • Fruit salad: A refreshing fruit salad can balance the savory flavors of the taco salad.
  • Guacamole and salsa: Serve alongside for extra flavor and dipping.

Conclusion

In the end, this Taco Salad is more than just a recipe; it’s a chance to gather around the table, share stories, and savor every bite together. With its rich flavors, vibrant colors, and endless customization options, it’s bound to become a cherished dish in your home. So gather your ingredients, invite your loved ones, and let this Taco Salad create new memories that warm your heart, just like the ones I hold dear from my own family table.

Taco Salad Recipe

Prep Time 15 minutes
Cook Time 10 minutes
Total Time 25 minutes
Servings 4 servings
Calories 650
A flavorful and easy-to-make taco salad perfect for a quick meal or gathering. Loaded with fresh ingredients and bold flavors.

Ingredients

Seasoning

  • 1 oz. packet taco seasoning (see notes for homemade recipe)

Salsa

  • 16 oz. salsa (divided)

Dairy

  • 3/4 cup sour cream (divided)
  • 1 each avocado
  • 1/8 teaspoon salt
  • 1 teaspoon lime juice
  • 1 tablespoon olive oil

Meat & Beans

  • 1 lb. ground beef
  • 1 cup black beans (drained and rinsed)
  • 1 cup whole kernel corn (drained)
  • ¼ cup black olives (drained and sliced)
  • 1/3 cup red onion (diced)

Vegetables & Cheese

  • 3 tablespoons cilantro (roughly chopped)
  • 1 ½ cups shredded Mexican cheese blend (see notes)

Other

  • 4 oz. Tortilla Chips

Instructions 

  • Cook ground beef with taco seasoning until browned.
  • Mix salsa, ½ of the sour cream, lime juice, and olive oil in a large bowl.
  • Add cooked beef, black beans, corn, olives, red onion, cilantro, and cheese to the bowl. Toss gently.
  • Serve over chopped lettuce, topped with remaining sour cream and crushed tortilla chips.

Notes

For a homemade taco seasoning, combine chili powder, cumin, paprika, garlic powder, onion powder, and oregano.
Calories: 650kcal
Cost: $15
Course: Main Course
Cuisine: Mexican
Keyword: beef, Salad, Tacos

Embrace the Flavor: Why Santa Fe Chicken Salad Will Become Your Go-To Dish

There’s something magical about a dish that brings together vibrant flavors and cherished memories. The Santa Fe Chicken Salad is more than just a meal; it’s a heartfelt tribute to gatherings with family and friends, evoking the warmth of shared moments around the table. With its combination of fresh ingredients, zesty dressing, and a delightful crunch, this salad is a celebration of life itself, perfect for any occasion.

In this article, we’ll explore everything you need to know about creating the perfect Santa Fe Chicken Salad. From detailed ingredient breakdowns to expert tips, you’ll find everything to make this salad a staple in your kitchen.

Why You’ll Love This Recipe

  • Quick and Easy: This salad comes together in under 30 minutes, making it perfect for busy weeknights or spontaneous gatherings.
  • Nutritious and Delicious: Packed with fresh vegetables and lean protein, this salad is a wholesome option that doesn’t skimp on flavor.
  • Customizable: Tailor the ingredients to your family’s preferences or dietary needs, ensuring everyone at the table enjoys a bite.
  • Meal Prep Friendly: Make it ahead of time for lunches throughout the week, saving you time and hassle.
  • Flavorful Dressing: The homemade dressing is a standout feature, combining zesty lime juice with the smoky kick of chipotle, elevating the whole dish.

Ingredients You’ll Need

Creating a Santa Fe Chicken Salad requires a medley of fresh ingredients that come together beautifully. Below, we’ve listed everything you’ll need, along with some substitution ideas for flexibility.

  • 1 1/2 large Limes (Juiced): Fresh lime juice adds a zesty kick; if unavailable, lemon juice works as a substitute.
  • 1/3 cup Olive oil: Use extra virgin for a richer flavor or avocado oil for a different taste.
  • 2 tsp Chipotle peppers in adobo: These add a smoky heat; you can adjust the amount based on your spice preference or use smoked paprika for a milder flavor.
  • 1/4 cup Cilantro: Fresh cilantro brightens the salad; parsley can be used if cilantro isn’t your thing.
  • 1/4 tsp Oregano: Dried oregano complements the dressing; fresh herbs can also be used for a more robust flavor.
  • 1 Garlic clove: Fresh garlic enhances the dressing’s taste; garlic powder can be a quick substitute.
  • 3 tbs Honey: This sweetener balances the acidity; agave syrup or maple syrup can be used for a vegan option.
  • 4 tbs Apple cider vinegar: A little tanginess; red wine vinegar is a great alternative.
  • 1 pinch of salt: Essential for enhancing all flavors; adjust to taste.
  • 1 1/2 heads Romaine lettuce (Chopped): This gives the salad a crunchy base; mixed greens can also be a vibrant choice.
  • 1/2 can Black beans: A great source of protein; kidney beans or chickpeas are excellent substitutes.
  • 1 cup Cherry tomatoes: These add sweetness and color; regular tomatoes can be used if halved.
  • 1/2 cup Bell peppers (Chopped): Use any color you like for visual appeal; cucumbers can add a refreshing crunch.
  • 1/2 large Jalapeno (Seeded and sliced): For those who enjoy heat, leave some seeds for an extra kick; omit if you prefer a milder salad.
  • 1 Avocado (Diced): Creamy avocado adds richness; omit or use a dollop of Greek yogurt for creaminess.
  • 1 cup Corn: Fresh, canned, or frozen corn gives a sweet crunch; you can skip it if desired.
  • 1 Green onion stock: Chopped green onions provide a mild onion flavor; red onion can be used sparingly.
  • 1 cup Chicken (Pulled or diced): Use rotisserie chicken for convenience or grill your own for a homemade touch.

How to Make Santa Fe Chicken Salad

Detailed view of a mouthwatering Santa Fe Chicken Salad, showcasing avocado, beans, and chicken.

Now that you have your ingredients ready, let’s dive into the steps for crafting this delightful salad.

  • Step 1: In a mason jar, combine the lime juice, olive oil, chipotle peppers, cilantro, oregano, salt, garlic, honey, and apple cider vinegar. Seal the jar and shake vigorously until everything is well mixed.
  • Step 2: In a large bowl, add the chopped romaine lettuce, black beans, cherry tomatoes, bell peppers, jalapeno, avocado, corn, green onion, and chicken. Pour the dressing over the salad and toss gently to combine all ingredients.

Pro Tips for the Perfect Salad

  • Use Fresh Ingredients: The quality of your ingredients makes a huge difference; opt for organic whenever possible.
  • Chill Before Serving: Allow the salad to chill in the fridge for 15-30 minutes before serving; this melds the flavors beautifully.
  • Dress Just Before Serving: If you plan to store leftovers, keep the dressing separate until you’re ready to eat to maintain crispness.
  • Experiment with Toppings: Add tortilla strips, cheese, or nuts for extra texture and flavor.
  • Adjust Seasoning: Taste and adjust the seasoning as needed; every palate is different!
  • Make It a Meal: Serve it alongside grilled bread or wrap it in a tortilla for a heartier option.
  • Save Time: Pre-chop your veggies and store them in the fridge for quicker assembly during busy days.
  • Utilize Leftovers: Use leftover salad as a filling for wraps or grain bowls for lunch the next day.

Common Mistakes to Avoid

  • Overdressing: Adding too much dressing can make the salad soggy; start with a little and add more as necessary.
  • Using Wilted Greens: Always use fresh, crisp greens; wilted lettuce can ruin the texture.
  • Skipping Seasoning: Don’t forget to season your salad; even a pinch of salt can enhance flavors.

Flavor Variations to Try

  • Spicy Santa Fe Salad: Add diced jalapenos and a dash of cayenne pepper to the dressing for an extra kick.
  • Southwest Quinoa Salad: Substitute half of the romaine with cooked quinoa for added protein and texture.
  • Vegan Delight: Omit the chicken and honey, and use chickpeas and maple syrup for a plant-based version.
  • Fruit-Infused Salad: Toss in some diced mango or pineapple for a sweet, tropical twist.

Storage and Make-Ahead Instructions

This Santa Fe Chicken Salad is perfect for meal prep! Here’s how to store it:

  • Refrigeration: Store any leftovers in an airtight container in the fridge for up to 3 days. The dressing should be stored separately to keep the greens fresh.
  • Make-Ahead: Prep the salad ingredients in advance and keep them in separate containers. Combine them with the dressing just before serving for optimal freshness.

Frequently Asked Questions

  • Can I use frozen corn? Yes! Frozen corn is a great option; just thaw it before adding.
  • How can I make this salad gluten-free? All ingredients listed are naturally gluten-free, making this salad a safe option.
  • What can I substitute for chicken? Try using chickpeas, tofu, or grilled shrimp for alternative protein sources.
  • Is this salad meal prep friendly? Absolutely! It holds up well in the fridge and can be made in advance.
  • Can I add cheese? Yes! Crumbled feta or shredded cheddar add a nice creaminess.
  • How spicy is this salad? The spice level depends on the amount of jalapeno and chipotle you use; adjust to your preference.
  • Can I use other dressings? Yes! Feel free to experiment with ranch or vinaigrette if you want a different flavor profile.
  • What’s the best way to serve it? It’s great on its own, but you can also serve it with warm bread or in a wrap.

Nutritional Information

This Santa Fe Chicken Salad is not just a feast for your taste buds but also a nutritious option. Here’s a quick overview of what you can expect per serving:

  • Calories: Approximately 350 calories per serving (varies based on chicken type and toppings).
  • Protein: High in protein, especially with chicken or beans.
  • Fats: Healthy fats from avocado and olive oil.
  • Fiber: Packed with fiber from beans and vegetables, keeping you full longer.

Equipment Recommendations

To prepare this salad, you’ll need a few kitchen essentials:

  • Mason Jar: Perfect for mixing the dressing.
  • Sharp Knife: For chopping veggies and slicing chicken.
  • Cutting Board: A stable surface for chopping.
  • Large Mixing Bowl: To combine all the salad ingredients.

Serving Suggestions

To make the most of your Santa Fe Chicken Salad, consider these serving ideas:

  • Wrap It Up: Use a tortilla to wrap the salad for a portable meal.
  • Top with Tortilla Strips: Add a crunchy texture by topping the salad with tortilla strips or crushed chips.
  • Serve with Grilled Bread: Pair it with crusty bread or garlic bread for a heartier meal.
  • Garnish with Lime Wedges: A squeeze of lime right before eating enhances the flavors.

Conclusion: A Salad Worth Sharing

The Santa Fe Chicken Salad is not just a dish; it’s an experience that brings people together. With its vibrant colors, fresh ingredients, and zesty dressing, every bite is a reminder of the love and memories shared around the table. Whether you’re making it for a family dinner or a potluck with friends, this salad is sure to impress and bring a smile to everyone’s face. So grab your ingredients and get ready to create a dish that’s not just nourishing but full of heart.

Santa Fe Chicken Salad

Prep Time 15 minutes
Cook Time 10 minutes
Total Time 25 minutes
Servings 4 servings
Calories 450
A vibrant and flavorful salad combining grilled chicken, fresh vegetables, and a zesty lime dressing, perfect for a light and satisfying meal.

Ingredients

Dressing

  • 1.5 large Limes (Juiced)
  • 0.33 cup Olive oil
  • 2 tsp Chipotle peppers in adobo
  • 0.25 cup Cilantro
  • 0.25 tsp Oregano
  • 1 clove Garlic
  • 3 tbs Honey
  • 4 tbs Apple cider vinegar
  • 1 pinch Salt

Salad

  • 1.5 heads Romaine lettuce (Chopped)
  • 0.5 can Black beans
  • 1 cup Cherry tomatoes
  • 0.5 cup Bell peppers (Chopped)
  • 0.5 large Jalapeno (Seeded and sliced)
  • 1 unit Avocado (Diced)
  • 1 cup Corn
  • 1 stalk Green onion
  • 1 cup Chicken (Pulled or diced)

Instructions 

  • In a jar, combine lime juice, olive oil, chipotle peppers, cilantro, oregano, salt, garlic, honey, and vinegar. Shake until well mixed.
  • Toss all salad ingredients with the dressing until evenly coated.

Notes

For extra flavor, let the salad sit for 10 minutes before serving.
Calories: 450kcal
Cost: $15
Course: Salad
Cuisine: American
Keyword: Chicken, Mexican, Salad

Discover the Heart of Mediterranean Cooking

When we think about Mediterranean cuisine, it conjures up images of vibrant markets bursting with fresh produce, the fragrant aroma of herbs wafting from kitchens, and laughter echoing around a family table. A Mediterranean chickpea salad is more than just a dish; it’s a celebration of flavors, memories, and the simple pleasure of sharing a meal with loved ones. In this article, we’ll explore how to create a delightful Mediterranean chickpea salad that’s not just nutritious, but will also transport you to sunlit shores with every bite.

Why You’ll Love This Recipe

  • Quick and Easy: With just a few ingredients and minimal prep time, this salad is perfect for busy weeknights or impromptu gatherings.
  • Nutritious Goodness: Packed with protein and fiber from chickpeas, this salad offers a healthy boost that keeps you satisfied.
  • Versatile Dish: Enjoy it as a refreshing side, a hearty main, or a delightful addition to your meal prep routine.
  • Flavor-Packed: The combination of zesty dressing and fresh veggies creates a flavor explosion that’s simply irresistible.
  • Customizable: Tailor it to your taste with various mix-ins or dressings, making it your own family favorite.

Ingredients Breakdown

The beauty of a Mediterranean chickpea salad lies in its simplicity and freshness. Here’s what you’ll need to create this vibrant dish:

  • 2 cups cooked chickpeas: Use canned for convenience or soak dried chickpeas overnight for a more authentic touch.
  • 1/4 cup red onions (diced): Provides a nice crunch and a mild bite; soak in water briefly to mellow the flavor.
  • 2 tbsp fresh parsley (finely diced): Adds a burst of freshness; feel free to substitute with cilantro for a different flavor profile.
  • 1 tomato (diced, seeded): Provides juiciness; any ripe tomato variety will work, but heirloom tomatoes are particularly flavorful.
  • 2 Persian cucumbers (diced): Their tender skin and sweet flavor make them ideal; substitute with English cucumbers if necessary.
  • 1 tbsp jalapeno (finely diced): For a little heat; adjust to your preference or omit for a milder salad.
  • 1/3 cup olive oil: Use high-quality extra virgin olive oil for the best flavor.
  • 1/8 cup fresh lemon juice (about 1 lemon): Brightens up the salad; fresh juice is always preferable.
  • 2 garlic cloves (mashed into a paste): Adds depth; use roasted garlic for a sweeter, more mellow flavor.
  • 1 tsp sea salt: Enhances all the flavors; adjust to taste.
  • 1 1/2 tsp cumin: Adds an earthy warmth; consider using smoked cumin for a different twist.

Step-by-Step Instructions

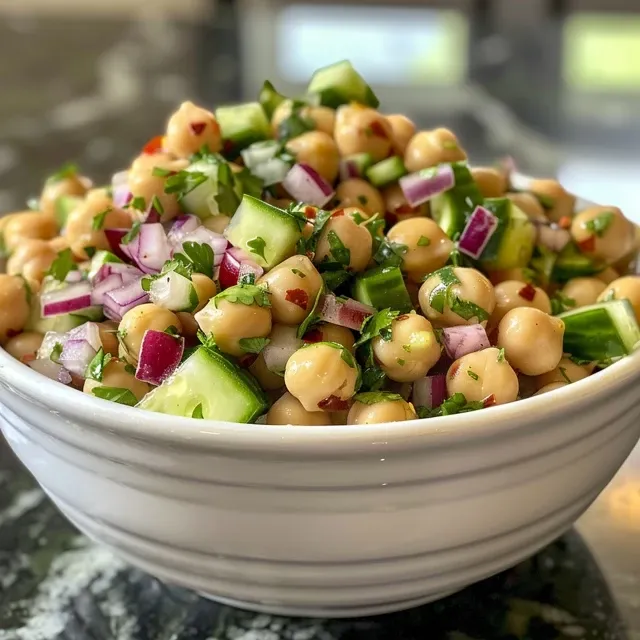
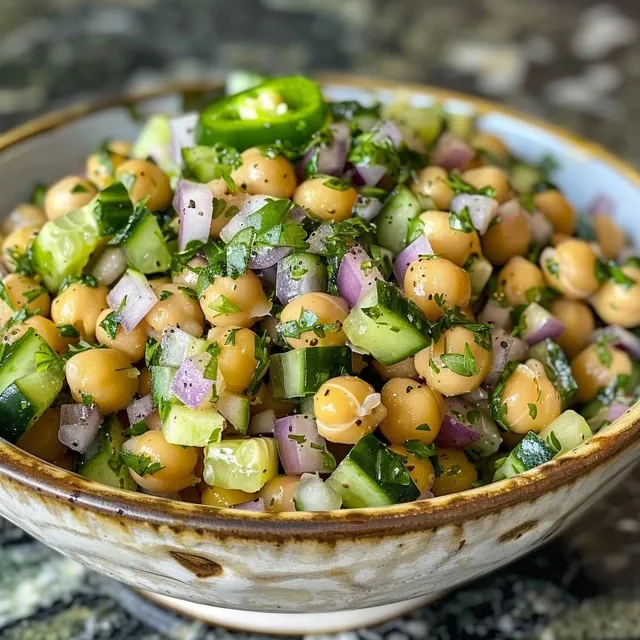
Close-up of a Mediterranean Chickpea Salad, highlighting the fresh ingredients and textures of the dish.

Let’s bring this Mediterranean chickpea salad to life! Follow these simple steps:

  1. Prepare Salad: In a large bowl, combine all the salad ingredients: chickpeas, red onions, parsley, tomato, cucumbers, and jalapeno.
  2. Mix the Dressing: In a small jar with a lid, combine olive oil, lemon juice, garlic, salt, and cumin. Close the lid and shake well—this is a fun step that kids love!
  3. Combine Everything: Pour the dressing over the salad and toss gently to combine, ensuring all ingredients are well coated.
  4. Time to Wait: For maximum flavor, let the salad marinate for at least 30 minutes in the fridge. The flavors will meld beautifully during this time.
  5. Serve and Enjoy: Serve this Mediterranean chickpea salad chilled or at room temperature, perfect for any occasion!

Expert Tips for Perfection

  • Rinse Chickpeas: If you’re using canned chickpeas, rinse and drain them well to remove excess sodium.
  • Adjust to Taste: Feel free to tweak the seasoning; taste as you go to find your perfect balance.
  • Chill Time: The longer the salad sits, the better it will taste, as the flavors deepen and blend.
  • Fresh Ingredients: Always opt for the freshest veggies; they make a noticeable difference in flavor and texture.
  • Texture Variety: For added crunch, toss in some toasted nuts or seeds just before serving.
  • Make it a Meal: Add grilled chicken or shrimp to turn this salad into a filling main dish.
  • Herb Substitutions: Mix in fresh dill or mint for a unique twist on flavor.
  • Dress Just Before Serving: If making ahead, keep the dressing separate until you’re ready to serve to maintain the salad’s crispness.

Common Mistakes and Troubleshooting

Even the best chefs make mistakes! Here’s how to avoid common pitfalls:

  • Over-dressing: Too much dressing can make the salad soggy; start with a little and add more if needed.
  • Using Old Ingredients: Ensure your veggies are fresh; wilted or overripe produce can ruin the salad.
  • Ignoring Personal Taste: Always taste and adjust; this salad should cater to your preferences.
  • Skipping the Chill: Marinating is key; don’t rush this step if you want the best flavor.

Variations of Mediterranean Chickpea Salad

One of the best parts about this recipe is its adaptability. Here are some variations to try:

  • Greek Twist: Add crumbled feta and kalamata olives for a classic Greek vibe.
  • Spicy Kick: Toss in chopped green chilies and a pinch of cayenne for heat.
  • Moroccan Flair: Incorporate dried apricots and a sprinkle of cinnamon for a sweet and savory blend.
  • Quinoa Addition: Mix in cooked quinoa for additional protein and texture, making it a more filling meal.

Storage and Make-Ahead Instructions

This salad is perfect for meal prep! Here’s how to store it:

  • Refrigerate: Store in an airtight container in the fridge for up to 3 days; the flavors will continue to improve.
  • Freezing: Not recommended due to the texture of the veggies; best enjoyed fresh.
  • Make Ahead: Prepare the salad and dressing separately up to a day in advance; combine just before serving.

Comprehensive FAQ

Here are answers to some common questions about Mediterranean chickpea salad:

  • Can I use dried chickpeas? Yes! Just soak them overnight and cook until tender before using.
  • What should I serve with this salad? It pairs wonderfully with grilled meats, pita bread, or as part of a mezze platter.
  • Can I make this salad vegan? Yes, this recipe is naturally vegan as is!
  • How can I make it gluten-free? This salad is gluten-free; just ensure all your ingredients are certified gluten-free.
  • What type of olive oil should I use? Opt for extra virgin for the best flavor; it makes a big difference!
  • Is this salad good for meal prep? Absolutely! It holds up well in the fridge and is a great grab-and-go lunch option.
  • Can I add fruits? Yes! Try adding diced apples or pears for a sweet contrast.
  • How long can I store the salad? It’s best enjoyed within 3 days for optimal freshness.

Nutritional Tips and Dietary Adaptations

This Mediterranean chickpea salad is not only delicious but also nutritious. Here’s how to maximize its health benefits:

  • High Fiber: Chickpeas are rich in fiber, promoting digestive health.
  • Protein Power: A great source of plant-based protein, making it an excellent option for vegetarians.
  • Healthy Fats: Olive oil offers heart-healthy fats; use it generously but wisely.
  • Low Calorie: With fresh veggies and chickpeas, this salad is low in calories but high in satisfaction.

Equipment Recommendations

To prepare your Mediterranean chickpea salad, here are a few kitchen essentials:

  • Mixing Bowls: A large mixing bowl is essential for combining all ingredients.
  • Measuring Cups and Spoons: Precision is key when it comes to dressing and ingredient ratios.
  • Jar with Lid: Perfect for shaking up the dressing; it makes mixing a breeze!
  • Knife and Cutting Board: For chopping your fresh ingredients; a sharp knife makes the task easier.

Serving Suggestions

This Mediterranean chickpea salad is incredibly versatile. Here are some delightful ways to serve it:

  • As a Side Dish: Serve alongside grilled chicken or fish for a refreshing complement.
  • In a Wrap: Roll it up in a whole-grain wrap for a delicious and nutritious lunch.
  • On a Bed of Greens: Serve it over a bed of leafy greens for added texture and nutrients.
  • With Crusty Bread: Pair with a crusty olive loaf for a satisfying meal.

Conclusion: A Salad to Cherish

This Mediterranean chickpea salad is more than just a recipe; it’s a way to share love and memories with those around you. Whether you’re enjoying it at a family gathering, a picnic with friends, or as a simple weeknight dinner, this dish embodies the spirit of togetherness. So gather your ingredients, roll up your sleeves, and create something beautiful that nourishes both body and soul. Remember, cooking is about love, and every bite of this salad tells a story. Enjoy your culinary journey!

Mediterranean Chickpea Salad

Prep Time 15 minutes
Total Time 15 minutes
Servings 4 servings
Calories 250
A fresh and flavorful Mediterranean chickpea salad perfect for a quick lunch or side dish, packed with vibrant vegetables and zesty lemon dressing.

Ingredients

Main ingredients

  • 2 cups cooked chickpeas
  • 1/4 cup red onions (diced)
  • 2 tbsp fresh parsley (finely diced)
  • 1 to tomato (diced seeded)
  • 2 Persian cucumbers diced
  • 1 tbsp jalapeno (* finely diced)
  • 1/3 cup olive oil
  • 1/8 cup fresh lemon juice (1 lemon)
  • 1 tsp sea salt
  • 1.5 tsp cumin

Instructions 

  • Add all salad ingredients into a large bowl and toss.
  • Mix dressing ingredients in a jar, shake well.
  • Pour dressing over salad and toss to combine.
  • Let the salad marinate for 30 minutes before serving.

Notes

For extra flavor, add a sprinkle of feta cheese or olives.
Calories: 250kcal
Cost: $10
Course: Salad
Cuisine: Mediterranean
Keyword: Chickpeas

Discover the Heartwarming Flavors of Guy Fieri’s Macaroni Salad

Welcome to a journey through the warm, nostalgic world of family gatherings with a dish that embodies love, flavor, and togetherness: Guy Fieri’s Macaroni Salad. This delightful salad is not just a recipe but a heartfelt tribute to the joy of cooking and sharing meals with loved ones. Trust me, every creamy, crunchy bite is a celebration of the simple, heartfelt cooking that brings us all back to the family table. In this article, we’ll explore why this macaroni salad is a must-have for your next picnic or barbecue, and I’ll share tips, variations, and everything you need to know to make it your own.

Why You’ll Love This Recipe

Here are just a few reasons why Guy Fieri’s Macaroni Salad is a crowd-pleaser:

  • Quick and Easy: This salad comes together in under 30 minutes, making it perfect for last-minute gatherings.
  • Flavor-Packed: The combination of creamy dressing, tangy mustard, and fresh veggies delivers a burst of flavor in every bite.
  • Crowd Favorite: Whether it’s a family reunion or a summer barbecue, this salad is sure to be a hit with everyone.
  • Versatile: Easily customizable with your favorite ingredients, making it suitable for various dietary preferences.
  • Make-Ahead Friendly: This salad tastes even better the next day, letting you enjoy more time with family and friends.

Ingredients for Guy Fieri’s Macaroni Salad

Before diving into the magic of making this salad, let’s gather our ingredients. Here’s what you’ll need:

  • 1 lb elbow macaroni
  • 1 cup mayonnaise
  • 1/4 cup sour cream
  • 2 tbsp apple cider vinegar
  • 1 tbsp Dijon mustard
  • 1 tsp sugar
  • 1/2 tsp salt
  • 1/2 tsp black pepper
  • 1/2 cup diced red onion
  • 1/2 cup diced celery
  • 1/2 cup diced red bell pepper
  • 1/4 cup chopped fresh parsley

Ingredient Substitutions

If you have specific dietary needs or preferences, here are some substitutions you might consider:

  • Gluten-Free: Use gluten-free elbow macaroni to accommodate dietary restrictions.
  • Vegan: Substitute mayonnaise with a vegan mayo and use a dairy-free sour cream alternative.
  • Low-Fat Option: Opt for reduced-fat mayonnaise and sour cream to lighten the dish.
  • Fresh Herbs: Feel free to mix in other fresh herbs like dill or chives for an extra flavor boost.

How to Make Guy Fieri’s Macaroni Salad

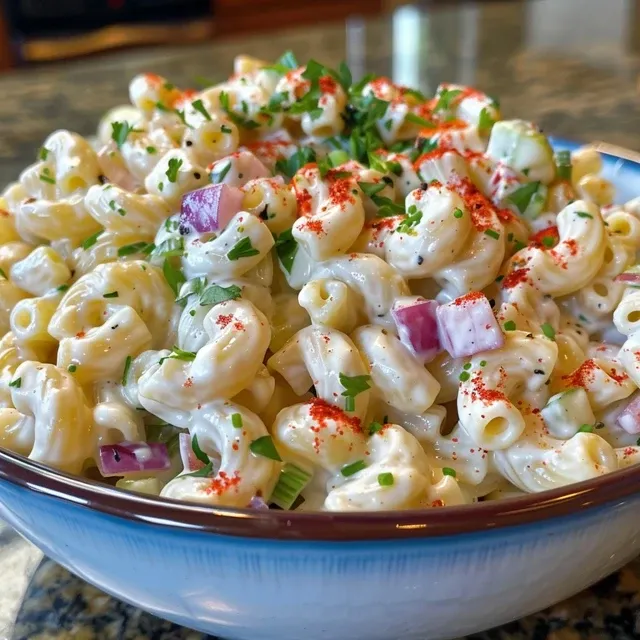
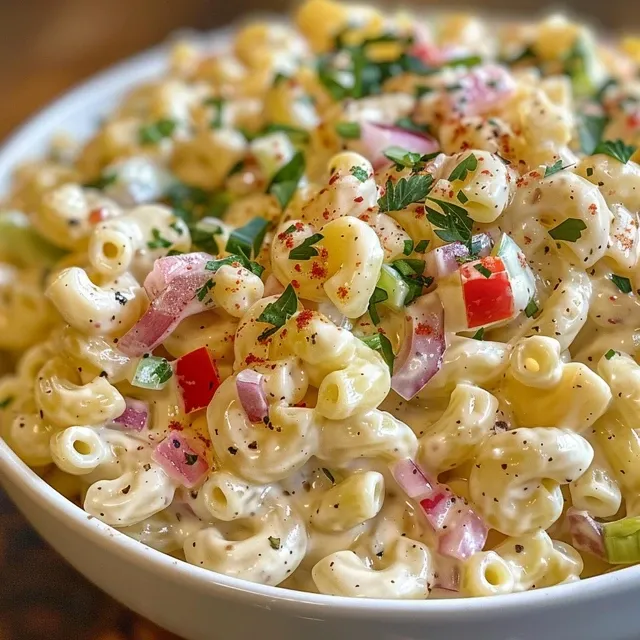
A mouthwatering bowl of macaroni salad with diced vegetables and creamy dressing.

Let’s roll up our sleeves and get cooking! Here’s how to prepare this delightful macaroni salad:

Step 1: Cook the Pasta

In a large pot, bring well-salted water to a boil. Add the elbow macaroni and cook for about 7-8 minutes until al dente. Once cooked, drain and rinse with cold water to stop the cooking process. This step is crucial to ensure the pasta doesn’t become mushy.

Step 2: Prepare the Dressing

In a large mixing bowl, whisk together the mayonnaise and sour cream until smooth. Then, whisk in the apple cider vinegar, Dijon mustard, sugar, salt, and black pepper. This dressing is what makes the salad creamy and tangy, adding that signature flavor.

Step 3: Combine Ingredients

Add the cooled pasta to the dressing bowl, along with the diced veggies and fresh parsley. Toss gently but thoroughly to ensure everything is well-coated. The combination of pasta, dressing, and crunchy vegetables creates a delightful texture.

Step 4: Chill and Serve

Cover the salad with plastic wrap and refrigerate for at least 1 hour (2 hours is even better) to let the flavors mingle. This chilling time allows the ingredients to come together, creating a harmonious blend of flavors.

Pro Tips for the Best Guy Fieri Macaroni Salad

To elevate your macaroni salad experience, consider these expert tips:

  • Chill the Ingredients: Using chilled ingredients helps keep the salad fresh and crisp.
  • Don’t Overcook the Pasta: Aim for al dente pasta to maintain a nice bite.
  • Mix and Match Veggies: Try adding diced cucumbers, peas, or shredded carrots for extra color and texture.
  • Adjust the Seasoning: Taste and tweak the dressing to your liking; add more vinegar for tang or sugar for sweetness.
  • Let It Rest: The longer it sits, the better the flavors meld together, so plan ahead!
  • Garnish with Fresh Herbs: A sprinkle of fresh parsley or dill adds a pop of color and freshness.
  • Portion Control: If serving at a larger gathering, consider using smaller bowls to make it easier for guests to serve themselves.
  • Pair with Grilled Meats: This salad pairs wonderfully with grilled chicken or burgers, rounding out a summer meal perfectly.

Common Mistakes and Troubleshooting

Even the best cooks can make mistakes! Here are some common pitfalls and how to avoid them:

  • Overcooked Pasta: If you overcook the macaroni, it can become mushy. Always cook al dente and rinse with cold water.
  • Too Much Dressing: If your salad feels soupy, try adding more pasta or veggies to balance it out.
  • Flavorless Salad: Always taste and adjust the seasoning before serving. A pinch of salt or extra vinegar can make a big difference.
  • Vegetable Sogginess: Add crunchy ingredients like celery and bell peppers right before serving to maintain their texture.

Variations of Guy Fieri’s Macaroni Salad

Want to get creative? Here are some delicious variations to try:

  • Smoky BBQ Macaroni Salad: Add diced smoked meats like ham or bacon for a smoky flavor.
  • Italian Macaroni Salad: Incorporate sliced olives, pepperoncini, and Italian dressing for a Mediterranean twist.
  • Spicy Macaroni Salad: Mix in diced jalapeños or a dash of hot sauce for a spicy kick.
  • Asian-Inspired Macaroni Salad: Use sesame oil instead of mayonnaise and add edamame, shredded carrots, and green onions.

Storage and Make-Ahead Instructions

This macaroni salad is not just delicious; it’s also perfect for meal prep. Here’s how to store it:

  • Refrigeration: Store the salad in an airtight container in the fridge for up to 3 days. The flavors will continue to develop.
  • Freezing: It’s best not to freeze macaroni salad, as the texture can change. However, you can freeze the dressing separately and add fresh ingredients before serving.
  • Make-Ahead: Prepare the salad a day in advance for easier entertaining!

Frequently Asked Questions

Here are some common questions about Guy Fieri’s Macaroni Salad:

  • What ingredients are in Guy Fieri’s macaroni salad? The salad contains elbow macaroni, mayonnaise, sour cream, veggies, and seasonings.
  • How do you make Guy Fieri’s macaroni salad? Follow our step-by-step guide, and you’ll have a delicious salad in no time!
  • Can I customize Guy Fieri’s macaroni salad recipe? Absolutely! Feel free to add or substitute ingredients based on your taste.
  • How long does macaroni salad last in the fridge? Properly stored, it can last up to 3 days in the fridge.
  • Is this salad suitable for vegans? Yes, with simple substitutions for mayonnaise and sour cream, it’s vegan-friendly.
  • Can I use different pasta shapes? While elbow macaroni is traditional, you can use any pasta shape you enjoy.
  • What should I serve with macaroni salad? It pairs well with grilled meats, sandwiches, or as part of a picnic spread.
  • Is Guy Fieri’s macaroni salad gluten-free? To make it gluten-free, simply use gluten-free elbow macaroni.

Nutritional Information and Dietary Tips

Understanding the nutritional content of your food is essential for making informed choices. Here’s a quick look at what’s in this macaroni salad:

  • Calories: Approximately 350-400 calories per serving, depending on the portion size.
  • Protein: Contains around 8-10 grams of protein, thanks to the pasta and dressing.
  • Healthy Fats: The mayonnaise and sour cream contribute healthy fats, but you can choose low-fat versions for a lighter option.

Consider adding additional veggies to increase fiber content and enhance the overall nutritional profile. Always balance your meals with lean proteins and fresh produce to create a well-rounded plate.

Equipment Recommendations

To make your cooking experience smooth and enjoyable, here are a few kitchen tools I recommend:

  • Large Pot: Essential for cooking pasta; a heavy-bottomed pot works best.
  • Mixing Bowls: Use a large bowl for mixing the salad and a smaller one for the dressing.
  • Whisk: A good whisk helps combine the dressing ingredients smoothly.
  • Measuring Cups and Spoons: Accurate measurements ensure the best flavor.
  • Spatula: Use a spatula for gently folding ingredients together without breaking the pasta.

Serving Suggestions

Now that you’ve crafted this beautiful macaroni salad, here are some serving suggestions:

  • Picnic Perfection: Serve this salad chilled at outdoor gatherings alongside grilled meats and fresh fruit.
  • As a Side Dish: Pair it with burgers, hot dogs, or fried chicken for a classic summer meal.
  • Buffet Style: Place it in a large bowl at potlucks, allowing guests to help themselves.
  • Garnish: Top with fresh herbs or a sprinkle of paprika for a pop of color before serving.

This Guy Fieri’s Macaroni Salad isn’t just a recipe; it’s a way to create memories and share love through food. Remember, cooking is about connection, and each dish tells a story. So gather your loved ones, share this salad, and enjoy the warmth that comes from cooking together.

Now, go ahead and make this macaroni salad your own! Let’s create something special together, just like how my grandmother taught me. Happy cooking!

Guy Fieri Macaroni Salad

Prep Time 15 minutes
Cook Time 10 minutes
Total Time 25 minutes
Servings 8 servings
Calories 350
A creamy and flavorful macaroni salad perfect for picnics and gatherings, combining fresh veggies and a tangy dressing.

Ingredients

Pasta

  • 1 lb elbow macaroni
  • 1 cup mayonnaise
  • 0.25 cup sour cream
  • 2 tbsp apple cider vinegar
  • 1 tbsp Dijon mustard
  • 1 tsp sugar
  • 0.5 tsp salt
  • 0.5 tsp black pepper
  • 0.5 cup diced red onion
  • 0.5 cup diced celery
  • 0.5 cup diced red bell pepper
  • 0.25 cup chopped fresh parsley

Instructions 

  • Cook the pasta in boiling salted water for 7-8 minutes until al dente, then drain and rinse with cold water.
  • Mix mayonnaise and sour cream in a large bowl, then add vinegar, mustard, sugar, salt, and pepper.
  • Add cooled pasta, diced veggies, and parsley to the dressing; toss to coat evenly.
  • Cover and refrigerate for at least 1 hour before serving.

Notes

For extra flavor, add a dash of paprika or chopped pickles.
Calories: 350kcal
Cost: $15
Course: Salad
Cuisine: American
Keyword: Macaroni, Salad

Discover the Heartwarming Flavor of Honey Garlic Chicken

Welcome to a culinary journey that encapsulates love, warmth, and shared memories around the family table. Honey Garlic Chicken is more than just a meal; it’s a celebration of flavors that bind us together. This dish transforms simple ingredients into a heartwarming recipe that’s perfect for family gatherings or a cozy dinner at home. With its sweet and savory sauce that envelops tender chicken, this recipe is so easy to love!

Why You’ll Love This Recipe

  • Simple Ingredients: This recipe requires just a few everyday ingredients, making it accessible for everyone, from novice cooks to seasoned chefs.
  • Quick to Prepare: With a total cooking time of about 30 minutes, you can whip up a delightful meal without spending hours in the kitchen.
  • Family-Friendly: The sweet and savory profile of honey garlic chicken is a hit with both kids and adults, making it a go-to for family dinners.
  • Versatile Pairings: Serve it over rice, with stir-fried vegetables, or in a wrap—this chicken is adaptable to any meal style.
  • Meal Prep Friendly: This dish stores well, making it perfect for meal prep. You can make it ahead of time and reheat for a quick weeknight dinner.

Ingredient Breakdown

Let’s dive into the heart of this recipe—the ingredients. Each component plays a crucial role in creating that beloved honey garlic flavor.

  • Chicken Thighs: I recommend using skinless, boneless chicken thighs for their tenderness and rich flavor. You can substitute with chicken breasts if you prefer, but thighs tend to be juicier.
  • Cornflour (Cornstarch): This is essential for coating the chicken, giving it a crispy exterior while keeping the inside moist.
  • Vegetable Oil: Used for frying, it has a high smoke point, making it ideal for searing the chicken.
  • Unsalted Butter: Adds richness to the sauce. If you need a dairy-free option, feel free to use a plant-based butter substitute.
  • Garlic: Fresh minced garlic is key for that aromatic punch. If you’re in a pinch, garlic powder can work, but fresh is always best.
  • Honey: The star of the dish, honey contributes sweetness and a beautiful glaze. You can swap it with maple syrup for a different flavor profile.
  • Chicken Stock: Adds depth to the sauce; low-sodium versions allow you to control the saltiness.
  • Rice Vinegar: This ingredient balances the sweetness with a tangy note. You can substitute it with apple cider vinegar if needed.
  • Soy Sauce: This adds umami and saltiness to the dish. For a gluten-free option, opt for tamari sauce.
  • Chili Flakes: A pinch adds a lovely warmth to the dish. Adjust it according to your spice preference!

Step-by-Step Instructions

Honey Garlic Chicken dish featuring a glossy finish and minced garlic pieces.

Now that we have our ingredients ready, let’s walk through the simple steps to create this heartwarming Honey Garlic Chicken.

  1. In a large bowl, combine the chicken thighs with cornflour, salt, and pepper. Toss until the chicken is fully coated.
  2. Heat the vegetable oil in a large frying pan over high heat. Once hot, add the chicken thighs and cook for about 4-5 minutes until golden brown on one side.
  3. Flip the chicken over and cook for an additional 2 minutes on the other side.
  4. Add the butter to the pan. Once melted, stir in the minced garlic, reducing the heat to medium to prevent burning.
  5. In a separate bowl, mix together the honey, chicken stock, rice vinegar, and soy sauce. Stir well to combine.
  6. Pour the sauce mixture into the pan with the chicken. Increase the heat to bring it to a boil, then reduce to a simmer for 4-5 minutes, allowing the sauce to thicken and the chicken to cook through.
  7. Once cooked, sprinkle with chopped parsley and chili flakes for an extra touch. Serve over boiled rice for a complete meal!

Pro Tips for Perfect Honey Garlic Chicken

  • Don’t overcrowd the pan: If your pan is too crowded, the chicken will steam instead of sear. Cook in batches if necessary.
  • Let the chicken rest: Allowing the chicken to rest for a few minutes after cooking helps retain its juices.
  • Adjust sweetness: If you prefer a less sweet sauce, reduce the amount of honey or add a splash of soy sauce.
  • For extra flavor: Marinate the chicken in the sauce for 30 minutes before cooking to deepen the flavors.
  • Storage tip: Store any leftovers in an airtight container in the fridge for up to 3 days.
  • Reheat gently: When reheating, do so slowly over low heat to prevent the chicken from drying out.
  • Try different proteins: This recipe works beautifully with shrimp or tofu for a twist!
  • Garnish creatively: Consider adding sesame seeds or sliced green onions for an appealing presentation.

Common Mistakes and Troubleshooting

Even the best cooks can run into hiccups. Here are some common mistakes and how to avoid them:

  • Burnt Garlic: If your garlic burns, it can turn bitter. Always lower the heat before adding it to the pan.
  • Too Saucy: If the sauce is too thin, let it simmer longer to reduce and thicken. Conversely, if it’s too thick, add a splash of water or stock.
  • Overcooked Chicken: Keep an eye on the cooking time. Chicken should be cooked until no longer pink in the middle but still juicy.

Delicious Variations to Try

Feeling adventurous? Here are some delightful variations of Honey Garlic Chicken:

  • Honey Garlic Chicken Stir-Fry: Add colorful vegetables like bell peppers and snap peas for a vibrant stir-fry.
  • Asian Honey Garlic Chicken Wraps: Serve the chicken in lettuce wraps with fresh veggies and a drizzle of extra sauce.
  • Honey Garlic Chicken Tacos: Shred leftover chicken and serve in soft tortillas with avocado and cilantro.
  • Honey Garlic Chicken with Pineapple: Add fresh pineapple chunks to the pan for a tropical twist.

Storage and Make-Ahead Instructions

This dish is perfect for meal prep! Here’s how to store it:

  • Refrigeration: Store in an airtight container in the fridge for up to 3 days.
  • Freezing: You can freeze the cooked chicken for up to 2 months. Thaw before reheating.
  • Reheating: Gently reheat in a skillet over low heat, adding a little water or stock to keep it moist.

Frequently Asked Questions

To help you further, here are some common questions about Honey Garlic Chicken:

  • Can I use chicken breasts instead of thighs? Yes, but keep in mind that breasts may dry out quicker than thighs.
  • Can I make this recipe gluten-free? Absolutely! Use gluten-free soy sauce or tamari.
  • How do I know when the chicken is done cooking? The chicken should reach an internal temperature of 165°F (75°C) and no longer be pink in the center.
  • Can I double the recipe? Yes! Just ensure your pan is large enough to accommodate the chicken without overcrowding.
  • What can I serve with Honey Garlic Chicken? This dish pairs wonderfully with rice, steamed vegetables, or a fresh salad.
  • Is this recipe spicy? The chili flakes can be adjusted to your taste; omit them for a milder dish.
  • Can I use other sweeteners besides honey? Yes, maple syrup or agave nectar can be great alternatives.
  • How long does it take to cook? Total cooking time is about 30 minutes, making it an excellent quick meal option.

Nourishing Nutrition Tips

This Honey Garlic Chicken is not just delicious; it can also fit nicely into a balanced diet. Here are some tips:

  • Protein Power: Chicken thighs provide essential proteins, helping to build and repair tissues.
  • Vegetable Boost: Pair with a side of colorful veggies to enhance the meal’s fiber and nutrient content.
  • Whole Grains: Serve over brown rice or quinoa for added health benefits and fiber.

Essential Equipment Recommendations

For the best cooking experience, here are some tools I recommend:

  • Non-stick Skillet: Ideal for frying chicken without it sticking.
  • Mixing Bowls: Essential for combining your ingredients seamlessly.
  • Meat Thermometer: Helps ensure your chicken reaches the perfect doneness.

Serve with Love

As you plate your Honey Garlic Chicken, think about the memories you’re creating. Whether it’s a casual family dinner or a festive gathering, this dish serves up more than just good food—it serves up affection and connection. Gather your loved ones around the table, and share not just a meal, but the joy of togetherness. Thank you for joining me in this culinary adventure, and I hope you create many beautiful memories with this recipe!

Honey Garlic Chicken Recipe

Prep Time 10 minutes
Cook Time 15 minutes
Total Time 25 minutes
Servings 4 servings
Calories 450
A delicious and easy honey garlic chicken dish with tender thighs coated in a savory sauce, perfect served over rice.

Ingredients

Meat

  • 8 pieces chicken thighs (skinless and boneless)
  • 2 tbsp cornflour (cornstarch)
  • 1/2 tsp salt
  • 1/2 tsp pepper
  • 2 tbsp vegetable oil
  • 1 tbsp unsalted butter
  • 4 cloves minced garlic
  • 110 g honey
  • 80 ml chicken stock
  • 1 tbsp rice vinegar
  • 1 tbsp light soy sauce
  • 1 tbsp finely chopped fresh parsley
  • 1/2 tsp chilli flakes

Additional

  • as needed boiled rice

Instructions 

  • Coat chicken thighs with cornflour, salt, and pepper.
  • Heat oil in a pan and cook chicken until golden, then set aside.
  • Melt butter, add garlic, then prepare the sauce with honey, stock, vinegar, and soy.
  • Add sauce to pan, simmer until thickened and chicken is cooked through.
  • Sprinkle parsley and chilli flakes, serve over boiled rice.

Notes

For extra flavor, marinate the chicken in some soy sauce before cooking.
Calories: 450kcal
Cost: $15
Course: Main Course
Cuisine: Asian
Keyword: Chicken, garlic, Honey

Discover the Joy of Honey Lime Rainbow Fruit Salad

Welcome to the delightful world of fruit salads, where every bite is a burst of sunshine and every ingredient carries a story. Today, we’re diving into a vibrant recipe that’s not just about mixing fruits, but about sharing love and memories around the table. Our Honey Lime Rainbow Fruit Salad combines fresh strawberries, sweet pineapple, juicy blueberries, and more, all drizzled with a zesty honey-lime dressing. This dish is perfect for family gatherings, picnics in the park, or simply a refreshing treat on a warm day.

Why You’ll Love This Recipe

  • Celebration of Flavors: The blend of fresh fruits creates a colorful array of flavors that dance on your palate, making it a joy to eat.
  • Health Benefits: Packed with vitamins, fiber, and antioxidants, this fruit salad is a delicious way to boost your health.
  • Simple Preparation: With just a handful of ingredients and minimal prep time, this fruit salad can be whipped up in no time.
  • Customizable: You can easily adapt this recipe based on the season or personal preferences, making it a versatile dish.
  • Perfect for Sharing: This salad is all about community. Serve it at gatherings and watch everyone gather around to enjoy it together.

Ingredients Breakdown

Here’s what you’ll need to create this colorful dish:

  • 1 lb fresh strawberries (chopped): Choose ripe, sweet strawberries for the best flavor.
  • 1 lb chopped fresh pineapple: Fresh is ideal, but canned or frozen can work in a pinch.
  • 12 oz fresh blueberries: These little gems add a burst of sweetness and a lovely color.
  • 12 oz red grapes (sliced into halves): Their crunch adds another texture to the salad.
  • 4 kiwis (peeled and chopped): The bright green adds a pop of color and a tangy taste.
  • 3 mandarin oranges: Their sweetness is a delightful addition.
  • 2 bananas (sliced, optional): Adds creaminess and a comforting flavor.
  • 1/4 cup honey: For a natural sweetness that blends beautifully with the fruit.
  • 2 tsp lime zest (zest of 2 medium limes): Adds a refreshing zing.
  • 1 1/2 Tbsp fresh lime juice: Enhances the flavors and balances the sweetness.

How to Make Honey Lime Rainbow Fruit Salad

A close-up of a playful fruit salad with juicy strawberries, green kiwis, and bright mandarin oranges.

Follow these simple steps to create your vibrant salad:

  1. Add all the chopped fruits to a large mixing bowl. Toss gently to combine.
  2. In a small mixing bowl, whisk together the honey, lime zest, and lime juice until well mixed.
  3. Pour the honey-lime dressing over the fruit and toss gently to coat evenly.
  4. Serve immediately for the freshest taste, or chill for a bit before serving if you prefer.

Pro Tips for Perfecting Your Fruit Salad

  • Use Fresh Ingredients: Fresh fruits not only taste better but also retain their nutrients.
  • Cut Fruits Uniformly: This makes for a more visually appealing salad and ensures even flavor distribution.
  • Opt for Seasonal Fruits: Depending on the season, use fruits that are at their peak for the best flavors.
  • Experiment with Dressings: While honey-lime is delightful, try adding a splash of orange juice or mint for variety.
  • Chill Before Serving: Allowing the salad to chill for at least 30 minutes helps the flavors meld beautifully.
  • Serve in a Fun Way: Consider using a hollowed-out watermelon or pineapple as a serving bowl for added flair.
  • Add Nuts or Seeds: For extra crunch, sprinkle some chopped nuts or seeds on top just before serving.
  • Be Mindful of Allergies: Always check for allergies or preferences when serving to a crowd.

Common Mistakes and Troubleshooting

  • Overmixing the Fruit: Gentle tossing is key to keep the shape and texture of the fruit intact.
  • Using Overripe Fruit: Choose fruit that is ripe but not mushy to ensure the best taste and texture.
  • Not Chilling Enough: If you serve it too soon, the flavors won’t have the chance to meld.
  • Ignoring Personal Taste: Adjust the dressing to your liking; you can make it sweeter or tangier based on preference.

Variations to Try

There’s no end to the delicious variations you can create with this recipe:

  • Tropical Twist: Add diced mango and coconut flakes for a tropical flavor.
  • Berry Delight: Focus on a variety of berries—raspberries and blackberries can add depth.
  • Nutty Addition: Incorporate chopped walnuts or pecans for an added crunch.
  • Mint Infusion: Add fresh mint leaves for a refreshing herbal note.

Storage and Make-Ahead Instructions

This fruit salad is best enjoyed fresh, but if you need to prepare it in advance:

  • In the Refrigerator: Store in an airtight container for up to 3 days. However, the freshness is best within the first day.
  • Keep Dressing Separate: If making in advance, store the dressing separately and drizzle it just before serving.

Frequently Asked Questions

  • Can I use frozen fruit? Yes, but thaw it and drain excess moisture before adding it to the salad for the best results.
  • Is this salad vegan? Yes, all the ingredients are plant-based, making it a delightful vegan option.
  • Can I add yogurt? Absolutely! A dollop of yogurt can add creaminess and enhance the flavors.
  • How can I make it sweeter? Add more honey to taste or include sweeter fruits like ripe bananas or mangoes.
  • Can I use citrus fruits? Yes, adding citrus like oranges or grapefruits will brighten up the flavors.
  • What’s the best way to serve it? Serve in a large bowl for sharing, or in individual cups for a fun presentation.
  • Will the fruits brown? Some fruits, like bananas, may brown; to prevent this, add a bit of lime juice over them before mixing.
  • What’s the best way to keep it fresh? Store airtight in the fridge and consume within a few days for the best taste.

Nutritional Tips and Dietary Adaptations

This fruit salad is inherently healthy, but you can enhance its nutritional profile by:

  • Choosing Organic Fruits: Whenever possible, choose organic to avoid pesticides and enhance flavor.
  • Adding Superfoods: Consider tossing in chia seeds or hemp hearts for an extra nutrient boost.
  • Reducing Sugar: If you’re watching your sugar intake, reduce the honey or substitute it with a sugar-free sweetener.

Recommended Equipment

For the best fruit salad experience, consider having these tools handy:

  • Sharp Knife: A good knife is essential for cutting fruits easily and safely.
  • Cutting Board: A sturdy board will keep your workspace organized.
  • Mixing Bowls: Use various sizes, with a large bowl for mixing and smaller ones for prep.
  • Whisk: A small whisk makes mixing dressings a breeze.

Serving Suggestions

To elevate your fruit salad experience:

  • Pair with Grilled Meats: This salad makes an excellent side dish for barbecued chicken or fish.
  • Serve with a Splash of Sparkling Water: For a refreshing drink, serve with a glass of sparkling water to complement the dish.
  • Garnish with Mint: Fresh mint leaves add a lovely aroma and visual appeal to your presentation.

Conclusion

Your Honey Lime Rainbow Fruit Salad is more than just a recipe; it’s an invitation to gather, share, and create memories. With each colorful layer, you’re not only nourishing your body but also your spirit. So, roll up your sleeves, gather those fresh fruits, and let your kitchen transform into a haven of joy. Happy cooking, and may every bite be a reminder of the love that goes into sharing food with family and friends!

Honey Lime Rainbow Fruit Salad

Prep Time 10 minutes
Total Time 10 minutes
Servings 4 servings
Calories 250
A vibrant and refreshing fruit salad combining sweet and tangy flavors, perfect for a quick snack or dessert.

Ingredients

Fruits

  • 1 lb fresh strawberries (chopped)
  • 1 lb chopped fresh pineapple
  • 12 oz fresh blueberries
  • 12 oz red grapes (sliced into halves)
  • 4 pcs kiwis (peeled and chopped)
  • 3 pcs mandarin oranges
  • 2 pcs bananas (sliced (optional))
  • 0.25 cup honey
  • 2 tsp lime zest (zest of 2 medium limes)
  • 1.5 Tbsp fresh lime juice

Instructions 

  • Add all fruit to a large mixing bowl.
  • In a small bowl, whisk together honey, lime zest, and lime juice.
  • Pour dressing over fruit and toss to coat. Serve immediately.

Notes

Use ripe, fresh fruit for the best flavor.
Calories: 250kcal
Cost: $12
Course: Dessert, Salad
Cuisine: fusion
Keyword: Fruit, Honey, Lime