Author

daniel

Browsing

Embracing Comfort: The Heartwarming Journey of Braised Short Ribs

Ah, the rich aroma of braised short ribs simmering gently on the stove, filling the air with nostalgia and warmth. This dish is more than just a meal; it’s a culinary hug that brings families together, celebrating traditions and the love woven into every bite. Today, I invite you to join me on a flavorful journey, where we’ll dive into the art of creating braised short ribs that are not only easy to prepare but also deeply comforting.

As we explore the depths of this recipe, you’ll discover how to create a dish that’s perfect for cozy family gatherings or intimate dinners. Let’s gather around the kitchen table and embrace the flavors of love and tradition.

Why You’ll Love This Recipe

This recipe for braised short ribs is designed to delight your taste buds and warm your heart. Here are five reasons why you’ll absolutely adore it:


Meal Prep Container Set

★ Recommended Kitchen Tool

Meal Prep Container Set

Make this recipe even easier with a quality Meal Prep Container Set — a must-have kitchen staple!


🛒 Shop This Tool →

As an Amazon Associate, we earn from qualifying purchases.
  • Rich Flavor Profile: The combination of tender, juicy beef short ribs and a savory red wine sauce creates a depth of flavor that is truly irresistible.
  • Comforting Tradition: This dish is steeped in Southern tradition, reminding us of family gatherings and cherished memories around the dinner table.
  • Simple Ingredients: Using everyday ingredients like beef short ribs, onions, and herbs makes this recipe accessible yet delicious.
  • Versatile Pairings: Serve these ribs with creamy garlic mash or a fresh salad, and you’ve got a well-rounded meal that everyone will enjoy.
  • Make-Ahead Friendly: Preparing the ribs in advance allows the flavors to meld beautifully, making it an ideal dish for entertaining.

Ingredient Breakdown

Let’s take a closer look at the ingredients that will bring our braised short ribs to life:

  • 3 lbs beef short ribs: Look for bone-in ribs for maximum flavor and tenderness. The bones add richness to the sauce.
  • Salt & black pepper (to taste): Essential for seasoning the meat, enhancing the natural flavors.
  • 2 tbsp olive oil: Used for searing the ribs, adding depth and a beautiful crust.
  • 1 large onion, chopped: Sweetness from the onion balances the savory elements beautifully.

Feel free to swap ingredients based on your pantry. For example, you can use beef broth instead of red wine for a non-alcoholic version, or add a splash of bourbon for a smoky twist.

Steps to Culinary Perfection
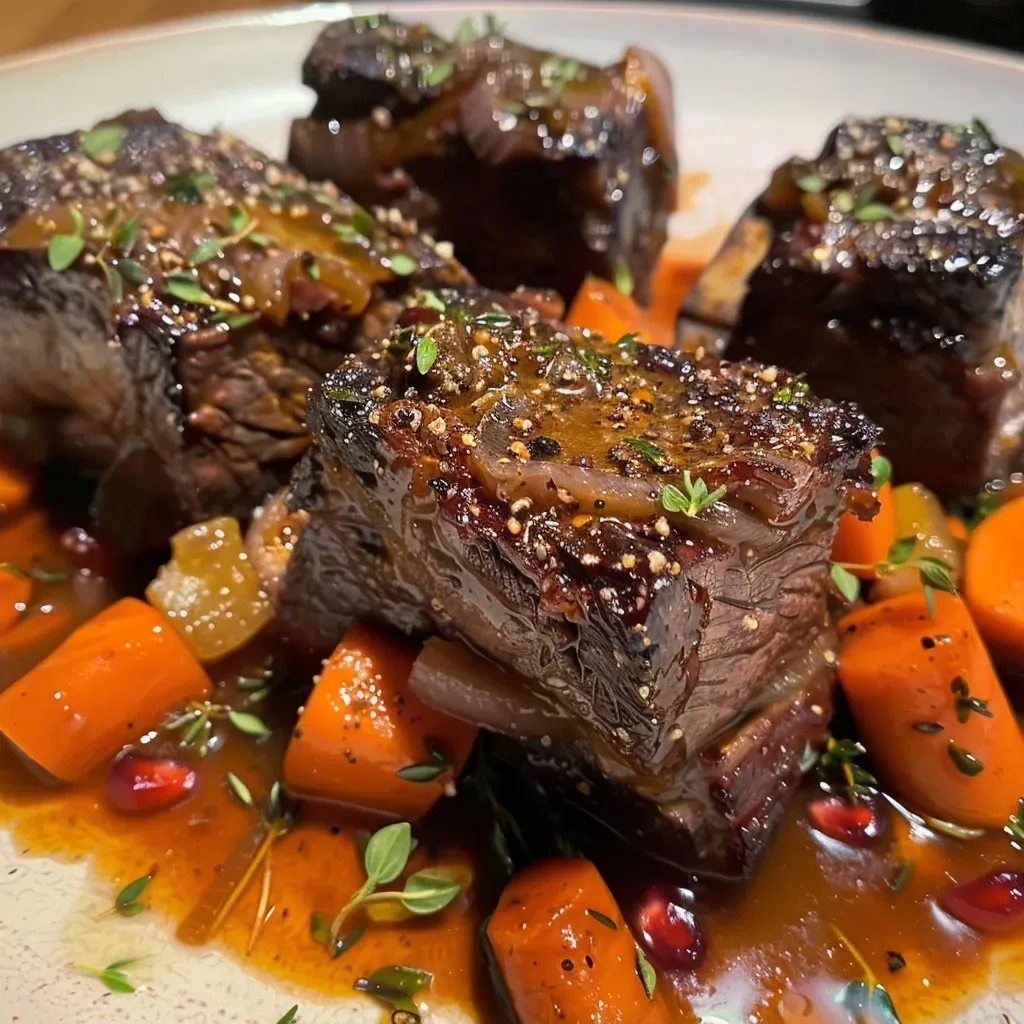
Juicy braised short ribs arranged with creamy garlic mash, highlighting rich colors and textures.

Now, let’s get into the nitty-gritty of how to prepare these delicious braised short ribs. Follow these steps for a mouthwatering result:

  • Prepare the Ribs: Season the beef short ribs generously with salt and pepper.
  • Heat the Oil: In a large pot or Dutch oven, heat the olive oil over medium-high heat.
  • Sear the Ribs: Add the short ribs to the pot, browning them on all sides. This takes about 5-7 minutes.
  • Add Onions: Once the ribs are browned, remove them from the pot and set aside. Add the chopped onions to the pot, cooking until they are soft and translucent.
  • Deglaze the Pan: Pour in your red wine, scraping the bottom of the pot to release those flavorful bits. Let it simmer for a few minutes.
  • Return the Ribs: Place the short ribs back into the pot, adding enough beef broth to cover the meat halfway.
  • Simmer Low and Slow: Cover the pot and let it simmer on low heat for 2-3 hours, or until the meat is tender and falling off the bone.

Pro Tips for Perfect Short Ribs

To help you achieve the best results, here are some expert tips:

  • Patience is Key: Allow the ribs to cook low and slow for the best texture. Rushing this process may lead to tougher meat.
  • Make it Ahead: Braised short ribs often taste better the next day, as the flavors deepen overnight.
  • Use Quality Ingredients: The quality of your beef and wine will significantly impact the final flavor of the dish.
  • Don’t Skip the Browning: Searing the meat creates a beautiful crust and adds layers of flavor to the dish.
  • Adjust Seasoning: Taste the cooking liquid before serving and adjust the seasoning as needed for balance.
  • Let it Rest: Allow the meat to rest for a few minutes before serving to retain its juices.
  • Use a Heavy Pot: A Dutch oven is ideal for braising, as it distributes heat evenly.
  • Consider Herbs: Fresh herbs like rosemary or thyme can be added for an aromatic boost.

Common Mistakes and Troubleshooting

Even the best recipes can have hiccups. Here’s how to avoid common pitfalls:

  • Overcrowding the Pot: If you crowd the pot while searing, the meat will steam instead of brown. Work in batches if needed.
  • Skipping Deglazing: This step is crucial for developing flavor. Don’t skip it!
  • Cooking at High Heat: Braising is all about low and slow. High heat can dry out the meat.
  • Not Using Enough Liquid: Ensure there’s enough liquid in the pot to prevent burning and to create a rich sauce.

Variations to Explore

Here are some delightful twists on the classic braised short ribs:

  • Bourbon Short Ribs: Add a splash of bourbon to the braising liquid for a sweet, smoky flavor.
  • Cajun Short Ribs: Incorporate Cajun spices for a spicy kick that reflects Southern roots.
  • Garlic and Herb Short Ribs: Enhance the dish with fresh garlic and herbs like rosemary or thyme.
  • Beef Bourguignon-style Short Ribs: Adapt this recipe by adding mushrooms and carrots for a French-inspired variation.

Storage and Make-Ahead Instructions

These ribs are perfect for meal prep! Here’s how to store and reheat:

  • Refrigerate: Store leftovers in an airtight container in the fridge for up to 3 days.
  • Freeze: For longer storage, freeze braised short ribs in a sealed container for up to 3 months.
  • Reheat Gently: When ready to enjoy, reheat the ribs slowly on the stovetop or in the oven, adding a splash of broth to keep them moist.

Frequently Asked Questions

Here are some common questions about braised short ribs:

  • Can I use boneless short ribs? Yes, but bone-in ribs tend to be more flavorful and tender.
  • What’s the best wine to use? A dry red wine like Cabernet Sauvignon or Merlot works beautifully.
  • How can I make this dish gluten-free? Use gluten-free broth and ensure your wine is gluten-free.
  • Can I cook these ribs in a slow cooker? Yes, you can adapt this recipe for a slow cooker; just sear the ribs first.
  • What sides pair well with short ribs? Creamy garlic mash, roasted vegetables, or a fresh salad complement the dish perfectly.
  • How do I know when the ribs are done? The meat should be tender and falling off the bone when done.
  • Can I add vegetables to the braise? Absolutely! Carrots, potatoes, and mushrooms can enhance the dish.
  • What’s the best way to serve these ribs? Serve with a drizzle of the cooking sauce and fresh herbs for a beautiful presentation.

Nutritional Considerations and Dietary Adaptations

For those mindful of their nutrition, here are some adaptations to consider:

  • Lean Cuts: Choose leaner cuts of beef for a healthier option.
  • Low-Sodium Broth: Use low-sodium beef broth to control salt intake.
  • Vegetarian Option: Substitute mushrooms or jackfruit for a plant-based version.

Essential Equipment for Success

To make this recipe shine, here’s what you’ll need:

  • Heavy Pot or Dutch Oven: Essential for even heat distribution while braising.
  • Wooden Spoon: Ideal for deglazing the pot and stirring ingredients.
  • Meat Thermometer: Helpful for checking doneness.
  • Cutting Board and Knife: For prepping your ingredients with ease.

Serving Suggestions

To round out your meal, consider these delightful serving suggestions:

  • Serve with Garlic Mashed Potatoes: Creamy potatoes complement the rich flavor of the ribs.
  • Pair with a Fresh Salad: A simple green salad adds a refreshing contrast.
  • Crusty Bread: Perfect for mopping up the delicious sauce.

So there you have it! A heartfelt exploration into the world of braised short ribs, where every bite tells a story. I hope this recipe brings warmth to your kitchen and joy to your gatherings, reminding you that cooking is ultimately about love, connection, and cherished memories. Enjoy your cooking journey, and may your table be filled with laughter and comfort!

Braised Short Ribs with Red Wine & Garlic Mash

Prep Time 20 minutes
Cook Time 3 hours
Total Time 3 hours 20 minutes
Servings 4 servings
Calories 650
Enjoy tender, flavorful short ribs braised in red wine, served with creamy garlic mashed potatoes for a hearty meal.

Ingredients

Main Ingredients

  • 3 lbs beef short ribs
  • Salt & black pepper (to taste) Salt & black pepper (to taste)
  • 2 tbsp olive oil
  • 1 large onion, chopped

Instructions 

  • Season the short ribs with salt and pepper.
  • Heat olive oil in a large pot and brown the short ribs on all sides.
  • Add chopped onion and cook until translucent.
  • Pour in red wine, cover, and braise on low heat for 3 hours until meat is tender.
  • Serve the short ribs with garlic mashed potatoes.

Notes

For extra flavor, add herbs like thyme or rosemary during braising.
Calories: 650kcal
Cost: $25
Course: Main Course
Cuisine: American
Keyword: beef, Red Wine

Welcome to a Flavorful Journey with Taco Stuffed Butternut Squash

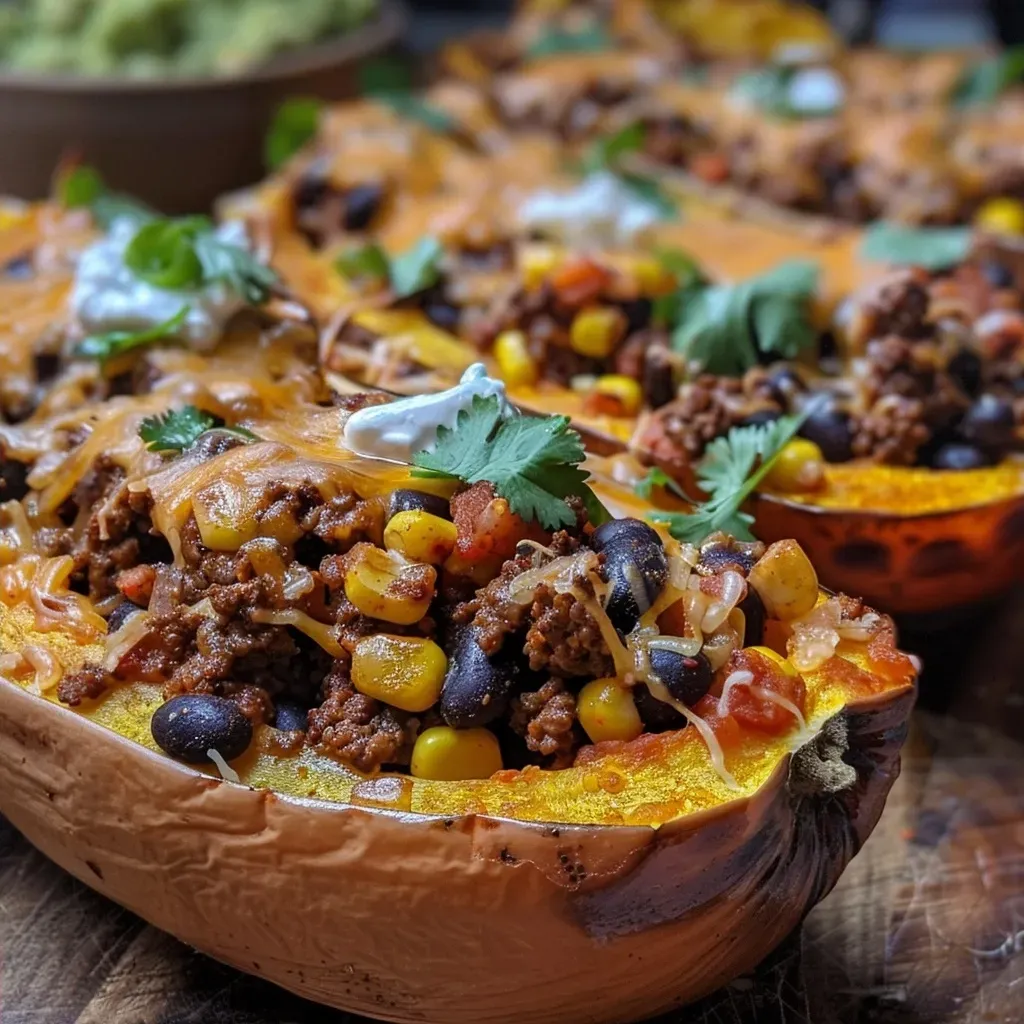
Gather around, my friends! Today, we’re diving into a recipe that brings back memories of family gatherings and the warmth of home-cooked meals. This taco stuffed butternut squash combines the rich, sweet flavors of the squash with a hearty, spiced filling that’s sure to please everyone at the table. With its vibrant colors and delectable taste, this dish isn’t just food; it’s a celebration of love and togetherness.

Why You’ll Love This Recipe

There are countless reasons to adore this stuffed butternut squash, but here are just a few:

  • Comforting and Satisfying: The combination of tender squash and savory taco filling creates a cozy dish that feels like a warm hug.
  • Nutritious Goodness: Packed with vitamins, fiber, and protein, this meal is a healthy option that doesn’t skimp on flavor.
  • Versatile Ingredients: You can easily swap out ingredients based on what you have at home or to accommodate dietary preferences.
  • Make Ahead Friendly: Prep this dish ahead of time for those busy weeknights or special gatherings.
  • Perfect for Sharing: Whether it’s a family dinner or a potluck, this recipe is made for sharing and creating memories together.

Ingredients You’ll Need

To make this delightful taco stuffed butternut squash, gather the following ingredients:


Meal Prep Container Set

★ Recommended Kitchen Tool

Meal Prep Container Set

Make this recipe even easier with a quality Meal Prep Container Set — a must-have kitchen staple!


🛒 See Deals on Amazon →

As an Amazon Associate, we earn from qualifying purchases.
  • 2 medium sized butternut squash: Ensure they’re ripe and firm for the best flavor.
  • 2 tbsp unsalted butter (melted): This adds a rich flavor to the squash.
  • Kosher salt: For seasoning the squash.
  • 1 tbsp olive oil: Used for browning the beef and adds depth of flavor.
  • 1 lb ground beef: You can substitute with ground turkey, chicken, or a plant-based alternative like lentils or beans.
  • 1 medium white onion (diced): Adds sweetness and depth to the filling.
  • 4 cloves garlic (minced): For that aromatic touch.
  • 2 tbsp taco seasoning: You can use store-bought or homemade for a personalized touch.
  • 1 tsp ground cumin: Adds warmth and earthiness.
  • 1 tsp smoked paprika: For a subtle smokiness.
  • Salt and pepper: To taste.
  • 1 can black beans (15oz – drained and rinsed): Provides protein and fiber.
  • 1 cup corn kernels (drained and rinsed): Adds sweetness and color.
  • 1 cup cheddar cheese (shredded, divided): For gooey deliciousness.
  • ½ cup Colby Jack cheese (shredded): To complement the cheddar’s flavor.
  • Sour cream: For a creamy topping.
  • Fresh chopped cilantro: A burst of freshness.
  • Fresh lime juice: Brightens the entire dish.
  • Guacamole: A delicious finishing touch.

How to Make Taco Stuffed Butternut Squash

Juicy taco stuffed butternut squash with visible layers of beef, beans, and cheese.

Now, let’s get cooking! Follow these simple steps to create your taco stuffed butternut squash:

  • Preheat the oven: Begin by preheating your oven to 400°F (204°C). This ensures a perfectly roasted squash.
  • Prepare the squash: Wash the butternut squash under running water. Cut off the stem and slice lengthwise into four equal halves. Scoop out the seeds with a spoon.
  • Roast the squash: Arrange the squash halves on a sheet pan, brush with melted butter, and season with kosher salt. Roast in the oven for 50–60 minutes, or until fork-tender.
  • Cook the filling: In a skillet, heat olive oil over medium heat. Brown the ground beef, seasoning with salt and pepper. Stir in the diced onion and minced garlic, cooking until the onion is translucent.
  • Add spices: Mix in taco seasoning, cumin, smoked paprika, drained black beans, and corn. Cook for an additional 3–5 minutes, stirring until the mixture is well combined. Add ½ cup of cheddar cheese until melted.
  • Fill the squash: Remove the roasted squash from the oven and scoop out some of the pulp to create a cavity. Fill generously with the taco meat mixture.
  • Top with cheese: Sprinkle the remaining cheddar and Colby Jack cheese over the filled squash. Broil for 2-3 minutes until the cheese is melted and bubbly.
  • Garnish and serve: Top with sour cream, chopped cilantro, and a squeeze of fresh lime juice. Serve hot alongside homemade guacamole for a delightful experience!

Pro Tips for Success

Here are some expert insights to ensure your taco stuffed butternut squash turns out perfectly every time:

  • Choose ripe squash: A firm and heavy butternut squash is best for this recipe.
  • Don’t rush the roasting: Allow the squash to roast until it’s fork-tender; this brings out its natural sweetness.
  • Customize your filling: Feel free to add diced tomatoes, bell peppers, or jalapeños to the filling for added flavor.
  • Make it vegetarian: Substitute the ground beef with lentils or quinoa for a hearty, plant-based version.
  • Experiment with toppings: Try adding avocado slices or your favorite salsa for extra flair.
  • Use fresh herbs: Fresh cilantro not only adds flavor but also enhances the visual appeal of the dish.
  • Leftover squash pulp: Save any leftover squash pulp for soups or smoothies; it’s nutritious and delicious!
  • Broil carefully: Keep an eye on the broiler to prevent the cheese from burning.

Common Mistakes and Troubleshooting

Even the best chefs make mistakes! Here are some common pitfalls and how to avoid them:

  • Overcooking the squash: If the squash is too mushy, it may collapse when filled. Roast until just tender.
  • Underseasoning: Don’t skimp on the seasoning in the filling; it’s essential for flavor.
  • Too much liquid in filling: Ensure black beans and corn are well-drained to avoid a soggy filling.
  • Burnt cheese: Keep a close watch while broiling to achieve that perfect bubbly texture without burning.

Creative Recipe Variations

If you’re feeling adventurous, here are some variations to try:

  • Mexican Quinoa Stuffed Squash: Replace ground beef with cooked quinoa and add spices for a nutritious twist.
  • Sweet Potato Taco Boats: Swap butternut squash for sweet potatoes for a different flavor profile.
  • Tex-Mex Stuffed Peppers: Use bell peppers instead of squash for a colorful presentation.
  • Buffalo Chicken Stuffed Squash: Mix shredded cooked chicken with buffalo sauce for a spicy kick.

Storage and Make-Ahead Instructions

This recipe is perfect for meal prep! Here’s how to store and make it ahead of time:

  • Make ahead: Prepare the filling a day in advance and store it in the refrigerator. Roast the squash fresh before serving.
  • Storing leftovers: Store any leftover stuffed squash in an airtight container in the fridge for up to 3 days.
  • Freezing options: You can freeze the filling separately. Thaw and reheat before filling the roasted squash.

Frequently Asked Questions

Here are some common questions about making taco stuffed butternut squash:

  • Can I use a different type of squash? Yes, acorn squash or spaghetti squash also works well for stuffing.
  • How do I know when the squash is done? The squash should be fork-tender when it’s fully roasted.
  • Can I make this dish vegan? Absolutely! Substitute the meat with lentils, and use vegan cheese and sour cream.
  • What can I serve with this dish? A simple green salad or Mexican rice pairs nicely with stuffed squash.
  • Is this recipe gluten-free? Yes, all the ingredients are naturally gluten-free. Just check your taco seasoning label.
  • How can I spice it up? Add jalapeños or a dash of hot sauce to the filling for extra heat.
  • Can I grill the squash instead of roasting it? Yes, grilling adds a lovely smoky flavor to the squash.
  • What’s the best way to reheat leftovers? Reheat in the oven for best results, but the microwave works in a pinch!

Nutritional Tips and Dietary Adaptations

This taco stuffed butternut squash is not only delicious but also provides a balanced meal:

  • High in fiber: The butternut squash and black beans contribute to a filling meal that supports digestive health.
  • Protein-packed: Ground beef or plant-based alternatives give you the protein needed for a well-rounded diet.
  • Low-carb option: This dish is a great low-carb choice for those monitoring their carbohydrate intake.

Equipment Recommendations

To make this dish, you’ll need:

  • Sharp knife: For cutting the squash easily.
  • Baking sheet: A sturdy sheet pan for roasting.
  • Skillet: For cooking the filling on the stovetop.
  • Measuring cups and spoons: For accurate ingredient measurements.

Serving Suggestions

To elevate your taco stuffed butternut squash experience, consider these serving ideas:

  • Pair with a side salad: A fresh green salad with a tangy vinaigrette complements the rich flavors.
  • Serve with chips and salsa: For a crunchy contrast, serve alongside tortilla chips and your favorite salsa.
  • Offer a variety of toppings: Set up a taco bar with additional toppings like diced tomatoes, olives, and extra cheese.

Conclusion: A Heartfelt Recipe to Share

Cooking is a labor of love, and this taco stuffed butternut squash recipe is a perfect reflection of that sentiment. As you gather with your loved ones around the table, remember that every bite carries the warmth of home and the joy of sharing. Enjoy this dish as a reminder that food is not just about sustenance; it’s about connection, memories, and loving moments. So, roll up your sleeves, get cooking, and create your own heartwarming stories around the family table!

Taco stuffed Butternut Squash

Prep Time 20 minutes
Cook Time 1 hour
Total Time 1 hour 20 minutes
Servings 4 servings
Calories 650
A delicious and hearty vegetarian-inspired dish featuring roasted butternut squash filled with flavorful taco meat and cheese, topped with fresh garnishes.

Ingredients

Vegetables and Fruits

  • 2 medium Butternut squash (washed and scrubbed)
  • 2 tbsp Unsalted butter (melted)
  • 1 tbsp Olive oil

Meat and Legumes

  • 1 lbs Ground Beef
  • 1 can 15oz black beans (drained and rinsed)
  • 1 cup corn kernels (drained and rinsed)

Dairy

  • 1.5 cups cheddar cheese (shredded, divided)
  • ½ cup Colby Jack cheese (shredded)
  • Sour cream Sour cream
  • Fresh chopped cilantro Cilantro (for topping)
  • Fresh lime juice Lime juice (for topping)
  • Guacamole Guacamole (for serving)

Spices and Seasonings

  • 4 cloves garlic (minced)
  • 2 tbsp Taco Seasoning
  • 1 tsp Ground Cumin
  • 1 tsp Smoked Paprika
  • salt and pepper Salt and Pepper (to taste)

Instructions 

  • Preheat oven to 400°F (200°C). Cut squash in half, remove seeds, brush with melted butter, and season with salt. Roast for 50-60 minutes until soft.
  • Cook ground beef with salt and pepper, stir in taco seasoning, cumin, paprika, black beans, and corn. Melt in ½ cup cheddar cheese.
  • Scoop out some squash pulp to create cavities, fill with meat mixture, top with remaining cheddar and Colby Jack cheese. Broil for 2-3 minutes until bubbly.
  • Garnish with sour cream, cilantro, and lime juice. Serve hot with guacamole.

Notes

For extra flavor, toast the spices before adding to the meat mixture.
Calories: 650kcal
Cost: $15
Course: Main Course
Cuisine: American
Keyword: squash, Tacos, vegetarian

Embrace Autumn with Our Heartwarming Mini Pumpkin Pie Cups

As the leaves begin to turn and the air gets a little crisper, nothing warms the heart quite like the aroma of freshly baked pumpkin pie. Imagine gathering around the table with family and friends, sharing sweet bites of nostalgia that remind us of home. These Mini Pumpkin Pie Cups are not just desserts; they are little pockets of love that celebrate the season and invite everyone to partake in the joy of cooking. With simple ingredients and a dash of creativity, you can create a treat that is perfect for any holiday gathering or cozy evening at home.

In this comprehensive guide, we will dive deep into the world of these delightful mini pumpkin pie cups. From the ingredients you’ll need to tips for perfecting your recipe, we aim to ensure that every bite is a reflection of warmth and togetherness. So, roll up your sleeves and let’s make some memories in the kitchen!

Why You’ll Love These Mini Pumpkin Pie Cups

  • Perfectly portioned: These mini cups are just the right size for everyone to enjoy without the mess of slicing a traditional pie.
  • Easy to make: With just a handful of ingredients and simple steps, you can whip these up in a flash, making them ideal for a last-minute treat.
  • Wholesome ingredients: Packed with nutritious elements like almond flour and pumpkin puree, these cups are a guilt-free indulgence.
  • Customizable: From gluten-free options to different toppings, you can easily adapt the recipe to fit your dietary needs and preferences.
  • Great for gatherings: Whether it’s a holiday party or a cozy family dinner, these mini pumpkin pie cups are sure to impress your guests.

Ingredients You’ll Need to Create Magic

To create these delightful Mini Pumpkin Pie Cups, you’ll need the following ingredients:


Professional Chef Knife Set

★ Recommended Kitchen Tool

Professional Chef Knife Set

Make this recipe even easier with a quality Professional Chef Knife Set — a must-have kitchen staple!


🛒 See Deals on Amazon →

As an Amazon Associate, we earn from qualifying purchases.
  • 1/2 cup almond flour: A gluten-free alternative that adds a nutty flavor and a great texture.
  • 1/4 cup coconut flour: This flour helps bind the crust together while keeping it light.
  • 3 tbsp coconut oil (melted): For a rich and buttery flavor while keeping it dairy-free.
  • 2 tbsp maple syrup: A natural sweetener that adds warmth and depth to the crust.
  • 1/2 cup cashew butter (or nut/seed butter of choice): This ingredient adds creaminess and healthy fats.
  • 1/2 cup coconut oil: To create a luscious filling texture.
  • 1/3 cup pumpkin puree: The star of the show, bringing that classic pumpkin flavor.
  • 1/4 cup maple syrup: For sweetness in the filling without the refined sugar.
  • 1 tsp vanilla extract: To enhance the flavors and add a touch of sweetness.
  • 2 tsp pumpkin pie spice: A blend of spices that embodies the essence of fall.
  • 1/4 tsp sea salt: Balances the sweetness and enhances the flavors.

Feel free to explore ingredient substitutions based on your preferences or what you have on hand. For a nut-free version, consider using sunflower seed butter or tahini instead of nut butter. You can also try using different sweeteners like honey or agave syrup for a unique twist.

How to Make Mini Pumpkin Pie Cups: Step-by-Step Instructions

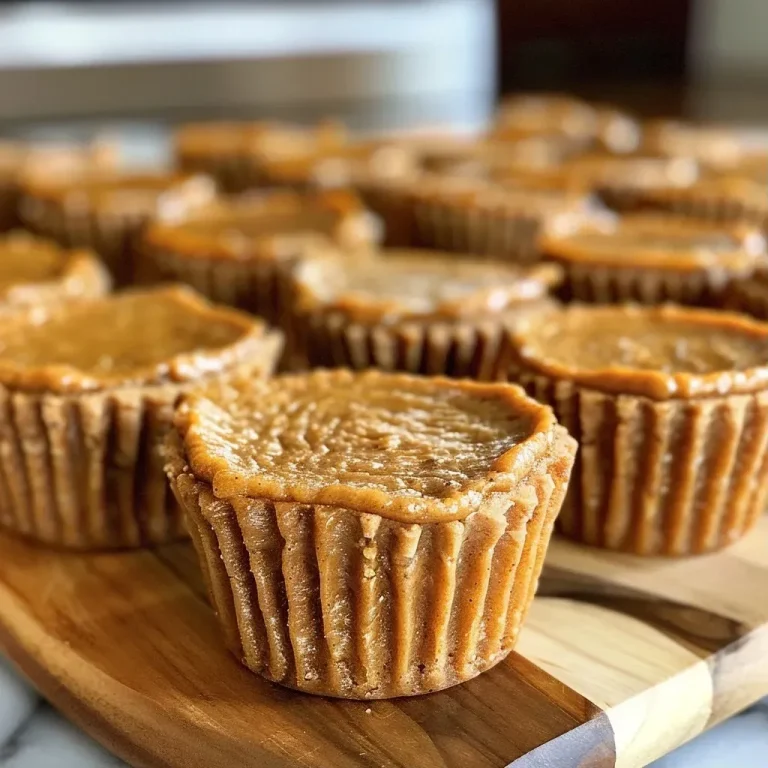
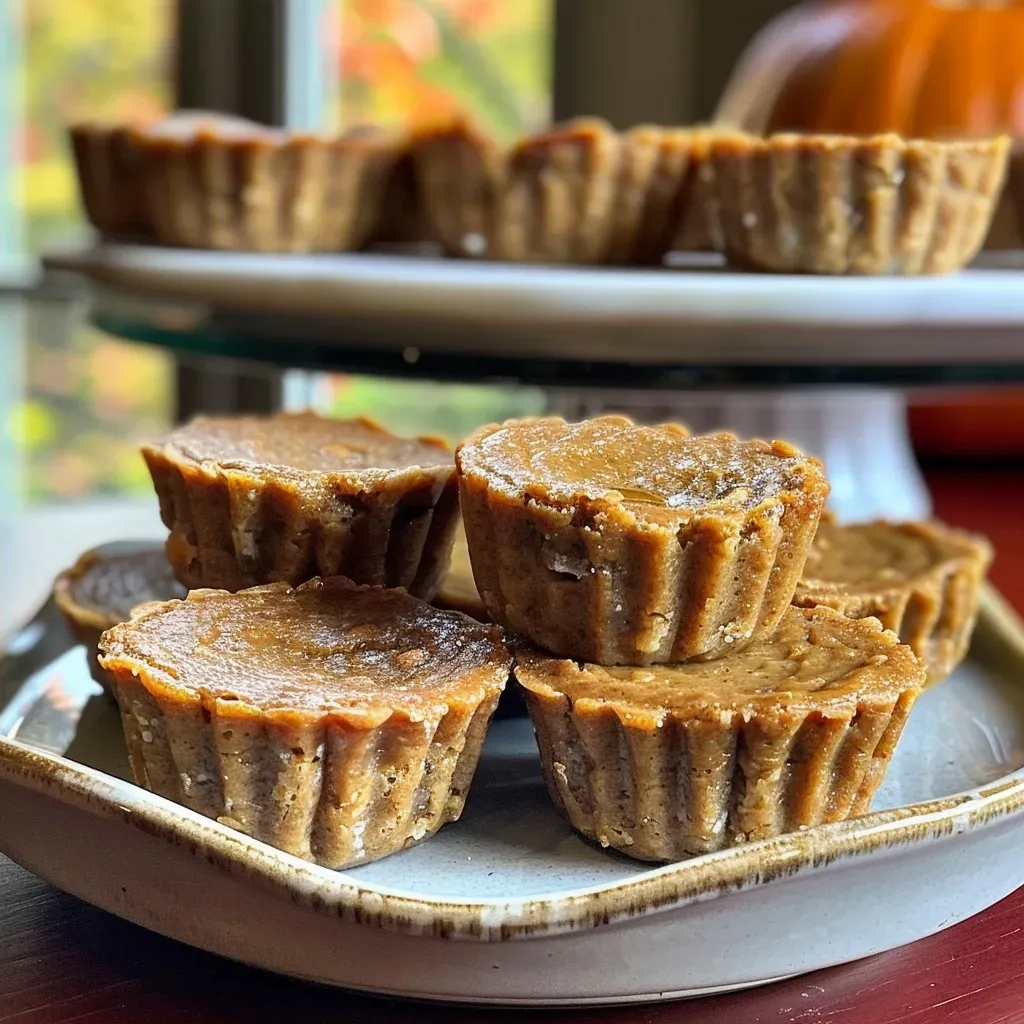
Side view of delicious mini pumpkin pie cups served on a rustic wooden table.

Let’s bring these mini pumpkin pie cups to life with a simple yet effective procedure that ensures perfect results:

  1. Preheat your oven: Set your oven to 350°F (175°C) and prepare a cupcake tin by placing liners in each cup.
  2. Prepare the crust: In a mixing bowl, combine the almond flour, coconut flour, melted coconut oil, and maple syrup. Mix until a dough forms. Scoop about 1 tablespoon of the mixture into each cupcake liner and press it down firmly to form the crust.
  3. Bake the crust: Bake the crust for 12 minutes or until the edges are golden brown. Once done, let it cool completely.
  4. Make the filling: In another bowl, combine the cashew butter, coconut oil, pumpkin puree, maple syrup, vanilla extract, pumpkin pie spice, and sea salt. Microwave the mixture for 15-30 seconds (or heat on the stovetop) and stir until fully combined and smooth.
  5. Fill the cups: Pour the pumpkin mixture over the cooled crust layer and spread it evenly.
  6. Chill: Place the filled cupcake tin in the freezer for at least two hours, allowing the layers to set properly.
  7. Serve and enjoy: Once set, remove the mini pumpkin pie cups from the liners, serve chilled, and, if you like, top with whipped cream or a sprinkle of extra pumpkin pie spice.

Expert Tips for the Best Mini Pumpkin Pie Cups

  • Don’t skip the chilling: Allowing the cups to chill is crucial for achieving the perfect texture.
  • Use quality ingredients: The flavor and texture of your mini pumpkin pie cups greatly depend on the quality of the ingredients used.
  • Mix well: Ensure all ingredients are mixed thoroughly to avoid clumps in your filling.
  • Be patient: Let the crust cool completely before adding the filling to prevent a soggy base.
  • Experiment with flavors: Feel free to add chocolate chips or nuts to the filling for a delightful twist.
  • Top it off: Consider serving with a dollop of whipped cream or a drizzle of caramel for added richness.
  • Make ahead: These mini pumpkin pie cups can be prepared a day in advance, making them a convenient option for busy days.
  • Storage: Keep any leftovers in an airtight container in the refrigerator for up to four days.

Common Mistakes and Troubleshooting

Even the best cooks can face challenges. Here are some common mistakes and solutions:

  • Crust falling apart: Ensure you’ve mixed the crust ingredients well and pressed it firmly into the liners.
  • Filling not setting: If the filling is too warm when poured onto the crust, it may not set properly. Chill the filling before pouring.
  • Overbaking the crust: Keep an eye on the crust; it should be golden brown but not overdone to maintain a soft texture.

Creative Variations to Explore

Don’t hesitate to get creative with your mini pumpkin pie cups. Here are some fun variations:

  • Chocolate Pumpkin Cups: Add chocolate chips to the filling for a rich, chocolatey twist.
  • Spiced Pecan Topping: Top with crushed pecans mixed with a touch of cinnamon for added crunch.
  • Maple Whipped Cream: Serve with whipped cream sweetened with maple syrup for a delightful topping.
  • Caramel Drizzle: Drizzle caramel sauce over the top for a sweet finish that pairs beautifully with pumpkin.

Storage and Make-Ahead Instructions

These mini pumpkin pie cups are excellent for meal prep and can be stored in the refrigerator for up to four days. For optimal freshness:

  • Keep them in an airtight container to prevent drying out.
  • If you plan to make them ahead of time, consider freezing them for up to two months. Just be sure to let them thaw in the fridge before serving.

Frequently Asked Questions About Mini Pumpkin Pie Cups

  • Can I use fresh pumpkin instead of canned? Yes, just make sure to cook and puree the pumpkin until smooth.
  • Are these mini pumpkin pie cups gluten-free? Absolutely! Using almond and coconut flour makes them gluten-free.
  • Can I substitute the nut butter? Yes, feel free to use sunflower seed butter or tahini for nut-free options.
  • How do I know when they are done? The filling should be set and slightly firm to the touch after chilling.
  • Can I make these dairy-free? Yes, using coconut oil and nut butter ensures they are dairy-free.
  • What can I use instead of maple syrup? Honey or agave syrup can be used as alternatives.
  • Can I use a muffin tin instead of a cupcake tin? Yes, a muffin tin works just as well; just adjust the baking time as needed.
  • How can I make these mini pumpkin pie cups vegan? Use a plant-based cream and ensure your sweeteners are vegan-friendly.

Nutritional Insights and Dietary Adaptations

These mini pumpkin pie cups not only taste fantastic but can also fit into various dietary plans. Here’s a quick overview of their nutritional benefits:

  • Rich in fiber: Pumpkin and almond flour contribute to a high fiber content, promoting digestive health.
  • Healthy fats: The use of nut butter and coconut oil provides beneficial fats that can support heart health.
  • Low in refined sugar: Sweetened naturally with maple syrup, they are a healthier alternative to traditional desserts.

Equipment Recommendations

For this recipe, you will need:

  • Cupcake or muffin tin: Essential for shaping your mini pie cups.
  • Mixing bowls: To combine your crust and filling ingredients effectively.
  • Measuring cups and spoons: For accurate ingredient measurements.
  • Silicone spatula: Ideal for mixing and scraping down the sides of bowls.

Serving Suggestions for a Festive Touch

When serving these mini pumpkin pie cups, consider the following tips to elevate your presentation:

  • Garnish: Top with a dollop of whipped cream and a sprinkle of cinnamon for an appealing look.
  • Serving platter: Arrange them on a decorative platter with autumn leaves or seasonal decor for a festive touch.
  • Pairing: Serve alongside spiced cider or hot chocolate for a cozy experience.

Cooking is more than just a task; it’s a way of connecting with our loved ones and preserving memories. As you gather around your table with these mini pumpkin pie cups, remember that each bite carries the warmth and love of your kitchen. Happy cooking, and may your autumn be filled with joy, laughter, and delicious treats!

Mini Pumpkin Pie Cups

Prep Time 15 minutes
Cook Time 12 minutes
Total Time 27 minutes
Servings 12 pieces
Calories 150
Delight in these easy, bite-sized pumpkin pies with a crunchy crust and creamy filling, perfect for fall gatherings or a cozy treat.

Ingredients

Crust

  • 1/2 cup almond flour
  • 1/4 cup coconut flour
  • 3 tbsp coconut oil (melted)
  • 2 tbsp maple syrup

Pumpkin Layer

  • 1/2 cup cashew butter (or nut/seed butter of choice)
  • 1/3 cup pumpkin puree
  • 1/4 cup maple syrup
  • 1 tsp vanilla extract
  • 2 tsp pumpkin pie spice
  • 1/4 tsp sea salt

Instructions 

  • Preheat oven to 350°F (175°C). Line cupcake tin with liners.
  • Mix crust ingredients, scoop 1 tbsp into each liner, and press into shape.
  • Bake for 12 minutes, then cool completely.
  • Combine pumpkin layer ingredients, microwave briefly, and stir until smooth.
  • Pour pumpkin filling over crusts and freeze for at least 2 hours. Serve topped with whipped cream if desired.

Notes

Use high-quality ingredients for best flavor. Keep refrigerated if not serving immediately.
Calories: 150kcal
Cost: $10
Course: Dessert
Cuisine: American
Keyword: Pumpkin

Embrace the Warmth with Turmeric Coconut Butternut Squash Soup

There’s something undeniably comforting about a bowl of soup that evokes memories of family gatherings and cherished recipes. This Turmeric Coconut Butternut Squash Soup is not just a meal; it’s a hug in a bowl, infused with the warmth of spices and the love of home. As we gather around the table, let’s explore how this delightful dish can nourish both body and soul, all while keeping traditions alive.

Why You’ll Love This Recipe

Here’s why this soup will become a staple in your kitchen:

  • Comforting flavors: The combination of butternut squash, coconut milk, and turmeric creates a creamy, rich base that warms you from the inside out.
  • Easy to prepare: With simple ingredients and straightforward steps, even novice cooks can whip up this delightful dish.
  • Health benefits: Turmeric is renowned for its anti-inflammatory properties, while butternut squash is packed with vitamins A and C, making this soup both delicious and nutritious.
  • Versatile ingredients: This recipe allows for various substitutions, so you can customize it according to your pantry and preferences.
  • Perfect for gatherings: Serve it at gatherings or family dinners; it’s bound to impress everyone at the table!

Ingredient Breakdown

Let’s dive deeper into each ingredient, ensuring you understand their roles and possible substitutions:


Professional Chef Knife Set

★ Recommended Kitchen Tool

Professional Chef Knife Set

Make this recipe even easier with a quality Professional Chef Knife Set — a must-have kitchen staple!


🛒 See Deals on Amazon →

As an Amazon Associate, we earn from qualifying purchases.
  • Butternut Squash: The star of this recipe, providing a sweet, nutty flavor. Substitute with pumpkin or sweet potatoes if needed.
  • Onion: Adds depth and sweetness. Shallots can be used as an alternative for a milder taste.
  • Ginger: Fresh ginger brings warmth and spice. Ground ginger can be an emergency substitute, but fresh is preferred.
  • Ground Turmeric: This golden spice not only adds color but has incredible health benefits. If unavailable, curry powder can be a substitute, though it will change the flavor profile slightly.
  • Coconut Milk: Provides creaminess. For a lighter option, use almond milk or another non-dairy milk, but the flavor will vary.
  • Chickpeas: Add protein and texture. Feel free to replace with white beans or lentils.
  • Ghee: Adds richness. Olive oil is a great alternative for a lighter option.
  • Fresh Coriander: A bright finishing touch. If you’re not a fan, parsley or basil can be used instead.

Pro Tips for Perfect Soup

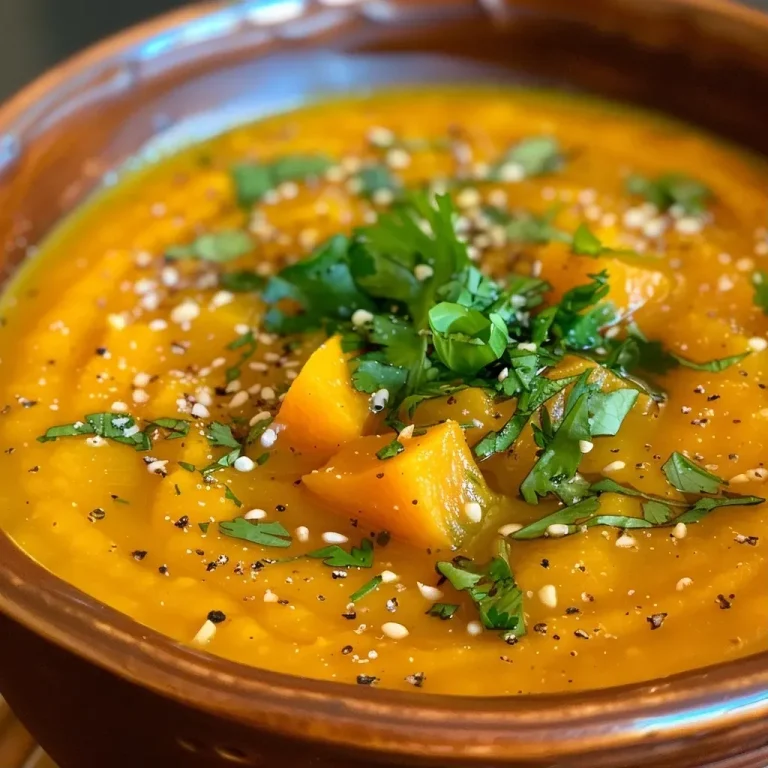
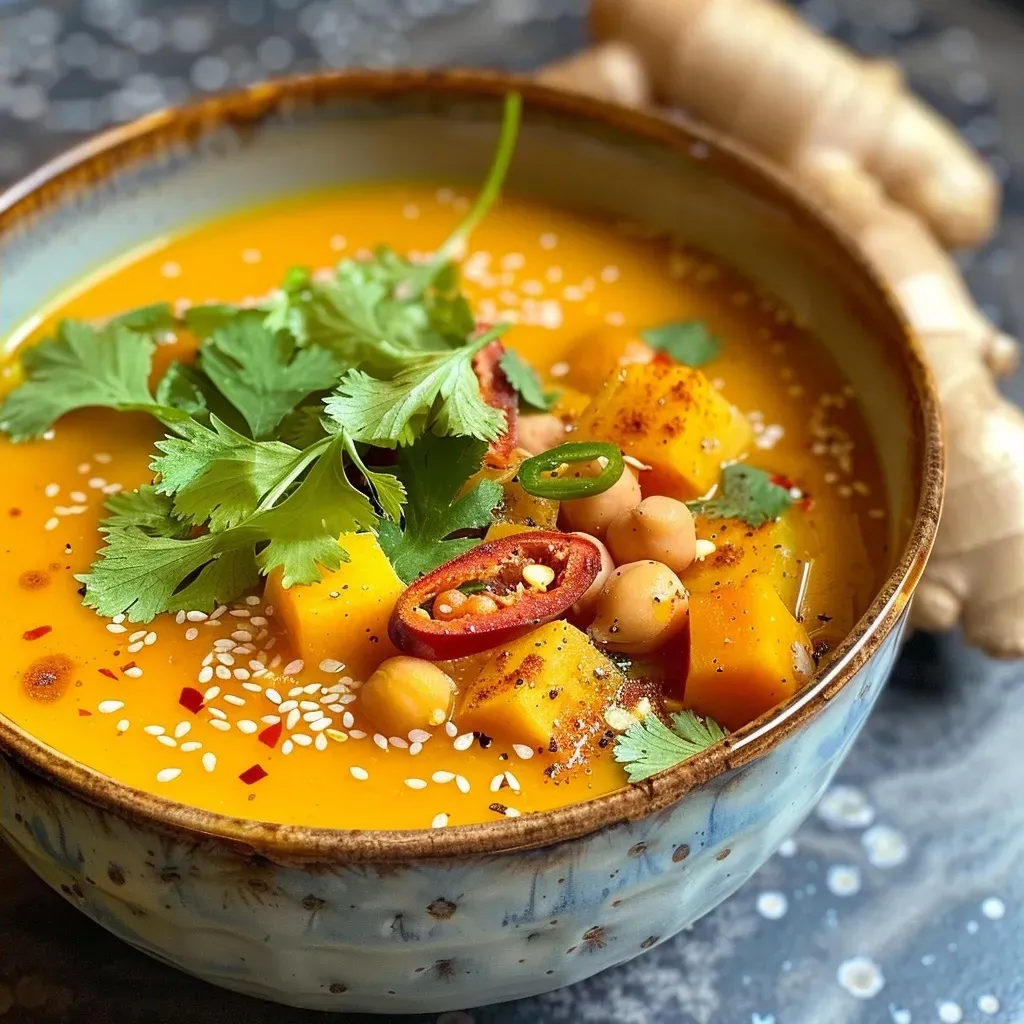
A side view of a creamy butternut squash soup with a golden hue, featuring spices and herbs on top.

To elevate your soup-making game, consider these expert insights:

  • Roasting enhances flavors: Don’t skip roasting the vegetables; this brings out their natural sweetness and depth.
  • Blend for creaminess: Ensure to blend the soup until smooth for that luxurious texture. A high-speed blender works best.
  • Adjust spice levels: Taste as you go! Feel free to add more turmeric or chili for an extra kick.
  • Make it ahead: This soup tastes even better the next day, as the flavors meld beautifully overnight.
  • Garnish creatively: Top with crispy chickpeas or a swirl of coconut milk for added texture and presentation.
  • Serve with crusty bread: Crusty artisan bread or warm naan pairs perfectly with this soup.
  • Freeze for later: Portion and freeze leftover soup for a quick meal option later.
  • Experiment with add-ins: Feel free to add spinach or kale for a nutrient boost!

Common Mistakes and Troubleshooting

Even the best chefs encounter hiccups. Here are some common pitfalls and how to avoid them:

  • Overcooking vegetables: Ensure not to over-roast your vegetables; they should be tender yet firm.
  • Too thick or too thin: If your soup is too thick, add more vegetable stock or water. If it’s too thin, let it simmer longer to reduce.
  • Not seasoning adequately: Always taste before serving; sometimes, a pinch of salt or squeeze of lemon can elevate the flavors.
  • Cold soup: Ensure to serve warm; this soup is all about that cozy warmth!

Delicious Variations

Make this soup your own with these creative variations:

  • Spicy version: Add more red chili or a dash of cayenne for a spicy kick.
  • Asian twist: Incorporate lemongrass and lime juice for a Southeast Asian flair.
  • Herbaceous delight: Mix in fresh herbs like basil or mint for a refreshing touch.
  • Protein-packed: Stir in cooked quinoa or lentils for a heartier meal.

Storage and Make-Ahead Instructions

This soup is perfect for meal prep! Here’s how to store and reheat:

  • Refrigerate: Store in an airtight container for up to 4 days.
  • Freeze: Portion into freezer-safe containers for up to 3 months. Thaw overnight in the fridge before reheating.
  • Reheat: Warm on the stove over low heat, stirring occasionally, until heated through.

Comprehensive FAQ

Let’s answer some common questions about this delicious soup:

  • Can I use frozen butternut squash? Yes, frozen butternut squash is a convenient option and works great in this recipe.
  • Is this soup vegan? Absolutely! All ingredients are plant-based, making it a heartwarming vegan dish.
  • Can I add meat to this soup? Certainly! Shredded chicken or turkey would make a lovely addition.
  • How can I make this soup spicier? Add more chili or a splash of hot sauce to taste.
  • What’s the best way to serve this soup? It’s delicious on its own, but pairs wonderfully with bread or a fresh salad.
  • Can I use yellow squash instead? Yes, yellow squash is a great alternative, though the flavor will differ slightly.
  • How long does it take to prepare? Total time is about 1 hour, including prep and cooking.
  • Can I use a different type of milk? Yes, feel free to substitute coconut milk with almond milk or cashew milk, though the taste will vary.

Nutritional Tips and Dietary Adaptations

This soup is not only delicious but can be adapted to fit various dietary needs:

  • Low-carb option: Swap butternut squash with cauliflower for a lower-carb version.
  • Gluten-free: This recipe is naturally gluten-free, perfect for those with gluten sensitivities.
  • Nut-free: Use a different fat instead of ghee or coconut milk if you have nut allergies.

Equipment Recommendations

To ensure your cooking experience is seamless, here’s what you’ll need:

  • High-speed blender: A powerful blender will give you that silky smooth texture.
  • Roasting pan: Ideal for roasting vegetables evenly.
  • Large pot: A sturdy pot is essential for simmering the soup.
  • Sharp knife: A good quality knife will make chopping easier and more efficient.

Serving Suggestions

Finally, let’s talk about how to serve your delicious soup:

  • Accompany with bread: Serve with crusty sourdough or warm naan for dipping.
  • Garnish: Fresh coriander or a drizzle of coconut milk adds a beautiful finish.
  • Pair with a salad: A light, green salad balances the richness of the soup.

In conclusion, this Turmeric Coconut Butternut Squash Soup is a heartfelt recipe that captures the essence of home cooking. Each spoonful is a reminder that cooking is not just about sustenance; it’s about love, memories, and sharing moments with those we cherish. So gather your loved ones, savor this bowl of sunshine, and relish the joy that comes from cooking together.

Turmeric Coconut Butternut Squash Soup

Prep Time 15 minutes
Cook Time 50 minutes
Total Time 1 hour 5 minutes
Servings 4 servings
Calories 250
A warm, vibrant soup combining roasted butternut squash, coconut milk, and spices, topped with crispy chickpeas and chili-ginger ghee for added flavor.

Ingredients

Vegetables

  • 2 pieces butternut squashes (cut into 1 cm chunks, reserve seeds)
  • 1 piece onion (cut into eighths)
  • 20 g ginger (thinly sliced)
  • 1 tbsp ground turmeric
  • to taste salt and pepper
  • 1 tbsp extra-virgin olive oil
  • 1 bulb garlic (top removed)
  • 400 g tinned chickpeas (drained)
  • 1 tsp cumin seeds
  • 400 ml tinned coconut milk (good-quality)
  • 400 ml vegetable stock
  • 4 tbsp ghee
  • 15 g fresh ginger (cut into thick matchsticks)
  • 1 red chilli red chilli (thinly sliced)

Herbs

  • small handful fresh coriander

Instructions 

  • Preheat oven to 200°C.
  • Roast butternut squash, onion, ginger, turmeric, and garlic for 35 mins.
  • Roast chickpeas, seeds, and cumin for 30 mins.
  • Blend roasted vegetables with coconut milk and stock, then simmer 5 mins.
  • Melt ghee, cook ginger and chilli for 2 mins, then serve soup topped with chickpeas and chili-ginger ghee.

Notes

For extra flavor, garnish with additional fresh coriander.
Calories: 250kcal
Cost: $15
Course: Soup
Cuisine: fusion
Keyword: butternut squash

Welcome to the Heart of Autumn: Small Batch Pumpkin Spice Whoopie Pies

As the leaves start to change and the air becomes crisp, there’s something truly magical about baking with pumpkin and warm spices. These Small Batch Pumpkin Spice Whoopie Pies are not just a delightful treat; they embody the warmth of shared memories, the joy of family gatherings, and the essence of home-cooked love. Imagine the scent of cinnamon wafting through your kitchen while you create these sweet, cream-filled cakes that are perfect for two or a small gathering. Let’s dive deeper into this nostalgic recipe that brings together the best of fall flavors.

Why You’ll Love This Recipe

These whoopie pies are more than just a dessert; they’re a celebration of the season and a tribute to cherished traditions. Here’s why I know you’ll adore them:

  • Perfectly Balanced Flavors: The combination of pumpkin and warm spices creates a cozy flavor profile that warms the heart and soul.
  • Small Batch Delight: Designed for smaller households or those who want to indulge without overdoing it, this recipe yields just enough for a sweet treat without leftovers.
  • Easy Assembly: The whoopie pies are simple to put together, making them an ideal baking project for beginners and seasoned bakers alike.
  • Memorable Texture: With a soft, cake-like exterior and a creamy filling, each bite is a delightful contrast that will remind you of childhood treats.
  • Versatility: This recipe can be adapted for various dietary needs, making it inclusive for everyone at your table.

Ingredients and Substitutions

Here’s a detailed list of ingredients you’ll need along with some handy substitutions to cater to your preferences or dietary restrictions:


Cake Decorating Set

★ Recommended Kitchen Tool

Cake Decorating Set

Make this recipe even easier with a quality Cake Decorating Set — a must-have kitchen staple!


🛒 View on Amazon →

As an Amazon Associate, we earn from qualifying purchases.
  • 1/2 cup all-purpose flour: For a gluten-free option, swap with almond or oat flour.
  • 1/8 teaspoon baking powder: This helps the cakes rise; ensure it’s fresh for the best results.
  • 1/8 teaspoon baking soda: A crucial component for achieving the right texture.
  • 1/8 teaspoon salt: Enhances the sweetness and balances flavors.
  • 3/4 teaspoon pumpkin pie spice: A blend of cinnamon, nutmeg, and ginger brings warmth; you can make your own blend if desired.
  • 1 large egg yolk, room temperature: Helps bind the ingredients; for a vegan option, use a flaxseed egg.
  • 3 tablespoons full-fat sour cream, room temperature: Adds richness; Greek yogurt can be used as a substitute.
  • 2 tablespoons unsalted butter, melted and cooled slightly: For a dairy-free version, use coconut oil.
  • 3 tablespoons light brown sugar: Brown sugar adds moisture and depth; coconut sugar can be a healthier alternative.
  • 3 tablespoons granulated sugar: Adjust according to your sweetness preference.
  • 1/4 cup, plus 2 tablespoons pure canned pumpkin: Make sure it’s pure pumpkin and not pumpkin pie filling for the best flavor.
  • 1/2 teaspoon vanilla extract: Adds a lovely aromatic note.
  • 2 ounces full-fat cream cheese, room temperature: Essential for the filling; a vegan cream cheese can also be used.
  • 2 tablespoons pure maple syrup: Sweetens the filling naturally.
  • 1/4 cup heavy whipping cream (cool temp.): Whipped cream adds lightness; coconut cream is a great alternative.
  • 2 tablespoons powdered sugar: For sweetness in the filling.
  • 1/2 teaspoon ground cinnamon: Enhances the autumnal flavor.
  • 1/8 teaspoon salt: Balances sweetness and enhances flavors.

Step-by-Step Instructions

Delicious small batch pumpkin spice whoopie pies with a smooth cream filling, viewed from the side.

Follow these simple steps to create your Small Batch Pumpkin Spice Whoopie Pies:

  • Preheat your oven: Set it to 350°F (175°C) and prepare a baking sheet with parchment paper.
  • Mix dry ingredients: In a bowl, whisk together the flour, baking powder, baking soda, salt, and pumpkin pie spice.
  • Combine wet ingredients: In another bowl, beat together the egg yolk, sour cream, melted butter, brown sugar, granulated sugar, pumpkin, and vanilla until smooth.
  • Incorporate dry into wet: Gradually add the dry mixture to the wet, stirring just until combined. Avoid overmixing.
  • Scoop and shape: Use a cookie scoop to portion the mixture onto the prepared baking sheet, ensuring even spacing.
  • Bake: Place in the oven for 10-12 minutes, or until the tops are set but soft to the touch.
  • Cool completely: Allow the cakes to cool on the baking sheet for a few minutes before transferring to a wire rack.

Crafting the Creamy Filling

While the cakes cool, let’s prepare the delightful cream cheese filling:

  • Beat the cream cheese: In a bowl, mix the cream cheese until smooth.
  • Add maple syrup: Gradually mix in the maple syrup, then add the heavy cream and powdered sugar, beating until fluffy.
  • Incorporate cinnamon: Add ground cinnamon and a pinch of salt for flavor.

Assembling Your Whoopie Pies

Once everything is cool and ready, it’s time to put together these delightful treats:

  • Spread the filling: Take one cake, and generously spread the cream cheese filling on the flat side.
  • Top with another cake: Place a second cake on top, flat side down, to create your whoopie pie.
  • Repeat: Continue this process until all cakes are filled.

Common Mistakes and Troubleshooting

Even the best bakers can face challenges; here are some common pitfalls and how to avoid them:

  • Dry cakes: Ensure not to overbake your whoopie pies; they should be soft and cake-like.
  • Filling too runny: Make sure your cream cheese is at room temperature for smooth mixing; chill the filling if it’s too soft before using.
  • Cakes spread too much: Check your baking powder and baking soda for freshness and ensure your butter isn’t too hot when mixing.

Flavor Variations

Feel free to get creative with your whoopie pies! Here are a few delightful variations:

  • Chocolate Pumpkin Spice Whoopie Pies: Add cocoa powder to the cake batter for a chocolate twist.
  • Maple Cream Cheese Filling: Use all maple syrup in place of powdered sugar for a unique filling flavor.
  • Nutty Addition: Incorporate chopped walnuts or pecans into the batter for added crunch.
  • Spiced Up Filling: Add a dash of nutmeg or ginger to your cream cheese filling for an extra kick.

Storage and Make-Ahead Instructions

These whoopie pies are best enjoyed fresh, but here’s how to store them properly:

  • Storage: Keep in an airtight container in the fridge for up to 3 days.
  • Make-ahead: You can bake the cakes a day in advance and fill them just before serving for the best texture.
  • Freezing: Freeze unfilled cakes in a single layer, then transfer to a freezer bag; they’ll last for up to a month.

Frequently Asked Questions

Here are answers to some common queries about making Small Batch Pumpkin Spice Whoopie Pies:

  • Can I make these whoopie pies gluten-free?: Absolutely! Use gluten-free flour as a substitute for all-purpose flour.
  • How do I store leftover whoopie pies?: Keep them in an airtight container in the fridge or freeze for later enjoyment.
  • Can I make these ahead of time?: Yes, bake the cakes ahead, and fill them closer to serving time for the best texture.
  • What’s the best way to get my cakes to rise?: Ensure your baking powder and baking soda are fresh and not expired.
  • How can I make the filling more stable?: Chill the whipped cream before mixing it into the filling for better consistency.
  • Can I use pumpkin pie filling instead of canned pumpkin?: It’s best to use pure canned pumpkin for this recipe to control the spice and sweetness.
  • What if my cakes are too flat?: Check your oven temperature with an oven thermometer; it may be baking at a lower temperature than indicated.
  • Can I add chocolate chips to the batter?: Yes! Mini chocolate chips can add a delightful surprise to each bite.

Nutritional Tips and Dietary Adaptations

This recipe can be adjusted to meet various dietary needs:

  • Low Carb Option: Use almond flour and sugar substitutes for a low-carb version.
  • Vegan Adaptation: Replace the egg yolk with a flaxseed egg and use plant-based cream cheese.
  • Reduced Sugar: You can cut back on sugars or use natural sweeteners.

Recommended Equipment

To make your baking experience seamless, consider these essential tools:

  • Cookie Scoop: Ensures even portions for uniform cakes.
  • Mixing Bowls: A set of various sizes will help with ingredient prep.
  • Electric Mixer: For whipping the cream and mixing the filling quickly.
  • Baking Sheet: Use a non-stick or lined sheet for easy removal of the cakes.
  • Parchment Paper: Helps prevent sticking and ensures easy cleanup.

Serving Suggestions

These whoopie pies are delightful on their own, but here are some serving ideas to elevate your dessert:

  • With a Cup of Tea or Coffee: Pair with your favorite fall beverage for a cozy afternoon treat.
  • Garnished with Toasted Nuts: Add a sprinkle of toasted pecans or walnuts on top of the filling for added texture.
  • Drizzled with Caramel: A light drizzle of caramel sauce can enhance the sweetness and presentation.

Final Thoughts

Creating these Small Batch Pumpkin Spice Whoopie Pies is not just about baking; it’s about crafting memories, sharing love, and celebrating the flavors of autumn. As you gather around your family table to enjoy these delightful treats, remember that every bite carries a story, a hug, and a piece of home. So roll up your sleeves, gather your loved ones, and let the magic of baking fill your kitchen with warmth and joy. Happy baking!

Small Batch Pumpkin Spice Whoopie Pies

Prep Time 15 minutes
Cook Time 10 minutes
Total Time 25 minutes
Servings 6 pieces
Calories 150
Delight in these cozy, mini pumpkin spice whoopie pies perfect for fall treats or holiday gatherings.

Ingredients

Dry Ingredients

  • 0.5 cup all-purpose flour
  • 0.125 teaspoon baking powder
  • 0.125 teaspoon baking soda
  • 0.125 teaspoon salt
  • 0.75 teaspoon pumpkin pie spice

Wet Ingredients

  • 1 large egg yolk, room temperature
  • 3 tablespoons full fat sour cream, room temperature
  • 2 tablespoons unsalted butter, melted and cooled slightly
  • 3 tablespoons light brown sugar
  • 3 tablespoons granulated sugar
  • 0.25 cup pure canned pumpkin
  • 0.5 teaspoon vanilla extract

Filling

  • 2 ounces full-fat cream cheese, room temperature (cool temp)
  • 2 tablespoons pure maple syrup
  • 0.25 cup heavy whipping cream (cool temp)
  • 2 tablespoons powdered sugar
  • 0.125 teaspoon ground cinnamon
  • 0.125 teaspoon salt

Instructions 

  • Mix dry ingredients together in a bowl.
  • Combine wet ingredients and mix until smooth.
  • Fold wet into dry ingredients to form batter.
  • Spoon batter onto baking sheet and bake at 350°F (175°C) for 10 minutes.
  • Prepare filling by beating cream cheese, maple syrup, cream, sugar, and cinnamon until smooth.
  • Assemble pies by spreading filling between two cookies.

Notes

Chill the assembled pies before serving for best flavor.
Calories: 150kcal
Cost: $8
Course: Dessert
Cuisine: American
Keyword: Pumpkin

Embrace the Warmth of Quinoa and Veggie Power Bowls

Welcome to a delightful journey through the heart of cooking, where flavors meet memories, and every meal is an embrace. Today, we’ll explore the magic of Quinoa and Veggie Power Bowls. This recipe is not just a collection of ingredients; it’s a story woven from the threads of nurturing, love, and vibrant colors. Imagine sitting at a family table, sharing a meal that feels like home—this recipe embodies that spirit.

Quinoa and Veggie Power Bowls are perfect for any occasion, whether you’re preparing a cozy dinner for your loved ones or meal prepping for a busy week ahead. With the combination of roasted Brussels sprouts and smoky butternut squash, this dish brings a touch of Southern charm to your dining experience.

Why You’ll Love This Recipe

Here are some reasons why this Quinoa Power Bowl will become a staple in your kitchen:


Belgian Waffle Maker

★ Recommended Kitchen Tool

Belgian Waffle Maker

Make this recipe even easier with a quality Belgian Waffle Maker — a must-have kitchen staple!


🛒 Check Price on Amazon →

As an Amazon Associate, we earn from qualifying purchases.
  • Wholesome Nutrition: Each bowl is packed with nutrients from fresh vegetables and quinoa, making it a great choice for your health.
  • Flavorful and Satisfying: The sweet and smoky flavors of roasted veggies combined with the nutty quinoa create a satisfying meal that delights the taste buds.
  • Perfect for Meal Prep: The components can be prepared in advance, making it easy to enjoy this dish throughout the week.
  • Versatile Ingredients: You can easily swap out vegetables or grains based on what you have on hand, allowing for endless variations.
  • Family-Friendly: This dish appeals to both adults and children, making it a wonderful option for family dinners.

Ingredient Breakdown and Substitutions

To make these delightful power bowls, gather the following ingredients:

  • Brussels Sprouts: 14 to 16 oz., trimmed and halved. These are the star of the show, but you can also use broccoli or cauliflower as substitutes.
  • Extra-Virgin Olive Oil: 2 Tbsp., divided. This oil adds richness; avocado oil is a great alternative.
  • Adobo Sauce: 1 Tbsp. (from a can of chipotle peppers in adobo sauce). It contributes a smoky kick, but if you prefer milder flavors, you can use harissa or omit it entirely.
  • Maple Syrup: 1 Tbsp. Sweetness balances the dish beautifully; you can substitute honey if desired.
  • Kosher Salt: 1 tsp., divided. Essential for enhancing flavors.
  • Butternut Squash: 3 cups, peeled and cubed (from 1 small squash). A naturally sweet addition, it can be replaced with sweet potatoes or carrots.
  • Smoked Paprika: 1 tsp. This brings depth; regular paprika can work in a pinch.
  • Garlic Powder: 1 tsp. Fresh garlic is a lovely alternative if you prefer.
  • Dry Quinoa: 1 cup. Quinoa is the foundation of your bowl, but brown rice or farro are suitable substitutes.
  • Vegetable or Chicken Broth: 2 cups, for cooking the quinoa. This adds flavor, but water is a fine option if you’re in a hurry.
  • Kale: 2 to 3 handfuls, chopped. This leafy green adds nutrients and color; feel free to use spinach or Swiss chard.
  • Sliced Avocado: for topping (optional). Creamy and delicious, avocado adds richness to your bowl.
  • Apple Cider Vinegar: 1 Tbsp. A splash of acidity brightens the dish.
  • Dijon Mustard: 1 Tbsp. This adds a lovely tang; yellow mustard is a good alternative.

How to Make Quinoa and Veggie Power Bowls

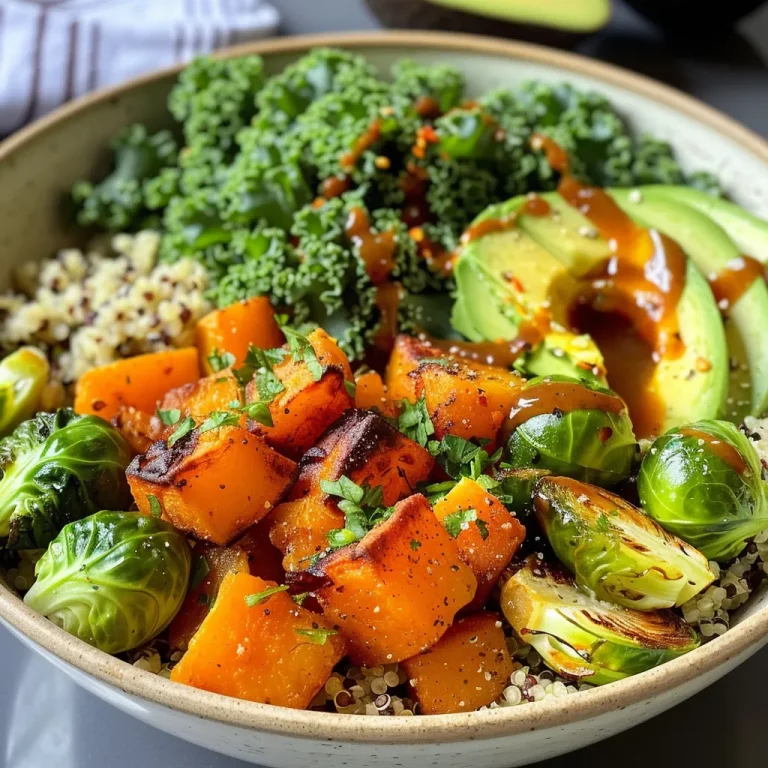
A vibrant bowl filled with quinoa, kale, and assorted vegetables, showcasing a healthy meal option.

Let’s dive into the steps to create these nourishing bowls:

  1. Preheat your oven to 425°F (220°C).
  2. Prepare the Vegetables: On one baking sheet, arrange the Brussels sprouts and toss them with 1 Tbsp. of olive oil, adobo sauce, maple syrup, and 1/2 tsp. of salt. On a separate sheet, toss the cubed butternut squash with the remaining olive oil, smoked paprika, garlic powder, and 1/2 tsp. of salt. Place both sheets in the oven and roast for about 25 minutes, stirring halfway through, until tender.
  3. Cook the Quinoa: In a small saucepan, combine the quinoa and broth. Bring to a boil, then reduce the heat to low, cover, and simmer until the quinoa is fluffy and the liquid has been absorbed, about 15 minutes. Once done, stir in the chopped kale, allowing it to wilt from the residual heat.
  4. Make the Dressing: In a small bowl, whisk together the olive oil, apple cider vinegar, Dijon mustard, honey, and salt until well combined.
  5. Assemble the Bowls: Divide the quinoa and kale mixture evenly among four bowls. Top with roasted Brussels sprouts and butternut squash, then drizzle with the dressing. Garnish with sliced avocado or any toppings of your choice.

Pro Tips for Perfect Quinoa and Veggie Power Bowls

Here are some expert insights to elevate your dish:

  • Fluffy Quinoa: Rinse your quinoa before cooking to remove bitterness and achieve a fluffy texture.
  • Even Roasting: Cut your vegetables into similar sizes for even cooking and browning.
  • Storage Tips: Store the components separately to maintain freshness, and they’ll last up to four days in the refrigerator.
  • Creative Variations: Experiment with different grains or roasted vegetables based on your preferences.
  • Serving Temperature: These bowls are delicious warm or chilled, making them versatile for any season.
  • Flavor Enhancements: Add nuts or seeds for extra crunch and flavor.

Common Mistakes and Troubleshooting

Here are a few pitfalls to avoid when preparing your power bowls:

  • Overcooking Quinoa: Keep an eye on the cooking time to prevent mushy quinoa—perfect quinoa should be fluffy and slightly chewy.
  • Underseasoning Vegetables: Don’t skip seasoning; it’s crucial for enhancing the natural flavors of your veggies.
  • Skipping the Dressing: The dressing adds a vital flavor element; don’t overlook it!

Variations to Try

Feel free to get creative with your power bowls! Here are some variations to inspire you:

  • Protein-Packed: Add grilled chicken or chickpeas for extra protein.
  • Spicy Kick: Incorporate jalapeños or a drizzle of Sriracha for a heat boost.
  • Seasonal Veggies: Swap in seasonal vegetables like zucchini in the summer or roasted root vegetables in the fall.
  • Herb Infusion: Fresh herbs like parsley or cilantro can brighten the dish.

Storage and Make-Ahead Instructions

This dish is fantastic for meal prep! Here’s how to store it:

  • Refrigeration: Store components separately in airtight containers for up to four days.
  • Freezing: You can freeze the quinoa and roasted vegetables for up to three months. Thaw in the refrigerator before reheating.
  • Reheating: Reheat in the microwave or on the stovetop until warmed through; add a splash of broth if needed to revive moisture.

Frequently Asked Questions

Here are common questions that might arise:

  • Can I make this vegan? Yes, this recipe is already vegan-friendly, just ensure all substitutions are plant-based.
  • How do I make this gluten-free? Quinoa is naturally gluten-free, but always check your broth and other ingredients for gluten.
  • What can I use instead of quinoa? You can substitute brown rice, farro, or any grain of your choice.
  • Can I eat this cold? Absolutely! These power bowls are delicious served chilled.
  • How do I add more flavor? Experiment with different spices or herbs to customize the dish to your taste.
  • How long will the leftovers last? Properly stored, leftovers will last up to four days in the fridge.
  • Can I add cheese? Yes, a sprinkle of feta or goat cheese can enhance the flavor!
  • Are these bowls kid-friendly? Yes! Adjust the spices and let the kids help assemble their bowls for a fun family activity.

Nourishing Bowls of Love

As we wrap up this exploration of Quinoa and Veggie Power Bowls, remember that cooking is a joyous act of love and creativity. These bowls are more than just a meal; they are a way to share warmth, nourishment, and memories with those you cherish. Whether you’re enjoying them alone or with family, each bite is a reminder that food connects us all. So gather your loved ones, and let’s fill our homes with laughter and delicious aromas, one bowl at a time!

Quinoa and Veggie Power Bowls

Prep Time 10 minutes
Cook Time 25 minutes
Total Time 35 minutes
Servings 4 servings
Calories 450
A nutritious and vibrant bowl combining roasted vegetables, fluffy quinoa, and a tangy dressing, perfect for a wholesome meal.

Ingredients

Vegetables

  • 14 to 16 oz Brussels sprouts, trimmed and halved
  • 2 Tbsp extra-virgin olive oil, divided (sub avocado oil)
  • 1 Tbsp adobo sauce (from a can of chipotle peppers in adobo sauce)
  • 1 Tbsp maple syrup
  • 1 tsp kosher salt, divided
  • 3 cups peeled and cubed butternut squash (from 1 small squash)
  • 1 tsp smoked paprika
  • 1 tsp garlic powder

Grains

  • 1 cup dry quinoa
  • 2 cups lower-sodium vegetable or chicken broth

Greens & Toppings

  • 2 to 3 handfuls chopped kale
  • Sliced optional avocado for topping
  • 1/4 cup extra-virgin olive oil
  • 1 Tbsp apple cider vinegar
  • 1 Tbsp honey (sub maple syrup)
  • 2 tsp Dijon mustard
  • 1/4 tsp kosher salt

Instructions 

  • Preheat oven to 425°F (220°C).
  • Toss Brussels sprouts with 1 Tbsp oil, adobo sauce, maple syrup, and 1/2 tsp salt; roast for 25 minutes.
  • Cook quinoa in broth until fluffy, then stir in kale to wilt.
  • Mix dressing ingredients in a small bowl.
  • Assemble bowls with quinoa, roasted vegetables, drizzle with dressing, and top with sliced avocado.

Notes

Feel free to add your favorite toppings like seeds or nuts for extra crunch.
Calories: 450kcal
Cost: $15
Course: Main Course
Cuisine: Healthy
Keyword: Quinoa, Vegetables

Discover the Heartwarming Power of Skillet Chicken Pot Pie

Gather around the kitchen table as we dive into a cherished recipe that embodies warmth, love, and nostalgia—the Skillet Chicken Pot Pie. This dish is not just a meal; it’s a comforting embrace that brings families together, evoking memories of cozy nights spent sharing laughter and stories. With tender chicken, vibrant vegetables, and a flaky biscuit topping, this recipe is a perfect blend of Southern roots and heartfelt tradition, designed to create moments worth savoring.

Why You’ll Love This Recipe

As you embark on this culinary journey, here are five reasons why this chicken pot pie will become a staple in your home:

  • Quick and Easy Preparation: With a total cook time of under an hour, you can whip up this delightful dish on a busy weeknight without sacrificing flavor.
  • One-Pan Wonder: Enjoy minimal cleanup with this one-pan recipe. The skillet does all the hard work while retaining all the rich flavors.
  • Customizable Ingredients: Use whatever vegetables you have on hand, or swap out chicken for turkey or even a vegetarian option, making it adaptable for different dietary needs.
  • Family-Friendly Appeal: Kids and adults alike will love the comforting flavors, ensuring that everyone cleans their plates.
  • Perfect for Leftovers: This pot pie can be stored and reheated, making it a perfect dish for meal prep or unexpected guests.

Ingredient Breakdown and Substitutions

Let’s look at the essential ingredients that come together to create this heartwarming dish, along with some thoughtful substitutions.


Air Fryer XL

★ Recommended Kitchen Tool

Air Fryer XL

Make this recipe even easier with a quality Air Fryer XL — a must-have kitchen staple!


🛒 Check Price on Amazon →

As an Amazon Associate, we earn from qualifying purchases.
  • Chicken: Use boneless, skinless chicken breasts or thighs. For a quicker option, rotisserie chicken works beautifully.
  • Vegetables: The classic mix includes onion, carrots, and celery, but feel free to add frozen peas or any seasonal vegetables you prefer.
  • Herbs: Fresh thyme adds aromatic flavor, but dried thyme or Italian seasoning can be used in a pinch.
  • Flour: All-purpose flour helps thicken the filling; however, you can opt for a gluten-free alternative if needed.
  • Biscuits: Use store-bought refrigerated biscuit dough for convenience, or try making your own from scratch for a personal touch.

Cooking Method: Step-by-Step Instructions

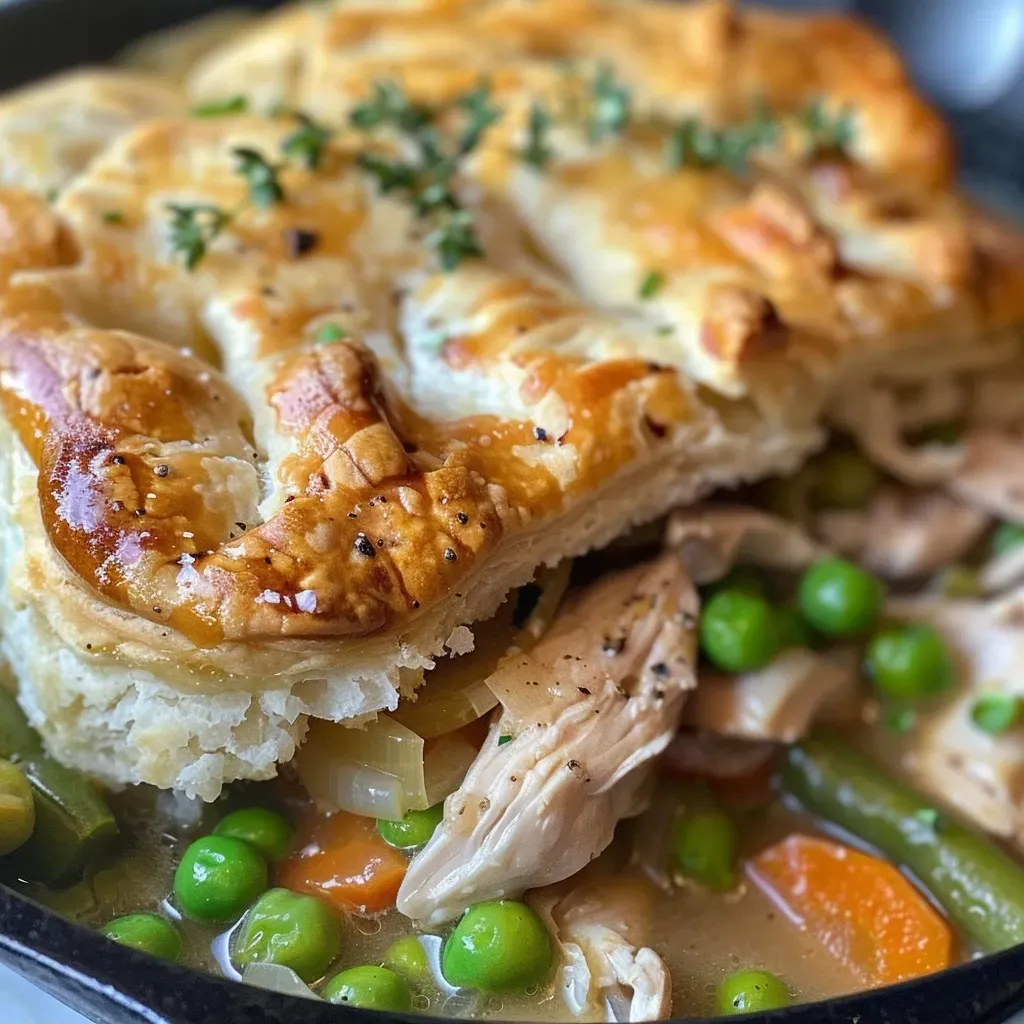
A side view of a Skillet Chicken Pot Pie, highlighting the flaky crust and colorful filling.

Now that we have our ingredients ready, let’s jump into the cooking process that will fill your kitchen with delectable aromas.

  1. Preheat your oven to 350°F. In a large skillet over medium heat, heat the olive oil. Add the chicken and season with salt and pepper, cooking until golden brown on all sides, about 6–8 minutes. Remove from the skillet and set aside.
  2. Add the onion, carrots, celery, and thyme to the skillet, cooking until the vegetables are soft, about 4–5 minutes. Sprinkle the flour over the vegetables and cook for an additional 2–3 minutes.
  3. Pour in the chicken broth and bring to a gentle simmer, stirring frequently. Cook for 8–10 minutes, until the mixture thickens slightly.
  4. Remove the skillet from the heat and stir in the heavy cream, peas, and the cooked chicken. Mix well to combine.
  5. Slice the biscuits in half horizontally and arrange them in a ring on the outer edge of the skillet. Brush the tops with the beaten egg and bake in the preheated oven for 25–30 minutes, or until the biscuits are golden brown and the filling is bubbling.

Expert Tips for the Perfect Skillet Chicken Pot Pie

To ensure your pot pie turns out perfectly every time, consider these pro tips:

  • Don’t rush the browning: Allow the chicken to get nice and golden; this adds depth of flavor to the dish.
  • Mix and match vegetables: Use what you love! Corn, green beans, or even potatoes can be delightful additions.
  • Keep an eye on the biscuits: If they start to brown too quickly, cover the skillet loosely with foil.
  • Let it cool: Allow the pot pie to rest for about 10 minutes before serving; this will help the filling set.
  • For extra richness: Add a splash of white wine to the filling after adding the flour for an added layer of flavor.
  • Use homemade broth: If you have it, homemade chicken broth enhances the flavor profile significantly.
  • Store leftovers properly: Keep any leftovers in an airtight container in the fridge for up to 3 days.
  • Freezing tips: You can freeze the filling before adding the biscuits for a quick meal later on.

Common Mistakes and Troubleshooting

Even the best cooks make mistakes! Here are some common pitfalls and how to avoid them:

  • Runny filling: If your filling is too watery, let it simmer longer to thicken, or add a little cornstarch mixed with cold water.
  • Biscuits sticking: Ensure your skillet is well-greased before adding the biscuits to prevent sticking.
  • Burnt biscuits: If baking too long causes them to burn, lower the temperature slightly and cover with foil until cooked through.

Delicious Variations to Try

Add a twist to your classic pot pie with these variations:

  • Vegetable Pot Pie: Skip the chicken and load up on a variety of vegetables, perfect for a meatless meal.
  • Cheesy Chicken Pot Pie: Stir in a cup of shredded cheddar cheese for a rich, creamy filling.
  • Spicy Chicken Pot Pie: Add jalapeños or a dash of cayenne pepper to the filling for a kick.
  • Herbed Biscuit Topping: Incorporate fresh herbs like rosemary or parsley into the biscuit dough for added flavor.

Storage and Make-Ahead Instructions

This pot pie is perfect for meal prep or making ahead:

  • Refrigeration: Store in an airtight container in the fridge for up to 3 days.
  • Freezing: Freeze the unbaked pie for up to 3 months. Bake from frozen, adding extra time.
  • Make-ahead filling: Prepare the filling a day in advance and assemble the pot pie when ready to bake.

Frequently Asked Questions

Here are some common questions to help you on your pot pie journey:

  • Can I make this pot pie ahead of time? Yes! You can prepare the filling and store it in the fridge or freeze it for later use.
  • What can I serve with chicken pot pie? A simple side salad or steamed vegetables pairs wonderfully with this dish.
  • Can I use frozen vegetables? Absolutely! Frozen mixed vegetables are a great time-saver and work perfectly in this recipe.
  • How do I reheat leftovers? Reheat in the oven at 350°F until warmed through, or microwave individual portions.
  • Can I use puff pastry instead of biscuits? Yes! Puff pastry will create a delightful flaky crust as well.
  • Is this recipe gluten-free? You can make it gluten-free by using gluten-free flour and biscuits.
  • What’s the best way to store leftovers? Store in an airtight container in the refrigerator for up to 3 days.
  • Can I add other meats? Definitely! Turkey or shredded beef could be delicious alternatives.

Nutrition Tips and Dietary Adaptations

For a healthier twist on this classic recipe, consider these nutrition tips:

  • Swap cream for milk: Use low-fat milk instead of heavy cream for a lighter dish.
  • Add more vegetables: Increase the vegetable content for added fiber and nutrients.
  • Lean meats: Opt for skinless chicken or turkey to reduce saturated fat.

Essential Equipment Recommendations

To make your cooking experience seamless, here are some essential tools:

  • Cast-iron skillet: Perfect for even cooking and great for transitioning from stovetop to oven.
  • Sharp knife: A good knife is essential for chopping vegetables efficiently.
  • Measuring cups and spoons: Accurate measurements ensure your pot pie turns out just right.

Serving Suggestions

Serve your pot pie with a side of love! Consider these suggestions:

  • Fresh greens: A light side salad with vinaigrette balances the richness of the pie.
  • Homemade bread: Offer some warm, crusty bread for sopping up that delicious filling.

As we bring this culinary adventure to a close, remember that cooking is all about sharing and creating memories. This Skillet Chicken Pot Pie is more than just a recipe; it’s a tradition that you can pass down through generations, reminding us that the kitchen is indeed a heartwarming place. So gather your loved ones, share a laugh, and enjoy every bite together. Thank you for joining me in this journey of flavors and memories. Happy cooking!

Skillet Chicken Pot Pie

Prep Time 15 minutes
Cook Time 30 minutes
Total Time 45 minutes
Servings 4 servings
Calories 550
A comforting and savory chicken pot pie cooked right in a skillet, topped with flaky biscuit dough for an easy, hearty meal.

Ingredients

Main ingredients

  • 1 tbsp olive oil
  • 3 boneless, skinless chicken breasts chicken breasts (cut into 1" chunks)
  • kosher salt kosher salt
  • Freshly ground black pepper black pepper (to taste)
  • 1/2 onion onion (chopped)
  • 2 medium carrots carrots (peeled and chopped)
  • 2 stalks celery (chopped)
  • 2 tsp. fresh thyme fresh thyme
  • 3 tbsp. flour
  • 1 1/2 c. frozen peas
  • 2 c. chicken broth
  • 2 tbsp. heavy cream heavy cream
  • 1 can refrigerated biscuit dough refrigerated biscuit dough
  • 1 Egg lightly beaten egg wash

Instructions 

  • Preheat oven to 350°.
  • Cook chicken in skillet with oil, salt, and pepper until golden, then remove.
  • Sauté vegetables with thyme, add flour, then broth; simmer until thickened. Stir in cream, peas, and chicken.
  • Arrange biscuit halves around skillet, brush with egg wash, and bake for 25-30 minutes.

Notes

Ensure vegetables are cooked until soft for best flavor.
Calories: 550kcal
Cost: $15
Course: Main Course
Cuisine: American
Keyword: Chicken, pot pie, skillet

Welcome to a delightful exploration of a dish that embodies warmth and nostalgia—Creamy Corn Pudding, or Spoon Bread as it’s affectionately known. This comforting recipe is not just about delicious flavors but also about the memories we create around the family table. With its rich, creamy texture and subtle sweetness, this dish brings people together, making every gathering a little more special. In this comprehensive guide, we’ll delve deep into the beauty of Creamy Corn Pudding, ensuring you have all the tools and inspiration you need to create it perfectly every time.

Why You’ll Love This Recipe

  • Family Tradition: This dish is a staple in many Southern households, often served at holidays and special occasions, making it a true symbol of togetherness.
  • Versatile Serving Options: Whether as a side dish at Thanksgiving or a comforting weeknight meal, it’s adaptable to any occasion.
  • Easy to Prepare: With simple ingredients and straightforward steps, this recipe is perfect for cooks of all skill levels.
  • Comforting Flavor: The blend of sweet corn and creamy textures evokes a sense of home, reminding us of the love shared through cooking.
  • Customizable: You can easily tweak the ingredients to suit your taste, adding herbs, spices, or even a hint of cheese for extra flavor.

Ingredient Breakdown

Let’s take a closer look at the ingredients that make this dish so special. Here’s what you’ll need:

  • 3 cups sweet corn kernels: Fresh or frozen, this is the star of the dish. For fresh, about 4-5 ears yield the right amount.
  • 1 1/2 cups whole milk: This adds creaminess. You can substitute with almond or oat milk for a dairy-free option.
  • 1/2 cup heavy cream: Essential for that rich texture. Use coconut cream for a dairy-free alternative.
  • 4 large eggs: They bind the ingredients together and help create that luscious custard-like texture.
  • 4 tbsp unsalted butter: Melted. You can replace this with olive oil or vegan butter for a healthier twist.
  • 1/3 cup fine yellow cornmeal: This adds a subtle graininess and body to the pudding.
  • 2 tbsp all-purpose flour: Helps to stabilize the pudding; gluten-free flour can be used as a substitute.
  • 1 tsp baking powder: To help the pudding rise slightly.
  • 2 tbsp granulated sugar (optional): Just a touch of sweetness, adjust according to your taste.
  • 1 tsp kosher salt: Enhances all the flavors.
  • 1/4 tsp ground white or black pepper: A hint of spice to balance the sweetness.
  • Chopped chives (for serving): A fresh garnish that adds a beautiful color contrast.

Step-by-Step Instructions

Now that we have our ingredients ready, let’s get into the nitty-gritty of preparing this heartwarming dish.


Digital Kitchen Scale

★ Recommended Kitchen Tool

Digital Kitchen Scale

Make this recipe even easier with a quality Digital Kitchen Scale — a must-have kitchen staple!


🛒 View on Amazon →

As an Amazon Associate, we earn from qualifying purchases.
  • Step 1: Preheat your oven to 350°F (175°C). Butter a 2-quart baking dish (11×7-inch or 8×8-inch) generously to prevent sticking.
  • Step 2: In a blender, combine 1 1/2 cups of corn with the whole milk and heavy cream, blending until mostly smooth, with a few chunks remaining for texture.
  • Step 3: In a separate bowl, whisk together the cornmeal, flour, and baking powder until well combined.
  • Step 4: In a large mixing bowl, whisk the eggs, sugar, salt, and pepper until light and frothy. Slowly whisk in the melted butter, followed by the blended corn mixture.
  • Step 5: Gently fold in the dry ingredients until the batter is smooth. Then, add the remaining corn kernels and let the mixture rest for about 5 minutes.
  • Step 6: Pour the batter into the prepared baking dish, spreading it evenly. Bake in the preheated oven for 45-55 minutes, or until puffed, lightly browned on top, and just set in the center.
  • Step 7: Allow to cool for about 10 minutes before serving. Top with chopped chives for a lovely touch and serve warm, ideally by the spoonful.

Pro Tips for Perfect Creamy Corn Pudding

Side view of juicy corn pudding served in a dish, showcasing its creaminess.
  • Choose Fresh Corn: If you can, use fresh sweet corn for the best flavor and texture. Look for plump, juicy kernels.
  • Let It Rest: Allowing the batter to rest helps the cornmeal absorb the liquids, resulting in a creamier texture.
  • Watch the Baking Time: Keep an eye on the pudding during the last few minutes of baking; you want a golden top without overcooking.
  • Use Room Temperature Ingredients: This ensures a smoother batter and better incorporation of ingredients.
  • Experiment with Flavors: Feel free to add herbs like thyme or basil for a unique twist on the classic flavor.
  • Check for Doneness: The center should be set but slightly jiggly; it will firm up as it cools.
  • Try Different Cheeses: Adding a bit of cheddar or gouda can elevate the dish significantly—just fold it in before baking.
  • Serve with Love: The best way to enjoy this dish is surrounded by family and friends, sharing stories and laughter.

Common Mistakes and Troubleshooting

Even the best of us can make mistakes in the kitchen. Here are some common pitfalls and how to avoid them:

  • Overmixing: This can lead to a dense texture. Mix just until combined.
  • Not Preheating the Oven: Ensure your oven is at the right temperature before baking to achieve the best rise.
  • Skipping the Resting Step: This can affect the final texture; always let the batter rest before baking.
  • Using Cold Ingredients: Cold eggs and dairy can lead to a lumpy batter; room temperature is best.
  • Underbaking: If the center is too wet, it will collapse after cooling. Bake until just set.

Delicious Variations to Try

One of the joys of cooking is experimenting! Here are some variations you can try:

  • Cheesy Corn Pudding: Fold in 1 cup of shredded cheddar cheese for a savory twist.
  • Savory Herb Pudding: Add fresh herbs like rosemary or thyme for an aromatic experience.
  • Spicy Corn Pudding: Mix in diced jalapeños or a pinch of cayenne pepper for some heat.
  • Sweet Corn Pudding: For a dessert version, add a bit more sugar and serve with whipped cream.

Storage and Make-Ahead Instructions

This Creamy Corn Pudding can be made ahead of time, making it perfect for gatherings. Here’s how to store and reheat:

  • Cool Completely: Let the pudding cool to room temperature before storing.
  • Refrigeration: Store in an airtight container in the fridge for up to 3 days.
  • Freezing: This dish can be frozen for up to 2 months. Wrap tightly in plastic wrap and foil.
  • Reheating: To reheat, thaw overnight in the fridge, then bake at 350°F (175°C) until warmed through, about 20-25 minutes.

Nutrition Tips and Dietary Adaptations

For those watching their dietary intake, here are some tips:

  • Lower-Calorie Option: Use skim milk and reduce the amount of butter for a lighter version.
  • Dairy-Free: Substitute with almond milk and coconut cream, and vegan butter if needed.
  • Gluten-Free: Use a gluten-free all-purpose flour blend instead of regular flour.
  • Reduced Sugar: Omit the sugar or substitute with a natural sweetener like honey or maple syrup.

Essential Equipment Recommendations

To make this recipe, here’s a list of equipment you’ll find handy:

  • Blender: For creating a smooth corn mixture.
  • Mixing Bowls: A set of various sizes for combining ingredients.
  • Whisk: Essential for mixing the wet and dry ingredients.
  • Baking Dish: An 11×7-inch or 8×8-inch dish is perfect for this recipe.
  • Spatula: For folding in ingredients and serving the pudding.

Serving Suggestions

To elevate your Creamy Corn Pudding experience, consider these serving suggestions:

  • As a Side Dish: Pair with roasted chicken or grilled meats for a complete meal.
  • With a Salad: Serve alongside a fresh green salad for a light lunch.
  • As a Breakfast Treat: Enjoy it warm with a drizzle of maple syrup for a sweet breakfast option.
  • With Toppings: Offer toppings like crumbled bacon, fresh herbs, or even a dollop of sour cream for added flavor.

Frequently Asked Questions

Here are some common questions surrounding Creamy Corn Pudding:

  • Can I use frozen corn? Yes, just thaw and drain it before using.
  • How do I know when it’s done? The center should be set but slightly jiggly; it will firm up as it cools.
  • Can I double the recipe? Absolutely! Just use a larger baking dish and adjust the baking time as needed.
  • Can I make it ahead of time? Yes, you can prepare it a day early and reheat before serving.
  • What’s the best way to serve leftovers? Warm it up in the oven; it retains its texture better than microwaving.
  • Can I freeze Creamy Corn Pudding? Yes, it freezes well for up to 2 months.
  • What’s the difference between corn pudding and spoon bread? They are similar; spoon bread is usually more custard-like and often has a softer texture.
  • How can I add more flavor? Consider adding herbs, spices, or cheese to customize it to your liking.

In conclusion, Creamy Corn Pudding is more than just a dish—it’s a heartfelt creation that brings families together. Whether shared at a holiday table or enjoyed on a quiet evening, this recipe carries with it love, warmth, and tradition. So gather your ingredients, embrace the joy of cooking, and let this delightful dish become a cherished part of your own family traditions.

Creamy Corn Pudding (Spoon Bread)

Prep Time 10 minutes
Cook Time 50 minutes
Total Time 1 hour
Servings 6 servings
Calories 250
A rich and creamy corn pudding with a tender texture, perfect for a comforting side dish or spooned straight from the oven.

Ingredients

Main

  • 3 cups sweet corn kernels (about 4–5 ears or 420–450 g; thaw if frozen)
  • 1.5 cups whole milk (360 ml)
  • 0.5 cup heavy cream (120 ml)
  • 4 large eggs (room temperature)
  • 4 tbsp unsalted butter (melted, plus extra for the dish)
  • 1/3 cup fine yellow cornmeal (50 g)
  • 2 tbsp all-purpose flour (15 g)
  • 1 tsp baking powder
  • 2 tbsp granulated sugar (optional, 25 g)
  • 1 tsp kosher salt
  • 1/4 tsp ground white or black pepper

Chopped chives

Instructions 

  • Preheat oven to 350°F (175°C). Butter a 2-quart dish.
  • Blend 1.5 cups corn with milk and cream until smooth.
  • Mix dry ingredients; whisk eggs with sugar, salt, pepper, and melted butter. Combine with corn mixture and fold in remaining corn. Rest 5 minutes.
  • Pour into dish and bake for 45–55 minutes until puffed and lightly browned.
  • Cool 10 minutes, top with chives, and serve warm by the spoon.

Notes

For extra flavor, add a sprinkle of cheese or herbs before baking.
Calories: 250kcal
Cost: $15
Course: Side Dish
Cuisine: American
Keyword: Corn

Embrace the Warmth of Home: Discover Soft Gingerbread Cinnamon Rolls

As the scent of freshly baked gingerbread cinnamon rolls wafts through the air, it’s hard not to feel a wave of nostalgia. Memories of cozy family gatherings and the joy of sharing sweet treats with loved ones come flooding back. These soft gingerbread cinnamon rolls are more than just a recipe; they are a heartfelt invitation to gather around the table, to share stories, and to create new memories. With every bite, you’ll find the perfect combination of warmth and spice, making them an ideal treat for any occasion.

In this guide, we’ll take you through every step of the process, ensuring your rolls are not only delicious but also a cherished part of your family traditions. Let’s dive into the magic that happens when flour, sugar, and love come together.

Why You’ll Love This Recipe

This recipe for gingerbread cinnamon rolls isn’t just about the flavors; it’s about the experience. Here are five reasons why you’ll adore making—and sharing—these rolls:


Professional Chef Knife Set

★ Recommended Kitchen Tool

Professional Chef Knife Set

Make this recipe even easier with a quality Professional Chef Knife Set — a must-have kitchen staple!


🛒 Check Price on Amazon →

As an Amazon Associate, we earn from qualifying purchases.
  • Unforgettable Flavor: The combination of warm spices like ginger and cinnamon creates a cozy flavor profile that dances on your taste buds.
  • Inviting Aroma: Baking these rolls fills your home with an irresistible aroma that beckons family and friends to come together.
  • Perfectly Soft Texture: The rolls are delightfully soft and fluffy, making them a comforting treat perfect for any time of year.
  • Versatile Enjoyment: Whether for a holiday brunch or a cozy weekend breakfast, these rolls fit any occasion beautifully.
  • Heartfelt Sharing: Making these rolls is a chance to share your love and tradition with those you cherish most.

Ingredients You’ll Need

Gathering the right ingredients is key to creating the best soft gingerbread cinnamon rolls. Here’s what you’ll need:

  • Whole Milk: 1 cup (240ml), warmed to about 100°F (38°C) to activate the yeast.
  • Brown Sugar: 6 Tablespoons (75g), packed (divided) for the dough and filling, adding sweetness and moisture.
  • Active Dry or Instant Yeast: 1 Tablespoon (9g) to help the dough rise beautifully.
  • Unsalted Butter: 5 Tablespoons (72g), melted for the dough and 5 Tablespoons (72g) softened for the filling.
  • Large Eggs: 2, at room temperature for richness and binding.
  • Salt: 1 teaspoon to enhance flavors.
  • Spices: 1/4 teaspoon each of ground ginger and nutmeg for a warm, fragrant touch.
  • Bread Flour: 4 cups (520g), spooned and leveled, plus more for dusting.
  • Molasses: 2 Tablespoons (43g), unsulfured or dark, for depth of flavor.
  • Cream Cheese: 4 ounces (113g), softened for the luscious frosting.
  • Confectioners’ Sugar: 2/3 cup (80g) for sweetness in the frosting.
  • Vanilla Extract: 1/2 teaspoon for a fragrant note in the frosting.
  • Optional Garnishes: Sugared cranberries and gingerbread cookies for a festive touch!

Pro Tips for Perfect Rolls

Side view of warm, fluffy cinnamon rolls with a gingerbread color and sweet glaze.

To ensure your gingerbread cinnamon rolls turn out perfectly, consider these expert tips:

  • Warm Environment: Ensure your dough rises in a warm, draft-free area for optimal yeast activity.
  • Proofing the Yeast: Always check that your yeast is active by ensuring it foams when mixed with warm milk and sugar.
  • Don’t Rush the Dough: Allow the dough to rise until it has doubled in size for a light and airy texture.
  • Be Gentle: When rolling out the dough, handle it gently to keep the air bubbles intact.
  • Use Parchment Paper: Lining your pan with parchment paper can help prevent sticking and make cleanup easier.
  • Monitor Baking Time: Keep an eye on your rolls as they bake; tent with foil if they brown too quickly.
  • Cool Before Frosting: Let your rolls cool for a few minutes before adding frosting to prevent it from melting away.
  • Experiment with Flavors: Feel free to add your favorite spices or even a splash of bourbon to the filling for a twist!

Common Mistakes and Troubleshooting

Even the best bakers can encounter hiccups. Here’s how to avoid common mistakes:

  • Dough Too Sticky: If your dough is too sticky, add flour gradually until it pulls away from the bowl.
  • Dough Not Rising: Ensure your yeast is fresh; if it doesn’t foam, it may not work.
  • Overbaking: Check for doneness a few minutes early; rolls should be golden brown and soft to the touch.
  • Filling Spilling Out: If your filling spills, tightly roll the dough and pinch seams to keep it contained.
  • Frosting Too Runny: If your frosting is too thin, add more confectioners’ sugar until you reach the desired consistency.

Variations to Try

Once you master the basic recipe, here are some delightful variations to consider:

  • Maple Cream Cheese Frosting: Swap traditional frosting for a maple-infused version for a unique twist.
  • Pecan Praline Filling: Add chopped pecans to the filling for an added crunch and flavor.
  • Chocolate Chip Gingerbread Rolls: Incorporate chocolate chips into the filling for a sweet surprise.
  • Fruit-Infused Rolls: Mix in dried fruits like cranberries or raisins for a burst of flavor.

Storage and Make-Ahead Instructions

These rolls can be enjoyed fresh or saved for later. Here’s how to store and prepare them:

  • Room Temperature: Store unfrosted rolls in an airtight container for up to 3 days.
  • Refrigeration: Frosted rolls can be kept in the refrigerator for up to 5 days.
  • Freezing: Freeze unfrosted rolls in a freezer-safe container for up to 2 months. Thaw overnight in the fridge before baking.
  • Make-Ahead: Prepare the dough and let it rise overnight in the fridge. Roll and bake the following day for fresh rolls in no time!

Comprehensive FAQs

Got questions? Here are some common inquiries answered:

  • Can I use whole wheat flour? Yes, you can substitute part of the bread flour with whole wheat, but the texture may be denser.
  • What can I use instead of molasses? Honey or maple syrup can be good substitutes, but the flavor will change slightly.
  • How do I know if my rolls are done? The rolls should be golden on top and spring back when gently pressed.
  • Can I make these rolls vegan? Yes, substitute milk with almond milk, use vegan butter, and flax eggs for the eggs.
  • What if my dough is too dry? Add milk, one teaspoon at a time, until it reaches the desired consistency.
  • Can I add nuts to the filling? Absolutely! Chopped nuts like walnuts or pecans add great texture.
  • How can I achieve a shiny finish? Brush the rolls with melted butter right after baking for a beautiful sheen.
  • What’s the best way to reheat the rolls? Warm them in the microwave for 10-15 seconds or in the oven at a low temperature until heated through.

Nutrition Tips and Dietary Adaptations

For those mindful of dietary needs, here are some suggestions:

  • Gluten-Free Option: Use a gluten-free flour blend to make these rolls gluten-free.
  • Lower Sugar Option: Reduce the brown sugar in the dough and filling for a lighter version.
  • Healthier Fats: Consider using coconut oil instead of butter for a dairy-free alternative.

Essential Equipment for Baking

Having the right tools can make your baking experience smoother:

  • Stand Mixer: A stand mixer with a dough hook makes kneading easier and quicker.
  • Rolling Pin: A good-quality rolling pin is essential for rolling out the dough evenly.
  • Baking Pan: Use a 9×13-inch pan for perfect rolls that rise beautifully.
  • Thermometer: An instant-read thermometer ensures your rolls are baked to perfection.

Serving Suggestions

Ready to serve? Here are some delightful ways to enjoy your gingerbread cinnamon rolls:

  • With Coffee: Pair these rolls with your favorite coffee or tea for a cozy morning treat.
  • As a Dessert: Serve warm with a scoop of vanilla ice cream for a comforting dessert.
  • With Fresh Fruit: Add a side of fresh fruit for a balanced breakfast or snack.

Creating soft gingerbread cinnamon rolls is more than just a cooking endeavor; it’s a way to bring family and friends together, to share stories, and to create lasting memories. So don your apron, gather your loved ones, and let the kitchen become a sanctuary of love and laughter. Happy baking!

Soft Gingerbread Cinnamon Rolls

Prep Time 30 minutes
Cook Time 25 minutes
Total Time 55 minutes
Servings 12 rolls
Calories 350
Delight in these soft, spiced cinnamon rolls with a rich gingerbread twist, perfect for cozy mornings or special occasions.

Ingredients

Dough

  • 1 cup whole milk, warmed to about 100°F (38°C)
  • 6 tablespoons brown sugar, divided
  • 1 tablespoon active dry or instant yeast
  • 5 tablespoons unsalted butter, melted and cooled
  • 2 large eggs (at room temperature)
  • 1 teaspoon salt
  • 1/4 teaspoon ground ginger
  • 1/4 teaspoon ground nutmeg
  • 4 cups bread flour (spooned & leveled), plus more as needed
  • 5 tablespoons unsalted butter, softened
  • 2 tablespoons unsulphured or dark molasses (do not use blackstrap)
  • 1/2 cup brown sugar, packed
  • 2 teaspoons ground cinnamon
  • 1 teaspoon ground ginger
  • 1/4 teaspoon ground nutmeg
  • 1/8 teaspoon ground cloves

Filling

  • 4 ounces full-fat cream cheese, softened (to room temperature)
  • 2 tablespoons unsalted butter, softened (to room temperature)
  • 2/3 cup confectioners’ sugar
  • 1/2 teaspoon pure vanilla extract
  • 1/8 teaspoon ground cinnamon

Instructions 

  • Mix warm milk, 2 tbsp brown sugar, and yeast; let sit until foamy (~5 min).
  • Add remaining brown sugar, melted butter, eggs, salt, ginger, nutmeg, and 1 cup flour; beat 1 min. Add 3 cups flour; knead until soft, tacky, and passes windowpane test.
  • Let dough rise in a greased bowl, covered, for 2 hours or until doubled.
  • Roll dough into a 10×16-inch rectangle; spread butter-molasses mixture, sprinkle spice-sugar, then roll tightly and cut into 12 rolls.
  • Arrange rolls in prepared pan, cover, and let rise until doubled (~1 hour). Bake at 350°F (177°C) for 25–28 min, tenting with foil after 15 min.
  • Make icing by beating cream cheese, butter, sugar, vanilla, and cinnamon; spread over warm rolls and serve.

Notes

For best results, ensure dough is properly kneaded and rises in a warm environment.
Calories: 350kcal
Cost: $15
Course: Breakfast
Cuisine: American
Keyword: baked goods, Cinnamon, gingerbread

Discover the Comfort of Rosemary and Roasted Garlic White Bean Soup

Imagine walking into a kitchen scented with the warmth of roasted garlic, where the comforting sight of a steaming pot of soup welcomes you like an old friend. This Rosemary and Roasted Garlic White Bean Soup is more than just a recipe; it’s a heartfelt reminder of the love and tradition that fills our homes. Today, I invite you to join me in creating this delightful dish that not only nourishes the body but also feeds the soul.

With its creamy texture and rich flavors, this soup is perfect for any occasion, whether it’s a chilly evening or a joyful family gathering. Let’s dive deep into why this recipe will become a staple in your kitchen, and how it embodies the essence of home cooking.

Why You’ll Love This Recipe

  • Comforting and Warm: This soup wraps you in a cozy embrace, making it the perfect dish for cold nights.
  • Nutritious Ingredients: Packed with protein-rich white beans and the health benefits of garlic and rosemary, this soup is as wholesome as it is delicious.
  • Simple to Make: With straightforward steps and minimal prep, you can have this hearty dish ready in no time.
  • Versatile and Adaptable: Enjoy this soup as a main course, or serve it as a side dish; it pairs beautifully with crusty bread.
  • Great for Meal Prep: This soup stores well, making it a fantastic option for busy weeks ahead.

Ingredients Breakdown

Let’s explore the ingredients that bring our Rosemary and Roasted Garlic White Bean Soup to life:


Professional Chef Knife Set

★ Recommended Kitchen Tool

Professional Chef Knife Set

Make this recipe even easier with a quality Professional Chef Knife Set — a must-have kitchen staple!


🛒 Check Price on Amazon →

As an Amazon Associate, we earn from qualifying purchases.
  • Garlic: Roasted garlic provides a sweet and mellow flavor, transforming the base of the soup.
  • Olive Oil: A tablespoon of oil helps sauté the onions, enhancing the soup’s overall richness.
  • Onion: Diced onions add depth and sweetness to the broth.
  • Chicken or Vegetable Broth: Choose your favorite broth for a savory foundation.
  • White Beans: Use canned or dried (soaked and cooked) white beans for protein and creaminess.
  • Fresh Rosemary: This herb infuses the soup with a fragrant aroma, elevating the dish.
  • Parmesan Cheese (optional): A sprinkle of cheese adds a delightful umami note.
  • Lemon Juice: A splash of lemon brightens the flavors and balances the richness.
  • Salt and Pepper: Essential for seasoning and bringing out the best in every ingredient.

Feel free to substitute ingredients based on what you have on hand or your dietary needs. For instance, if you prefer a vegan option, simply omit the cheese or use nutritional yeast for a cheesy flavor.

Pro Tips for Making the Best Soup

Side view of a bowl filled with white bean soup topped with herbs.
  • Roasting the Garlic: Roast the garlic until it’s golden and tender to achieve a sweet, caramelized flavor that elevates the soup.
  • Simmering Time: Allow the soup to simmer for at least 30 minutes to let the flavors meld beautifully.
  • Blending: For a smoother texture, blend the soup until creamy, but leave some beans whole for added texture.
  • Seasoning: Taste and adjust the seasoning after blending; sometimes, a dash more salt or a squeeze of lemon can make all the difference.
  • Storage: Store leftovers in an airtight container in the fridge for up to 5 days, or freeze for up to 3 months.

Common Mistakes to Avoid

Cooking can be a joyous experience, but a few common pitfalls can occur:

  • Over-roasting the Garlic: Keep an eye on the garlic; if it burns, it can impart a bitter taste.
  • Not Enough Liquid: If the soup is too thick, add more broth or water to achieve your desired consistency.
  • Skipping the Blend: Blending enhances the creamy texture; don’t skip this step!

Delicious Variations to Try

Feeling adventurous? Here are some exciting variations to make the soup your own:

  • Spicy Kick: Add a pinch of red pepper flakes or a dash of hot sauce for some heat.
  • Herb Medley: Experiment with other herbs like thyme or sage alongside rosemary for a different flavor profile.
  • Vegetable Boost: Stir in chopped spinach, kale, or carrots for added nutrition and color.
  • Cheesy Delight: Mix in cream cheese or a dollop of sour cream for extra creaminess.

Storage and Make-Ahead Instructions

This Rosemary and Roasted Garlic White Bean Soup not only tastes even better the next day but is also an excellent candidate for meal prep:

  • Refrigerator: Store in an airtight container for up to 5 days. Reheat gently on the stove.
  • Freezer: Freeze in individual portions for up to 3 months. Thaw overnight in the fridge before reheating.
  • Make-Ahead: Prepare the soup a day or two in advance for easy entertaining or weeknight dinners.

Frequently Asked Questions

As you embark on this culinary journey, you might have a few questions:

  • Can I use dried beans instead of canned? Absolutely! Just soak and cook them until tender before adding them to the soup.
  • Is this soup gluten-free? Yes, all ingredients are gluten-free; just ensure your broth is certified gluten-free.
  • How can I make this soup vegan? Replace the chicken broth with vegetable broth and skip the cheese.
  • Can I add meat to this soup? Yes, shredded chicken or sausage can be delicious additions.
  • What can I serve with this soup? Crusty bread, a side salad, or even grilled cheese sandwiches pair beautifully.
  • How do I reheat leftovers? Gently reheat on the stove, adding a splash of broth if it thickens too much.
  • Can I freeze this soup? Yes, freeze in portions for future meals.
  • What’s the best way to blend the soup? A stick blender is ideal, but a countertop blender works too—just be careful with hot liquids.

Nutritional Tips and Dietary Adaptations

This soup not only comforts; it also nourishes:

  • High in Protein: White beans provide a great source of protein, making this soup filling.
  • Low in Calories: A light yet hearty option for those watching their caloric intake.
  • Rich in Fiber: Beans are a fantastic source of dietary fiber, promoting digestive health.
  • Vitamins and Minerals: Garlic and rosemary are packed with antioxidants and essential nutrients.

Recommended Equipment

To make this recipe a breeze, here are a few kitchen tools that will be helpful:

  • Large Pot or Dutch Oven: Perfect for cooking and simmering the soup.
  • Stick Blender: For easy blending right in the pot.
  • Measuring Cups and Spoons: Essential for accurate ingredient measurements.

Serving Suggestions

This soup is versatile and can be enjoyed in many ways:

  • Garnish: Top with a sprinkle of fresh parsley or a drizzle of olive oil for presentation.
  • Accompaniments: Serve with a slice of crusty bread or a fresh garden salad for a complete meal.
  • Perfect Pairings: A glass of white wine or a refreshing iced tea complements the flavors beautifully.

As we gather around our tables, let this Rosemary and Roasted Garlic White Bean Soup serve as a reminder of the warmth we create in our kitchens. With every spoonful, you’ll be sharing not just a meal, but a piece of your heart. Thank you for joining me on this culinary journey, and I hope this recipe becomes a cherished part of your family traditions.

Rosemary and Roasted Garlic White Bean Soup

Prep Time 15 minutes
Cook Time 1 hour 15 minutes
Total Time 1 hour 30 minutes
Servings 4 servings
Calories 250
A hearty and flavorful soup combining roasted garlic, fresh rosemary, and creamy white beans for a comforting meal.

Ingredients

Roasted Garlic

  • 3 heads garlic (top 1/8 inch removed)
  • 2 tablespoons oil
  • 1 onion diced onion
  • 3 cloves garlic (chopped)
  • 4 cups chicken or vegetable broth
  • 3 cans white beans (14.5 oz each, rinsed and drained)
  • 2 teaspoons fresh rosemary (chopped (or 1 teaspoon dried))
  • 1/4 cup Parmigiano Reggiano (grated (optional))
  • 1 tablespoon lemon juice
  • to taste NA salt and pepper

Instructions 

  • Drizzle oil over garlic, wrap in foil, and roast at 350°F (180°C) for 60-90 minutes until tender and golden.
  • Heat oil in a large pot, cook diced onion until tender, about 5-7 minutes.
  • Add chopped garlic and cook for 1 minute until fragrant.
  • Add broth, beans, and rosemary; bring to a boil, then simmer for 5 minutes.
  • Squeeze roasted garlic into the soup and blend until smooth. Stir in Parmesan and lemon juice, season with salt and pepper.

Notes

For a creamier texture, blend the soup longer or add a splash of cream.
Calories: 250kcal
Cost: $15
Course: Soup
Cuisine: American
Keyword: white beans