Author

daniel

Browsing

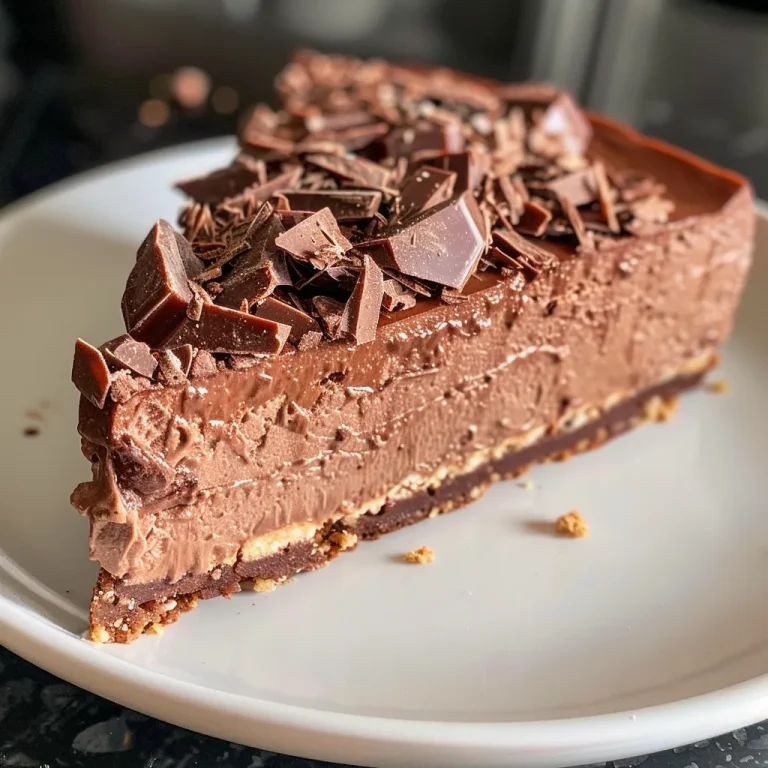
Discover the Joy of No Bake Chocolate Cheesecake

There’s something profoundly comforting about a no bake chocolate cheesecake. It’s not just a dessert; it’s an experience that brings family and friends together around the table, sharing laughter and memories. This creamy delight is perfect for any occasion, whether it’s a festive gathering or a quiet evening at home. In this article, we’ll guide you step by step through making the most luscious no bake chocolate cheesecake, ensuring it’s as easy as it is delicious.

Why You’ll Love This Recipe

This no bake chocolate cheesecake is more than just a dessert; it’s a canvas for creativity and memories. Here are a few reasons why this recipe will become a favorite in your home:

  • Effortlessly Simple: With straightforward steps, this recipe requires minimal preparation, making it perfect for both beginners and seasoned cooks.
  • Rich and Creamy Flavor: The combination of cream cheese and melted chocolate creates an indulgent texture that melts in your mouth.
  • Customizable Toppings: You can personalize your cheesecake with toppings like fresh berries, chocolate ganache, or nuts, catering to every palate.
  • Make Ahead Convenience: This dessert needs time to chill, making it an ideal make-ahead option for parties or family gatherings.
  • No Bake, No Fuss: Skip the oven and the hassle of baking. This recipe focuses on ease without compromising on taste.

Ingredients for No Bake Chocolate Cheesecake

Before we dive into the preparation, let’s gather our ingredients. Here’s what you’ll need:

  • Crust: 1 ½ cups of crushed biscuits or cookies (like graham crackers or Oreos) combined with ½ cup of melted butter.
  • Filling: 16 oz of cream cheese, softened, 1 cup of powdered sugar, 1 tsp of vanilla extract, 8 oz of heavy cream, and 1 cup of melted chocolate.
  • Optional Toppings: Chocolate ganache, chocolate shavings, cocoa powder, fresh berries, chopped nuts, or whipped cream.

Step-by-Step Instructions
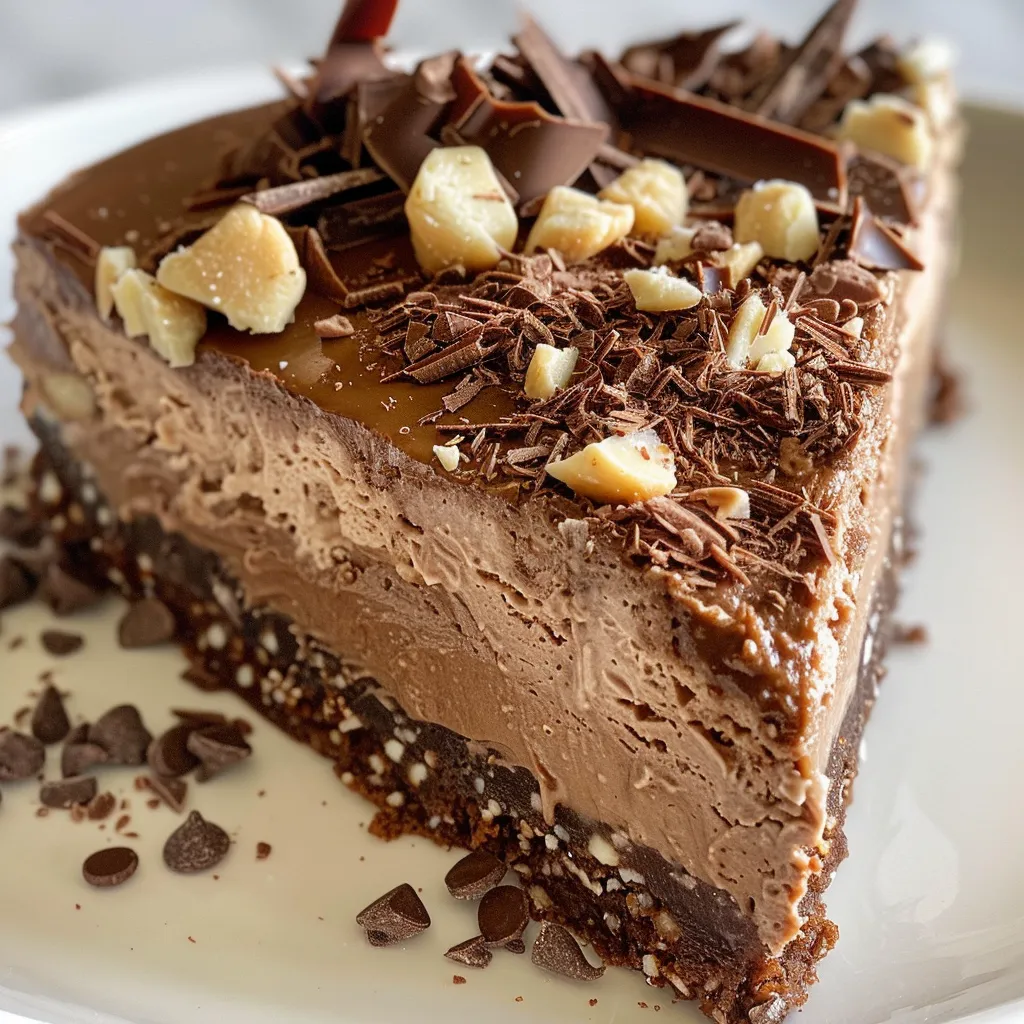
Indulgent No Bake Chocolate Cheesecake features a glossy top and a side of crushed nuts.

Now that we have everything ready, let’s create this delicious dessert.

Step 1: Prepare the Crust

Start by crushing your biscuits or cookies into fine crumbs. Combine them with melted butter in a mixing bowl. Press this mixture firmly into the bottom of a springform pan or pie dish. Place it in the fridge for at least 20 minutes to set.

Step 2: Melt the Chocolate

Break your chocolate into small pieces and melt it in the microwave or over a double boiler. Be sure to let it cool slightly before adding it to the filling. This prevents the chocolate from curdling the cream cheese.

Step 3: Make the Cheesecake Filling

In a large mixing bowl, beat the softened cream cheese until it’s smooth. Gradually add in the powdered sugar and vanilla extract, mixing until well combined. Slowly incorporate the cooled melted chocolate until the mixture is silky and uniform.

Step 4: Whip the Cream

In a separate bowl, whip the heavy cream until soft peaks form. Gently fold this whipped cream into the chocolate cream cheese mixture, being careful not to deflate the air bubbles.

Step 5: Assemble the Cheesecake

Pour the cheesecake filling over the chilled crust, smoothing the top with a spatula. Tap the pan gently to release any trapped air bubbles.

Step 6: Chill and Set

Cover the cheesecake with plastic wrap and refrigerate for at least 4–6 hours, or preferably overnight, allowing it to firm up beautifully.

Step 7: Add Toppings and Serve

Once your cheesecake is set, carefully remove it from the springform pan. Add your desired toppings, slice with a warm knife for clean edges, and serve with joy!

Pro Tips for the Perfect No Bake Cheesecake

Here are some expert insights to ensure your cheesecake turns out perfect every time:

  • Room Temperature Ingredients: Ensure your cream cheese is at room temperature for a smoother filling.
  • Chill the Tools: For extra fluffy whipped cream, chill your mixing bowl and beaters before whipping.
  • Don’t Skip the Chill: Patience is key! Letting the cheesecake set properly will enhance its flavor and texture.
  • Variations Are Key: Feel free to experiment with different crusts, such as almond flour or gluten-free options.
  • Melt Chocolate Wisely: If using a microwave, melt in 30-second intervals to avoid burning the chocolate.
  • Fresh Ingredients: Use high-quality chocolate and fresh cream for the best flavor.
  • Layering Toppings: For added texture, layer different toppings and flavors.
  • Serving Temperature: Let the cheesecake sit at room temperature for 10 minutes before slicing for easier serving.

Common Mistakes and Troubleshooting

Sometimes, even the best plans can go awry. Here’s how to troubleshoot common issues:

  • Crust Falling Apart: Make sure the butter is evenly mixed with the crumbs and pressed firmly into the pan.
  • Runny Filling: Ensure that the cream cheese is well-beaten and the heavy cream is whipped to the right consistency.
  • Chocolate Seizing: If the melted chocolate cools too much before mixing, it can seize. Use a warm bowl to gently reheat if needed.
  • Overmixing the Cream: Be gentle when folding in the whipped cream to keep the mixture airy and light.

Delicious Variations to Try

Why not switch things up with these exciting variations of your no bake chocolate cheesecake?

  • Peanut Butter Swirl: Add ½ cup of creamy peanut butter to the filling for a nutty twist.
  • Mint Chocolate: Incorporate peppermint extract into the filling and top with crushed mint candies.
  • Berry Bliss: Fold in fresh raspberries or strawberries into the filling for a fruity flavor.
  • Mocha Delight: Add a tablespoon of instant coffee to the filling for a coffee-infused cheesecake.

Storage and Make-Ahead Instructions

This cheesecake can be made ahead of time and stored in the fridge for up to a week. Here’s how to store it properly:

  • Cover Well: Use plastic wrap or an airtight container to keep the cheesecake fresh.
  • Chill Before Serving: Always serve chilled for the best texture and flavor.
  • Freezing Option: You can freeze the cheesecake for up to 3 months. Thaw in the fridge overnight before serving.

Frequently Asked Questions

Here are some common questions about no bake chocolate cheesecakes:

  • Can I use different types of chocolate?: Yes! Dark, milk, or white chocolate can all be used for different flavor profiles.
  • How do I make it gluten-free?: Substitute the crust with gluten-free cookies or crushed nuts.
  • What can I use instead of cream cheese?: Mascarpone or a non-dairy cream cheese alternative can be used for a different taste.
  • Can I add more sugar?: Adjust the powdered sugar to your taste, but be careful not to overpower the chocolate flavor.
  • Is it possible to make it vegan?: Yes! Use vegan cream cheese and coconut whipped cream for a delicious alternative.
  • How long does it take to set?: For best results, chill the cheesecake overnight to allow it to firm up properly.
  • Can I double the recipe?: Absolutely! Just use a larger pan and adjust your chilling time accordingly.
  • What’s the best way to slice the cheesecake?: Use a warm knife to cut through the cheesecake smoothly.

Nutrition Tips and Dietary Adaptations

If you’re looking for healthier options, consider these adaptations:

  • Use Light Cream Cheese: This can reduce calories while maintaining flavor.
  • Sweetener Alternatives: Try using honey or maple syrup in place of powdered sugar for a natural sweetener.
  • Lower Fat Options: Substitute heavy cream with a lighter whipped topping for fewer calories.

Essential Equipment for Making Cheesecake

Having the right tools can make your cheesecake-making experience smoother:

  • Springform Pan: Essential for easy removal of the cheesecake.
  • Mixing Bowls: Use different sizes for mixing the crust, filling, and whipped cream.
  • Hand Mixer or Stand Mixer: Makes beating cream cheese and whipping cream much easier.
  • Spatula: A silicone spatula is perfect for folding and smoothing your cheesecake.

Serving Suggestions for Sharing

When it comes time to serve, think about these delightful ideas:

  • Garnish with Fresh Fruits: Add a vibrant touch by garnishing with seasonal fruits.
  • Pair with Coffee: Serve alongside coffee or a dessert wine for a delightful end to a meal.
  • Create Individual Servings: Consider making mini cheesecakes in muffin tins for easy serving.

Conclusion

No bake chocolate cheesecake is more than a treat; it’s a way to create sweet memories. With every slice, you’re sharing love, warmth, and the joy of baking with those you cherish. So gather your ingredients, invite your friends or family to join you in the kitchen, and savor this delightful dessert that truly embodies the spirit of togetherness. Enjoy your time in the kitchen, and remember, it’s all about creating something special to share around the table.
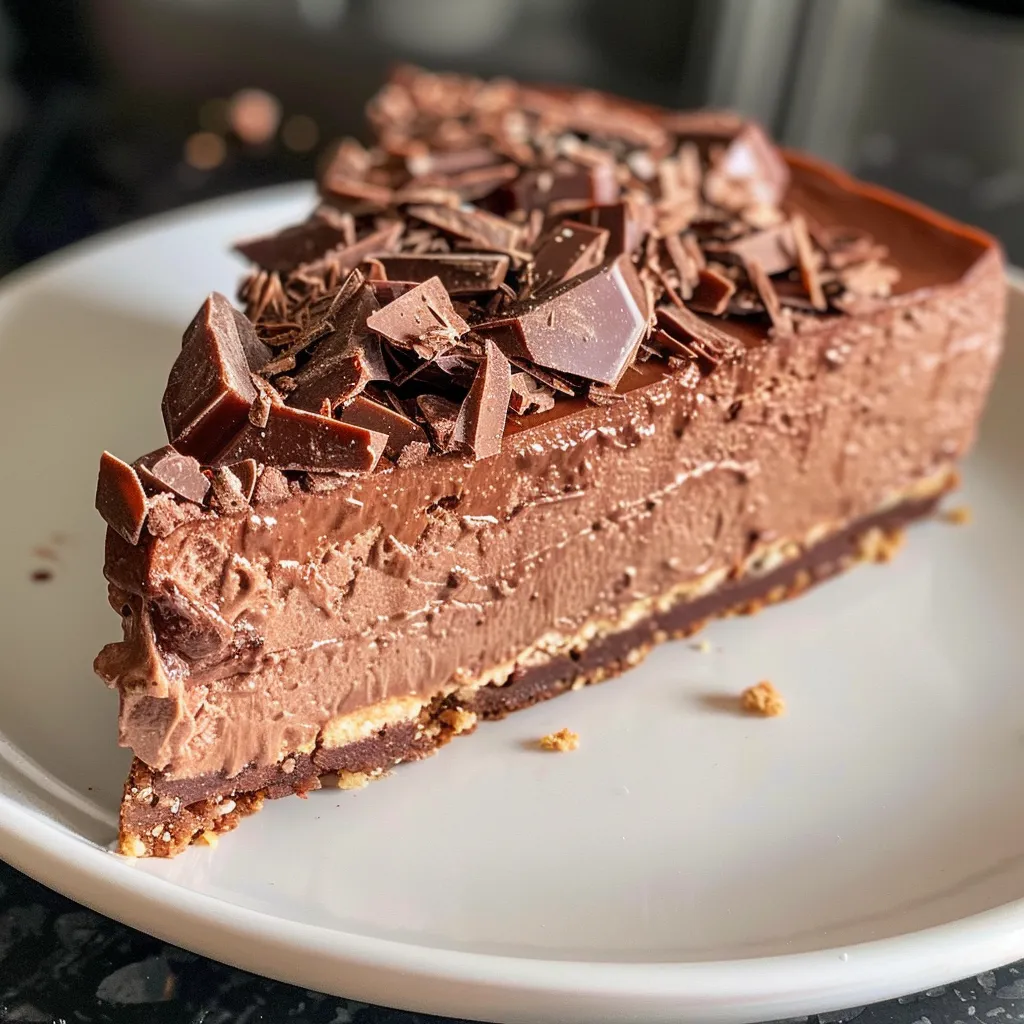
No Bake Chocolate Cheesecake

Prep Time 20 minutes
Total Time 20 minutes
Servings 8 pieces
Calories 450
A rich and creamy no-bake dessert combining chocolate and cheesecake flavors, perfect for easy indulgence.

Ingredients

Crust

  • 200 grams crushed biscuits or cookies
  • 50 grams melted butter

Filling

  • 250 grams cream cheese
  • 240 ml heavy cream
  • 50 grams powdered sugar
  • 100 grams melted chocolate
  • 1 teaspoon vanilla extract

Optional Toppings

  • chocolate ganache, chocolate shavings, cocoa powder, fresh berries, chopped nuts (for topping)

Instructions 

  • Mix crushed biscuits with melted butter and press into a pan. Chill for 20 minutes.
  • Melt chocolate and let cool slightly.
  • Beat cream cheese, powdered sugar, and vanilla. Mix in melted chocolate.
  • Whip heavy cream until soft peaks form and fold into the chocolate mixture.
  • Pour filling over crust, smooth, and refrigerate for 4–6 hours. Add toppings before serving.
Notes

Use a warm knife to slice for clean pieces.
Calories: 450kcal
Cost: $15
Course: Dessert
Keyword: cheesecake, chocolate, no-bake

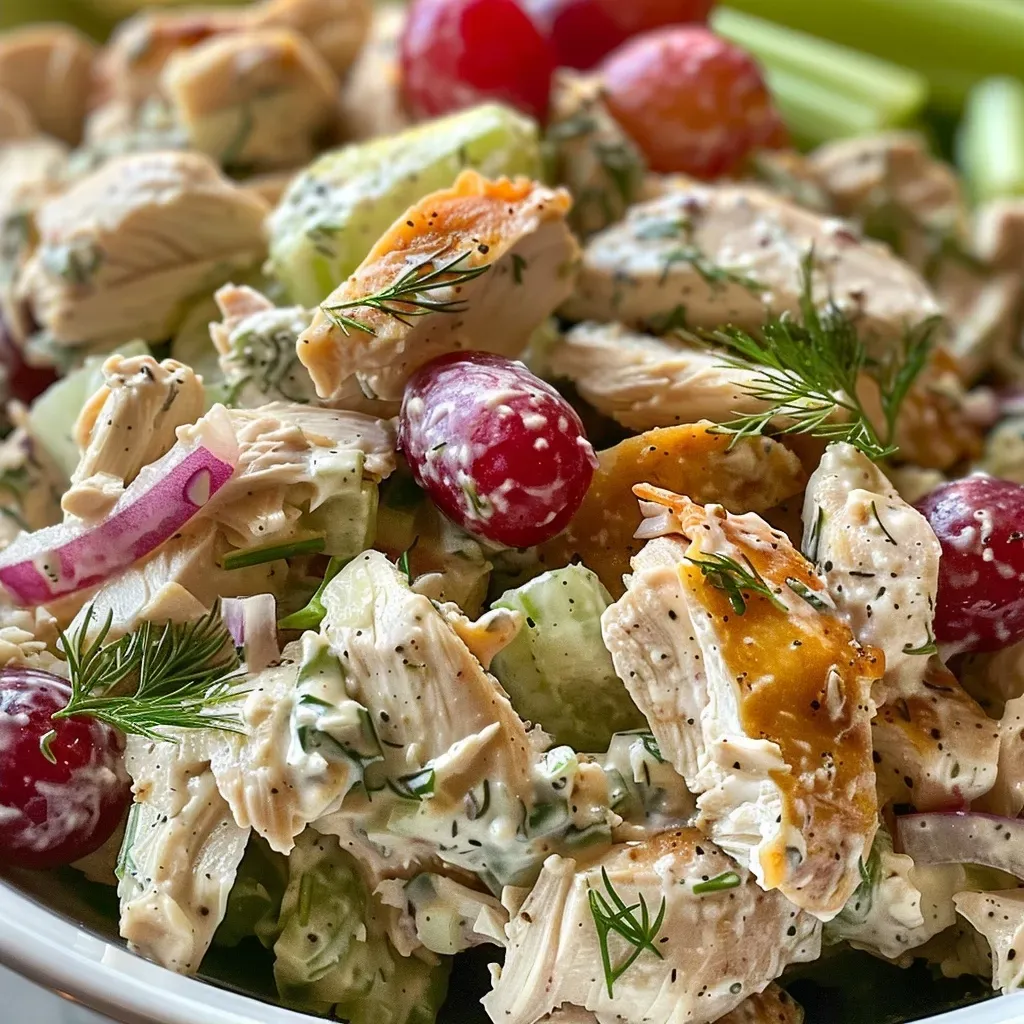
Welcome to a Heartwarming Chicken Salad Experience

Cooking is a beautiful way to connect with our past, and this Greek yogurt chicken salad recipe embodies that warmth and nostalgia. In just 15 minutes, you can create a dish that not only satisfies your hunger but also serves as a comforting reminder of home-cooked meals shared with loved ones. With fresh ingredients and a creamy texture from Greek yogurt instead of mayo, this chicken salad is both delicious and wholesome.

Why You’ll Love This Recipe

  • Quick and Easy: Ready in just 15 minutes, perfect for busy days when you need something nutritious.
  • Mayo-Free Delight: The creamy texture comes from Greek yogurt, making it a healthier choice while still being satisfying.
  • High Protein: Packed with protein from chicken and Greek yogurt, it’s great for muscle recovery and staying full longer.
  • Customizable: Easily adapt the ingredients to your taste or dietary needs, whether you’re adding nuts, swapping fruits, or going vegan.
  • Nostalgic Comfort: Each bite brings back memories of family gatherings and the love that fills a home-cooked meal.

Essential Ingredients for Your Greek Yogurt Chicken Salad

Gathering the right ingredients is key to making this chicken salad a success. Here’s what you’ll need:

  • 2 cups cooked, shredded chicken: A rotisserie chicken works perfectly for speed and flavor.
  • 1 cup plain Greek yogurt: Opt for 2% or full-fat for the best creaminess.
  • 2 stalks celery: Dice finely for that satisfying crunch.
  • 1/2 cup red grapes (optional): These add a sweet burst, but feel free to omit if you prefer.
  • 1/4 cup red onion: Minced for a little bite.
  • 1 tablespoon Dijon mustard: This adds a zesty depth of flavor.
  • 1 tablespoon fresh lemon juice: Brightens the salad and keeps it fresh.
  • 1 teaspoon dried dill: A classic herb that complements chicken beautifully.
  • 1/2 teaspoon salt: To taste, enhance the flavors.
  • 1/4 teaspoon black pepper: A touch of warmth.

Step-by-Step Instructions for Quick Greek Yogurt Chicken Salad

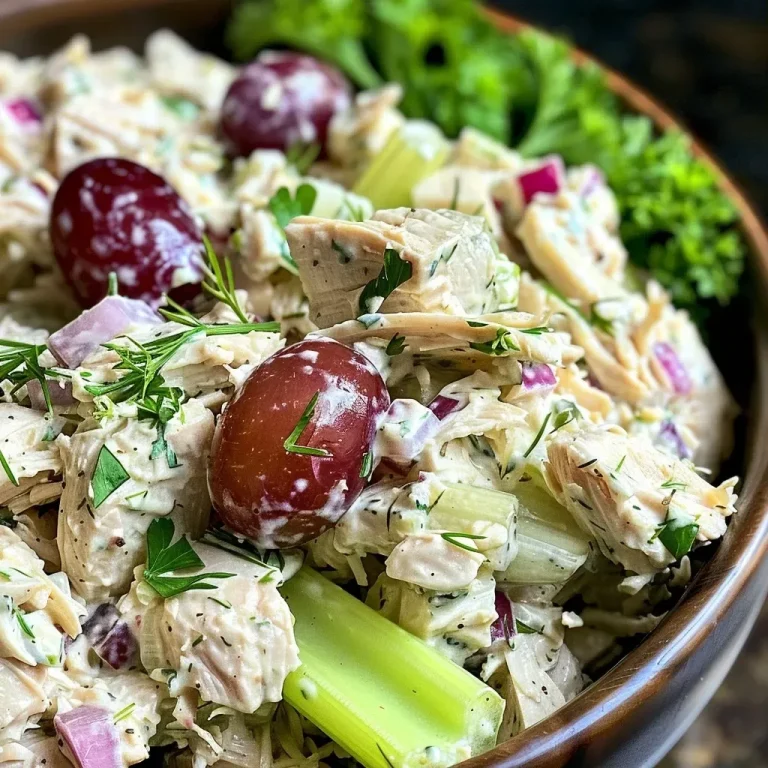
The Ultimate 15-Minute Healthy Greek Yogurt Chicken Salad (Mayo-Free & Rotisserie Ready)

Making this salad is as easy as pie—well, easier! Follow these simple steps:

  • Place the shredded chicken in a medium mixing bowl.
  • In a separate small bowl, whisk together the Greek yogurt, Dijon mustard, lemon juice, dried dill, salt, and pepper until smooth. This creates your creamy yogurt dressing.
  • Add the diced celery, minced red onion, and halved grapes (if using) to the bowl with the chicken.
  • Pour the Greek yogurt dressing over the chicken and vegetable mixture.
  • Use a spatula or spoon to gently fold all ingredients together until the chicken is evenly coated. Do not overmix.
  • Taste the salad and adjust salt or pepper as needed.
  • Chill for at least 10 minutes before serving for best flavor, or serve immediately.

Pro Tips for Perfecting Your Greek Yogurt Chicken Salad

  • Chill for Flavor: Letting the salad sit in the fridge enhances the flavors, making it even more delicious.
  • Fresh Ingredients: Use fresh veggies and herbs for the most vibrant flavor and texture.
  • Texture Matters: For a creamier salad, use full-fat Greek yogurt.
  • Season to Taste: Feel free to adjust the salt, pepper, or lemon juice according to your palate.
  • Make Ahead: This salad can be made a day in advance, just be sure to store it in an airtight container.
  • Experiment with Add-ins: Try adding nuts or seeds for extra crunch or swap out the grapes for apples for a different sweetness.
  • Serving Temperature: This salad can be enjoyed cold or at room temperature, making it versatile for any occasion.
  • Check the Chicken: If using leftover chicken, ensure it’s not past its prime for the best taste.

Common Mistakes and Troubleshooting

Even the best recipes can have hiccups. Here are some common issues and how to fix them:

  • Too Dry: If your salad is too dry, add more Greek yogurt or a touch of olive oil.
  • Overmixing: Be gentle when mixing; overmixing can break down the chicken and make it mushy.
  • Flavorless Salad: Always taste and adjust the seasoning before serving; a pinch more salt or a squeeze of lemon can make a huge difference.

Variations: Customizing Your Greek Yogurt Chicken Salad

This chicken salad is wonderfully adaptable. Here are some variations to try:

  • Buffalo Chicken Salad: Mix in buffalo sauce for a spicy twist.
  • Curried Chicken Salad: Add curry powder and chopped apples for a fragrant flavor.
  • Avocado Chicken Salad: Replace some of the Greek yogurt with mashed avocado for a creamy texture.
  • Vegetarian Option: Swap chicken for chickpeas or use a variety of beans for protein.

Storage and Make-Ahead Instructions

This salad not only tastes great fresh but also keeps well for a few days:

  • Refrigeration: Store in an airtight container in the fridge for up to 3 days.
  • Freezing: Not recommended due to the yogurt texture; best enjoyed fresh.
  • Make-Ahead: Prepare the salad a day in advance for optimal flavor.

Frequently Asked Questions

Here are some common questions about this recipe:

  • Can I use low-fat Greek yogurt? Yes, but full-fat provides a creamier texture.
  • How do I make this chicken salad dairy-free? Substitute the Greek yogurt with a dairy-free yogurt alternative.
  • What can I serve with this salad? It pairs beautifully with whole grain bread, crackers, or a fresh green salad.
  • Can I make this salad with leftover turkey? Absolutely! It works well with any leftover cooked poultry.
  • How long does this chicken salad last in the fridge? Up to 3 days when stored properly.
  • Is this salad suitable for meal prep? Yes, it’s perfect for meal prep and can be portioned out for lunches.
  • Can I add nuts to this salad? Yes, chopped walnuts or almonds add a nice crunch!
  • What’s the best way to serve this salad? Serve it chilled as a sandwich, in lettuce wraps, or alongside fresh veggies.

Nutritional Tips and Dietary Adaptations

This chicken salad is not only delicious but also nutritious:

  • High Protein: With chicken and Greek yogurt as the main ingredients, it’s a great protein source.
  • Low Carb Option: Omit the grapes for a low-carb salad.
  • Gluten-Free: Naturally gluten-free; serve it on gluten-free bread or lettuce wraps.
  • Heart-Healthy: Using Greek yogurt instead of mayo reduces saturated fat.

Equipment Recommendations

To make this recipe, you’ll need:

  • Mixing Bowls: A medium bowl for the chicken and a small bowl for the dressing.
  • Whisk: For blending the yogurt dressing smoothly.
  • Spatula: To gently fold the ingredients together.
  • Measuring Cups and Spoons: For precise ingredient measurements.

Serving Suggestions

This salad is versatile and can be enjoyed in many ways:

  • Sandwiches: Spread it on whole grain bread for a hearty sandwich.
  • Wraps: Use lettuce leaves or tortillas for a healthy wrap.
  • Salad Bowls: Serve over a bed of greens or with sliced cucumbers and tomatoes.
  • Picnics: Pack it up for a delightful picnic dish!

Conclusion: A Recipe to Cherish

This Greek yogurt chicken salad is not just a meal; it’s a way to bring warmth and love to your table. Whether you’re enjoying it solo, with family, or at a gathering, each bite carries the essence of home. Cooking is about sharing stories, memories, and flavors. So gather your ingredients, follow this recipe, and let your kitchen be filled with laughter and joy. Happy cooking!

The Ultimate 15-Minute Healthy Greek Yogurt Chicken Salad (Mayo-Free & Rotisserie Ready)

Prep Time 5 minutes
Cook Time 10 minutes
Total Time 15 minutes
Servings 4 servings
Calories 250
A quick, healthy chicken salad made with Greek yogurt, perfect for a nutritious lunch or light dinner in just 15 minutes.

Ingredients

Protein

  • 2 cups cooked, shredded chicken (rotisserie shortcut recommended)
  • 1 cup plain Greek yogurt (2% or full-fat recommended for best texture)
  • 2 stalks celery, finely diced
  • 0.5 cup red grapes, halved (optional)
  • 0.25 cup red onion, finely minced
  • 1 tablespoon Dijon mustard
  • 1 tablespoon fresh lemon juice
  • 1 teaspoon dried dill
  • 0.5 teaspoon salt
  • 0.25 teaspoon black pepper

Instructions 

  • Place shredded chicken in a bowl.
  • Whisk Greek yogurt, Dijon mustard, lemon juice, dill, salt, and pepper to make dressing.
  • Add celery, red onion, and grapes to the chicken.
  • Pour dressing over mixture and gently fold to combine.
  • Chill for 10 minutes or serve immediately.

Notes

For extra flavor, add fresh herbs or a dash of olive oil.
Calories: 250kcal
Cost: $15
Course: Salad
Cuisine: Greek
Keyword: Chicken, Greek yogurt, Healthy

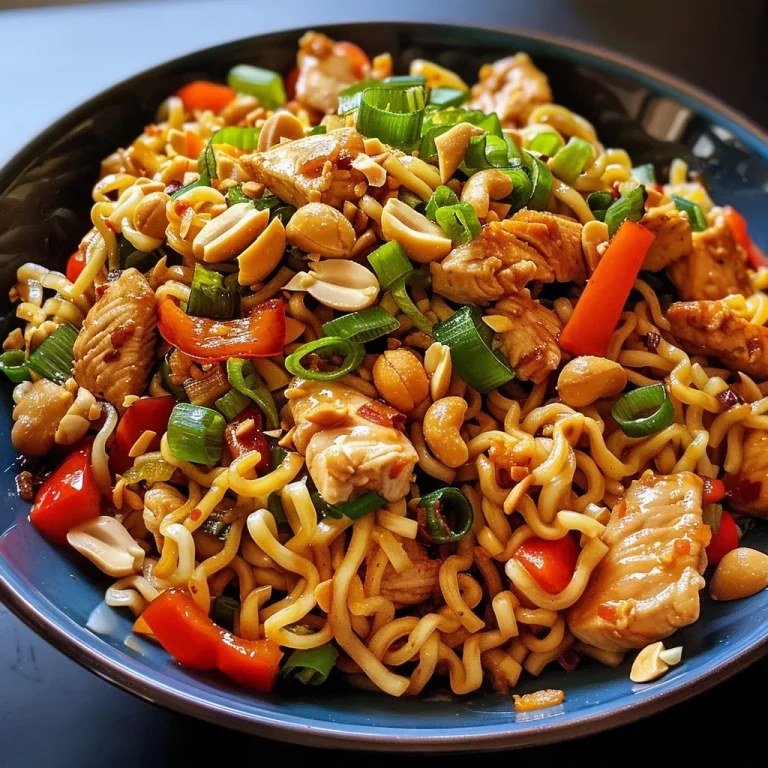
Discover the Heartwarming Recipe for Stir-Fried Mie Noodles

When it comes to family gatherings and cozy evenings at home, few dishes can evoke the warmth and nostalgia of a shared meal like Mie Goreng. This simple yet flavorful Indonesian stir-fried noodle dish is more than just a recipe; it’s a celebration of loved ones, laughter, and cherished memories. In this article, we’ll dive deep into the world of stir-fried noodles, exploring every aspect of this delightful dish, from the ingredients to preparation tips, variations, and even some troubleshooting advice. Let’s embark on this culinary journey together!

Why You’ll Love This Recipe

  • Quick and Easy: With minimal prep time and simple steps, you can whip up this delicious dish in no time, making it perfect for busy weeknights.
  • Flavorful Ingredients: The combination of kecap manis (sweet soy sauce), fresh vegetables, and tender chicken creates a symphony of flavors that will tantalize your taste buds.
  • Customizable: Whether you prefer chicken, shrimp, or a vegetarian option, this recipe can easily be adapted to suit your dietary preferences.
  • Perfect for Sharing: This dish is ideal for gatherings, allowing everyone to enjoy a hearty meal together, creating memories around the table.
  • Healthy and Wholesome: Packed with colorful veggies, this stir-fried noodle dish is not only delicious but also nutritious.

Ingredients You’ll Need

To create the perfect plate of Mie Goreng, gather the following ingredients:

  • 200 g Hähnchenbrust: Tender chicken breast, sliced into thin strips.
  • 170 g Mie Nudeln: Fresh egg noodles that soak up the flavors beautifully.
  • 1 Stück Rote Paprika: Sweet red bell pepper, sliced into strips for a pop of color.
  • 1 Stück Frühlingszwiebeln: Green onions, chopped for a fresh crunch.
  • 0,5 Stück Karotten: Grated carrot, adding sweetness and texture.
  • 4 Esslöffel Sojasauce: Soy sauce for seasoning and depth of flavor.
  • 15 g Geröstete, gesalzene Erdnüsse: Crunchy peanuts for garnishing and added flavor.
  • 1 Esslöffel Sonnenblumenöl: Oil for cooking, ensuring the noodles don’t stick.

Step-by-Step Instructions for Making Mie Goreng

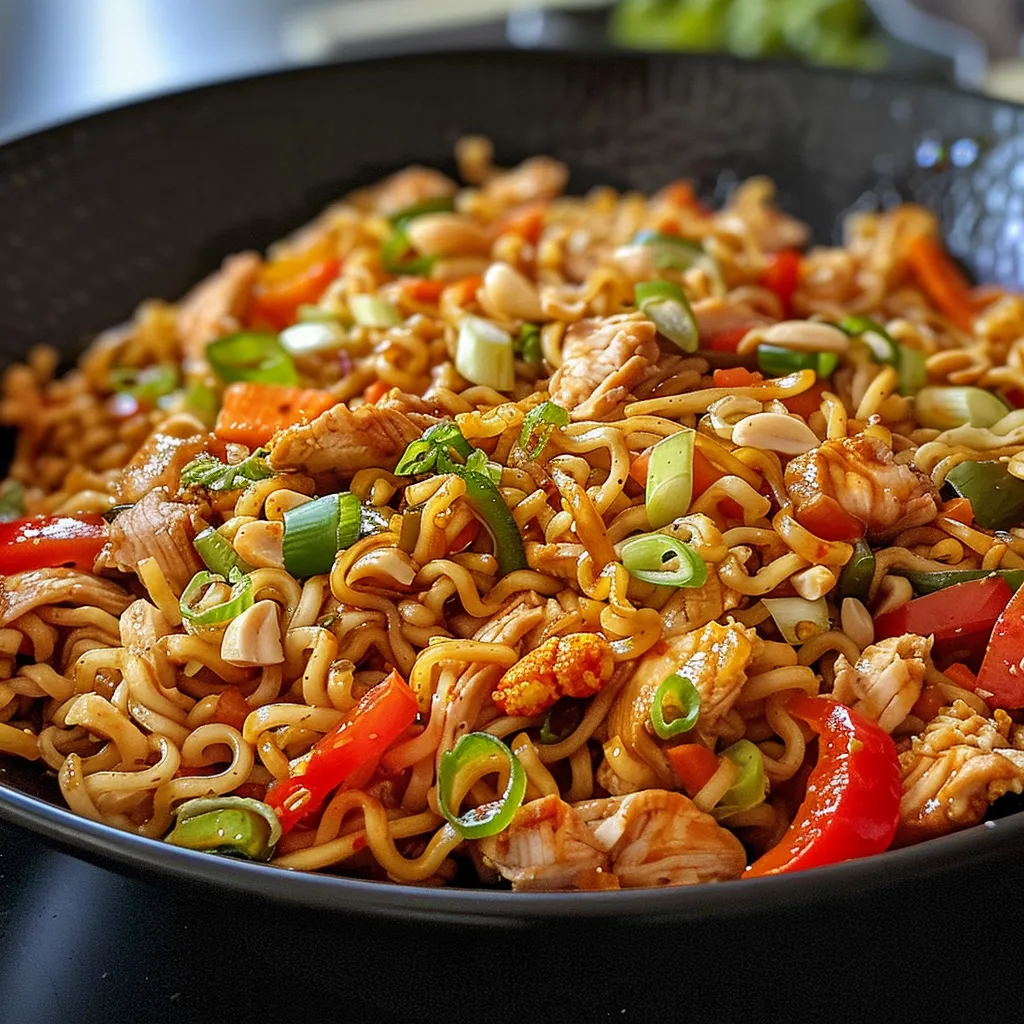
Gebratene Mie Nudeln mit Hähnchen

Follow these detailed steps to create your own plate of delicious stir-fried noodles:

  • Wash and pat dry the vegetables and chicken thoroughly.
  • Grate the carrot, slice the bell pepper into strips, and chop the green onions into rings.
  • Slice the chicken breast into thin strips, ensuring even cooking.
  • Heat a non-stick frying pan over medium-high heat. Add a splash of sunflower oil and sauté the chicken with the bell pepper until golden brown.
  • Meanwhile, cook the fresh egg noodles in boiling water until al dente, then drain and set aside.
  • Add the cooked noodles and remaining vegetables to the frying pan, stirring everything together for about 5 minutes.
  • Season the stir-fried mixture with salt, pepper, and soy sauce, adjusting the flavor to your liking.
  • Serve hot, garnished with crushed peanuts for that delightful crunch.

Pro Tips for Perfecting Your Mie Goreng

  • Prep Ingredients Ahead: Having all your ingredients prepped and ready to go (a technique known as Mise En Place) will make cooking smoother and faster.
  • Use High Heat: Stir-frying requires high heat to achieve that signature ‘wok hei’ flavor, so ensure your pan is hot before adding ingredients.
  • Don’t Overcrowd the Pan: Cook in batches if necessary to maintain high heat and achieve a better stir-fry.
  • Experiment with Sauces: Feel free to add oyster sauce or sambal oelek for an extra kick of flavor.
  • Balance Flavors: Taste as you go and adjust the seasoning with soy sauce, salt, or a splash of vinegar to achieve the perfect balance.
  • Fresh Noodles Are Key: If available, use fresh egg noodles for the best texture and flavor absorption.
  • Garnish Generously: Don’t skimp on the peanuts; they add a lovely crunch and contrast to the soft noodles and veggies.
  • Serve Immediately: For the best experience, serve your Mie Goreng hot off the stove.

Common Mistakes and Troubleshooting

Even the best cooks can run into hiccups. Here’s how to avoid common mistakes:

  • Overcooking the Noodles: Make sure to cook the noodles just until al dente; they will continue to cook when you stir-fry them.
  • Too Much Soy Sauce: Start with less soy sauce and adjust to taste; too much can make the dish overly salty.
  • Not Using Enough Heat: If your noodles aren’t browning, your pan may not be hot enough. Increase the heat and try again.
  • Skipping the Garnish: The garnish is essential! It adds flavor and texture, so don’t skip the peanuts.

Variations to Try

Here are some delicious variations of Mie Goreng to suit your taste:

  • Shrimp Mie Goreng: Substitute chicken with shrimp for a seafood twist that’s equally delightful.
  • Vegetarian Mie Goreng: Skip the chicken and load up on more veggies like broccoli, snap peas, and mushrooms.
  • Spicy Mie Goreng: Add chili paste or fresh chilies to the stir-fry for a fiery kick.
  • Egg Mie Goreng: Top your dish with a fried or poached egg for added richness and flavor.

Storage and Make-Ahead Instructions

If you’re planning to make this dish ahead of time, here’s how to store it properly:

  • Refrigeration: Store leftovers in an airtight container for up to 3 days. Reheat in a pan over medium heat for the best results.
  • Freezing: For longer storage, freeze the stir-fried noodles in a freezer-safe container for up to 2 months. Thaw in the refrigerator before reheating.
  • Make-Ahead: You can prepare the veggies and chicken ahead of time, storing them separately in the refrigerator until you’re ready to cook.

Frequently Asked Questions

Here are some common questions about Mie Goreng:

  • Can I use other types of noodles? Absolutely! While egg noodles are traditional, you can use rice noodles or even spaghetti in a pinch.
  • What can I substitute for kecap manis? If you don’t have kecap manis, mix regular soy sauce with a bit of brown sugar for a similar flavor.
  • Is Mie Goreng gluten-free? Use gluten-free noodles and tamari instead of soy sauce for a gluten-free version.
  • Can I add other proteins? Yes! Feel free to add tofu, beef, or any protein you prefer.
  • What vegetables work best? Bell peppers, carrots, bok choy, and snap peas are all excellent options.
  • How spicy is Mie Goreng? The spice level can be adjusted based on your preference, so feel free to add more or less chili.
  • Can I make this vegan? Yes! Simply omit the chicken and use vegetable broth for cooking the noodles.
  • How do I know when the noodles are done? They should be tender but firm to the bite; typically around 4-5 minutes in boiling water.

Nutritional Insights and Dietary Adaptations

Enjoying Mie Goreng can fit into various dietary lifestyles. Here are some tips:

  • Protein Boost: Add tofu or legumes for additional protein if you’re following a plant-based diet.
  • Lowering Carbs: Substitute traditional noodles with spiralized zucchini or shirataki noodles for a low-carb option.
  • Calorie Control: Use less oil and load up on vegetables to create a lighter version of this dish.

Essential Equipment for Making Mie Goreng

To make the cooking process seamless, consider these essentials:

  • Wok or Large Skillet: A large cooking surface heats evenly and allows for great stir-frying.
  • Sharp Knife: For slicing ingredients quickly and efficiently.
  • Spatula: A sturdy spatula is essential for tossing everything together in the pan.
  • Measuring Cups and Spoons: For precise ingredient measurements to ensure consistency.

Serving Suggestions

To make your Mie Goreng experience even more delightful, consider these serving suggestions:

  • Pair with a Fresh Salad: A light cucumber salad can balance the richness of the noodles.
  • Serve with Extra Sauce: Offer additional soy sauce or sambal oelek on the side for those who like it spicy.
  • Accompany with Beverages: A chilled iced tea or a refreshing lemonade complements the dish beautifully.

In conclusion, Stir-Fried Mie Noodles is not just a meal but a heartwarming experience steeped in tradition and love. As you create this dish, remember that the kitchen is a place to share, connect, and celebrate life’s little moments. Embrace the flavors, enjoy the process, and gather your loved ones around the table. Happy cooking!

Gebratene Mie Nudeln mit Hähnchen

Prep Time 10 minutes
Cook Time 10 minutes
Total Time 20 minutes
Servings 2 people
Calories 550
Enjoy a quick and flavorful stir-fried noodle dish with tender chicken and fresh vegetables.

Ingredients

Protein

  • 200 g Hähnchenbrust

Carbohydrate

  • 170 g Mie Nudeln

Vegetables

  • 1 stück Rote Paprika
  • 1 stück Frühlingszwiebeln
  • 0.5 stück Karotte (fein geraspelt)

Sauces & Oils

  • 4 EL Sojasauce
  • 15 g Geröstete, gesalzene Erdnüsse
  • 1 EL Sonnenblumenöl

Instructions 

  • Waschen und trocknen Sie das Gemüse und das Hähnchen.
  • Schneiden Sie das Hähnchen in Streifen und das Gemüse entsprechend.
  • Braten Sie das Hähnchen mit Paprika in Öl an.
  • Kochen Sie die Mie-Nudeln bissfest und abtropfen lassen.
  • Fügen Sie Nudeln und Gemüse in die Pfanne, braten Sie alles 5 Minuten.
  • Mit Sojasauce, Salz, Pfeffer abschmecken und mit Erdnüssen garnieren.

Notes

Für extra Geschmack, fügen Sie frisches Koriander hinzu.
Calories: 550kcal
Cost: $12
Course: Main Course
Cuisine: Asian
Keyword: Chicken, noodles

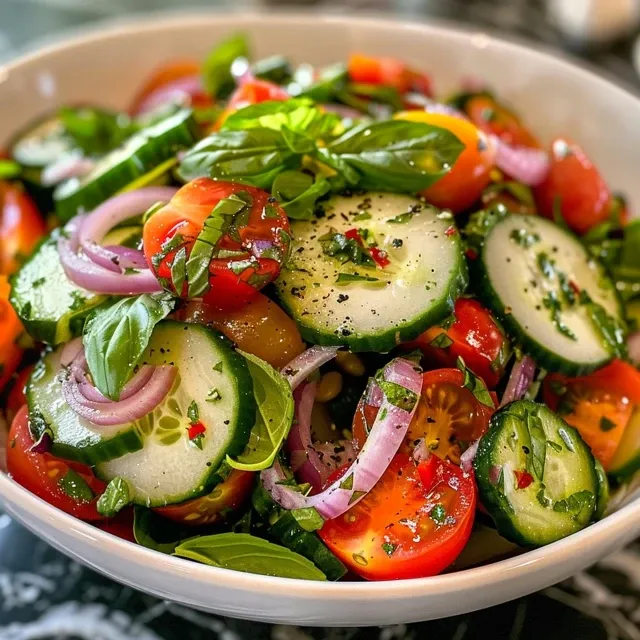
Welcome to a Garden of Flavor

Cooking is a journey of love, and every dish we create tells a story. Today, I invite you to explore the delightful Basil Dreams: A Salad That Whispers of Sunlit Gardens. This basil salad combines vibrant basil leaves with crisp cucumbers and sweet cherry tomatoes, drizzled with a zesty lemon dressing. It’s perfect for sharing around the table, bringing the essence of summer right to your plate. Let’s dive into this culinary experience that’s not just about food, but about memories and moments shared.

Why You’ll Love This Recipe

This salad isn’t just a dish; it’s a celebration of flavors and textures that reflects the warmth of southern hospitality. Here are a few reasons why this Fresh & Zesty Basil Salad will become a favorite:

  • Bright and Refreshing: The combination of fresh basil, crunchy cucumbers, and sweet tomatoes creates a burst of flavor that dances on your palate.
  • Simple Preparation: With just a few fresh ingredients and minimal prep, this salad can be ready in minutes, making it a hassle-free choice for busy days.
  • Versatile: This salad can be a side dish, a light lunch, or even a main course with the addition of protein, showcasing its adaptability.
  • Healthy and Nutritious: Packed with vitamins and antioxidants, it’s a delightful way to incorporate more fresh vegetables into your diet.
  • Perfect for Sharing: Whether it’s a family gathering or a casual meal with friends, this salad brings people together, encouraging conversation and connection.

The Ingredients: Freshness is Key

Let’s take a closer look at the ingredients that make this salad a true delight:

  • 2 cups fresh basil leaves: The star of the show, providing a fragrant aroma and vibrant green color.
  • 1 large cucumber: Thinly sliced, offering a refreshing crunch.
  • 1 cup cherry tomatoes: Halved for sweetness and visual appeal.
  • 1/4 cup red onion: Thinly sliced for a hint of sharpness that complements the sweetness of the tomatoes.
  • 1/4 cup extra virgin olive oil: A rich base for the dressing, enhancing the flavors of the salad.
  • 2 tbsp lemon juice: Adds acidity and brightness to the dish, balancing the flavors perfectly.
  • 1 clove garlic: Minced for a subtle kick of flavor.
  • Salt and pepper: To taste, bringing all the elements together.

Substitutions and Variations

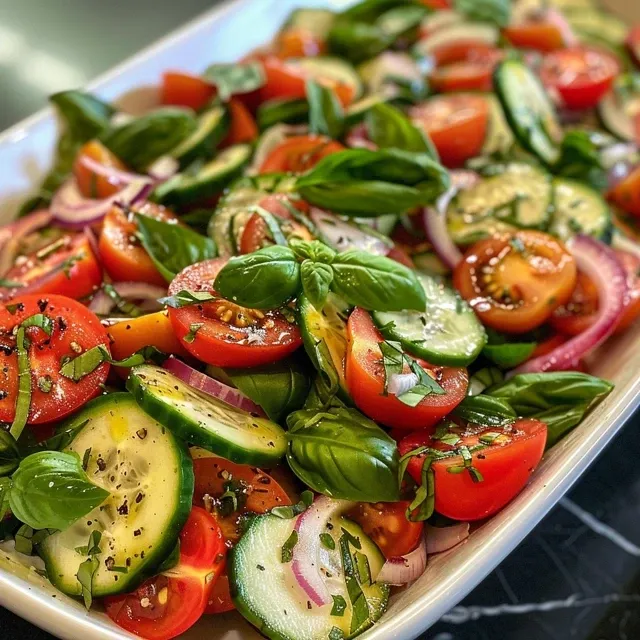
A side view of a fresh basil salad, highlighting sliced cucumbers and cherry tomatoes, with a drizzle of olive oil.

Feel free to make this salad your own! Here are some substitutions and variations to consider:

  • Herb Variations: Try replacing basil with mint or cilantro for a different flavor profile.
  • Cheese Addition: Crumbled feta or fresh mozzarella can add creaminess and richness.
  • Add Protein: Grilled chicken, shrimp, or chickpeas can transform this salad into a hearty meal.
  • Nutty Crunch: Toss in some toasted pine nuts or walnuts for added texture and nutrition.

Step-by-Step Instructions

Bringing this salad to life is a straightforward process that anyone can master:

  1. Prepare the vegetables by washing and slicing them as directed.
  2. In a small bowl, whisk together the olive oil, lemon juice, garlic, salt, and pepper to make a zesty dressing.
  3. In a large bowl, gently toss the cucumbers, cherry tomatoes, red onion, and fresh basil leaves.
  4. Drizzle the dressing over the salad and toss lightly to coat every piece.
  5. Serve immediately for the best flavor and texture, allowing the salad to shine in its freshest form.

Pro Tips for the Perfect Salad

To elevate your salad-making skills, here are some expert insights:

  • Use Fresh Ingredients: Always opt for the freshest produce available; it makes a world of difference in flavor.
  • Don’t Overdress: Adding too much dressing can make the salad soggy; start with less and add more if needed.
  • Let it Rest: Allowing the salad to sit for a few minutes before serving can help the flavors meld beautifully.
  • Season Generously: Don’t shy away from seasoning; a pinch of salt can enhance the natural flavors of the ingredients.
  • Experiment with Texture: Consider adding different textures, such as creamy cheese or crunchy nuts, to create a more dynamic salad.
  • Chill Before Serving: For a refreshing experience, chill the salad for about 30 minutes in the refrigerator before serving.
  • Presentation Matters: Arrange the salad in a beautiful bowl to enhance the visual appeal, inviting everyone to enjoy.
  • Keep it Simple: Sometimes, the best salads are those that celebrate the ingredients without too many additions.

Common Mistakes and Troubleshooting

Even the best chefs can make mistakes. Here are some common pitfalls and how to avoid them:

  • Soggy Salad: If your salad becomes soggy, it’s likely from too much dressing or letting it sit too long before serving. Always dress just before serving.
  • Overpowering Flavors: If one ingredient overpowers the others, adjust the quantities next time or balance it with complementary flavors.
  • Basil Browning: If your basil wilts or browns, it’s best to add it just before serving to keep it vibrant.

Storage and Make-Ahead Instructions

Want to prep ahead? Here’s how to handle storage:

  • Make Ahead: You can prepare the dressing a day in advance and store it in the fridge. Just mix the salad ingredients fresh before serving.
  • Storage: If you have leftovers, store them in an airtight container in the refrigerator for up to 2 days, but note that the salad may lose some crispness.

Frequently Asked Questions

Here are some common questions about this delightful salad:

  • Can I make this salad vegan? Absolutely! The ingredients are naturally vegan; just ensure any cheese you add is dairy-free.
  • What can I serve with this salad? It pairs wonderfully with grilled meats, seafood, or as a light appetizer with bread.
  • How can I make it spicier? Add a pinch of red pepper flakes or diced jalapeños to the dressing for a kick.
  • Can I use dried basil instead of fresh? While you can, fresh basil offers a much brighter flavor and is recommended for this salad.
  • Is this salad gluten-free? Yes, all ingredients in this salad are gluten-free, making it suitable for various dietary needs.
  • How long does fresh basil last? Fresh basil can last about a week in the refrigerator if stored properly in a damp paper towel and sealed in a plastic bag.
  • What’s the best way to cut cherry tomatoes? Slice them in half lengthwise for optimal presentation and ease of eating.
  • Can I add fruits to this salad? Yes! Fresh fruits like strawberries or peaches can add a delightful sweetness.

Nutrition Tips and Dietary Adaptations

For those watching their diet, here are some tips:

  • Low-Calorie Option: Skip the olive oil or use a lighter dressing alternative to reduce calories.
  • Boost Fiber: Add more vegetables like bell peppers or carrots to enhance fiber content.
  • Protein-Rich: Incorporate grilled chicken or beans to make this salad more filling and protein-rich.

Equipment Recommendations

Here’s what you’ll need to prepare this salad:

  • Sharp Knife: For slicing vegetables and herbs with ease.
  • Cutting Board: A sturdy surface for all your chopping needs.
  • Mixing Bowl: A large bowl for tossing your salad ingredients together.
  • Whisk: For mixing the dressing ingredients thoroughly.
  • Serving Bowl: To present your salad beautifully at the table.

Serving Suggestions

For the best dining experience, consider these serving ideas:

  • Garnish: Top the salad with a sprinkle of toasted nuts or crumbled cheese for added flavor.
  • Pair with Bread: Serve alongside crusty bread or garlic knots for a delightful meal.
  • Make it a Meal: Add grilled chicken or shrimp on top to create a satisfying main course.

In Conclusion: A Salad to Cherish

The Fresh & Zesty Basil Salad is more than just a recipe; it’s a way to create cherished moments and share love with those around you. So gather your loved ones, prepare this delightful salad, and enjoy the flavors and stories it brings. Remember, in the kitchen, it’s not about perfection; it’s about authenticity, warmth, and the joy of sharing a meal. Happy cooking!

Fresh & Zesty Basil Salad

Prep Time 10 minutes
Total Time 10 minutes
Servings 4 people
Calories 150
A vibrant and refreshing salad combining fresh basil, crisp vegetables, and a tangy lemon dressing for a light, flavorful dish.

Ingredients

Vegetables

  • 2 cups fresh basil leaves (washed and dried)
  • 1 large cucumber (thinly sliced)
  • 1 cup cherry tomatoes (halved)
  • 0.25 cup red onion (thinly sliced)
  • 0.25 cup extra virgin olive oil
  • 2 tbsp lemon juice
  • 1 clove garlic (minced)
  • to taste Salt and pepper

Instructions 

  • Wash and slice vegetables; prepare basil.
  • Whisk olive oil, lemon juice, garlic, salt, and pepper for dressing.
  • Toss vegetables and basil in a large bowl.
  • Drizzle dressing over salad and toss lightly.
  • Serve immediately.

Notes

Use fresh basil for the best flavor.
Calories: 150kcal
Cost: $10
Course: Salad
Cuisine: fusion
Keyword: Basil

Welcome to a Breakfast Tradition: Fluffy Chocolate Protein Pancakes

In the heart of every home, breakfast is a cherished ritual, a moment where love and laughter blend seamlessly over delicious food. Today, I invite you to explore a recipe that brings warmth to your mornings: Fluffy Chocolate Protein Pancakes. These pancakes are not just about satisfying hunger; they are an invitation to gather around the table and share stories, laughter, and memories. With wholesome ingredients and a delightful chocolatey twist, this recipe is perfect for busy mornings or leisurely weekends alike.

Why You’ll Love This Recipe

These chocolate protein pancakes are crafted with care, and here’s why they should become a staple in your breakfast repertoire:

  • Nutritious and Wholesome: Packed with protein from Greek yogurt and protein powder, they provide a balanced start to your day.
  • Customizable: Adjust the sweetness or add your favorite toppings like fresh fruit, nuts, or chocolate chips.
  • Quick and Easy: Ready in under 30 minutes, perfect for those hectic mornings.
  • Family-Friendly: Everyone loves pancakes! These are sure to satisfy both kids and adults alike.
  • Heartwarming Tradition: Making pancakes can become a cherished family tradition, bringing everyone together in the kitchen.

Ingredient Breakdown

To create these delightful pancakes, you’ll need a few key ingredients. Here’s a detailed look at each one along with some suggested substitutions:

  • 1 cup flour (120g): You can use all-purpose, whole wheat, or even gluten-free flour for a healthier twist.
  • 1/4 cup chocolate protein powder (32g): This is the star ingredient; it enhances the protein content while delivering rich chocolate flavor.
  • 2 tbsp unsweetened cocoa powder (10g): Dutch-processed cocoa powder adds deep color and a robust chocolate taste.
  • 2 1/2 tsp baking powder: This helps your pancakes rise and become fluffy.
  • 1/2 tsp salt: Balances the sweetness and enhances the flavors.
  • 1/8 tsp baking soda: Aids in leavening for that perfect fluffy texture.
  • 3/4 cup milk of choice (180g): Almond milk, oat milk, or regular cow’s milk all work beautifully.
  • 2 tbsp pure maple syrup (30g): Natural sweetness; you can substitute with honey or agave syrup.
  • 1 tbsp oil (12g): Use vegetable oil, melted butter, or peanut butter for added flavor.
  • 1 large egg or 1/4 cup mashed banana or applesauce: Acts as a binder; choose based on your dietary preferences.
  • 1/2 tsp pure vanilla extract (2g): Adds a warm aroma and flavor.
  • 1 tsp apple cider vinegar (5g): This reacts with baking soda for extra fluffiness.
  • 6 oz Greek yogurt or dairy-free alternative (170g) (optional): Adds creaminess and extra protein.

How to Make Chocolate Protein Pancakes

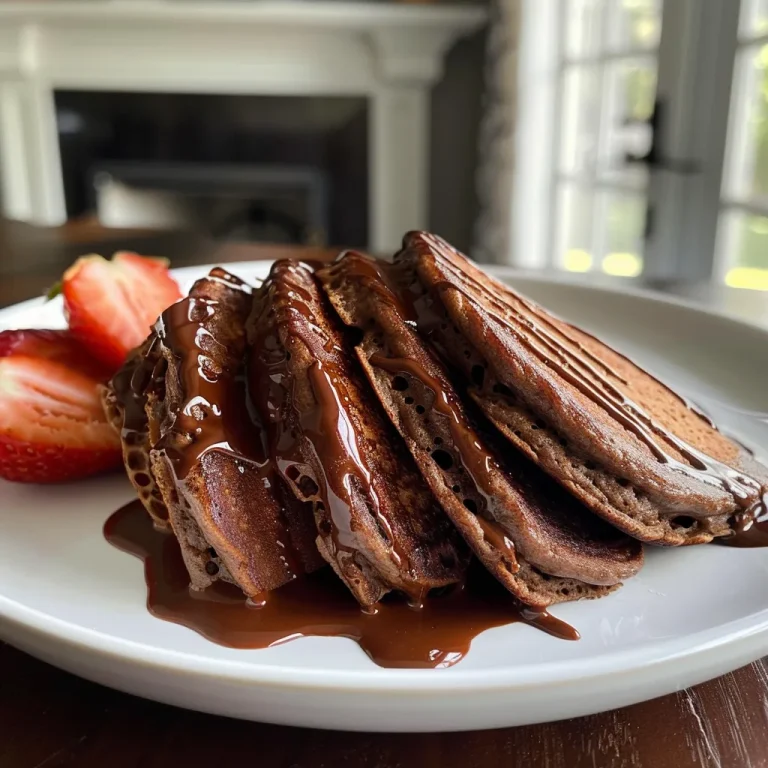
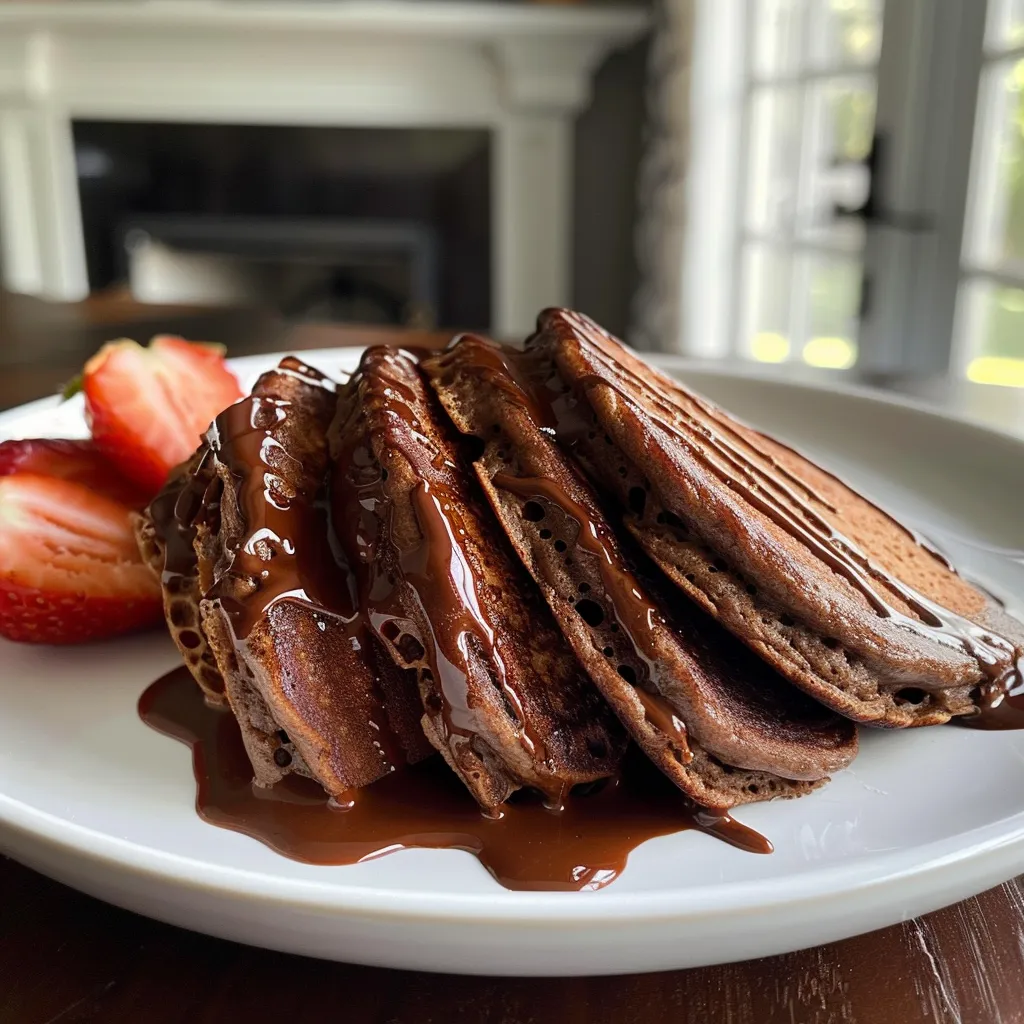
Fluffy chocolate pancakes with a rich, glossy appearance and a side of fresh fruit.

Follow these simple steps to whip up your delicious pancakes:

  1. Whisk Dry Ingredients: In a large bowl, whisk together all dry ingredients thoroughly to ensure even distribution.
  2. Combine Wet Ingredients: Stir in the liquid ingredients (except Greek yogurt) until just combined. You can adjust consistency with more milk if needed.
  3. Let the Batter Rest: For fluffier pancakes, let the batter rest for 10 minutes or refrigerate overnight.
  4. Heat Your Pan: Grease a pancake griddle or nonstick skillet over medium heat. A drop of water should sizzle when the pan is ready.
  5. Cook the Pancakes: Spoon approximately 2 tablespoons of batter onto the hot griddle. Cook until edges look dry and bubbles form, then flip and cook for another minute.
  6. Re-grease the Pan: Between batches, re-grease the pan to prevent sticking.
  7. Serve Hot: Enjoy your pancakes topped with maple syrup, Greek yogurt, or mini chocolate chips.
  8. Store Leftovers: Refrigerate or freeze extras for up to five days; reheat gently before serving.

Pro Tips for Perfect Pancakes

Mastering the art of pancake making takes practice, and here are some expert insights to elevate your game:

  • Don’t Overmix: Mix until just combined; lumps are okay! Overmixing leads to dense pancakes.
  • Temperature Matters: Ensure your pan is at the right heat; too hot will burn the outside while leaving the inside raw.
  • Test a Small Batch: Cook one pancake first to check the heat and adjust as necessary.
  • Play with Add-ins: Consider adding chocolate chips, nuts, or berries directly into the batter for extra flavor.
  • Keep it Warm: Place cooked pancakes in a warm oven (200°F) while you finish cooking the rest.
  • Fluffier Pancakes: Using fresh baking powder and letting the batter rest can make a noticeable difference.
  • Try Different Flours: Experiment with almond flour or coconut flour for unique flavors and textures.
  • Practice Patience: Allow pancakes to cook undisturbed for the best rise and texture.

Common Mistakes and Troubleshooting

Even seasoned cooks can face hiccups in the kitchen. Here are solutions for common pancake problems:

  • Pancakes Are Tough: This often results from overmixing. Mix just until combined for a tender texture.
  • Pancakes Are Flat: Ensure your baking powder is fresh and that you’re measuring it correctly.
  • Pancakes Stick to the Pan: Make sure your pan is properly greased and heated before adding batter.
  • Uneven Cooking: Adjust the heat to ensure even cooking; too high can burn the outside before the inside is done.

Delicious Variations

Here are some tasty twists to keep your pancake game exciting:

  • Banana Chocolate Protein Pancakes: Add mashed banana for natural sweetness and moisture.
  • Peanut Butter Swirls: Incorporate creamy peanut butter into the batter for rich flavor.
  • Berry Burst: Fold in fresh or frozen berries for a fruity twist.
  • Nutty Flavors: Sprinkle chopped nuts into the batter for added crunch and nutrition.

Storage and Make-Ahead Instructions

Meal prep these pancakes to save time on busy mornings:

  • Refrigerate: Store in an airtight container for up to five days.
  • Freeze: Lay pancakes flat in a single layer on a baking sheet, freeze until solid, then transfer to a freezer bag. They can last for up to three months.
  • Reheat: Warm in the microwave for about 30 seconds, or reheat in a toaster oven for a crispy texture.

Frequently Asked Questions

Here are some common questions answered to help you in your pancake journey:

  • Can I make these pancakes ahead of time?: Yes, you can prepare the batter the night before and refrigerate it.
  • Are these pancakes gluten-free?: Absolutely! Just substitute the flour with a gluten-free blend.
  • Can I use a different protein powder?: Yes, both whey and plant-based protein powders work well in this recipe.
  • What can I use instead of eggs?: You can substitute with 1/4 cup of unsweetened applesauce or a flax egg.
  • How do I know when they’re done?: Look for edges that appear dry and bubbles forming on the surface before flipping.
  • Can I make them vegan?: Yes! Use plant-based milk, vegan protein powder, and a flax egg.
  • Why are my pancakes dense?: This could be due to overmixing or using old baking powder.
  • What toppings do you recommend?: Try fresh fruit, nut butter, or a drizzle of maple syrup for the perfect finish.

Nutritional Tips and Dietary Adaptations

These pancakes can fit seamlessly into various dietary preferences:

  • Low-Carb Option: Use almond flour instead of regular flour to create a lower-carb version.
  • Protein Boost: Increase the protein by adding more Greek yogurt or an extra scoop of protein powder.
  • Vegan Adaptation: Replace dairy ingredients with plant-based alternatives for a vegan-friendly dish.
  • Healthy Sweetener: Consider using stevia or monk fruit as a sugar substitute, based on your sweetness preference.

Essential Equipment Recommendations

Here’s what you’ll need to whip up these pancakes:

  • Mixing Bowls: A good set of mixing bowls for preparing your batter.
  • Whisk: Essential for combining dry and wet ingredients smoothly.
  • Pancake Griddle or Nonstick Skillet: For even cooking and easy flipping.
  • Spatula: A sturdy spatula helps in flipping without breaking your pancakes.

Serving Suggestions

When it comes to serving your pancakes, the options are endless. Here are some ideas to elevate your breakfast experience:

  • Top with Fresh Fruits: Berries, banana slices, or sautéed apples add a delightful freshness.
  • Drizzle with Maple Syrup: A classic choice that pairs perfectly with chocolate.
  • Sprinkle with Nuts: Chopped walnuts or pecans can add a nice crunch.
  • Greek Yogurt Dollop: A spoonful of Greek yogurt on top adds creaminess and extra protein.

As you embark on this culinary journey, remember that cooking is a celebration. Each pancake you make is a testament to love, tradition, and the joy of bringing family and friends together. Enjoy every bite, share your creations, and let the warmth of your kitchen fill your home with happiness. Happy cooking!

Chocolate Protein Pancakes Recipe

Prep Time 10 minutes
Cook Time 10 minutes
Total Time 20 minutes
Servings 4 pancakes
Calories 350
Delicious and nutritious chocolate protein pancakes perfect for a quick breakfast or post-workout treat.

Ingredients

Dry ingredients

  • 1 cup flour (120g) (or try these Keto Pancakes)
  • 0.25 cup chocolate protein powder (32g)
  • 2 tbsp unsweetened cocoa powder (10g) (or Dutch cocoa powder)
  • 2.5 tsp baking powder
  • 0.5 tsp salt
  • 0.125 tsp baking soda

Liquid ingredients

  • 0.75 cup milk of choice (180g)
  • 2 tbsp pure maple syrup (30g) (or sweetener of choice)
  • 1 tbsp oil (12g) (or peanut butter or mashed banana)
  • 1 large egg (or 1/4 cup mashed banana or applesauce)
  • 0.5 tsp pure vanilla extract (2g)
  • 1 tsp apple cider vinegar (5g)
  • 6 oz Greek yogurt (170g) (optional, dairy free alternative possible)

Instructions 

  • Whisk dry ingredients thoroughly in a bowl.
  • Stir in liquid ingredients except Greek yogurt until just combined. Adjust with more milk if needed.
  • Let batter rest for 10 minutes or proceed immediately. Heat a greased skillet over medium heat.
  • Spoon batter onto skillet, cook until edges are dry and bubbles form, then flip and cook until centers are done.
  • Serve hot with maple syrup, Greek yogurt, and optional chocolate chips.

Notes

Refrigerate leftovers in a covered container for up to five days. Reheat gently for best texture.
Calories: 350kcal
Cost: $15
Course: Breakfast
Cuisine: American
Keyword: chocolate, Pancakes, Protein

Welcome to Your Tropical Escape: The Pineapple Coconut Smoothie Journey

Ah, the Pineapple Coconut Smoothie—it’s like a mini-vacation in a glass. With its vibrant colors and luscious flavors, this smoothie isn’t just a drink; it’s a celebration of warmth, sunshine, and the joy of sharing good food. If you’re looking to infuse your mornings with a tropical twist, this recipe is your ticket to bliss. Let’s dive into the world of smoothies, where each sip whispers tales of paradise, just like the ones my grandmother used to tell me while we cooked together in our cozy Louisiana kitchen.

Why You’ll Love This Recipe

This Pineapple Coconut Smoothie is not just about taste; it’s packed with benefits that make it a perfect addition to your daily routine. Here’s what makes it irresistible:

  • Nutrient-Rich: Bursting with vitamins and minerals, this smoothie helps boost your immune system with the goodness of pineapple and coconut.
  • Quick and Easy: Ready in just 10 minutes, this smoothie is perfect for busy mornings or a refreshing afternoon pick-me-up.
  • Versatile Ingredients: Use fresh or frozen fruits, and customize it with your favorite add-ins to suit your taste.
  • Perfectly Creamy: The combination of coconut milk and Greek yogurt gives this smoothie a rich, creamy texture that’s simply delightful.
  • Great for Meal Prep: Make a batch ahead of time and store it for a quick and healthy snack throughout the week.

Ingredient Breakdown: What You’ll Need

Let’s gather our ingredients! The beauty of this Pineapple Coconut Smoothie is in its simplicity, yet the flavor is anything but basic. Here’s what you’ll need:

  • 1 cup fresh or frozen pineapple chunks: Pineapple is the star, providing natural sweetness and a vibrant tropical flavor.
  • 1/2 cup coconut milk: Offers creaminess and a hint of coconut flavor—opt for light coconut milk if you prefer a lighter version.
  • 1/2 cup coconut water: Adds hydration and a subtle sweetness. It’s perfect for replenishing electrolytes!
  • 1 medium banana: Bananas enhance the smoothie’s creaminess and provide natural sweetness.
  • 1/4 cup Greek yogurt: Adds protein and a nice tang, making the smoothie more filling.
  • 1 teaspoon honey or maple syrup: Optional, depending on your sweetness preference.
  • 1/2 cup ice cubes: For that refreshing chill!

Pro Tips for the Perfect Smoothie

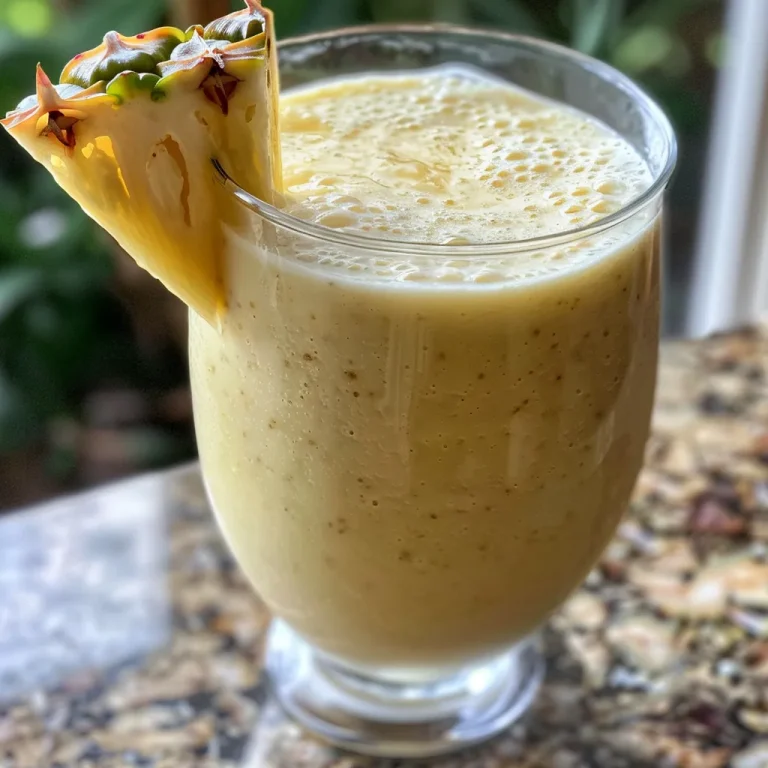
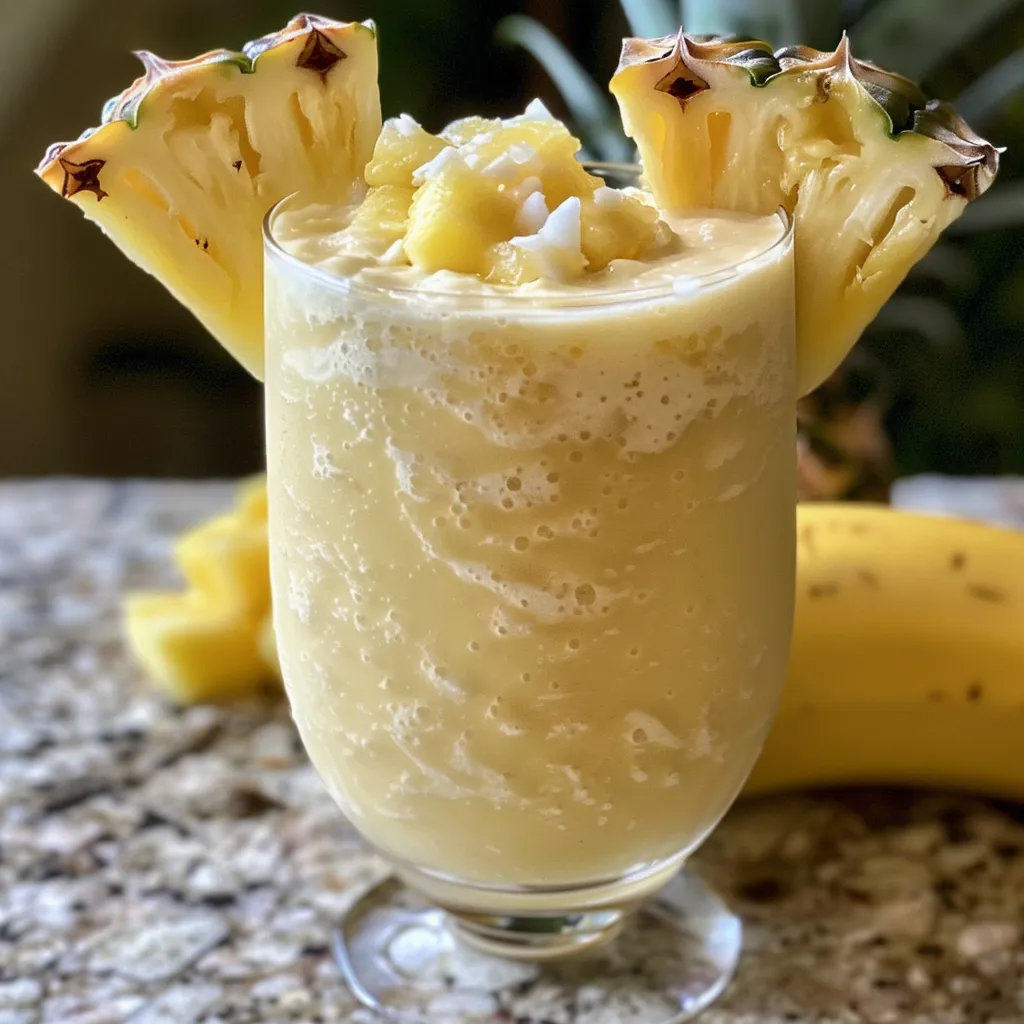
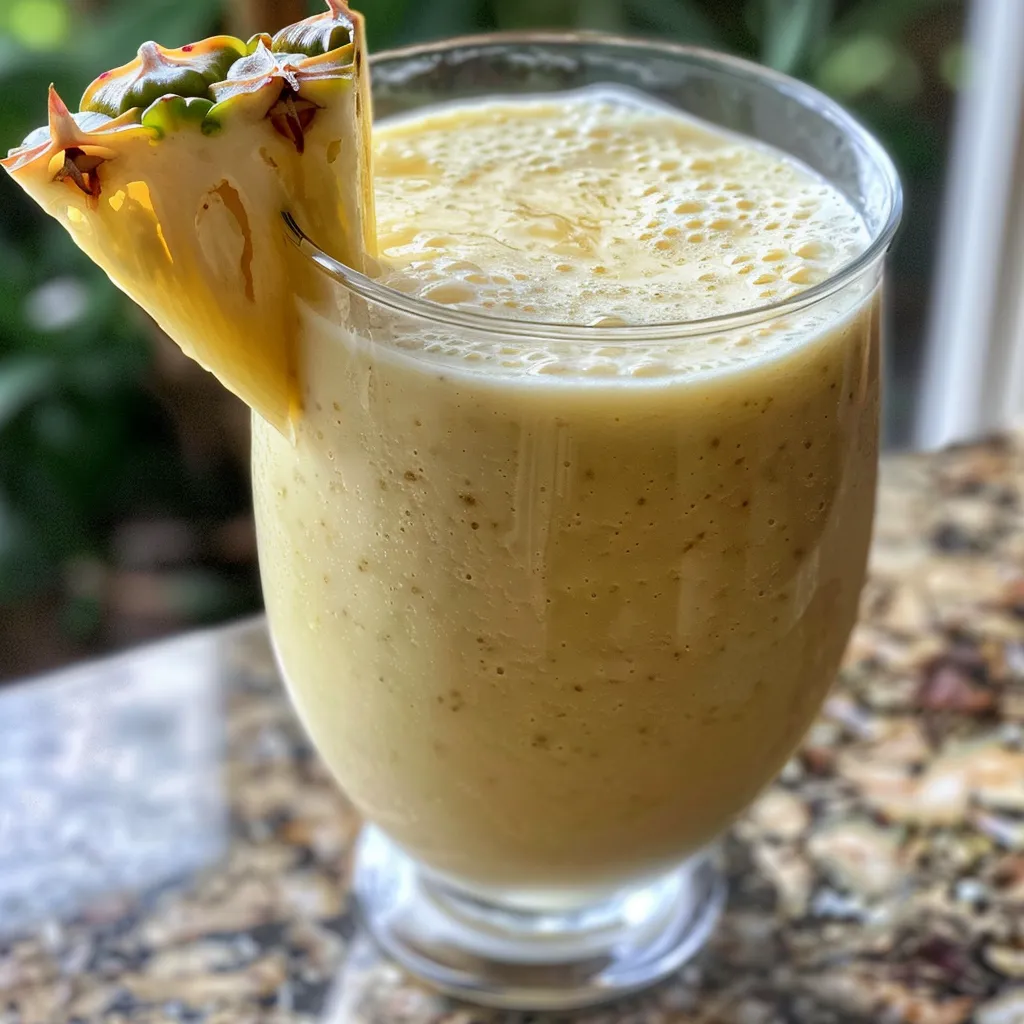
Side view of a vibrant yellow pineapple coconut smoothie featuring chunks of pineapple and topped with a slice of fresh fruit.

Want to elevate your Pineapple Coconut Smoothie? Here are some expert tips to ensure you get the most out of your blending experience:

  • Frozen Fruits: Using frozen pineapple and banana can help you skip the ice and create a creamier texture.
  • Blend Order Matters: Always add liquids first to help the blender process everything smoothly.
  • Adjust Consistency: If your smoothie is too thick, add a splash more coconut water or milk until you reach your desired texture.
  • Sweetness Check: Taste before pouring; you might find you don’t need the honey or maple syrup after all!
  • Add Greens: For a nutritional boost, toss in a handful of spinach or kale. The flavors will still shine through!
  • Protein Boost: Add a scoop of protein powder if you’re looking to make this smoothie a meal.
  • Flavor Variations: Experiment with adding a teaspoon of vanilla extract or a sprinkle of cinnamon for an extra layer of flavor.

Common Mistakes and Troubleshooting

Even the best of us can make a few missteps in the kitchen. Here’s how to avoid common pitfalls with your smoothie:

  • Too Watery: If your smoothie turns out thin, try adding more frozen fruit or a handful of oats to thicken it.
  • Overly Sweet: If you’ve added too much honey or syrup, balance it out with a splash of lemon juice or more yogurt.
  • Unblended Chunks: Make sure your blender is powerful enough to handle frozen ingredients; if not, blend in stages.

Delicious Variations to Try

This recipe is a fantastic base, and you can easily adjust it based on your tastes and dietary needs. Here are some fun variations to try:

  • Pineapple Mango Smoothie: Swap half the pineapple for mango for a delightful twist.
  • Berry Coconut Smoothie: Add a cup of mixed berries for a tangy kick.
  • Green Goddess Smoothie: Add a handful of spinach or kale for added nutrients without sacrificing flavor.
  • Chocolate Coconut Smoothie: Add a tablespoon of cocoa powder for a rich, indulgent treat.

Storage and Make-Ahead Instructions

If you’re busy, don’t worry! You can prepare your smoothie in advance:

  • Make-Ahead: Combine all the ingredients in a blender pitcher and store it in the fridge for up to 24 hours.
  • Freezing: Freeze individual portions in zip-top bags; just blend when you’re ready to enjoy!
  • Storage: If you have leftovers, store them in an airtight container in the fridge for up to 24 hours, but note that the texture may change slightly.

Frequently Asked Questions

Curious about your Pineapple Coconut Smoothie? Here are some common questions that can help you:

  • Can I use canned pineapple? Yes, canned pineapple works great—just make sure it’s packed in juice or water, not syrup!
  • Is this smoothie vegan? Absolutely! Simply omit the Greek yogurt or substitute it with a plant-based yogurt.
  • Can I add protein powder? Yes! A scoop of your favorite protein powder can make this smoothie even more filling.
  • How do I make it thicker? Use frozen fruits or add oats for a creamier texture.
  • What’s the best type of blender for smoothies? A high-speed blender will yield the best results, but any blender will suffice if you blend carefully.
  • Can I use other types of milk? Yes, almond milk, oat milk, or any plant-based milk can work well in this recipe.
  • How long does it take to prepare? This refreshing smoothie takes about 10 minutes from start to finish!
  • Can I add greens without changing the flavor? Yes, spinach is a great option as it blends smoothly and doesn’t overpower the flavor.

Nutritional Tips and Dietary Adaptations

This smoothie is not only delicious but also a nutritional powerhouse. Here are some tips to make it work for your dietary needs:

  • Low-Calorie Option: Use light coconut milk and skip the honey.
  • High-Protein Variation: Add a scoop of Greek yogurt or protein powder to boost your protein intake.
  • Low-Carb Version: Use unsweetened almond milk and reduce the banana.

Equipment Recommendations

To make your smoothie experience seamless, here’s what I recommend:

  • High-Speed Blender: A Vitamix or similar high-performance blender will ensure a smooth texture.
  • Measuring Cups and Spoons: Accurate measurements help maintain the recipe’s balance of flavors.
  • Smoothie Jars: Invest in some reusable jars for on-the-go convenience.

Serving Suggestions

How you serve your Pineapple Coconut Smoothie can enhance the experience:

  • Garnish: Top with shredded coconut or a pineapple slice for a tropical flair.
  • Pairing: Serve with a light breakfast like granola or avocado toast for a balanced meal.
  • Presentation: Use fun, colorful glasses to make the experience even more inviting!

Conclusion: Sip, Share, and Savor the Moment

This Pineapple Coconut Smoothie is more than just a drink; it’s a way to bring a touch of the tropics into your life, filled with memories and flavors that will warm your heart. Whether you enjoy it alone or share it with loved ones, each sip is a reminder of the love and joy that good food brings. So, gather your ingredients, fire up that blender, and let’s create something magical together. Cheers to health, happiness, and the beauty of sharing meals with those we cherish!

Pineapple Coconut Smoothie

Prep Time 5 minutes
Total Time 5 minutes
Servings 2 cups
Calories 180
A refreshing and tropical smoothie combining pineapple, coconut, and banana for a delicious treat.

Ingredients

Fruits

  • 1 cup pineapple chunks (fresh or frozen)
  • 1/2 cup coconut milk
  • 1/2 cup coconut water
  • 1 medium banana (ripe)
  • 1/4 cup Greek yogurt
  • 1 teaspoon honey or maple syrup
  • 1/2 cup ice cubes

Instructions 

  • Combine all ingredients in a blender.
  • Blend until smooth and creamy.
  • Taste and adjust sweetness if needed.
  • Pour into glasses and serve immediately.

Notes

For a thinner smoothie, add a splash of coconut water.
Calories: 180kcal
Cost: $10
Course: Breakfast, Snack
Cuisine: Tropical
Keyword: Pineapple

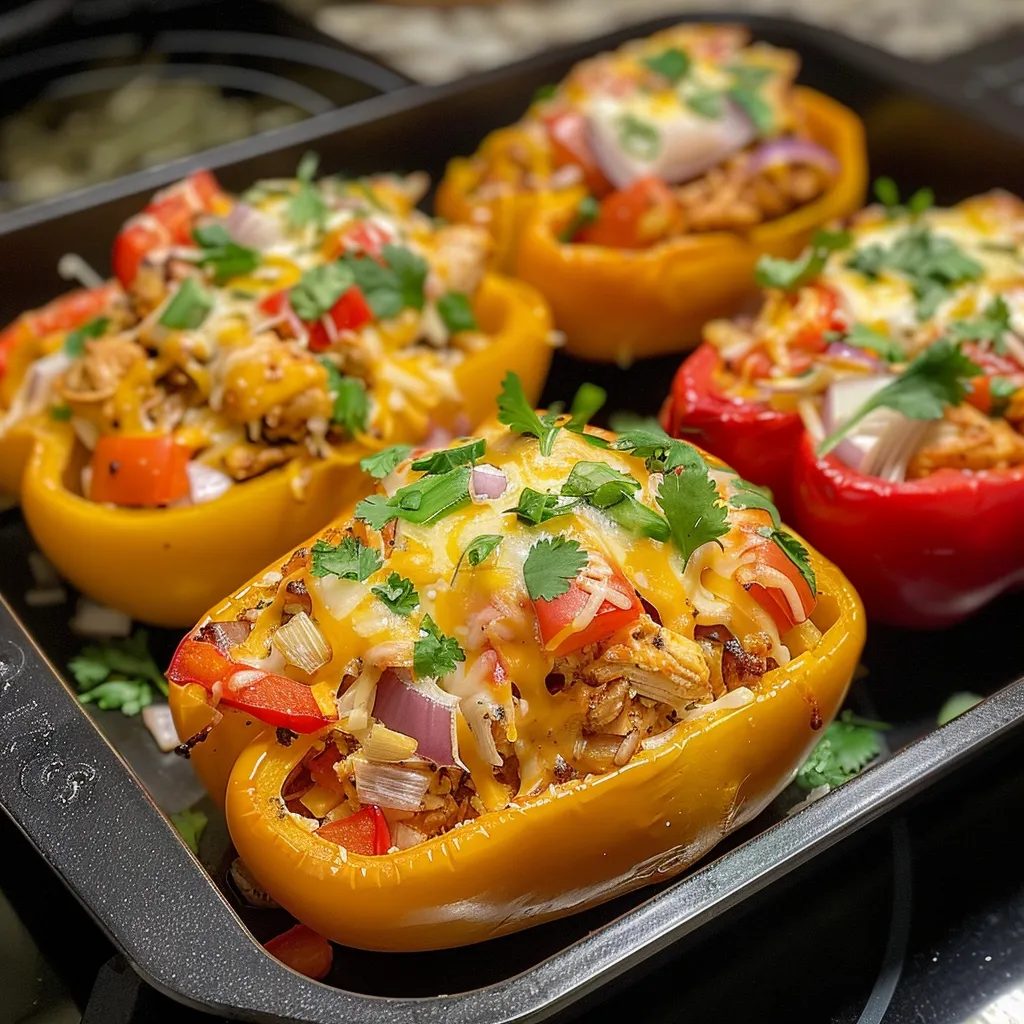
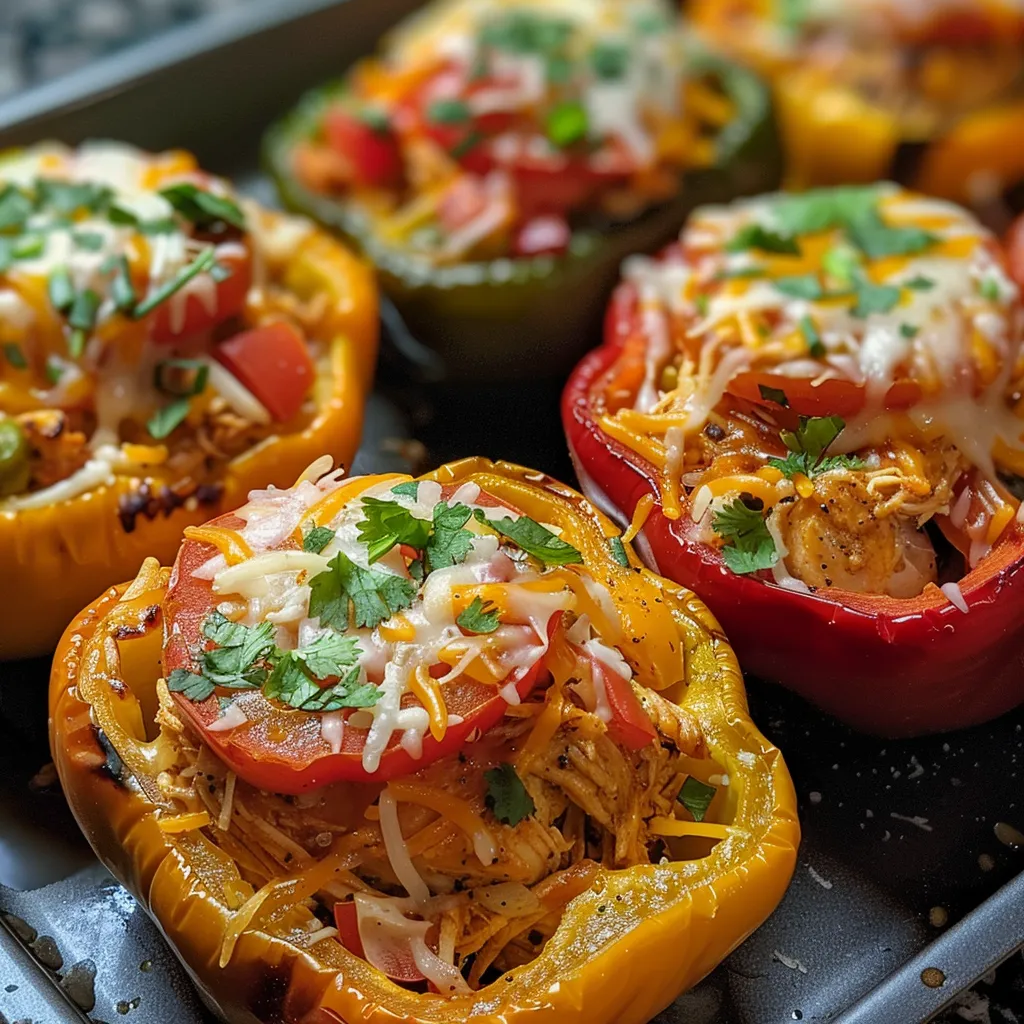
Gather around the family table, where love and laughter fill the air, and the aroma of delicious food brings everyone together. Today, we’re diving into a classic dish that’s not just about nourishment but about memories—Stuffed Bell Peppers Chicken. This recipe is a celebration of vibrant bell peppers filled with tender, flavorful chicken and spices, creating a dish that’s as comforting as a hug from grandma. If you’re looking for a wholesome dinner that warms the heart and delights the senses, you’ve found it. Let’s explore why this dish deserves a place in your kitchen, along with tips, variations, and all you need to know to make it perfect every time.

Why You’ll Love This Recipe

Stuffed bell peppers are more than just a meal; they’re a canvas for creativity and comfort. Here are five reasons why this recipe stands out:

  • Flavorful filling: The savory combination of tender chicken, spices, and fresh herbs creates a delicious filling that’s bursting with flavor.
  • Customizable: Whether you’re following a specific diet or have picky eaters at home, you can easily modify the ingredients to suit everyone’s taste.
  • Nutritious: Packed with protein, fiber, and vitamins from the bell peppers and other ingredients, this dish is a wholesome option for a healthy family dinner.
  • Meal prep friendly: You can make these stuffed peppers ahead of time. They store well in the fridge for easy reheating throughout the week.
  • Perfect for gatherings: Whether it’s a family dinner or a gathering with friends, these colorful peppers are sure to impress and spark joy at the table.

Ingredients for Stuffed Bell Peppers Chicken

Let’s gather our ingredients for this heartwarming dish. Here’s what you’ll need:

  • 4 large bell peppers: You can choose any color—red, yellow, green, or orange—each adds a unique sweetness.
  • 2 cups cooked chicken breast, shredded: Rotisserie chicken works great for quick preparation.
  • 1 tablespoon olive oil: For sautéing the onions and peppers, adding healthy fats to the dish.
  • 1 medium onion, thinly sliced: Provides a sweet base flavor.
  • 1 red bell pepper, sliced thin: Enhances the filling with extra flavor and color.
  • 1 teaspoon chili powder: Adds warmth and depth.
  • 1 teaspoon cumin: A spice that brings an earthy flavor.
  • 1 teaspoon paprika: Adds a subtle sweetness and vibrant color.
  • 1/2 teaspoon garlic powder: For that aromatic touch.
  • 1/2 teaspoon salt: To enhance all the flavors.
  • 1/4 teaspoon black pepper: Adds a hint of spice.
  • 1/2 cup diced tomatoes, drained: Keeps the filling moist without making it soggy.
  • 1/2 cup shredded cheese, optional: For a gooey, delicious topping.
  • 2 tablespoons fresh cilantro, chopped: A fresh garnish that brightens the dish.

Step-by-Step Instructions

Now, let’s bring our stuffed bell peppers to life! Follow these simple steps:

  • Step 1: Prepare the Peppers: Preheat your oven to 375 degrees Fahrenheit. Cut the tops off the bell peppers and remove the seeds and membranes. For larger peppers, slice them in half lengthwise for easier serving. Place the peppers in a baking dish and lightly brush them with olive oil. Bake for 10 minutes to soften slightly before filling.
  • Step 2: Cook the Filling: Heat olive oil in a skillet over medium heat. Add the sliced onion and red bell pepper, cooking until softened but not browned. Stir in the shredded chicken and all the spices, ensuring they coat the chicken evenly. Add the diced tomatoes and cook for 3-4 minutes until the mixture is moist but not watery. Remove from heat and stir in the chopped cilantro.
  • Step 3: Stuff the Peppers: Remove the partially baked bell peppers from the oven. Spoon the chicken mixture evenly into each pepper cavity, pressing gently to pack the filling without crushing the pepper walls. If using cheese, sprinkle it on top.
  • Step 4: Bake Until Tender: Return the baking dish to the oven and bake for 20-25 minutes, until the peppers are tender but still hold their shape. Allow the stuffed bell peppers chicken to rest for 5 minutes before serving.

Pro Tips for Perfect Stuffed Bell Peppers

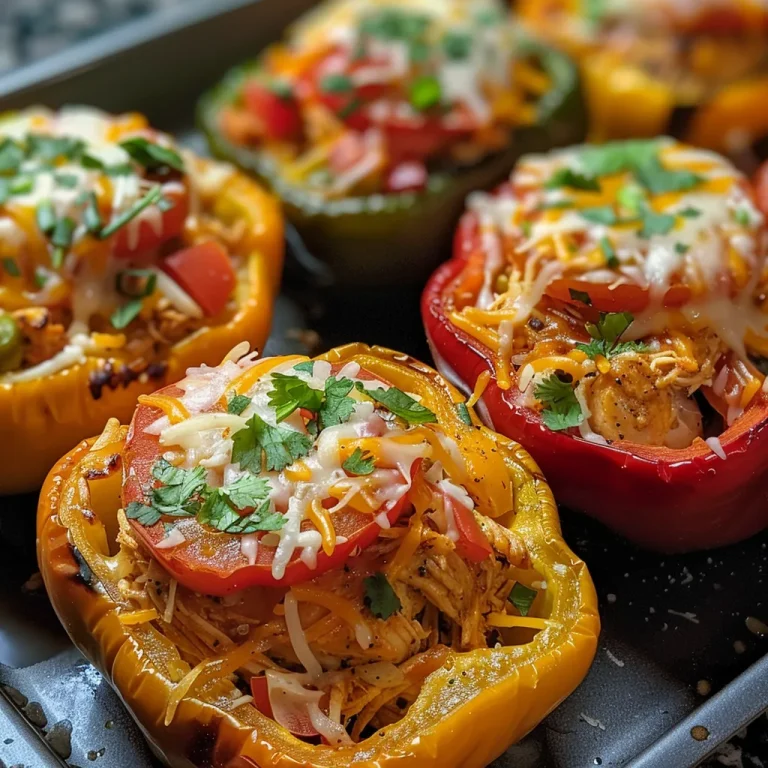
Side angle of stuffed bell peppers, revealing a mixture of shredded chicken and spices.

To ensure your stuffed bell peppers turn out delightful every time, consider these expert tips:

  • Use fresh ingredients: Fresh vegetables and herbs enhance the flavor significantly.
  • Don’t overstuff: Leave some space at the top of the peppers; the filling will expand as it cooks.
  • Experiment with spices: Feel free to add your favorite spices, like Italian seasoning or taco seasoning, to give a unique twist.
  • Incorporate grains: For added texture, mix in some cooked rice or quinoa to the filling.
  • Cheese options: Try different types of cheese such as feta or mozzarella for varied flavors.
  • Garnish creatively: Top with avocado or sour cream for a creamy finish.
  • Mind the cooking time: Every oven is different. Keep an eye on your peppers to avoid overcooking.
  • Let them cool: Allow the peppers to cool slightly before serving to help the flavors meld.

Common Mistakes and Troubleshooting

Even the best cooks encounter hiccups. Here’s how to avoid some common mistakes:

  • Too soggy filling: Ensure you drain the tomatoes well and avoid overcooking the filling.
  • Peppers too tough: If you skip pre-baking the peppers, they may not soften enough during the cooking process.
  • Flavors too bland: Always taste and adjust seasonings in the filling before stuffing the peppers.
  • Cheese burning on top: Cover with foil during the first half of baking if you’re worried about burning.

Variations on Stuffed Bell Peppers

If you want to switch things up, here are some tasty variations you can try:

  • Mexican-style: Use ground turkey, add black beans, corn, and top with salsa and avocado.
  • Italian twist: Substitute chicken with Italian sausage and add marinara sauce with mozzarella cheese on top.
  • Vegetarian delight: Replace chicken with lentils or quinoa and add extra vegetables like zucchini and mushrooms.
  • Low-carb option: Skip the rice and fill with cauliflower rice and extra cheese for a low-carb delight.

Storage and Make-Ahead Instructions

These stuffed bell peppers are perfect for meal prep! Here’s how to store and prepare them:

  • Make ahead: Prepare the filling and stuff the peppers a day in advance, then refrigerate. Bake them fresh when you’re ready to eat.
  • Storage: Leftover stuffed peppers can be stored in an airtight container in the fridge for up to 4 days. Reheat in the oven or microwave.
  • Freezing: Stuffed peppers freeze well. Wrap each pepper tightly in plastic wrap and then in aluminum foil. They can be frozen for up to 3 months. Thaw in the refrigerator overnight before reheating.

Frequently Asked Questions (FAQs)

Let’s address some common questions about stuffed bell peppers:

  • Can I use frozen peppers? Yes, but they may be softer. Pre-bake them slightly to help maintain their shape.
  • What can I substitute for chicken? Ground turkey, beef, or even a plant-based protein work well.
  • How do I make stuffed peppers spicy? Add diced jalapeños or a pinch of cayenne pepper to the filling.
  • Can I cook them in a slow cooker? Yes! Cook on low for about 4-6 hours until the peppers are tender.
  • What sides go well with stuffed peppers? Serve with a simple salad, garlic bread, or rice for a complete meal.
  • Can I use other types of peppers? Absolutely! Mini bell peppers or poblano peppers can also be great options.
  • How can I make them vegetarian? Substitute the chicken with beans, lentils, or a mix of your favorite vegetables.
  • What’s the best way to reheat stuffed peppers? Reheat in the oven at 350°F for about 15-20 minutes or until heated through.

Nutrition Tips and Dietary Adaptations

For those watching their diet, here are some tips to make stuffed bell peppers even healthier:

  • Low-carb adaptation: Use cauliflower rice instead of regular rice for a low-carb version.
  • Gluten-free: Ensure all ingredients, especially sauces, are gluten-free.
  • Healthy swaps: Use low-fat cheese or skip it entirely for a lighter option.
  • Increase fiber: Add beans or lentils to the filling for extra fiber and protein.

Equipment Recommendations

To make the process smoother, here are some kitchen essentials:

  • Baking dish: A sturdy dish for baking your peppers evenly.
  • Skillet: A non-stick skillet for sautéing your filling.
  • Sharp knife: For easy cutting of the peppers and vegetables.
  • Measuring spoons and cups: Accurate measurements help maintain flavor.

Serving Suggestions

When it’s time to serve, consider these ideas to elevate your stuffed bell peppers:

  • Garnish: Top with fresh cilantro, avocado slices, or a dollop of sour cream.
  • Accompaniments: Serve with a side of quinoa, rice, or a fresh garden salad.
  • Presentation: Place stuffed peppers on a colorful platter for a beautiful table display.

So there you have it! A recipe that brings the warmth of family cooking right into your home. Each bite of these stuffed bell peppers chicken is a reminder of love and togetherness. Don’t be afraid to make it your own and create memories that will last a lifetime. Happy cooking!

Stuffed Bell Peppers Chicken - Flavor Packed, Healthy Dinner

Prep Time 15 minutes
Cook Time 35 minutes
Total Time 50 minutes
Servings 4 servings
Calories 350
A delicious and healthy dinner featuring bell peppers stuffed with seasoned shredded chicken and cheese, baked to perfection.

Ingredients

Bell Peppers

  • 4 large bell peppers, any color
  • 2 cups cooked chicken breast, shredded
  • 1 tablespoon olive oil
  • 1 medium onion, thinly sliced
  • 1 red bell pepper sliced thin
  • 1 teaspoon chili powder
  • 1 teaspoon cumin
  • 1 teaspoon paprika
  • 0.5 teaspoon garlic powder
  • 0.5 teaspoon salt
  • 0.25 teaspoon black pepper
  • 0.5 cup diced tomatoes, drained
  • 0.5 cup shredded cheese, optional
  • 2 tablespoons fresh cilantro, chopped

Instructions 

  • Preheat oven to 375°F. Prepare peppers by cutting tops, removing seeds, and baking for 10 minutes.
  • Cook onion and red bell pepper in olive oil until softened. Add shredded chicken, spices, and tomatoes; cook briefly. Stir in cilantro.
  • Stuff partially baked peppers with chicken mixture. Top with cheese if desired.
  • Bake stuffed peppers for 20-25 minutes until tender and golden. Rest for 5 minutes before serving.

Notes

For a lower-fat option, skip the cheese or use a reduced-fat variety.
Calories: 350kcal
Cost: $15
Course: Main Course
Cuisine: American
Keyword: Bell Peppers, Chicken, Healthy

Discover the Heartwarming Delight of Greek Yogurt Chicken Salad

In the bustling kitchen of my childhood home in Louisiana, food was more than just sustenance; it was a way to share love and create memories. This High Protein Greek Yogurt Chicken Salad embodies that spirit, combining tender chicken and creamy Greek yogurt with zesty ingredients that come together in a dish perfect for family gatherings or a cozy night in. Whether you’re a seasoned cook or just starting your culinary journey, this recipe is not just about the flavors—it’s about the love and warmth that fills the room when you serve it.

Why You’ll Love This Recipe

  • High in Protein: Each serving is packed with lean protein from chicken and Greek yogurt, promoting muscle health and satiety.
  • Quick and Easy: With simple steps and minimal prep time, this dish can be ready in under 30 minutes, perfect for busy weeknights.
  • Healthy Twist: Using Greek yogurt instead of mayonnaise gives this salad a creamy texture while cutting down on calories and fat.
  • Customizable: This recipe allows you to add your favorite ingredients, making it a versatile dish tailored to your taste preferences.
  • Meal Prep Friendly: It stores well in the fridge for up to four days, making it ideal for meal prep and on-the-go lunches.

Ingredients for High Protein Greek Yogurt Chicken Salad

This delicious salad combines wholesome ingredients that are easy to find. Here’s what you will need:

  • 3 cups cooked shredded chicken breast
  • 3/4 cup plain Greek yogurt
  • 1 tablespoon Dijon mustard
  • 1 tablespoon fresh lemon juice
  • 1/2 cup diced celery
  • 1/4 cup finely diced red onion
  • 2 tablespoons chopped fresh parsley
  • Salt and black pepper to taste

Ingredient Substitutions: Feel free to swap out ingredients based on what you have on hand:

  • Chicken: Use rotisserie chicken for convenience or canned chicken for a quick option.
  • Yogurt: Substitute Greek yogurt with regular yogurt for a lighter version, but be mindful of the texture.
  • Mustard: Replace Dijon with yellow mustard if that’s what you have.
  • Herbs: Experiment with different fresh herbs like dill or chives for a unique flavor twist.

Step-By-Step Instructions

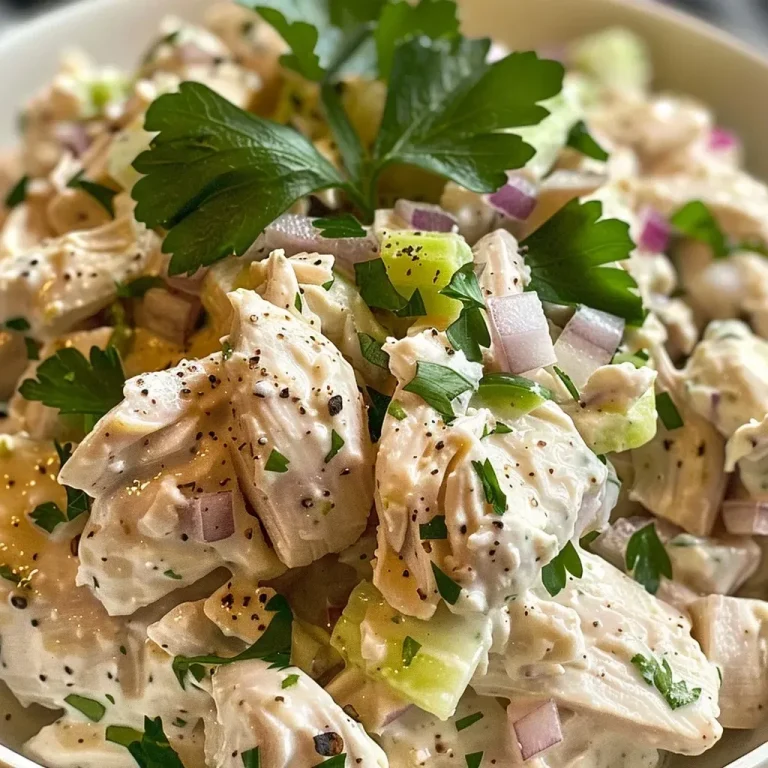
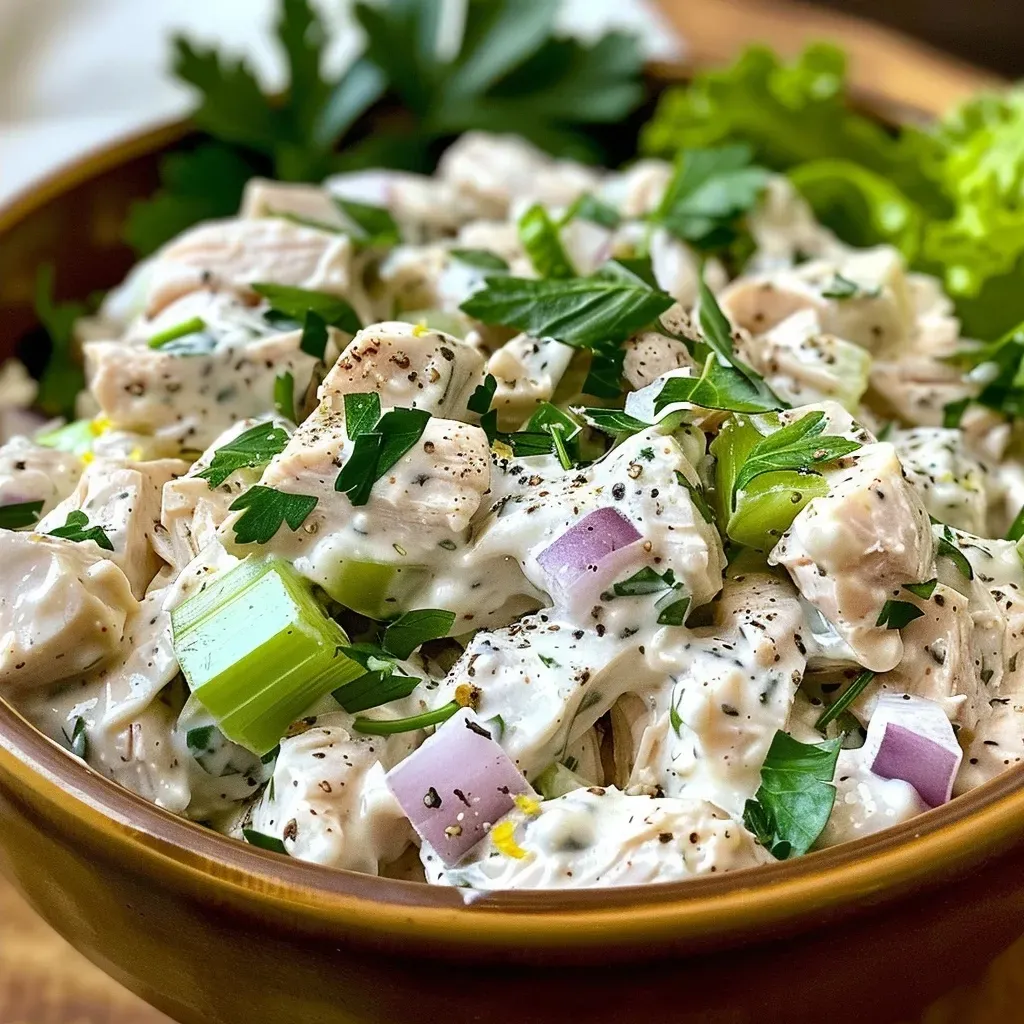
High Protein Greek Yogurt Chicken Salad

Creating this yogurt chicken salad is as easy as pie! Follow these simple steps:

  1. Add shredded chicken to a large mixing bowl.
  2. In a separate bowl, mix Greek yogurt, Dijon mustard, and lemon juice until smooth.
  3. Pour the yogurt mixture over the chicken.
  4. Add diced celery, red onion, and parsley.
  5. Stir until everything is evenly coated.
  6. Season with salt and pepper to taste.
  7. Chill in the refrigerator for at least 30 minutes before serving.

Pro Tips for the Best Chicken Salad

For a truly delightful dish, consider these expert tips:

  • Use Cold Chicken: Ensure the chicken is cold to prevent the yogurt dressing from separating.
  • Prep Ingredients Ahead: Dice your veggies the night before to save time on busy days.
  • Let it Chill: Allowing the salad to chill enhances the flavors and gives it a refreshing taste.
  • Adjust Seasonings: Taste and adjust the salt and pepper to your preference for the best flavor.
  • Mix Gently: When combining ingredients, mix gently to maintain the texture of the chicken.
  • Keep it Fresh: Always store leftovers in an airtight container to maintain freshness.
  • Add Crunch: Toss in some nuts like almonds or walnuts for added texture and flavor.
  • Balance Flavors: A dash of honey can add a nice sweetness if you prefer a sweeter salad.

Common Mistakes and Troubleshooting

Even the best cooks have their moments! Here are some common pitfalls to avoid:

  • Overmixing: Mixing too vigorously can result in a mushy salad. Stir gently to keep the chicken intact.
  • Using Warm Chicken: Adding warm chicken can make the dressing runny. Always use cold chicken.
  • Skipping the Chill: Not chilling the salad can lead to a less flavorful dish. Don’t skip this step!
  • Too Much Dressing: Start with less dressing and add more as needed to avoid an overly wet salad.

Variations of Greek Yogurt Chicken Salad

This recipe is a canvas for your creativity! Here are a few variations to try:

  • Fruit & Nut Delight: Add diced apples and walnuts for a sweet and crunchy twist.
  • Spicy Kick: Mix in some diced jalapeños or a dash of hot sauce for a spicy flavor.
  • Herbed Chicken Salad: Incorporate fresh herbs like dill and basil for an aromatic experience.
  • Mediterranean Style: Add olives, feta cheese, and sun-dried tomatoes to create a Mediterranean flavor profile.

Storage and Make-Ahead Instructions

This protein-packed chicken salad is perfect for make-ahead meals:

  • Refrigeration: Store in an airtight container in the fridge for up to 4 days.
  • Freezing: Although not recommended due to potential texture changes, you can freeze it for up to 2 months. Thaw in the refrigerator overnight.
  • Prep Ahead: Make the salad a day in advance for the flavors to meld together beautifully.

Nutrition Tips and Dietary Adaptations

For those health-conscious folks, here are some nutrition tips:

  • Low-Carb Option: Serve over a bed of greens instead of bread for a low-carb meal.
  • Gluten-Free: This recipe is naturally gluten-free; just ensure all your ingredients are certified.
  • Vegan Variation: Substitute chicken with chickpeas or tofu, and use a vegan yogurt alternative.

Equipment Recommendations

To make the cooking process smoother, here’s a list of handy equipment:

  • Mixing Bowls: A set of nesting bowls is perfect for mixing ingredients and preparation.
  • Sharp Knife: A good knife will help you chop ingredients quickly and safely.
  • Cutting Board: Invest in a sturdy cutting board for all your chopping needs.

Serving Suggestions

How you serve this salad can elevate the entire meal:

  • On Whole Grain Bread: Serve as a sandwich for a hearty lunch.
  • In Lettuce Wraps: For a low-carb option, use large lettuce leaves to wrap the salad.
  • On a Bed of Greens: Serve over mixed greens for a fresh salad.
  • With Crackers: Pair with whole grain crackers for a delightful crunch.

Frequently Asked Questions

Here are answers to some common questions about this salad:

  • Can I make this chicken salad ahead of time? Yes! It can be made a day in advance and stored in the fridge.
  • Can I use flavored Greek yogurt? Flavored yogurt can work, but it may alter the taste of the salad.
  • What can I use instead of chicken? Chickpeas or tofu are great alternatives for a vegetarian version.
  • How long does this salad last in the fridge? It will keep well for up to 4 days in an airtight container.
  • Is this recipe good for meal prep? Absolutely! It’s perfect for quick lunches throughout the week.
  • Can I freeze this chicken salad? Freezing is not recommended, but if you must, it can last up to 2 months.
  • What can I serve with this salad? It’s delicious on its own, in a sandwich, or served with crackers.
  • Can I add fruits to this salad? Yes! Diced apples, grapes, or cranberries add a nice sweetness.

In this journey of flavors, remember that cooking is about love and sharing. Every bite of this High Protein Greek Yogurt Chicken Salad is a reminder of shared moments around the table, the laughter, and the joy of togetherness. So gather your loved ones, enjoy this nourishing meal, and create more beautiful memories, one recipe at a time.

High Protein Greek Yogurt Chicken Salad

Prep Time 10 minutes
Cook Time 15 minutes
Total Time 25 minutes
Servings 4 servings
Calories 350
A healthy and protein-packed chicken salad with creamy Greek yogurt and fresh herbs, perfect for a quick lunch or light dinner.

Ingredients

Protein

  • 3 cups cooked shredded chicken breast
  • 3/4 cup plain Greek yogurt
  • 1 tablespoon Dijon mustard
  • 1 tablespoon fresh lemon juice
  • 1/2 cup diced celery
  • 1/4 cup finely diced red onion
  • 2 tablespoons chopped fresh parsley
  • to taste Salt and black pepper

Instructions 

  • Add shredded chicken to bowl.
  • Mix Greek yogurt, mustard, and lemon juice.
  • Pour mixture over chicken and add celery, onion, and parsley.
  • Stir until evenly coated and season with salt and pepper.
  • Chill before serving.

Notes

For extra flavor, add a dash of paprika or fresh dill.
Calories: 350kcal
Cost: $15
Course: Salad
Cuisine: American
Keyword: Chicken, Greek yogurt

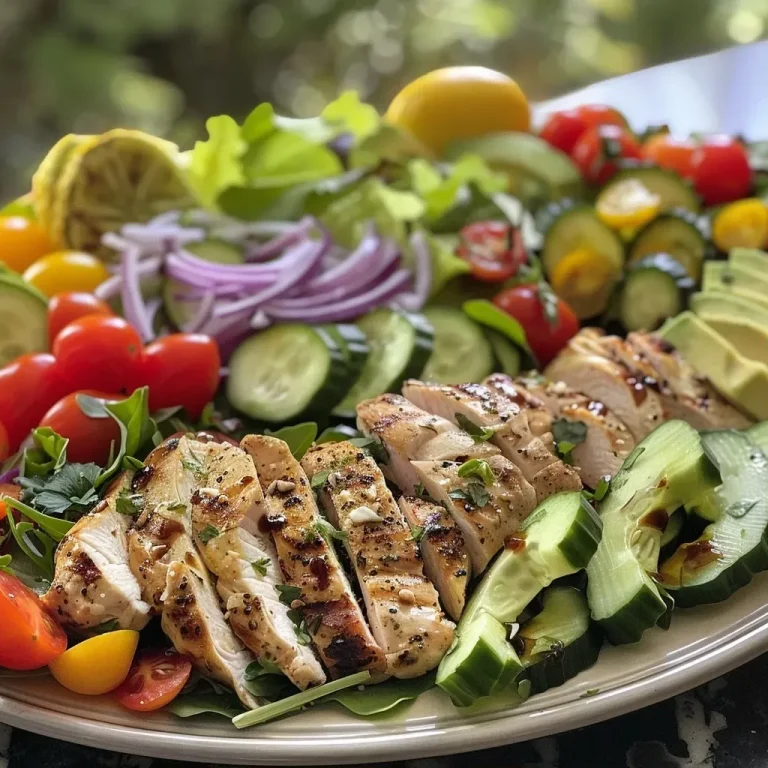
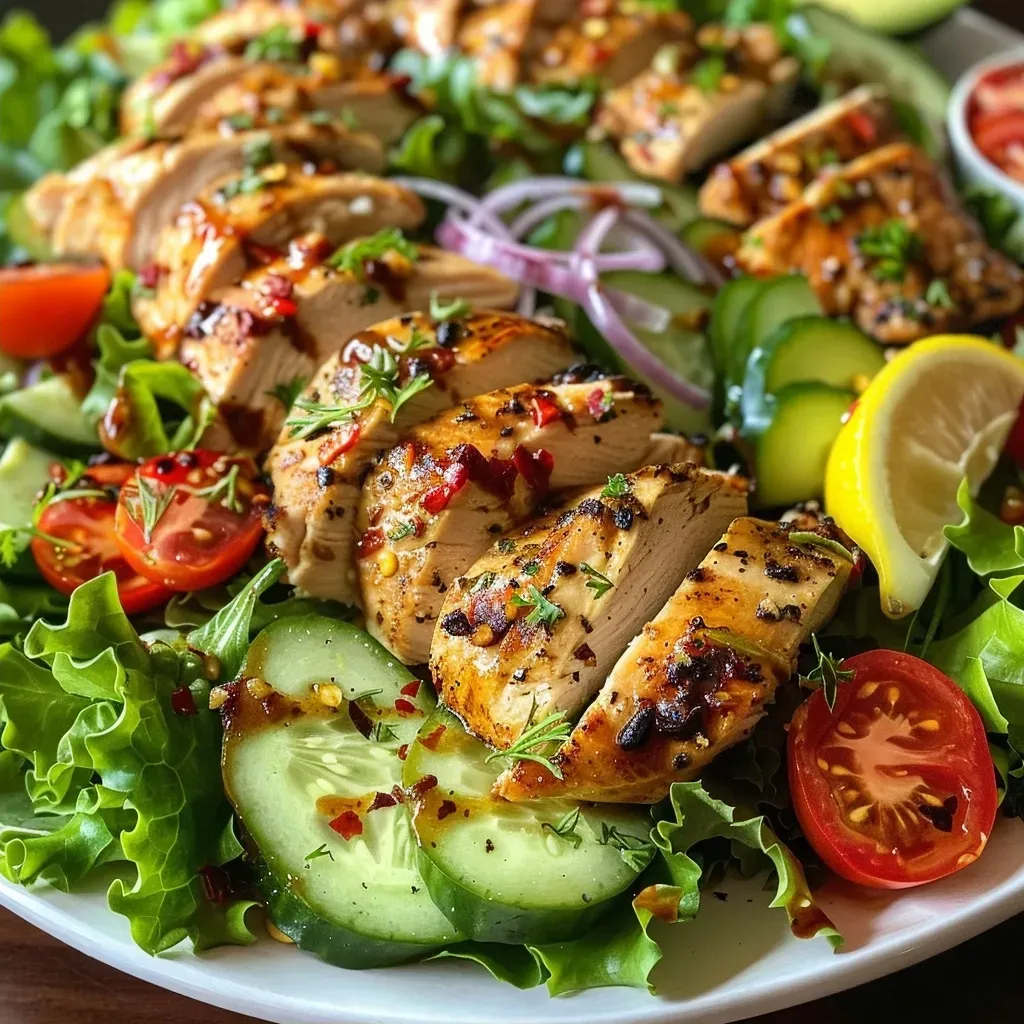
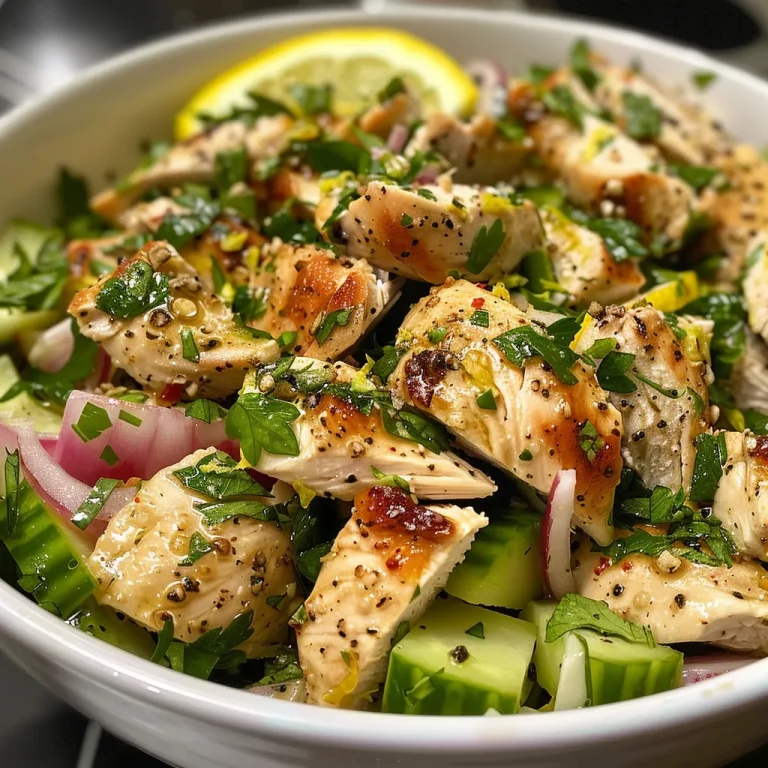
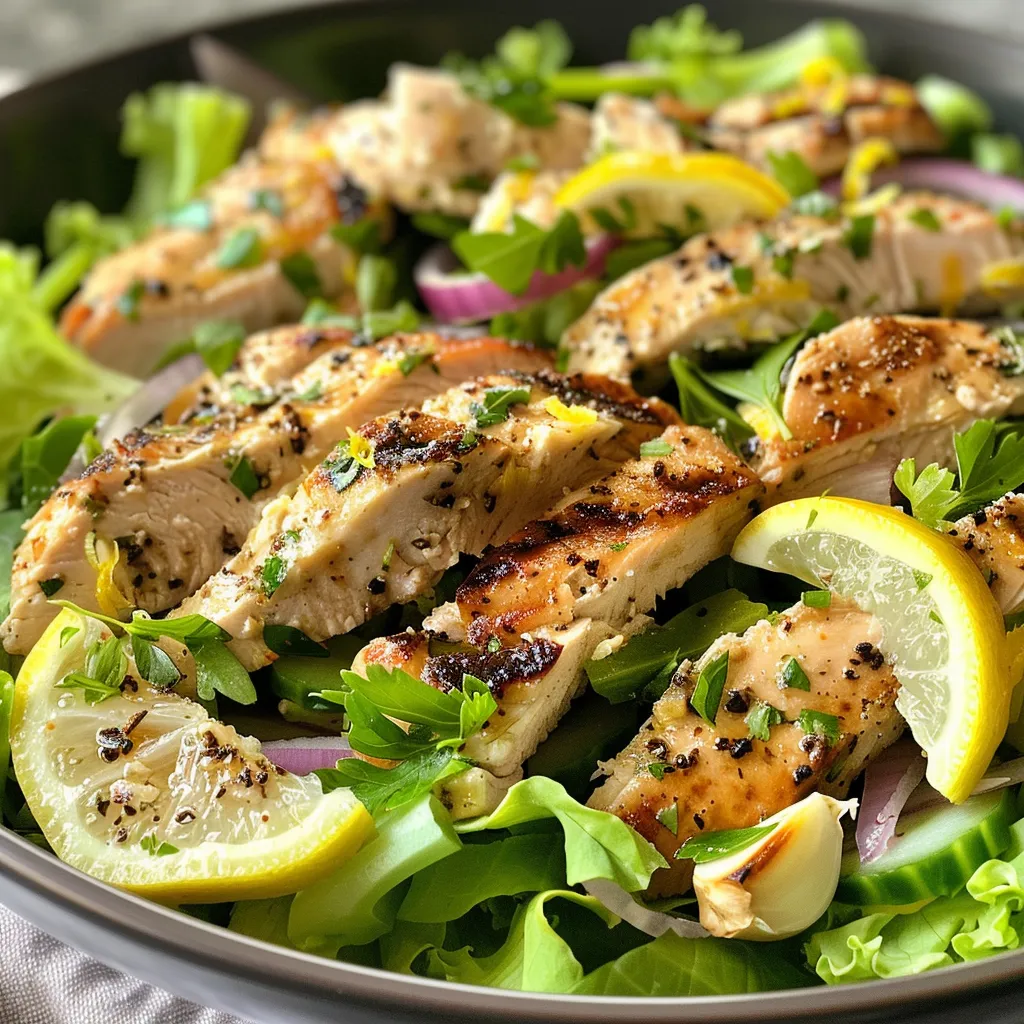
A Bright Spring Gathering: Discover the Joy of Lemon Chicken Salad

As the blossoms bloom and the sun shines a little brighter, it’s time to celebrate the essence of spring with a dish that brings warmth and joy to your table. This Lemon Chicken Salad Platter is not only a feast for the eyes with its vibrant colors, but it also carries the flavors of love and togetherness. The tender chicken, crisp greens, and zesty lemon come together to create a delightful meal, perfect for family gatherings or a casual dinner party with friends.

Whether you’re reminiscing about warm days spent outdoors or simply looking for a refreshing meal that embodies the spirit of the season, this lemon chicken salad is your go-to recipe. Let’s dive into the heart of this dish and explore what makes it so special!

Why You’ll Love This Recipe

  • Easy to Prepare: With straightforward steps, you can whip up this dish in under an hour, making it perfect for busy weeknights or spontaneous gatherings.
  • Versatile Ingredients: This salad allows for various substitutions based on what you have on hand, ensuring you can always create a delicious meal with ease.
  • Fresh and Flavorful: The combination of fresh greens, ripe vegetables, and a zesty vinaigrette elevates every bite, making it a refreshing choice for warmer days.
  • Healthy and Nourishing: Packed with protein from the chicken and vitamins from the veggies, this salad is not only tasty but also a nutritious option for any meal.
  • Perfect for Sharing: The salad platter presentation invites everyone to gather around and enjoy, turning any meal into a celebration of togetherness.

Ingredients You’ll Need

Gathering the right ingredients is essential to making your Lemon Chicken Salad shine. Here’s what you’ll need:

  • 2 large chicken breasts: Lean and protein-rich, they serve as the foundation of the dish.
  • 1 tablespoon olive oil: Adds healthy fats and enhances the cooking process.
  • 1 teaspoon salt: Essential for seasoning, bringing out the chicken’s natural flavors.
  • 1/2 teaspoon black pepper: Adds a subtle warmth to the dish.
  • 6 cups mixed salad greens: A vibrant base providing texture and nutrients.
  • 1 cup cherry tomatoes, halved: Sweet and juicy, they add a pop of color.
  • 1 cucumber, sliced: Refreshing and crisp, perfect for balancing flavors.
  • 1/2 red onion, thinly sliced: Offers a slight sharpness that complements the other ingredients.
  • 1 avocado, diced: Creamy and rich, it enhances the salad’s texture.
  • Zest and juice of 1 lemon: The star ingredient, providing brightness and acidity.
  • 2 tablespoons Dijon mustard: Adds depth to the vinaigrette.
  • 1 tablespoon honey: A touch of sweetness that perfectly balances the dressing.
  • Salt and pepper, to taste: For final seasoning adjustments.

How to Make This Lemon Chicken Salad

Spring Dinner Party: Lemon Chicken Salad Platter

Let’s walk through the steps to create this delightful salad:

  1. Prepare the Chicken: Start by trimming any excess fat from the chicken breasts and pat them dry with a paper towel. Rub the chicken with olive oil, seasoning it generously with salt and black pepper.
  2. Cook the Chicken: Heat a skillet over medium-high heat. Once hot, add the seasoned chicken breasts. Cook for about 6-7 minutes on each side, until the internal temperature reaches 165°F (75°C). Let the chicken rest for a few minutes after cooking.
  3. Prepare the Vinaigrette: In a small bowl, whisk together the lemon zest, lemon juice, Dijon mustard, and honey until smooth. Adjust salt and pepper to taste.
  4. Assemble the Salad: In a large bowl, place the mixed greens as the base. Add halved cherry tomatoes, cucumber slices, red onion, and diced avocado. Mix gently to combine.
  5. Slice the Chicken: Once the chicken has rested, slice it into strips against the grain.
  6. Dress the Salad: Drizzle the vinaigrette over the salad and toss gently to ensure all ingredients are evenly coated.
  7. Serve Immediately: This salad is best enjoyed fresh, with the greens still crisp and vibrant.

Pro Tips for the Perfect Salad

  • Use Fresh Ingredients: The fresher the produce, the better the flavors will shine through. Consider visiting a local farmer’s market for the best selections.
  • Let the Chicken Rest: Allowing the chicken to rest after cooking helps retain its juices, ensuring a tender bite every time.
  • Experiment with Herbs: Fresh herbs like basil or parsley can elevate the flavor profile and add a lovely aroma to the salad.
  • Chill the Vinaigrette: A cold dressing can enhance the overall freshness of the salad, so consider refrigerating it before serving.
  • Serve with a Side: Pair the salad with crusty bread or a light soup to create a complete meal.
  • Customize for Dietary Needs: This salad can easily adapt to various dietary preferences. Use grilled tofu instead of chicken for a vegetarian version.
  • Prep Ahead: You can prepare the vinaigrette and chop the vegetables in advance to save time on busy days.
  • Adjust Seasoning: Always taste and adjust seasoning as needed to suit your palate.

Common Mistakes to Avoid

Even the best of us can make mistakes in the kitchen! Here are some common pitfalls to watch out for:

  • Overcooking the Chicken: Keep a meat thermometer handy to ensure perfectly cooked chicken without drying it out.
  • Not Letting the Chicken Rest: Skipping this step can result in dry chicken; always allow it to rest after cooking.
  • Using Wilted Greens: Always check your greens for freshness; wilted greens can ruin the texture of your salad.
  • Skipping Seasoning: Don’t underestimate the power of salt and pepper! Properly seasoning each component enhances the overall flavor.

Variations and Substitutions

This lemon chicken salad is versatile, allowing for creative twists. Here are some variations you can try:

  • Grilled Shrimp Salad: Substitute chicken with grilled shrimp for a seafood twist that brings a different texture and flavor.
  • Quinoa Lemon Salad: Add cooked quinoa for a hearty, protein-packed version that is gluten-free and filling.
  • Peach and Feta Salad: Incorporate fresh peaches and crumbled feta cheese for a sweet and tangy flavor explosion.
  • Spicy Chicken Salad: Spice things up by adding jalapeños or a dash of hot sauce to the vinaigrette for an extra kick.

Storage and Make-Ahead Instructions

Planning ahead makes meal prep easier, and this salad can fit right into your schedule:

  • Store Leftovers in the Fridge: Keep any leftover salad in an airtight container for up to 2 days. The greens may wilt, but the flavors will still be delicious.
  • Prepare the Vinaigrette Ahead: Make the dressing in advance and store it in the refrigerator for up to a week—just shake before using.
  • Chop Ingredients Ahead: You can chop the veggies and store them separately in the fridge for quick assembly later.

Frequently Asked Questions

  • Can I use frozen chicken?: Yes! Just ensure it’s fully thawed before cooking for the best results.
  • What greens work best?: Any mix of greens works well—arugula, spinach, and romaine are all great options.
  • How can I make it gluten-free?: This recipe is naturally gluten-free; just ensure all your ingredients are certified gluten-free.
  • Can I add nuts?: Absolutely! Toasted almonds or walnuts can add a nice crunch and enhance the overall flavor.
  • How do I make it dairy-free?: Simply omit any cheese and ensure your dressing is free from dairy ingredients.
  • Can I serve it warm?: Yes! While it’s best served chilled, warm chicken can be delicious in this salad too.
  • What can I substitute for honey?: Maple syrup or agave nectar can serve as great alternatives if you prefer a vegan option.
  • How do I prevent browning of the avocado?: Squeeze a little lemon juice over the diced avocado to keep it vibrant and fresh.

Nutritional Benefits & Dietary Adaptations

This Lemon Chicken Salad is not only delicious but also offers a range of nutritional benefits:

  • High in Protein: The chicken provides a significant protein boost, essential for muscle repair and growth.
  • Rich in Vitamins: Fresh veggies contribute vitamins A and C, promoting healthy skin and immune function.
  • Healthy Fats: Avocado and olive oil provide heart-healthy fats that keep you satiated.

Essential Equipment Recommendations

To make this salad seamlessly, consider having the following kitchen tools on hand:

  • Skillet: A good-quality skillet is essential for perfectly cooking the chicken.
  • Mixing Bowl: A large bowl for tossing all the salad ingredients together is a must.
  • Whisk: Use a whisk to ensure your vinaigrette is well combined and emulsified.
  • Meat Thermometer: To check the chicken’s doneness accurately, a meat thermometer is invaluable.

Serving Suggestions

When it comes to serving this delightful salad, consider these options:

  • On a Platter: Present the salad on a large platter for a beautiful centerpiece that encourages sharing.
  • With Crusty Bread: Serve alongside warm, crusty bread to make it a complete meal.
  • As Part of a Buffet: This salad makes an excellent addition to any buffet-style meal, allowing guests to serve themselves.

Cooking is not just about the food; it’s about the memories we create around the table. I hope this Lemon Chicken Salad brings joy and connection to your spring gatherings, reminding you of the love and warmth that good food can provide. Let’s keep sharing these moments together, one recipe at a time!

Spring Dinner Party: Lemon Chicken Salad Platter

Prep Time 15 minutes
Cook Time 15 minutes
Total Time 30 minutes
Servings 4 servings
Calories 350
A fresh and vibrant salad perfect for spring gatherings, featuring tender lemon-seasoned chicken and crisp greens.

Ingredients

Chicken

  • 2 large chicken breasts
  • 1 tablespoon olive oil
  • 1 teaspoon salt
  • 1/2 teaspoon black pepper

Salad

  • 6 cups mixed salad greens
  • 1 cup cherry tomatoes, halved
  • 1 cucumber sliced cucumber
  • 1/2 red onion thinly sliced red onion
  • 1 avocado diced avocado
  • Zest and juice of 1 lemon lemon zest and juice
  • 2 tablespoons Dijon mustard
  • 1 tablespoon honey
  • Salt and pepper, to taste Salt and pepper

Instructions 

  • Season chicken with olive oil, salt, and black pepper. Cook in a skillet until done, then rest and slice.
  • Whisk lemon zest, juice, Dijon mustard, and honey to make vinaigrette. Season with salt and pepper.
  • Combine greens, tomatoes, cucumber, onion, and avocado in a large bowl. Add sliced chicken.
  • Drizzle vinaigrette over the salad and toss gently. Serve immediately.

Notes

Use fresh lemon for the best flavor and adjust seasoning as needed.
Calories: 350kcal
Cost: $15
Course: Main Course, Salad
Cuisine: American
Keyword: Chicken, Lemon, Salad

Welcome to a Zesty Culinary Adventure

There’s something undeniably special about a homemade Lemon Chicken Salad, a dish that captures the essence of warmth and comfort while offering a refreshing burst of flavor. As you prepare this salad, you’re not just following a recipe; you’re weaving together memories, love, and a sense of community around your dining table. In this article, we will explore the delightful Ina Garten Lemon Chicken Salad Recipe, breaking it down step by step, and sharing tips and tricks that ensure your creation is as vibrant and heartwarming as the memories it brings back.

Why You’ll Love This Recipe

Every bite of this Lemon Chicken Salad is a celebration of flavors and textures. Here are five reasons why this recipe should find a cherished place in your kitchen:

  • Quick and Easy: This recipe takes less than 30 minutes, making it perfect for busy weeknights or last-minute gatherings.
  • Versatile Ingredients: You can easily substitute ingredients based on what you have on hand or your personal preferences.
  • Healthy and Nourishing: Packed with lean protein and fresh vegetables, this salad is a light yet satisfying meal option.
  • Refreshing Flavor: The combination of zesty lemon and fresh herbs creates a vibrant taste that brightens up any meal.
  • Perfect for Sharing: Whether you’re hosting a casual lunch or a festive dinner party, this salad is sure to impress your guests.

Ingredient Breakdown and Substitutions

Let’s dive into the ingredients that make this salad a standout. Here’s what you’ll need:

  • Boneless chicken breasts: 2 large, cooked and shredded. You can also use chicken thighs for a richer flavor.
  • Olive oil: 3 tablespoons. Feel free to substitute with avocado oil for a different flavor.
  • Fresh lemon juice: 3 tablespoons. For a sweeter note, consider using Meyer lemons.
  • Lemon zest: 1 teaspoon. This adds a punch of lemon flavor; don’t skip it!
  • Dijon mustard: 1 teaspoon. This gives the dressing a delightful tanginess.
  • Garlic: 1 teaspoon, minced. Fresh garlic adds a depth of flavor.
  • Celery: ½ cup, chopped. Provides a nice crunch; you can replace it with cucumber for a lighter texture.
  • Red onion: ¼ cup, finely chopped. If red onion is too strong, try green onions for a milder taste.
  • Fresh parsley: ¼ cup, chopped. Basil or cilantro can be delightful alternatives.
  • Salt: 1 teaspoon and Black pepper: ½ teaspoon to taste.

Step-by-Step Guide to Perfection

Appetizing Lemon Chicken Salad with lemon slices and green parsley visible.

Cooking is an art, and this Lemon Chicken Salad is a canvas waiting for your touch. Follow these steps to create a masterpiece:

  1. Cook the Chicken: Season the chicken breasts with salt and pepper, then grill or bake them until cooked through. Allow to cool before shredding.
  2. Prepare the Dressing: In a small bowl, whisk together the olive oil, fresh lemon juice, lemon zest, Dijon mustard, garlic, salt, and pepper until well combined.
  3. Combine Ingredients: In a large bowl, combine the shredded chicken, celery, red onion, and parsley. Pour the dressing over the mixture and toss gently to coat.
  4. Taste and Adjust: Sample your salad and adjust seasoning, adding more salt, pepper, or lemon juice as desired.
  5. Chill: For the best flavor, let the salad chill in the refrigerator for at least 30 minutes before serving.

Pro Tips for the Best Lemon Chicken Salad

To elevate your salad game, consider these expert insights:

  • Use Fresh Ingredients: Fresh herbs and high-quality olive oil make a noticeable difference in flavor.
  • Let the Flavors Marinate: Allowing the salad to sit for a bit before serving helps the flavors meld beautifully.
  • Texture Matters: Aim for a balance of crunchy and creamy textures by adjusting the amount of celery and dressing.
  • Make It Ahead: You can prepare this salad a day in advance; just hold off on adding any delicate greens until serving time.
  • Experiment with Add-Ins: Consider adding avocado, nuts, or dried fruit for added texture and flavor.
  • Presentation Counts: Serve your salad in a beautiful bowl and garnish with additional parsley or lemon slices for a stunning visual.
  • Pair Wisely: This salad works well with crusty bread, over a bed of greens, or as a filling for wraps.
  • Season Gradually: Add seasonings gradually, tasting as you go to ensure the perfect flavor profile.

Avoiding Common Mistakes

Every great cook has faced a hiccup or two. Here are some common pitfalls and how to avoid them:

  • Overcooking the Chicken: Aim for juicy chicken by using a meat thermometer; it should read 165°F (75°C).
  • Too Much Dressing: Start with less dressing and add more as needed to avoid a soggy salad.
  • Skipping the Chill: Chilling the salad helps the flavors develop and the salad to be refreshing.
  • Neglecting Texture: Don’t skip on crunchy ingredients like celery; they add a delightful contrast to the tender chicken.

Delicious Variations to Try

While the classic Lemon Chicken Salad is a delight on its own, feel free to mix things up!

  • Greek Twist: Add feta cheese, Kalamata olives, and cucumber for a Mediterranean flair.
  • Fruit-Infused: Toss in diced apples or grapes for a touch of sweetness.
  • Spicy Kick: Include diced jalapeños or a dash of hot sauce for some heat.
  • Herbaceous Delight: Experiment with fresh dill or tarragon for a unique flavor profile.

Storage and Make-Ahead Instructions

To keep your salad fresh and tasty:

  • Store in an Airtight Container: This salad can be kept in the refrigerator for up to 3 days.
  • Make Ahead: Prepare the chicken and dressing a day in advance; just combine everything right before serving.
  • Freezer Friendly: While it’s better fresh, you can freeze the chicken separately for later use.

Frequently Asked Questions

Here are some common questions about the Lemon Chicken Salad:

  • Can I use leftover chicken? Absolutely! Leftover rotisserie chicken works wonderfully in this salad.
  • Is this salad gluten-free? Yes, all the ingredients are gluten-free, making it a great option for those with dietary restrictions.
  • What can I serve with this salad? It pairs beautifully with crusty bread, a fresh green salad, or even as a sandwich filling.
  • Can I make this salad vegan? Substitute chicken with chickpeas or tofu and use a vegan mayo for the dressing.
  • How can I make it spicier? Add diced jalapeños or a pinch of cayenne pepper to the dressing for a kick.
  • What’s the best way to store leftovers? Keep in an airtight container in the fridge for up to 3 days.
  • Can I add nuts? Yes! Chopped walnuts or almonds add a wonderful crunch.
  • Should I serve it cold or at room temperature? This salad is best served chilled, as it enhances the refreshing flavors.

Nutritional Tips and Dietary Adaptations

This Lemon Chicken Salad is not just delicious; it’s also packed with nutrients. Here’s how to adapt it to fit different dietary needs:

  • Low-Carb: Keep it simple with just chicken and veggies, omitting the dressing or using a low-carb version.
  • High-Protein: Add more chicken or include a scoop of Greek yogurt in the dressing for extra protein.
  • Low-Fat: Substitute the dressing with a yogurt-based version for a lighter option.
  • Vegetarian: Use chickpeas, lentils, or grilled veggies in place of chicken for a filling salad.

Essential Equipment Recommendations

Having the right tools can make all the difference in your cooking experience:

  • Good Chef’s Knife: Essential for chopping and slicing ingredients with ease.
  • Cutting Board: A sturdy board helps with food prep and protects your countertops.
  • Mixing Bowls: Use different sizes for mixing ingredients and preparing the salad.
  • Whisk: A whisk is perfect for blending dressings smoothly.
  • Meat Thermometer: Ensures your chicken is cooked perfectly every time.

Serving Suggestions

Now that you’ve created this delightful Lemon Chicken Salad, consider these serving ideas:

  • Over Greens: Serve the salad atop a bed of mixed greens for a beautiful presentation.
  • In a Wrap: Use a whole-grain tortilla to wrap up the salad for a portable meal.
  • On Toast: Serve on crusty bread or croissants for a satisfying lunch option.
  • With a Side: Pair with a light soup or a side of fresh fruit for a complete meal.

Conclusion: A Dish to Cherish

As you gather around the table to share this Lemon Chicken Salad, remember that cooking is about more than just feeding the body; it’s about nourishing the soul. This recipe is not just a meal; it’s an experience filled with love, flavor, and treasured memories. So go ahead, share this dish with your family and friends, and let each bite remind you of the warmth of home and the joy of togetherness.

Ina Garten Lemon Chicken Salad Recipe

Prep Time 15 minutes
Cook Time 20 minutes
Total Time 35 minutes
Servings 4 servings
Calories 350
A fresh and tangy chicken salad perfect for a light lunch or dinner, featuring bright lemon flavors and crunchy celery.

Ingredients

Protein

  • 2 large Boneless chicken breasts

Dressing

  • 3 tablespoons Olive oil
  • 3 tablespoons Fresh lemon juice
  • 1 teaspoon Lemon zest
  • 1 teaspoon Dijon mustard
  • 1 teaspoon Minced garlic

Vegetables

  • ½ cup Chopped celery
  • ¼ cup Finely chopped red onion
  • ¼ cup Chopped fresh parsley
  • 1 teaspoon Salt
  • ½ teaspoon Black pepper

Instructions 

  • Cook the chicken breasts until fully cooked, then let cool and chop into bite-sized pieces.
  • In a bowl, whisk together olive oil, lemon juice, lemon zest, Dijon mustard, and minced garlic to make the dressing.
  • Combine the chopped chicken, celery, red onion, and parsley in a large bowl.
  • Pour the dressing over the chicken mixture and toss to coat evenly. Season with salt and black pepper.
  • Serve immediately or chill for 30 minutes to let flavors meld.

Notes

For extra flavor, add a touch of honey or serve with crusty bread.
Calories: 350kcal
Cost: $15
Course: Salad
Cuisine: American
Keyword: Chicken, Lemon