Author

daniel

Browsing

Welcome to a heartwarming adventure in baking! This Orange Cranberry Cake is not just a recipe; it’s a journey through vibrant flavors and cherished memories. Imagine the sweet scent of fresh oranges mingling with the tartness of cranberries filling your kitchen. This cake is more than a delightful treat; it’s a centerpiece for celebrations, a comforting slice to share with loved ones, and a reminder of the joy found in cooking together.

As we dive into this recipe, you’ll discover why this **cranberry orange cake** is perfect for every occasion—from tea time to festive gatherings. Let’s unwrap the layers of flavor and love that this cake brings!

Why You’ll Love This Recipe

  • Perfect for gatherings: This cake serves as a delightful centerpiece for any occasion, bringing smiles and conversation to your table.
  • Bright and refreshing flavors: The combination of fresh oranges and tart cranberries creates a flavor profile that is both uplifting and comforting.
  • Simple ingredients: With everyday pantry staples, you can whip up this cake without a fuss, making it accessible for any baker.
  • Moist and tender texture: Thanks to Greek yogurt, this cake stays moist, ensuring that every slice is a treat.
  • Customizable variations: Whether you want to add nuts or adjust the sweetness, this recipe welcomes your personal touch.

Ingredients Breakdown

Here’s what you’ll need to create this delightful **orange cranberry cake**:

  • 1 ½ cups All Purpose flour/Maida: This forms the base of your cake. For a gluten-free option, substitute with almond flour.
  • 1 ½ tsp Baking Powder: This helps the cake rise beautifully.
  • ½ tsp Baking Soda: A little boost to keep your cake light.
  • ¾ cup Greek Yogurt/Hung curd: This adds moisture and richness. You can also use buttermilk for a similar effect.
  • 6 tbsp Vegetable Oil: This keeps the cake moist. Feel free to swap with melted coconut oil for a tropical twist.
  • ¾ cup Castor sugar: For sweetness, but if you’re looking for a healthier option, coconut sugar works well too.
  • ½ cup Orange juice: Freshly squeezed is best, but store-bought will do in a pinch.
  • 1 tsp Orange Zest (optional): Adds an extra punch of flavor.
  • ¼ cup Chopped cranberries: Fresh or frozen, both work beautifully in this cake.
  • Chopped pistachios (optional): For garnishing, adding a delightful crunch.
  • 5 tbsp Powdered sugar/Icing sugar (for glaze): This will give your cake a sweet finish.
  • 2 tbsp Orange juice (for glaze): To bring the glaze together.

How To Make Orange Cranberry Cake Step By Step

Let’s get baking! Here’s a step-by-step guide to crafting your **cranberry orange cake**:

Get Your Kitchen Ready:

  1. Preheat your oven to 170°C (340°F). Grease a 7-inch loaf tin with butter, then sprinkle a bit of flour over it to prevent sticking.

Make the Cake Batter:

  1. In a bowl, sift together the flour, baking powder, and baking soda.
  2. In another large bowl, whisk together the sugar and Greek yogurt until the sugar dissolves completely.
  3. Add the orange juice, vegetable oil, and orange zest to the yogurt mixture. Mix until well combined.
  4. Gradually mix the dry ingredients into the wet ingredients, being careful not to overmix. Just until combined is perfect!
  5. Coat the chopped cranberries with a little flour before folding them into the batter. This prevents them from sinking to the bottom of the cake.

Bring It All Together:

  1. Pour the batter into your prepared loaf tin.
  2. Bake for 30-35 minutes. Check for doneness by inserting a toothpick into the center; it should come out clean.

Cool and Glaze:

  1. Allow the cake to cool in the pan for 15-20 minutes before transferring to a wire rack to cool completely.
  2. For the glaze, mix the powdered sugar with the orange juice until you achieve a thick, pourable consistency. Adjust with more sugar or juice as needed.
  3. Once the cake has cooled, pour the glaze over the top and let it set in the fridge for 20-25 minutes before slicing.

Smart Swaps for Your Cranberry Orange Cake

Close-up side view of a freshly baked Orange Cranberry Cake with a glossy glaze.

Want to make this cake your own? Here are some smart swaps:

  • Gluten-free option: Substitute all-purpose flour with almond flour or a gluten-free baking blend.
  • Vegan alternative: Replace Greek yogurt with a plant-based yogurt and use flax eggs instead of regular eggs.
  • Flavor boost: Add spices like cinnamon or nutmeg for a warm, cozy flavor.
  • Fruit variations: Substitute cranberries with blueberries or raspberries for a different berry twist.

Cranberry Orange Cake Variations

Feel free to explore these delicious variations:

Cream Cheese Swirl Version:

Add a cream cheese swirl for an extra layer of flavor. Mix together 4 oz of cream cheese with ¼ cup of sugar and 1 egg. Swirl through the batter before baking.

Chocolate Chip Addition:

Mix in ½ cup of chocolate chips for a decadent touch that pairs beautifully with the orange and cranberry.

Almond Cranberry Orange:

Incorporate almond extract in place of vanilla for a nutty flavor that complements the cake’s citrus notes.

Spiced Cranberry Orange:

Add a teaspoon of ginger or allspice to the batter for a warm, spiced cake perfect for the holiday season.

Storage and Make-Ahead Instructions

This cake is perfect for making ahead of time!

  • Storage: Keep the cake in an airtight container at room temperature for up to 3 days, or in the fridge for 5 days.
  • Freezing: Wrap the cooled cake tightly in plastic wrap and aluminum foil. It can be frozen for up to 2 months.
  • Thawing: To enjoy, simply thaw at room temperature for a few hours before serving.

Frequently Asked Questions (FAQ)

  • Can I use frozen cranberries? Yes! Just toss them in flour before adding to the batter.
  • What can I substitute for Greek yogurt? You can use buttermilk, sour cream, or a dairy-free yogurt.
  • How do I know when the cake is done? Insert a toothpick in the center; if it comes out clean, it’s ready!
  • Can I make this cake in advance? Absolutely! It stays fresh for several days and even freezes well.
  • What’s the best way to serve this cake? Serve it plain, or with a dusting of powdered sugar or a scoop of vanilla ice cream.
  • Can I add nuts to the recipe? Yes, walnuts or pecans make a lovely addition!
  • Why is my cake dense? This could be due to overmixing the batter or not incorporating enough air when mixing.
  • Can I use a different fruit? Yes! Other fruits like blueberries or cherries work wonderfully in this recipe.

Nutrition Tips and Dietary Adaptations

This cake can be made healthier by:

  • Using whole wheat flour: This adds fiber and nutrients.
  • Reducing sugar: Adjust the sugar to your taste; you can use natural sweeteners like honey or maple syrup.
  • Adding seeds: Incorporate chia or flaxseeds for added nutrition.

Equipment Recommendations

Here are a few tools that will make your baking experience smoother:

  • Mixing bowls: A good set of mixing bowls is essential for combining ingredients.
  • Loaf pan: A sturdy loaf pan ensures even baking.
  • Whisk: A whisk helps to incorporate air and create a light batter.
  • Cooling rack: This allows your cake to cool evenly.

Serving Suggestions

When it comes time to serve, consider these delightful ideas:

  • With a side of whipped cream: A dollop of whipped cream adds a light and airy texture.
  • Accompanied by tea or coffee: This cake makes for a perfect pairing with your favorite hot beverages.
  • As a dessert platter: Slice and arrange with other desserts for a beautiful presentation at gatherings.

In conclusion, this Orange Cranberry Cake holds the promise of joyful moments around the table, filled with laughter, warmth, and love. It’s not just about baking; it’s about creating memories that last beyond the last slice. So gather your loved ones, roll up your sleeves, and let’s bake a slice of sunshine together!

Orange Cranberry Cake

Prep Time 15 minutes
Cook Time 35 minutes
Total Time 50 minutes
Servings 8 slices
Calories 250
A moist and tangy cake infused with fresh orange flavor and studded with cranberries, perfect for a delightful treat.

Ingredients

Dry ingredients

  • 1 ½ cups All Purpose flour/Maida
  • 1 ½ tsp Baking Powder
  • 1/2 tsp Baking Soda

Wet ingredients

  • 3/4 cup Greek Yogurt/Hung curd
  • 6 tbsp Vegetable Oil
  • 3/4 cup Castor sugar
  • 1 tsp Orange Zest (optional)
  • 1/2 cup Orange juice (use fresh or packaged)

Add-ins

  • ¼ cup Chopped cranberries
  • 5 tbsp Powdered sugar/Icing sugar (for glaze)
  • 2 tbsp Orange juice (for glaze)

Instructions 

  • Preheat oven to 170°C. Grease a 7-inch loaf tin.
  • Sieve together flour, baking powder, and baking soda.
  • Whisk sugar and yogurt until dissolved. Add orange juice, oil, and zest; mix well.
  • Combine wet and dry ingredients; do not overmix. Toss cranberries in flour and fold in.
  • Pour batter into the pan and bake for 30-35 minutes. Cool before glazing.
  • Mix powdered sugar with orange juice to make glaze. Pour over cooled cake and chill for 20-25 minutes.
Notes

Ensure cranberries are coated with flour to prevent sinking.
Calories: 250kcal
Cost: $12
Course: Dessert
Cuisine: Western
Keyword: cake, Cranberry, Orange

Welcome to Taco Night: A Heartfelt Journey

Gathering around the table for taco night is more than just a meal; it’s a celebration of flavors, memories, and togetherness. With my Instant Pot Taco Meat and vibrant Salad Jars, we’ll explore how cooking can bring families closer—just like those warm evenings spent in my grandmother’s kitchen in Louisiana. Let’s dive into a recipe that’s not only efficient but also brimming with love and nostalgia.

Why You’ll Love This Recipe

This Instant Pot Taco Meat recipe is designed to simplify your weeknight dinners while keeping the spirit of cooking alive. Here are five heartwarming reasons to embrace this dish:

  • Quick Preparation: The Instant Pot allows you to create tender, juicy taco meat in just minutes, making it perfect for busy households.
  • Versatile Ingredients: Feel free to substitute ground beef with turkey or even plant-based options to cater to dietary preferences.
  • Meal Prep Friendly: Make a batch ahead of time, and enjoy flavorful taco salads or wraps throughout the week.
  • Family-Friendly: Kids love the customizable nature of tacos, allowing them to choose their favorite toppings and ingredients.
  • Sustainable Leftovers: The meat can be stored and repurposed into various dishes like nachos, burritos, or quesadillas, reducing waste.

Gather Your Ingredients: A Detailed Breakdown

Before we roll up our sleeves, let’s ensure you have everything you need to create this delicious taco meat:

  • 1 tbsp olive oil: A healthy fat that adds flavor. You may substitute it with avocado oil or canola oil.
  • 1 lb ground beef or turkey: Choose lean ground beef or ground turkey for a lighter option.
  • 2 tbsp taco seasoning: Use store-bought or make your own with chili powder, cumin, garlic powder, and paprika.
  • 2 cloves garlic, minced: Fresh garlic enhances the aroma and taste of the dish.
  • 1 yellow onion, diced: Sweet onions caramelize beautifully, adding depth of flavor.
  • 3/4 cup water: Helps to create steam in the Instant Pot for cooking.
  • 1/2 tsp salt: Balance the flavors; adjust based on your preference.
  • 1 jar salsa: Choose your favorite salsa for an extra flavor kick.
  • 1 cup corn: Fresh or frozen corn adds sweetness and texture.
  • 1 can black beans: Rinse and drain for added protein.
  • 1 cup cherry tomatoes, sliced in half: Fresh tomatoes add a juicy burst of flavor.
  • 1 head romaine lettuce: Crunchy lettuce is perfect for topping your tacos or salads.
  • 1 cup tortilla chips: Serve on the side or crush them into your salad jars for added crunch.

How to Make Taco Meat in the Instant Pot

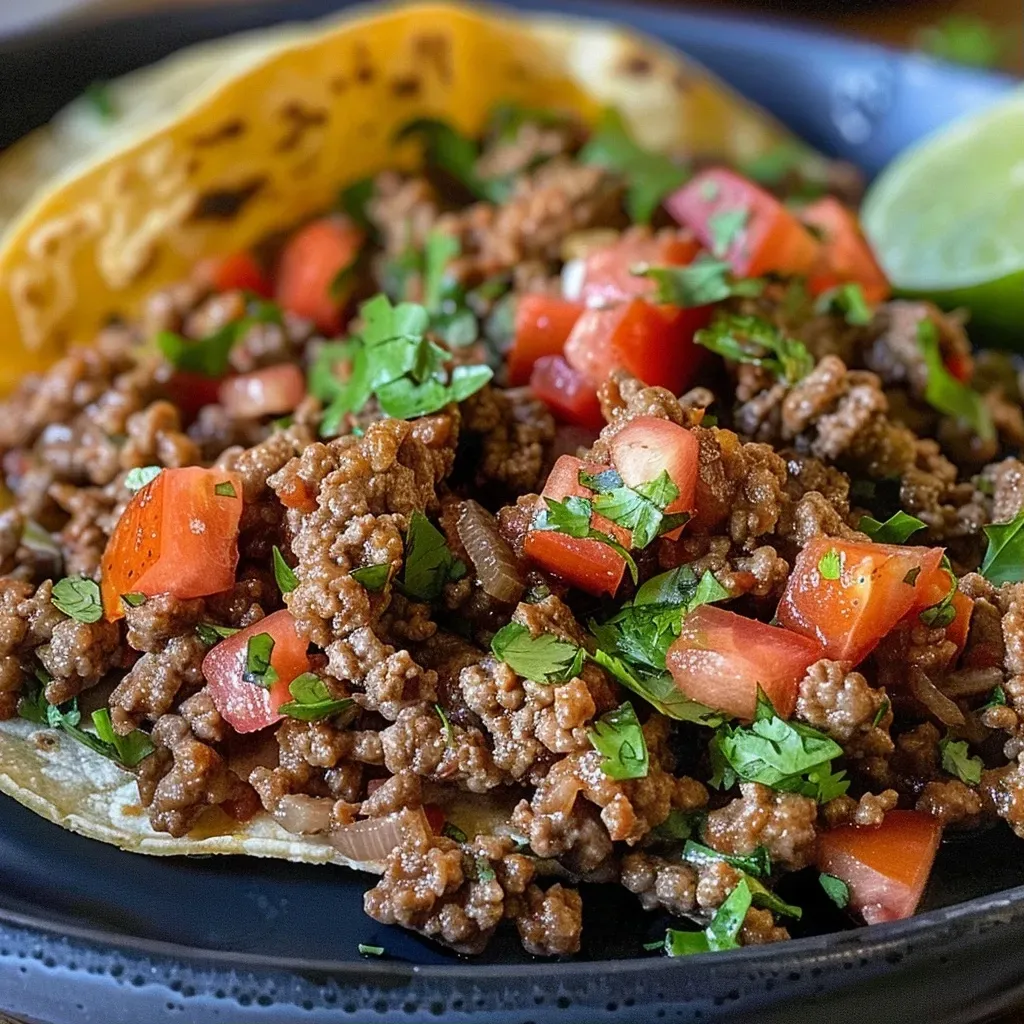
Close-up of juicy Instant Pot taco meat with diced onions and garlic.

Now that we have our ingredients ready, let’s jump into the cooking process:

  1. Add olive oil, onions, garlic, salt, ground meat, taco seasoning, and water to the Instant Pot. Mix well, breaking up the meat.
  2. Seal the Instant Pot lid and cook on high pressure for 3 minutes. The pot will take about 10-15 minutes to preheat before the cooking time begins.
  3. Once the timer goes off, perform a quick release of the pressure. Carefully open the lid and drain any excess liquid from the meat.

Crafting Your Taco Salad Jars

While the taco meat is cooking, let’s prepare the colorful taco salad jars. These jars are not only visually appealing but also perfect for meal prep!

  1. In 4 (1L) mason jars, layer the ingredients starting with salsa at the bottom.
  2. Add a generous portion of taco meat on top of the salsa.
  3. Next, layer in corn, black beans, and cherry tomatoes.
  4. Finish with a handful of chopped romaine lettuce. If desired, top with tortilla chips or pack them separately to keep them fresh.

Pro Tips for Taco Night Success

Here are some expert insights to elevate your taco night:

  • Make Your Own Taco Seasoning: Combine chili powder, cumin, garlic powder, onion powder, and paprika for a fresh blend.
  • Experiment with Proteins: Swap ground beef for shredded chicken or even tofu for a vegetarian twist.
  • Customize Toppings: Set up a toppings bar with ingredients like avocado, jalapeños, cheese, and cilantro for a fun family experience.
  • Use Fresh Ingredients: Fresh cilantro, lime juice, and diced avocado can elevate the flavor profile.
  • Batch Cook: Double the recipe and freeze extra taco meat for quick meals later.
  • Try Different Jars: Use different sized jars for portion control or to create fun layered salads.
  • Incorporate Leftovers: Use leftover taco meat in breakfast burritos or as a topping for nachos.
  • Don’t Skip the Quick Release: This method ensures your taco meat stays juicy and tender.

Common Mistakes & Troubleshooting

Even the best chefs can face hurdles. Here are a few common mistakes to avoid:

  • Overcooking: Don’t exceed the recommended cooking time; it can make the meat tough.
  • Skipping the Quick Release: This can lead to overcooked meat, so always follow the instructions.
  • Not Breaking Up the Meat: Ensure the meat is well-broken to prevent clumping during cooking.
  • Ignoring Temperature: If using frozen meat, adjust cooking times accordingly to avoid undercooking.

Variations to Try

Feeling adventurous? Here are some delicious variations to inspire your creativity:

  • Chicken Taco Meat: Substitute ground beef with shredded chicken for a lighter option.
  • Vegetarian Taco Meat: Use lentils or quinoa mixed with spices for a tasty vegetarian twist.
  • Spicy Taco Version: Add diced jalapeños or hot sauce to the meat mixture for an extra kick.
  • BBQ Taco Meat: Mix in your favorite barbecue sauce for a smoky, sweet flavor.

Storage Instructions and Make-Ahead Tips

Planning ahead? Here’s how to store and manage your taco meat and salad jars:

  • Refrigeration: Store leftover taco meat in an airtight container for up to 5 days.
  • Freezing: Freeze taco meat in portions for up to 3 months for a quick meal option.
  • Salad Jars: Keep assembled salad jars in the refrigerator for up to 5 days, but add chips just before serving.
  • Meal Prep: Prepare all ingredients in advance, so you can whip up tacos in no time during the week.

Frequently Asked Questions

Here are some common questions and answers to guide you:

  • Can I use frozen ground beef? Yes, just adjust the cooking time to allow for thawing.
  • What if I don’t have an Instant Pot? You can cook the meat on the stovetop, simmering until fully cooked.
  • How can I make this recipe gluten-free? Use gluten-free taco seasoning and ensure your toppings are also gluten-free.
  • What toppings do you recommend? Try avocado, cheese, sour cream, and fresh cilantro for a tasty finish.
  • How long does taco meat last in the fridge? Properly stored, it lasts up to 5 days.
  • Can I make this recipe in advance? Yes, taco meat can be made ahead and reheated when needed.
  • What sides pair well with tacos? Consider serving with rice, beans, or a side of guacamole.
  • Is this recipe kid-friendly? Absolutely! Kids can customize their tacos with their favorite toppings.

Nutritional Tips and Dietary Adaptations

This recipe can be easily adapted to meet various dietary needs:

  • Low Carb: Use lettuce wraps instead of tortillas for a low-carb alternative.
  • High Protein: Add beans and use lean meats for a protein-packed meal.
  • Vegetarian: Substitute meat with lentils or plant-based proteins.
  • Gluten-Free: Ensure all ingredients, especially toppings, are gluten-free.

Essential Equipment Recommendations

To make your taco night a breeze, here are some tools to consider:

  • Instant Pot: This versatile appliance is a must-have for quick cooking.
  • Mason Jars: Perfect for assembling your salad jars and for storage.
  • Cutting Board and Knives: Essential for prepping your ingredients.
  • Measuring Cups: Accurate measurements ensure perfect flavor balance.

Serving Suggestions to Elevate Your Meal

To create a truly memorable taco night, consider these serving ideas:

  • Taco Bar: Set up a taco bar with various toppings for guests to customize their own.
  • Side Dishes: Serve with rice, beans, or a refreshing corn salad.
  • Signature Drink: Pair with homemade margaritas or a zesty limeade.
  • Dessert: Finish off the meal with a light dessert like flan or churros.

Conclusion: A Meal to Remember

As you serve up this Instant Pot Taco Meat and Salad Jars, remember that the most important ingredient is love. Each bite represents not just sustenance but the joy of gathering with family and friends. Embrace the flavors, share your stories, and create new memories around the table. Happy cooking, and may your taco nights be joyous and filled with laughter!

Instant Pot Taco Meat {+Taco Salad Jars}

Prep Time 10 minutes
Cook Time 3 minutes
Total Time 13 minutes
Servings 4 servings
Calories 350
Enjoy a quick and flavorful taco meat prepared in the Instant Pot, perfect for assembling fresh taco salad jars.

Ingredients

Main ingredients

  • 1 tbsp olive oil
  • 1 lb ground beef or turkey
  • 2 tbsp taco seasoning (homemade or store-bought)
  • 2 cloves garlic, minced
  • 1 yellow onion diced yellow onion
  • 3/4 cup water
  • 1/2 tsp salt
  • 1 jar salsa
  • 1 cup corn
  • 1 can black beans
  • 1 cup cherry tomatoes, sliced in half
  • 1 head romaine lettuce
  • 1 cup tortilla chips

Instructions 

  • Add olive oil, onions, garlic, salt, meat, taco seasoning, and water to Instant Pot. Mix and cook on high pressure for 3 minutes.
  • Quick release pressure, open lid, and drain excess liquid from meat.
  • Layer salsa, meat, corn, black beans, tomatoes, and lettuce in jars. Top with chips or pack separately.

Notes

Store assembled jars in the fridge for up to 5 days for a quick meal prep.
Calories: 350kcal
Cost: $15
Course: Main Course
Cuisine: Mexican
Keyword: Instant Pot, Salad, Tacos

Embrace the Joy of Cooking with This Pomegranate Couscous Salad

Welcome to a culinary journey where flavors dance, memories unfold, and love is served on a plate. This Pomegranate Couscous Salad is more than just a recipe; it’s a celebration of togetherness, echoing the laughter and warmth of family gatherings. Bursting with vibrant colors and textures, this dish brings a delightful harmony of sweet pomegranate, refreshing herbs, and nutty couscous, inviting everyone to share in its joy. Let’s explore how to create this beautiful salad that you’ll cherish for years to come.

Why You’ll Love This Recipe

This Pomegranate Couscous Salad isn’t just a dish; it’s an experience. Here are some heartfelt reasons to fall in love with it:

  • Quick and Easy Preparation: Ready in just 20 minutes, this recipe is perfect for busy weeknights or unexpected guests.
  • Fresh Ingredients: Packed with vibrant herbs and juicy pomegranate seeds, it’s not only delicious but also a feast for the eyes.
  • Versatile Side Dish: Whether you’re serving it at a holiday gathering or a casual barbecue, it complements a variety of main dishes beautifully.
  • Health Benefits: Loaded with antioxidants from pomegranates and nutrients from fresh herbs, this salad is as nourishing as it is flavorful.
  • Customizable: Feel free to add your personal touch with variations that cater to your taste preferences.

Ingredient Breakdown

Before diving into the preparation, let’s take a closer look at the ingredients that make this salad shine:

  • Couscous: The fluffy base that absorbs all the wonderful flavors. You can use regular or whole wheat couscous for added fiber.
  • Pomegranate: The star of the show! Its sweet and tart seeds add a burst of flavor and beautiful color.
  • Pistachios: These crunchy nuts provide a lovely texture and a nutty flavor that pairs perfectly with the salad.
  • Fresh Herbs: Mint and parsley bring freshness and vibrancy. Feel free to substitute with cilantro or basil if you prefer.
  • Lemon Juice and Zest: For brightness and acidity, these ingredients enhance the overall flavor profile.
  • Olive Oil: Use high-quality extra virgin olive oil for a rich, fruity taste.
  • Salt and Pepper: Essential for seasoning and enhancing the flavors of all ingredients.

If you’re looking to make substitutions, here are some options:

  • Quinoa: Swap couscous with quinoa for a gluten-free version.
  • Almonds or Walnuts: Use these nuts in place of pistachios for a different crunch.
  • Feta Cheese: Crumbled feta can add a creamy, salty element, perfect for those who enjoy cheese.

How to Make Pomegranate Couscous Salad

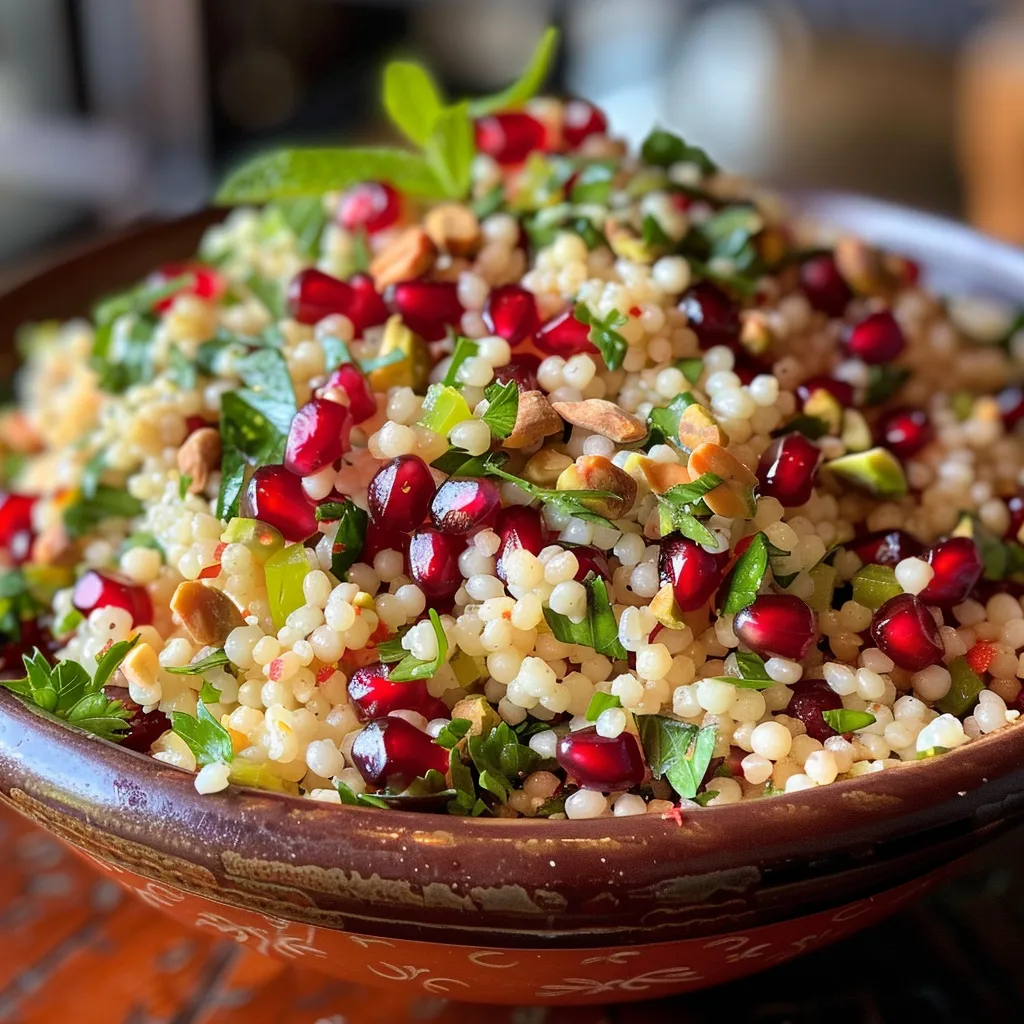
Close-up view of a colorful pomegranate couscous salad with fresh herbs and nuts.

Now that we’ve gathered our ingredients, let’s get to the heart of the matter—making this delicious salad!

  1. Prepare the Couscous: In a medium saucepan, bring 2 cups of water to a boil. Stir in 2 cups of couscous and a pinch of salt. Remove from heat, cover, and let it sit for about 5 minutes. Fluff with a fork once done.
  2. Mix the Dressing: In a small bowl, whisk together 4 tablespoons of olive oil, 2 tablespoons of fresh lemon juice, 1/2 teaspoon kosher salt, and 10 grinds of pepper.
  3. Combine Ingredients: In a large bowl, mix the fluffed couscous, 1 pomegranate (seeds only), 1/2 cup of chopped mint, 1/2 cup of chopped parsley, and 1/2 cup of pistachios.
  4. Add the Dressing: Pour the dressing over the salad and toss gently until everything is nicely coated.
  5. Serve and Enjoy: This beautiful salad can be served immediately or chilled in the fridge for 30 minutes to allow the flavors to meld.

Pro Tips for Perfect Pomegranate Couscous Salad

Here are some of my favorite tips to elevate your salad-making experience:

  • Cool the Couscous: Allow the couscous to cool completely before mixing with other ingredients to prevent wilting herbs.
  • Fresh Ingredients Matter: Use the freshest herbs and pomegranate for the best flavor and texture.
  • Adjust Seasoning: Taste and adjust the seasoning before serving. Sometimes a little extra salt or lemon can make all the difference.
  • Make Ahead: This salad keeps well in the fridge for up to 3 days, making it a great option for meal prep.
  • Mix and Match: Experiment with different nuts, fruits, or dressings to create your unique version!
  • Use Leftover Couscous: If you have any leftover couscous, this recipe is a fantastic way to repurpose it.
  • Garnish Thoughtfully: Consider adding a sprinkle of pomegranate seeds on top just before serving for a stunning presentation.
  • Chill Before Serving: Chilling the salad allows the flavors to meld together beautifully, enhancing the overall taste.

Common Mistakes and Troubleshooting

Even the best chefs can encounter a few hiccups. Here are some common mistakes and how to avoid them:

  • Overcooked Couscous: Be careful not to overcook the couscous. Follow the package instructions for perfect texture.
  • Too Much Dressing: Start with a little dressing, as you can always add more. Too much can overpower the delicate flavors.
  • Not Enough Flavor: If your salad tastes bland, try adding more lemon juice or a pinch of salt to brighten it up.
  • Wilting Herbs: Prevent wilting by ensuring the couscous is cool before adding herbs and pomegranate seeds.

Variations to Try

One of the joys of cooking is experimenting. Here are some delightful variations you can try:

  • Greek Twist: Add crumbled feta cheese and kalamata olives for a Mediterranean flair.
  • Fruit Fusion: Toss in some diced apples or pear for an additional layer of sweetness and crunch.
  • Spicy Kick: Add a pinch of red pepper flakes or diced jalapeños for a touch of heat.
  • Herb Medley: Mix in a combination of herbs like cilantro, basil, or dill for a unique flavor profile.

Storage and Make-Ahead Instructions

This salad can be made ahead of time, making it perfect for gatherings or meal prep. Here’s how to store it:

  • Refrigerate: Store leftovers in an airtight container in the fridge for up to 3 days.
  • Freeze: It’s best eaten fresh, but you can freeze the couscous separately if needed. Thaw and mix in fresh ingredients later.
  • Reheat Carefully: If serving warm, gently reheat couscous before mixing but avoid reheating the salad itself to keep the herbs fresh.

FAQs About Pomegranate Couscous Salad

Here are some common questions people ask about this delightful salad:

  • Can I use instant couscous for this recipe? Yes, instant couscous works perfectly! Just follow the package instructions.
  • Is this salad gluten-free? To make it gluten-free, substitute couscous with quinoa or rice.
  • How can I make it vegan? Simply omit the feta or use a dairy-free alternative; it’s naturally vegetarian.
  • Can I add protein? Absolutely! Grilled chicken, shrimp, or chickpeas make great additions.
  • What are the best serving suggestions? This salad pairs beautifully with grilled meats, fish, or as a stand-alone light meal.
  • How do I prevent the pomegranate seeds from sticking together? Ensure they are dry before adding them to the salad, and toss gently.
  • Can I make this salad ahead of time? Yes! It’s even better after the flavors meld for a few hours in the fridge.
  • What’s the best way to serve leftovers? Serve cold or at room temperature, and refresh with a drizzle of olive oil.

Nutritional Tips and Dietary Adaptations

This Pomegranate Couscous Salad is not only delicious but also nutritious. Here are some tips to enhance its health benefits:

  • Whole Grains: Opt for whole wheat couscous for extra fiber and nutrients.
  • Low Sodium: Use low-sodium salt or omit it altogether if you’re watching your sodium intake.
  • Fresh Produce: The more colorful your ingredients, the more antioxidants and vitamins you incorporate.

Equipment Recommendations

To make your cooking experience smoother, here are a few essential tools:

  • Medium Saucepan: For boiling water and cooking couscous.
  • Mixing Bowls: A large bowl for mixing salad and a smaller bowl for dressing.
  • Whisk: For combining the dressing ingredients smoothly.
  • Measuring Cups and Spoons: Accurate measurements ensure consistent results.

Serving Suggestions

To elevate your dining experience, consider these serving ideas:

  • Garnish with Fresh Herbs: A sprinkle of additional chopped mint or parsley adds a lovely touch.
  • Pair with Grilled Proteins: This salad pairs wonderfully with grilled chicken, fish, or shrimp.
  • Serve in Individual Bowls: For a more elegant presentation, serve the salad in small bowls or on a large platter.

As we gather around the table, sharing stories and laughter, this Pomegranate Couscous Salad will undoubtedly become a cherished recipe in your home. Cook with love, serve with joy, and remember that every meal is an opportunity to create beautiful memories. Happy cooking!

Pomegranate Couscous Salad

Prep Time 10 minutes
Cook Time 15 minutes
Total Time 25 minutes
Servings 4 servings
Calories 250
A vibrant and refreshing salad combining fluffy couscous with sweet pomegranate seeds, crunchy pistachios, and fresh herbs, perfect for a light meal or side dish.

Ingredients

group

  • 2 cups couscous
  • 1 pomegranate pomegranate seeds
  • 0.5 cup pistachios, (roughly chopped)
  • 0.5 cup chopped mint
  • 0.5 cup chopped flat-leaf parsley
  • 1 large lemon lemon, (zested)
  • 4 tablespoons extra virgin olive oil
  • 2 tablespoons fresh lemon juice
  • 0.5 teaspoon kosher salt
  • 10 grinds pepper

Instructions 

  • Cook the couscous according to package instructions and let it cool.
  • In a large bowl, combine cooled couscous, pomegranate seeds, chopped pistachios, mint, and parsley.
  • In a small bowl, whisk together lemon zest, lemon juice, olive oil, salt, and pepper.
  • Pour the dressing over the salad and toss to combine.
  • Serve immediately or chill for 30 minutes before serving.

Notes

For extra flavor, toast the pistachios lightly before chopping.
Calories: 250kcal
Cost: $12
Course: Salad
Cuisine: Mediterranean
Keyword: Pomegranate

There’s something magical about the aroma of a freshly baked cinnamon roll cake wafting through the house, conjuring up cherished memories of family gatherings and cozy moments spent in the kitchen. This Cinnamon Roll Bundt Cake is more than just a dessert; it’s a heartfelt recipe that embodies warmth, love, and nostalgia. With its delicious swirls of cinnamon and a luscious cream cheese glaze, this cake is the perfect centerpiece for any gathering, inviting everyone to share stories and laughter around the table.

In this comprehensive guide, we’ll explore every aspect of creating the best Cinnamon Roll Bundt Cake, from understanding its ingredients to mastering the technique that will have your friends and family begging for seconds. Whether you’re an experienced baker or just starting, let’s embark on this delicious journey together!

Why You’ll Love This Recipe

  • Perfect for gatherings: This cake is designed to serve a crowd, making it ideal for parties, brunches, or holiday celebrations.
  • Deliciously moist: The combination of sour cream and butter ensures a cake that is incredibly moist and tender with each bite.
  • Rich cinnamon flavor: The generous swirl of cinnamon adds warmth and spice, elevating this cake beyond the ordinary.
  • Easy to make: With straightforward steps and simple ingredients, even novice bakers can whip this up with confidence.
  • Customizable: You can easily adapt this cake with various fillings, toppings, or dietary adjustments to suit your preferences.

Essential Ingredients for Cinnamon Roll Bundt Cake

This cake is a delightful blend of classic ingredients that come together to create a comforting treat.

Main Ingredients

  • All-purpose flour: 3 1/4 cups, the backbone of your cake.
  • Granulated sugar: 1 1/3 cup for sweetness.
  • Light brown sugar: 2/3 cup adds depth and moisture.
  • Baking soda and baking powder: 1/2 teaspoon baking soda, 1 1/2 teaspoons baking powder for the perfect rise.
  • Cinnamon: 1 1/2 teaspoons for that iconic flavor.
  • Fine grain salt: 1/2 teaspoon balances the sweetness.
  • Unsalted butter: 1 cup (softened) for richness.
  • Eggs: 4 large eggs at room temperature for a fluffy texture.
  • Vanilla extract: 2 teaspoons for a fragrant note.
  • Whole milk: 2/3 cup for moisture.
  • Sour cream: 1/2 cup enhances the cake’s tenderness.

Cinnamon Swirl Filling

  • Light brown sugar: 2/3 cup for sweetness and moisture.
  • Ground cinnamon: 2 tablespoons for that warm flavor.
  • All-purpose flour: 2 tablespoons to bind the filling.

Cream Cheese Frosting

  • Unsalted butter: 1/4 cup for creaminess.
  • Cream cheese: 4 oz. at room temperature for a rich flavor.
  • Confectioners’ sugar: 1 cup for sweetness and smoothness.
  • Heavy cream: 1/2 cup to achieve the desired consistency.
  • Vanilla extract: 1 teaspoon for flavor.

Optional Topping

  • Chopped pecans: 1/2 cup, toasted for added crunch and flavor.

Step-by-Step Guide to Prepare the Perfect Cinnamon Roll Bundt Cake

Let’s dive into the process of creating this beautiful cake.

Step 1: Prepare Your Ingredients

Gather all your ingredients and let them come to room temperature. This ensures proper mixing and enhances the cake’s texture.

Step 2: Make the Cake Batter

In a large mixing bowl, cream together the softened butter, granulated sugar, and light brown sugar until fluffy. Add the eggs one at a time, mixing well after each addition. Then stir in the vanilla extract.

Step 3: Combine Dry Ingredients

In another bowl, whisk together the flour, baking soda, baking powder, cinnamon, and salt. Gradually add the dry mixture to the wet ingredients, alternating with the milk and sour cream until just combined.

Step 4: Prepare the Cinnamon Swirl Mixture

In a small bowl, mix the light brown sugar, cinnamon, and flour. This will be your filling.

Step 5: Layer the Batters

Pour half of the cake batter into the prepared bundt pan. Sprinkle half of the cinnamon swirl mixture over the batter. Add the remaining cake batter, and top with the remaining cinnamon swirl mixture. Use a knife to gently swirl the batter for a marbled effect.

Step 6: Bake the Bundt Cake

Preheat the oven to 350°F (175°C). Bake for 50-60 minutes or until a toothpick inserted into the center comes out clean. Allow the cake to cool in the pan for 10 minutes before inverting onto a wire rack.

Step 7: Make the Cream Cheese Frosting

In a mixing bowl, beat together the softened cream cheese and unsalted butter until smooth. Gradually add the confectioners’ sugar and heavy cream, mixing until creamy. Stir in the vanilla extract.

Step 8: Frost and Serve

Once the cake has completely cooled, drizzle the cream cheese frosting over the top. Sprinkle with toasted pecans if desired. Slice, serve, and enjoy!

Pro Tips for the Best Cinnamon Roll Bundt Cake

Close-up of a fluffy Cinnamon Roll Bundt Cake with a caramel glaze.
  • Use room temperature ingredients: This ensures better mixing and a smoother batter.
  • Don’t overmix: Mix until just combined to keep your cake tender and fluffy.
  • Grease your bundt pan well: This prevents sticking and helps achieve a beautiful cake release.
  • Check for doneness: Ovens can vary; a toothpick should come out clean or with a few moist crumbs.
  • Allow to cool completely: This makes frosting easier and prevents melting.
  • Experiment with flavors: Try adding chocolate chips, nuts, or dried fruit to the batter for variety.
  • Adjust sweetness: Feel free to reduce sugar in the frosting if you prefer a less sweet topping.
  • Store properly: Keep the cake covered at room temperature for up to 3 days, or refrigerate for up to a week.

Common Mistakes and Troubleshooting

Even the best bakers encounter challenges. Here are some common pitfalls and how to avoid them:

  • Dense cake: This can happen due to overmixing or not enough leavening agents. Always measure flour accurately and mix gently.
  • Cake sticking to the pan: Ensure thorough greasing and consider using a flour-based spray for bundt pans.
  • Uneven baking: If your oven has hot spots, rotate the cake halfway through baking.
  • Frosting too runny: Add more confectioners’ sugar to thicken it, or chill the frosting briefly before use.

Variations to Try

  • Nutty Addition: Incorporate 1 cup of chopped walnuts or pecans into the batter for added texture.
  • Chocolate Swirl: Mix in cocoa powder to the cinnamon swirl for a chocolatey twist.
  • Fruit-filled: Add a layer of fresh fruit, like blueberries or apples, before the cinnamon swirl for extra flavor.
  • Gluten-free option: Substitute all-purpose flour with a gluten-free blend to accommodate dietary needs.

Storage and Make-Ahead Instructions

This cake can be made in advance and stored properly. It keeps well at room temperature for up to 3 days, or you can refrigerate it for up to a week. To freeze, wrap the cake tightly in plastic wrap and then foil, storing it for up to 3 months. When ready to enjoy, thaw overnight in the refrigerator and frost just before serving.

Frequently Asked Questions

  • Can I use different nuts?: Absolutely! Feel free to use your favorite nuts or omit them entirely.
  • What can I substitute for sour cream?: Greek yogurt works great as a substitute.
  • Can I make this cake without a bundt pan?: Yes, you can use a standard cake pan, but baking times may vary.
  • How do I know when the cake is done?: A toothpick inserted into the center should come out clean or with a few crumbs.
  • Can I make this cake vegan?: To veganize, substitute eggs with flax eggs, and use plant-based milk and butter.
  • What’s the best way to serve this cake?: Serve warm or at room temperature, drizzled with frosting and garnished with nuts.
  • How do I store leftovers?: Keep in an airtight container at room temperature or refrigerate for longer shelf life.
  • Can I add more spices?: For a spiced cake, feel free to add nutmeg or allspice to the batter.

Nutrition Tips and Dietary Adaptations

While this cake is a delightful treat, there are ways to make it healthier:

  • Reduce sugar: Consider cutting down the sugar in both the cake and frosting to lessen sweetness.
  • Use whole grain flour: Swap out some all-purpose flour for whole wheat flour for added nutrients.
  • Lower fat options: Use low-fat cream cheese and butter in the frosting to cut calories.
  • Portion control: Cut smaller slices to enjoy a taste without overindulging.

Equipment Recommendations

To create this Cinnamon Roll Bundt Cake, you’ll need the following equipment:

  • Bundt pan: A high-quality non-stick bundt pan ensures easy release.
  • Mixing bowls: Use both large and medium-sized bowls for mixing ingredients.
  • Measuring cups and spoons: Accurate measurements are key to baking success.
  • Stand or hand mixer: A mixer makes creaming butter and sugar a breeze.
  • Spatula: A rubber spatula helps in folding and scraping the bowl.

Serving Suggestions

This Cinnamon Roll Bundt Cake shines as the star of any gathering. Here are some serving ideas:

  • With coffee: Serve alongside a warm cup of coffee or tea for a delightful afternoon treat.
  • With ice cream: A scoop of vanilla ice cream on top adds a delightful contrast to the warm cake.
  • As part of a brunch spread: Slice and serve alongside fresh fruit, yogurt, and pastries.
  • At celebrations: Decorate with seasonal fruits or edible flowers for birthdays or holidays.

The joy of sharing this cake is immeasurable; it’s a bridge connecting generations, a way to honor traditions, and a means to create new memories. So, gather your loved ones, slice a piece of this warm, spiced goodness, and relish every moment spent together. Happy baking!

Cinnamon Roll Bundt Cake Recipe

Prep Time 20 minutes
Cook Time 1 hour
Total Time 1 hour 20 minutes
Servings 12 pieces
Calories 450
A decadent cake combining the flavors of cinnamon rolls in a bundt form, perfect for special occasions or indulgent treats.

Ingredients

Dough

  • 3 1/4 cups all-purpose flour
  • 1 1/3 cups granulated sugar
  • 2/3 cup light brown sugar
  • 1/2 teaspoon baking soda
  • 1 1/2 teaspoons baking powder
  • 1 1/2 teaspoons cinnamon
  • 1/2 teaspoon fine grain salt
  • 1 cup unsalted butter (softened)
  • 4 large eggs
  • 2 teaspoons vanilla extract
  • 2/3 cup whole milk
  • 1/2 cup sour cream

Filling

  • 2/3 cup light brown sugar
  • 2 tablespoons ground cinnamon
  • 2 tablespoons all-purpose flour
  • 3 tablespoons whole milk
  • 1/4 cup unsalted butter (melted)

Cream Cheese Frosting

  • 4 oz cream cheese (at room temperature)
  • 1 cup confectioners’ sugar
  • 1/2 cup heavy cream
  • 1 teaspoon vanilla extract
  • 1/2 cup chopped pecans (toasted)

Instructions 

  • Preheat oven to 350°F (175°C). Grease and flour a bundt pan.
  • Mix dry ingredients and creamed butter, eggs, vanilla, milk, and sour cream to make the batter. Pour half into the pan.
  • Combine filling ingredients and swirl into the batter. Top with remaining batter.
  • Bake for 60 minutes or until a toothpick inserted comes out clean. Let cool.
  • Prepare frosting by beating cream cheese, sugar, cream, vanilla, and pecans. Spread over cooled cake.

Notes

For best results, use room temperature ingredients and toast pecans for added flavor.
Calories: 450kcal
Cost: $15
Course: Dessert
Cuisine: American
Keyword: cake, Cinnamon

A Warm Welcome to Chicken Stuffing Bake

Gather around, friends! There’s a dish that feels like a warm hug from grandma, a recipe that brings back memories of family dinners and laughter echoing through the halls. In this Chicken Stuffing Bake, tender chicken meets delightful stuffing in a creamy embrace, making it not just a meal but a comforting experience to share with your loved ones. Let’s dive into this culinary journey, where every bite tells a story and every flavor evokes a memory.

Why You’ll Love This Recipe

This Chicken Stuffing Bake isn’t just another recipe; it’s a labor of love that you’ll cherish for years to come. Here are some reasons to get excited:

  • Family Favorite: This dish is a hit with both kids and adults, making it perfect for family gatherings.
  • Easy Preparation: With just a few steps, you can have a delicious meal ready to go, perfect for busy weeknights.
  • Comforting Flavors: The combination of chicken, creamy soup, and stuffing creates a cozy, satisfying dish that warms the heart.
  • Versatile Ingredients: You can easily adapt the recipe by using different proteins or stuffing varieties based on your preferences.
  • Make-Ahead Friendly: Prepare it in advance, so you can enjoy more time with loved ones and less time in the kitchen.

Gathering the Ingredients

Let’s get our hands on the ingredients that will make this Chicken Stuffing Bake a reality. Each ingredient contributes to the overall flavor and texture, so let’s break them down:

  • 4 boneless skinless chicken breasts: About 2 pounds, the star of our dish. Feel free to use leftover chicken or rotisserie chicken for convenience.
  • 2 tablespoons poultry seasoning: This fragrant blend adds depth and warmth.
  • 10.5 ounces cream of chicken soup: A creamy base that binds everything together beautifully.
  • 1/2 cup milk: To enhance creaminess and add a touch of richness.
  • 1/2 cup sour cream: Adds tang and creaminess, elevating the dish.
  • 1/2 teaspoon garlic powder: For a hint of savory flavor that complements the chicken.
  • 1/2 teaspoon dried parsley: A touch of freshness and color.
  • 6 ounces instant stuffing mix: The magical ingredient that creates a flavorful topping.
  • 1 cup chicken broth: To moisten the stuffing and infuse it with flavor.
  • 1/2 cup butter (melted): Adds richness and helps the stuffing achieve that perfect golden top.

How to Create the Chicken Stuffing Bake

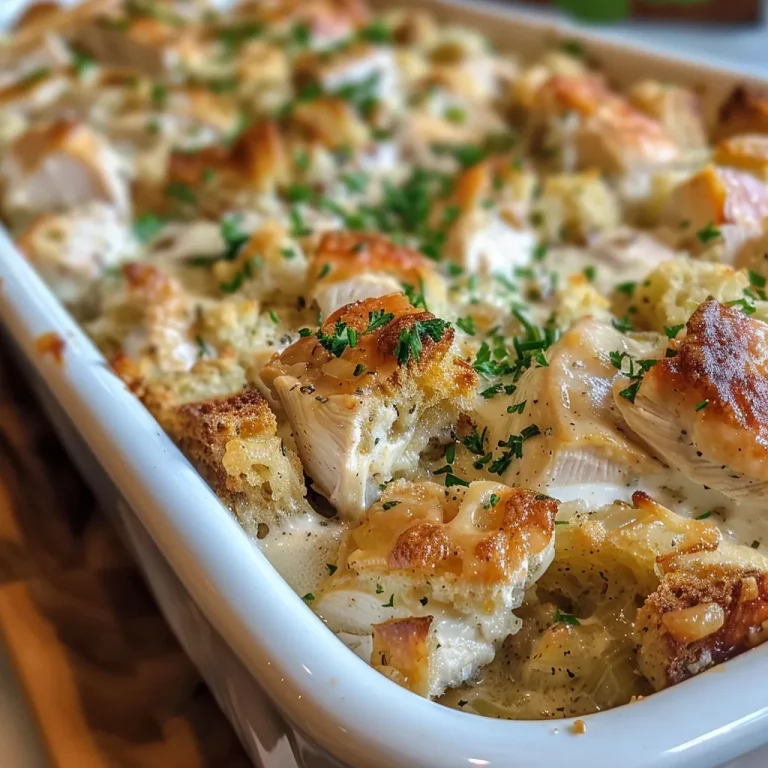
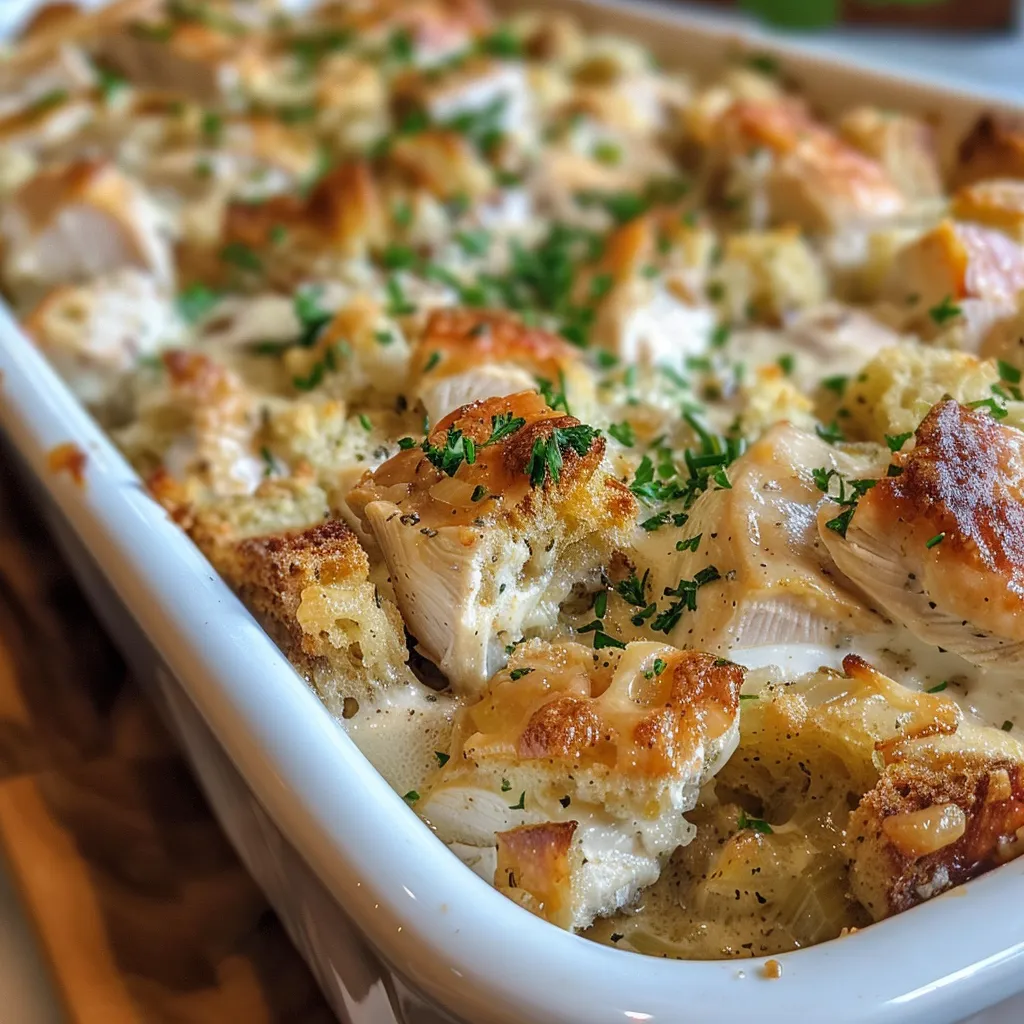
Close-up view of a Chicken Stuffing Bake, showcasing juicy chicken and golden stuffing.

Now that we have everything set, let’s bring this dish to life with some simple, heartfelt steps that anyone can follow:

  1. Preheat the oven to 400 degrees F. Coat a 9-inch x 13-inch baking dish with non-stick cooking spray. Set aside.
  2. Season the chicken breasts all over with poultry seasoning. Arrange them in the bottom of the baking dish side by side in a single layer.
  3. In a medium mixing bowl, whisk together the cream of chicken soup, milk, sour cream, garlic powder, and dried parsley until smooth and combined. Pour this mixture over the chicken.
  4. In a small bowl, stir together the stuffing mix and chicken broth. Allow to sit for 2 minutes so the bread can absorb the liquid. Divide the stuffing evenly over the top of each chicken breast.
  5. Cover the baking dish with aluminum foil and bake for 20 minutes. Carefully remove the foil and bake for another 20-25 minutes, or until the chicken is cooked through (165 degrees F internal temperature).
  6. Remove from the oven and let rest for 5 minutes. Plate each chicken breast and spoon as much sauce from the baking dish over the chicken as you like. Serve warm with your favorite sides.

Pro Tips for Success

To ensure your Chicken Stuffing Bake turns out perfectly, consider these expert insights:

  • Use fresh ingredients: Fresh poultry seasoning makes a significant difference in flavor.
  • Don’t skip the resting time: Allowing the dish to rest helps the flavors meld and makes serving easier.
  • Experiment with stuffing types: Try cornbread or savory herb stuffing for a twist on the classic recipe.
  • Make it lighter: Substitute Greek yogurt for sour cream for a healthier option.
  • Check chicken temperature: Always ensure the internal temperature of the chicken reaches 165 degrees F for safety.
  • Enhance with veggies: Add frozen mixed vegetables or sautéed spinach for added nutrition and color.
  • For extra crunch: Sprinkle breadcrumbs over the stuffing before baking for a crispy topping.
  • Stay flexible: Feel free to adjust the quantities based on your family size; this recipe can easily be doubled!

Common Mistakes to Avoid

Let’s make sure your Chicken Stuffing Bake is as delightful as can be. Here are some common pitfalls and how to avoid them:

  • Overcooking the chicken: This can lead to dry meat. Using a meat thermometer can help you avoid this.
  • Not allowing the stuffing to soak: If you skip soaking the stuffing, it may turn out dry and crumbly.
  • Skipping the seasoning: Don’t forget to season the chicken well; it’s the key to flavorful meat.
  • Using cold ingredients: Bring your ingredients to room temperature before mixing for better texture.

Delicious Variations to Try

Want to switch things up? Here are some variations that keep the spirit of the Chicken Stuffing Bake alive:

  • Cheesy Chicken Stuffing Bake: Add shredded cheddar cheese to the stuffing mix for a cheesy delight.
  • Herbed Chicken Bake: Mix in fresh herbs like thyme or rosemary for a fragrant twist.
  • Mushroom Chicken Bake: Incorporate sautéed mushrooms into the creamy mixture for a rich umami flavor.
  • Vegetarian Option: Substitute chicken with hearty vegetables like zucchini and bell peppers, and use vegetable broth instead of chicken broth.

Make-Ahead and Storage Instructions

Planning ahead can be a lifesaver. Here’s how to prepare your Chicken Stuffing Bake ahead of time:

  • Make-Ahead: Assemble the dish one day in advance, cover tightly with foil, and refrigerate. Bake it the next day, adding an extra 10-15 minutes to the baking time.
  • Freezing: You can freeze the assembled dish before baking. When ready to enjoy, thaw overnight in the fridge and bake as usual.
  • Storage: Leftovers can be stored in an airtight container in the fridge for up to 3 days. Reheat in the oven or microwave until heated through.

Frequently Asked Questions

Curious about something? Here are some common questions about the Chicken Stuffing Bake:

  • Can I use bone-in chicken instead of boneless? Yes, but adjust the cooking time to ensure the chicken is cooked through.
  • What can I use instead of cream of chicken soup? You can substitute it with cream of mushroom soup or a homemade white sauce.
  • Is it possible to make it gluten-free? Absolutely! Use gluten-free stuffing mix and ensure the broth and soup are gluten-free as well.
  • How do I know when the chicken is done? Use a meat thermometer to check that the internal temperature reaches 165 degrees F.
  • Can I add vegetables to this dish? Yes! Frozen mixed veggies or fresh sautéed veggies can be mixed in for added nutrition.
  • What sides go well with Chicken Stuffing Bake? Serve with steamed green beans, a fresh salad, or mashed potatoes.
  • Can I make this vegetarian? Yes, by replacing chicken with hearty vegetables or using plant-based protein alternatives.
  • How many servings does this recipe yield? This recipe typically serves about 4-6 people, depending on portion sizes.

Nourishing Nutrition Tips

This Chicken Stuffing Bake is not just delicious; it can also be nourishing. Here are some tips to enhance its nutritional profile:

  • Incorporate whole grains: Use whole-grain stuffing mix for added fiber and nutrients.
  • Boost the veggies: Adding vegetables increases fiber and vitamins, making the dish more wholesome.
  • Control fat content: Opt for low-fat sour cream and milk to reduce calories without sacrificing flavor.

Recommended Equipment

To make cooking this Chicken Stuffing Bake easier, here’s a list of recommended tools:

  • 9×13 baking dish: Essential for the perfect bake.
  • Mixing bowls: For combining ingredients easily.
  • Meat thermometer: Ensures your chicken is cooked perfectly.
  • Whisk: For mixing the creamy sauce ingredients smoothly.
  • Wooden spoon or spatula: Useful for spreading the stuffing evenly over the chicken.

Serving Suggestions

Now that your Chicken Stuffing Bake is ready, here are some serving suggestions to elevate your meal:

  • Pair with a fresh salad: A crisp green salad with vinaigrette balances the richness of the bake.
  • Serve with cranberry sauce: The tartness of cranberry sauce complements the savory flavors beautifully.
  • Include crusty bread: Offer warm bread to soak up the delicious sauce.
  • Finish with dessert: A light fruit dessert or pie brings a sweet end to a hearty meal.

Final Thoughts

Your Chicken Stuffing Bake is more than just a recipe; it’s an invitation to gather and share moments with those you love. As you enjoy this dish, remember that each bite carries the warmth of home and the love of family. So, roll up your sleeves, gather your loved ones around the table, and create lasting memories together. Happy cooking, friends!

Chicken Stuffing Bake

Prep Time 10 minutes
Cook Time 40 minutes
Total Time 50 minutes
Servings 4 servings
Calories 550
A comforting baked chicken dish topped with flavorful stuffing and creamy sauce, perfect for a hearty family dinner.

Ingredients

Chicken

  • 2 pounds boneless skinless chicken breasts
  • 2 tablespoons poultry seasoning
  • 10.5 ounces cream of chicken soup
  • 1/2 cup milk
  • 1/2 cup sour cream
  • 1/2 teaspoon garlic powder
  • 1/2 teaspoon dried parsley
  • 6 ounces instant stuffing mix
  • 1 cup chicken broth
  • 1/2 cup butter (melted)

Instructions 

  • Preheat oven to 400°F. Prepare a 9x13-inch baking dish with non-stick spray.
  • Season chicken with poultry seasoning and arrange in the dish.
  • Mix cream of chicken soup, milk, sour cream, garlic powder, and parsley; pour over chicken.
  • Combine stuffing mix and chicken broth; let sit 2 minutes, then spread over chicken.
  • Cover with foil and bake 20 minutes, then remove foil and bake 20-25 minutes until cooked through.
  • Rest 5 minutes, then serve with sauce spooned over.

Notes

Ensure chicken reaches an internal temperature of 165°F for safety.
Calories: 550kcal
Cost: $15
Course: Main Course
Keyword: Chicken

A Comforting Broccoli-Rice Casserole Recipe to Cherish

There’s something about a warm, bubbling casserole that evokes memories of family gatherings and cherished traditions. This Broccoli-Rice Casserole is not just a dish; it’s a heartfelt reminder of togetherness, love, and the simple pleasures of home-cooked meals. As we gather around the table, this casserole brings with it a sense of nostalgia, making it perfect for potlucks, holidays, or just a cozy family dinner. Let’s dive into this recipe that will surely fill your home with warmth and joy.

Why You’ll Love This Recipe

  • Family Favorite: This casserole has a unique ability to please even the pickiest of eaters, making it a beloved dish in many households.
  • Comforting Ingredients: With wholesome ingredients like broccoli, rice, and cheese, this dish is not only delicious but also satisfying.
  • Easy to Make: The simple preparation means you can whip it up quickly, without any complex techniques or hard-to-find ingredients.
  • Make-Ahead Friendly: Preparing it in advance saves time and allows flavors to meld beautifully, making it even more enjoyable when baked.
  • Versatile Dish: This casserole can be served as a side or a main course, pairing well with a variety of proteins.

Ingredients You Need

Gather these ingredients to create your comforting broccoli-rice casserole:

  • 3 cups cooked rice (about 1 cup uncooked): Brown or white rice works beautifully.
  • 1 (16 oz.) package frozen broccoli florets: Fresh can be used, but frozen is convenient.
  • 1 small onion, finely chopped: For a touch of sweetness and flavor.
  • 1 (10 3/4 oz.) can cream of mushroom soup: This adds creaminess and depth of flavor.
  • 1/2 cup milk: For a velvety texture.
  • 1 tsp. salt: Enhances all the flavors.
  • 1/2 tsp. black pepper: A touch of spice.
  • 1/4 tsp. garlic powder: For a hint of aromatic goodness.
  • 1/4 tsp. paprika: Adds color and a mild smoky taste.
  • 2 cups shredded mild or medium cheddar cheese: Cheese is key for that gooey, comforting element.

Step-by-Step Instructions

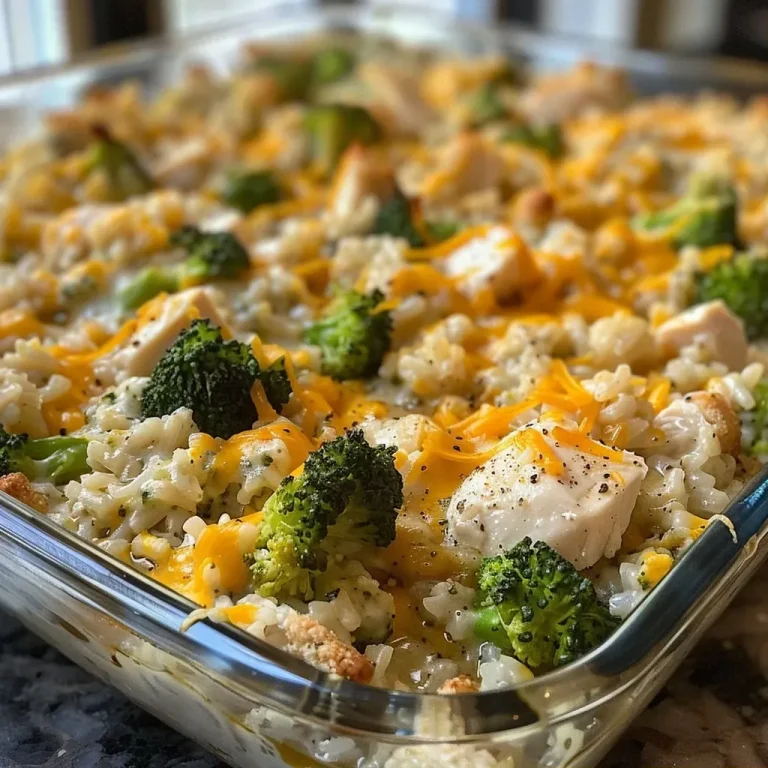
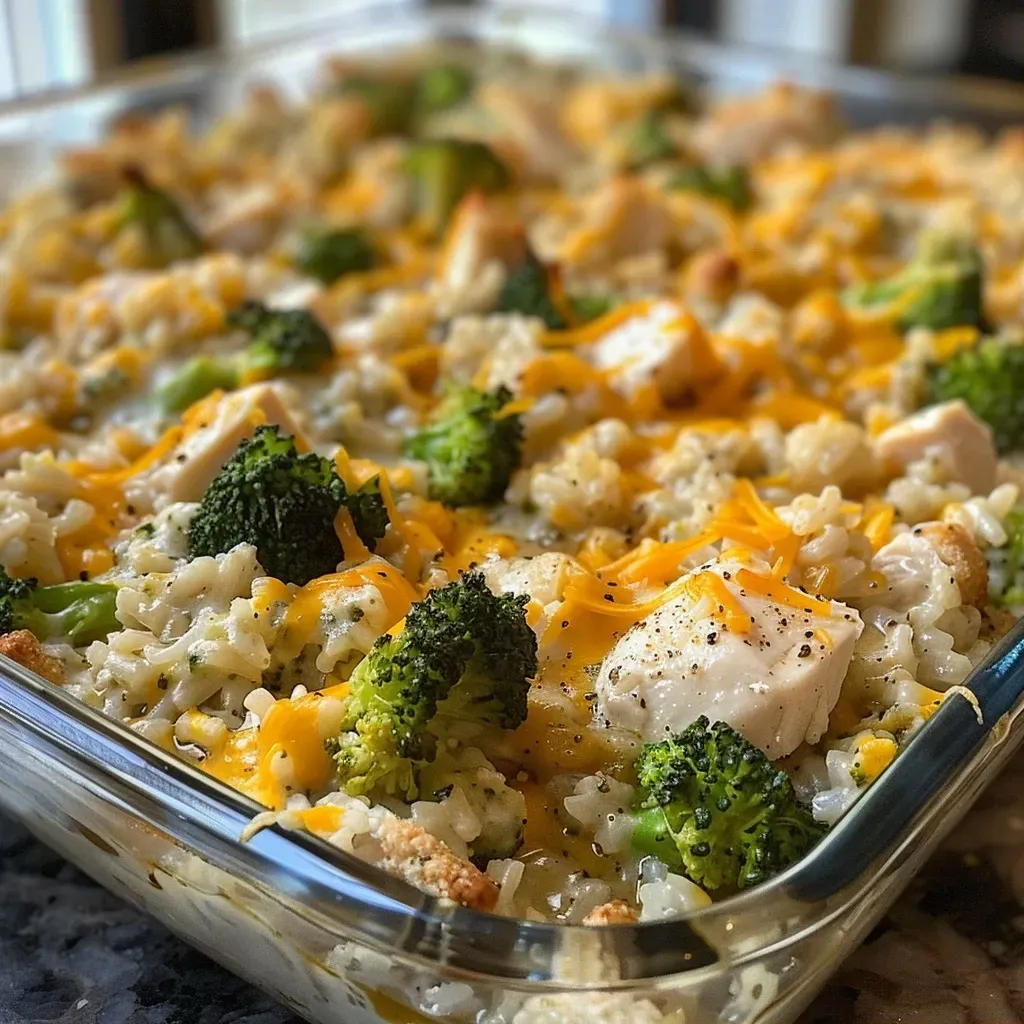
Close-up view of a delicious broccoli rice casserole with melted cheese on top.

Follow these simple steps to create your casserole:

  • Step 1: Thaw the broccoli and warm it in the microwave for about 5 minutes; then, drain well. If there are any large florets, cut them into smaller, bite-sized pieces.
  • Step 2: In a mixing bowl, combine the warm cooked rice, onion, cream of mushroom soup, milk, salt, pepper, garlic powder, paprika, and 1 cup of the shredded cheddar. Stir until well mixed, then fold in the broccoli.
  • Step 3: Spoon the mixture into a greased 9×13-inch baking dish and top with the remaining 1 cup shredded cheddar cheese.
  • Step 4: Bake in a preheated oven at 350°F for 35-40 minutes until bubbly and the cheese is just starting to brown.
  • Tip: If you prefer, frozen chopped broccoli can be used instead of florets.
  • Make Ahead: You can prepare the casserole in advance. Simply place the broccoli mixture in the dish, top with cheese, and refrigerate. When you’re ready to bake, it may take 60-75 minutes. Cover loosely with foil if the cheese browns too quickly.

Expert Tips for Perfecting Your Casserole

  • Use fresh ingredients: Whenever possible, fresh vegetables can elevate the dish.
  • Adjust the cheese: Try mixing different types of cheese for a unique flavor profile.
  • Don’t rush the baking: Ensure the casserole is heated through and bubbly for the best results.
  • Check for doneness: Use a toothpick or knife to check if it’s heated all the way through.
  • Experiment with spices: Feel free to add your favorite herbs or spices to customize the flavor.
  • Serve with a salad: A fresh salad pairs wonderfully with this rich dish.
  • Store leftovers properly: Keep in an airtight container in the refrigerator for up to 3 days.
  • Freeze for later: Casserole can be frozen before baking; just add 10-15 minutes to the baking time when ready to cook.

Common Mistakes and Troubleshooting

Even the best cooks make mistakes. Here are some common pitfalls and how to avoid them:

  • Overcooking the broccoli: Ensure you don’t microwave it for too long; it should be just thawed and warm.
  • Too much moisture: Make sure to drain the broccoli well to avoid a soggy casserole.
  • Cheese clumping: Mix cheese with other ingredients while it is still warm to prevent clumping.
  • Baking time issues: Every oven is different; check doneness a few minutes before the suggested time.

Delicious Variations

Want to mix things up? Here are some delightful variations to consider:

  • Broccoli and Chicken Casserole: Add diced cooked chicken for a heartier meal.
  • Cheesy Broccoli Rice Casserole with Bacon: Stir in crispy bacon for a smoky flavor.
  • Vegan Version: Substitute cream of mushroom soup with a homemade or store-bought vegan alternative, and use vegan cheese.
  • Spicy Broccoli Rice Casserole: Add a pinch of cayenne pepper or diced jalapeños for a kick.

Storage and Make-Ahead Instructions

This casserole is perfect for meal prepping or making ahead of time:

  • Refrigeration: Store leftovers in an airtight container for up to 3 days.
  • Freezing: This dish freezes well! To freeze, assemble the casserole but do not bake it. Cover tightly with foil and freeze for up to 3 months. When ready to bake, allow to thaw in the refrigerator overnight and bake as directed.

Frequently Asked Questions

  • Can I use fresh broccoli instead of frozen? Yes, fresh broccoli works wonderfully! Just steam it lightly before adding to the casserole.
  • Is there a gluten-free option? Absolutely! Use gluten-free rice and ensure your cream of mushroom soup is gluten-free.
  • Can I double the recipe? Yes, you can double the ingredients and use a larger baking dish, but adjust the baking time.
  • How can I make it spicier? Add some red pepper flakes or diced jalapeños.
  • Can I use different types of cheese? Yes! Feel free to experiment with your favorite cheeses for different flavors.
  • What can I serve with this casserole? A fresh garden salad or some roasted vegetables make excellent sides.
  • Can I make this casserole vegan? Yes, substitute the cheese and soup with vegan alternatives.
  • How do I know when it’s done? The casserole is done when it is bubbly and the cheese is melted and lightly golden.

Nutritional Tips and Dietary Adaptations

This casserole can be adapted to fit various dietary needs:

  • Low-Calorie Option: Use reduced-fat cheese and low-calorie soup to cut down on calories.
  • Protein Boost: Add chickpeas or cooked ground turkey for additional protein.
  • Dairy-Free: Use dairy-free cheese and a plant-based cream of mushroom soup.

Essential Equipment for Your Casserole

To make this broccoli-rice casserole, you will need:

  • 9×13-inch baking dish: Essential for baking your casserole evenly.
  • Mixing bowls: For combining your ingredients effortlessly.
  • Measuring cups and spoons: Precision is key for delicious results.
  • Microwave-safe dish: To warm your broccoli quickly.

Serving Suggestions

When it’s time to serve, consider these pairing suggestions:

  • With Grilled Meat: A slice of grilled chicken or steak complements the richness of the casserole.
  • On a Buffet Table: It’s a hit at potlucks and family gatherings, bringing a touch of home to any spread.
  • As a Main Dish: Serve alongside crusty bread for a satisfying vegetarian meal.

As we share this Broccoli-Rice Casserole, let it be more than just a recipe; let it be a way to connect with loved ones, to reminisce about days gone by, and to create new memories around the dinner table. Thank you for allowing me to share this piece of my heart with you. Happy cooking, y’all!

Broccoli-Rice Casserole

Prep Time 10 minutes
Cook Time 40 minutes
Total Time 50 minutes
Servings 6 servings
Calories 420
A comforting baked casserole combining rice, broccoli, and cheddar cheese, perfect for a family dinner.

Ingredients

Rice and Broccoli

  • 3 cups cooked rice (about 1 cup uncooked)
  • 1 package frozen broccoli florets (16 oz.)
  • 1 small onion, finely chopped
  • 1 can cream of mushroom soup (10 3/4 oz.)
  • 0.5 cup milk
  • 1 tsp. salt
  • 0.5 tsp. black pepper
  • 0.25 tsp. garlic powder
  • 0.25 tsp. paprika
  • 2 cups shredded cheddar cheese, divided

Instructions 

  • Thaw broccoli and microwave for 5 minutes; drain well. Cut large florets into smaller pieces.
  • Mix cooked rice, onion, mushroom soup, milk, salt, pepper, garlic powder, paprika, and 1 cup cheese. Fold in broccoli.
  • Spoon mixture into a greased 9x13-inch dish. Top with remaining cheese.
  • Bake at 350°F (175°C) for 35-40 minutes until bubbly and golden.
  • For make-ahead, assemble, refrigerate, and bake longer (60-75 min). Cover with foil if cheese browns too quickly.

Notes

You can use frozen chopped broccoli instead of florets if preferred.
Calories: 420kcal
Cost: $15
Course: Main Course
Cuisine: American
Keyword: Broccoli, Cheddar, Rice

Embrace the Comfort of a Heartwarming Pot Roast

There’s something truly magical about a pot roast cooking away in the slow cooker, filling your home with aromas that transport you back to cherished family meals. This slow cooker pot roast recipe is not just about the ingredients; it’s a heartfelt journey into flavors that bring us together. With tender chuck roast, fresh vegetables, and aromatic herbs, each bite is a reminder of love and togetherness. Let’s dive into this delightful recipe that’s perfect for sharing with your loved ones.

Why You’ll Love This Recipe

  • Effortless Preparation: With just a few steps, you can set it and forget it. The slow cooker takes care of the rest, allowing you to enjoy your day while it cooks.
  • Rich Flavor: The combination of fresh ingredients and spices creates a flavor profile that’s both comforting and exciting, making it a family favorite.
  • Tender and Juicy: The slow cooking process ensures that your roast is perfectly tender, practically falling apart with a fork.
  • Versatile Leftovers: Enjoy this pot roast as a main dish, in sandwiches, or as a filling for tacos—its flavors only get better with time.
  • Family Bonding: Cooking this meal can be a communal experience. Gather your family, share stories, and create memories together in the kitchen.

Ingredients You’ll Need

To create this heartwarming pot roast, gather the following ingredients. Each one plays a crucial role in building the dish’s rich flavors and textures.

  • 3-4 pound chuck roast, fat trimmed
  • 3 tablespoons olive oil
  • 1 yellow onion, cut into 1/2” slices
  • 6 cloves garlic, smashed
  • 2 tablespoons tomato paste
  • 2 teaspoons brown sugar
  • 2 teaspoons Italian seasoning
  • 1 teaspoon garlic powder
  • 1 teaspoon onion powder
  • 1 teaspoon chili powder
  • 2 teaspoons Worcestershire sauce
  • 32 ounces beef stock
  • 2 pounds carrots, peeled and cut into 2-3” pieces
  • 2 pounds baby gold potatoes, halved if they’re large
  • 4 sprigs fresh thyme
  • 4 sprigs fresh rosemary
  • 2 bay leaves
  • 3 tablespoons cornstarch, optional (for making gravy)
  • Kosher salt
  • Fresh cracked pepper
  • Fresh chopped parsley for garnish

Step-By-Step: How to Make Your Crock Pot Pot Roast

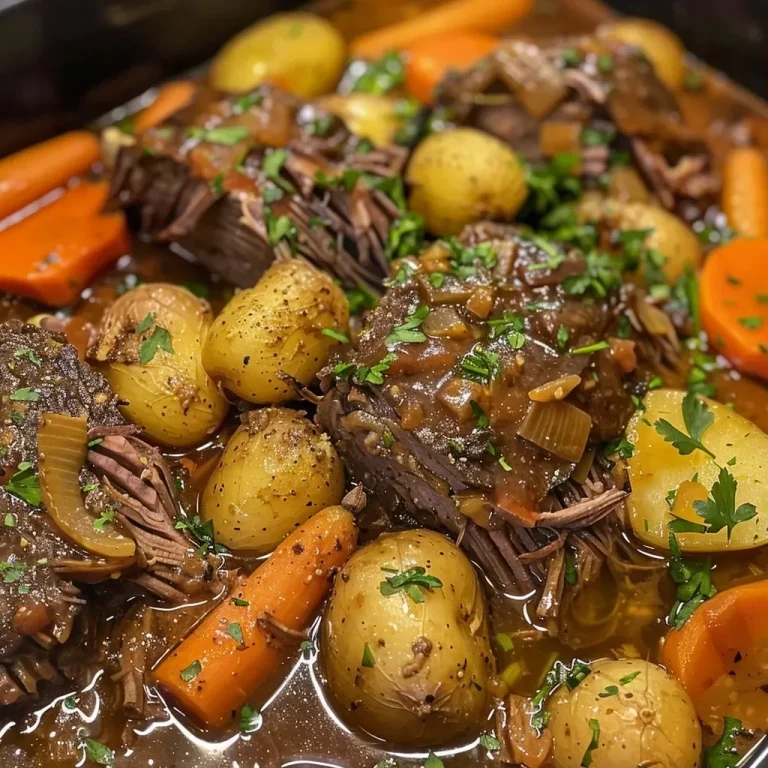
Juicy Crock Pot Pot Roast with carrots and potatoes, side view.

This pot roast is as straightforward as it is delicious. Follow these easy steps, and your meal will be ready in no time.

  • Heat olive oil in a large sauté pan over medium-high heat.
  • Pat roast dry. Season liberally on all sides with kosher salt and freshly cracked black pepper. Add roast to the sauté pan and sear on all sides (including the edges), cooking for about 4-5 minutes per side. Place in slow cooker.
  • Without wiping out the pan, reduce heat to medium, add onion along with a couple pinches of salt and pepper, and cook, stirring occasionally for about 4 minutes. Add garlic, tomato paste, brown sugar, Italian seasoning, garlic powder, onion powder, chili powder, and another couple pinches of salt and pepper. Cook for another minute.
  • Add Worcestershire sauce to the pot along with a few splashes of beef stock to deglaze the bottom and scrape the yummy bits off.
  • Add the onion and garlic mixture, carrots, and potatoes to the large crock pot. Pour in remaining beef stock. Add a few liberal pinches of salt and pepper. Nestle fresh thyme, fresh rosemary, and bay leaves into the veggies.
  • Put the lid on and cook on high for 5-6 hours or on low for 8-10 hours or until the roast shreds easily.

Make Gravy from Pot Roast Drippings

If you desire a rich gravy to accompany your pot roast, here’s a simple method to whip it up:

  • Strain the cooking liquid into a saucepan on the stove over medium heat.
  • Dissolve 3 tablespoons cornstarch in 3 tablespoons cold water.
  • Stir cornstarch slurry into the stock. Bring gravy to a simmer and simmer, stirring frequently for a few minutes or until the gravy thickens to your liking. Season to taste with salt and pepper.

Common Mistakes and Troubleshooting

Even the best cooks can run into snags. Here’s how to avoid common pitfalls:

  • Not searing the meat: This crucial step locks in flavor. Don’t skip it!
  • Overcooking the vegetables: Add delicate veggies, like potatoes, later in the cooking process to avoid mushiness.
  • Using too much liquid: Less is more. You want the roast to braise, not boil.
  • Skipping the salt: Don’t forget to season at each step for a well-rounded flavor.

Delicious Variations

This pot roast recipe is versatile. Try these variations to mix things up:

  • Herb-Infused: Add fresh herbs like rosemary and thyme for an aromatic twist.
  • Spicy Kick: Incorporate crushed red pepper flakes or a dash of cayenne for some heat.
  • Vegetarian Option: Substitute the roast with mushrooms and use vegetable stock for a plant-based twist.
  • Barbecue Style: Add your favorite BBQ sauce for a smoky flavor that’s perfect for summer.

Storage and Make-Ahead Instructions

If you’re looking to save time, you can prepare this pot roast ahead of time:

  • Make-Ahead: Prepare all ingredients the day before and store them in the refrigerator. Just assemble and cook when you’re ready.
  • Storage: Leftover pot roast can be stored in an airtight container in the fridge for up to 4 days, or frozen for up to 3 months.

Frequently Asked Questions

Here are some common questions that might arise when making this pot roast:

  • Can I use a different cut of beef? Yes, you can use brisket or round roast, but cooking times may vary.
  • Do I need to brown the meat? While it’s not mandatory, browning adds depth of flavor.
  • How can I make it gluten-free? Use gluten-free Worcestershire sauce and ensure your beef stock is gluten-free.
  • Can I add other vegetables? Absolutely! Feel free to experiment with parsnips, turnips, or celery.
  • What if my roast is tough? This usually means it needs more cooking time. Give it a few extra hours.
  • How do I reheat leftovers? Reheat in the microwave or on the stove with a splash of beef stock to keep it moist.
  • Can I cook it on high? Yes, cooking on high is an option, just be sure to check for tenderness.
  • How do I know when it’s done? The roast is done when it shreds easily with a fork.

Nutritional Tips and Dietary Adaptations

This pot roast can be adapted to fit various dietary needs:

  • Low-Carb: Substitute potatoes with cauliflower for a lower-carb option.
  • Heart-Healthy: Trim excess fat from the roast and use less salt.
  • Paleo-Friendly: Ensure all ingredients are whole foods, avoiding processed items.

Equipment Recommendations

To make this pot roast, you’ll need some essential kitchen tools:

  • Slow Cooker: A reliable slow cooker is crucial for even cooking.
  • Sauté Pan: A good pan for searing the meat before slow cooking.
  • Meat Thermometer: Helps ensure your roast reaches the perfect internal temperature.

Serving Suggestions

This pot roast is perfect on its own, but consider pairing it with:

  • Fresh Bread: Serve with crusty bread to soak up the delicious gravy.
  • Side Salads: A light salad can balance the richness of the roast.
  • Mashed Potatoes: For an extra comforting side, creamy mashed potatoes are a classic choice.

Conclusion

This slow cooker pot roast is more than just a meal; it’s a celebration of family and tradition. It brings warmth to your home and joy to your gatherings. I hope this recipe finds a special place in your heart and your kitchen, just as it has in mine. So gather your loved ones, share stories, and enjoy the comforting embrace of a pot roast that truly brings us together. And remember, if you loved this recipe, please leave a 5-star rating and review below!

Crock Pot Pot Roast

Prep Time 20 minutes
Cook Time 6 hours
Total Time 6 hours 20 minutes
Servings 6 servings
Calories 650
A hearty and flavorful slow cooker pot roast with tender vegetables and savory gravy, perfect for a comforting family meal.

Ingredients

Main

  • 3-4 pounds chuck roast, fat trimmed
  • 3 tablespoons olive oil
  • 1 yellow onion yellow onion, cut into 1/2" slices
  • 6 cloves garlic, smashed
  • 2 tablespoons tomato paste
  • 2 teaspoons brown sugar
  • 2 teaspoons Italian seasoning
  • 1 teaspoon garlic powder
  • 1 teaspoon onion powder
  • 1 teaspoon chili powder
  • 2 teaspoons Worcestershire sauce
  • 32 ounces beef stock
  • 2 pounds carrots, peeled and cut into 2-3" pieces
  • 2 pounds baby gold potatoes, halved if large
  • 4 sprigs fresh thyme
  • 4 sprigs fresh rosemary
  • 3 tablespoons cornstarch, optional (for gravy)
  • to taste Kosher salt
  • to taste fresh cracked pepper
  • for garnish fresh chopped parsley (for garnish)

Instructions 

  • Heat olive oil in a large skillet over medium-high heat. Season the roast with salt and pepper, then sear on all sides for 4-5 minutes each. Transfer to slow cooker.
  • In the same pan, cook onions with salt and pepper for 4 minutes. Add garlic, tomato paste, sugar, Italian seasoning, garlic powder, onion powder, chili powder, and cook for 1 minute. Deglaze with Worcestershire and a splash of beef stock, scraping up bits.
  • Add the onion mixture, carrots, potatoes, remaining beef stock, herbs, and bay leaves to the slow cooker. Cover and cook on high for 5-6 hours or low for 8-10 hours until beef shreds easily.
  • Optional: Strain cooking liquid into a saucepan, dissolve cornstarch in water, and stir into the liquid. Simmer until thickened to make gravy. Season with salt and pepper.
  • Garnish the roast with parsley, serve with gravy. Enjoy!

Notes

For best flavor, sear the meat well and use fresh herbs if available.
Calories: 650kcal
Cost: $20
Course: Main Course
Cuisine: American
Keyword: beef

Welcome, dear friends, to the heart of the kitchen, where warmth and nostalgia intertwine to create something truly special. Today, we’re diving into the delightful world of Apple Butter Pull-Apart Bread, a recipe that not only fills your home with the comforting scent of baked apples and spices, but also wraps you in the loving embrace of cherished memories. This bread is more than just a treat; it’s a celebration of family, tradition, and the joy of sharing.

In this article, we will explore every facet of this enchanting bread, ensuring that your kitchen becomes a haven of love and flavor. With more than 1500 words of heartfelt content, you’ll discover the magic of this recipe, why it holds a special place in my heart, and how you can bring it to life in your own home.

Why You’ll Love This Recipe

This Apple Butter Pull-Apart Bread is truly a gem, and here’s why:

  • Comforting aroma: The scent of warm apple butter and spices will waft through your home, reminding you of cozy family gatherings.
  • Easy to share: This bread pulls apart effortlessly, making it perfect for sharing at brunches, potlucks, or holiday celebrations.
  • Versatile flavors: The combination of apple butter and cinnamon creates a rich, sweet taste that pairs beautifully with coffee or tea.
  • Customizable: With simple variations, you can adapt the recipe to suit your taste or dietary needs.
  • Memory-making experience: Baking this bread is a wonderful opportunity to create lasting memories with loved ones, just as I did with my grandmother.

Ingredients You’ll Need

Gathering the right ingredients is key to making your Apple Butter Pull-Apart Bread a success. Here’s what you’ll need:

  • 3 cups (375 g) all-purpose flour: The foundation of our bread, providing structure and texture.
  • ¼ cup (50 g) granulated sugar: Adds a touch of sweetness to balance the flavors.
  • ½ teaspoon kosher salt: Enhances the overall taste of the bread.
  • 2¼ teaspoons (1 packet) instant yeast: Responsible for the rise, ensuring a light and airy texture.
  • ¼ cup (½ stick / 57 g) unsalted butter, melted: Adds richness and flavor.
  • ⅓ cup (82 g) whole milk, warm (about 105-115°F): Helps create a soft dough.
  • ¼ cup (62.5 g) water, warm (about 105-115°F): Activates the yeast for that perfect rise.
  • 1 teaspoon vanilla extract: A hint of sweetness and depth of flavor.
  • 2 large eggs, room temperature: Provides moisture and richness.
  • ½ cup (120 g) apple butter: The star ingredient, bringing moisture and flavor.
  • ½ cup (1 stick / 113 g) unsalted butter: For brushing and adding richness to the layers.
  • 2 teaspoons heavy cream: Adds a glossy finish to the bread.
  • ½ cup light brown sugar, packed: For a caramelized sweetness.
  • 1 teaspoon vanilla extract: Enhances the flavor profile.

Feel free to make substitutions as needed! For example, you can use whole wheat flour for a heartier texture or substitute almond milk for a dairy-free option.

Step-by-Step Instructions

Now, let’s get to the heart of the matter—making this delicious bread! Follow these steps, and you’ll have a loaf that’s sure to impress.

Step 1 — Make the Dough

In a large mixing bowl, combine the warm milk, warm water, and instant yeast. Allow it to sit for about 5 minutes until it froths slightly. Then, whisk in the melted butter, sugar, and vanilla extract.

Step 2 — Add the Dry Ingredients

Gradually add the flour and salt to the wet mixture, stirring until a dough begins to form. Add the eggs one by one, mixing until fully incorporated.

Step 3 — Knead the Dough

Turn the dough onto a lightly floured surface and knead for about 5-7 minutes until smooth and elastic. Place it in a greased bowl, cover with a towel, and let it rise in a warm place for about 1 hour, or until doubled in size.

Step 4 — Prepare the Filling & Pan

While the dough is rising, prepare your filling. In a small bowl, mix together the apple butter, light brown sugar, and additional cinnamon if desired. Grease a loaf pan and set aside.

Step 5 — Shape the Bread

Once the dough has risen, punch it down and roll it out into a rectangle about 1/2 inch thick. Brush the surface with melted butter and spread the apple butter mixture evenly over the top.

Step 6 — Cut and Layer

Cut the dough into squares or strips and stack them vertically in the prepared loaf pan. This will create that beautiful pull-apart texture.

Step 7 — Second Rise & Preheat

Cover the pan with a towel and let it rise again for about 30 minutes while you preheat the oven to 350°F (175°C).

Step 8 — Bake to Perfection

Once the dough has risen, bake for 30-35 minutes until golden brown. A toothpick inserted in the center should come out clean. Brush with heavy cream for a glossy finish, if desired.

Pro Tips for Perfect Pull-Apart Bread

A close-up side view of a loaf of apple butter pull-apart bread, showcasing its golden-brown crust and soft, fluffy texture.

Here are some expert insights to ensure your bread turns out just right:

  • Use room temperature ingredients: Let your eggs and butter sit out for about 30 minutes before using. This helps the dough rise better.
  • Check your yeast: Always ensure your yeast is fresh for optimal rising. A quick test is to dissolve it in warm water and sugar; it should foam up.
  • Don’t rush the rises: Allowing the dough to rise fully is crucial for light and fluffy bread.
  • Experiment with fillings: Feel free to add nuts, dried fruits, or spices to the apple butter mixture for added texture and flavor.
  • Store properly: Keep leftover bread in an airtight container at room temperature to maintain its softness.

Common Mistakes and Troubleshooting

Even the best bakers can face challenges. Here’s how to troubleshoot:

  • Dough not rising: Ensure your yeast is fresh and that the environment is warm enough. If it’s too cold, the yeast won’t activate.
  • Dense bread: This could be due to over-kneading or not enough rising time. Be gentle when kneading and be patient with the dough.

Delicious Variations

While this recipe is delightful as is, here are some variations to try:

  • Maple Pecan Pull-Apart Bread: Substitute maple syrup for the apple butter and add chopped pecans.
  • Cinnamon Sugar Swirl: Mix cinnamon and sugar into the dough for an extra sweet twist.
  • Chocolate Chip Apple Butter Bread: Add chocolate chips to the filling for a decadent treat.
  • Savory Spinach and Cheese: For a savory version, swap out apple butter for a spinach and cheese filling.

Storage and Make-Ahead Instructions

To enjoy this bread at its best:

  • Storing leftovers: Keep in an airtight container at room temperature for up to 3 days.
  • Freezing: Once fully cooled, you can freeze the bread for up to 3 months. Wrap it tightly in plastic wrap and aluminum foil.
  • Reheating: Warm slices in the microwave for a few seconds or pop them in a toaster for a crispy finish.

Frequently Asked Questions

Here are some common questions about Apple Butter Pull-Apart Bread:

  • Can I use homemade apple butter? Absolutely! Homemade apple butter adds a personal touch and unique flavor.
  • Is it necessary to use eggs? Eggs add richness, but you can substitute with flaxseed meal or omit them for a vegan version.
  • What can I serve this bread with? It pairs beautifully with coffee, tea, or as an accompaniment to breakfast dishes.
  • How do I know when the bread is done baking? When golden brown and a toothpick inserted in the center comes out clean, it’s ready!
  • Can I make this bread gluten-free? Yes, you can use a gluten-free flour blend. Make sure it’s designed for baking.
  • How long does it take to rise? About 1 hour for the first rise and 30 minutes for the second rise, but it can vary based on temperature.
  • Can I add other flavors? Definitely! Consider adding spices like nutmeg or allspice for a delightful twist.
  • What’s the best way to serve it? Serve warm, pulling apart pieces and enjoying with a smear of butter or cream cheese.

Nutritional Tips and Dietary Adaptations

To accommodate various dietary needs:

  • Gluten-free: Use a gluten-free flour blend and ensure all other ingredients are gluten-free.
  • Dairy-free: Substitute butter with coconut oil and milk with almond or oat milk.
  • Lower sugar option: Reduce the amount of sugar in the dough or filling to suit your dietary needs.

Equipment Recommendations

To make this recipe, you’ll need:

  • Mixing bowls: For combining and rising the dough.
  • Whisk and spatula: For mixing ingredients smoothly.
  • Loaf pan: Essential for shaping your pull-apart bread.
  • Kitchen scale: For precise measurements if desired.
  • Stand mixer: Optional, but helpful for kneading the dough.

Serving Suggestions

When it comes to serving this delightful bread, consider these ideas:

  • With a drizzle of honey: A touch of honey elevates the sweetness.
  • As a breakfast treat: Serve alongside scrambled eggs and fruit for a wholesome morning meal.
  • With whipped cream cheese: A creamy spread complements the sweetness of the bread.
  • As a dessert: Pair with vanilla ice cream for a deliciously indulgent treat.

Conclusion

As we wrap up our journey into the world of Apple Butter Pull-Apart Bread, I hope you feel inspired to create this comforting recipe in your own kitchen. It’s not just about the ingredients or the technique; it’s about the memories we create and the love we share around the table. So gather your loved ones, bake this delightful bread, and let it be a sweet reminder of home and togetherness. Happy baking!

Apple Butter Pull-Apart Bread

Prep Time 20 minutes
Cook Time 30 minutes
Total Time 50 minutes
Servings 8 pieces
Calories 350
A deliciously sweet and flaky bread filled with apple butter, perfect for breakfast or dessert.

Ingredients

Dough

  • 3 cups all-purpose flour
  • 0.25 cup granulated sugar
  • 0.5 teaspoon kosher salt
  • 2.25 teaspoons instant yeast
  • 0.25 cup unsalted butter, melted
  • 0.33 cup whole milk, warm
  • 0.25 cup water, warm
  • 1 teaspoon vanilla extract
  • 2 large eggs, room temperature

Filling

  • 0.5 cup apple butter
  • 0.5 stick unsalted butter
  • 2 teaspoons heavy cream
  • 0.5 cup light brown sugar, packed
  • 1 teaspoon vanilla extract

Instructions 

  • Mix dry ingredients and activate yeast in warm water and milk.
  • Combine wet ingredients and knead into a dough; let rise until doubled.
  • Roll out dough, spread apple butter and brown sugar mixture, then roll up and cut into pieces.
  • Arrange pieces in a baking dish, let rise again, then bake at 350°F (175°C) for 30 minutes.
  • Prepare glaze with butter, heavy cream, and vanilla, then drizzle over warm bread.

Notes

Ensure dough is properly risen for a fluffy texture.
Calories: 350kcal
Cost: $15
Course: Breakfast, Dessert
Cuisine: American
Keyword: apple, Bread

Discovering the Comfort of Vanilla Chai

In the heart of every kitchen lies a recipe that evokes warmth and nostalgia. This Vanilla Chai Protein Shake is one such delightful concoction. A perfect blend of rich flavors and nourishing ingredients, it encapsulates cherished memories of family gatherings around the table. Whether you’re starting your day or looking for a nourishing snack, this shake is designed to uplift your spirit and nourish your body.

Let’s dive into the world of chai protein and explore why this shake is destined to become a beloved staple in your home.

Why You’ll Love This Recipe

  • Rich Flavor: The combination of chai spices and creamy vanilla creates a comforting taste that feels like a warm hug.
  • Quick and Easy: This shake can be whipped up in under 5 minutes, making it a perfect choice for busy mornings or post-workout recovery.
  • Nutritious Ingredients: Packed with protein from vanilla protein powder and antioxidants from chai tea, it’s a drink that fuels your day.
  • Customizable: You can easily adjust the flavors and ingredients based on what you have at home, allowing for personal twists.
  • Family-Friendly: This shake is not just for adults; kids will love the sweet and spicy flavors, making it a great way to sneak in some nutrition.

Ingredients Breakdown

To create your own Vanilla Chai Protein Shake, you’ll need the following ingredients:

  • 1 scoop vanilla protein powder: A delicious base that adds protein and flavor.
  • 1/2 cup chai tea: Brewed and cooled, this brings the classic chai flavor that warms the soul.
  • 1/2 tsp ground nutmeg: Adds a warm, sweet spice that perfectly complements the vanilla.
  • 1/2 tsp ground cardamom: A fragrant spice that is a hallmark of chai, enhancing the shake’s flavor profile.
  • 1/2 cup unsweetened almond milk: A creamy base that keeps the shake light and dairy-free.
  • 1 cup ice: For that refreshing, chilled shake experience.

Substitutions & Variations

If you’re missing an ingredient or want to try something new, here are some substitutions:

  • Milk Alternatives: Swap almond milk for oat milk or coconut milk for different flavors.
  • Protein Powder: Use chocolate or unflavored protein powder if vanilla isn’t available.
  • Sweeteners: Add honey, maple syrup, or a sweetener of your choice if you prefer a sweeter shake.
  • Fruits: Blend in a frozen banana or some berries for added nutrition and flavor.

Pro Tips for the Perfect Shake

Close-up side view of a Vanilla Chai Protein Shake in a glass with ice.

Here are some expert insights to ensure your Vanilla Chai Protein Shake turns out perfectly every time:

  • Blend Well: Ensure all ingredients are blended on high for at least 1-2 minutes for a smooth texture.
  • Adjust Thickness: If your shake is too thick, add a little more almond milk or water until you reach your desired consistency.
  • Pre-Brew Your Tea: Brew your chai tea ahead of time and keep it refrigerated for a quick shake.
  • Add Ice Last: If you add ice before blending, it can make it harder to achieve a smooth consistency.
  • Experiment with Spices: Don’t hesitate to add a pinch of cinnamon or ginger for a spicier kick.
  • Make It Ahead: You can prepare the dry ingredients in advance, so it’s easy to blend when you’re ready.
  • Use Frozen Ingredients: Using frozen banana or berries can give your shake a creamier texture.
  • Serve Immediately: This shake is best served fresh, but you can refrigerate it for a couple of hours if needed.

Common Mistakes and Troubleshooting

Even the best chefs can have a mishap in the kitchen. Here are common mistakes to avoid and how to fix them:

  • Too Thick: If your shake is thicker than you like, simply add a splash more almond milk or water to loosen it up.
  • Too Sweet: If it turns out too sweet, balance it with a dash of salt or a bit more chai tea.
  • Grainy Texture: This can happen if the protein powder isn’t blended well. Make sure to blend thoroughly!
  • Flavorless: If it lacks flavor, consider adding a pinch more chai spices or adjusting the sweetness.

Variations to Try

Feeling adventurous? Here are some delightful variations on the Vanilla Chai Protein Shake:

  • Chocolate Chai Shake: Swap vanilla protein for chocolate protein powder and add a tablespoon of cocoa powder.
  • Berry Chai Shake: Blend in a handful of mixed berries for a fruity twist.
  • Nutty Chai Shake: Include a tablespoon of almond butter for added creaminess and flavor.
  • Matcha Chai Shake: Add a teaspoon of matcha powder for a unique flavor and health benefits.

Storage and Make-Ahead Instructions

This shake is best enjoyed fresh, but if you need to prepare in advance, here are some tips:

  • Refrigerate: You can store your shake in the refrigerator for up to 24 hours. Just give it a good shake or stir before drinking.
  • Pre-Mix Ingredients: Prepare the dry ingredients ahead of time and keep them in an airtight container for quick access.
  • Freeze for Later: Freeze your shake in an ice cube tray and blend it later for a quick treat.

Frequently Asked Questions

Here are some common questions and answers to help you with your Vanilla Chai Protein Shake:

  • Can I use regular milk instead of almond milk? Yes, feel free to use any milk of your choice!
  • Is this shake good for weight loss? Yes, it’s low in calories and high in protein, making it a great option for weight management.
  • Can I make this vegan? Absolutely! Use a plant-based protein powder and stick with almond milk.
  • How can I make it sweeter? Add a natural sweetener like honey or maple syrup to taste.
  • What if I’m allergic to nuts? Substitute the almond milk with oat milk or coconut milk.
  • Can I add greens to this shake? Yes! Spinach or kale can be blended in for an extra nutrient boost.
  • How long does it take to prepare? It takes less than 5 minutes to make this shake!
  • Is this shake suitable for kids? Yes, it’s a nutritious option that kids will enjoy!

Nutrition Tips and Dietary Adaptations

Enhance your shake’s nutritional profile with these tips:

  • Add Fiber: Incorporate ground flaxseeds or chia seeds for added fiber and omega-3 fatty acids.
  • Boost Protein: Use a higher protein ratio by adding Greek yogurt or cottage cheese.
  • Reduce Sugar: Opt for unsweetened almond milk and avoid sugary protein powders.
  • Fortified Vitamins: Choose protein powders with added vitamins and minerals for extra nutrition.

Equipment Recommendations

To make your Vanilla Chai Protein Shake, you’ll need:

  • High-Speed Blender: A quality blender ensures a smooth and creamy shake.
  • Measuring Cups: Accurate measurements help achieve the perfect consistency and flavor.
  • Serving Glasses: Use tall glasses to showcase your delightful shake.

Serving Suggestions

Enjoy your shake as a refreshing breakfast or a wholesome snack. Pair it with:

  • Whole Grain Toast: Add some avocado or nut butter for a satisfying meal.
  • Fruit Salad: A side of fresh fruit complements the flavors of the shake beautifully.
  • Granola Bars: For a quick on-the-go option, pair it with a homemade granola bar.

In every sip of this Vanilla Chai Protein Shake, you’ll find a piece of home—a reminder that cooking is about sharing love and memories. So, gather your ingredients, blend them with care, and enjoy every moment at your kitchen table. Happy sipping!

Vanilla Chai Protein Shake

Prep Time 5 minutes
Total Time 5 minutes
Servings 1 shake
Calories 250
A delicious and energizing protein shake infused with warm chai spices and vanilla flavor, perfect for a quick breakfast or post-workout boost.

Ingredients

Protein Powder

  • 1 scoop vanilla protein powder

Liquid

  • 1/2 cup chai tea (prepared or brewed)
  • 1/2 tsp ground nutmeg
  • 1/2 tsp ground cardamom
  • 1/2 cup unsweetened almond milk
  • 1 cup ice

Instructions 

  • Add all ingredients to blender and blend on high for 1-2 minutes or until desired consistency is reached.
  • If your smoothie is too thick, add a little more milk or water.

Notes

Adjust the spice levels to taste for a personalized flavor.
Calories: 250kcal
Cost: $8
Course: Breakfast, Snack
Cuisine: fusion
Keyword: chai, Protein, Smoothie

Welcome to the Heart of the Kitchen: Beef Taquitos

In every home, there are recipes that bring families together, and beef taquitos are one of those cherished dishes. With their crispy exterior and savory filling, these delightful bites are perfect for sharing, whether at a family gathering or a cozy weeknight dinner. Join me as we explore the warmth and flavor of this beloved dish that has roots in our family traditions, reminding us that food is not just about sustenance—it’s about love and connection.

Why You’ll Love This Recipe

  • Quick and Easy: With a preparation time that fits perfectly into a busy lifestyle, these taquitos can be whipped up in under an hour, making them a delightful weeknight meal.
  • Versatile Filling: The beef filling can be adjusted to suit your taste. Whether you prefer more spice or a milder flavor, you can tailor it to your family’s preferences.
  • Perfect for Sharing: Taquitos are ideal for gatherings. They can be served as appetizers or part of a larger feast, encouraging family and friends to come together around the table.
  • Make-Ahead Friendly: These taquitos can be prepared in advance and frozen, allowing for quick meals on busy days without sacrificing flavor.
  • Customizable Toppings: Top your taquitos with a variety of options like guacamole, sour cream, or fresh salsa, allowing everyone to create their personalized plate.

Ingredients That Bring Flavor to Life

To create the perfect batch of beef taquitos, you’ll need a handful of simple ingredients, each contributing to a symphony of flavors. Here’s what you need:

  • 1 pound ground beef or shredded cooked beef: Use brisket or roast for rich flavor.
  • 1 small onion, finely diced: Sweetness from the onion enhances the dish.
  • 2 cloves garlic, minced: Adds depth and aroma.
  • 1 teaspoon chili powder: For that classic kick.
  • 1 teaspoon ground cumin: A warm, earthy flavor that’s essential.
  • 1 teaspoon smoked paprika: Adds a subtle smokiness.
  • 1/2 teaspoon dried oregano: For herbal notes.
  • 1/2 teaspoon salt: Adjust to taste.
  • 1/4 teaspoon black pepper: For a touch of heat.
  • 1/2 cup tomato sauce or salsa: Provides moisture and tang.
  • 1/2 cup shredded cheese: Cheddar, Monterey Jack, or a Mexican blend for creaminess.
  • 12 small corn tortillas: The vessel for our delicious filling.
  • Vegetable oil: For frying; can substitute with cooking spray for baking.
  • Optional toppings: Guacamole, sour cream, salsa, shredded lettuce, chopped cilantro, and diced tomatoes.

Preparing the Taquitos: Step-by-Step Instructions

A close-up side view of a plate of golden-brown beef taquitos garnished with fresh toppings.

Let’s get cooking! Follow these easy steps to create a platter of delicious beef taquitos:

  1. Heat a large skillet over medium heat and add a drizzle of oil. Cook the diced onion until softened, about 3-4 minutes. Add the garlic and sauté for 30 seconds until fragrant.
  2. Stir in the ground beef, breaking it up with a spoon. Cook until browned and no longer pink. If using shredded cooked beef, warm it through in the skillet.
  3. Mix in the chili powder, cumin, smoked paprika, oregano, salt, and black pepper. Cook for 1-2 minutes to toast the spices.
  4. Add the tomato sauce or salsa and stir well. Cook for 3-5 minutes until the mixture thickens slightly.
  5. Remove the pan from heat and stir in the shredded cheese. Let it cool slightly.
  6. Warm the tortillas in a skillet for 10-15 seconds per side to make them pliable. Alternatively, wrap them in a damp paper towel and microwave for 20-30 seconds.
  7. Place 2 tablespoons of the beef filling in a line along the bottom third of each tortilla. Roll the tortilla tightly around the filling and secure it with a toothpick.
  8. Frying: Heat 1-2 inches of vegetable oil in a deep skillet or saucepan to 350°F. Fry the taquitos in batches, seam-side down first, for 2-3 minutes per side until golden and crispy. Drain on paper towels.
  9. Baking: Preheat your oven to 425°F. Place the taquitos seam-side down on a baking sheet lined with parchment paper. Spray lightly with cooking spray or brush with oil. Bake for 15-20 minutes, turning halfway until crispy and golden.
  10. Air Frying: Preheat the air fryer to 400°F. Arrange the taquitos seam-side down in a single layer (cook in batches if needed). Spray lightly with oil and air fry for 6-8 minutes, flipping halfway through.
  11. Arrange the taquitos on a platter and garnish with toppings like guacamole, sour cream, salsa, shredded lettuce, or diced tomatoes. Sprinkle with chopped cilantro for a fresh finish. Enjoy!

Pro Tips for Perfect Taquitos

  • Warm the tortillas: Warming them makes them more pliable and prevents cracking when rolling.
  • Don’t overfill: Keep your filling to about 2 tablespoons to ensure they roll easily and cook evenly.
  • Experiment with spices: Feel free to adjust spices according to your taste. A little extra chili powder can spice things up!
  • Test oil temperature: Use a small piece of tortilla to test the oil; it should sizzle immediately when ready.
  • Keep them crispy: If baking, ensure they are spaced apart on the baking sheet to allow air circulation.
  • Use fresh ingredients: Fresh herbs and vegetables make a significant difference in flavor.
  • Let them cool: Allow the taquitos to cool slightly after cooking to help them crisp up.
  • Make extra: Taquitos freeze beautifully—just make sure to cool them completely before freezing.

Common Mistakes and Troubleshooting

  • Cracking tortillas: If your tortillas crack, they may be too cold or not warmed enough. Always heat them just before filling.
  • Filling oozing out: Overfilling can lead to mess. Stick to the recommended amount for best results.
  • Taquitos not crispy: Ensure the oil is hot enough before frying or bake them long enough to achieve that golden color.
  • Flavor too bland: Taste as you go! Adjust salt and spice levels to your preference before filling the tortillas.

Variations to Try

While this recipe is delicious as is, you can also explore these tasty variations:

  • Chicken Taquitos: Substitute ground beef with shredded rotisserie chicken for a lighter option.
  • Vegetarian Taquitos: Use black beans, corn, and bell peppers as a filling for a hearty vegetarian version.
  • Breakfast Taquitos: Fill with scrambled eggs, cheese, and your favorite breakfast meats for a morning treat.
  • Spicy Taquitos: Add diced jalapeños or a splash of hot sauce to the filling for an extra kick.

Storage and Make-Ahead Instructions

These taquitos are perfect for meal prep! Here’s how to store and reheat them:

  • Refrigerator: Store cooked taquitos in an airtight container for up to 4 days.
  • Freezer: Freeze uncooked taquitos on a baking sheet until solid, then transfer to a freezer bag for up to 3 months.
  • Reheating: For best results, reheat in the oven at 375°F for 10-15 minutes until heated through and crispy.

Frequently Asked Questions

  • Can I use flour tortillas instead of corn? Yes, but note that they will yield a different flavor and texture.
  • What can I serve with taquitos? Pair with guacamole, salsa, or a fresh salad for a complete meal.
  • Can I bake taquitos instead of frying? Absolutely! Baking is a healthier alternative and still delicious.
  • How do I keep the taquitos from getting soggy? Make sure to let them cool slightly after cooking and avoid stacking them.
  • Can I add cheese to the filling? Yes! Mixing cheese into the filling adds extra creaminess.
  • How long do taquitos take to cook? Depending on your method, they take about 15-20 minutes when baking or 2-3 minutes when frying.
  • What’s the best way to reheat leftovers? Oven reheating at 375°F keeps them crispy.
  • Can I make the filling in advance? Yes, the filling can be made ahead and stored in the fridge for up to 3 days.

Nutritional Tips and Dietary Adaptations

For those watching their diet or with dietary restrictions, here are some tips:

  • Low-Carb Option: Replace tortillas with zucchini slices or lettuce wraps for a low-carb version.
  • Dairy-Free: Omit cheese or use vegan cheese alternatives.
  • Gluten-Free: Ensure tortillas are labeled gluten-free if you have a gluten sensitivity.

Essential Equipment for Making Taquitos

To make the cooking process smoother, here are some recommended kitchen tools:

  • Cast Iron Skillet: Ideal for even heat distribution when frying or sautéing.
  • Wooden Spoon: Perfect for mixing and breaking up meat without scratching your pans.
  • Baking Sheet: Necessary for baking taquitos evenly.
  • Air Fryer: A great tool for achieving crispy taquitos with less oil.
  • Measuring Cups and Spoons: For accuracy in your ingredient measurements.

Serving Suggestions: Enjoying Your Taquitos

Once your beef taquitos are ready, it’s time to serve them up! Here are some suggestions:

  • Family Style: Serve them on a large platter with bowls of toppings so everyone can customize their own.
  • As Part of a Feast: Pair with sides like Mexican rice, beans, or a fresh corn salad for a complete meal.
  • Perfect for Parties: They make an excellent finger food option for gatherings—just set out with a variety of dips!

Wrapping Up: A Kitchen Full of Love

Cooking is a journey of love, and as you prepare these beef taquitos, remember that each step is about creating memories and sharing joy with those you care for. Whether it’s for a casual weeknight dinner or a festive celebration, these taquitos will not only fill your belly but also your heart with warmth and nostalgia. So gather your family, share your stories, and enjoy the delicious flavors that bring you all together. Happy cooking!

Beef Taquitos

Prep Time 15 minutes
Cook Time 20 minutes
Total Time 35 minutes
Servings 4 servings
Calories 350
Delicious crispy beef taquitos perfect for a snack or main dish, topped with fresh garnishes.

Ingredients

Meat

  • 1 pound ground beef or shredded cooked beef (e.g., brisket or roast)
  • 1 small onion (finely diced)
  • 2 cloves garlic (minced)
  • 1 teaspoon chili powder
  • 1 teaspoon ground cumin
  • 1 teaspoon smoked paprika
  • 0.5 teaspoon dried oregano
  • 0.5 teaspoon salt (adjust to taste)
  • 0.25 teaspoon black pepper
  • 0.5 cup tomato sauce or salsa
  • 0.5 cup shredded cheese (cheddar, Monterey Jack, or Mexican blend)
  • 12 small corn tortillas
  • to taste Vegetable oil or cooking spray (for frying or baking)
  • optional Toothpicks (for holding taquitos during cooking)

Toppings

  • to taste Guacamole
  • to taste Sour cream
  • to taste Salsa
  • to taste Shredded lettuce
  • to taste Chopped cilantro
  • to taste Diced tomatoes

Instructions 

  • Cook diced onion in a skillet until softened, then add garlic and cook briefly.
  • Add ground beef or shredded beef, cook until browned or warmed through, then stir in spices and tomato sauce. Let cool slightly and mix in cheese.
  • Warm tortillas, place 2 tbsp filling, roll tightly, and secure with toothpicks if needed.
  • Fry in hot oil until golden, or bake at 425°F for 15-20 mins, or air fry at 400°F for 6-8 mins, flipping halfway.
  • Serve with toppings like guacamole, sour cream, salsa, lettuce, and cilantro.

Notes

Ensure tortillas are pliable before filling to prevent tearing.
Calories: 350kcal
Cost: $15
Course: Appetizer, main
Cuisine: Mexican
Keyword: beef