Author

daniel

Browsing

Awaken Your Senses with a Cozy Pumpkin Cinnamon Roll Casserole

As the chill of autumn settles in, there’s nothing quite like the warm embrace of a cozy breakfast to start your day. This Pumpkin Cinnamon Roll Casserole is more than just a meal; it’s a delightful journey down memory lane, evoking the comforting scents of cinnamon and pumpkin that fill your home, reminiscent of family gatherings and cozy mornings. This recipe is perfect for sharing, whether it’s a festive brunch or a simple family breakfast. Let’s dive into why this casserole will quickly become a beloved tradition at your table.

Why You’ll Love This Recipe

  • Effortless Preparation: This casserole comes together in just about 15 minutes of prep time, making it perfect for busy mornings or special occasions.
  • Comforting Flavors: The blend of pumpkin and cinnamon offers a warm, nostalgic taste that evokes feelings of home and family, ideal for chilly mornings.
  • Feeding a Crowd: With its generous portions, this casserole is designed to serve a family or group, ensuring everyone leaves the table happy and satisfied.
  • Flexible Ingredients: The recipe allows for substitutions, meaning you can use what you have on hand without sacrificing flavor or quality.
  • Memorable Presentation: Drizzled with a luscious maple cream cheese glaze, this casserole not only tastes amazing but looks beautiful on any breakfast table.

Ingredients Breakdown

To recreate this heartwarming dish, gather the following ingredients:

  • 1 (12 count) package refrigerated cinnamon rolls with icing: Preferably Pillsbury for best results.
  • 1 cup canned pumpkin puree: Ensure it’s not pumpkin pie filling for accurate flavor.
  • 1/2 cup whole milk: Any milk variety works, including almond or oat milk for dairy-free options.
  • 3 large eggs: Room temperature helps with even mixing and texture.
  • 1/2 cup granulated sugar: Sweetens the dish perfectly against the spices.
  • 1 tsp vanilla extract: Adds depth and warmth to the flavor.
  • 1 tsp pumpkin pie spice: This can be substituted with a mix of cinnamon, nutmeg, ginger, and cloves.
  • 4 oz cream cheese: Softened for easy mixing; Philadelphia brand is recommended.
  • 1/4 cup powdered sugar: To sweeten the glaze.
  • 3 tbsp pure maple syrup: A must for that rich glaze flavor; grade A dark syrup is preferred.
  • 1-2 tbsp milk: To thin the glaze as needed for drizzling.

Step-by-Step Instructions

Close-up side view of a pumpkin cinnamon roll casserole topped with a maple glaze.

Follow these simple steps to create your own Pumpkin Cinnamon Roll Casserole:

  1. Preheat your oven to 350°F (175°C). Lightly grease a 9×13 inch baking dish with butter or non-stick spray.
  2. Open the cinnamon rolls package and cut each roll into quarters (about 4 pieces per roll).
  3. In a large bowl, whisk together pumpkin puree, milk, eggs, sugar, vanilla extract, and pumpkin pie spice until the mixture is smooth and well combined.
  4. Spread the cut cinnamon roll pieces evenly in the prepared baking dish.
  5. Pour the pumpkin custard mixture over the rolls, ensuring all pieces are coated. Let it sit for 10 minutes to soak in.
  6. Bake in the preheated oven for 35-40 minutes, or until the top is golden brown and the custard is set (a knife inserted should come out clean).
  7. While baking, beat softened cream cheese with powdered sugar and maple syrup until smooth. Gradually add milk, one tablespoon at a time, to reach the desired pourable consistency.
  8. Once baked and slightly cooled (about 10 minutes), drizzle the maple cream cheese glaze generously over the casserole.
  9. Serve warm for the best flavor and texture.

Expert Tips for Success

  • Choose Quality Ingredients: Select the best quality cinnamon rolls and pure maple syrup for the richest flavors.
  • Room Temperature Ingredients: Allow eggs and cream cheese to sit at room temperature for easy mixing.
  • Soak Time Matters: Don’t skip the soaking step! It ensures your cinnamon rolls absorb all that delicious pumpkin goodness.
  • Check Doneness: Ovens vary, so keep an eye on your casserole. It should be puffed and golden brown when done.
  • Glaze Variations: Try adding a sprinkle of cinnamon or nutmeg to the glaze for an extra kick.
  • Make it Ahead: Assemble the casserole the night before, cover, and refrigerate. Bake in the morning for a fuss-free breakfast.
  • Customize It: Add chocolate chips or nuts for extra texture and flavor!
  • Don’t Overmix: When combining the pumpkin custard, mix just until combined to keep the texture light.

Common Mistakes and Troubleshooting

Even the best cooks can make mistakes! Here’s how to avoid common pitfalls:

  • Too Dry: If the casserole comes out dry, it may have baked too long. Keep an eye on the time and test for doneness early.
  • Unsoaked Rolls: Ensure the cinnamon rolls are well-coated with the pumpkin mixture before baking to avoid dryness.
  • Glaze Too Thick: If your glaze is too thick, gradually add more milk until you achieve a pourable consistency.
  • Burnt Edges: If the edges brown too quickly, tent the casserole with foil halfway through baking.

Delicious Variations

Mix it up! Here are some variations to try:

  • Chocolate Chip Pumpkin Cinnamon Roll Casserole: Fold in 1 cup of chocolate chips for a decadent twist.
  • Pecan Pumpkin Cinnamon Roll Casserole: Add 1/2 cup of chopped pecans for a delightful crunch.
  • Maple Bacon Cinnamon Roll Casserole: Crumble cooked bacon on top before baking for a sweet and savory experience.
  • Spiced Apple Cinnamon Roll Casserole: Substitute half of the pumpkin with shredded apples and a dash of additional cinnamon.

Storage and Make-Ahead Instructions

This casserole is perfect for prepping ahead of time:

  • Refrigeration: Store leftovers in an airtight container in the fridge for up to 3 days.
  • Freezing: You can freeze the unbaked casserole for up to 2 months. Thaw overnight in the fridge before baking.
  • Reheating: To reheat, warm in the oven at 350°F (175°C)

Frequently Asked Questions

  • Can I use homemade pumpkin puree? Yes! Fresh puree works beautifully but ensure it’s well-drained to avoid excess moisture.
  • What can I substitute for eggs? You can use flax eggs (1 tbsp flaxseed meal + 2.5 tbsp water per egg) for a vegan option.
  • How do I know if the casserole is cooked through? Insert a knife into the center; it should come out clean when fully baked.
  • Can I double this recipe? Absolutely! Just use a larger baking dish and adjust the baking time as needed.
  • What kind of cinnamon rolls should I use? Refrigerated cinnamon rolls work best, but you can use homemade if you prefer.
  • Is this casserole suitable for freezing? Yes! It freezes well, either assembled or baked.
  • Can I make this gluten-free? Use gluten-free cinnamon rolls and a gluten-free flour blend for the custard.
  • How can I make this recipe dairy-free? Substitute with dairy-free milk and cream cheese alternatives.

Nutritional Tips and Dietary Adaptations

This Pumpkin Cinnamon Roll Casserole can be adapted to fit various dietary needs:

  • Lower Sugar: Reduce the granulated sugar or use a sugar substitute to cut calories.
  • Higher Protein: Add a scoop of protein powder to the pumpkin custard mixture.
  • Dairy-Free Options: Use almond milk and a dairy-free cream cheese for a complete dairy-free version.

Essential Kitchen Equipment

Here’s what you’ll need to make this casserole:

  • 9×13 inch Baking Dish: Essential for baking the casserole evenly.
  • Mixing Bowls: For combining the pumpkin custard and preparing the glaze.
  • Whisk: To ensure your custard mixture is smooth and well-blended.
  • Measuring Cups and Spoons: Accurate measurements ensure the best results.

Serving Suggestions

Serve this delightful casserole warm, perhaps with a side of:

  • Fresh Fruit: Slices of apples or pears complement the flavors beautifully.
  • Coffee or Tea: A warm cup of your favorite beverage pairs perfectly with the sweet and spicy flavors.
  • Yogurt: A dollop of Greek yogurt adds a creamy contrast to the sweetness.

In conclusion, this Pumpkin Cinnamon Roll Casserole is a warm hug on a plate, perfect for creating new memories around your family table. With its rich flavors and comforting texture, it invites everyone to slow down and savor each bite. So gather your loved ones, whip up this delightful dish, and let the aromas of cinnamon and pumpkin fill your home, creating a cozy atmosphere that celebrates togetherness and love.

Cozy Pumpkin Cinnamon Roll Casserole Recipe with Easy Maple Glaze

Prep Time 15 minutes
Cook Time 40 minutes
Total Time 55 minutes
Servings 8 servings
Calories 420
A warm and comforting casserole combining cinnamon rolls and pumpkin, topped with a sweet maple glaze—perfect for a cozy breakfast or brunch.

Ingredients

Dough and Filling

  • 1 package refrigerated cinnamon rolls with icing (preferably Pillsbury)
  • 1 cup canned pumpkin puree (not pumpkin pie filling)
  • 1/2 cup whole milk (or any milk of your choice)
  • 3 large eggs (room temperature)
  • 1/2 cup granulated sugar
  • 1 tsp vanilla extract
  • 1 tsp pumpkin pie spice (or a blend of cinnamon, nutmeg, ginger, and cloves)
  • 4 oz cream cheese (softened, Philadelphia brand recommended)
  • 1/4 cup powdered sugar
  • 3 tbsp pure maple syrup (grade A dark preferred)
  • 1-2 tbsp milk (to thin glaze as needed)

Instructions 

  • Preheat oven to 350°F (175°C). Grease a 9×13 inch baking dish.
  • Cut cinnamon rolls into quarters and spread in the dish. Whisk pumpkin, milk, eggs, sugar, vanilla, and spices; pour over rolls. Let sit for 10 minutes.
  • Bake for 35-40 minutes until golden and set. Meanwhile, beat cream cheese with powdered sugar and maple syrup; add milk to reach desired consistency.
  • Once baked and cooled slightly, drizzle with maple cream cheese glaze. Serve warm.
Notes

For best flavor, serve warm and enjoy!
Calories: 420kcal
Cost: $15
Course: Breakfast
Cuisine: American
Keyword: Brunch, Cinnamon Rolls, Pumpkin

Whispers of Nostalgia: The Heartwarming Journey of Banana Walnut Cream Cake

Sometimes, a recipe is more than just a list of ingredients and steps; it’s a cherished memory, a family ritual, and a way to connect across generations. The Heavenly Banana Walnut Cream Cake embodies this sentiment beautifully. With its luscious layers of banana and walnut, combined with a fluffy cream filling, this cake is not just dessert; it’s a celebration of love, family, and the joy of sharing. Let’s embark on this delicious journey together and discover why this cake has become a staple in kitchens across the country.

Why You’ll Love This Recipe

  • Rich Flavor Profile: The combination of ripe bananas and crunchy walnuts creates a delightful contrast, making every bite a flavor explosion that dances on your taste buds.
  • Perfect for Any Occasion: Whether it’s a birthday celebration or a casual family gathering, this cake is versatile enough to steal the show at any event.
  • Easy to Make: With straightforward steps and simple ingredients, even novice bakers can create this masterpiece with confidence.
  • Moist and Decadent: The buttermilk and whipped cream ensure your cake remains moist and luscious, making it a great treat for any palate.
  • Customizable: Feel free to add chocolate chips or spices to the batter, or drizzle honey on top for a personal touch.

Ingredients for Heavenly Banana Walnut Cream Cake

Gathering the right ingredients is the first step to creating a memorable cake. Here’s what you’ll need:

  • 2 cups ripe bananas, mashed (about 4 medium bananas): Use overripe bananas for maximum sweetness and flavor.
  • 2 ½ cups all-purpose flour: This forms the sturdy base for your cake.
  • 1 tsp baking soda: Essential for achieving a light, fluffy texture.
  • 1 tsp baking powder: Helps the cake rise.
  • ½ tsp salt: Balances the sweetness of the bananas and cream.
  • ½ cup unsalted butter, softened: Adds richness to the cake.
  • 1 cup granulated sugar: Sweetens the batter perfectly.
  • ½ cup brown sugar, packed: Enhances the cake with a hint of caramel flavor.
  • 2 large eggs: Binds the ingredients together and adds moisture.
  • 1 tsp vanilla extract: A must-have for depth of flavor.
  • 1 cup buttermilk: Makes the cake tender and moist.
  • 1 ½ cups heavy whipping cream: For that fluffy cream filling.
  • ¼ cup powdered sugar: Sweetens the whipped cream.
  • ½ cup chopped walnuts: Adds crunch and nutty flavor.
  • 2 tbsp honey (optional): A drizzle on top for an added touch of sweetness.

Step-by-Step Preparation for Heavenly Banana Walnut Cream Cake

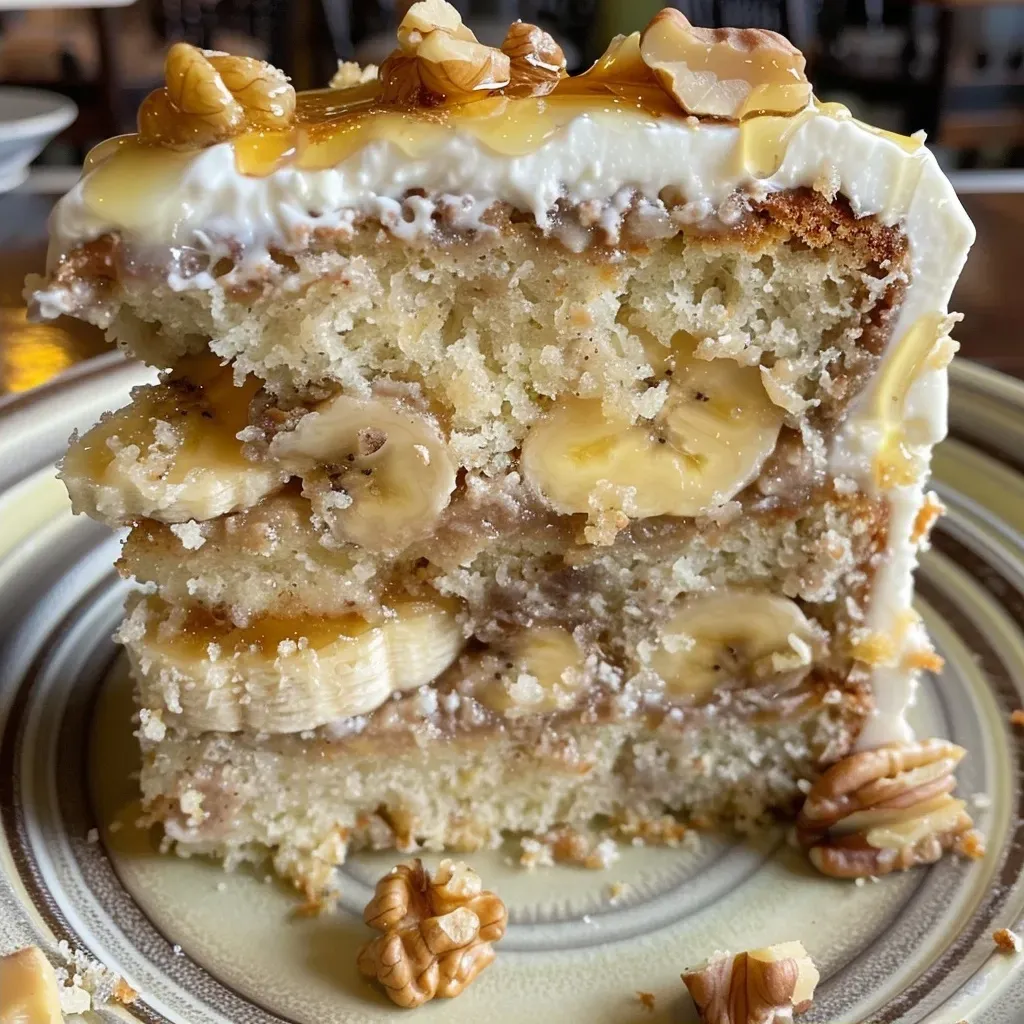
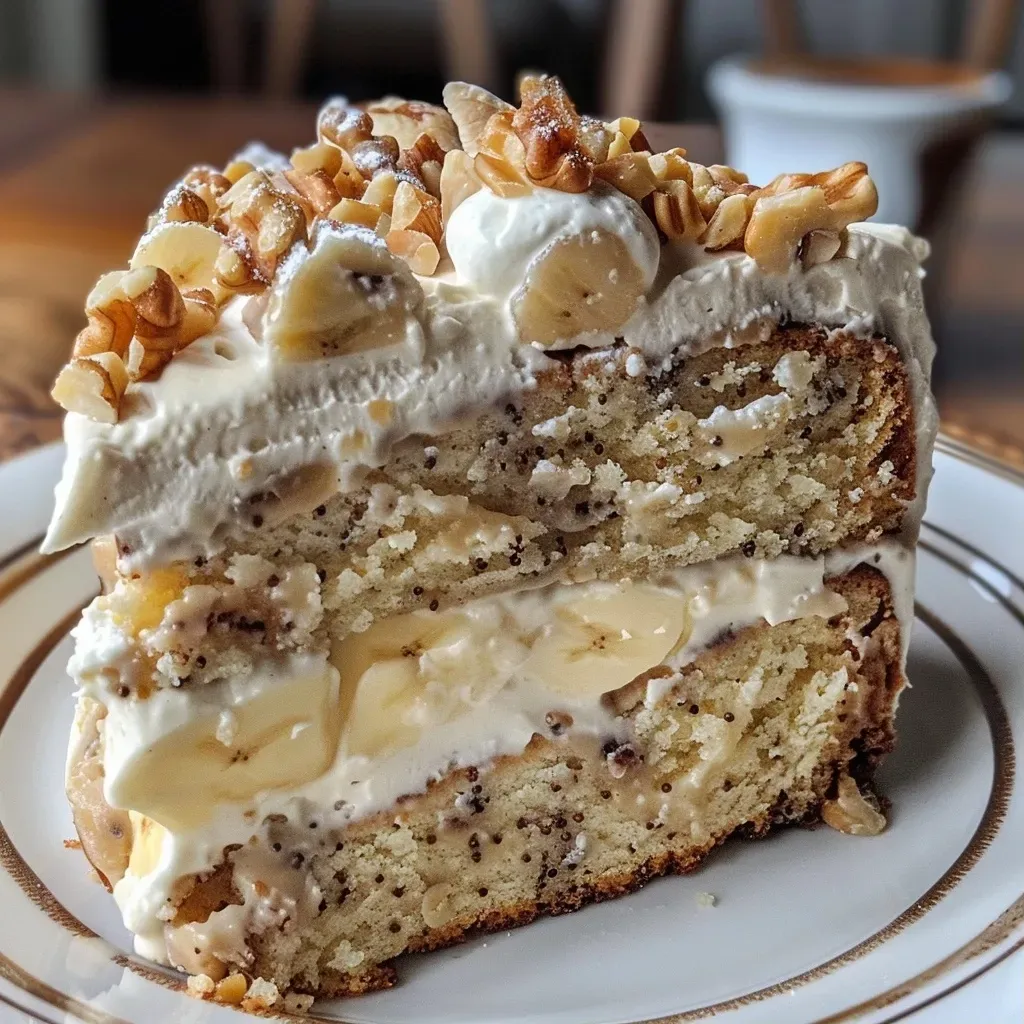
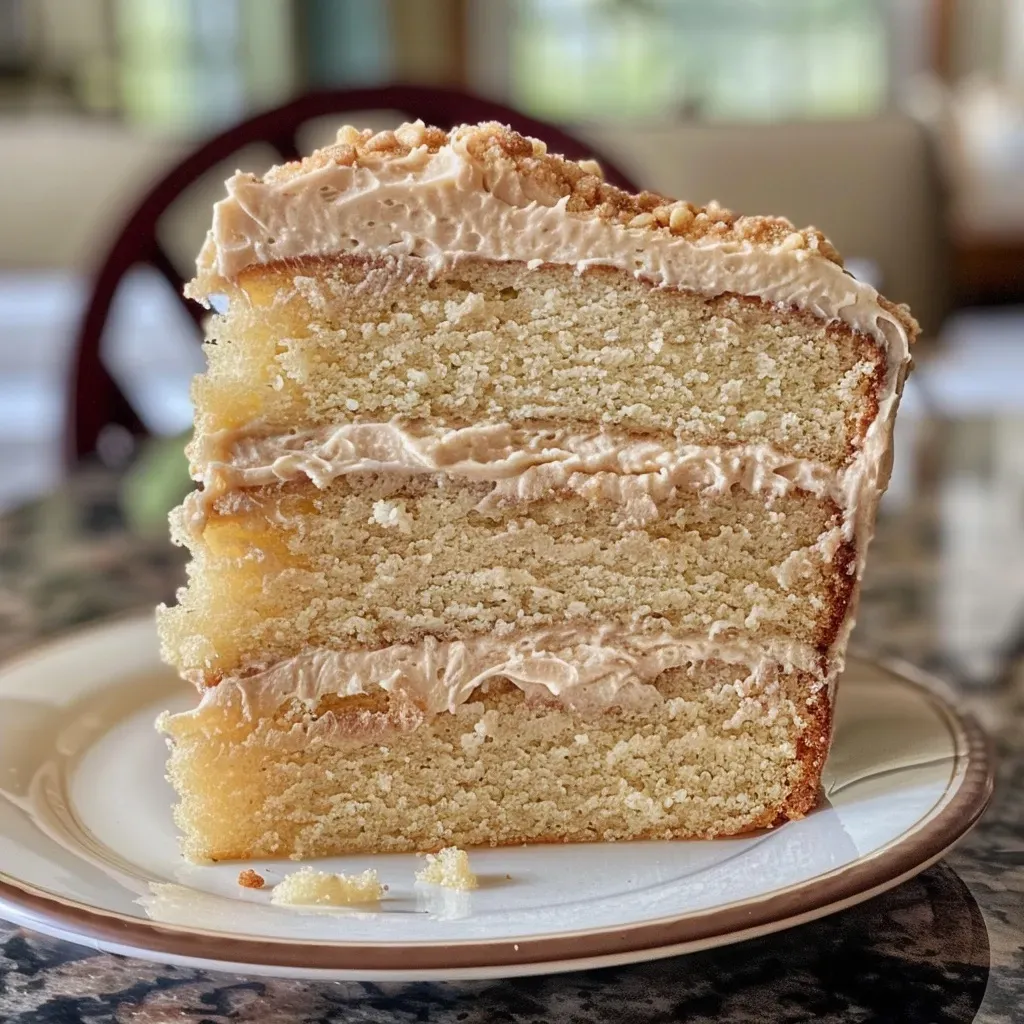
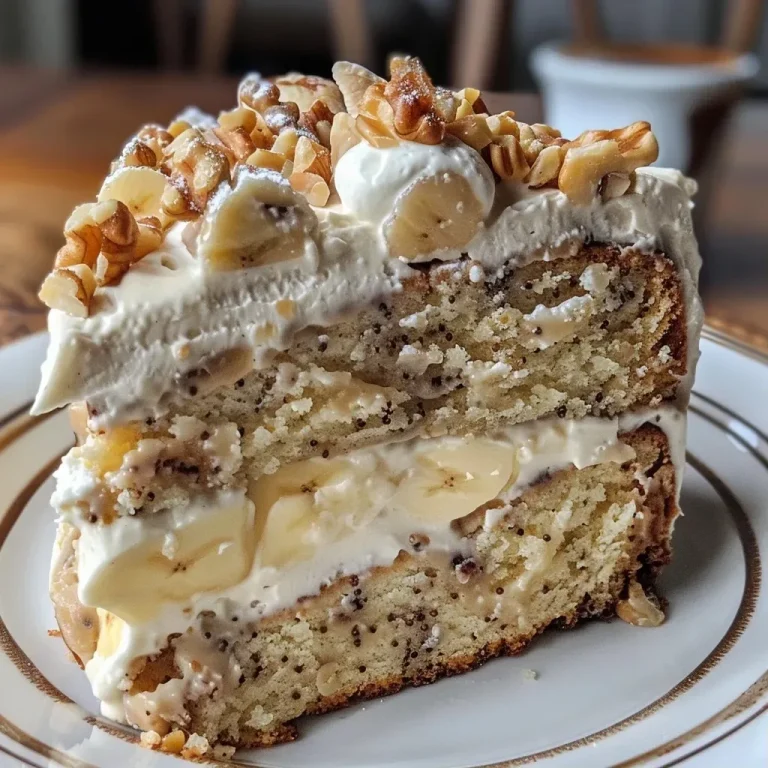
Close-up of a moist banana walnut cream cake with visible layers and cream frosting.

Let’s roll up our sleeves and get started on crafting this delightful cake!

1. Preheat Your Oven

Begin by preheating your oven to 350°F (175°C). Grease and flour two 9-inch round cake pans to prevent sticking.

2. Mix the Dry Ingredients

In a medium bowl, whisk together the flour, baking soda, baking powder, and salt. This ensures even distribution of the leavening agents.

3. Cream the Butter and Sugars

In a large mixing bowl, using an electric mixer, cream the softened butter, granulated sugar, and brown sugar until light and fluffy, about 3-5 minutes.

4. Incorporate the Eggs and Bananas

Add the eggs one at a time, mixing well after each addition. Then, fold in the mashed bananas and vanilla extract until well combined.

5. Combine Wet and Dry Ingredients

Alternate adding the dry ingredients and buttermilk to the banana mixture. Start with dry, then buttermilk, and repeat until everything is well integrated. Be careful not to overmix; a few lumps are okay.

6. Fold in the Walnuts

Gently fold in the chopped walnuts, ensuring they are evenly distributed throughout the batter.

7. Divide and Bake

Pour the batter evenly into the prepared pans. Bake for 25-30 minutes or until a toothpick inserted into the center comes out clean.

8. Cool the Cakes

Once baked, allow the cakes to cool in the pans for 10 minutes before transferring them to wire racks to cool completely.

9. Prepare the Whipped Cream Filling

In a mixing bowl, beat the heavy whipping cream with powdered sugar until stiff peaks form. This will be the creamy layer that complements the cake.

10. Assemble the Cake

Once the cakes are completely cool, place one layer on a serving plate. Spread a generous layer of whipped cream on top, then place the second layer on top and repeat. Optionally, you can drizzle honey over the top for an added touch of sweetness.

Pro Tips for Success

  • Use overripe bananas: They provide the best flavor and sweetness for your cake.
  • Don’t overmix the batter: A few lumps are okay; overmixing can lead to a dense cake.
  • Cool cakes completely: This prevents the whipped cream from melting and ensures clean layers.
  • Chill your mixing bowl: For best results when whipping cream, chill the bowl beforehand.
  • Experiment with flavors: Add a pinch of cinnamon or nutmeg for a warm, spiced flavor.
  • Toast the walnuts: Toasting adds an extra dimension of flavor; just be careful not to burn them.
  • Make it a day ahead: This cake tastes even better the next day as the flavors meld together.
  • Adjust sweetness to taste: Depending on your preference, feel free to adjust the sugar levels in both the cake and the cream.

Common Mistakes and Troubleshooting

Even the most experienced bakers can run into issues. Here are some common mistakes and how to avoid them:

  • Dense Cake: This can happen if the batter is overmixed. Mix just until combined for a light, airy cake.
  • Dry Cake: Overbaking can dry out your cake. Keep an eye on the timer and do the toothpick test.
  • Melting Cream: Ensure the cakes are completely cool before adding the whipped cream layer.
  • Uneven Layers: Make sure to use a kitchen scale or measure your batter evenly for consistent layers.

Variations to Try

Make this recipe your own! Here are a few variations to consider:

  • Chocolate Chips: Fold in 1 cup of chocolate chips to the batter for an indulgent twist.
  • Spiced Banana Cake: Add ½ teaspoon of cinnamon and nutmeg to the dry ingredients for a warm, spicy flavor.
  • Nut-Free Version: Omit the walnuts or substitute with sunflower seeds for a nut-free alternative.
  • Fruit Layering: Add fresh banana slices between the layers for an extra burst of banana flavor.

Storage and Make-Ahead Instructions

This cake can be made ahead of time, making it perfect for busy schedules:

  • Room Temperature: Store at room temperature for up to 2 days in an airtight container.
  • Refrigeration: If you have leftovers, keep them in the fridge for up to 5 days. The cream may slightly soften over time.
  • Freezing: You can freeze the unassembled cake layers for up to 3 months. Just wrap them tightly in plastic wrap and foil.

Frequently Asked Questions

  • Can I make this cake gluten-free? Yes! Substitute all-purpose flour with a gluten-free blend.
  • What if I don’t have buttermilk? You can make a quick substitute by mixing 1 cup of milk with 1 tablespoon of vinegar or lemon juice.
  • How can I enhance the banana flavor? Use very ripe bananas and consider adding banana extract for a more intense flavor.
  • Can I use a different type of nut? Absolutely! Pecans or almonds can be great alternatives to walnuts.
  • What should I serve with this cake? This cake pairs wonderfully with a scoop of vanilla ice cream or a drizzle of caramel sauce.
  • Can I add frosting instead of whipped cream? Yes! Cream cheese frosting or buttercream can also work well.
  • How do I know when the cake is done? A toothpick inserted in the center should come out clean or with a few moist crumbs.
  • Is this cake suitable for special diets? You can modify this recipe to be vegan or dairy-free by using plant-based alternatives.

Nutritional Tips and Dietary Adaptations

When it comes to enjoying this cake, consider these nutritional tips:

  • Reduce sugar: You can cut down the sugars by using natural sweeteners like honey or maple syrup.
  • Boost the fiber: Substitute half of the all-purpose flour with whole wheat flour to increase fiber content.
  • Lower the fat: Replace half of the butter with unsweetened applesauce for a lighter version.

Recommended Equipment

Having the right tools can make all the difference:

  • Electric Mixer: Essential for creaming butter and whipping cream.
  • Measuring Cups and Spoons: Accurate measurements ensure baking success.
  • Cooling Racks: Allow your cakes to cool evenly and prevent sogginess.
  • 9-inch Round Cake Pans: The preferred size for even baking.

Serving Suggestions

Serve this cake with style to impress your guests:

  • Garnish: Top with additional chopped walnuts or banana slices for a beautiful presentation.
  • Accompaniments: Pair with a dollop of whipped cream or a scoop of vanilla ice cream for a decadent treat.
  • Presentation: Dust the top with powdered sugar just before serving for an elegant touch.

In the end, baking is not just about ingredients; it’s about the love and memories you create. The Heavenly Banana Walnut Cream Cake is a perfect representation of that sentiment. Each slice is like a warm hug, inviting you to gather around the table and share stories while savoring every bite. So, roll up your sleeves and create your own memories with this delightful recipe. Happy baking!

Heavenly Banana Walnut Cream Cake – A Dreamy Dessert Delight!

Prep Time 30 minutes
Cook Time 20 minutes
Total Time 50 minutes
Servings 8 slices
Calories 450
Indulge in this luscious banana walnut cream cake, combining moist banana layers with rich whipped cream and crunchy walnuts for a delightful treat.

Ingredients

Banana Mixture

  • 2 cups ripe bananas, mashed (about 4 medium bananas)

Dry Ingredients

  • 2 ½ cups all-purpose flour
  • 1 tsp baking soda
  • 1 tsp baking powder
  • ½ tsp salt

Wet Ingredients

  • ½ cup unsalted butter, softened
  • 1 cup granulated sugar
  • ½ cup brown sugar, packed
  • 2 large eggs
  • 1 tsp vanilla extract

Buttermilk

  • 1 cup buttermilk

Whipped Cream

  • 1 ½ cups heavy whipping cream
  • ¼ cup powdered sugar
  • 1 tsp vanilla extract

Walnuts

  • ½ cup chopped walnuts

Optional Topping

  • 2 tbsp honey (optional, for drizzling)

Instructions 

  • Preheat oven to 350°F (175°C). Mix mashed bananas with dry ingredients.
  • Cream together butter, sugars, eggs, and vanilla. Add buttermilk and combine.
  • Gradually add dry ingredients to wet mixture. Pour into prepared pans and bake for 20 minutes.
  • Whip heavy cream with powdered sugar and vanilla until stiff peaks form. Fold in walnuts.
  • Layer cake with whipped cream, top with walnuts, and drizzle honey if desired. Chill before serving.

Notes

For extra flavor, add a touch of cinnamon to the dry ingredients.
Calories: 450kcal
Cost: $15
Course: Dessert
Cuisine: American
Keyword: Banana

Welcome to a warm and comforting dish that wraps you in the loving embrace of family cooking. This Spinach and Artichoke Pasta Bake is a delightful blend of creamy goodness, tender chicken, and vibrant greens, perfect for bringing everyone together around the table. With roots in Southern cuisine and a touch of nostalgia, this recipe is not just about food; it’s about sharing memories and love.

As we dive into this recipe, I want you to feel the essence of home—where every ingredient tells a story and every bite is a reminder of cherished moments spent in the kitchen. Let’s embark on this delicious journey together!

Why You’ll Love This Recipe

  • Comforting flavors: The creamy blend of spinach, artichokes, and chicken creates a dish that feels like a warm hug on a chilly evening.
  • High protein content: With shredded chicken and Greek yogurt, this pasta bake is a healthy choice packed with protein, making it satisfying for the whole family.
  • Quick and easy: Perfect for busy nights, this recipe can be made in under an hour, allowing you to spend more time with loved ones.
  • Meal prep friendly: Make a double batch and freeze half for those days when you need a quick dinner option—just reheat and enjoy!
  • Customizable: This pasta bake is versatile; you can easily add your favorite vegetables or swap out ingredients to suit your taste.

Ingredients You’ll Need

Gathering the right ingredients is key to bringing this dish to life. Here’s what you’ll need:

  • 8 ounces rigatoni pasta: These short, ridged noodles hold onto the rich sauce beautifully.
  • 4 ounces light cream cheese: Make sure it’s at room temperature for easy mixing.
  • ½ cup plain Greek yogurt: Adds creaminess and a protein boost.
  • ½ cup light mayo: For that extra creaminess without the calories.
  • 1½ teaspoon Italian seasoning: A blend of herbs that adds depth to the dish.
  • 1 teaspoon garlic powder: A must for flavor—garlic is the heart of many comforting dishes.
  • 1 teaspoon onion powder: Adds sweetness and depth to the flavor profile.
  • ½ teaspoon salt: Essential for enhancing all the flavors.
  • ¼ teaspoon black pepper: For a hint of spice.
  • 6 ounces fresh baby spinach: Nutrient-rich and vibrant.
  • 4 cups cooked chicken: Shredded or roughly chopped—perfect for using leftover rotisserie chicken.
  • 14 ounce can quartered artichoke hearts: Drained well to avoid excess moisture.
  • 1½ cup shredded mozzarella cheese: Divided, for topping and mixing.
  • ⅓ cup parmesan cheese: Grated or shredded, plus more for topping.

How to Make Spinach and Artichoke Pasta Bake

Now that you have your ingredients ready, let’s bring this dish to life!

  1. Preheat the oven to 400°F (200°C). Grease a 9×13” casserole dish with cooking spray.
  2. Bring a pot of salted water to a boil. Cook the rigatoni according to package directions, stopping two minutes short of al dente. Drain and set aside.
  3. In a large bowl, mix together the light cream cheese, Greek yogurt, light mayo, Italian seasoning, garlic powder, onion powder, salt, and black pepper until smooth.
  4. Add the cooked pasta, spinach, shredded chicken, drained artichoke hearts, parmesan cheese, and ½ cup of mozzarella cheese to the bowl and toss well to combine.
  5. Transfer the mixture to the greased baking dish and top with the remaining 1 cup of mozzarella cheese.
  6. Bake for 8 to 10 minutes, then broil for 2 to 3 minutes until the top is golden brown and bubbly.

Pro Tips for the Perfect Pasta Bake

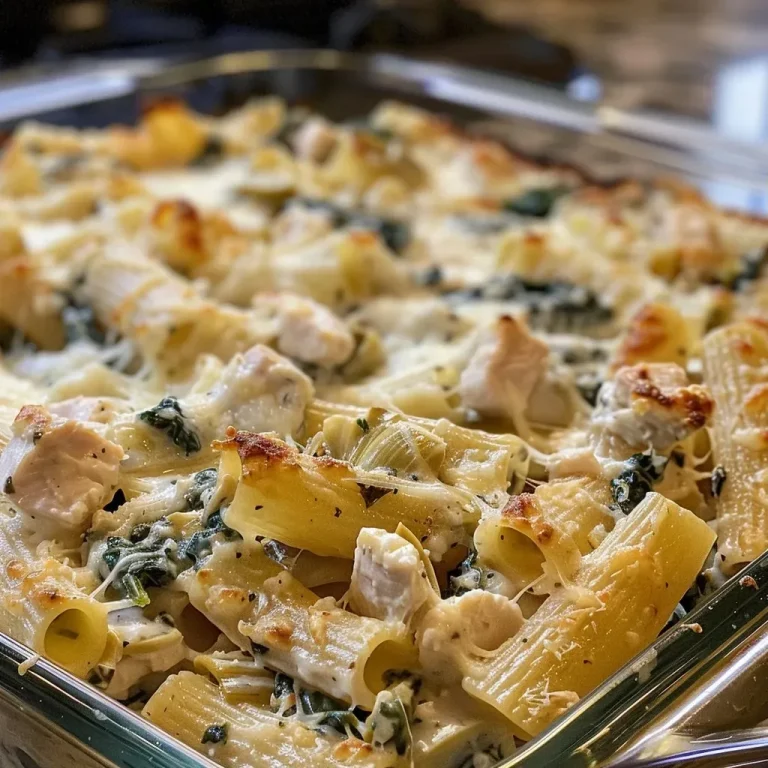
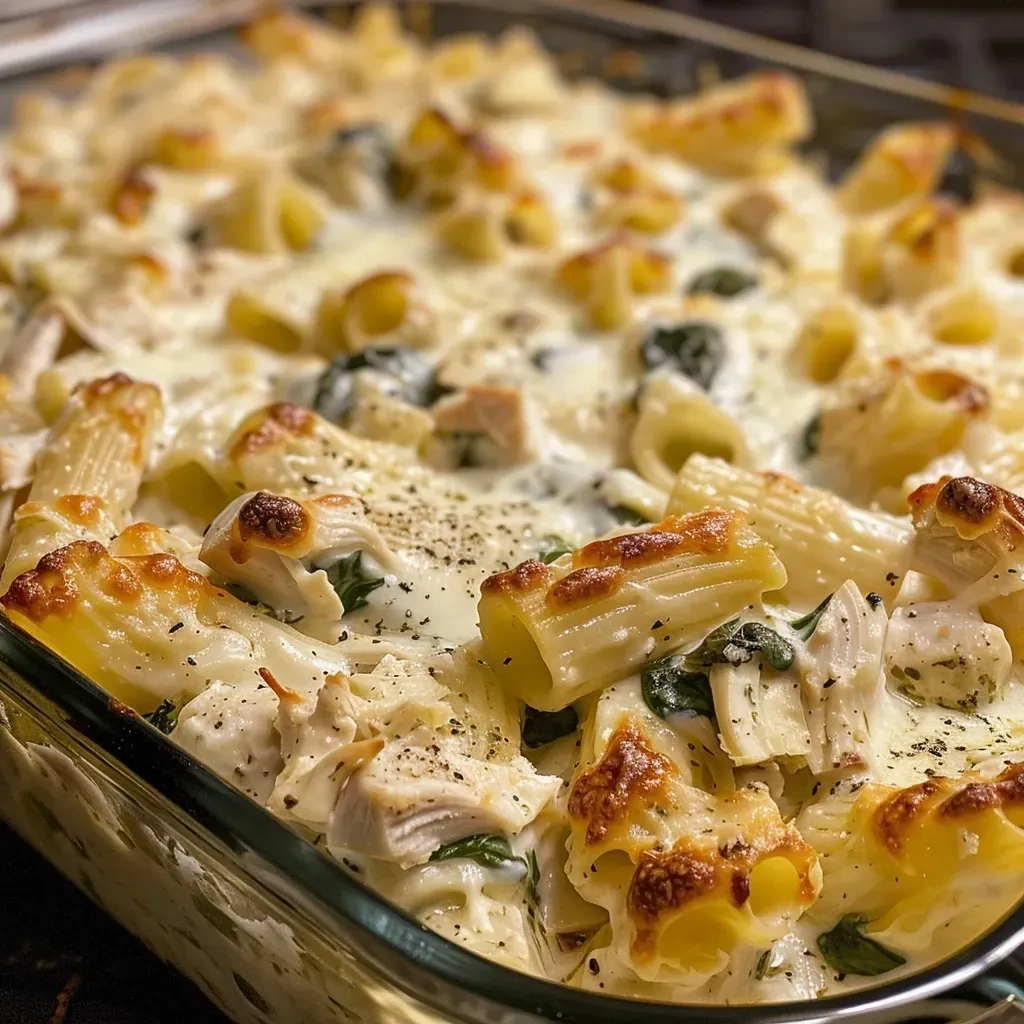
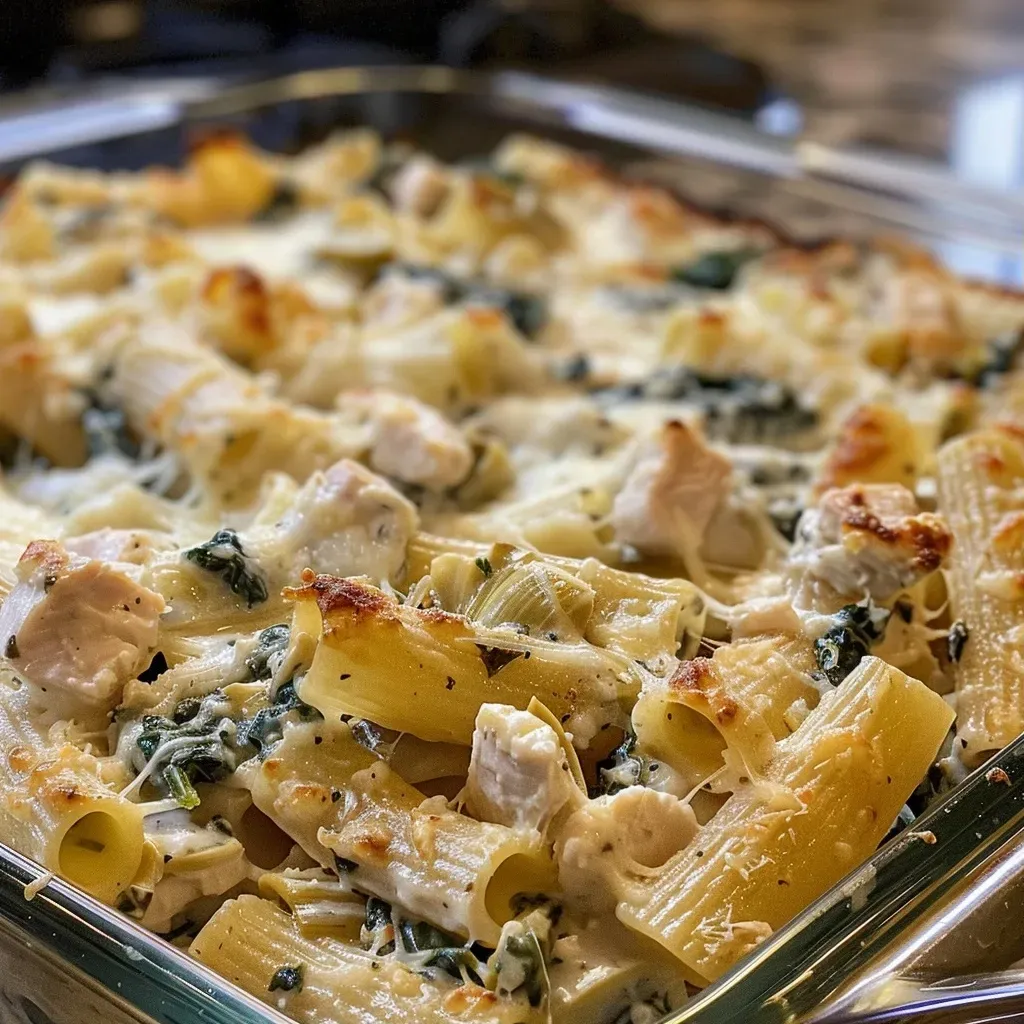
Close-up of a deliciously creamy Spinach and Artichoke Pasta Bake with cheese bubbling on top.
  • Use leftover chicken: Save time by using leftover rotisserie chicken; it adds flavor and moisture.
  • Don’t overcook the pasta: Since it will continue cooking in the oven, stop just short of al dente to prevent mushiness.
  • Experiment with cheeses: Try mixing in cheddar or a sprinkle of feta for a different flavor profile.
  • Add more veggies: Consider adding chopped bell peppers or mushrooms for extra nutrition and texture.
  • Let it rest: Allow the pasta bake to sit for a few minutes before serving; this helps it set and makes serving easier.
  • Mix your spices: Don’t be afraid to add a pinch of red pepper flakes or fresh herbs for a little kick and freshness.

Common Mistakes and Troubleshooting

Even the best cooks make mistakes. Here are a few common pitfalls and how to avoid them:

  • Overmixing the pasta: Gently fold the pasta into the mixture to avoid breaking it.
  • Too much moisture: Make sure to drain the artichoke hearts well to prevent a watery bake.
  • Burnt cheese: Keep an eye on the broiler; it can quickly turn golden brown into burnt!

Variations to Try

Feeling adventurous? Here are some tasty variations to make this dish your own:

  • Vegetarian Delight: Omit the chicken and add more vegetables like zucchini or broccoli.
  • Cheesy Chicken Alfredo: Swap out some of the cream cheese for an Alfredo sauce for a richer flavor.
  • Spicy Spinach and Artichoke: Add diced jalapeños or a sprinkle of chili powder for a kick.
  • Mediterranean Style: Incorporate olives, sun-dried tomatoes, and feta cheese for a Mediterranean twist.

Storage and Make-Ahead Instructions

This dish is perfect for meal prep! Here’s how to store and prepare it in advance:

  • Refrigerator: Store leftovers in an airtight container for up to 3 days.
  • Freezer: This pasta bake freezes beautifully. Just make sure it’s completely cooled before transferring to a freezer-safe container. It can be frozen for up to 3 months.
  • Reheating: To reheat, thaw overnight in the refrigerator and bake at 350°F (175°C) until warmed through, about 20-25 minutes.

Comprehensive FAQ

  • Can I use a different pasta? Absolutely! Feel free to substitute with penne, fusilli, or even gluten-free pasta.
  • Is this dish gluten-free? You can make it gluten-free by using gluten-free pasta and ensuring your other ingredients are free from gluten.
  • Can I prepare this dish ahead of time? Yes! Assemble it the night before and refrigerate; just bake it when you’re ready to serve.
  • What can I serve with this pasta bake? Garlic bread, a fresh salad, or roasted vegetables make great sides.
  • Can I add more cheese? Yes! Feel free to load it up with your favorite cheeses for a cheesier experience.
  • What if I don’t have Greek yogurt? You can substitute it with sour cream or even more cream cheese.
  • How do I know when it’s done? It’s done when the cheese is bubbly and golden brown, and you can see the edges are slightly crisp.
  • Can I use fresh spinach instead of frozen? Yes! Fresh spinach adds a lovely texture and flavor.

Nutrition Tips and Dietary Adaptations

This dish is not only delicious but can be tailored to fit various dietary needs:

  • Low-fat option: Use low-fat cream cheese and Greek yogurt to cut down on calories.
  • Vegetarian option: Omit chicken and add chickpeas or lentils for protein.
  • Dairy-free option: Use cashew cream or a dairy-free cheese alternative.

Equipment Recommendations

Having the right tools makes all the difference in the kitchen:

  • 9×13” casserole dish: Essential for baking this pasta bake evenly.
  • Large mixing bowl: For combining all your ingredients effortlessly.
  • Pot for boiling pasta: A larger pot allows the pasta to cook evenly.

Serving Suggestions

This Spinach and Artichoke Pasta Bake is best enjoyed fresh out of the oven. Here are some serving ideas:

  • Pair with garlic bread: The perfect companion for soaking up the delicious sauce.
  • Fresh salad: A simple green salad with vinaigrette complements the richness of the bake.
  • Wine pairing: A crisp white wine, like a Sauvignon Blanc, pairs beautifully with this dish.

In closing, this Spinach and Artichoke Pasta Bake is more than just a recipe; it’s a way to connect with loved ones, celebrate traditions, and create new memories around the dinner table. So, gather your ingredients, invite your family, and let the magic of cooking fill your home with warmth and joy. Happy cooking!

Spinach and Artichoke Pasta Bake Recipe

Prep Time 15 minutes
Cook Time 20 minutes
Total Time 35 minutes
Servings 6 servings
Calories 650
A creamy, cheesy pasta bake loaded with spinach, artichokes, and tender chicken, perfect for a comforting dinner.

Ingredients

pasta

  • 8 ounces rigatoni pasta

dairy

  • 4 ounces light cream cheese (room temperature (half of a block))
  • 0.5 cup plain Greek yogurt
  • 0.5 cup light mayo

seasonings

  • 1.5 teaspoon Italian seasoning
  • 1 teaspoon garlic powder
  • 1 teaspoon onion powder
  • 0.5 teaspoon salt
  • 0.25 teaspoon black pepper

vegetables

  • 6 ounces fresh baby spinach (or more)

protein

  • 4 cups cooked chicken (shredded or roughly chopped)

canned goods

  • 14 ounce can quartered artichoke hearts (drained)

cheese

  • 1.5 cups shredded mozzarella cheese (divided)
  • 0.33 cup parmesan cheese (grated or shredded, plus more for topping)

Instructions 

  • Preheat oven to 400F and spray a 9×13” dish.
  • Cook pasta until 2 minutes short of al dente, then drain.
  • Mix cream cheese, Greek yogurt, mayo, seasonings, salt, and pepper in a large bowl.
  • Add pasta, spinach, chicken, artichokes, parmesan, and half the mozzarella; toss to combine.
  • Transfer to baking dish, top with remaining mozzarella, then bake and broil until golden.

Notes

For extra flavor, sprinkle additional parmesan on top before serving.
Calories: 650kcal
Cost: $15
Course: Main Course
Cuisine: American
Keyword: bake, cheesy, Pasta

Welcome to the Soul of Southern Baking

Gather around the kitchen as we dive into the heartwarming world of baking with our Brown Butter Cake. This recipe isn’t just about creating a dessert; it’s about evoking memories, sharing stories, and celebrating the love that fills our homes. With its rich, nutty flavor and delightful frosting, this cake promises to transport you back to cherished family gatherings, reminding you that cooking is a way to keep traditions alive.

Join me, Daniel, as we explore the comforting embrace of this butter cake, infused with warm spices and topped with a luscious Maple Miso Frosting. Whether you’re new to baking or a seasoned pro, this cake will inspire you to create, share, and enjoy the simple pleasures of life.

Why You’ll Love This Recipe

This isn’t just any cake; it’s a brown butter cake steeped in nostalgia. Here are five reasons to fall in love with it:

  • Rich Flavor: The brown butter adds a deep, nutty flavor that elevates this cake from ordinary to extraordinary.
  • Moist and Tender: Infusing the batter with buttermilk ensures that every slice is moist and tender, melting in your mouth.
  • Versatile Frosting: The Maple Miso Frosting perfectly balances sweetness with a touch of umami, but you can easily customize it to suit your taste.
  • Perfect for Any Occasion: Whether it’s a family gathering, birthday celebration, or just a quiet afternoon, this cake fits right in.
  • A Recipe to Share: This cake is a wonderful way to bring family and friends together, creating new memories around the table.

Ingredients Breakdown

Before we dive into the baking process, let’s gather our ingredients. This cake calls for:

  • 8 tablespoons (113 grams) unsalted butter: This is the star ingredient. Remember to brown it for that nutty flavor.
  • 1 1/4 cups (150 grams) all-purpose flour: All-purpose flour provides the right structure for the cake. You can substitute with cake flour for a lighter texture.
  • 1 teaspoon baking powder: This will help the cake rise beautifully.
  • 1/4 teaspoon baking soda: A little boost for the baking powder, ensuring a fluffy cake.
  • 3/4 teaspoon salt: Balances the sweetness and enhances flavors.
  • 1/4 teaspoon nutmeg: Adds warmth and spice, reminiscent of holiday gatherings.
  • One 3.7 ounce packet vanilla pudding mix: This secret ingredient keeps the cake moist and adds a lovely vanilla flavor.
  • 2 large eggs (100 grams) + 1 large egg white (35 grams): Bind the ingredients together and provide richness.
  • 3/4 cup (160 grams) packed brown sugar: Brown sugar adds moisture and a hint of caramel flavor.
  • 3/4 cup + 1 tablespoon (185 grams) buttermilk: Ensures a tender crumb. Substitute with regular milk mixed with a splash of vinegar if needed.
  • 2 teaspoons pure vanilla extract or vanilla bean paste: For that lovely aromatic flavor.
  • 1/2 teaspoon almond extract (optional): Adds a delightful depth to the flavor profile.
  • 1/4 cup (56 grams) heavy whipping cream: Lightens the batter and adds richness.
  • Maple Miso Frosting: A unique topping that marries sweet and savory beautifully.
  • About 1/2 cup chopped roasted and salted almonds: For garnish, adding texture and crunch.

Step-by-Step Instructions

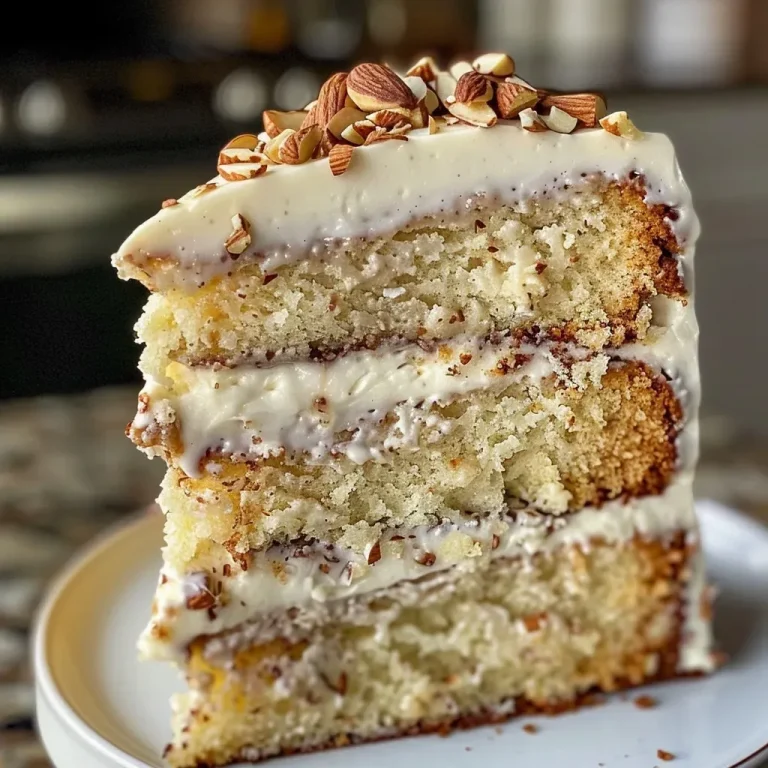
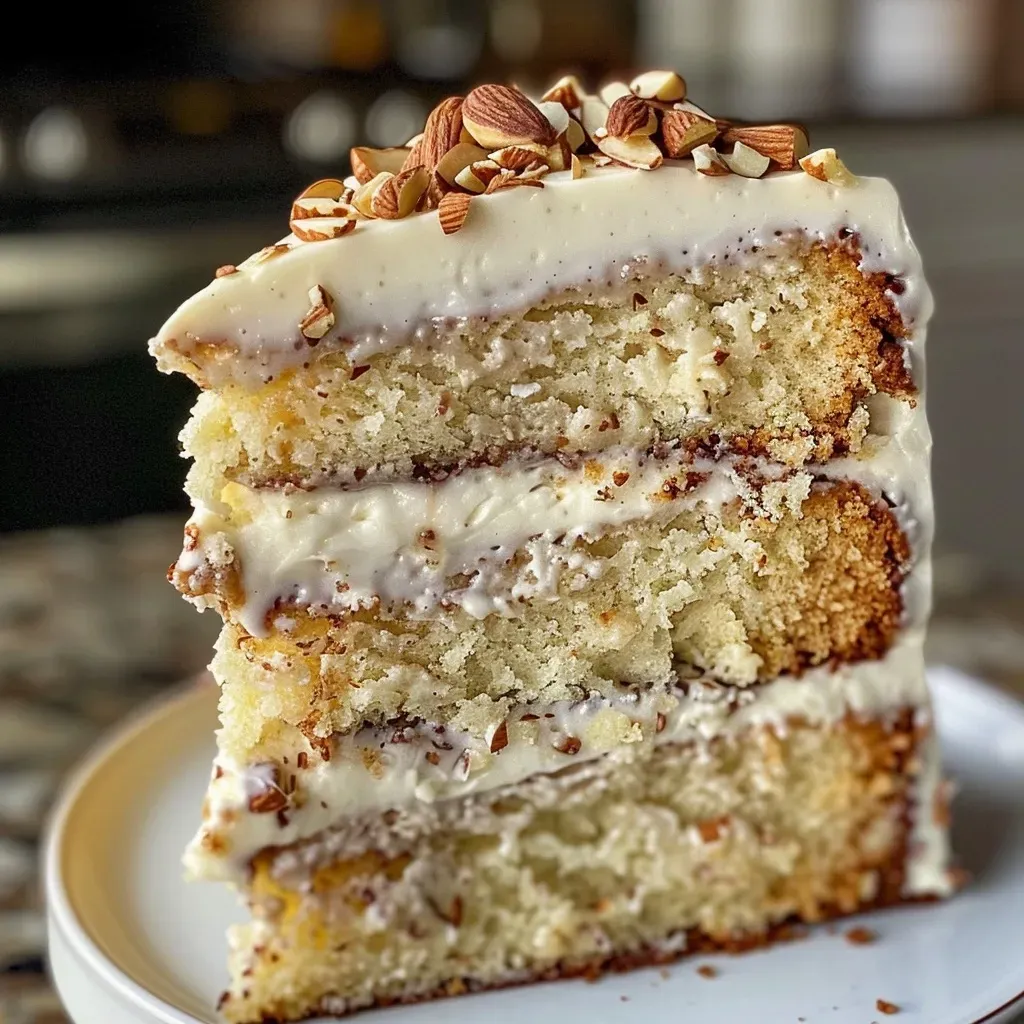
Close-up side view of a moist brown butter cake topped with frosting and almonds.

Now that we have our ingredients ready, let’s get to the fun part—baking!

  • Brown the butter: Cut the butter into chunks and place it in a light-colored saucepan over medium heat. Stir constantly until melted and boiling. Watch for a golden brown color and nutty aroma. Once browned, pour into a bowl, scraping the delicious brown bits from the pan. Allow to cool completely.
  • Preheat the oven: Set your oven to 350°F (176°C). Grease, flour, and line the bottom of an 8-inch round cake pan with parchment paper.
  • Mix dry ingredients: In a bowl, combine the flour, baking powder, baking soda, salt, nutmeg, and pudding mix, whisking together until well combined.
  • Prepare eggs: In a small bowl, whisk together the eggs and egg white until blended.
  • Combine brown butter and sugar: In a mixing bowl, scrape in the cooled brown butter and add the brown sugar. Beat with an electric mixer on medium speed until light and fluffy (about 3-4 minutes).
  • Add eggs and extracts: Beat in the egg mixture until smooth, followed by the vanilla and almond extracts.
  • Incorporate dry ingredients: Alternately add the buttermilk and flour mixture, mixing on low speed just until combined. Be careful not to overmix.
  • Fold in whipped cream: In a separate bowl, beat the heavy whipping cream until medium peaks form. Gently fold into the batter until just combined.
  • Bake the cake: Pour the batter into the prepared cake pan, smoothing the top. Bake for 40-48 minutes, or until a toothpick inserted in the center comes out clean.
  • Cool and frost: Allow the cake to cool in the pan for 5 minutes, then invert onto a cooling rack. Let it cool completely before frosting with your Maple Miso Frosting and topping with chopped almonds.

Pro Tips for Success

To ensure your brown butter cake turns out perfectly, keep these expert tips in mind:

  • Use a light-colored pan: This allows you to monitor the browning process of the butter more easily.
  • Cool the butter completely: Make sure the brown butter is solid and at room temperature before adding it to the batter to prevent curdling.
  • Don’t overmix: Mix the batter just until combined to maintain a tender crumb.
  • Check for doneness: Use a toothpick to test the center; it should come out clean or with a few moist crumbs.
  • Let it cool completely: This is essential for the frosting to adhere properly and for the cake to slice neatly.
  • Experiment with flavor: Feel free to add citrus zest or spices to the batter for a personal twist.
  • Try different frostings: This cake pairs well with chocolate ganache or cream cheese frosting for varied tastes.
  • Storage matters: Keep the cake covered at room temperature to maintain moisture; it can last up to three days.

Common Mistakes and Troubleshooting

Even the best bakers make mistakes! Here’s how to avoid common pitfalls:

  • Dry cake: This can result from overbaking or not enough fat. Always check for doneness and measure ingredients accurately.
  • Dense texture: Overmixing can lead to a tough cake. Mix just until combined, and remember that lumps are okay!
  • Frosting issues: If your frosting is too runny, try chilling it in the fridge for a bit before spreading.
  • Cake sticking to the pan: Ensure you grease and flour the pan well, and don’t skip the parchment lining.

Variations to Try

Add your personal touch to this delightful butter cake with these variations:

  • Citrus Zest: Add the zest of 1 orange or lemon for a refreshing twist.
  • Chocolate Chip Brown Butter Cake: Fold in 1 cup of semi-sweet chocolate chips for a decadent addition.
  • Spiced Version: Consider adding a teaspoon of cinnamon or ginger for a warm, spiced flavor.
  • Nutty Delight: Mix in 1/2 cup of chopped walnuts or pecans for added texture and flavor.

Storage and Make-Ahead Instructions

Want to prepare ahead of time? Here’s how:

  • Make Ahead: You can prepare the cake batter and refrigerate it for up to 24 hours before baking.
  • Storage: The cake can be kept at room temperature in an airtight container for up to three days or in the refrigerator for about a week.
  • Freezing: Wrap the cooled cake tightly in plastic wrap and freeze for up to three months. Thaw in the fridge overnight before serving.

Comprehensive FAQ

Here are some frequently asked questions about this brown butter cake:

  • Can I use salted butter instead of unsalted? Yes, but reduce the added salt in the recipe by half.
  • What can I substitute for buttermilk? You can mix milk with a tablespoon of vinegar or lemon juice to create a buttermilk substitute.
  • How can I make this cake gluten-free? Substitute the all-purpose flour with a 1:1 gluten-free baking blend.
  • What if I don’t have maple syrup? Honey or agave nectar can be used as an alternative in the frosting.
  • Can I make this cake as cupcakes? Absolutely! Bake for 18-20 minutes in cupcake liners for individual servings.
  • How should I store leftover cake? Keep it covered at room temperature for up to three days or refrigerate for longer freshness.
  • Can I use other extracts? Yes, feel free to experiment with different extracts like coconut or hazelnut for unique flavors.
  • Is this cake suitable for special diets? You can adjust the recipe to be dairy-free by using plant-based butter and milk substitutes.

Nutritional Tips and Dietary Adaptations

Keeping health in mind? Here’s how to adapt this cake:

  • Reduce Sugar: You can cut the sugar by 25% without sacrificing flavor.
  • Whole Grain Option: Substitute half of the all-purpose flour with whole wheat flour for added fiber.
  • Lower Fat: Use unsweetened applesauce in place of some of the butter for a lower-fat version.
  • Vegan Option: Replace eggs with flaxseed meal (1 tablespoon mixed with 3 tablespoons of water) and use plant-based butter and milk.

Equipment Recommendations

Here’s what you’ll need for a smooth baking experience:

  • Light-colored saucepan: For browning the butter effectively.
  • Mixing bowls: A set of various sizes for mixing ingredients.
  • Electric mixer: For efficient mixing and to achieve that fluffy texture.
  • 8-inch round cake pan: Essential for baking the perfect cake.
  • Cooling racks: To cool the cake without trapping moisture.

Serving Suggestions

Once your cake is ready, here are some delightful ways to serve it:

  • Pair with coffee or tea: A slice of this cake alongside a warm beverage makes for a perfect afternoon treat.
  • Add fresh fruit: Serve with berries or a fruit compote for a refreshing contrast.
  • Whipped cream topping: A dollop of whipped cream enhances the cake’s richness.
  • Ice cream option: Serve warm slices with a scoop of vanilla or caramel ice cream for indulgence.

Conclusion

As we close our time in the kitchen, remember that baking is more than just following a recipe; it’s about creating moments of joy and love. This Brown Butter Cake, with its nostalgic flavors and versatile frosting, is a perfect centerpiece for any gathering. So gather your loved ones, share stories, and create new memories around this delightful cake. Happy baking, and may your kitchen always be filled with love and laughter!

Brown Butter Cake

Prep Time 30 minutes
Cook Time 45 minutes
Total Time 1 hour 15 minutes
Servings 8 slices
Calories 450
A rich and flavorful cake featuring nutty brown butter and a luscious frosting, perfect for special occasions or indulgent treats.

Ingredients

Butter

  • 8 tablespoons unsalted butter (113 grams)

Flour

  • 1 1/4 cups all-purpose flour (150 grams)
  • 1 teaspoon baking powder
  • 0.25 teaspoon baking soda
  • 0.75 teaspoon salt
  • 0.25 teaspoon nutmeg
  • 1 packet vanilla pudding mix (3.7 ounces)
  • 2 large eggs (100 grams)
  • 1 large egg white (35 grams)
  • 0.75 cup brown sugar (160 grams)
  • 0.75 cup buttermilk (185 grams)
  • 2 teaspoons vanilla extract (or vanilla bean paste)
  • 0.5 teaspoon almond extract (optional)
  • 0.25 cup heavy whipping cream (56 grams)

Frosting

  • Maple Miso Brown Butter Frosting
  • about 1/2 cup chopped roasted and salted almonds

Instructions 

  • Brown the butter in a light-colored pan until golden and nutty, then cool to solid.
  • Preheat oven to 350°F (176°C). Grease and line an 8-inch pan.
  • Mix dry ingredients; beat browned butter with sugars, then add eggs, vanilla, and almond extract. Alternate adding buttermilk and flour, then fold in whipped cream.
  • Pour batter into pan, bake for 40-48 minutes, then cool completely.
  • Frost with maple miso brown butter frosting and decorate with chopped almonds.

Notes

Ensure browned butter is cooled before mixing to prevent melting the batter.
Calories: 450kcal
Cost: $15
Course: Dessert
Cuisine: American
Keyword: Butter

Welcome to the Heart of Home Cooking

Gather ’round the table, friends! Today, we’re diving into a recipe that fills the home with warmth and love—a creamy high protein chicken bake that’s perfect for family gatherings or cozy dinners. This dish not only satisfies the hunger of your loved ones but also nourishes the soul with its delightful flavors and rich textures. Let’s explore how to create this comforting meal, packed with wholesome ingredients and heartfelt memories.

Why You’ll Love This Recipe

  • Wholesome Nutrition: This chicken bake is loaded with high protein ingredients that keep you feeling full and satisfied without compromising on taste.
  • Easy Preparation: With straightforward steps, this dish can be whipped up quickly, making it an ideal choice for busy weeknights.
  • Versatile Ingredients: Customize the recipe based on what’s in your pantry or your family’s preferences—substitutions are easy!
  • Perfect for Sharing: The recipe yields enough to feed a crowd, making it perfect for family dinners or gatherings with friends.
  • Comfort Food Appeal: With its creamy texture and savory flavor, this bake is the kind of dish that wraps you in a warm hug.

Ingredients You’ll Need

Let’s gather our ingredients to create this creamy high protein chicken bake. Here’s what you’ll need:

  • 2 pounds boneless, skinless chicken breasts, cut into large bite-sized pieces
  • 1 tablespoon extra-virgin olive oil
  • 1 1/2 teaspoons kosher salt
  • 1 teaspoon freshly ground black pepper
  • 1 teaspoon smoked paprika
  • 2 teaspoons garlic powder
  • 1 cup plain Greek yogurt
  • 8 ounces cream cheese, softened
  • 1 cup shredded mozzarella cheese
  • 1/2 cup grated Parmesan cheese
  • 2 cups chopped baby spinach
  • 2 tablespoons chopped fresh parsley

Feel free to make substitutions such as using low-fat Greek yogurt for a lighter option or adding other vegetables like bell peppers or mushrooms to enhance the dish.

Step-by-Step Cooking Instructions

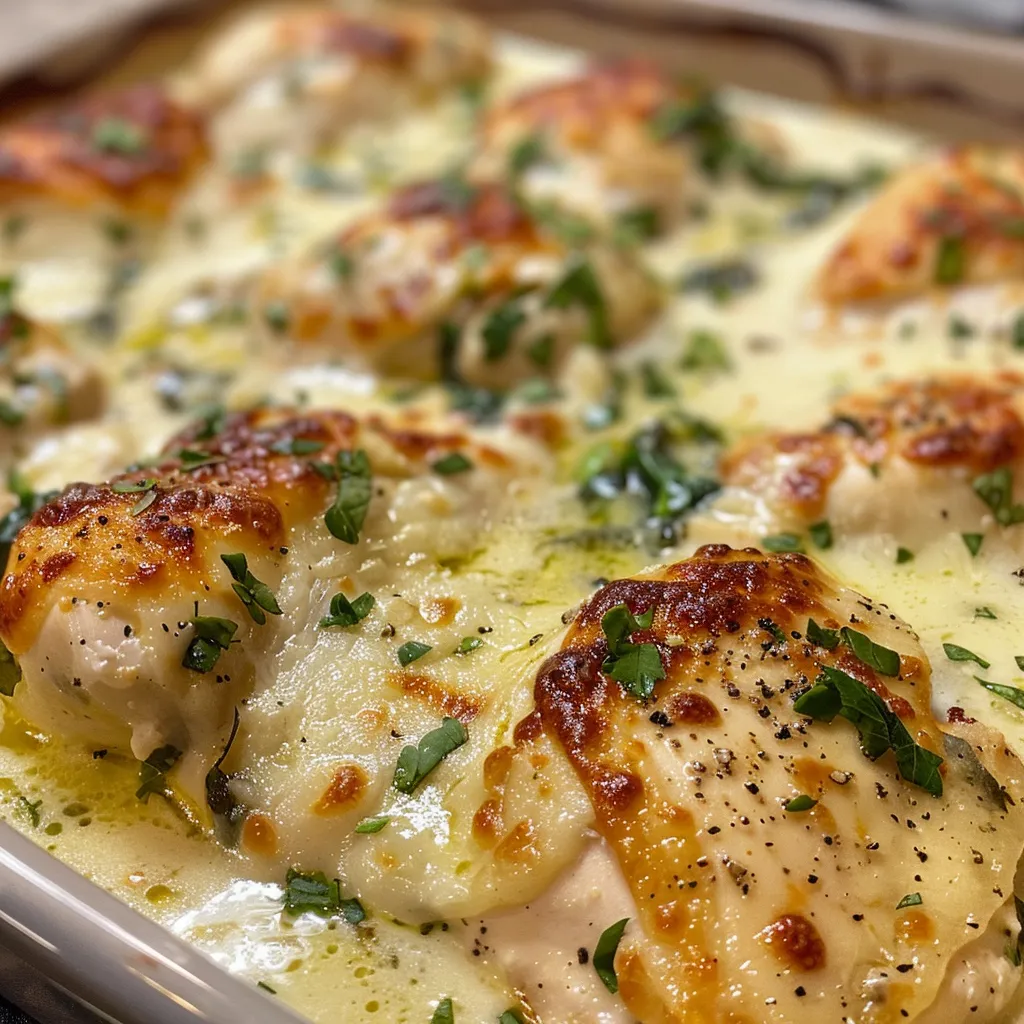
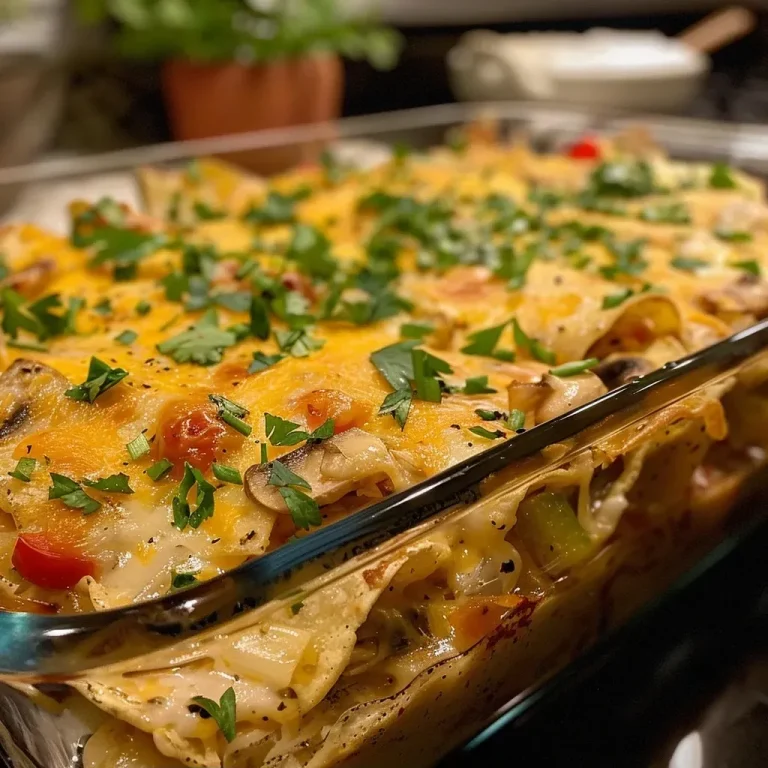
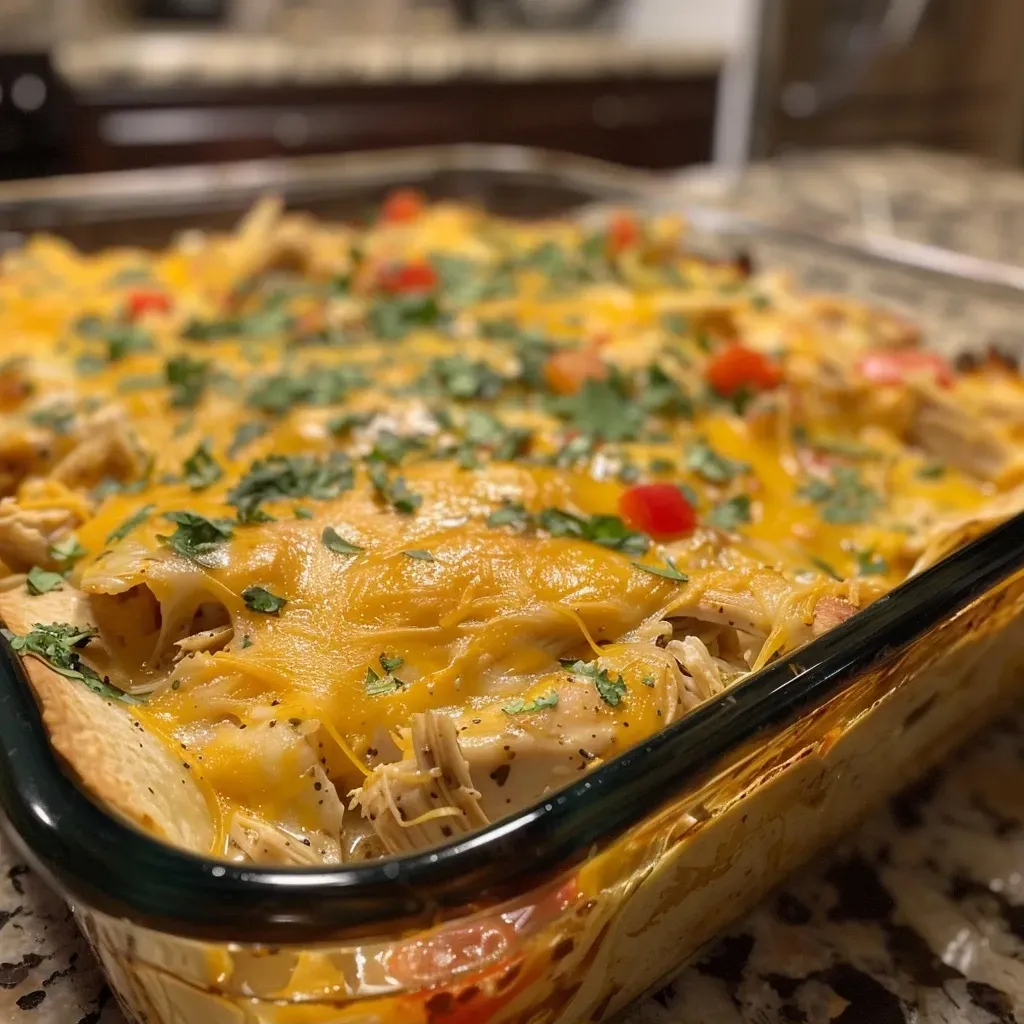
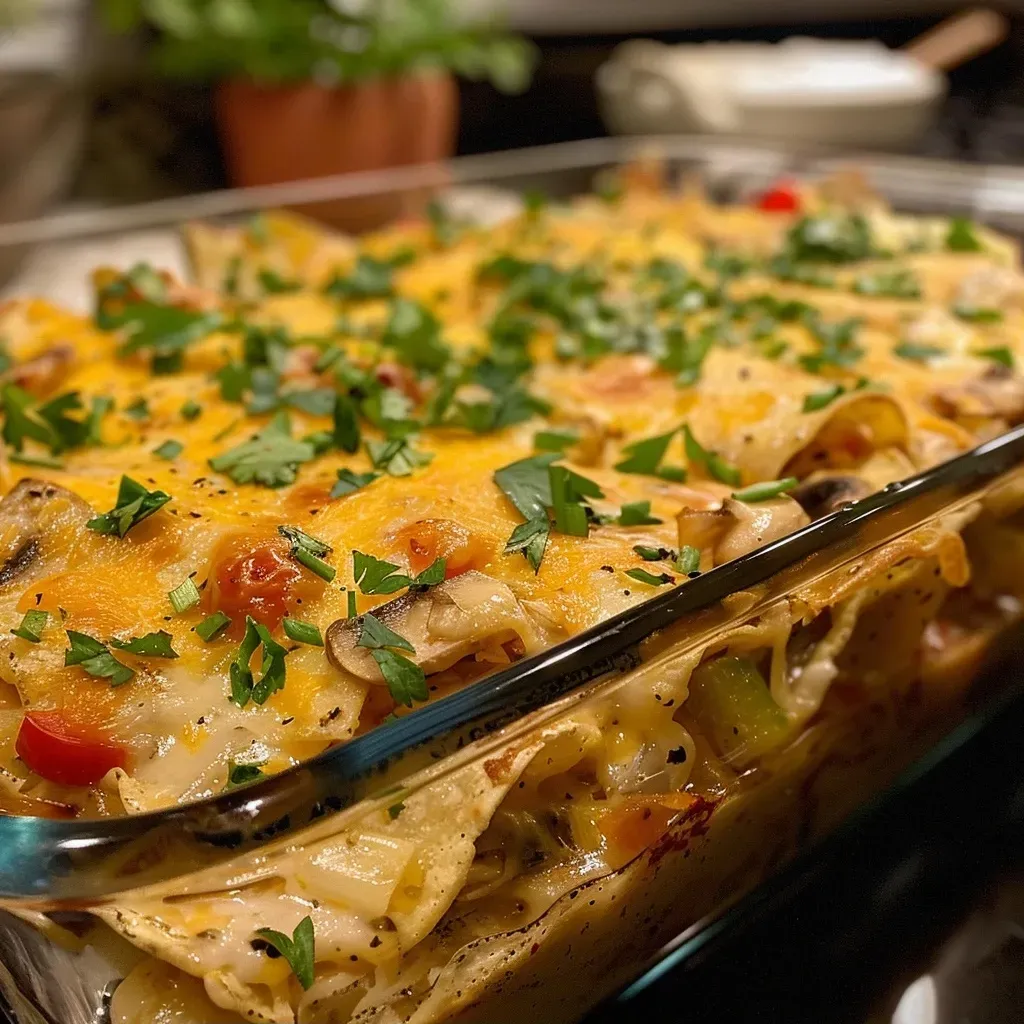
A close-up side view of a creamy chicken bake with melted cheese and spinach.

Now, let’s get cooking! Follow these simple steps to create your creamy chicken bake:

  • Pat the chicken pieces dry, then toss with olive oil, salt, black pepper, smoked paprika, and garlic powder until every surface is evenly coated. This step helps the seasoning stick and ensures a savory crust.
  • Heat a large skillet over medium-high heat and sear the chicken in batches until lightly browned on the outside, about 2 minutes per side. Remember, you’re not cooking it through; this quick sauté builds flavor.
  • In a mixing bowl, stir together the Greek yogurt, softened cream cheese, mozzarella, and Parmesan until mostly smooth. Fold in the chopped spinach for a fresh note that balances the richness of the dish.
  • Spread half of the cream mixture in a greased baking dish, arrange the chicken over it, then spoon the remaining cream mixture on top. Use a spatula to make sure every bite is coated.
  • Smooth the surface and sprinkle a bit of extra mozzarella or Parmesan over the top if desired. Cover loosely with foil to trap steam during baking.
  • Bake in a preheated oven at 400°F for 20-25 minutes, then uncover and bake for an additional 8-10 minutes until the top is golden and bubbly.
  • Let the casserole rest for 5-10 minutes before serving to allow the creamy sauce to settle.
  • Finish with chopped parsley for a pop of color and freshness before enjoying!

Pro Tips for Perfecting Your Bake

Here are some expert tips to elevate your chicken bake:

  • Don’t rush the searing: Take your time when searing the chicken to develop a nice golden crust, which adds depth to the dish.
  • Use room temperature cream cheese: This ensures a smooth and creamy sauce without lumps.
  • Let it rest: Allowing the dish to rest after baking prevents the creamy layer from spilling when you serve it.
  • Experiment with spices: Don’t hesitate to add herbs like thyme or oregano for added flavor.
  • Adjust the cheese: Use a mix of cheeses for different flavor profiles. Gouda or cheddar can add a unique twist!
  • Make it ahead: Prepare the dish a day in advance and store it in the refrigerator. Just pop it in the oven when ready to serve!
  • Don’t skip the spinach: It not only adds nutrients but also a lovely color contrast to the dish.
  • Pair it with a salad: A fresh salad on the side balances the rich flavors of the bake.

Common Mistakes and Troubleshooting

Even the best cooks can run into issues. Here are some common pitfalls and how to avoid them:

  • Dry chicken: Make sure not to overbake the chicken. Use a meat thermometer to check for an internal temperature of 165°F.
  • Watery sauce: If your sauce is too watery, ensure you’ve properly drained any excess moisture from the spinach before mixing it in.
  • Lumpy sauce: Blend the cream cheese and yogurt thoroughly to prevent lumps. Using a handheld mixer can help achieve smoothness.
  • Overseasoning: Taste as you go! It’s easy to overdo it with salt and spices, especially if you’re using pre-seasoned ingredients.

Delicious Variations to Try

This creamy high protein chicken bake is versatile! Here are some variations to keep things exciting:

  • Italian Style: Add Italian seasoning and sun-dried tomatoes for a Mediterranean twist.
  • Southwestern Kick: Incorporate black beans, corn, and taco seasoning for a spicy flair.
  • Mediterranean: Replace spinach with kale and add olives and feta cheese.
  • Veggie-Loaded: Toss in your favorite vegetables like zucchini or bell peppers for added nutrition.

Storage and Make-Ahead Instructions

This dish is perfect for meal prep! Here’s how to store and reheat:

  • Refrigerate: Store leftovers in an airtight container in the fridge for up to 3 days.
  • Freeze: This chicken bake can be frozen before baking. Wrap it tightly and store for up to 3 months. Thaw in the refrigerator before baking.
  • Reheat: Warm in the oven at 350°F until heated through, about 20-25 minutes.

Frequently Asked Questions

Here are some common questions about the creamy high protein chicken bake:

  • Can I use frozen chicken? Yes, just ensure it’s thawed completely before cooking.
  • What can I substitute for Greek yogurt? Sour cream or cottage cheese can work in a pinch.
  • How do I know when the chicken is done? Use a meat thermometer to check for an internal temperature of 165°F.
  • Can I make this dish vegetarian? Absolutely! Substitute the chicken with chickpeas or tofu.
  • What sides pair well with this bake? Serve it with a fresh salad, roasted vegetables, or quinoa for a complete meal.
  • Is this dish gluten-free? Yes, all ingredients listed are gluten-free. Always check labels for packaged items.
  • Can I use different cheeses? Yes, feel free to experiment with your favorite cheeses!
  • How long can leftovers be stored? Leftovers are best consumed within 3 days when refrigerated.

Nutritional Tips and Dietary Adaptations

This recipe is not only delicious but also nutritious! Here are some dietary adaptations:

  • Low-carb option: Substitute the chicken with cauliflower and use a low-carb flour alternative for thickening.
  • Higher fiber: Add beans or lentils to the mix for a fiber boost.
  • Dairy-free version: Use a dairy-free cream cheese and yogurt alternative.

Equipment Recommendations

To make this chicken bake, you’ll need:

  • A large skillet: For searing the chicken to perfection.
  • A mixing bowl: To combine all the creamy ingredients.
  • A baking dish: To hold the chicken bake while it cooks.
  • A meat thermometer: For checking the doneness of the chicken.

Serving Suggestions

To make your meal even more delightful, consider these serving suggestions:

  • Garnish with fresh herbs: A sprinkle of parsley or basil adds freshness.
  • Pair with a side salad: A light salad balances the richness of the bake.
  • Serve with crusty bread: Perfect for soaking up the creamy sauce.
  • Offer a selection of sauces: A drizzle of balsamic glaze or hot sauce can add a nice touch.

Conclusion: A Dish That Brings Us Together

In the end, this creamy high protein chicken bake isn’t just a recipe; it’s a love letter to the joy of sharing meals with family and friends. Each bite is a reminder of the warmth of home and the beauty of gathering around the table. So, gather your loved ones, serve this dish with a smile, and let the stories flow as you enjoy a meal made with love. Happy cooking!

Creamy High Protein Chicken Bake

Prep Time 15 minutes
Cook Time 30 minutes
Total Time 45 minutes
Servings 4 servings
Calories 650
A delicious and protein-packed chicken bake with creamy cheese and fresh spinach, perfect for a comforting dinner.

Ingredients

Protein

  • 2 pounds boneless, skinless chicken breasts (cut into large bite-size pieces)
  • 1 tablespoon extra-virgin olive oil
  • 1.5 teaspoons kosher salt
  • 1 teaspoon freshly ground black pepper
  • 1 teaspoon smoked paprika
  • 2 teaspoons garlic powder

Dairy & Cheese

  • 1 cup plain Greek yogurt
  • 8 ounces cream cheese, softened
  • 1 cup shredded mozzarella cheese
  • 1/2 cup grated Parmesan cheese

Vegetables

  • 2 cups chopped baby spinach
  • 2 tablespoons chopped fresh parsley

Instructions 

  • Toss chicken with olive oil, salt, pepper, paprika, and garlic powder. Sear in batches until lightly browned, about 2 minutes per side.
  • Mix Greek yogurt, cream cheese, mozzarella, Parmesan, and spinach until smooth. Spread half in a greased dish, add chicken, then top with remaining sauce.
  • Bake at 400°F (200°C) for 20-25 minutes, uncover and bake 8-10 minutes until golden and bubbly. Rest 5-10 minutes, garnish with parsley, then serve.

Notes

Ensure chicken reaches 165°F internally for safety.
Calories: 650kcal
Cost: $15
Course: Main Course
Keyword: bake, Chicken, High-Protein

The Heartwarming Magic of Berry Croissant Breakfast Bake

There’s something truly special about gathering around the breakfast table with family, sharing stories and laughter over a warm, delicious meal. The Berry Croissant Breakfast Bake is not just a recipe; it’s a nostalgic embrace that transports you to cozy mornings spent in the kitchen. This dish blends flaky croissants with juicy mixed berries, creating a soft, custardy delight that whispers love in every bite. Perfect for lazy weekends or festive brunches, this bake is a celebration of flavors and memories.

Why You’ll Love This Recipe

  • Effortless Preparation: With minimal prep time, this dish comes together in a snap, making it ideal for busy mornings or special occasions.
  • Flavorful Harmony: The combination of sweet berries and rich custard creates a burst of flavor that dances on your taste buds.
  • Make-Ahead Magic: Prepare it the night before, so you can simply pop it in the oven in the morning, letting the aroma fill your home.
  • Crowd-Pleaser: Whether for family gatherings or brunch with friends, this bake is sure to impress and satisfy everyone at the table.
  • Customizable Creations: This recipe serves as a wonderful base, allowing you to add your favorite fruits or flavors to make it your own.

Ingredients You’ll Need

Gathering the right ingredients is essential to crafting the perfect Berry Croissant Breakfast Bake. Here’s what you’ll need:

  • 6 large croissants, cut into pieces
  • 2 cups mixed berries (strawberries, blueberries, raspberries)
  • 4 large eggs
  • 1½ cups whole milk
  • ½ cup granulated sugar
  • 1 tsp vanilla extract
  • ½ tsp ground cinnamon
  • ¼ tsp salt
  • Powdered sugar (for topping)
  • Fresh mint (optional, for garnish)

Ingredient Breakdown & Substitutions

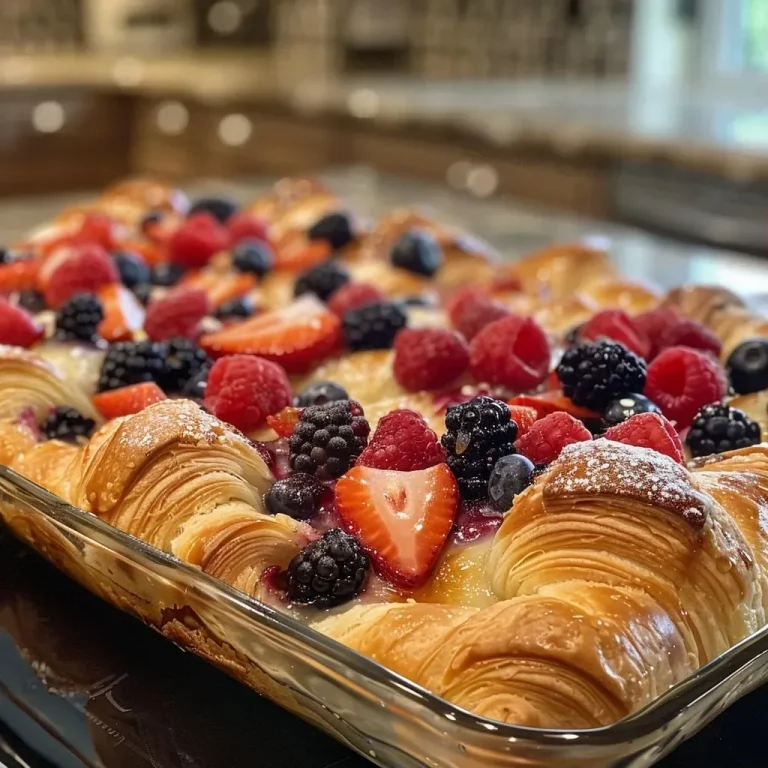
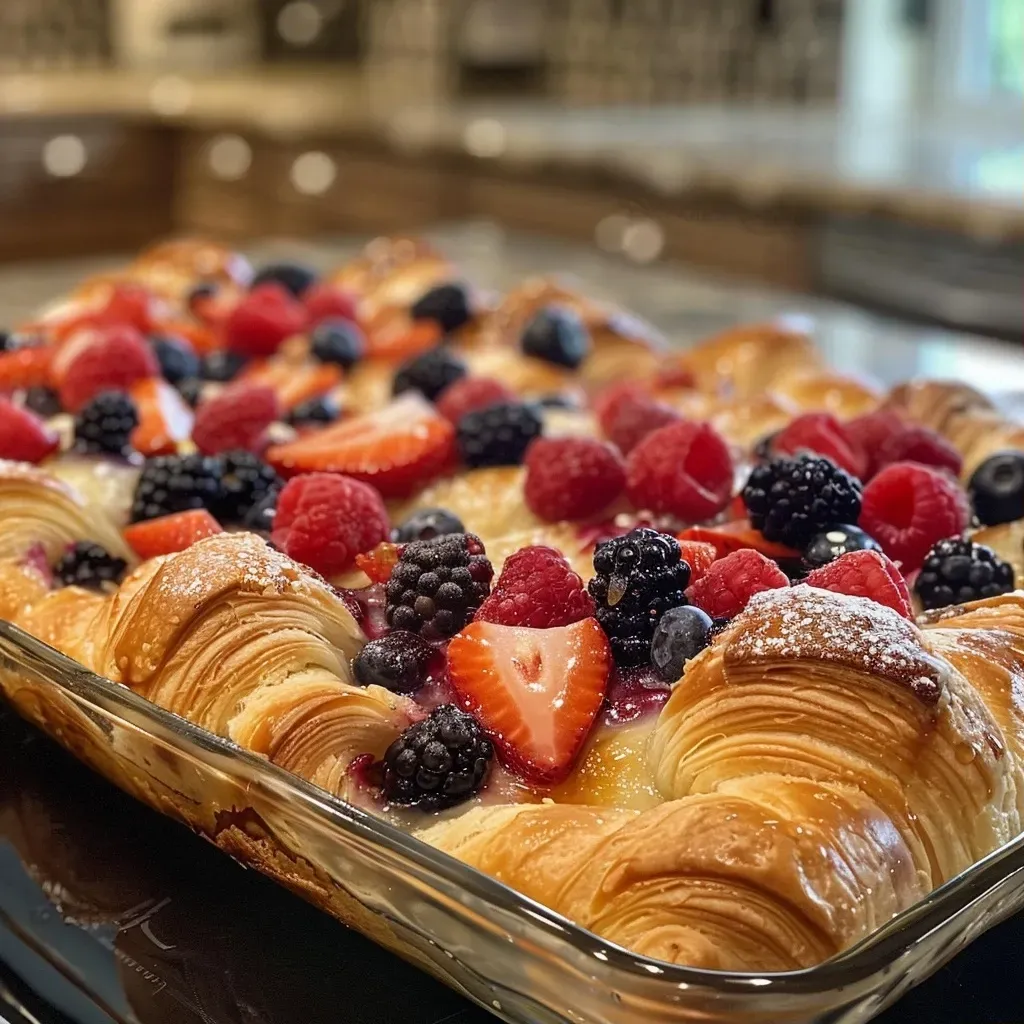
Close-up of a baked berry croissant dish with vibrant mixed berries and powdered sugar.

Understanding your ingredients can elevate your dish to new heights. Here’s a closer look:

  • Croissants: Day-old croissants work best for this recipe, absorbing the custard beautifully. You can use fresh ones if you prefer a flaky texture.
  • Mixed Berries: Feel free to use frozen berries without thawing them. They add a delightful burst of flavor. Alternatives include chopped apples or peaches for a seasonal twist.
  • Milk: Whole milk gives a rich flavor, but you can substitute with almond or oat milk for a dairy-free version.
  • Eggs: For a vegan option, replace eggs with a flaxseed mixture (1 tablespoon ground flaxseed + 3 tablespoons water per egg).

Step-by-Step Guide to Making Berry Croissant Breakfast Bake

Now that you have your ingredients ready, let’s dive into the steps to create this delightful bake:

  • Step 1: Preheat the Oven – Preheat your oven to 350°F (175°C) and grease a baking dish.
  • Step 2: Arrange the Croissants – Place croissant pieces evenly in the dish and scatter mixed berries generously on top.
  • Step 3: Prepare the Custard – In a bowl, whisk together eggs, milk, sugar, vanilla, cinnamon, and salt until smooth and well combined.
  • Step 4: Soak the Croissants – Pour the custard mixture evenly over the croissants and berries. Gently press down to ensure the croissants absorb the liquid well.
  • Step 5: Let it Rest – Allow the mixture to rest for 10-15 minutes for optimal soaking.
  • Step 6: Bake – Bake for 30-35 minutes until golden brown and set in the center.
  • Step 7: Cool and Serve – Let cool slightly, dust with powdered sugar, and garnish with fresh mint if desired.

Pro Tips for the Perfect Bake

  • Perfect Texture: For the best results, use stale croissants as they soak up the custard better, creating a rich texture.
  • Berry Bliss: Mix and match your berries according to what’s in season or your personal favorites.
  • Don’t Rush: Allow the bake to rest before cutting; this helps it hold its shape and ensures a creamy texture.
  • Experiment with Flavors: Add a splash of orange zest or almond extract to the custard for a unique twist.
  • Check for Doneness: Insert a toothpick in the center; it should come out clean when fully baked.
  • Leftovers Love: This dish is just as delicious the next day and can be reheated in the oven for a quick breakfast.
  • Freezing Option: You can freeze the unbaked casserole for up to a month; just thaw and bake as directed.
  • Serving Suggestions: Serve warm with a drizzle of maple syrup or a dollop of whipped cream for extra indulgence.

Common Mistakes & Troubleshooting

Even the best cooks make mistakes. Here are some common pitfalls and how to avoid them:

  • Too Dry: If your bake turns out dry, make sure to soak the croissants properly in the custard.
  • Overbaking: Keep an eye on the time; overbaking can lead to a rubbery texture. Check for doneness a few minutes early.
  • Uneven Baking: Rotate your dish halfway through baking to ensure even cooking.
  • Not Enough Flavor: Adjust sugar and spices according to your taste; feel free to add more vanilla or cinnamon.

Variations to Try

Mix things up with these creative variations:

  • Chocolate Lover’s Delight: Add chocolate chips or chunks to the custard for a decadent twist.
  • Tropical Escape: Substitute berries with pineapple and mango for a tropical flavor.
  • Nutty Goodness: Incorporate chopped nuts like pecans or almonds for added crunch.
  • Savory Spin: Swap berries for sautéed spinach and cheese for a savory breakfast bake.

Storage and Make-Ahead Instructions

Planning ahead is key to a stress-free breakfast:

  • Make-Ahead: Assemble the bake the night before and store it covered in the refrigerator. Bake in the morning for a warm, fresh dish.
  • Refrigeration: Store leftovers in an airtight container in the refrigerator for up to 3 days.
  • Freezing: Freeze unbaked or baked portions for up to 2 months. Thaw in the refrigerator before reheating.

Frequently Asked Questions

  • Can I prepare it ahead of time? Yes, you can assemble it the night before and bake it fresh in the morning.
  • What type of croissants work best? Day-old croissants provide the best texture, but fresh works too.
  • Can I use non-dairy milk? Absolutely! Almond or oat milk are great substitutes.
  • How do I know it’s fully baked? The center should be set, and a toothpick should come out clean.
  • Can I freeze leftovers? Yes, freeze leftovers for up to 2 months, and thaw before reheating.
  • How do I serve this dish? Serve warm, dusted with powdered sugar and garnished with fresh mint.
  • Can I add other fruits? Yes, feel free to use any fruits you love or have on hand.
  • Is this recipe customizable? Definitely! Experiment with flavors and ingredients to suit your taste.

Nutritional Tips and Dietary Adaptations

Keeping health in mind, here are some tips:

  • Reduce Sugar: Consider using a sugar substitute or reducing the amount for a healthier version.
  • Whole Grains: Use whole grain croissants for added fiber and nutrients.
  • Protein Boost: Incorporate protein powder into the custard for an extra boost.

Equipment Recommendations

To make your cooking experience smooth, here’s what you’ll need:

  • Baking Dish: A 9×13 inch dish is perfect for this recipe.
  • Whisk: A good whisk helps blend the custard smoothly.
  • Measuring Cups: For accurate ingredient measurements.
  • Spatula: To gently mix and serve the bake.

Serving Suggestions

To elevate your breakfast experience:

  • Garnish with Fresh Mint: Adds a refreshing touch that complements the berries.
  • Serve with Maple Syrup: A drizzle of syrup enhances the sweet flavors.
  • Pair with Coffee or Tea: A warm beverage completes the cozy breakfast vibe.

Conclusion

Creating a Berry Croissant Breakfast Bake is more than just cooking; it’s about crafting a heartfelt experience for you and your loved ones. As you gather around the table, savoring each bite, remember that the kitchen is a place of love, tradition, and connection. So, roll up your sleeves, embrace the joy of cooking, and let this delightful dish become part of your family’s cherished memories.

Berry Croissant Breakfast Bake

Prep Time 15 minutes
Cook Time 35 minutes
Total Time 50 minutes
Servings 6 servings
Calories 350
A delicious and easy breakfast casserole combining flaky croissants, fresh berries, and a sweet custard, perfect for brunch or weekend mornings.

Ingredients

Croissants

  • 6 large croissants (cut into pieces)
  • 2 cups mixed berries (strawberries, blueberries, raspberries)

Eggs

  • 4 large eggs

Milk

  • 1.5 cups whole milk
  • 0.5 cup granulated sugar
  • 1 tsp vanilla extract
  • 0.5 tsp ground cinnamon
  • 0.25 tsp salt

Powdered sugar

  • for topping Powdered sugar (for dusting)

Fresh mint

  • optional Fresh mint (for garnish)

Instructions 

  • Preheat oven to 350°F (175°C) and grease a baking dish.
  • Arrange croissant pieces and berries in the dish, then whisk eggs, milk, sugar, vanilla, cinnamon, and salt. Pour over and let soak for 10–15 minutes.
  • Bake for 30–35 minutes until golden and set. Cool slightly, dust with powdered sugar, and garnish with mint if desired.

Notes

This breakfast bake is perfect for a weekend brunch and can be customized with your favorite berries and toppings.
Calories: 350kcal
Cost: $15
Course: Breakfast
Cuisine: American
Keyword: Berries, Breakfast, Croissants

Welcome to a delightful journey that brings together the crispness of fresh apples, the richness of decadent caramel, and the joy of shared moments. In this recipe, we’ll explore how to craft Caramel Apple Nachos that are not just a treat for the taste buds but also a celebration of togetherness. Imagine gathering around the table with family and friends, laughter echoing as you dig into this colorful and scrumptious dish. These nachos are a perfect blend of sweetness and crunch, making them an ideal snack for any gathering!

Why You’ll Love This Recipe

This isn’t just any recipe; it’s a heartfelt creation that will have you reminiscing about cozy family gatherings. Here are just a few reasons why you’re going to adore these Caramel Apple Nachos:

  • Easy to Prepare: With just a few simple steps, you can whip up these nachos in no time, making them perfect for spontaneous gatherings or a fun family night.
  • Customizable Toppings: You can personalize your nachos with a variety of toppings, ensuring that everyone at your table finds something they love.
  • Visually Appealing: The vibrant colors of the apples, caramel, and toppings create a stunning presentation that’s sure to impress your guests.
  • Perfect for All Ages: This dish is a hit with kids and adults alike! It’s a fun way to encourage your little ones to enjoy fresh fruit.
  • Memorable Moments: Serving these nachos is about more than just the food; it’s about creating moments and memories with loved ones.

Ingredients Needed for Caramel Apple Nachos

Let’s dive into the delightful components of this recipe. Here’s what you’ll need:

  • 2 crisp apples: Choose your favorites, like Granny Smith or Honeycrisp, for the ideal balance of sweet and tart.
  • 1/2 lemon: Fresh lemon juice helps keep the apples from turning brown.
  • 1/3 cup caramel sauce: You can use store-bought or homemade—either will do!
  • 1/3 cup white chocolate chips: These add a creamy sweetness that complements the caramel perfectly.
  • 2 tablespoons mini chocolate chips: For a delightful crunch and extra sweetness.
  • 2 tablespoons Heath toffee bits: These provide a toasty flavor that enhances your nacho experience.
  • 2 tablespoons salted peanuts: A touch of saltiness balances the sweetness.
  • 2 tablespoons mini M&Ms: Because who doesn’t love a pop of color and chocolate?
  • 2 teaspoons sprinkles: Just for fun and a festive touch!

How to Make Caramel Apple Nachos

Now that we have everything ready, follow these simple steps to create your Caramel Apple Nachos:

  1. Cut the apples into slices, adding them to a medium bowl. Squeeze the lemon juice over the top and toss gently to prevent browning.
  2. Arrange the apple slices on a plate like a beautiful canvas.
  3. Drizzle the caramel sauce and melted white chocolate over the apple slices, making sure to cover them generously.
  4. Top the caramel apple nachos with your choice of toppings: mini chocolate chips, toffee bits, chopped salted peanuts, mini M&Ms, and sprinkles for that extra flair.
  5. Serve immediately for the best experience. Any leftovers can be stored in the fridge for a day or two, but keep in mind that the apples will turn brown and some toppings may soften.

Pro Tips for Perfect Caramel Apple Nachos

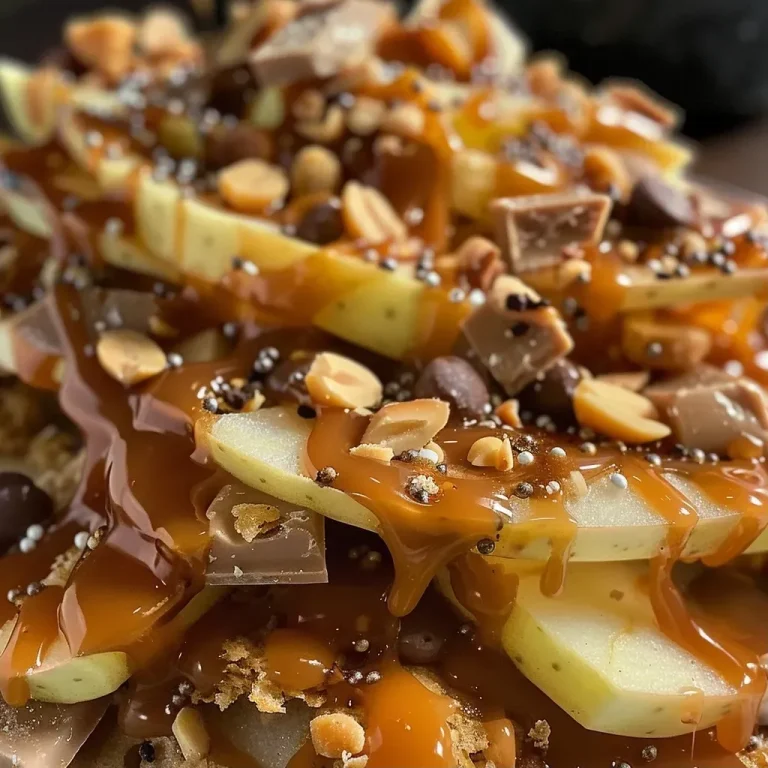
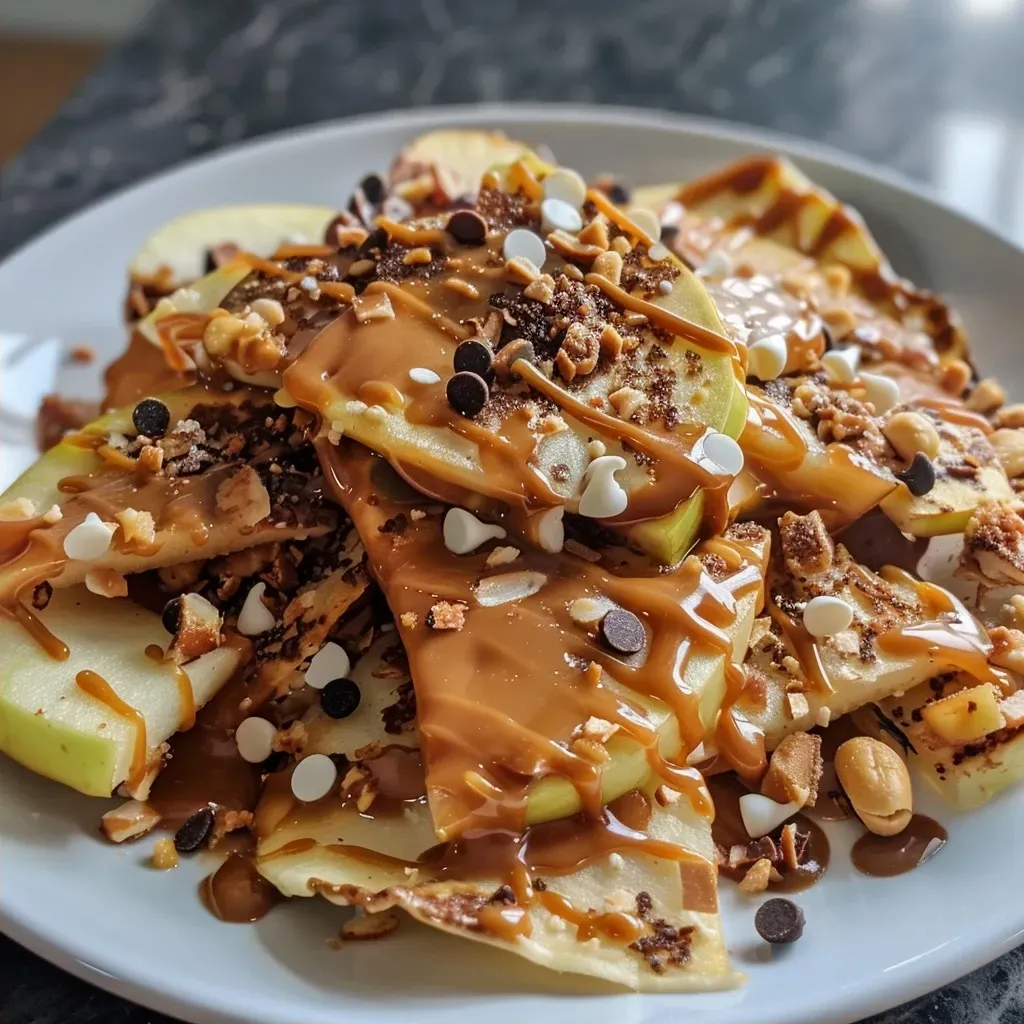
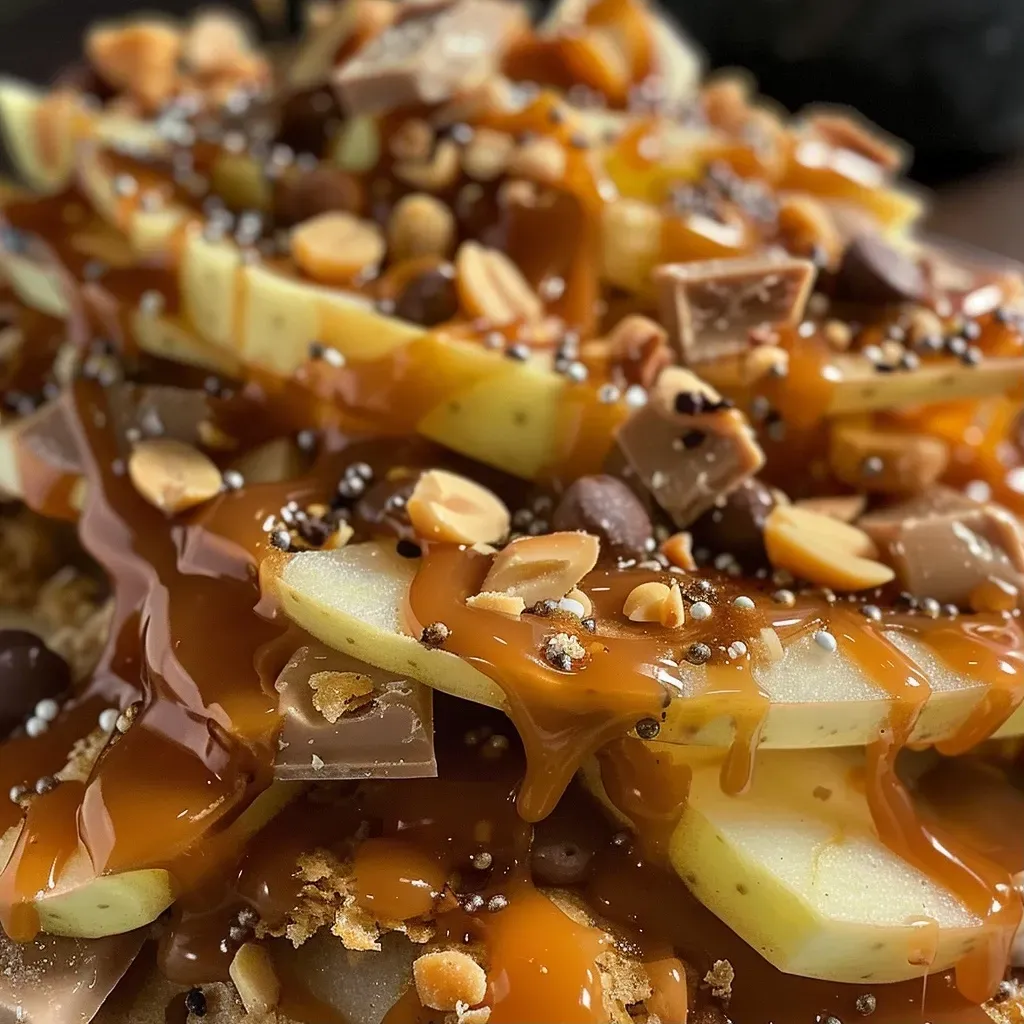
Close-up view of Caramel Apple Nachos drizzled with caramel and topped with chocolate chips and peanuts.

Here are some expert insights to take your nacho game to the next level:

  • Choose the Right Apples: Opt for tart apples like Granny Smith for a nice contrast to the sweetness of the caramel.
  • Keep Apples Fresh: Remember to toss your apple slices in lemon juice to prevent browning.
  • Warm Your Caramel: If using store-bought caramel, warm it slightly for easier drizzling.
  • Layer Smartly: Start with a base of apples, then layer on the caramel and toppings to create a beautiful presentation.
  • Mix Up the Toppings: Try adding coconut flakes, crushed graham crackers, or even some chopped dark chocolate for variety.
  • Let Kids Get Creative: Set up a topping bar and let your kids build their own nachos for a fun, interactive snack.
  • Serve Quickly: These nachos are best enjoyed fresh, so serve them right after assembling!
  • Use a Large Plate: This gives you room to arrange everything nicely and makes it easy to share.

Common Mistakes and Troubleshooting

Even the best of us make mistakes in the kitchen. Here are some common pitfalls and how to avoid them:

  • Apples Turning Brown: If you forget to use lemon juice, your apples may brown quickly. Always drizzle lemon juice over your slices.
  • Too Much Caramel: While caramel is delicious, too much can make the nachos soggy. Drizzle sparingly!
  • Soft Toppings: If you prepare in advance, some toppings may lose their crunch. Add delicate toppings like sprinkles last.

Variations on Caramel Apple Nachos

Get creative! Here are some fun variations to try:

  • Chocolate Lovers: Use dark chocolate chips and chocolate syrup for a richer flavor.
  • Nutty Delight: Add almond slices or walnuts for an extra crunch.
  • Fall Spice: Sprinkle cinnamon or pumpkin spice over the apples for a seasonal twist.
  • Peanut Butter Drizzle: Replace some of the caramel with warm peanut butter for a nutty flavor.

Storage and Make-Ahead Instructions

To enjoy these nachos later:

  • Store Leftovers: Keep any leftover nachos in an airtight container in the fridge for up to two days. However, the apples will brown and some toppings may soften.
  • Make Ahead: You can prepare the apple slices and lemon juice mixture ahead of time and store them in the fridge until you’re ready to assemble.

Frequently Asked Questions (FAQs)

Here are some questions I often hear about Caramel Apple Nachos:

  • Can I use different types of apples? Absolutely! Any apple you enjoy can be used. Just remember that the tartness balances the sweetness of the caramel.
  • How long can I store leftovers? They can be stored for up to two days in the fridge; however, they are best enjoyed fresh.
  • What toppings are best? It really depends on your taste! Some favorites include chocolate chips, nuts, and sprinkles.
  • Can I make these vegan? Yes! Use vegan caramel and chocolate alternatives.
  • What if I don’t have caramel sauce? You can melt down caramel candies with a little cream or milk as a substitute.
  • How do I keep my apples from browning? Squeeze fresh lemon juice over the apple slices as you cut them.
  • Is this recipe kid-friendly? Yes, kids love building their own nachos and choosing their toppings!
  • Can I prepare this in advance? You can prepare the apple slices in advance, but it’s best to assemble just before serving for optimal freshness.

Nutritional Tips and Dietary Adaptations

While these nachos are a delightful treat, here are some ways to make them more nutritious:

  • Choose Whole Apples: Eating the skin adds fiber and nutrients, so keep the skin on!
  • Use Dark Chocolate: Opt for dark chocolate chips for a healthier option with less sugar.
  • Limit the Caramel: Use less caramel to reduce sugar intake and still enjoy the sweetness.
  • Top with Nuts: Adding nuts not only enhances flavor but also provides healthy fats and protein.

Equipment Recommendations

Here’s a list of helpful tools to make your apple nachos:

  • Sharp Knife: For evenly slicing apples.
  • Cutting Board: A sturdy board makes the slicing process easier.
  • Measuring Cups: For precise ingredient measurements.
  • Microwave-Safe Bowl: If you’re melting chocolate or caramel, a microwave-safe bowl is essential.

Serving Suggestions

These nachos are perfect for any occasion! Here are some ideas for serving:

  • Game Day Snacks: Serve them during a game for a fun twist on traditional snacks.
  • Birthday Parties: They make a colorful addition to any dessert table.
  • Family Gatherings: A great way to bring everyone together over a shared treat.
  • Movie Nights: Enjoy them as a sweet treat while you snuggle up for a film.

In conclusion, Caramel Apple Nachos are more than just a snack; they’re a way to bring people together, share stories, and create lasting memories. As you gather around the table with your loved ones, may each bite remind you of the warmth and joy that cooking and sharing food can bring. So grab those apples, let the caramel flow, and get ready to celebrate the sweet moments in life!

Caramel Apple Nachos

Prep Time 10 minutes
Cook Time 5 minutes
Total Time 15 minutes
Servings 4 servings
Calories 250
A fun and delicious treat featuring fresh apple slices topped with caramel and chocolate, perfect for sharing.

Ingredients

Fruits

  • 2 pieces apple (sliced)
  • 0.5 lemon lemon (for juice)
  • 0.33 cup caramel sauce
  • 0.33 cup white chocolate chips
  • 2 tablespoons mini chocolate chips
  • 2 tablespoons Heath toffee bits
  • 2 tablespoons salted peanuts
  • 2 tablespoons mini M&Ms
  • 2 teaspoons sprinkles

Instructions 

  • Slice apples, squeeze lemon juice over, and toss to prevent browning.
  • Arrange apple slices on a plate and drizzle with caramel and melted chocolate.
  • Top with desired toppings like mini chocolate chips, toffee bits, peanuts, M&Ms, and sprinkles. Serve immediately.

Notes

Enjoy immediately for best texture and flavor.
Calories: 250kcal
Cost: $10
Course: Dessert
Keyword: apple

Indulge in the Comfort of an Apple Galette

When the crisp air of fall arrives, there’s nothing quite like the aroma of freshly baked apple desserts wafting through the home. The Apple Galette not only warms the heart but also wraps you in sweet memories of family gatherings and cherished moments shared around the dinner table. This rustic pastry, with its flaky crust and tender apple filling, is an invitation to enjoy the simple joys of life. Let’s dive into this delightful recipe that combines tradition with a sprinkle of love, making it a perfect treat for any occasion.

Why You’ll Love This Recipe

This Apple Galette is not just another dessert; it’s a celebration of flavors and memories. Here are a few reasons why this recipe will become a favorite:

  • Easy and forgiving: The galette’s rustic nature means you don’t need to worry about perfecting a pie crust. It’s all about the love you put in.
  • Versatile ingredients: Use seasonal apples or swap in your favorite fruits to create variations that suit your taste.
  • Salted caramel touch: The addition of salted caramel elevates the dessert, adding a delightful contrast to the sweet apples.
  • Perfect for sharing: This recipe makes a generous galette, ideal for family gatherings or cozy nights in with friends.
  • Make-ahead friendly: Prepare the crust and filling in advance, and assemble it just before baking for fresh-out-of-the-oven goodness.

Ingredient Breakdown

Gather the following ingredients to create your Apple Galette:

  • 200g de açúcar: For a sweet base that caramelizes beautifully.
  • 50g manteiga: Adds richness and flavor to the filling.
  • 10ml creme de leite: Provides a creamy texture to the caramel.
  • 1/2 colher de chá de sal: Balances the sweetness.
  • 190g farinha: The foundation of your flaky dough.
  • 50g açúcar refinado: A touch of sweetness for the crust.
  • 115g manteiga gelada: Essential for a tender, flaky crust.
  • 60ml água gelada: Helps bring the dough together without melting the butter.
  • 1 ovo para pincelar: Gives the crust a beautiful golden color.
  • 3 maçãs grandes (usei gala): The star of the dish—choose your favorite variety!
  • Limão: Adds brightness and prevents the apples from browning.

Instructions to Create Your Galette

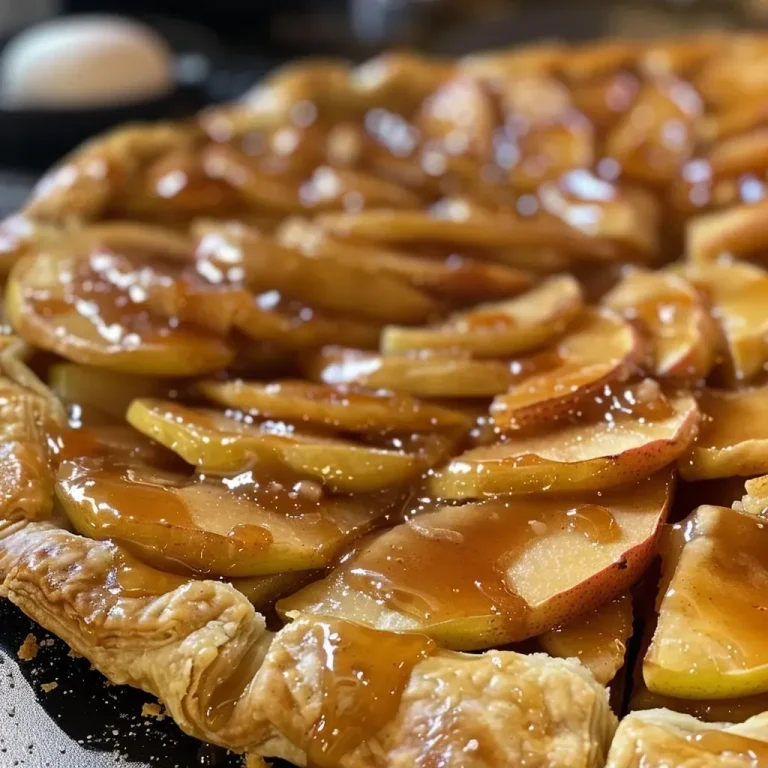
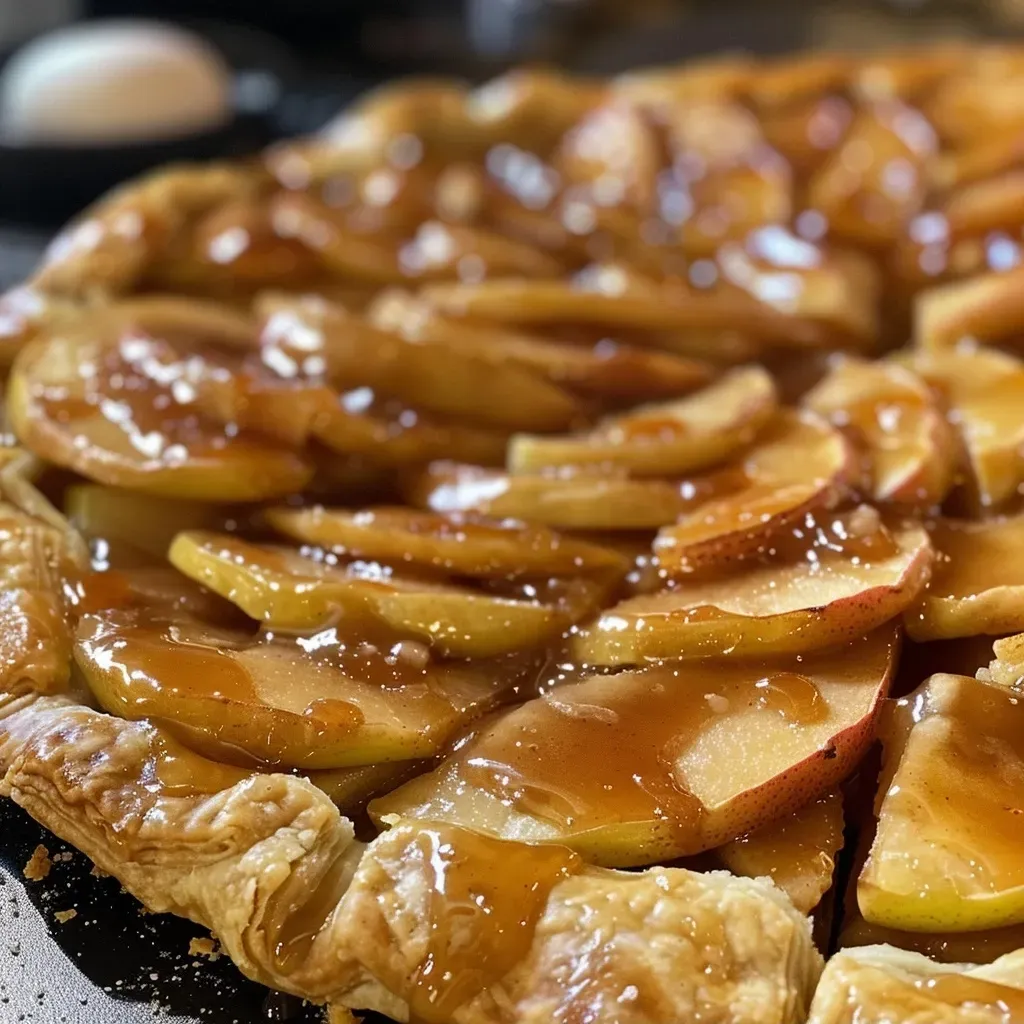
Close-up view of a golden Apple Galette drizzled with salted caramel.

Now that you have your ingredients ready, follow these steps to craft your Apple Galette:

  1. Prepare the salted caramel: In a heavy-bottomed saucepan, melt the sugar over medium heat until it turns a deep amber color. Remove from heat and stir in the butter until melted. Add the cream and salt, mixing well with a whisk. Allow to cool and store in a sealed jar for up to 15 days in the fridge.

  2. Make the dough: In a mixing bowl, whisk together the flour, refined sugar, and salt. Add the cold butter in small pieces and work it with your fingertips until the mixture resembles coarse crumbs. Gradually add cold water until a shaggy dough forms. Shape into a disc, wrap in plastic, and refrigerate for at least 1 hour.

  3. Prepare the apple filling: Peel, core, and slice the apples thinly. In a large bowl, combine the apples with sugar, flour, and lemon juice. Let it sit for about 15 minutes to draw out moisture.

  4. Assemble the galette: Roll out the chilled dough on a lightly floured surface into a round shape. Transfer to a parchment-lined baking sheet. Arrange the apple filling in the center, leaving a border. Fold the edges of the dough over the apples. Drizzle with a little salted caramel, brush the edges with beaten egg, and sprinkle with sugar.

  5. Bake: Chill the assembled galette in the fridge while preheating the oven to 190°C (375°F). Bake for about 45 minutes, or until the crust is golden brown and the apples are tender. Allow to cool for 20 minutes before serving.

Pro Tips for a Perfect Galette

Here are some expert insights to ensure your Apple Galette turns out beautifully:

  • Use chilled ingredients: Keep your butter and water cold to achieve a flaky crust.
  • Don’t skip the chilling: Chilling the dough helps maintain its structure during baking.
  • Experiment with spices: Add cinnamon or nutmeg for an extra layer of flavor.
  • Choose the right apples: Firm varieties like Granny Smith or Honeycrisp hold their shape well during baking.
  • Brush with cream: For a richer glaze, consider brushing with cream instead of an egg wash.
  • Adjust sweetness: Taste your apple filling before baking and adjust sugar based on the apple variety.
  • Serve warm: This galette is best enjoyed warm, drizzled with salted caramel.
  • Store leftovers properly: Cover with plastic wrap and store in the fridge for up to 3 days.

Common Mistakes & Troubleshooting

Even seasoned bakers can run into hurdles. Here are some common mistakes and how to avoid them:

  • Overmixing the dough: This can lead to a tough crust. Mix just until combined.
  • Watery filling: Make sure to drain excess liquid from the apples before baking.
  • Burning the edges: If the crust edges brown too quickly, cover them with foil during baking.
  • Crust too thick or thin: Aim for about 1/8 inch thickness for even baking.

Variations to Try

Feel free to get creative with these variations:

  • Mixed Berry Galette: Substitute apples with a mix of berries for a vibrant twist.
  • Peach Galette: Use ripe peaches in place of apples for a summery dessert.
  • Pecan Topping: Add chopped pecans for a nutty crunch on top of the apples.
  • Spiced Pear Galette: Swap apples for pears and add cinnamon for a cozy flavor.

Storage & Make-Ahead Instructions

To enjoy this galette even longer, follow these storage tips:

  • Storing leftovers: Keep in an airtight container in the fridge for up to 3 days.
  • Freezing: You can freeze the unbaked assembled galette for up to 2 months. Simply bake from frozen, adding extra time.
  • Make-ahead crust: Prepare and refrigerate the dough up to 2 days in advance.

Frequently Asked Questions

Here are some common queries about making an Apple Galette:

  • Can I use a different type of apple? Yes! Try mixing different varieties for added flavor.
  • How do I store leftover galette? Cover it and store in the fridge for up to 3 days.
  • Can I make this gluten-free? Absolutely! Substitute the flour with a gluten-free blend.
  • What if my caramel hardens? Gently reheat it with a splash of cream to soften.
  • Can I add nuts? Yes! Chopped walnuts or pecans can add a nice crunch.
  • How can I make it vegan? Substitute butter with vegan butter and use flax egg for brushing.
  • What’s the best way to serve it? Serve warm with vanilla ice cream or whipped cream.
  • How do I prevent a soggy crust? Make sure to drain the apple filling well before assembling.

Nutritional Tips & Dietary Adaptations

For those mindful of their dietary choices:

  • Lowering sugar: Reduce the sugar in the filling or use a natural sweetener.
  • Increased fiber: Add oats to the crust for added texture and nutrition.
  • Lower fat options: Use Greek yogurt as a substitute for some of the butter in the filling.

Essential Equipment Recommendations

To make your baking experience smooth, consider having these tools on hand:

  • Mixing bowls: For combining ingredients.
  • Pastry cutter: Helps achieve a flaky dough.
  • Rolling pin: For rolling out the dough evenly.
  • Baking sheet: A sturdy, flat surface for even heat distribution.
  • Parchment paper: Prevents sticking and makes cleanup a breeze.

Serving Suggestions

Serve your Apple Galette warm, perhaps with:

  • Vanilla ice cream: The creamy sweetness complements the caramel perfectly.
  • Whipped cream: A light, airy topping balances the richness.
  • Extra caramel drizzle: A touch more for those who crave sweetness.
  • Chopped nuts: A sprinkle of toasted nuts adds both flavor and crunch.

Conclusion: A Slice of Home

As you savor each bite of this Apple Galette, let it remind you of the beauty of homemade food and the love that goes into it. Whether shared with family during a festive gathering or enjoyed solo with a cup of tea, this recipe is more than just a dessert—it’s a hug baked into a crust. So roll up your sleeves, embrace the delightful chaos of the kitchen, and create a galette that tells your own sweet story.

Galette de maçã com caramelo salgado

Prep Time 30 minutes
Cook Time 45 minutes
Total Time 1 hour 15 minutes
Servings 8 porções
Calories 350
Uma deliciosa torta de maçã com crosta crocante e caramelo salgado, perfeita para uma sobremesa especial.

Ingredients

Caramelo salgado

  • 200 g açúcar
  • 50 g manteiga
  • 10 ml creme de leite
  • 0.5 colher de chá sal (ou a gosto)

Massa

  • 190 g farinha
  • 50 g açúcar refinado
  • 115 g manteiga gelada
  • 60 ml água gelada

Recheio de maçã

  • 3 unidades maçãs grandes (usei gala)
  • 50 g açúcar refinado
  • 12 g farinha
  • 1 unidade limão

Pincel e cobertura

  • 1 ovo ovo para pincelar
  • açúcar cristal açúcar cristal para polvilhar

Instructions 

  • Derreta o açúcar até formar um caramelo âmbar, adicione a manteiga e misture até derreter. Acrescente o creme e o sal, reserve.
  • Misture farinha, açúcar e sal. Adicione a manteiga gelada e misture até obter uma farofa. Acrescente água aos poucos até formar uma massa esfarelada, modele em disco, embale e refrigere por 1 hora.
  • Descasque e corte as maçãs em fatias finas, misture com açúcar, farinha e limão, deixe descansar 15 minutos.
  • Abra a massa, coloque na forma, distribua as maçãs, dobre as bordas, pincele ovo, polvilhe açúcar e refrigere enquanto aquece o forno a 190°C por 20 minutos.
  • Asse por 45 minutos até dourar, deixe esfriar 20 minutos, sirva com o caramelo restante.

Notes

Para um toque extra, polvilhe açúcar cristal antes de assar.
Calories: 350kcal
Cost: $15
Course: sobremesa
Cuisine: francesa
Keyword: maçã

Welcome to King Ranch Chicken Casserole: A Heartfelt Family Favorite

Gather around the table as we dive into the rich, comforting world of King Ranch Chicken Casserole, a dish that brings warmth and nostalgia to every family gathering. This delightful casserole is not just a meal; it’s a tradition, a way to connect with loved ones, and a celebration of flavors that echo through generations. Whether you’re a seasoned cook or just stepping into the kitchen, this recipe will guide you through creating a dish that’s as memorable as the stories shared around the dinner table.

Why You’ll Love This Recipe

There’s something truly special about King Ranch Chicken Casserole. Here are just a few reasons why this dish will steal your heart:

  • Easy to Prepare: With simple ingredients and straightforward steps, you’ll have this casserole ready to bake in no time, making it perfect for busy weeknights.
  • Comforting Flavors: The combination of creamy soups, seasoned chicken, and gooey cheese creates a comfort food experience that warms the soul.
  • Versatile Dish: You can customize this recipe with your favorite ingredients or what you have on hand, making it a flexible option for any family preferences.
  • Great for Leftovers: This casserole tastes even better the next day, making it a fantastic choice for meal prep or potlucks.
  • Family-Friendly: Its delicious Tex-Mex flavors appeal to both kids and adults, making it an instant hit at any gathering.

Ingredients Breakdown

Let’s take a closer look at the ingredients that make this casserole so special, along with some tips on substitutions.

  • 3 teaspoons olive oil: Use extra virgin for added flavor, or substitute with vegetable oil if needed.
  • 1 cup chopped sweet yellow onion: This adds sweetness and depth; you could also use a white onion or shallots in a pinch.
  • 1 chopped bell pepper: Any color works well; red, yellow, or green adds a touch of brightness.
  • 10.5 ounces cream of chicken soup: For a lighter option, you could use cream of mushroom soup instead, or make your own from scratch.
  • 10.5 ounces cream of mushroom soup: Feel free to replace with another creamy soup of your choice.
  • 10 ounces mild Rotel: This is essential for that Tex-Mex flavor; don’t skip it! Hot Rotel can be used for a spicier kick.
  • 3 cups boneless skinless chicken breast: Shredded, fully cooked chicken is ideal. Leftover roast chicken works perfectly here.
  • 2 tablespoons chopped cilantro: Optional, but it adds a fresh touch. You could also use parsley if you prefer.
  • 12 soft taco-size corn tortillas: Corn tortillas give the best texture; if you don’t have them, flour tortillas can be used, though they will change the flavor profile.
  • 4 cups Colby and Monterey jack cheese: Freshly shredded cheese melts better than pre-shredded. You could also mix in pepper jack for a touch of heat.

How to Make King Ranch Chicken Casserole

Close-up of a King Ranch Chicken Casserole, showcasing layers of ingredients and melted cheese.

Now that we’ve gathered our ingredients, let’s walk through the steps to create this heartwarming dish.

  1. Preheat your oven to 375°F (190°C).
  2. In a 4 to 5-quart Dutch oven, heat the olive oil over medium-high heat. Add the chopped onion and bell pepper, sautéing for 5 to 7 minutes until softened.
  3. Remove from heat and whisk in the cream of chicken soup, cream of mushroom soup, and undrained Rotel until well combined.
  4. Stir in the shredded chicken and optional cilantro, mixing thoroughly.
  5. Lightly spray a 9×13 inch baking dish with nonstick cooking spray.
  6. Layer half of the quartered corn tortillas on the bottom of the dish.
  7. Spoon half of the chicken mixture over the tortillas, then sprinkle with 1½ cups of the shredded cheese.
  8. Repeat the layers, finishing with the remaining shredded cheese on top.
  9. Bake uncovered for 30 minutes, or until bubbly and golden brown. Serve hot, and watch your loved ones dig in with smiles!

Pro Tips for the Best King Ranch Chicken Casserole

To elevate your casserole to new heights, consider these expert insights:

  • Use Day-Old Tortillas: Slightly stale corn tortillas absorb less sauce, maintaining their structure.
  • Don’t Skip the Rotel: This adds essential flavor; generic diced tomatoes won’t do!
  • Layer Wisely: Ensure even distribution of chicken and cheese to avoid dry spots.
  • Add a Crunchy Topping: For added texture, incorporate crushed tortilla chips or panko breadcrumbs during the last few minutes of baking.
  • Make It Ahead: Assemble the casserole a day before, refrigerate, and bake before serving for easy prep.
  • Experiment with Cheeses: Mixing different cheeses like pepper jack or gouda can add unique flavors.
  • Serve With a Side: Pair with a fresh salad or Mexican rice for a complete meal.
  • Store Properly: Cover leftovers tightly and refrigerate, they taste even better the next day!

Common Mistakes and Troubleshooting Tips

Even the best cooks can run into hiccups. Here’s how to troubleshoot:

  • Too Dry: Ensure you’re using enough sauce; consider adding more cream of chicken or mushroom soups.
  • Too Saucy: If it’s soupy, reduce the amount of soup or tortillas in your next batch.
  • Burnt Edges: Cover the casserole with foil for the first half of baking to prevent over-browning.
  • Uneven Cooking: Stir layers gently before baking to ensure even cooking and flavor distribution.

Variations to Try

Get creative with these variations to suit your taste:

  • Vegetarian Version: Swap chicken for black beans or lentils for a hearty vegetarian meal.
  • Spicy Kick: Add jalapeños or use spicy Rotel for those who enjoy heat.
  • Tex-Mex Twist: Incorporate corn, black olives, or diced green chiles into the mixture for added flavor.
  • Cheesy Delight: Experiment with different types of cheese, like feta or goat cheese, for a unique flavor profile.

Storage and Make-Ahead Instructions

This casserole is perfect for making ahead of time:

  • Refrigerator: Store leftovers in an airtight container in the fridge for up to 3 days.
  • Freezer: You can freeze an unbaked casserole for up to 3 months. Thaw in the refrigerator overnight before baking.
  • Reheating: To reheat, bake at 350°F until heated through, about 20-25 minutes.

Frequently Asked Questions

Here are some common questions about King Ranch Chicken Casserole:

  • Can I use leftover chicken? Yes! Leftover roasted chicken works beautifully.
  • What can I substitute for the cream soups? You can make homemade versions using milk, flour, and seasonings.
  • Is it possible to make this dish gluten-free? Yes, just use gluten-free tortillas and soups.
  • Can I add vegetables? Absolutely! Bell peppers, corn, or spinach can be great additions.
  • How spicy is this casserole? It’s mild, but you can add spicy ingredients to adjust the heat.
  • Can I make it vegetarian? Yes, replace chicken with beans or lentils.
  • How long can I freeze it? It’s good for up to 3 months in the freezer.
  • Do leftovers reheat well? Yes! They often taste even better the next day.

Nutritional Tips and Dietary Adaptations

If you’re looking to lighten the dish, consider these options:

  • Reduce Fat: Use low-fat cream soups and cheese alternatives.
  • Add Fiber: Incorporate more vegetables to boost nutritional content.
  • Watch Sodium: Opt for low-sodium soups and ingredients to keep salt in check.

Essential Equipment for the Kitchen

To make the cooking process smooth, here’s what you’ll need:

  • 9×13 Baking Dish: Essential for assembling and baking the casserole.
  • 4 to 5-Quart Dutch Oven: For sautéing and mixing ingredients.
  • Whisk: Useful for combining the soups and ensuring a smooth mixture.
  • Sharp Knife: For chopping vegetables and shredding chicken.

Serving Suggestions

Complete your meal with these delightful ideas:

  • Fresh Salad: A light green salad with vinaigrette pairs wonderfully.
  • Guacamole and Salsa: Serve with tortilla chips for a crunchy contrast.
  • Mexican Rice: Fluffy rice complements the casserole perfectly.
  • Homemade Cornbread: A slice of cornbread brings a comforting touch to the table.

Conclusion

King Ranch Chicken Casserole is more than just a recipe; it’s a tribute to family, love, and the joy of sharing meals together. With its rich flavors and heartwarming nature, this dish is destined to become a cherished favorite in your home. So gather your loved ones, share stories, and create new memories around the dinner table. Happy cooking!

King Ranch Chicken Casserole

Prep Time 15 minutes
Cook Time 30 minutes
Total Time 45 minutes
Servings 6 servings
Calories 650
A hearty and cheesy casserole combining tender chicken, flavorful vegetables, and melted cheese, perfect for a comforting family meal.

Ingredients

Vegetables

  • 3 teaspoons olive oil (extra virgin)
  • 1 cup chopped sweet yellow onion
  • 1 1/4 cups chopped bell pepper (any color)

Canned Goods

  • 10.5 ounces cream of chicken soup (undiluted)
  • 10.5 ounces cream of mushroom soup (undiluted)
  • 10 ounces mild Rotel (undrained)

Protein

  • 3 cups boneless skinless chicken breast (shredded and cooked)

Herbs & Spices

  • 2 tablespoons chopped cilantro (optional)

Tortillas

  • 12 soft taco-size corn tortillas corn tortillas (quartered)

Cheese

  • 4 cups Colby and Monterey Jack cheese (shredded, divided)

Instructions 

  • Preheat oven to 375°F (190°C).
  • Sauté onion and bell pepper in olive oil for 5-7 minutes until softened. Remove from heat.
  • Whisk in cream of chicken, mushroom soups, and Rotel until combined. Stir in chicken and cilantro.
  • Layer half of the tortillas in a greased 9x13 dish, top with half of the chicken mixture, then sprinkle 1½ cups cheese. Repeat layers.
  • Bake uncovered for 30 minutes. Serve hot.

Notes

For a spicier version, add diced jalapeños or hot sauce.
Calories: 650kcal
Cost: $15
Course: Main Course
Cuisine: American
Keyword: casserole, Cheese, Chicken

Embrace the Cozy Season with Apple Cider Cookies

As the leaves turn golden and the air carries the sweet scent of cinnamon, it’s time to wrap yourself in the warmth of home-baked goods. Apple cider cookies are not just a treat; they’re an experience that invites you to share stories and laughter around the family table. With each bite, you’ll find a nostalgic echo of fall, reminiscent of cozy afternoons spent with loved ones. This recipe is more than just a baking project; it’s a way to create memories that linger long after the last crumb is gone.

Why You’ll Love This Recipe

Once you taste these cookies, you’ll understand why they are a must-bake for the season:

  • Warm, inviting flavors: Each cookie bursts with the comforting taste of apples and spices, wrapping you in a nostalgic embrace.
  • Easy to make: With straightforward steps and simple ingredients, you can whip these cookies up in no time, perfect for both novice and seasoned bakers.
  • Perfect for sharing: These cookies are ideal for gatherings, gift-giving, or simply enjoying with a cup of tea or coffee.
  • Versatile treats: Customize the flavors with various spices or add-ins, making them uniquely yours.
  • Keep the traditions alive: Baking these cookies is a heartfelt way to continue family traditions and create new ones.

Ingredients for Apple Cider Cookies

Before diving into the baking, let’s explore the ingredients that make these cookies special:

  • 1 cup apple cider: The star of the show! Use a high-quality, fresh apple cider for the best flavor. If you want a deeper taste, reduce the cider over low heat until it thickens.
  • 2 cups all-purpose flour: Essential for structure, you can also substitute with gluten-free flour if needed.
  • 1 tsp ground cinnamon: This spice brings warmth and depth. Feel free to experiment with fresh grated cinnamon for a stronger aroma.
  • 1/2 tsp baking soda: This helps the cookies rise, creating a delightful texture.
  • 1/2 tsp kosher salt: Balances the sweetness and enhances flavors.
  • 1/4 tsp ground nutmeg: Adds a hint of spice that complements the cinnamon beautifully.
  • 3/4 cup packed brown sugar: For sweetness and moisture, brown sugar gives the cookies a delightful chewiness.
  • 1/2 cup unsalted butter, melted: This adds richness; you can replace it with coconut oil or applesauce for a lighter option.
  • 1/2 cup granulated sugar: Provides a bit of crispness to the cookie edges.
  • 1 large egg: Binds everything together and adds moisture.
  • 4 tbsp unsalted butter, melted (for coating): The perfect finish to make the cookies shine when rolled in cinnamon sugar.
  • 2 tsp ground cinnamon (for coating): Enhances the outer layer of the cookies with sweet spice.

Step-by-Step Instructions

Now, let’s get baking! Follow these steps to create your apple cider cookies:

  1. In a saucepan, bring the apple cider to a boil over medium heat. Reduce the heat and let it simmer, stirring occasionally, until it reduces to about 1/2 cup. This concentrates the flavor.
  2. In a bowl, mix together the dry ingredients: flour, cinnamon, baking soda, salt, and nutmeg.
  3. In another large bowl, whisk together the melted butter, brown sugar, and granulated sugar until smooth. Add the egg and reduced apple cider, mixing until fully combined.
  4. Gradually add the dry ingredients to the wet mixture, stirring until just combined. Be careful not to overmix.
  5. Chill the dough in the fridge for at least 30 minutes to help the cookies maintain their shape.
  6. Preheat your oven to 350°F (175°C) and line a baking sheet with parchment paper.
  7. Once chilled, scoop the dough using a tablespoon and roll into balls. Roll each ball in melted butter, then in the cinnamon-sugar mixture.
  8. Place the coated dough balls on the prepared baking sheet, spacing them about 2 inches apart.
  9. Bake for 10-12 minutes, or until the edges are golden. The centers may look slightly underbaked, but they will continue to set as they cool.
  10. Allow the cookies to cool on the baking sheet for 5 minutes before transferring them to a wire rack to cool completely.

Pro Tips for Perfect Apple Cider Cookies

To ensure your cookies turn out perfectly every time, keep these tips in mind:

  • Chill the dough: This step is crucial for preventing the cookies from spreading too much while baking.
  • Use fresh spices: Freshly ground spices can elevate the flavor significantly.
  • Don’t overbake: Aim for a soft center; they will firm up as they cool on the baking sheet.
  • Experiment with add-ins: Consider adding chocolate chips, nuts, or dried fruits for extra texture and flavor.
  • Store properly: Keep cookies in an airtight container to maintain freshness. They can be kept at room temperature for up to a week.
  • Freeze for later: Freeze the dough or baked cookies for a quick treat any time.
  • Adjust sweetness: If you prefer less sweetness, reduce the sugar in the recipe slightly.
  • Mix well: Ensure all ingredients are well incorporated to achieve the best texture.

Common Mistakes and Troubleshooting

Even the best bakers encounter hiccups. Here are some common issues and how to solve them:

  • Cookies are too dry: This may be due to over-measuring the flour. Spoon the flour into the measuring cup instead of scooping it directly.
  • Cookies spread too much: If the dough isn’t chilled enough, they may spread. Always chill before baking.
  • Flavor is lacking: Ensure you’re using fresh spices and high-quality apple cider for the best flavor.
  • Cookies are too tough: Overmixing the dough can lead to tough cookies. Mix until just combined.

Delicious Variations

Feel free to switch things up! Here are some delightful variations you can try:

  • Apple Cider Donut Cookies: Add a dash of nutmeg and glaze with a simple powdered sugar icing.
  • Maple Apple Cider Cookies: Substitute some brown sugar with maple syrup for a unique twist.
  • Spiced Pumpkin Apple Cider Cookies: Include pumpkin puree and pumpkin spice for a fall favorite.
  • Caramel Stuffed Apple Cider Cookies: Add a caramel candy in the center of each cookie before baking for a gooey surprise.

Storage and Make-Ahead Instructions

To keep your cookies fresh and ready for sharing:

  • Room Temperature: Store baked cookies in an airtight container at room temperature for up to a week.
  • Refrigerator: They can also be stored in the fridge for up to 10 days.
  • Freezing Dough: Roll the dough into balls and freeze on a baking sheet. Once frozen, transfer to a zip-top bag for up to 3 months.
  • Freezing Baked Cookies: Baked cookies can be frozen as well. Place parchment between layers in a freezer-safe container.

Frequently Asked Questions (FAQ)

Here are some common questions about apple cider cookies:

  • Can I use store-bought apple cider? Absolutely! Store-bought apple cider works well, but try to choose a brand with a rich flavor.
  • What can I substitute for butter? Coconut oil or applesauce can be used as alternatives for a healthier option.
  • How do I make these cookies gluten-free? Simply substitute all-purpose flour with a gluten-free blend.
  • Can I add nuts to the recipe? Yes, chopped walnuts or pecans would complement the flavors beautifully.
  • How thick should the dough be before baking? The dough should be thick enough to hold its shape but not dry.
  • How do I know when they’re done? The edges should be golden while the centers appear slightly underbaked.
  • Can I use other spices? Feel free to experiment with ginger or allspice for a different flavor profile.
  • How many cookies does this recipe make? This recipe yields about 24 cookies, depending on your portion size.

Nutritional Tips and Dietary Adaptations

For those mindful of dietary needs:

  • Low sugar options: Use less sugar or natural sweeteners like stevia or monk fruit.
  • Dairy-free version: Substitute butter with a plant-based alternative and use a flax egg.
  • Low-carb adaptations: Use almond flour and sugar substitutes for a keto-friendly treat.

Equipment Recommendations

To make your baking experience seamless, here are some essential tools:

  • Mixing bowls: A set of various sizes for mixing ingredients.
  • Baking sheets: Choose non-stick or line with parchment for easy cleanup.
  • Measuring cups and spoons: Accurate measurements are key to perfect cookies.
  • Cooling rack: Essential for cooling cookies evenly.
  • Cookie scoop: For uniform cookie sizes, ensuring even baking.

Serving Suggestions

When it comes to serving these delightful cookies, consider these ideas:

  • Pair with warm cider: Enjoy your cookies alongside a mug of hot apple cider for a true fall experience.
  • Serve at gatherings: These cookies are perfect for holiday parties or casual get-togethers.
  • Gift-giving: Package them in a decorative box for a thoughtful homemade gift.
  • With ice cream: Serve warm cookies with a scoop of vanilla ice cream for a delicious dessert.

As you bake these apple cider cookies, remember that cooking is about love and sharing. May each cookie you create be a warm hug, a sweet memory, and a reminder of the good times spent with family and friends. Happy baking!

Apple Cider Cookies

Prep Time 15 minutes
Cook Time 10 minutes
Total Time 25 minutes
Servings 24 cookies
Calories 150
Delight in these warm, spiced cookies infused with apple cider for a cozy treat.

Ingredients

liquids

  • 1 cup apple cider
  • 2 cups all-purpose flour
  • 1 tsp ground cinnamon
  • 1/2 tsp baking soda
  • 1/2 tsp kosher salt
  • 1/4 tsp ground nutmeg
  • 3/4 cup packed brown sugar
  • 1/2 cup unsalted butter, melted
  • 1/2 cup granulated sugar
  • 1 large egg
  • 4 tbsp unsalted butter, melted
  • 2 tsp ground cinnamon

Instructions 

  • Preheat oven to 350°F (175°C).
  • Mix dry ingredients in a bowl.
  • Combine apple cider, sugars, and melted butter; add egg and mix well.
  • Gradually add dry ingredients to wet mixture, stirring until combined.
  • Drop spoonfuls onto baking sheet and bake for 10 minutes.

Notes

For extra flavor, add a pinch of ground ginger or cloves.
Calories: 150kcal
Cost: $12
Course: Dessert
Cuisine: American
Keyword: apple cider