Author

daniel

Browsing

Unlock the Joy of Cooking: Air Fryer Chicken Tacos

Welcome to a culinary adventure that invites the warmth of family gatherings right into your kitchen! If you’re looking for a quick, delicious, and heartwarming meal, you’re in the right place. Air Fryer Chicken Tacos are not just another recipe; they’re a celebration of flavors and memories that come together in just 30 minutes. Let’s dive into a dish that carries the essence of love, community, and togetherness.

In this guide, you’ll find everything you need to know about crafting these delightful tacos—from selecting the perfect chicken to making your own toppings. So grab your apron, and let’s create something special!

Why You’ll Love This Recipe

  • Quick and Easy: Ready in just 30 minutes, this recipe is perfect for those busy weeknights when you still want a homemade meal.
  • Healthier Option: By using the air fryer, you’ll enjoy juicy, flavorful chicken without excess oil, making this a lighter version of traditional tacos.
  • Customizable: Feel free to swap ingredients and make these tacos your own—whether you prefer spicy or mild, the choice is yours!
  • Minimal Cleanup: The air fryer means less mess and fewer dishes to wash, allowing you to savor the moments spent with loved ones.
  • Perfect for Sharing: These tacos are ideal for family gatherings or taco nights with friends, bringing everyone together around the table.

Ingredients You’ll Need

Gather these ingredients to create your Air Fryer Chicken Tacos:

  • 1 tbsp taco seasoning: For that classic taco flavor.
  • 1 tsp olive oil: Just a light coating helps the seasonings stick to the chicken.
  • 18 oz chicken breast: Cut into 1-inch cubes for even cooking.
  • 1/2 cup cilantro: Freshly chopped, to add a burst of flavor.
  • 1/2 cup sliced green onions: For a mild, oniony crunch.
  • 1 cup corn kernels: Fresh or frozen, adding sweetness and texture.
  • 3 cups shredded cabbage: For that crisp freshness in every bite.
  • 1/2 cup plain yogurt: Greek yogurt works wonderfully for thickness and tang.
  • 1/2 tsp salt: To enhance all the flavors.
  • 1/2 tbsp lime juice: Freshly squeezed for a zesty kick.
  • 8 flour tortillas: Warmed before serving, to hold all the goodness!

Pro Tips for Success
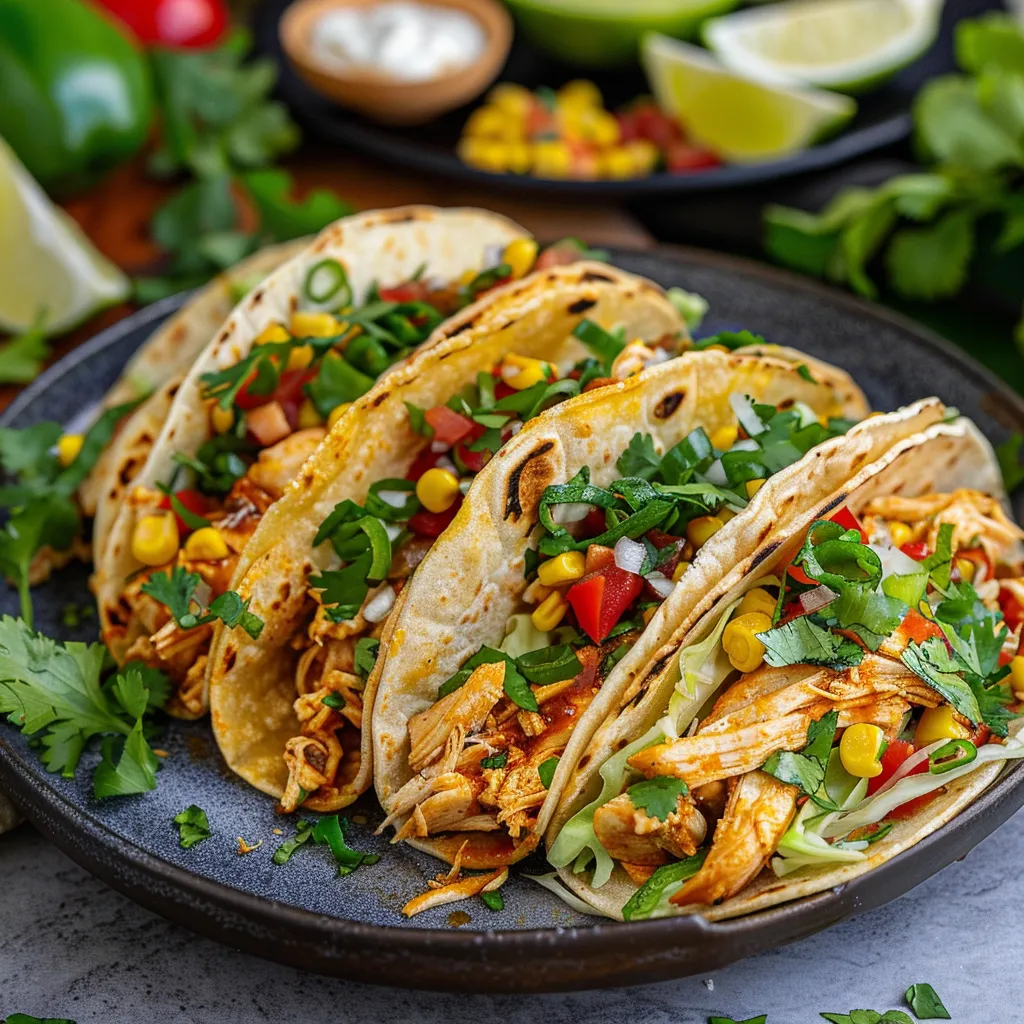
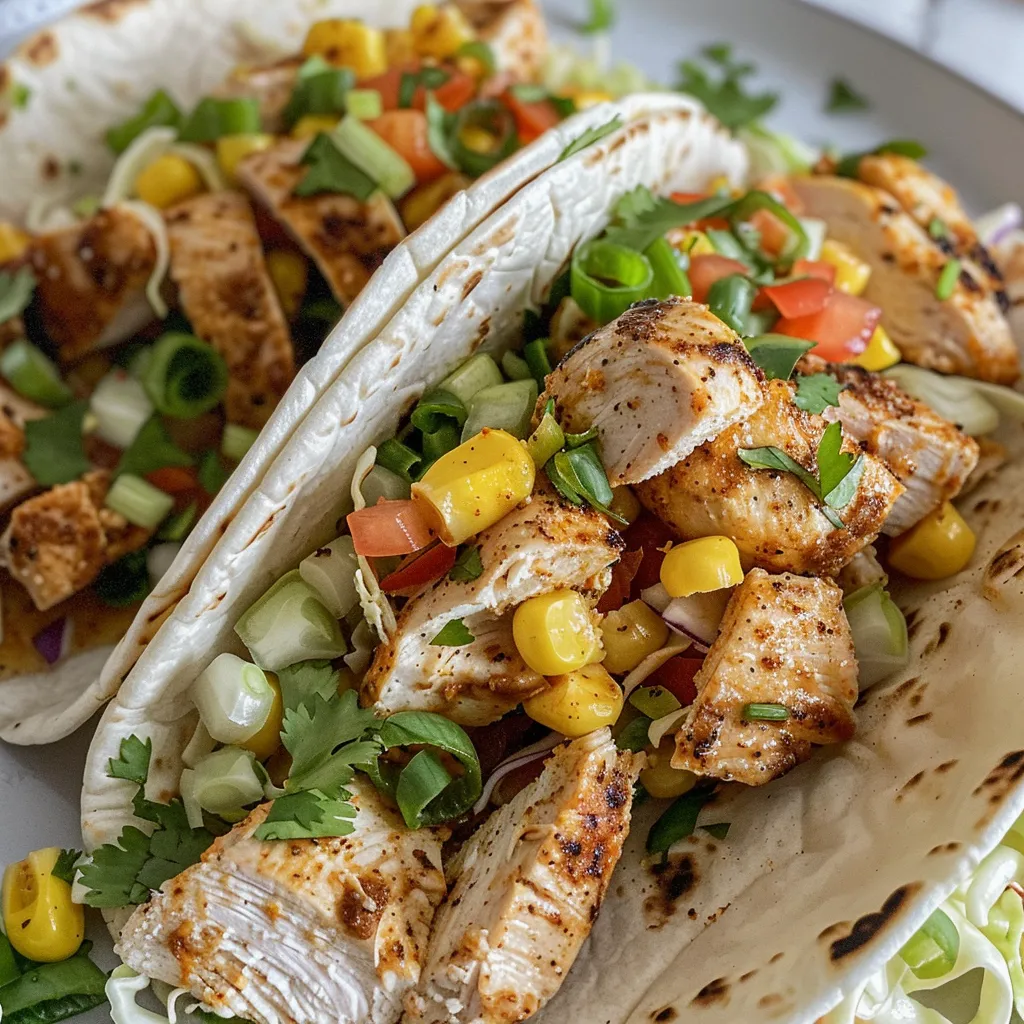
Side view of vibrant air fryer chicken tacos with colorful toppings.

To ensure your cooking experience is smooth and successful, consider these expert insights:

  • Use Fresh Ingredients: Fresh herbs and vegetables make a world of difference in flavor and texture.
  • Don’t Overcrowd the Basket: Give the chicken space in the air fryer to ensure even cooking and crispiness.
  • Preheat the Air Fryer: If your model requires it, preheating ensures that the chicken cooks evenly.
  • Check for Doneness: The chicken is ready when it reaches an internal temperature of 165°F (75°C).
  • Warm Tortillas: Warmed tortillas are more pliable and enhance the overall eating experience.
  • Experiment with Toppings: Try adding avocado, salsa, or cheese for a personal touch.
  • Make It Ahead: Prep your ingredients in advance for a quicker assembly during mealtime.
  • Adjust Seasoning: Feel free to tweak the taco seasoning to suit your taste—add more spice if you like heat!

Common Mistakes and Troubleshooting

Even the best cooks make mistakes! Here’s how to avoid common pitfalls:

  • Dry Chicken: Ensure you don’t overcook the chicken. Use a meat thermometer for accuracy.
  • Unseasoned Chicken: Don’t skip on seasoning; it’s crucial for flavor. Marinate if possible!
  • Cold Tortillas: Always warm your tortillas to prevent them from cracking when filled.
  • Too Much Filling: Avoid overstuffing the tortillas, which can lead to messy tacos and spills.

Variations to Try

Let’s get creative! Here are some variations to personalize your tacos:

  • Spicy Chicken Tacos: Add jalapeños or a dash of hot sauce to the chicken for extra heat.
  • Vegetarian Option: Substitute chicken with black beans or roasted vegetables for a delicious meatless meal.
  • Fish Tacos: Swap the chicken for air-fried fish fillets for a fresh twist.
  • Breakfast Tacos: Use scrambled eggs and your favorite breakfast meats for a morning delight.

Storage and Make-Ahead Instructions

If you want to prep ahead or store leftovers, here’s how:

  • To Store: Keep leftover chicken and toppings in airtight containers in the refrigerator for up to 3 days.
  • To Reheat: Reheat chicken in the air fryer for a few minutes to regain crispness, or in the microwave if you’re short on time.
  • Make Ahead: You can marinate the chicken the night before, making for a quick cook time when you’re ready to eat.

Frequently Asked Questions

Here are some common questions about Air Fryer Chicken Tacos:

  • Can I use frozen chicken? Yes, but ensure to increase the cooking time. Always check for doneness.
  • What toppings do you recommend? Cilantro, avocado, salsa, cheese, and lime wedges are all fantastic choices!
  • Can I make these tacos gluten-free? Absolutely! Just use corn tortillas instead of flour tortillas.
  • How can I make the chicken more flavorful? Consider marinating the chicken for a few hours before cooking.
  • What’s a good side dish with these tacos? Mexican rice, refried beans, or a fresh salad make great companions.
  • How do I know when the chicken is done? Use a meat thermometer; it should read 165°F (75°C).
  • Can I air fry other proteins similarly? Yes, pork and beef can be cooked using similar methods with appropriate adjustments.
  • How do I prevent the tortillas from breaking? Warm them before filling to keep them pliable.

Nutrition Tips and Dietary Adaptations

To make your meal even more nutritious, consider these tips:

  • Add More Veggies: Incorporate extra veggies into the slaw or as toppings for added fiber and nutrients.
  • Lean Protein: Choose chicken breast for a leaner option that’s lower in fat.
  • Low-Fat Alternatives: Opt for low-fat Greek yogurt instead of sour cream for a healthier topping.
  • Portion Control: Enjoy smaller portions if you’re watching your calorie intake, and load up on veggies!

Equipment Recommendations

Here’s what you’ll need to make the most of this recipe:

  • Air Fryer: Choose a reliable model that fits your kitchen needs; it’s essential for achieving that crispy chicken.
  • Cutting Board and Knife: For prepping your chicken and vegetables.
  • Mixing Bowls: Ideal for marinating and mixing your ingredients.
  • Meat Thermometer: To ensure your chicken is cooked perfectly every time.

Serving Suggestions

As you lay out your tacos, consider these delightful serving ideas:

  • Family Style: Set up a taco bar with all the toppings so everyone can customize their own.
  • Fresh Sides: Serve with a side of guacamole, chips, or a refreshing fruit salad.
  • Celebrate with Drinks: Pair with a nice margarita, iced tea, or a refreshing agua fresca for a festive touch.

Cooking is all about love, memories, and the joy of sharing. I hope you savor every bite of these Air Fryer Chicken Tacos with those who matter most. Remember, every meal is a chance to create new stories that linger long after the last bite. Happy cooking, and may your kitchen always be filled with laughter and warmth!
30-Minute Air Fryer Chicken Tacos

Prep Time 10 minutes
Cook Time 15 minutes
Total Time 25 minutes
Servings 4 servings
Calories 350
Enjoy quick and flavorful chicken tacos made effortlessly in the air fryer, perfect for a satisfying weeknight dinner.

Ingredients

Seasonings

  • 1 tbsp taco seasoning
  • 1 tsp olive oil (for light coating)

Chicken

  • 18 oz chicken breast (cut into 1-inch cubes)

Fresh Produce

  • 0.5 cup cilantro (freshly chopped)
  • 0.5 cup sliced green onions
  • 1 cup corn kernels (fresh or frozen)
  • 3 cups shredded cabbage

Dairy

  • 0.5 cup plain yogurt (Greek yogurt works great for thickness)
  • 0.5 tsp salt
  • 1 tsp taco seasoning
  • 0.5 tbsp lime juice (freshly squeezed preferred)
  • 8 pieces flour tortillas (warmed before serving)

Instructions 

  • Toss chicken cubes with taco seasoning and olive oil.
  • Air fry the seasoned chicken at 400°F (200°C) for 10-12 minutes until cooked through.
  • While chicken cooks, prepare the slaw by mixing shredded cabbage, cilantro, green onions, and lime juice.
  • Warm the tortillas before serving.
  • Assemble tacos with chicken, slaw, and a dollop of yogurt. Serve immediately.
Notes

For extra flavor, add a squeeze of lime or hot sauce.
Calories: 350kcal
Cost: $15
Course: Main Course
Cuisine: Mexican
Keyword: Chicken

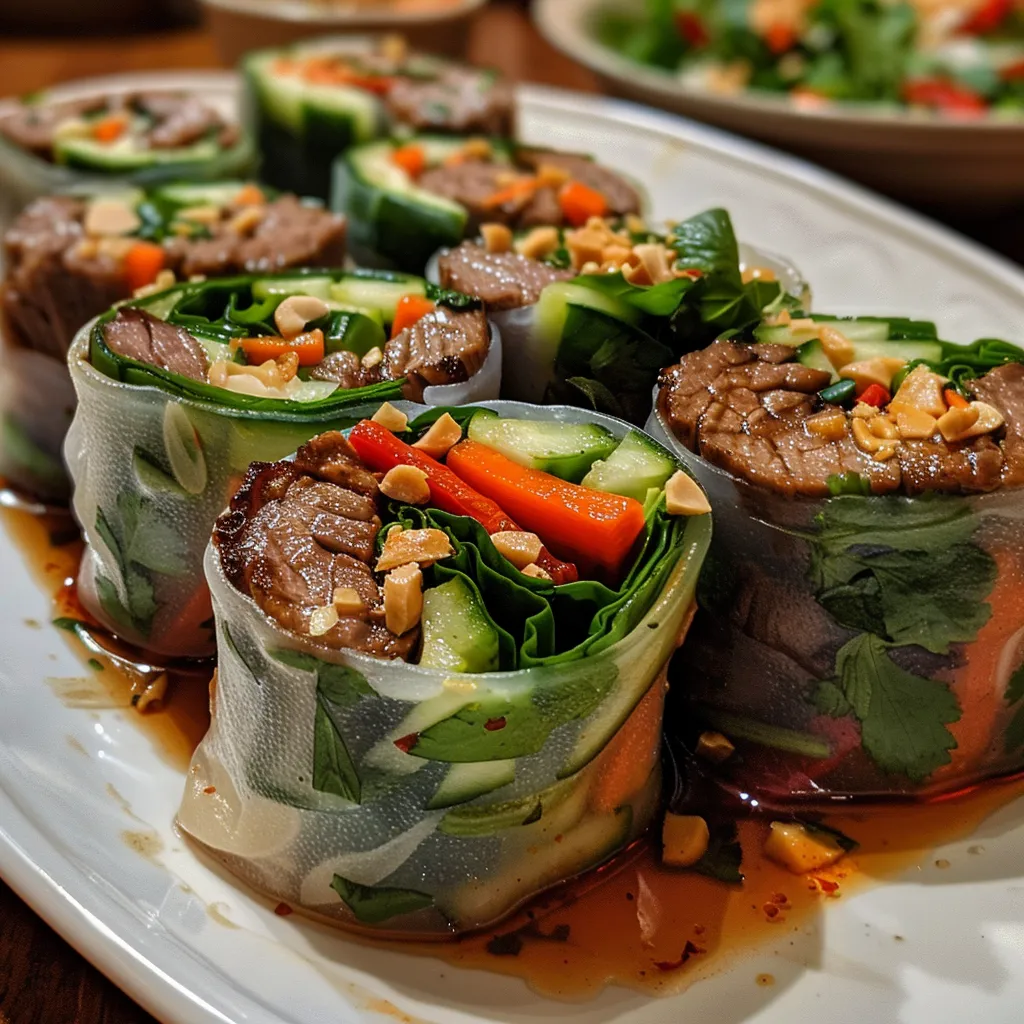
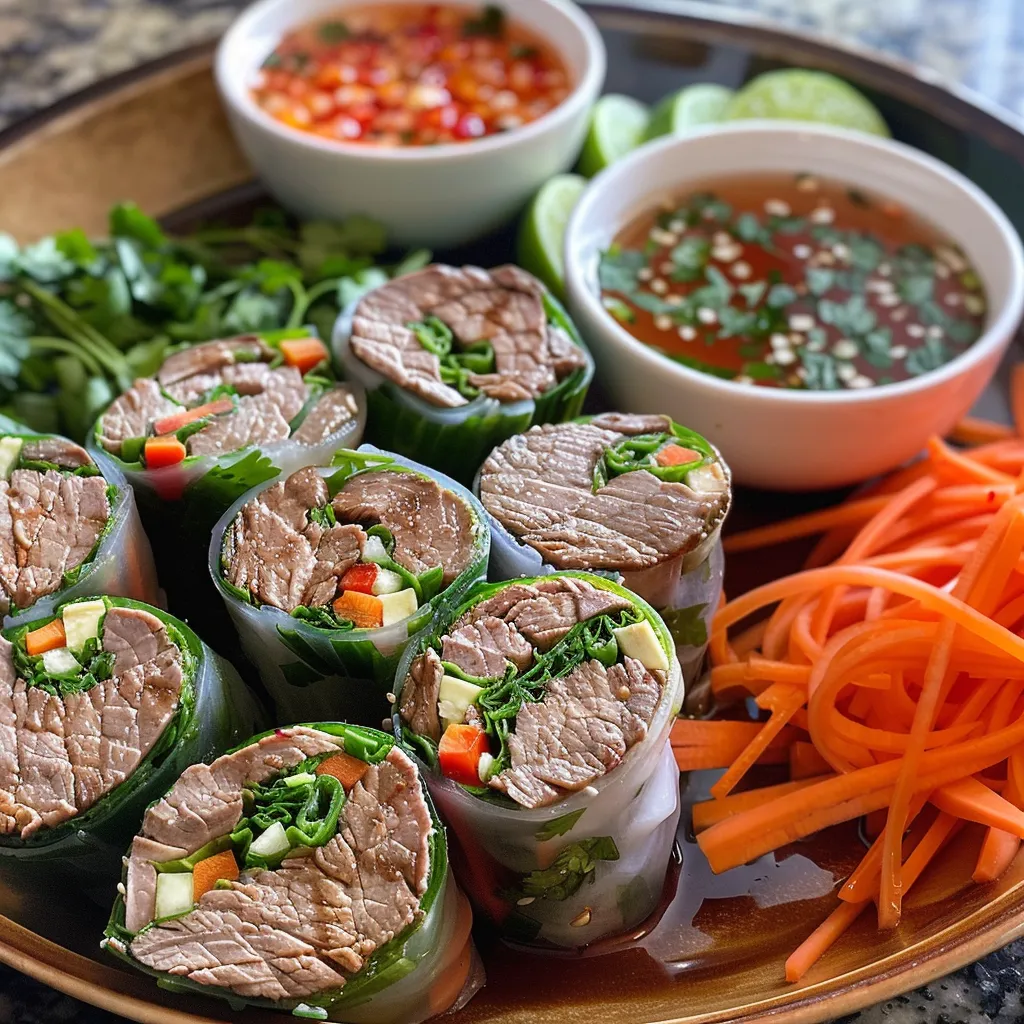
Rolling Memories: The Heartwarming Thai Basil Beef Rolls Recipe

Welcome to a culinary journey that takes us back to cherished moments spent in the kitchen, where flavors and stories intertwine. Our Thai Basil Beef Rolls are not just a dish; they’re a celebration of love, tradition, and the joy of sharing meals with family and friends. If you’ve ever savored the aroma of fresh basil or the tender bite of beef wrapped in delicate rice paper, then you know you’re in for something special. This recipe combines tender beef, fresh vegetables, and aromatic herbs, creating a delightful dish that brings us together around the table.

In the following sections, we will explore why you’ll love this recipe, dive into a detailed ingredient breakdown, and share invaluable tips to ensure your rolls turn out perfectly every time. Let’s get started!

Why You’ll Love This Recipe

  • Quick and Easy: Ready in under 30 minutes, these beef rolls are perfect for busy weeknights or last-minute gatherings.
  • Fresh Flavors: The combination of crunchy vegetables and fragrant basil creates a burst of freshness in every bite.
  • Customizable: You can easily adapt the ingredients to suit your taste, making these rolls perfect for everyone.
  • Perfect for Sharing: These rolls are a fantastic appetizer or main dish, ideal for parties, family gatherings, or cozy dinners.
  • Delicious Dipping Sauce: The accompanying sauce elevates the dish, adding layers of flavor that complement the rolls beautifully.

Ingredient Breakdown

Let’s take a closer look at the ingredients that make these Thai Basil Beef Rolls a culinary delight. Here’s what you’ll need:

  • 1 lb flank or sirloin steak: Thinly sliced against the grain for tenderness.
  • 2 tbsp vegetable oil: For sautéing the beef and aromatics.
  • 2 garlic cloves, minced: Adds a fragrant kick.
  • 1 tbsp grated ginger: A warm, zesty flavor enhancer.
  • 1 stalk lemongrass (optional): Finely chopped for an authentic Thai aroma.
  • 1 tbsp soy sauce: For a savory depth of flavor.
  • 1 tbsp oyster sauce: Adds richness and umami.
  • 1 tsp sugar: Balances the flavors beautifully.
  • 1 tbsp fish sauce: A staple in Thai cuisine, contributing a salty savoriness.
  • 1 red bell pepper, julienned: For a crunchy texture and sweet flavor.
  • 1 carrot, julienned: Adds color and a slight sweetness.
  • 1 cucumber, julienned: For freshness and crunch.
  • 1 cup fresh Thai basil leaves: The star of this dish, providing aromatic notes.
  • 12–16 rice paper wrappers: The delightful outer layer.
  • For the dipping sauce:
  • 3 tbsp fish sauce: A key ingredient for authenticity.
  • 1 tbsp lime juice: Brightens the sauce.
  • 1 tbsp sugar: Helps balance the tartness.
  • 1–2 small red chilies, finely chopped: For a spicy kick, adjust based on your heat preference.
  • 2 garlic cloves, minced: For an extra punch of flavor.
  • 1 tbsp chopped cilantro (optional): For garnish and freshness.

Pro Tips for Perfect Thai Basil Beef Rolls

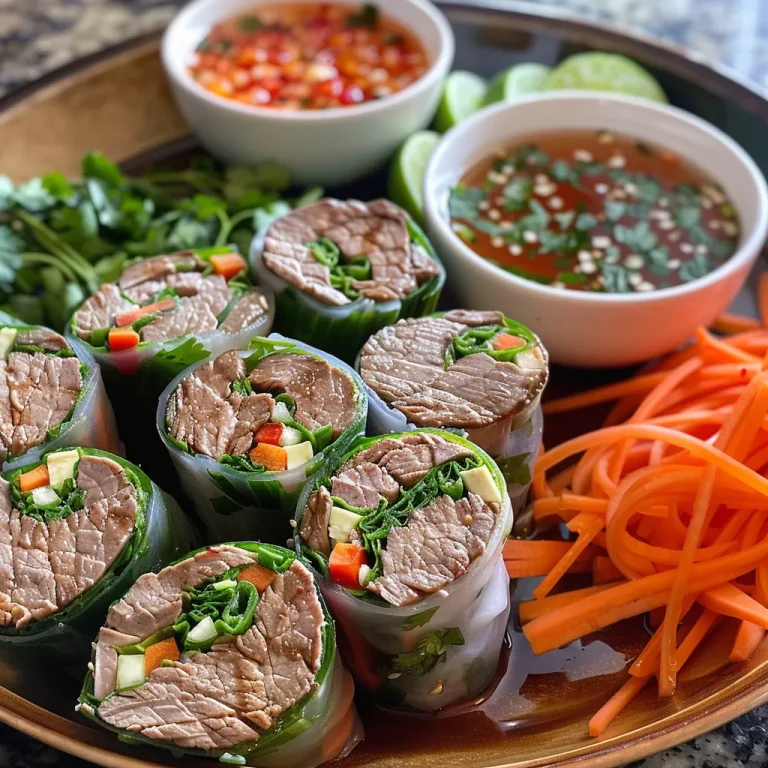
Side view of savory Thai Basil Beef Rolls with colorful vegetables.

Here are some expert insights to help you master these rolls:

  • Prep Ahead: Prepare your ingredients in advance to make assembly quick and easy.
  • Soak Rice Paper Correctly: Soak each wrapper in warm water for 10-15 seconds until pliable, but don’t over-soak to prevent tearing.
  • Layering Matters: When assembling, layer beef, veggies, and basil for balanced flavors in each bite.
  • Roll Tightly: Ensure your rolls are tightly wrapped to keep the filling secure and prevent them from falling apart.
  • Chill Before Serving: Refrigerating the rolls for 30 minutes before serving can help them hold their shape.
  • Experiment with Fillings: Feel free to add other ingredients like avocado, shrimp, or even tofu for a vegetarian twist.
  • Perfect Your Sauce: Adjust the dipping sauce ingredients based on your taste; more lime for tanginess or more chili for heat.
  • Serve Fresh: Enjoy these rolls immediately after making them for the best texture and flavor.

Common Mistakes and Troubleshooting

Even the best cooks can run into a few hiccups. Here are some common mistakes and how to avoid them:

  • Over-soaking Rice Paper: If the wrappers become too floppy, they’ll tear easily. Soak just until pliable.
  • Filling Too Much: Less is often more! Overfilling can make rolling difficult. Aim for a balance.
  • Not Chilling: If the rolls are warm when served, they may fall apart. Chill them briefly for best results.
  • Ignoring Freshness: The quality of your ingredients matters. Use fresh herbs and vegetables for the best flavor.

Variations on Thai Basil Beef Rolls

Feel free to get creative! Here are some delicious variations you can try:

  • Spicy Shrimp Rolls: Substitute shrimp for beef and add a dash of sriracha for heat.
  • Vegetarian Delight: Use tofu or tempeh with a mix of colorful vegetables and avocado.
  • Herb-Infused: Mix in mint or cilantro with the basil for a unique flavor profile.
  • Fruit and Nut: Add slices of mango or apple with crushed peanuts for a sweet twist.

Storage and Make-Ahead Instructions

Want to prepare these rolls in advance? Here’s how:

  • Make-Ahead: Prepare the filling a day in advance and store it in the fridge. Roll them just before serving.
  • Storage: Unwrapped rolls can be stored in an airtight container in the fridge for up to 2 days. Wrap them in damp paper towels to keep them fresh.
  • Freezing: These rolls can be frozen before cooking. Wrap individually in plastic wrap and store in a freezer bag. Thaw before cooking.

FAQ: Your Questions Answered

Here are some common questions about making Thai Basil Beef Rolls:

  • Can I use ground beef instead of sliced beef? Yes! Ground beef can work well, just cook it thoroughly before assembling.
  • What other sauces can I use for dipping? Peanut sauce or hoisin sauce are great alternatives for dipping.
  • Can I make these rolls gluten-free? Absolutely! Use gluten-free soy sauce and rice paper wrappers.
  • How can I add more crunch? Include crispy lettuce or bean sprouts for extra texture.
  • Is it necessary to use fish sauce? While it adds authentic flavor, you can substitute with soy sauce for a vegetarian option.
  • How long do they last in the fridge? They are best enjoyed fresh but can last up to 2 days in the fridge.
  • Can I serve these with other dishes? Yes! They pair wonderfully with jasmine rice or a light salad.
  • What’s the best way to reheat leftover rolls? Enjoy them cold or at room temperature; reheating is not recommended as it can affect texture.

Nutritional Tips and Dietary Adaptations

Here are some ways to make these rolls fit various dietary needs:

  • Low-Carb Option: Use lettuce wraps instead of rice paper for a fresh, low-carb alternative.
  • High-Protein: Add more protein by including edamame or chickpeas in the filling.
  • Vegan Option: Substitute beef with sautéed mushrooms and tofu for a hearty, plant-based option.
  • Heart-Healthy: Opt for lean cuts of meat and load up on veggies to increase fiber and nutrients.

Essential Equipment Recommendations

To make the process smoother, here’s some equipment you might need:

  • Non-stick skillet: Ideal for sautéing without sticking.
  • Sharp knife: For precise slicing of vegetables and meat.
  • Cutting board: A stable surface for all your prep work.
  • Rice paper holder: Helpful for soaking and managing wrappers.

Serving Suggestions

Finally, let’s talk about how to serve these delightful rolls:

  • Plate Artfully: Arrange the rolls on a platter, garnished with fresh basil and lime wedges.
  • Offer Variety: Serve with a range of dipping sauces to cater to different tastes.
  • Pair with Refreshments: Light cocktails or iced tea complement the flavors beautifully.

In conclusion, these Thai Basil Beef Rolls are not just a meal; they’re an experience filled with warmth and connection. So gather your loved ones, roll up some memories, and let each bite remind you of the love and joy that food brings. Happy cooking!

Thai Basil Beef Rolls

Prep Time 20 minutes
Cook Time 10 minutes
Total Time 30 minutes
Servings 4 servings
Calories 250
Delight in these fresh and flavorful Thai beef rolls, perfect for a light appetizer or snack with a tangy dipping sauce.

Ingredients

Main ingredients

  • 1 lb flank or sirloin steak, thinly sliced against the grain
  • 2 tbsp vegetable oil
  • 2 cloves garlic, minced
  • 1 tbsp grated ginger
  • 1 stalk lemongrass, finely chopped (optional)
  • 1 tbsp soy sauce
  • 1 tbsp oyster sauce
  • 1 tsp sugar
  • 1 tbsp fish sauce
  • 1 red bell pepper julienned
  • 1 carrot julienned
  • 1 cucumber julienned
  • 1 cup fresh Thai basil leaves

Dipping sauce

  • 3 tbsp fish sauce
  • 1 tbsp lime juice
  • 1 tbsp sugar
  • 1–2 small red chilies finely chopped
  • 2 cloves garlic, minced
  • 1 tbsp chopped cilantro (optional)

Instructions 

  • Mix soy sauce, oyster sauce, sugar, and fish sauce.
  • Heat oil and sauté garlic, ginger, and lemongrass until fragrant (~30 s).
  • Stir-fry beef slices 3–5 min until browned; let cool slightly.
  • Prepare vegetables and basil: julienne pepper, carrot, cucumber, rinse basil leaves.
  • Soak rice paper in warm water 10–15 s, fill with beef, veg, basil, then roll tightly.
  • Whisk dipping sauce ingredients until sugar dissolves; serve rolls with sauce.

Notes

Use fresh Thai basil for authentic flavor and soak rice papers briefly for best pliability.
Calories: 250kcal
Cost: $15
Course: Appetizer
Cuisine: Thai
Keyword: beef, Fresh Herbs, Rice Paper

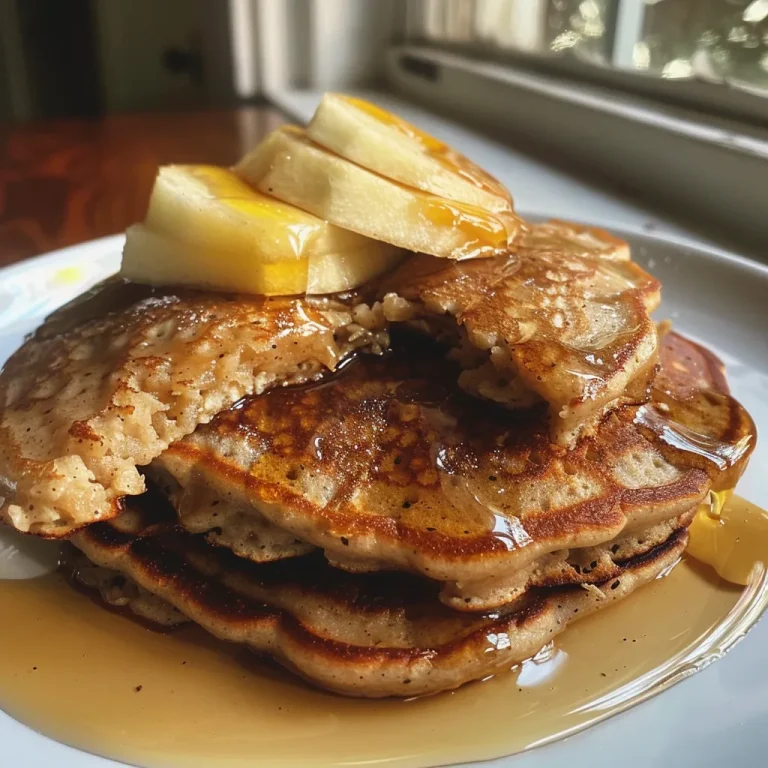
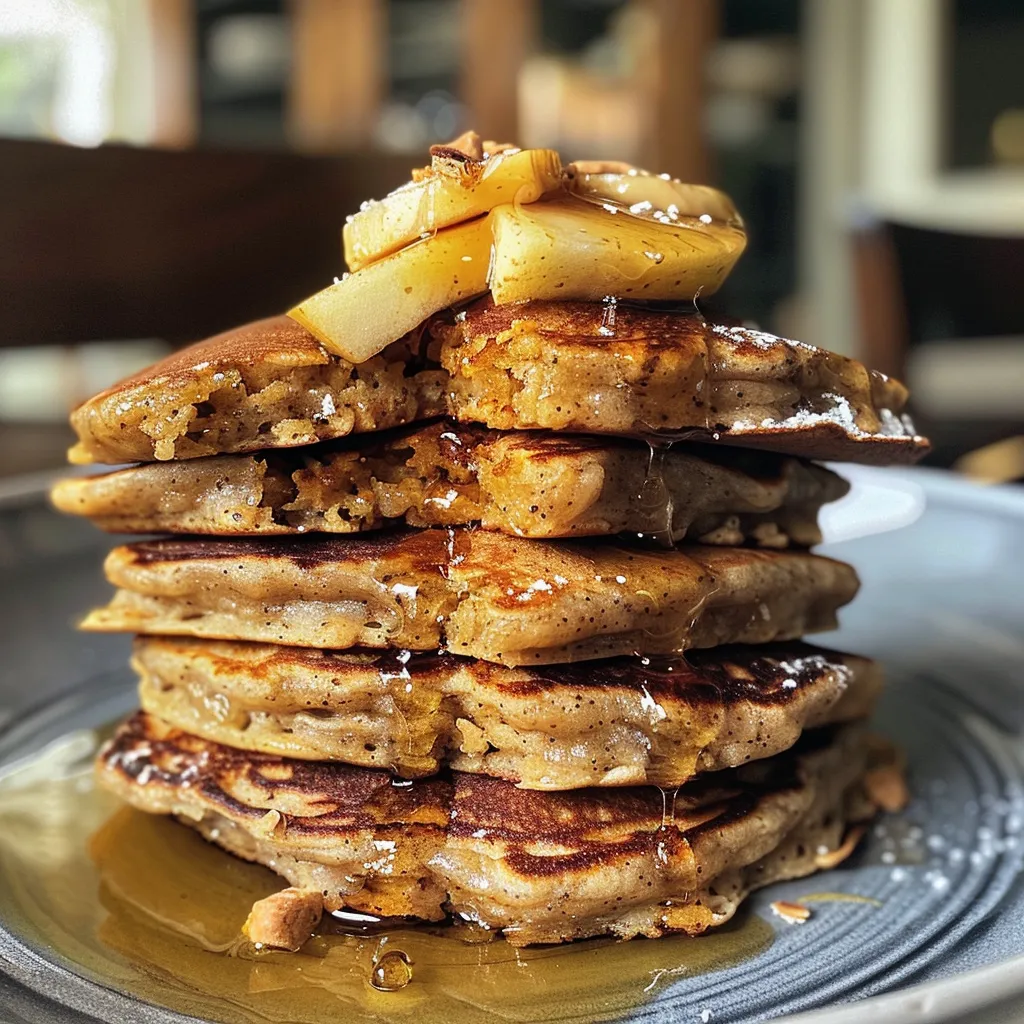
Welcome to the heart of comfort food! These Wholesome Oatmeal Apple Pancakes are not just a delicious breakfast; they are a warm embrace of nostalgia and love, bringing back memories of cozy mornings spent around the kitchen table. Each bite is a reminder that cooking is a beautiful way to share moments with family and friends. So, gather your loved ones and let’s dive into this wholesome recipe bursting with flavor and goodness!

Why You’ll Love This Recipe

Here are five reasons why these pancakes will steal your heart:

  • Healthy Ingredients: Made with oats and fresh fruits, these pancakes are a nutritious way to start your day.
  • Easy to Make: The simple preparation makes it a perfect recipe for busy mornings or lazy weekends.
  • Customizable: You can easily tweak ingredients to suit your taste or dietary needs.
  • Perfect for Meal Prep: Make a big batch and enjoy them throughout the week, saving time and effort.
  • Family-Friendly: Kids love them! These pancakes can turn any meal into a fun experience.

Ingredients Breakdown

Let’s take a closer look at the ingredients for these delightful pancakes and explore some substitutions that you can try:

  • 1 taza de avena: Oats are the base of our pancakes, providing fiber and nutrients. You can substitute with gluten-free oats if needed.
  • 1 plátano maduro: This adds natural sweetness and moisture. If bananas are not available, try using applesauce instead.
  • 1 manzana rallada: Fresh apples bring a juicy crunch. Feel free to use any variety you love!
  • 1/2 taza de yogurt natural: Yogurt adds creaminess and helps bind the ingredients. You can use Greek yogurt or a dairy-free alternative.
  • 1 cucharadita de canela: This spice enhances flavor and provides warmth. Consider adding a pinch of nutmeg for an extra kick.
  • 1/2 cucharadita de vainilla: Vanilla extract rounds out the flavors beautifully. Homemade vanilla extract can be a lovely touch!
  • 1/2 taza de leche: Any milk will work, including dairy or plant-based options like almond or oat milk.
  • 1 pizca de sal: Just a touch of salt enhances the overall flavors.
  • Aceite para engrasar la sartén: A little oil prevents sticking and helps achieve that golden-brown finish.

Steps to Create Your Pancakes

Now that we’ve gathered our ingredients, let’s walk through the steps to create these delicious pancakes:

  1. In a large bowl, combine the oats, banana, grated apple, yogurt, cinnamon, vanilla, milk, and salt. Mix until you achieve a smooth batter.
  2. Heat a non-stick skillet over medium heat and lightly grease it with oil.
  3. Pour portions of the batter onto the hot skillet. Cook until you see bubbles forming on the surface.
  4. Carefully flip the pancakes and cook for an additional 2-3 minutes until golden brown.
  5. Serve the pancakes warm with your favorite toppings, such as maple syrup, fresh fruits, or a sprinkle of nuts.

Pro Tips for Perfect Pancakes

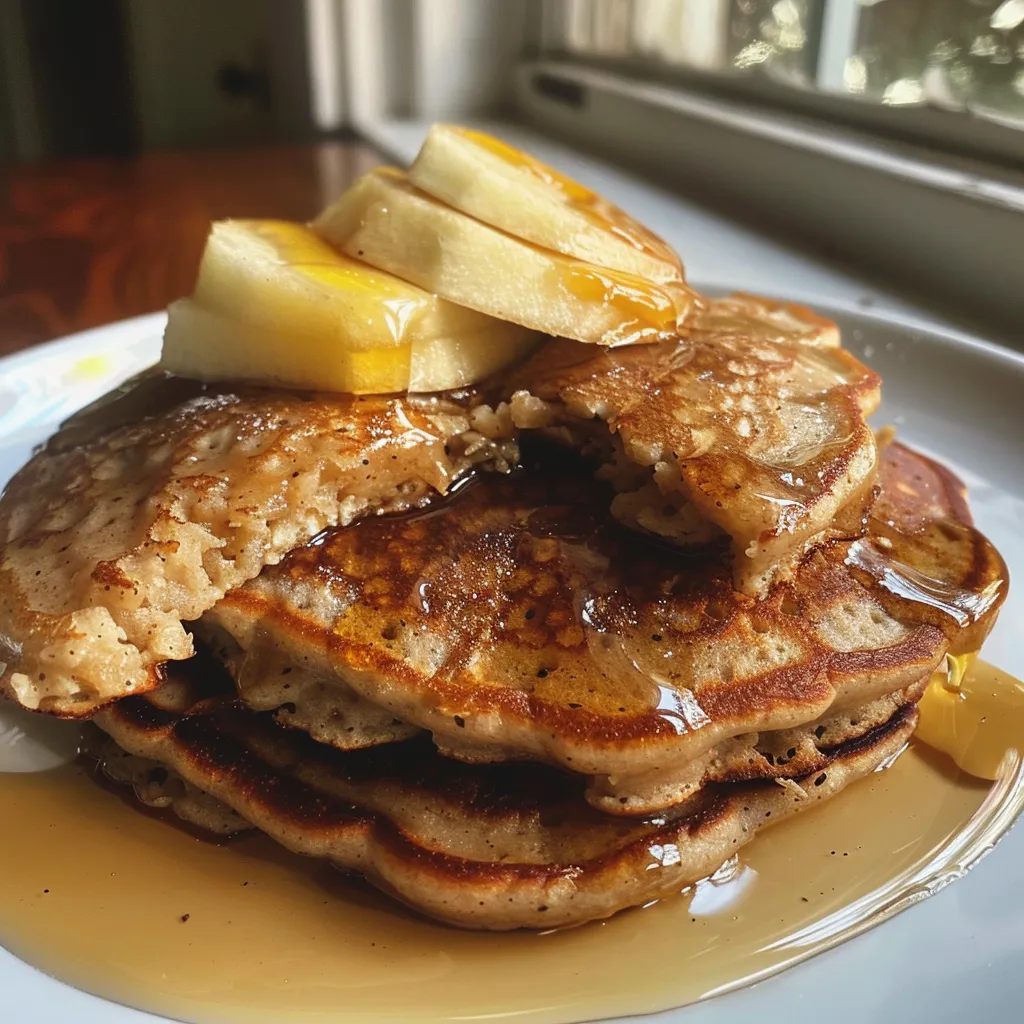
Side view of delicious oatmeal and apple pancakes topped with fresh fruit.

To ensure your pancakes turn out perfectly every time, keep these expert tips in mind:

  • Rest the Batter: Letting the batter sit for a few minutes can improve the texture.
  • Adjust Heat: If pancakes are browning too quickly, lower the heat to ensure they cook through without burning.
  • Measure Ingredients Accurately: Precision in measuring helps achieve the right consistency.
  • Don’t Overmix: Mix just until combined; a few lumps are okay!
  • Use Room Temperature Ingredients: This facilitates even mixing and cooking.
  • Make Mini Pancakes: Smaller pancakes cook faster and are perfect for little hands.
  • Freeze Extras: Make a big batch and freeze leftovers for quick breakfasts later.
  • Experiment with Flavors: Add chocolate chips, nuts, or dried fruits to the batter for a unique twist!

Common Mistakes and Troubleshooting

Even the best cooks can have hiccups in the kitchen. Here are some common mistakes to avoid:

  • Using Old Ingredients: Always check the freshness of your baking powder and other ingredients for the best results.
  • Not Preheating the Pan: Make sure your skillet is hot enough before adding the batter to achieve that golden crust.
  • Overcooking: Keep an eye on your pancakes; they can go from perfect to burnt quickly!
  • Skipping the Grease: A well-greased pan prevents sticking and ensures easy flipping.

Variations to Try

Feel free to get creative with these variations:

  • Berry Delight: Add a handful of blueberries or strawberries to the batter for a fruity burst.
  • Nutty Banana: Stir in some chopped walnuts or almonds for added crunch.
  • Chocolate Chip: Mix in dark chocolate chips for a sweet treat.
  • Spiced Pumpkin: Replace the banana with pumpkin puree and add pumpkin spice for a fall-inspired twist.

Storage and Make-Ahead Instructions

These pancakes are a fantastic option for meal prepping:

  • Refrigerate: Store leftover pancakes in an airtight container in the fridge for up to 3 days.
  • Freeze: For longer storage, freeze pancakes between layers of parchment paper and place them in a freezer bag. They can last up to 2 months!
  • Reheat: To enjoy again, simply warm them in the microwave or toast them in a skillet until heated through.

Frequently Asked Questions

Got questions? We’ve got answers:

  • Can I make these pancakes gluten-free? Yes! Just ensure you use certified gluten-free oats.
  • Can I use a different sweetener? Absolutely! Honey or maple syrup can be used in place of banana for sweetness.
  • How do I know when the pancakes are done? Look for bubbles on the surface and a golden-brown color on the edges.
  • Can I double the recipe? Yes, feel free to double or triple the ingredients for a larger batch.
  • What toppings go well with these pancakes? Try yogurt, fresh fruit, or a drizzle of honey or maple syrup.
  • Can I freeze the batter? It’s best to cook the pancakes and then freeze them, as the batter may separate when stored.
  • How can I make them dairy-free? Use plant-based yogurt and milk alternatives.
  • What’s the best way to serve these pancakes? Stack them high and drizzle with syrup, or serve with a side of fresh fruit for a refreshing touch.

Nutrition Tips and Dietary Adaptations

These pancakes can fit into various dietary preferences:

  • Low Sugar: Use unsweetened yogurt and reduce the banana for a lower sugar option.
  • Vegan Option: Substitute the eggs with flax eggs or a chia seed mixture, and use plant-based yogurt and milk.
  • Protein Boost: Add protein powder or Greek yogurt to the batter for an extra protein kick.

Equipment Recommendations

To make your cooking experience smooth, here’s what you’ll need:

  • Non-Stick Skillet: Essential for easy flipping and minimal sticking.
  • Mixing Bowls: Have a few different sizes for efficient prep.
  • Measuring Cups and Spoons: Precision is key in baking!
  • Spatula: A sturdy spatula will help in flipping your pancakes without breaking them.

Serving Suggestions

Serve these pancakes with a variety of toppings to enhance their flavor:

  • Maple Syrup: A classic choice that adds sweetness and richness.
  • Fresh Fruits: Berries, banana slices, or apple chunks can brighten up your plate.
  • Nut Butter: A smear of almond or peanut butter adds protein and creaminess.
  • Yogurt: A dollop of yogurt on top provides a tangy contrast to the sweetness.

In conclusion, these Wholesome Oatmeal Apple Pancakes are a delightful way to start your day, filled with love and warmth. Remember, cooking is not just about the food; it’s about the memories created and the love shared around the table. So, grab your loved ones, whip up a batch, and enjoy a hearty breakfast together. Happy cooking!

Tortitas Saludables de Avena y Manzana

Prep Time 10 minutes
Cook Time 15 minutes
Total Time 25 minutes
Servings 4 porciones
Calories 250
Disfruta de unas tortitas nutritivas y fáciles de preparar, perfectas para un desayuno saludable.

Ingredients

Grupo de ingredientes secos

  • 1 taza avena

Grupo de ingredientes líquidos y fruta

  • 1 plátano plátano maduro
  • 1 manzana rallada manzana rallada
  • 1/2 taza yogurt natural
  • 1 cucharadita canela
  • 1/2 cucharadita vainilla
  • 1/2 taza leche (puede ser vegetal)
  • 1 pizca sal

Aceite para engrasar la sartén

Instructions 

  • Mezcla todos los ingredientes en un bol hasta obtener una masa homogénea.
  • Calienta una sartén antiadherente y engrásala ligeramente con aceite.
  • Vierte porciones de la masa en la sartén y cocina hasta que aparezcan burbujas.
  • Voltea las tortitas y cocina hasta dorar.
  • Sirve caliente con toppings a tu elección.

Notes

Para una opción más dulce, añade miel o jarabe de arce.
Calories: 250kcal
Cost: $8
Course: Desayuno
Cuisine: Internacional
Keyword: Avena

There’s something magical about combining the nostalgic flavors of a Big Mac with the comfort of a homemade taco. These Big Mac Style Taco Wraps are not just a meal; they’re a journey back to cherished memories of family dinners and late-night snacks. In my Louisiana upbringing, every meal was an opportunity to connect, to share stories, and to savor flavors that felt like a warm hug. This recipe encapsulates that spirit, blending simplicity and heart into a dish that’s perfect for any gathering.

Not only do these wraps capture the beloved essence of fast food, but they also provide a healthier, homemade alternative that’s bursting with flavor. Let’s dive deep into the heart of this recipe and discover how to make it a staple in your kitchen.

Why You’ll Love This Recipe

  • All the Flavor, None of the Guilt: These wraps bring the classic Big Mac taste without the hefty calories, allowing you to indulge guilt-free.
  • Quick and Easy: Ready in just 30 minutes, making it a perfect weeknight dinner solution that doesn’t compromise on flavor.
  • Customizable: Whether you’re a meat lover or a vegetarian, you can easily tailor these wraps to suit your dietary preferences.
  • Family-Friendly Fun: Kids will love helping in the kitchen, making these wraps a fantastic way to bond while cooking.
  • Perfect for Meal Prep: Make a batch ahead of time and enjoy them throughout the week for a delicious, quick option.

Ingredients You’ll Need (And Easy Swaps)

Before we start cooking, let’s gather our ingredients. Each component plays a vital role in creating those beloved flavors we know and love.

  • 1 lb ground beef (80/20 blend): This blend gives the right amount of fat for flavor. You can substitute with ground turkey or a plant-based ground meat for a lighter version.
  • 1 small onion, finely chopped: Adds sweetness and depth. Red or yellow onions work well too.
  • 1 packet (1 oz) dry onion soup mix: This brings in a savory punch. If you don’t have it, you can mix equal parts of onion powder and garlic powder.
  • 1/4 cup water: To help the beef mixture simmer and absorb flavors.
  • 4 large burrito-size flour tortillas: These are the perfect wrap base. Whole wheat or corn tortillas are great alternatives.
  • 1 cup shredded iceberg lettuce: For crunch and freshness. You can use spinach or mixed greens for added nutrients.
  • 1/2 cup dill pickle slices: Essential for that classic Big Mac taste. You can swap with sweet pickles if you prefer a sweeter profile.
  • 1 cup shredded cheddar cheese: For a creamy texture. Feel free to experiment with pepper jack or even vegan cheese.
  • 1/2 cup Thousand Island dressing: This is the star of the sauce! Homemade or store-bought works, but try making it from scratch for a personal touch.
  • 1 tbsp yellow mustard: Adds a tangy kick. Dijon mustard can be used for a gourmet twist.
  • 1 tsp white vinegar: Balances the richness. Apple cider vinegar can also be a flavorful alternative.
  • 1 tsp paprika: For a hint of smokiness. Smoked paprika can enhance the flavor even more.

Step-by-Step: How to Make Big Mac Wraps at Home

Now that we have our ingredients ready, let’s roll up our sleeves and get cooking. Here’s how to make these scrumptious wraps:

  1. In a large skillet, cook the ground beef and chopped onion over medium-high heat until the beef is browned and the onion is soft. Drain any excess grease.
  2. Sprinkle the onion soup mix over the meat, add water, and stir together. Simmer for 5 minutes until the liquid is mostly absorbed.
  3. In a small bowl, mix the Thousand Island dressing, yellow mustard, white vinegar, and paprika to create the special sauce.
  4. Warm the tortillas in the microwave for 20 seconds or in a dry skillet until they are pliable.
  5. Spread a generous spoonful of the special sauce down the center of each tortilla.
  6. Top with the beef mixture, shredded lettuce, pickle slices, and shredded cheese.
  7. Fold in the sides of the tortilla, then roll it up tightly from the bottom, burrito-style.
  8. Serve immediately, or for crispier wraps, cook in a panini press or skillet over medium heat for 2-3 minutes per side.

Pro Tips for Perfect Taco Wraps

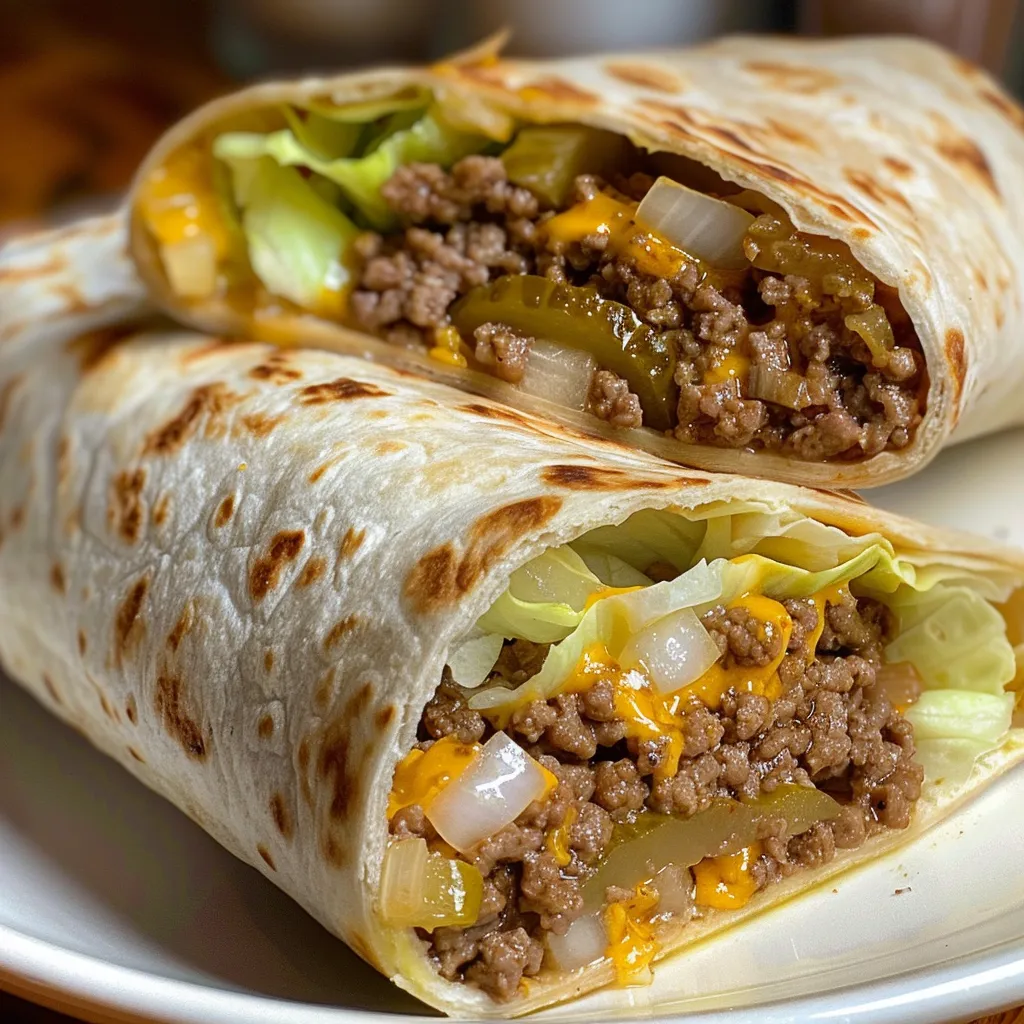
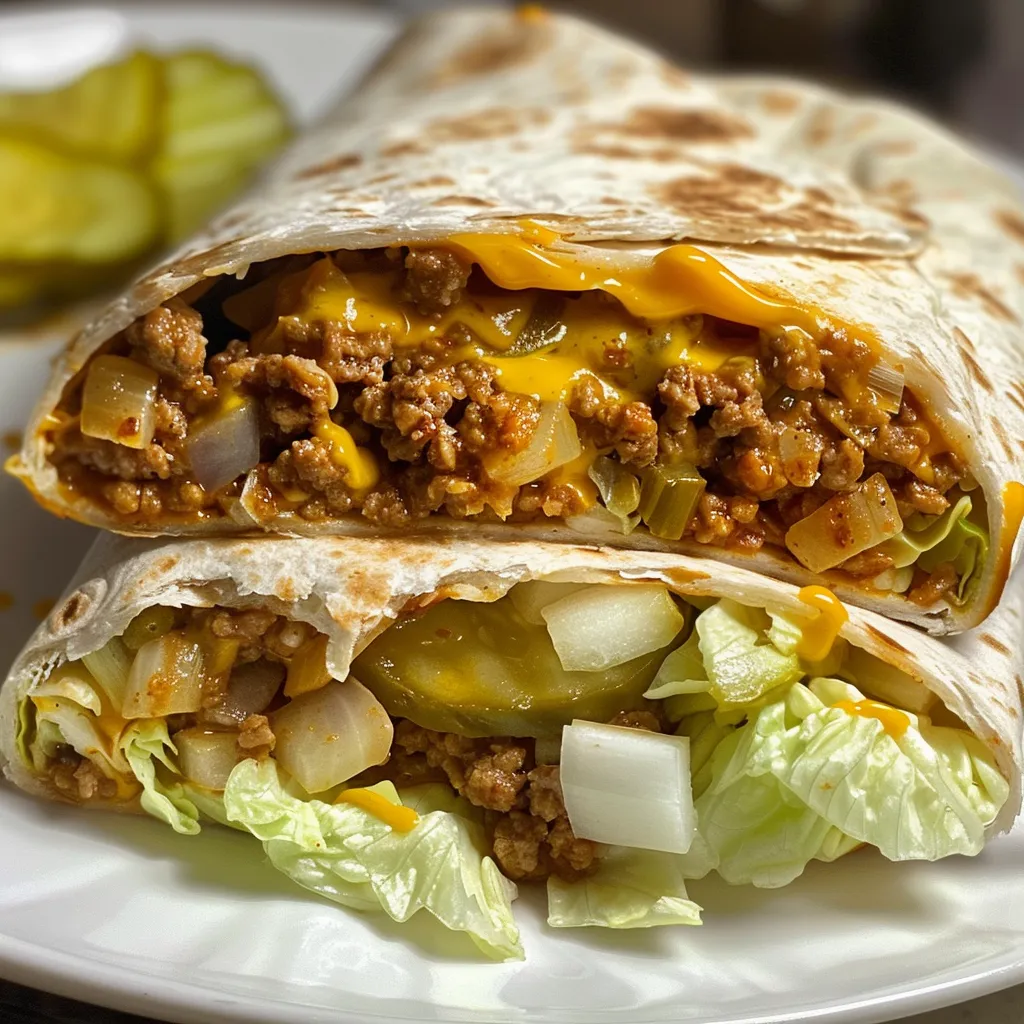
Juicy taco wrap layered with ground beef, lettuce, and cheese, ready to eat.
  • Don’t Overfill: Less is more when it comes to filling. Overstuffing can lead to messy wraps that fall apart.
  • Warm Tortillas: Always warm your tortillas for easier rolling and to prevent cracking.
  • Experiment with Sauces: Don’t hesitate to try different sauces! A spicy aioli or ranch can add exciting flavors.
  • Make It Ahead: Prepare the beef mixture in advance and store it in the fridge for quick assembly later.
  • Be Creative with Cheese: Mix it up with different cheeses for varied flavors and textures.
  • Serve with Sides: Pair your wraps with a side of sweet potato fries or a fresh salad for a complete meal.
  • Use Fresh Ingredients: Fresh lettuce and quality beef make a noticeable difference in flavor.
  • Keep it Simple: Sometimes, a classic approach is the best way to enjoy these wraps.

Common Mistakes and Troubleshooting

Even the best cooks make mistakes. Here are some common pitfalls and how to avoid them:

  • Overcooking the Beef: Keep an eye on your beef as it cooks to avoid drying it out. Aim for a nice brown color, not overcooked.
  • Too Much Sauce: If your wraps are soggy, you’ve added too much sauce. Start with a small amount and build up.
  • Cold Tortillas: Cold tortillas are harder to work with. Always warm them up before assembling.
  • Not Enough Seasoning: Taste your beef mixture before wrapping. If it lacks flavor, don’t hesitate to adjust the seasoning.

Variations on Big Mac Style Taco Wraps

Feel free to get creative! Here are some variations to try:

  • Vegetarian Version: Substitute ground beef with lentils or chickpeas for a hearty meatless option.
  • Spicy Taco Wraps: Add jalapeños or a spicy sauce to give your wraps an extra kick.
  • BBQ Twist: Mix BBQ sauce with the beef for a smoky flavor that’s sure to please.
  • Breakfast Wrap: Use scrambled eggs, cheese, and diced sausage for a delicious breakfast take on this recipe.

Storage and Make-Ahead Instructions

These wraps can be made ahead of time, making them perfect for meal prep. Here’s how to store them:

  • Refrigerator: Store the assembled wraps in an airtight container for up to 2 days. Reheat in a microwave or skillet before serving.
  • Freezer: Freeze unassembled wraps for up to 3 months. Thaw in the fridge overnight before reheating.
  • Make-Ahead Beef Mixture: The beef mixture can be prepared in advance and stored in the refrigerator for up to 4 days.

FAQ: Your Big Mac Taco Wrap Questions Answered

  • Can I use a different type of meat? Absolutely! Ground turkey, chicken, or even plant-based options work wonderfully.
  • What if I don’t have Thousand Island dressing? You can easily make a substitute using mayonnaise, ketchup, and relish.
  • How can I make these wraps gluten-free? Use gluten-free tortillas and ensure your seasonings are gluten-free.
  • Can I add more veggies? Sure! Bell peppers, tomatoes, or even avocado can be added for extra nutrition.
  • How do I prevent my wraps from getting soggy? Ensure your beef mixture is not too watery and use the right amount of sauce.
  • What should I serve with these wraps? Pair them with sweet potato fries, a side salad, or even a creamy coleslaw.
  • Can I make these wraps spicy? Yes! Add hot sauce or diced jalapeños to the beef mixture for a spicy kick.
  • Are these wraps kid-friendly? Absolutely! Kids love the fun of assembling their own wraps.

Nutrition Tips and Dietary Adaptations

Cooking is all about joy and nourishment. Here are some tips to make these wraps even healthier:

  • Lean Meats: Opt for leaner ground meats to reduce fat content.
  • Load Up on Veggies: Add more fresh vegetables to boost fiber and nutrients.
  • Watch the Sauce: Be mindful of the amount of dressing to keep calories in check.
  • Whole Grains: Choose whole-grain tortillas for added fiber and health benefits.

Equipment Recommendations

To make your cooking experience seamless, here are a few tools that can help:

  • Non-Stick Skillet: Perfect for browning the meat without sticking.
  • Measuring Cups and Spoons: Essential for accurate ingredient measurement.
  • Mixing Bowls: Great for preparing your sauce and combining ingredients.
  • Plastic Wrap or Foil: Useful for storing your wraps in the fridge or freezer.

Serving Suggestions

These wraps are versatile and can be served in many delightful ways:

  • Platter Style: Serve with various dipping sauces for a fun appetizer spread.
  • With a Side Salad: Accompany with a fresh salad to balance the richness of the wraps.
  • As Party Food: Cut them into smaller pieces for appetizers at gatherings.
  • Garnished: Top with fresh herbs like cilantro or parsley for a pop of color.

Conclusion

There you have it! These Big Mac Style Taco Wraps are more than just a recipe; they’re a celebration of flavors, memories, and the joy of sharing food with loved ones. Whether it’s a casual weeknight dinner or a fun gathering with friends, these wraps are sure to bring smiles and satisfaction. So gather your loved ones around the table, roll up your sleeves, and dive into this delicious creation. Remember, the kitchen is where love is stirred into every dish, and every bite tells a story. Happy cooking!

Big Mac Style Taco Wraps Recipe

Prep Time 10 minutes
Cook Time 15 minutes
Total Time 25 minutes
Servings 4 servings
Calories 650
Enjoy a flavorful twist on tacos with these Big Mac-inspired wraps, featuring a special sauce, seasoned beef, and fresh toppings.

Ingredients

Meat and Seasonings

  • 1 lb ground beef (80/20 blend)
  • 1 small onion, finely chopped
  • 1 packet dry onion soup mix
  • 1/4 cup water

Tortillas and Toppings

  • 4 large burrito-size flour tortillas
  • 1 cup shredded iceberg lettuce
  • 1/2 cup dill pickle slices
  • 1 cup shredded cheddar cheese
  • 1/2 cup Thousand Island dressing
  • 1 tbsp yellow mustard
  • 1 tsp white vinegar
  • 1 tsp paprika

Instructions 

  • Cook beef and onion until browned; drain excess grease.
  • Add onion soup mix and water; simmer for 5 minutes.
  • Mix dressing, mustard, vinegar, and paprika for the sauce.
  • Warm tortillas; spread sauce, add beef, lettuce, pickles, and cheese.
  • Fold and roll wraps; serve immediately or pan-fry for crispiness.

Notes

For extra flavor, add sliced tomatoes or jalapeños.
Calories: 650kcal
Cost: $15
Course: Main Course
Cuisine: American
Keyword: beef, Tacos, Wraps

There’s something magical about a strawberry banana smoothie that takes us back to sunny mornings, filled with laughter and love. This nourishing blend captures the essence of warmth and joy, making it perfect for sharing with those we cherish. With every sip, you’ll feel a delightful embrace of flavors that remind us that cooking—and drinking—is about creating memories. Let’s dive into this delicious journey together, where simplicity meets nostalgia.

Why You’ll Love This Strawberry Banana Smoothie Recipe

This strawberry banana smoothie isn’t just another drink; it’s a comforting hug in a glass. Here are five reasons why you’ll adore this recipe:

  • Nostalgic flavors: The harmonious blend of strawberries and bananas evokes cherished childhood memories, reminding us of simpler times.
  • Quick and easy: With just a few ingredients, you can whip up this smoothie in minutes, making it perfect for busy mornings.
  • Customizable goodness: Whether you’re looking to add protein or sneak in some greens, this recipe is versatile enough to cater to your taste.
  • Health-conscious choice: Packed with vitamins and nutrients, this smoothie supports a healthy lifestyle while satisfying your sweet tooth.
  • Perfect for sharing: This recipe serves multiple servings, making it an ideal choice for family breakfasts or brunch with friends.

Key Ingredients for Making Perfect Strawberry Banana Smoothies

Let’s gather our ingredients and set the stage for a delightful smoothie experience. Below is a breakdown of what you’ll need, along with some handy substitutions to keep in mind:

  • ¾ cup low-fat milk: You can substitute this with almond milk, oat milk, or coconut milk for a plant-based option.
  • 1 medium banana: Fresh or frozen, ripe bananas lend natural sweetness and creaminess to the smoothie.
  • ¾ cup strawberries: Fresh strawberries yield a vibrant flavor, while frozen strawberries create a thicker consistency.
  • 2 tablespoons ground flax: This ingredient adds omega-3 fatty acids and fiber, enhancing the smoothie’s nutritional value.
  • ¼ cup unflavored whey protein powder or pea protein: Boost your smoothie’s protein content; Greek yogurt or silken tofu works well too.
  • ½ teaspoon vanilla extract: Though optional, this ingredient deepens the flavor profile beautifully.
  • ¾ cup ice: Omit if using frozen fruit for a thicker smoothie.
  • 1 teaspoon monk fruit sweetener: This low-sugar option can be substituted with honey, agave, or stevia if desired.
  • 1 tablespoon peanut butter or almond butter: Adds creaminess and protein; feel free to skip if you prefer a lighter version.
  • Handful of baby spinach or kale: Sneak in some greens without compromising flavor.
  • 1 tablespoon chia seeds or hemp seeds: For an extra nutrient boost and delightful texture.
  • Sliced strawberries and banana slices: Use these as garnishes for a beautiful presentation.
  • Sprinkle of chia seeds or toasted coconut flakes: A finishing touch that elevates your smoothie visually and texturally.

Step-by-Step Instructions for Making Strawberry Banana Smoothies

Now that we have our ingredients ready, let’s walk through the steps to create this delightful smoothie:

  1. Gather all ingredients and measure them accurately. If you want a thicker, colder smoothie, consider using frozen bananas or strawberries.
  2. In a blender, combine the low-fat milk, banana, strawberries, ground flax, protein powder, vanilla extract (if using), ice, and sweetener.
  3. Blend until smooth and creamy. Taste the smoothie and adjust sweetness or thickness by adding more sweetener or liquid if needed.
  4. Pour into a glass and enjoy right away for the freshest taste. For an extra touch, garnish with sliced strawberries, banana slices, or a sprinkle of chia seeds.

Pro Tips for Achieving the Best Texture and Flavor in Strawberry Banana Smoothies

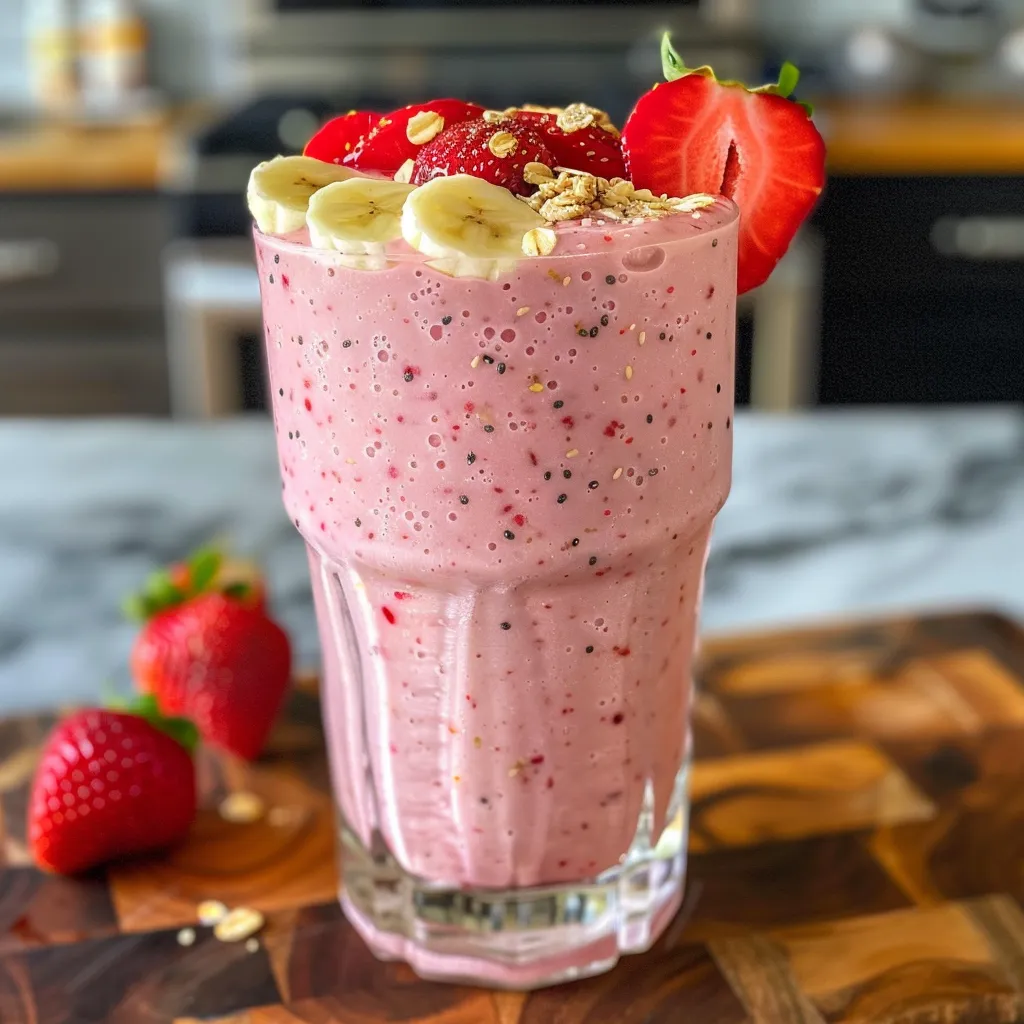
A side view of a creamy strawberry banana smoothie showcasing its rich texture and colorful ingredients.

To ensure your smoothie is nothing short of perfection, consider these expert insights:

  • Use ripe bananas: Ripe bananas are sweeter and creamier, making them ideal for this recipe.
  • Mix frozen fruits: Incorporating frozen strawberries can enhance the thickness without needing too much ice.
  • Blend in stages: Start by blending the liquids and softer ingredients first, then add the frozen components for a more consistent texture.
  • Don’t overblend: Blend just until smooth; over-blending can introduce excess air, making your smoothie less creamy.
  • Experiment with add-ins: Try adding oats for extra fiber, or a teaspoon of honey for sweetness.
  • Chill your glass: Serving your smoothie in a chilled glass keeps it cold longer, enhancing your drinking experience.
  • Adjust sweetness to taste: Everyone’s palate is different; feel free to modify the sweetener to fit your preferences.
  • Presentation matters: Use colorful garnishes to make your smoothie visually appealing and Instagram-worthy!

Common Mistakes and Troubleshooting

Even the best of us can make a misstep in the kitchen. Here are some common pitfalls and how to avoid them:

  • Too thick or too thin: If your smoothie is too thick, add a splash more milk; if it’s too thin, throw in more frozen fruit.
  • Overly sweet: If you’ve added too much sweetener, balance it with a splash of lemon juice or more frozen strawberries.
  • Unpleasant texture: Make sure to blend thoroughly, and use fresh, high-quality ingredients for the best mouthfeel.
  • Flavor imbalance: Taste as you go! Adjust ingredients based on your personal preferences.

Variations: Customize Your Strawberry Banana Smoothie for Unique Twists

Feeling adventurous? Here are four delightful variations to try:

  • Green Smoothie: Add a handful of spinach or kale for a nutrient boost without altering the flavor.
  • Chocolate Delight: Blend in a tablespoon of cocoa powder for a chocolatey twist that kids will love.
  • Nutty Banana: Add a tablespoon of almond butter or peanut butter for an extra dose of healthy fats and flavor.
  • Berry Blast: Mix in a handful of blueberries or raspberries for a berry explosion that complements the strawberries beautifully.

Storage Tips: How to Store and Preserve Leftover Smoothies

If you find yourself with leftover smoothie (which is rare, but it happens!), here’s how to store it:

  • Refrigeration: Store your smoothie in an airtight container for up to 24 hours. Shake or stir well before drinking.
  • Freezing: Pour leftover smoothie into an ice cube tray and freeze. Once frozen, transfer to a resealable bag for quick smoothie additions later.

Frequently Asked Questions About Strawberry Banana Smoothies

Curious about more smoothie-related queries? Here are some common questions:

  • Can I make this smoothie vegan? Absolutely! Simply replace the milk with a plant-based option and use plant-based protein.
  • How can I make this smoothie lower in sugar? Use less sweetener or opt for ripe bananas and strawberries to naturally sweeten your smoothie.
  • Can I use other fruits? Yes! Feel free to mix in your favorite fruits, like mango or pineapple, for different flavor profiles.
  • Is this smoothie suitable for kids? Definitely! It’s a great way to sneak in nutrients while offering a delicious treat.
  • What if I don’t have protein powder? You can substitute with Greek yogurt or silken tofu for protein.
  • How can I make this a meal replacement? Add oats and additional protein for a heartier smoothie.
  • Can I use frozen fruit? Yes! Frozen fruits create a thicker smoothie and can replace the need for ice.
  • What’s the best time to enjoy this smoothie? Anytime! It’s perfect for breakfast, a snack, or a post-workout treat.

Nutrition Tips and Dietary Adaptations

Whether you’re looking for a healthy boost or managing dietary preferences, here are some nutrition tips:

  • Protein-rich options: Incorporate protein powder, Greek yogurt, or nut butter for muscle recovery and satiety.
  • Low-fat choices: Opt for low-fat milk or yogurt if you’re watching your fat intake.
  • Dairy-free needs: Use plant-based milk and yogurt to create a delicious dairy-free smoothie without sacrificing flavor.
  • Incorporate fiber: Adding flaxseed or chia seeds enhances fiber content, promoting digestion.

Equipment Recommendations

To make the perfect smoothie, consider using these kitchen tools:

  • High-speed blender: A good quality blender ensures a smooth consistency, blending even the toughest ingredients with ease.
  • Measuring cups and spoons: Accurate measurements are key to achieving the best flavor and texture.
  • Spatula: A spatula helps you scrape down the sides of the blender for even blending.
  • Glass or mason jar: Serve your smoothie in a beautiful glass or jar for an inviting presentation.

Serving Suggestions: Pairing Strawberry Banana Smoothies with Meals or Snacks

This smoothie is delightful on its own, but here are a few pairing ideas:

  • Served with granola: Top your smoothie with granola for added crunch and texture.
  • Accompanied by whole-grain toast: A slice of whole-grain toast with nut butter complements the smoothie perfectly.
  • Paired with a fruit platter: Create a colorful fruit platter for a refreshing and nutritious breakfast spread.
  • As a post-workout snack: Enhance recovery by pairing your smoothie with a protein bar.

Embrace the warmth and love that comes with each sip of this Strawberry Banana Smoothie. It’s not just a recipe—it’s a celebration of togetherness, memories, and the joy of cooking. So gather your loved ones, blend up some smiles, and share this delightful treat that will surely become a cherished addition to your family traditions!

Strawberry Banana Smoothie

Prep Time 5 minutes
Total Time 5 minutes
Servings 2 cups
Calories 250
A delicious and nutritious smoothie combining fresh strawberries, bananas, and plant-based ingredients for a refreshing treat.

Ingredients

Liquid

  • 0.75 cup low-fat milk (substitute plant-based milk for vegan diets)
  • 1 medium banana, fresh or frozen
  • 0.75 cup strawberries, fresh or frozen

Add-ins

  • 2 tablespoons ground flax
  • 0.25 cup unflavored whey protein powder or pea protein (substitute Greek yogurt or silken tofu if preferred)
  • 0.5 teaspoon vanilla extract (optional)
  • 0.75 cup ice (omit if using frozen fruit)
  • 1 teaspoon monk fruit sweetener (or substitute stevia or other low-sugar sweeteners; optional)
  • 1 tablespoon peanut butter or almond butter

Greens

  • a handful baby spinach or kale
  • 1 tablespoon chia seeds or hemp seeds

Toppings

  • sliced strawberries Sliced strawberries
  • banana slices Banana slices
  • a sprinkle chia seeds or toasted coconut flakes Sprinkle of chia seeds or toasted coconut flakes

Instructions 

  • Gather all ingredients and measure accurately. Use frozen fruit for a colder smoothie.
  • Place milk, banana, strawberries, flax, protein, vanilla, ice, and sweetener into a blender.
  • Blend until smooth. Adjust sweetness or thickness as needed.
  • Pour into glasses and garnish with sliced strawberries, banana slices, or chia seeds if desired.

Notes

For a creamier texture, use frozen bananas and strawberries.
Calories: 250kcal
Cost: $10
Course: Breakfast, Snack
Cuisine: American
Keyword: Fruit, Smoothie

Welcome to a Tropical Adventure

Picture yourself on a sun-kissed beach, the waves gently lapping at the shore, as you sip on a refreshing cocktail that captures the essence of summer. That’s exactly what the Ocean Love Colada offers—a delightful blend that sings of coconut, pineapple, and banana, all wrapped up in a creamy embrace. This recipe is more than just a drink; it’s a heartfelt invitation to create memories, just like the ones I shared with my grandmother in our Louisiana kitchen. Let’s dive into this tropical adventure together and discover why this drink deserves a spot in your heart and on your table.

Why You’ll Love This Recipe

The Ocean Love Colada is not just another cocktail; it’s a celebration of flavor, nostalgia, and joy. Here are five reasons why you and your loved ones will adore this recipe:

  • Easy to Make: With just a few simple ingredients and steps, you’ll be enjoying this drink in no time.
  • A Taste of the Tropics: The blend of coconut cream and pineapple juice transports you to a sunlit beach, no plane ticket required.
  • Perfect for Sharing: This recipe makes enough for everyone to enjoy, making it ideal for gatherings and celebrations.
  • Customizable: Adjust the sweetness or add your favorite fruits to make it uniquely yours.
  • Healthy and Nourishing: Packed with natural ingredients, it’s a refreshing treat that feels good to drink.

Ingredients Breakdown

To craft your own Ocean Love Colada, gather the following ingredients:

  • 1 cup Coconut Milk: This rich base adds creaminess and a hint of sweetness. You can substitute with coconut cream for a thicker texture.
  • 1 cup Pineapple Juice: Freshly squeezed is best, but store-bought works too! It provides that essential tropical flavor.
  • 1 Banana: Adds natural sweetness and a smooth texture. Frozen bananas can give you an even creamier drink.
  • 1 cup Ice Cubes: Essential for that refreshingly cold experience.
  • Splash of Vanilla Extract: Enhances the flavors and adds a lovely aromatic quality. Feel free to use a splash of coconut extract for a more intense coconut flavor.

How to Make the Ocean Love Colada

Side view of a refreshing Ocean Love Colada drink, featuring fruit garnishes and a creamy texture.

Now that we have our ingredients, let’s blend our way to paradise with these easy steps:

  • Step 1: Gather Your Ingredients: Collect 1 cup of coconut milk, 1 cup of pineapple juice, 1 banana, 1 cup of ice, and a splash of vanilla extract.
  • Step 2: Prepare Your Blender: Ensure your blender is clean and ready for action. This is where the magic happens!
  • Step 3: Add Ingredients to Blender: Pour in the coconut milk, pineapple juice, banana, and ice. Don’t forget that splash of vanilla extract for extra flavor!
  • Step 4: Blend Until Smooth: Secure the lid and blend on high until everything is smooth and creamy. You want a luscious texture!
  • Step 5: Taste and Adjust: Give it a taste! If you want it sweeter, add a little honey or agave syrup. Blend again if you add anything.
  • Step 6: Serve in a Fun Glass: Pour your Ocean Love Colada into a chilled glass. Feel free to use a fancy glass to make it extra special!
  • Step 7: Garnish and Enjoy: Add a slice of pineapple or a cherry on top for a beautiful garnish. Grab a straw and sip away!

Expert Tips for the Perfect Ocean Love Colada

Here are some pro tips to elevate your Ocean Love Colada experience:

  • Texture Matters: For a creamier drink, use frozen banana instead of fresh.
  • Chill Your Glasses: Pre-chilling your glasses adds an extra touch of refreshment.
  • Layer Your Drink: For a stunning visual, pour each ingredient slowly to create layers.
  • Make It Ahead: Blend your ingredients and store in the fridge for up to an hour before serving.
  • Experiment with Fruits: Try adding mango or berries for a twist on the classic flavor.
  • Blend in Nutrition: For added health benefits, toss in a handful of spinach or kale without sacrificing flavor.
  • Garnish Creatively: Use toasted coconut flakes or edible flowers for a tropical touch.
  • Stay Hydrated: Enjoy this drink alongside water to balance out the sweetness!

Common Mistakes and Troubleshooting

Even the best cooks make mistakes! Here’s how to troubleshoot common issues when making your Ocean Love Colada:

  • Too Thick?: Add a bit more coconut milk or pineapple juice to reach your desired consistency.
  • Too Sweet?: A splash of fresh lime juice can balance out sweetness and add brightness.
  • Not Creamy Enough?: Blend longer or add more coconut milk to achieve that luscious texture.
  • Flavor Off?: Adjust with a pinch of salt or a bit more vanilla extract to enhance flavors.

Variations on the Ocean Love Colada

Make this recipe your own with these delightful variations:

  • Berry Love Colada: Add a cup of mixed berries for a fruity twist.
  • Strawberry Banana Colada: Replace the banana with strawberries for a fresh take.
  • Alcoholic Version: Add a splash of rum for a tropical kick.
  • Vegan Delight: Ensure your coconut milk is vegan-friendly and enjoy guilt-free.

Storage and Make-Ahead Instructions

If you want to prepare your Ocean Love Colada in advance, here’s how:

  • Refrigeration: Store blended colada in an airtight container for up to 2 hours. The texture may change slightly.
  • Freezing: Freeze in an ice cube tray for a quick frozen treat or smoothie addition.

Comprehensive FAQ

Here are some frequently asked questions about the Ocean Love Colada:

  • Can I make this recipe without alcohol? Absolutely! This recipe is delicious as a non-alcoholic drink.
  • How can I make it lower in calories? Use light coconut milk and reduce the amount of pineapple juice.
  • Can I use other fruits? Yes! Feel free to experiment with mango, peaches, or even passion fruit.
  • What’s the best way to serve it? Serve it in chilled glasses garnished with fresh fruit or coconut flakes.
  • How long does it stay fresh? It’s best enjoyed fresh, but can be refrigerated for up to 2 hours.
  • Can I double the recipe? Yes! Just blend in batches if your blender can’t accommodate all the ingredients at once.
  • What other cocktails can I make with coconut milk? Coconut milk works well in piña coladas, tropical smoothies, and even some desserts.
  • Can I substitute the coconut milk? Yes, almond milk or oat milk can be used, but they will change the flavor profile.

Nutritional Benefits and Dietary Adaptations

The Ocean Love Colada isn’t just a treat for your taste buds; it also brings some health benefits:

  • Hydration: Coconut milk helps keep you hydrated, making it perfect for hot days.
  • Vitamins and Minerals: Pineapple juice is rich in vitamin C and manganese, supporting your immune system.
  • Healthy Fats: The coconut milk provides healthy fats essential for energy and nutrient absorption.

Equipment Recommendations

To make your Ocean Love Colada effortlessly, here’s what you’ll need:

  • High-Speed Blender: A powerful blender ensures a smooth and creamy texture.
  • Measuring Cups: For accurate ingredient measurements.
  • Chilled Glasses: Enhance your presentation and keep your drink cold.
  • Spoon or Straw: For easy sipping and enjoying your tropical delight.

Serving Suggestions

To elevate your Ocean Love Colada experience, consider these serving ideas:

  • Pair with Snacks: Serve with tropical fruit platters or coconut shrimp for a fun pairing.
  • Perfect for Parties: Make a large batch and serve in a punch bowl for a party atmosphere.
  • Garnish Creatively: Use colorful straws, umbrellas, or fresh mint leaves for that extra touch.

Conclusion

The Ocean Love Colada is a refreshing, heartwarming drink that brings the spirit of summer right to your kitchen. It’s a reminder that cooking and sharing food is about love and connection. So gather your friends and family, make this delightful drink, and create new memories together. Whether it’s a hot summer day or a cozy evening, the Ocean Love Colada is sure to bring a smile to your face and warmth to your heart. Cheers to love, laughter, and unforgettable moments around the table!

Ocean Love Colada

Prep Time 5 minutes
Total Time 5 minutes
Servings 2 glasses
Calories 180
A refreshing tropical smoothie blending coconut, pineapple, and banana for a delightful treat.

Ingredients

Liquid Ingredients

  • 1 cup Coconut Milk
  • 1 cup Pineapple Juice
  • 1 piece Banana
  • 1 cup Ice Cubes
  • splash splash Vanilla Extract

Instructions 

  • Add all ingredients to the blender and blend until smooth.
  • Pour into glasses, garnish with pineapple or cherry, and serve.

Notes

For a sweeter taste, add honey or agave syrup before blending.
Calories: 180kcal
Cost: $12
Course: Beverage
Cuisine: Tropical
Keyword: Banana, coconut, Pineapple

Refreshing Peach Lemonade: A Summer Essential

As the warmth of summer settles in, there’s nothing quite like a glass of fresh peach lemonade to brighten your day. The sweet aroma of ripe peaches combined with the zesty tang of lemons creates a drink that’s not just refreshing but also a reminder of sun-soaked afternoons and cherished family gatherings. This recipe is a celebration of flavors that brings people together, making it perfect for picnics, backyard barbecues, or a cozy evening on the porch. Let’s dive into the delightful world of peach lemonade and explore why it’s a favorite among many.

Why You’ll Love This Recipe

  • Simple Ingredients: Made with just a handful of ingredients, you can easily whip up this lemonade with pantry staples.
  • Versatile Drink: Not only is this lemonade delicious on its own, but it can also be turned into a fun peach lemonade cocktail with the addition of your favorite spirits.
  • Seasonal Delight: This recipe highlights the best of summer’s bounty, using fresh peaches that offer a sweet, juicy flavor.
  • Make-Ahead Friendly: You can prepare this drink ahead of time, making it easy to serve at gatherings without the last-minute rush.
  • Family Tradition: Each sip is like a hug, bringing back memories of warm summer days spent with loved ones around the table.

Ingredients for Fresh Peach Lemonade

To make this delightful lemonade recipe, you’ll need:

  • 4 large ripe peaches: Pitted and sliced (reserve a few slices for garnish).
  • 1 cup freshly squeezed lemon juice: Approximately 5–6 lemons.
  • 3/4 cup granulated sugar: Adjust to taste based on your sweetness preference.
  • 4 cups cold water: Essential for dilution.
  • Ice cubes: To keep your drink chilled and refreshing.
  • Fresh mint sprigs: Optional, for a beautiful garnish that adds a touch of elegance.

Steps to Make Fresh Peach Lemonade

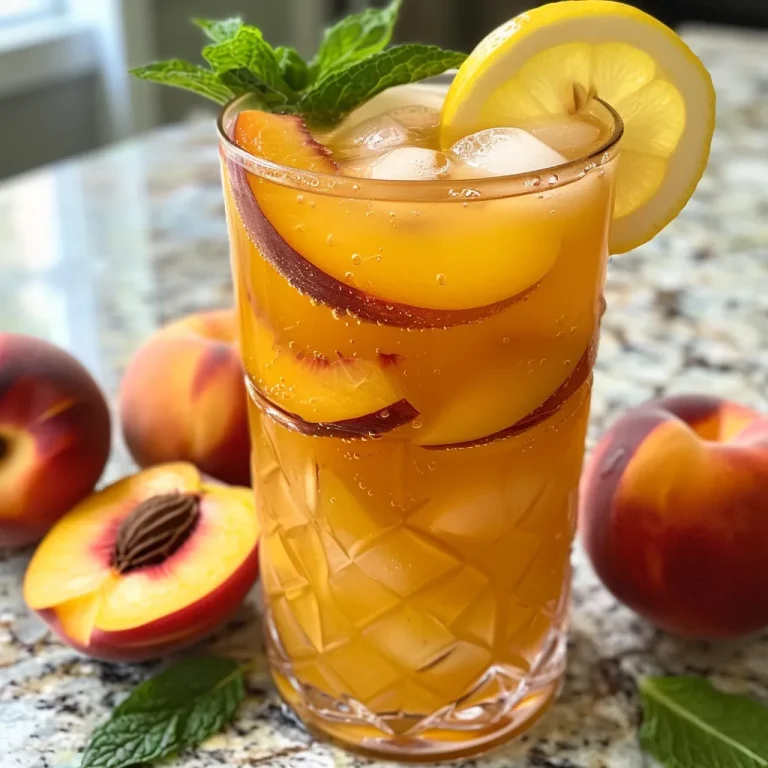
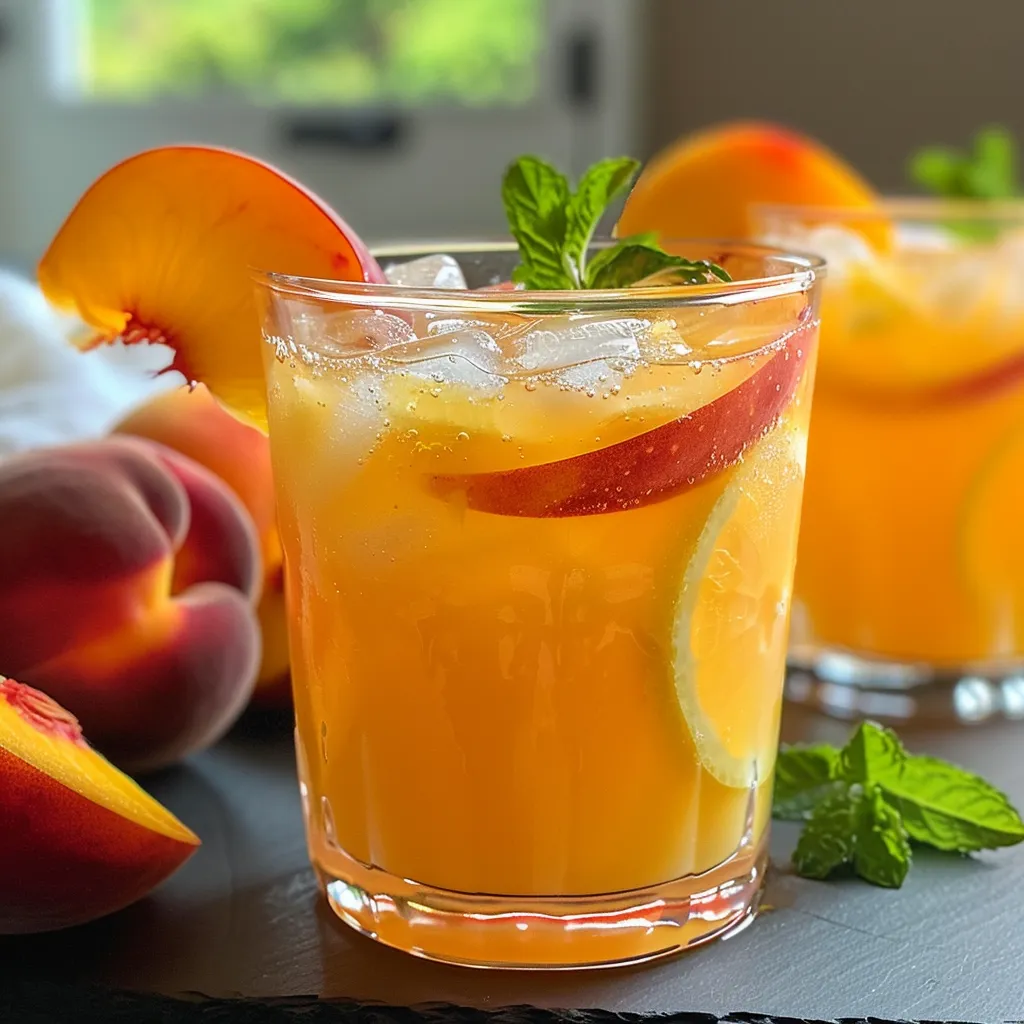
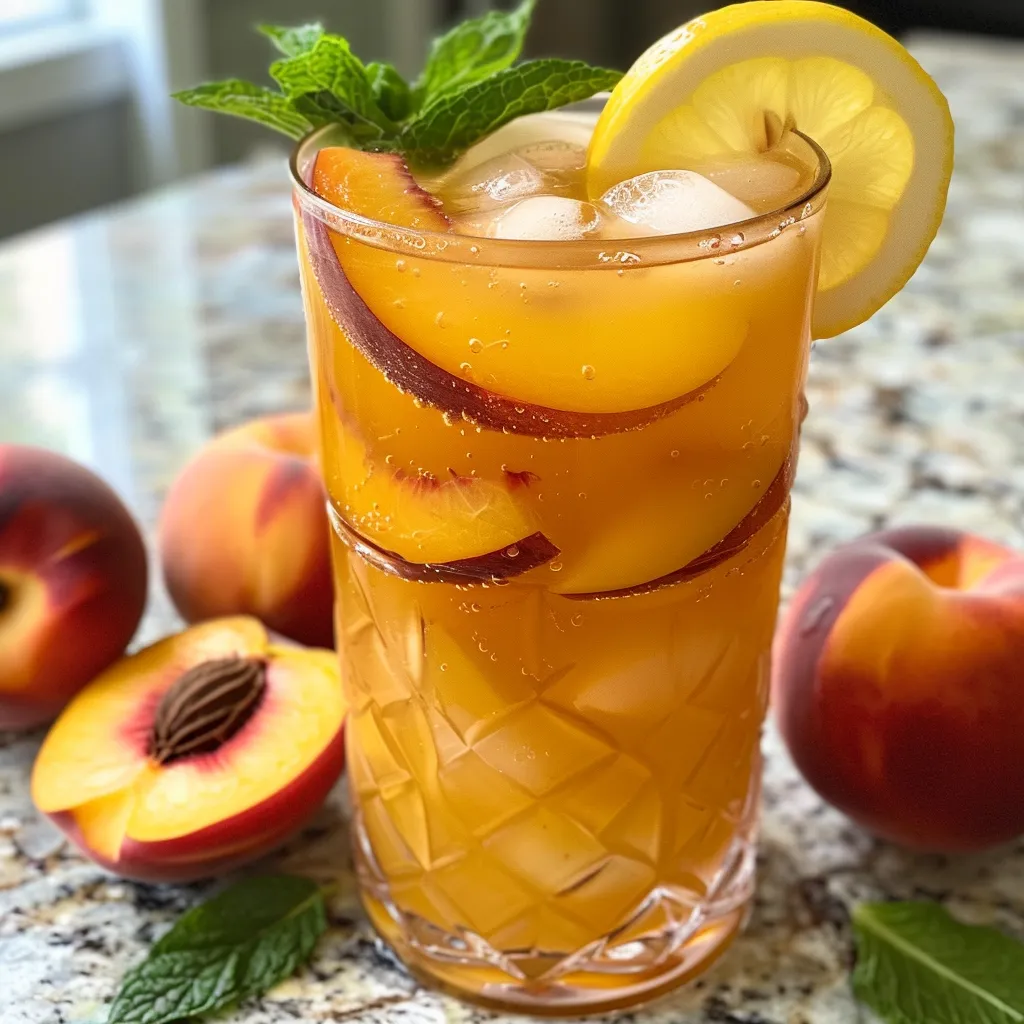
Side view of a refreshing peach lemonade in a glass, garnished with fresh mint.

Follow these simple steps to create your peach lemonade:

  1. In a blender, combine the sliced peaches and sugar with about half a cup of the cold water. Blend on high until smooth and the sugar is fully dissolved.
  2. For a smoother texture, pour the peach puree through a fine-mesh strainer into a large pitcher, discarding any pulp or skin. If you enjoy a more rustic feel, feel free to skip this step.
  3. Add the freshly squeezed lemon juice and the remaining cold water to the pitcher with the peach puree. Stir vigorously to ensure everything is well combined.
  4. Taste the lemonade and adjust the sweetness by adding more sugar if desired, or increase the water if it’s too strong.
  5. Chill the pitcher in the refrigerator for at least an hour, allowing the flavors to meld beautifully.
  6. Serve over ice in tall glasses, garnishing each with a fresh peach slice and a sprig of mint for that special touch.

Pro Tips for the Perfect Peach Lemonade

  • Choose Ripe Peaches: The best flavor comes from perfectly ripe peaches, so opt for those that are slightly soft to the touch and fragrant.
  • Adjust Sweetness: Depending on the ripeness of your peaches, you may need to modify the amount of sugar. Start with less, and add more to taste.
  • Experiment with Citrus: For a zesty twist, consider adding a splash of lime juice to complement the lemon.
  • Make it Boozy: For adults, a splash of bourbon or vodka can transform this lemonade into a refreshing cocktail.
  • Blend, Don’t Shake: Blending the peaches ensures a smooth texture, while shaking can introduce air bubbles that give an unwanted frothy effect.
  • Use Filtered Water: For the best taste, use filtered water to enhance the flavors of your lemonade.
  • Try Infusing: Add a few sprigs of rosemary or basil to your lemonade while chilling for an aromatic infusion.
  • Garnish Creatively: Besides mint, consider garnishing with edible flowers or additional citrus slices for a beautiful presentation.

Common Mistakes & Troubleshooting

Even the best recipes can have hiccups. Here are a few common mistakes and how to avoid them:

  • Too Sweet or Too Tart: If your lemonade ends up too sweet, add more water or a splash of lemon juice. If it’s too tart, balance it with a bit more sugar.
  • Pulp Overload: If you find your lemonade too pulpy, make sure to strain the puree thoroughly or blend longer to achieve a smoother consistency.
  • Not Chilling Long Enough: Allowing the lemonade to chill for at least an hour improves flavor integration. Be patient!
  • Using Overripe Peaches: Avoid using overly soft or bruised peaches, as they can introduce off-flavors.

Delicious Variations of Peach Lemonade

Once you have mastered the basic recipe, here are some delightful variations to try:

  • Berry Peach Lemonade: Add a cup of fresh berries such as strawberries or blueberries to the blender for a fruity twist.
  • Peach Basil Lemonade: Blend fresh basil leaves with the peaches for a refreshing herbal note.
  • Spicy Peach Lemonade: Infuse with a slice of jalapeño or a dash of cayenne pepper for a spicy kick.
  • Frozen Peach Lemonade: Freeze the peach slices and blend with ice for a slushy version that’s perfect for hot days.

Storage & Make-Ahead Instructions

This refreshing peach lemonade can be made ahead of time. Here’s how to store it:

  • Refrigeration: Store any leftover lemonade in an airtight container in the fridge for up to a week.
  • Freezing: You can freeze peach puree in ice cube trays for up to three months. When you need a refreshing drink, blend with water and lemon juice.
  • Make Ahead: Prepare the peach puree a day in advance and mix in the lemon juice and water just before serving.

FAQs About Peach Lemonade

  • Can I use canned peaches?: Yes, canned peaches can work in a pinch, but fresh peaches provide the best flavor.
  • How do I make this lemonade less sweet?: Simply reduce the sugar amount or add more water to dilute the sweetness.
  • Can I use bottled lemon juice?: While fresh lemon juice is recommended, bottled can be used in a pinch, but will lack some freshness.
  • How long does peach lemonade last?: When stored properly, it can last in the refrigerator for up to one week.
  • Can I use other fruits?: Absolutely! You can experiment with other fruits, such as mango or pineapple, for a tropical twist.
  • Is this recipe vegan?: Yes, all the ingredients are plant-based, making it perfect for vegan diets.
  • Can I adjust the serving size?: Yes, simply scale the ingredients up or down based on your needs.
  • How do I make a peach lemonade cocktail?: Add a shot of vodka or bourbon to your glass for a refreshing adult version.

Nutrition Tips & Dietary Adaptations

This peach lemonade can easily be adapted for different dietary needs:

  • Low Sugar Option: Use a sugar substitute like stevia or monk fruit for a no-calorie sweetener.
  • Gluten-Free: Naturally gluten-free, this lemonade is safe for those with gluten sensitivities.
  • Low-Calorie Version: To cut calories, reduce the sugar and add more water or ice to dilute.

Recommended Equipment

To make this recipe, here are a few essential tools you may need:

  • Blender: A high-powered blender is crucial for creating a smooth peach puree.
  • Fine-Mesh Strainer: For those who prefer a smoother lemonade, this tool helps remove pulp.
  • Large Pitcher: A sturdy pitcher for mixing and serving your refreshing drink.
  • Measuring Cups: To ensure accurate measurements for all ingredients.

Serving Suggestions

Pair your peach lemonade with delightful dishes to enhance your gathering:

  • Ham Quiche: The savory flavors of quiche complement the sweetness of the lemonade.
  • Peach Syrup Pancakes: A breakfast treat that matches perfectly with the drink.
  • Lemon Poppyseed Muffins: A delightful snack that echoes the citrusy notes of the lemonade.
  • Salad Mixed Greens: A fresh salad balances the sweetness and adds a healthy element.

In conclusion, this Fresh Peach Lemonade recipe is more than just a drink; it’s a vessel for memories, love, and shared moments. Whether you’re sipping it on a sunny afternoon or serving it at a family gathering, each glass is a reminder of the joy that comes from cooking and sharing with those you love. So gather your ingredients, invite your friends, and let the summer celebrations begin! Cheers to good times and great flavors!

Fresh Peach Lemonade

Prep Time 10 minutes
Total Time 1 hour 10 minutes
Servings 4 glasses
Calories 150
A refreshing homemade lemonade infused with ripe peaches and zesty lemon juice, perfect for hot days.

Ingredients

Fruits and liquids

  • 4 large ripe peaches (pitted and sliced, reserve some for garnish)
  • 1 cup freshly squeezed lemon juice (about 5–6 lemons)
  • 3/4 cup granulated sugar (adjust to taste)
  • 4 cups cold water
  • Ice cubes Ice cubes (for serving)
  • Fresh mint sprigs Fresh mint sprigs (for garnish (optional))

Instructions 

  • Blend peaches and half the water with sugar until smooth.
  • Strain the mixture if desired, then combine with lemon juice and remaining water.
  • Stir well, taste, and adjust sweetness or water as needed.
  • Chill in the refrigerator for at least an hour.
  • Serve over ice, garnished with peach slices and mint if desired.

Notes

Use ripe peaches for the best flavor and adjust sugar to taste.
Calories: 150kcal
Cost: $12
Course: Beverage
Cuisine: American
Keyword: lemonade, peach

Welcome to the Heart of Comfort: Creamiest Chicken Alfredo Pasta

There’s something truly special about gathering around the table, sharing stories, and savoring a warm, comforting meal. This creamiest chicken Alfredo pasta recipe is more than just a dish; it’s a hug in a bowl, a celebration of love and tradition that brings families together. With its luscious sauce and tender chicken, this recipe is as much about the experience as it is about the flavors. Let’s dive into the heart of this comforting dish and discover why it deserves a place at your dinner table.

Why You’ll Love This Recipe

Every great recipe has its secrets, and this one is no different. Here are a few reasons why this homemade chicken Alfredo will quickly become a favorite:

  • Quick & Easy: Ready in just 30 minutes, making it perfect for busy weeknights when you still want to impress.
  • Simple Ingredients: Uses pantry staples like cream, chicken, and cheese that you likely already have on hand.
  • Ultimate Comfort Food: Rich, creamy, and satisfying—a bowl of this pasta feels like a warm embrace.
  • Customizable: Easily adapted to suit your family’s tastes with various proteins or add-ins.
  • Perfect for Sharing: Ideal for family dinners, gatherings, or even a cozy night in with loved ones.

Ingredient Breakdown

Let’s explore the ingredients that make this dish truly special, along with some delicious substitutions!

  • Boneless, Skinless Chicken Breasts: Use thighs for a richer flavor, or even shrimp for a seafood twist.
  • Fettuccine or Tagliatelle: While these are traditional choices, any pasta shape will work beautifully.
  • Double Cream or Heavy Cream: For an even lighter option, use half-and-half, but know it won’t be as rich.
  • Cheeses: Freshly grated Parmesan and low-moisture mozzarella provide the perfect flavor and texture. Feel free to experiment with Gruyere or Fontina for a unique twist!
  • Garlic and Onions: These aromatics are key to building flavor; shallots can be used for a milder taste.

Step-by-Step Instructions

Juicy pieces of chicken blended with creamy Alfredo sauce and pasta in a side view.

Ready to cook? Let’s get started with this easy-to-follow guide!

  1. Prepare the Chicken: Pat the chicken dry, season with salt, pepper, and paprika, and sauté in olive oil until cooked through. Set aside.
  2. Cook the Pasta: In salted boiling water, cook the fettuccine until al dente. Reserve 1 cup of pasta water before draining.
  3. Create the Sauce: In the same skillet, melt butter, sauté garlic and onions until fragrant, then add cream and simmer gently.
  4. Add the Cheeses: Gradually whisk in Parmesan and mozzarella until melted and smooth.
  5. Toss Everything Together: Mix in the cooked pasta and chicken, adding reserved pasta water until the sauce reaches desired consistency.
  6. Season and Serve: Stir in fresh parsley, adjust seasoning, and serve hot, garnished with more parsley.

Pro Tips for Alfredo Perfection

To elevate your cooking game, consider these expert insights:

  • Don’t Rush the Sauce: Allow the cream to simmer gently to develop a rich flavor without boiling.
  • Pasta Water is Key: The starch in reserved pasta water helps bind the sauce and pasta, giving it that creamy texture.
  • Quality Ingredients Matter: Opt for freshly grated cheese and high-quality cream for the best flavor.
  • Experiment with Herbs: Add a pinch of nutmeg or Italian herbs to the sauce for an aromatic twist.
  • Let It Rest: Allow the dish to sit for a few minutes before serving to enhance the flavors.

Common Mistakes and Troubleshooting

Even the best chefs make mistakes! Here’s how to avoid some common pitfalls:

  • Too Thick Sauce: If your sauce is too thick, add more reserved pasta water until you reach the desired consistency.
  • Cheese Clumping: Ensure cheeses are at room temperature and add them gradually for a smooth sauce.
  • Overcooked Pasta: Always cook pasta al dente; it will continue to cook when tossed with the hot sauce.
  • Flavorless Chicken: Don’t skip the seasoning! Generously season chicken before cooking for maximum flavor.

Delicious Variations to Try

Make this recipe your own with these tasty variations:

  • Vegetarian Alfredo: Substitute chicken with sautéed mushrooms and add spinach or broccoli for a hearty dish.
  • Garlic Parmesan Shrimp: Swap chicken for shrimp, adding a splash of lemon juice for brightness.
  • Buffalo Chicken Alfredo: Mix in shredded buffalo chicken for a spicy twist on the classic.
  • Spinach and Artichoke: Fold in cooked spinach and artichokes for a creamy, flavorful addition.

Storage and Make-Ahead Instructions

This creamy chicken Alfredo pasta is perfect for meal prep! Here’s how to store it:

  • Refrigeration: Store leftovers in an airtight container in the fridge for up to 3 days.
  • Reheating: Gently reheat on the stove with a splash of cream or pasta water to restore the sauce’s creaminess.
  • Make-Ahead: Prepare the sauce and chicken in advance, then combine with freshly cooked pasta just before serving.

Nutritional Information & Dietary Adaptations

For those mindful of nutrition, here are some tips:

  • Lower Calorie Option: Substitute heavy cream with a blend of half-and-half and low-fat milk.
  • Gluten-Free: Use gluten-free pasta for a safe, delicious alternative.
  • Vegetarian: Omit chicken and use vegetable broth instead of chicken broth for a rich flavor.
  • Dairy-Free: Use coconut cream and a dairy-free cheese substitute for a creamy texture.

Equipment Recommendations

To make your cooking experience smoother, here are some recommended tools:

  • Large Skillet: A sturdy skillet for sautéing chicken and creating your sauce.
  • Pot for Pasta: A large pot to boil pasta, ensuring enough space for even cooking.
  • Whisk: Essential for smoothly incorporating cheese into the sauce.
  • Measuring Cups and Spoons: Accurate measurements ensure consistent results every time.

Serving Suggestions

To elevate your meal, consider these serving suggestions:

  • Garnish: Top with extra parsley and a sprinkle of Parmesan for a beautiful presentation.
  • Pair with Wine: A crisp Chardonnay or a light Pinot Noir complements the creamy sauce beautifully.
  • Side Dishes: Serve with a fresh garden salad or garlic bread for a complete meal.

Frequently Asked Questions

Still have questions? Here are some common inquiries:

  • Can I use chicken thighs instead of breasts? Yes, thighs offer a richer flavor and remain juicy.
  • What if I don’t have double cream? Heavy cream works well, but the sauce may be slightly less rich.
  • Can I freeze leftovers? Yes, but the texture may change upon reheating.
  • How do I make it spicier? Add crushed red pepper flakes or hot sauce to the sauce for heat.
  • Is this recipe suitable for kids? Absolutely! It’s creamy and mild, perfect for little ones.
  • Can I add vegetables? Yes! Broccoli, peas, or bell peppers can be lovely additions.
  • How do I store leftovers? In an airtight container in the fridge for up to 3 days.
  • Can I make this dish vegetarian? Yes, simply omit the chicken and use a vegetable broth.

In conclusion, this creamiest chicken Alfredo pasta recipe is a delightful way to bring loved ones together, sharing not just a meal, but memories and warmth. I hope you take the time to cook this dish, to feel the love that goes into every bite, and to create new memories around your own family table. Happy cooking!

Creamiest Chicken Alfredo Pasta

Prep Time 10 minutes
Cook Time 20 minutes
Total Time 30 minutes
Servings 4 servings
Calories 850
A rich and creamy chicken Alfredo pasta that combines tender chicken, silky sauce, and perfectly cooked pasta for a comforting meal.

Ingredients

Chicken

  • 1.5 lbs boneless, skinless chicken breasts, thinly sliced or cubed
  • 1 tsp salt
  • 0.5 tsp black pepper
  • 1 tsp paprika
  • 2 tbsp olive oil

Pasta

  • 12 oz fettuccine or tagliatelle pasta

Sauce

  • 4 tbsp unsalted butter (½ stick / 56g)
  • 1 tsp chopped garlic (2-3 cloves, minced)
  • 1 tbsp finely chopped onions or shallots
  • 2 cups double cream or heavy cream
  • 0.5 cup freshly grated Parmesan cheese
  • 2 cups shredded low-moisture, part-skim mozzarella cheese
  • 1 tsp fresh parsley, chopped (plus more for garnish)
  • 1 cup reserved pasta water

Instructions 

  • Season chicken with salt, pepper, and paprika. Cook in olive oil until golden and cooked through, then set aside.
  • Cook pasta until al dente, reserving 1 cup of pasta water before draining.
  • In the same skillet, melt butter, sauté garlic and onions, then add cream and simmer gently.
  • Gradually whisk in Parmesan and mozzarella until smooth, then add cooked pasta and chicken, tossing to coat.
  • Add reserved pasta water gradually until sauce reaches desired consistency, stir in parsley, and serve.

Notes

Use freshly grated cheese for the best flavor and texture.
Calories: 850kcal
Cost: $15
Course: Main Course
Cuisine: Italian
Keyword: Chicken, Creamy, Pasta

The Heart of Every Celebration: A Vanilla Cake Recipe

There’s a special kind of magic that fills the air when baking a vanilla cake. It’s not just about the sweet vanilla flavor wafting through the kitchen; it’s about the memories that come rushing back—the laughter of family gatherings, the warmth of loved ones gathered around a table, and the shared joy of indulging in a delicious slice of cake. This recipe for Vanilla Cake will not only satisfy your taste buds but will also become a cherished part of your family traditions.

In this guide, we’ll explore everything you need to know to create the perfect vanilla cake that whispers sweet memories. From the ingredients to tips for success, we’ll ensure that your baking experience is as delightful as the cake itself. Ready to embark on this delicious journey? Let’s get started!

Why You’ll Love This Recipe

This vanilla cake recipe stands out for several reasons:

  • Simple and Accessible: With ingredients you likely already have in your pantry, baking this cake is a breeze.
  • Comforting Flavor: The rich vanilla flavor brings warmth and nostalgia, making it perfect for birthdays and special occasions.
  • Moist and Fluffy: With the right technique, this cake achieves a perfect, moist crumb that stays fresh for days.
  • Versatile Base: This vanilla cake serves as an excellent base for various frostings and fillings, allowing you to customize it for any event.
  • Family Tradition: Sharing this cake with loved ones helps create lasting memories around the dinner table, just like my grandmother did.

Ingredients Breakdown

Before you start baking, it’s essential to gather all the necessary ingredients. Here’s a detailed list along with some substitutions you can consider:

  • 2 ½ cups all-purpose flour: This forms the foundation of the cake. For a gluten-free option, you can use a gluten-free all-purpose blend.
  • 2 ½ tsp baking powder: This ingredient is crucial for achieving a light and fluffy texture. You can substitute it with baking soda, but you’ll need to adjust the amount of acid in the recipe.
  • ½ tsp salt: Salt enhances the sweetness and balances the flavors. Don’t skip this!
  • 1 cup unsalted butter, softened: Butter adds richness. For a dairy-free version, you can use coconut oil or vegan butter.
  • 2 cups granulated sugar: Sweetness is key! You can substitute with brown sugar for a deeper flavor.
  • 4 large eggs: Eggs provide moisture and structure. For a vegan alternative, use flax eggs (1 tbsp ground flaxseed + 2.5 tbsp water per egg).
  • 1 tbsp vanilla extract: This is the star ingredient! Vanilla bean paste can be used for an even more intense flavor.
  • 1 cup whole milk: Milk keeps the batter moist. Almond or oat milk can be used for a dairy-free alternative.
  • 4 cups powdered sugar: Essential for frosting. You can use less for a less sweet frosting.
  • 1 cup heavy cream: This creates a rich frosting. Coconut cream works well for a vegan option.

Step-by-Step Instructions

Side view of a deliciously layered vanilla cake topped with whipped cream.

Now that you have your ingredients gathered, it’s time to bring this cake to life! Follow these steps carefully for the best results:

  • Preheat the oven: Set your oven to 350°F (175°C). Grease and line three 8-inch round cake pans with parchment paper.
  • Mix dry ingredients: In a medium bowl, whisk together the flour, baking powder, and salt. This ensures even distribution of the leavening agent.
  • Cream butter and sugar: In a large mixing bowl, beat the softened butter and granulated sugar together until pale and fluffy, about 3-5 minutes.
  • Add eggs and vanilla: Add the eggs one at a time, mixing well after each addition. Stir in the vanilla extract until combined.
  • Combine dry and wet ingredients: Gradually add the dry mixture to the wet mixture, alternating with the milk. Begin and end with the dry ingredients, stirring until just smooth.
  • Divide and bake: Evenly distribute the batter among the prepared pans. Bake for 25-30 minutes or until a toothpick inserted into the center comes out clean.
  • Cool the cakes: Allow the cakes to cool in the pans for about 10 minutes, then turn them out onto wire racks to cool completely.
  • Make the frosting: In a mixing bowl, beat the softened butter until creamy. Gradually add powdered sugar, followed by the vanilla and cream until smooth and fluffy.
  • Assemble the cake: Once the cakes are completely cool, place one layer on a serving plate, spread a layer of frosting, and repeat with the other layers. Frost the top and sides as desired.

Pro Tips for Vanilla Cake Success

To ensure your vanilla cake turns out perfectly every time, consider these expert tips:

  • Room temperature ingredients: Using eggs and butter at room temperature helps create a smoother batter.
  • Don’t overmix: Mix until just combined. Overmixing can lead to a dense cake.
  • Check for doneness: Use a toothpick to ensure the cake is baked through—if it comes out clean, you’re good to go!
  • Cool completely: Allow the cakes to cool completely before frosting to prevent melting.
  • Chill the cake: For cleaner slices, chill the cake in the refrigerator before cutting.
  • Use quality ingredients: Opt for high-quality vanilla extract for the best flavor.
  • Decorate with love: Get creative with your frosting and toppings—fresh berries, edible flowers, or sprinkles can add a personal touch.
  • Store properly: Keep any leftovers in an airtight container to maintain freshness.

Common Mistakes and Troubleshooting

Even the best bakers face challenges. Here are some common mistakes and how to avoid them:

  • Dense texture: This often results from overmixing or not enough leavening agent. Ensure you measure accurately and mix just until combined.
  • Dry cake: Overbaking can cause dryness. Keep an eye on the oven towards the end of the baking time.
  • Frosting issues: If your frosting is too thin, add more powdered sugar. If it’s too thick, mix in a little milk until it reaches the desired consistency.
  • Uneven layers: Ensure your oven temperature is accurate and that you rotate the pans halfway through baking for even cooking.

Variations to Try

This vanilla cake is versatile! Here are some variations you can explore:

  • Chocolate Vanilla Cake: Replace half the flour with cocoa powder for a delicious chocolate twist.
  • Almond Vanilla Cake: Substitute almond extract for half of the vanilla for a nutty flavor.
  • Fruit-Infused Vanilla Cake: Fold in fresh fruits like blueberries or raspberries into the batter for a fruity surprise.
  • Layered Creations: Add layers of jam or whipped cream between the cake layers for added flavor and texture.

Storage and Make-Ahead Instructions

If you want to prepare this cake in advance, here are some tips:

  • Make ahead: The cake layers can be baked a day in advance. Store them in an airtight container until you’re ready to frost.
  • Freezing: You can freeze the unfrosted cake layers for up to 3 months. Thaw them in the refrigerator before frosting.
  • Leftovers: Store any leftover cake in an airtight container at room temperature for up to 3 days or in the fridge for up to a week.

Frequently Asked Questions

Here are some common questions and answers about this vanilla cake recipe:

  • Can I use cake flour instead of all-purpose flour? Yes, cake flour can yield an even lighter cake.
  • What can I use instead of eggs? Flax eggs or applesauce can be great substitutes for a vegan version.
  • How do I make my cake more flavorful? Use high-quality vanilla extract, and don’t hesitate to experiment with adding spices like cinnamon or nutmeg.
  • Can I use a different size pan? Yes, just adjust the baking time accordingly. A larger pan will take less time, while a smaller pan may take longer.
  • What frosting goes best with vanilla cake? Classic buttercream frosting is a favorite, but cream cheese frosting or whipped cream also pairs well.
  • How do I know when the cake is done? A toothpick inserted into the center should come out clean or with a few crumbs attached.
  • Can I make this cake gluten-free? Yes, use a gluten-free all-purpose flour blend.
  • What’s the best way to frost a cake? Use a spatula to apply a thin layer of frosting, then chill before adding a thicker layer for a smooth finish.

Nutrition Tips and Dietary Adaptations

This vanilla cake can be easily adapted to meet various dietary needs:

  • Lower sugar: Reduce sugar by 25% for a less sweet cake.
  • Whole grain option: Substitute half the all-purpose flour with whole wheat flour for added fiber.
  • Dairy-free: Use plant-based butter and milk alternatives for a dairy-free version.

Equipment Recommendations

To achieve the best results when baking this vanilla cake, consider using the following equipment:

  • Mixing bowls: A set of mixing bowls in various sizes makes it easy to mix and combine ingredients.
  • Electric mixer: A stand or hand mixer helps achieve a fluffy batter.
  • Measuring cups and spoons: Accurate measurements are key to baking success.
  • Spatula: A silicone spatula is perfect for folding in ingredients and scraping bowls.
  • Wire cooling racks: These allow for even cooling of the cake layers.
  • 8-inch round cake pans: The ideal size for this recipe that yields even layers.

Serving Suggestions

Here are a few delightful ways to serve your vanilla cake:

  • With fresh berries: Top individual slices with a mix of fresh strawberries, blueberries, or raspberries for a refreshing touch.
  • Ice cream pairing: Serve alongside a scoop of vanilla or chocolate ice cream for an indulgent dessert.
  • Drizzle with sauce: A warm chocolate or caramel sauce drizzled over each slice adds a luxurious feel.
  • Garnish with mint: A sprig of fresh mint can elevate presentation and add a pop of color.

Conclusion: Baking with Love

As we wrap up this journey through the world of vanilla cake, remember that every bite is a testament to the love and care you put into your baking. This recipe isn’t just about flavor; it’s about creating memories that last a lifetime. Whether it’s a birthday, a family gathering, or a simple afternoon treat, this vanilla cake will bring smiles to your loved ones’ faces, filling your home with warmth and joy. So don your apron, gather your ingredients, and let’s bake something beautiful together!

Vanilla Cake

Prep Time 20 minutes
Cook Time 30 minutes
Total Time 50 minutes
Servings 12 pieces
Calories 450
A classic vanilla cake that's perfect for celebrations or everyday treats. Moist, fluffy, and topped with creamy frosting.

Ingredients

Dry ingredients

  • 2.5 cups all-purpose flour
  • 2.5 tsp baking powder
  • 0.5 tsp salt

Wet ingredients

  • 1 cup unsalted butter, softened
  • 2 cups granulated sugar
  • 4 large eggs
  • 1 tbsp vanilla extract
  • 1 cup whole milk

Frosting ingredients

  • 4 cups powdered sugar
  • 1 cup heavy cream

Instructions 

  • Preheat oven to 350°F (175°C). Grease and line three 8-inch pans.
  • Mix dry ingredients. Beat butter and sugar until fluffy. Add eggs and vanilla. Alternate adding dry mix and milk. Divide batter and bake 25-30 mins.
  • Cool cakes, then prepare frosting by beating butter, powdered sugar, vanilla, and cream. Layer and frost.

Notes

Ensure ingredients are at room temperature for best results.
Calories: 450kcal
Cost: $15
Course: Dessert
Cuisine: American
Keyword: cake, Vanilla

Welcome to a delightful journey where warmth and nostalgia meet modern convenience! This Air Fryer Egg Toast is more than just a meal; it’s a heartfelt tradition that celebrates the joy of cooking and sharing with loved ones. With every bite, you’ll experience the perfect blend of crispy bread and a perfectly cooked egg, all brought together by the magic of your air fryer. In just a few simple steps, you can create a breakfast that not only nourishes but also brings smiles around the table.

Let’s dive into why this recipe is a must-try for anyone who cherishes moments shared over food, and how it can transform your mornings into something special.

Why You’ll Love This Recipe

There are countless reasons to embrace this recipe, and here are just a few:

  • Quick and Easy: This recipe takes minimal time and effort, making it perfect for busy mornings.
  • Customizable: Use your favorite bread and toppings, allowing you to personalize each serving.
  • Healthy Option: With the ability to substitute ingredients, you can create a lighter or gluten-free version that suits your dietary needs.
  • Flavor Packed: The combination of fresh herbs, spices, and cheese elevates the flavor profile, creating a delightful taste experience.
  • Perfect for Sharing: This dish is great for breakfast gatherings, ensuring that everyone leaves the table happy and satisfied.

Ingredients for Your Air Fryer Egg Toast

Let’s gather what you need for this scrumptious breakfast:

  • 1 large Egg: Substituting with egg whites is an excellent option for a lighter meal.
  • 2 slices Bread: Opt for sturdy types like sourdough, whole wheat, or gluten-free for the best texture.
  • Salt and Pepper: Season to taste, enhancing the natural flavors of the dish.
  • 1 teaspoon Paprika: Sprinkle on just before serving for an extra kick of flavor.
  • 1 tablespoon Fresh Herbs: Use right before serving to keep them vibrant and fresh.
  • 1/2 cup Cheese: Add in the last minute of cooking for that melty touch that everyone loves.

Step-by-Step Instructions for Air Fryer Egg Toast

Now that we have our ingredients ready, let’s walk through the simple steps to create this delicious dish:

  • Step 1: Prepare the Bread: Cut your bread to fit your air fryer basket, ensuring it’s not too thick or too thin.
  • Step 2: Assemble: Crack the egg into a small bowl, season with salt and pepper, and gently pour it onto the center of the bread slice.
  • Step 3: Air Fry: Place the assembled toast in the air fryer basket and set the temperature to 300°F (150°C). Cook for about 6-8 minutes, or until the egg is set to your liking.
  • Step 4: Add Cheese: In the last minute of cooking, sprinkle cheese on top and allow it to melt beautifully.
  • Step 5: Serve: Remove from the air fryer, garnish with fresh herbs and paprika, and serve warm with your favorite sides.

Pro Tips for Perfect Air Fryer Egg Toast

Sliced bread with a perfectly cooked egg and herbs, presented on a wooden plate.

To ensure that your dish turns out flawless every time, consider these expert tips:

  • Don’t Overcrowd: Make sure to leave space between each piece in the air fryer basket for even cooking.
  • Monitor Cooking Time: Cooking times may vary based on your air fryer model; adjust as necessary for desired doneness.
  • Experiment with Bread: Different types of bread can yield varied textures and flavors—try brioche or gluten-free options!
  • Layer Flavors: Consider adding toppings like avocado or smoked salmon for an elevated experience.
  • Prepare Ahead: You can assemble the egg toast ahead of time and store it in the fridge until ready to cook.
  • Fresh Herbs Matter: Use vibrant herbs like chives or parsley for a burst of freshness.
  • Adjust Egg Consistency: For runny yolks, cook for a shorter time; for firmer yolks, extend the cooking duration slightly.
  • Keep it Clean: Line your air fryer basket with parchment paper for easy cleanup.

Common Mistakes and Troubleshooting

Even the best cooks make mistakes. Here are some common pitfalls and how to avoid them:

  • Egg Overflow: If your egg spills over, it might be due to a too-small piece of bread. Ensure the bread can hold the egg comfortably.
  • Under or Overcooked Eggs: If the egg is too runny or too firm, adjust your cooking time based on your preferences and the air fryer’s performance.
  • Soggy Bread: Ensure you’re using bread that can withstand moisture; less dense types may not hold up well.

Delicious Variations to Try

Feeling adventurous? Here are some tasty variations you can try:

  • Veggie Delight: Add sautéed spinach, tomatoes, or bell peppers for a nutritious boost.
  • Cheesy Mexican: Top with pepper jack cheese and fresh jalapeños for a spicy kick.
  • Sweet Twist: Spread a layer of nut butter and add sliced bananas or strawberries for a sweet breakfast option.
  • Herb & Garlic: Mix minced garlic with herbs into the egg for a more robust flavor.

Storage and Make-Ahead Instructions

To keep your Air Fryer Egg Toast fresh, follow these storage tips:

  • Refrigerate: Store any leftovers in an airtight container in the fridge for up to 2 days.
  • Reheat: Warm in the air fryer for a few minutes before serving again to regain that crispy texture.
  • Make-Ahead: Prepare the bread and seasoning mixture the night before, storing them separately until you’re ready to cook.

Frequently Asked Questions (FAQs)

Here are some common questions about Air Fryer Egg Toast:

  • Can I use any type of bread? Yes! Sourdough, whole wheat, and even gluten-free bread work beautifully.
  • How do I make it gluten-free? Simply substitute regular bread with gluten-free varieties.
  • What’s the best way to store leftovers? Place in an airtight container in the fridge for up to 2 days.
  • Can I make this recipe vegan? Yes! Use a plant-based egg substitute and vegan cheese.
  • How do I know when the egg is cooked? The egg should be set but still slightly soft; check by gently shaking the bread.
  • Can I use pre-cooked eggs? Yes, but you might want to adjust the cooking time to prevent overcooking.
  • What other toppings can I use? Avocado slices, smoked salmon, or fresh salsa are all excellent choices!
  • What’s the best air fryer for this recipe? Any standard air fryer will work, but those with adjustable temperature settings offer the best control.

Nutritional Tips and Dietary Adaptations

This recipe can easily fit into various dietary needs:

  • High Protein: Using egg whites or adding additional eggs increases protein content.
  • Low Carb: Opt for low-carb bread alternatives to keep carbs in check.
  • Vegetarian Options: Keep it plant-based by using vegetables and plant-based cheeses.

Equipment Recommendations

To make the best Air Fryer Egg Toast, you’ll need:

  • Air Fryer: A reliable model with adjustable settings.
  • Silicone Mat or Parchment Paper: Helps prevent sticking and makes cleanup easier.
  • Measuring Cups and Spoons: For accurate ingredient measurements.

Serving Suggestions

This dish pairs wonderfully with a variety of sides:

  • Fresh Fruit: Serve with a side of seasonal fruit for a refreshing contrast.
  • Yogurt Parfait: A yogurt parfait with granola complements the toast perfectly.
  • Salad: A light salad with a vinaigrette can add a fresh touch to your meal.

As we wrap up, I hope you feel inspired to create your own Air Fryer Egg Toast. Remember, cooking is a celebration of love and community. Each bite is a reminder of the cherished moments we share around the table. May this recipe bring joy to your mornings and a smile to your loved ones. Happy cooking!

Air Fryer Egg Toast: A Crispy Breakfast Game Changer

Prep Time 5 minutes
Cook Time 8 minutes
Total Time 13 minutes
Servings 1 serving
Calories 350
Enjoy a quick, crispy, and customizable breakfast with this air fryer egg toast recipe that combines savory flavors and a satisfying crunch.

Ingredients

Eggs

  • 1 large Egg (Substitute with egg whites for a lighter option.)

Bread

  • 2 slices Bread (Opt for sturdy types like sourdough, whole wheat, or gluten-free.)

Seasonings

  • to taste Salt
  • to taste Pepper

Spices

  • 1 teaspoon teaspoon Paprika (Sprinkle on just before serving for an extra kick.)

Herbs

  • 1 tablespoon tablespoon Fresh Herbs (Use right before serving to keep them vibrant.)

Cheese

  • 1/2 cup cup Cheese (Add it in the last minute of cooking for a melty touch.)

Instructions 

  • Preheat the air fryer to 375°F (190°C).
  • Cut the bread into a hole or shape to hold the egg, then place it in a small oven-safe dish or directly in the air fryer basket.
  • Crack the egg into the bread hole, season with salt and pepper, then cook in the air fryer for 4-5 minutes.
  • Sprinkle cheese on top and cook for an additional 2-3 minutes until melted.
  • Remove, garnish with herbs and paprika, then serve immediately.

Notes

For a lighter version, substitute the egg with egg whites and choose whole wheat bread for added fiber.
Calories: 350kcal
Cost: $5
Course: Breakfast
Cuisine: American
Keyword: air fryer, Egg, Toast