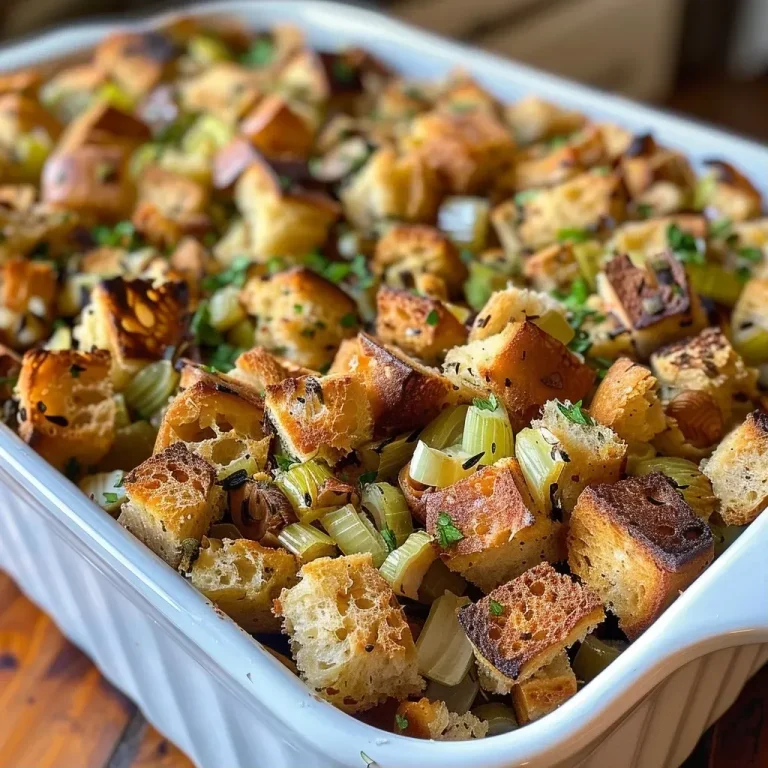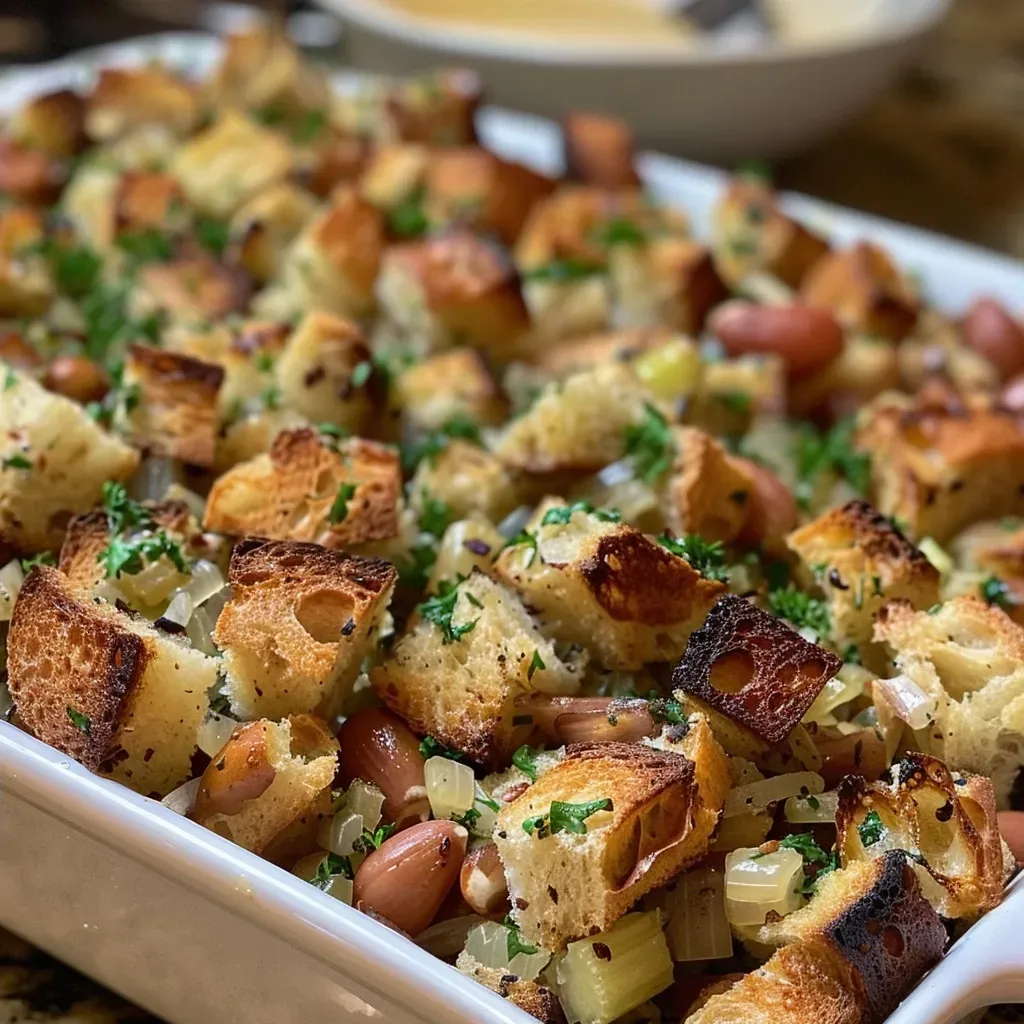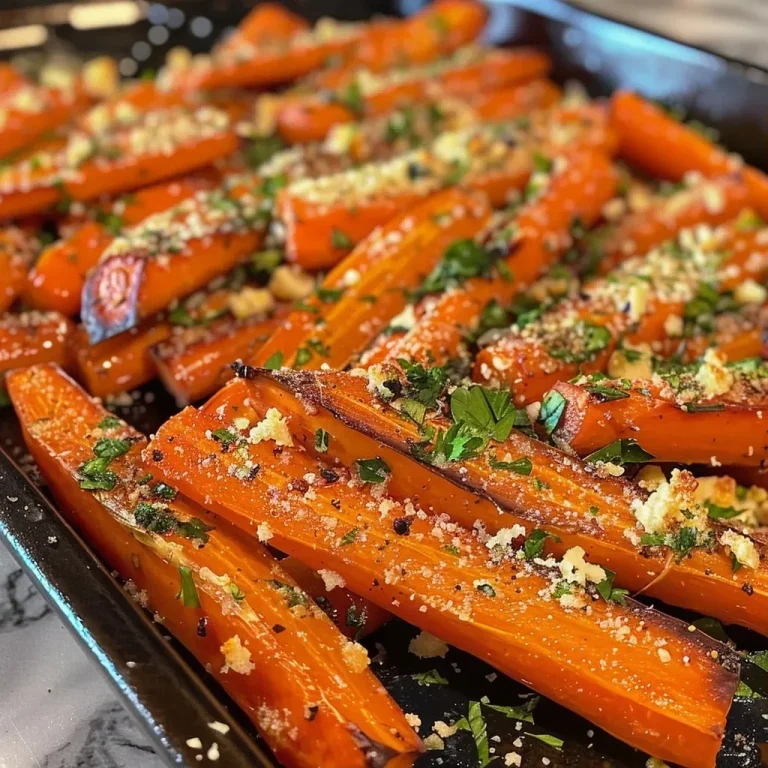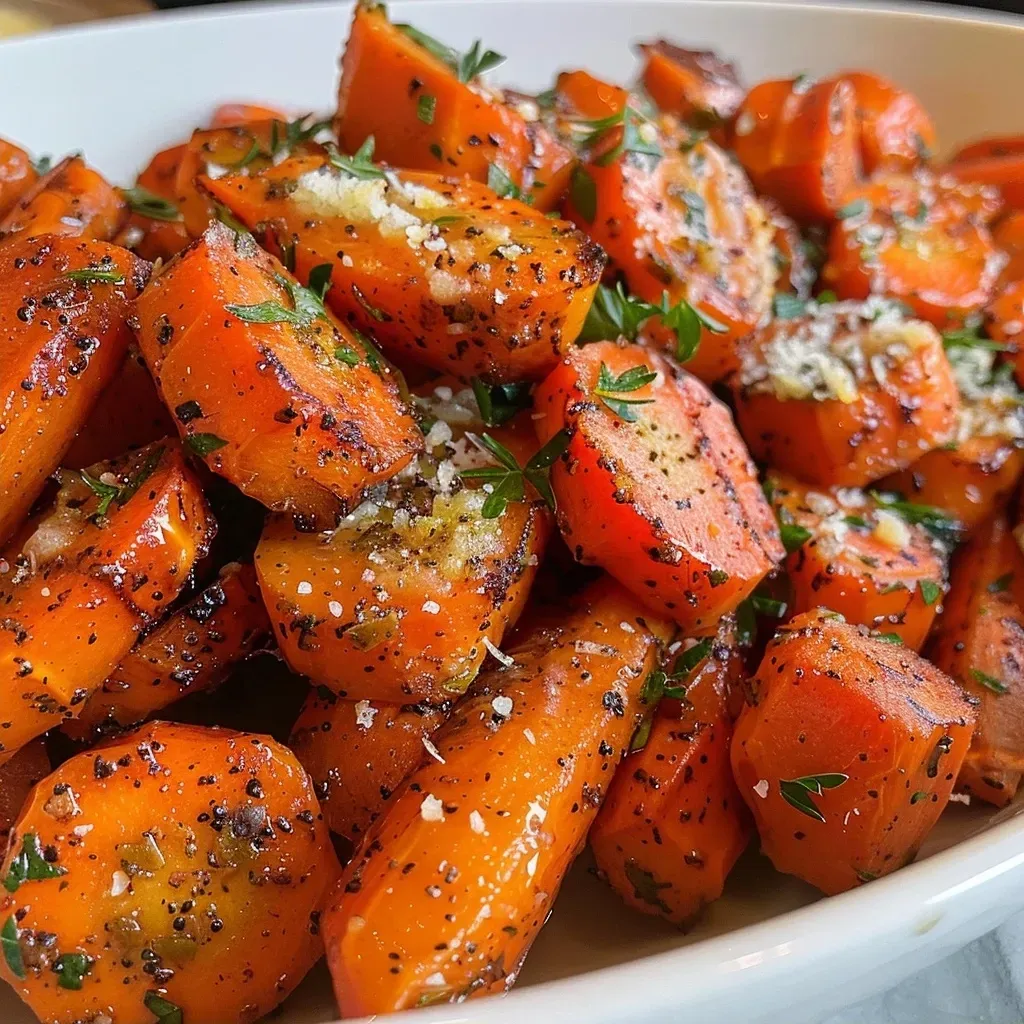
Author

daniel

Browsing

In the heart of every home, there exists a recipe that whispers stories of love, warmth, and cherished memories. For me, that recipe is for honey roast parsnips. This dish transforms simple parsnips into golden, caramelized bites of joy that dance on your palate, bringing the essence of Southern cooking to your family table. In this article, I’ll guide you through the process of making this delightful side dish, sharing my cherished tips and memories along the way. Let’s dive into the sweet embrace of honey roast parsnips and discover why this recipe is a must-try for your next gathering.

Why You’ll Love This Recipe

Honey roast parsnips are not just another side dish; they are a celebration of flavor and nostalgia. Here are five reasons why you’ll love making this recipe:

  • Easy to Make: With just a handful of ingredients and straightforward steps, you can create a dish that impresses without overwhelming you.
  • Flavorful Harmony: The combination of honey and balsamic vinegar adds a beautiful depth of flavor, balancing sweetness with a hint of tang.
  • Visual Appeal: Golden-brown parsnips glistening with honey evoke a feeling of comfort and home, making them a perfect centerpiece for your table.
  • Versatile Side Dish: These parsnips pair beautifully with a range of main courses, from roasted meats to hearty vegetarian dishes.
  • Health Benefits: Parsnips are packed with nutrients, making this dish a wholesome addition to your meal.

Ingredients Breakdown

To create the perfect honey roast parsnips, you’ll need the following ingredients:


5-Speed Electric Hand Mixer

★ Recommended Kitchen Tool

5-Speed Electric Hand Mixer

Make this recipe even easier with a quality 5-Speed Electric Hand Mixer — a must-have kitchen staple!


🛒 Check Price on Amazon →

As an Amazon Associate, we earn from qualifying purchases.
  • 2 lbs parsnips (1 kg): Select firm, fresh parsnips for the best flavor. You can substitute with carrots if necessary.
  • 2 tablespoons honey: Use runny honey for easier mixing. Maple syrup can be a delightful alternative.
  • 2 tablespoons olive oil: A high-quality extra virgin olive oil enhances the dish’s flavor.
  • 1 teaspoon balsamic vinegar: This adds a tangy note that complements the sweetness.
  • 1/2 teaspoon salt: Essential for enhancing all the flavors.

How to Make Honey Roasted Parsnips

Let’s get cooking! Follow these simple steps to bring the sweetness of honey-roasted parsnips to your table.

  1. Preheat the oven to 425°F / 220°C / 200°C fan oven / Gas Mark 7.
  2. Peel the parsnips and cut them into sticks, making sure they are all of uniform thickness for even cooking.
  3. Add the parsnips to a baking tray. Drizzle honey, olive oil, salt, and balsamic vinegar over them. Stir to coat every piece thoroughly.
  4. Transfer the tray to the oven and roast for 15 minutes. After that, turn the parsnips over to ensure even caramelization.
  5. Continue roasting until they are golden and tender, which usually takes another 20-30 minutes, depending on the thickness.

Pro Tips for Perfect Honey Roasted Parsnips
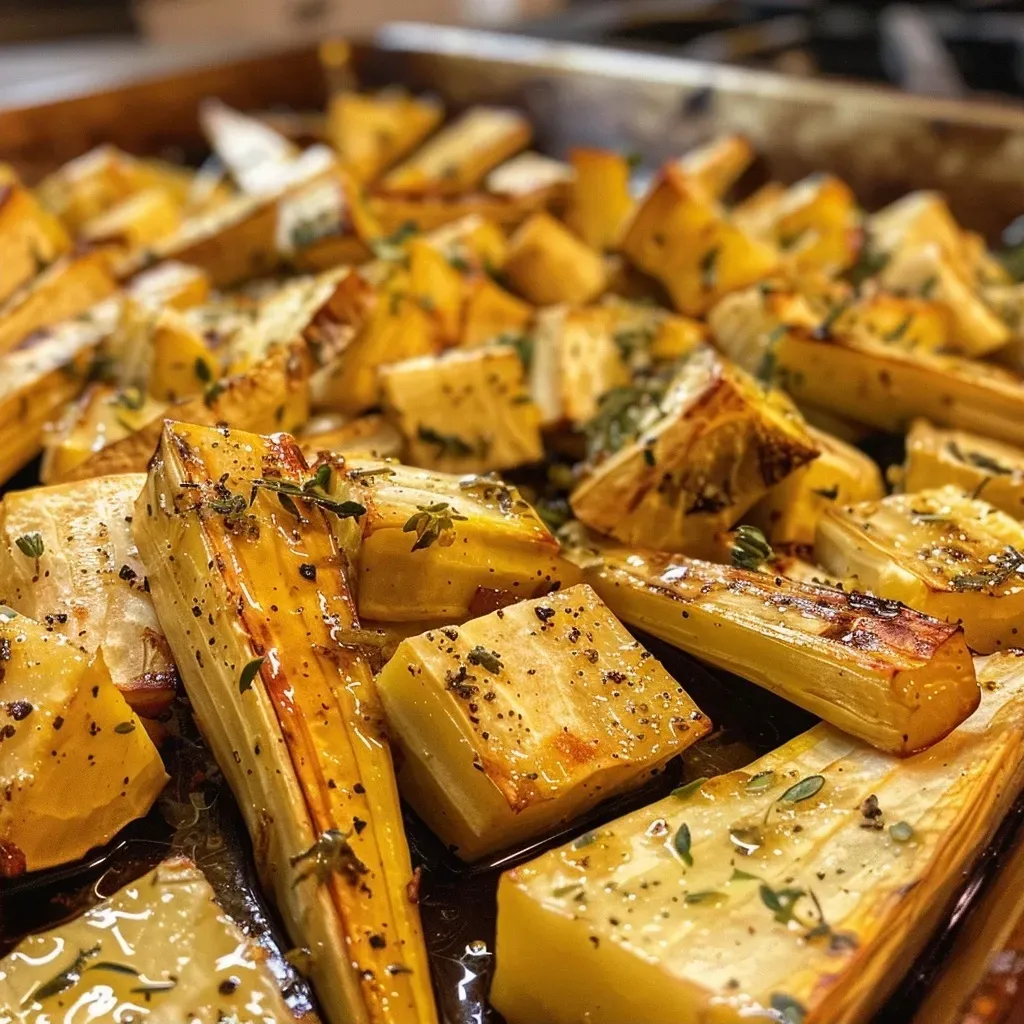
Side view of caramelized parsnips on a plate, glistening with honey and oil.

Here are some expert insights to elevate your honey roast parsnips:

  • Cut Evenly: Ensure all parsnips are cut to the same size for uniform cooking.
  • Use Fresh Ingredients: Fresh parsnips will provide the best flavor and texture.
  • Don’t Overcrowd the Pan: Spread parsnips out on the baking tray to allow them to caramelize properly.
  • Experiment with Flavors: Add spices like cinnamon or nutmeg for a warm twist.
  • Check for Doneness: Parboil them briefly before roasting if you prefer a softer texture.
  • Adjust Cooking Time: Keep an eye on the parsnips; they can go from perfect to burnt quickly.
  • Garnish with Fresh Herbs: A sprinkle of fresh parsley or thyme adds color and freshness.
  • Serve Immediately: For the best taste and texture, serve them right out of the oven.

Common Mistakes and Troubleshooting

Even the best of us can run into hiccups while cooking. Here are some common mistakes to avoid:

  • Using Old Parsnips: Wilted or rubbery parsnips will not yield the best results.
  • Not Preheating the Oven: Make sure your oven is hot enough to caramelize the sugars.
  • Ignoring the Size of Cuts: Uneven pieces will cook at different rates, leading to some being overdone while others are undercooked.
  • Overcomplicating the Recipe: This dish shines in its simplicity; stick to the basics for the best results.

Variations to Try

If you’re looking to switch things up, here are some delightful variations:

  • Maple Roasted Parsnips: Replace honey with maple syrup for a unique twist.
  • Spiced Honey Parsnips: Add a pinch of cayenne or paprika for a hint of heat.
  • Herb-Infused Parsnips: Toss in rosemary or thyme before roasting for an aromatic flavor.
  • Honey Mustard Parsnips: Mix honey with Dijon mustard for a tangy glaze.

Storage and Make-Ahead Instructions

Want to enjoy this dish later? Here’s how to store and prepare it in advance:

  • Refrigeration: Store leftovers in an airtight container in the fridge for up to 3 days.
  • Freezing: You can freeze cooked parsnips for up to 2 months. Reheat in the oven for the best texture.
  • Make-Ahead Option: Prep the parsnips and toss them with the honey mixture a day in advance. Store in the fridge and roast before serving.

Frequently Asked Questions

Here are some common questions about honey roast parsnips:

  • Can I use other vegetables? Absolutely! Carrots, sweet potatoes, and even Brussels sprouts can be delicious when roasted with honey.
  • What can I serve with honey roast parsnips? They pair wonderfully with roasted chicken, beef, or a hearty vegetarian dish.
  • Can I make this vegan? Yes, substitute honey with maple syrup or agave nectar.
  • How do I know when they are done? They should be golden-brown and tender enough to pierce with a fork.
  • Can I reheat leftovers? Yes, reheat them in the oven to maintain their texture.
  • What’s the best way to cut parsnips? Cut them into uniform sticks or wedges to ensure even cooking.
  • Can I skip the balsamic vinegar? You can, but it adds a lovely depth of flavor. Consider substituting with lemon juice.
  • How do I store leftovers? Place them in an airtight container in the fridge for up to three days.

Nutritional Benefits and Dietary Adaptations

Honey roast parsnips are not only delicious but also nutritious. Here are a few benefits:

  • Rich in Vitamins: Parsnips are an excellent source of vitamin C, K, and folate.
  • High in Fiber: They promote healthy digestion and can keep you feeling full longer.
  • Low in Calories: This dish is a healthier alternative to many other side dishes.

Equipment Recommendations

To achieve the best results, here’s what you’ll need:

  • Sharp Knife: For easy cutting of parsnips.
  • Cutting Board: A sturdy surface for prep work.
  • Baking Tray: Use a large, flat tray for even roasting.
  • Spatula: To turn the parsnips halfway through cooking.

Serving Suggestions

Honey roast parsnips shine when served alongside:

  • Roast Chicken: The sweetness complements the savory flavors beautifully.
  • Grilled Steak: A hearty meat dish pairs wonderfully with the caramelized parsnips.
  • Vegetarian Grain Bowls: They add a delightful contrast to earthy grains and legumes.
  • Festive Dinners: Perfect for Thanksgiving or Christmas alongside your favorite roasts.

As we gather around the table, sharing stories and laughter, let these honey roast parsnips be a symbol of love and togetherness. They are more than just a recipe; they are a bridge between generations, a way to keep our culinary traditions alive. So, gather your loved ones, and let the sweet embrace of honey roast parsnips bring warmth to your home. Happy cooking!

Honey Roast Parsnips

Prep Time 10 minutes
Cook Time 25 minutes
Total Time 35 minutes
Servings 4 servings
Calories 150
Sweet and savory honey roasted parsnips make a delicious side dish with a caramelized finish.

Ingredients

Vegetables

  • 2 lbs parsnips (peeled and cut into sticks)
  • 2 tablespoons honey
  • 2 tablespoons olive oil
  • 1 teaspoon balsamic vinegar
  • 1/2 teaspoon salt

Instructions 

  • Preheat oven to 425°F / 220°C. Peel and cut parsnips into sticks.
  • Mix honey, olive oil, salt, and balsamic vinegar. Coat parsnips and spread on a baking tray.
  • Roast for 15 minutes, then turn parsnips and continue cooking until browned and soft, about 10-15 minutes.

Notes

Ensure parsnips are cut evenly for uniform cooking.
Calories: 150kcal
Cost: $10
Course: Side Dish
Cuisine: International
Keyword: Parsnips

In the heart of every Southern kitchen, there lies a treasure that brings families together—deviled eggs. This simple yet delightful dish is not just about food; it’s about memories, laughter, and love shared around the table. Just thinking of creamy deviled eggs evokes feelings of warmth, reminiscent of gatherings where stories are exchanged and bonds are strengthened. This recipe is a heartfelt tribute to those cherished moments, allowing you to create your own precious memories with loved ones. Let’s dive into the world of classic creamy deviled eggs that are sure to become a standout at your next gathering.

Why You’ll Love This Recipe

  • Easy to Prepare: With straightforward steps, even novice cooks can create a dish that impresses everyone at the table.
  • Customizable Flavors: This recipe serves as a foundation for your creativity, allowing you to add your favorite spices and ingredients.
  • Perfect for Any Occasion: Whether it’s a family reunion or a casual brunch, these deviled eggs fit right in, making them a versatile choice.
  • Rich in Flavor: The combination of creamy yolks, tangy mustard, and a touch of vinegar creates a taste that dances on the palate.
  • Great for Leftovers: If you have any left, they make for a delightful snack or lunch option!

Gathering Your Ingredients for Deviled Eggs

Before diving into the preparation, let’s ensure you have everything you need. Here’s a breakdown of the ingredients:

  • 12 large eggs: The star of the show! Fresh eggs yield the best results.
  • ½ cup mayonnaise: For that creamy texture, you can also try Greek yogurt for a healthier twist.
  • 2 tsp yellow mustard: Adds a classic tang.
  • 1 tsp Dijon mustard: Enhances the flavor profile with its slight spiciness.
  • 1 tbsp white vinegar: A key ingredient that balances the richness.
  • ½ tsp salt: Adjust to your taste; it’s essential for enhancing flavors.
  • ¼ tsp black pepper: For a touch of warmth.
  • Paprika for garnish: Not just for flavor, but also for that beautiful pop of color.
  • 2 tbsp fresh chives, finely chopped: Adds freshness and a lovely green touch.

Crafting Your Creamy Deviled Eggs: Step-by-Step

Here’s how to bring these delightful eggs to life:


Personal Smoothie Blender

★ Recommended Kitchen Tool

Personal Smoothie Blender

Make this recipe even easier with a quality Personal Smoothie Blender — a must-have kitchen staple!


🛒 Check Price on Amazon →

As an Amazon Associate, we earn from qualifying purchases.
  1. Start by placing the eggs in a large pot, covering them with cold water. Bring to a boil, then turn off the heat, cover the pot, and let them sit for 10–12 minutes.
  2. Transfer the eggs to an ice bath to cool completely—this makes peeling much easier.
  3. Once cooled, peel the eggs and carefully slice them in half lengthwise.
  4. Remove the yolks and place them in a bowl. The whites should remain intact for filling.
  5. Mash the yolks until smooth, then stir in mayonnaise, both mustards, vinegar, salt, and pepper until creamy and well combined.
  6. Spoon or pipe the luscious filling back into the egg whites.
  7. For the finishing touch, sprinkle with paprika and top with chopped chives.
  8. Chill the deviled eggs in the refrigerator for at least 30 minutes before serving to enhance the flavors.

Pro Tips for Perfect Creamy Deviled Eggs

A plate of classic deviled eggs, showing creamy filling and spices on top.
  • Use Fresh Eggs: Fresh eggs not only peel easier but also taste better. Look for eggs with a recent expiration date.
  • Ice Bath Magic: Placing hot eggs in an ice bath immediately after boiling helps prevent a greenish tinge around the yolk.
  • Mixing Techniques: For ultra-smooth filling, consider using a food processor to blend the yolks and other ingredients.
  • Chill Time Matters: Allowing the filled eggs to chill enhances the flavors and improves the texture.
  • Experiment with Seasonings: Don’t hesitate to add a dash of hot sauce or smoked paprika for a unique twist.
  • Presentation is Key: Use a piping bag for a professional look, or simply use a spoon for a rustic charm.
  • Mind the Salt: Taste as you go! Adjusting the salt to your preference is crucial for flavor.
  • Store Properly: Keep any leftovers covered in the fridge to maintain their freshness.

Common Mistakes and Troubleshooting

Even the best cooks can face challenges. Here are common pitfalls and how to avoid them:

  • Cracked Eggs: Ensure the eggs are at room temperature before boiling to prevent cracking.
  • Dry Filling: If your filling turns out dry, add a bit more mayonnaise or a splash of pickle juice for moisture.
  • Difficulty Peeling: If your eggs won’t peel easily, they may have been too fresh. Try using slightly older eggs next time.
  • Overcooked Yolks: Boiling for too long can lead to a green-gray ring around the yolk. Stick to the recommended cooking time.

Delicious Variations to Try

Once you master the classic version, here are some delightful variations to keep things exciting:

  • Spicy Jalapeño Deviled Eggs: Add finely chopped jalapeños or a few dashes of hot sauce to the filling for some heat.
  • Smoky Bacon Deviled Eggs: Incorporate crumbled bacon and a sprinkle of smoked paprika for a savory twist.
  • Herbed Goat Cheese Deviled Eggs: Replace some of the mayonnaise with goat cheese and add fresh herbs for a tangy flavor.
  • Avocado Deviled Eggs: Swap out some mayonnaise for ripe avocado for a creamy, healthy alternative.

Storage and Make-Ahead Instructions

These deviled eggs can be made ahead of time, making them perfect for busy hosts:

  • Make Ahead: Prepare the filling a day in advance and store it in the refrigerator. Just fill the egg whites just before serving.
  • Storage: Keep any leftovers in an airtight container in the fridge for up to 2 days. Cover with plastic wrap to prevent them from drying out.

Comprehensive FAQ

Here’s a collection of frequently asked questions to guide you further:

  • Can I make deviled eggs ahead of time? Yes! Prepare the filling and keep it in the refrigerator. Just fill the egg whites when you’re ready to serve.
  • How long do deviled eggs last? They can be stored in the fridge for up to 2 days.
  • What if I don’t have a fine-mesh sieve? A regular strainer will work, or you can simply mash the yolks well by hand.
  • Can I use something other than mayonnaise? Yes, Greek yogurt or avocado can be good substitutes for a lighter option.
  • What are some other variations I can try? Consider adding flavors like curry powder or horseradish for unique twists!
  • Why do my eggs turn green? Overcooking can cause a greenish tint around the yolk. Stick to the recommended boiling time.
  • Can I freeze deviled eggs? It’s not recommended as the texture will change upon thawing.
  • What to serve with creamy deviled eggs? Pair them with fresh veggies, crackers, or alongside a charcuterie board for a delightful spread.

Your Nutrition Tips and Dietary Adaptations

For those looking to make the recipe a bit healthier or cater to dietary needs:

  • Low-Calorie Option: Use low-fat mayonnaise or Greek yogurt to cut down on calories.
  • Vegan Version: Replace eggs with chickpeas blended into a creamy mixture with vegan mayo.
  • Gluten-Free: This recipe is naturally gluten-free—enjoy without worry!

Equipment Recommendations

Having the right tools can make your cooking experience smoother:

  • Pot with Lid: A good pot for boiling eggs is essential.
  • Ice Bath Bowl: A large bowl for cooling eggs quickly.
  • Mixing Bowl: For mashing and mixing the yolk filling.
  • Piping Bag: If you wish to pipe the filling for a more elegant presentation.

Serving Suggestions

Deviled eggs shine with thoughtful presentation:

  • Garnish with Fresh Herbs: A sprinkle of fresh herbs can elevate the dish.
  • Serve on a Platter: Arrange beautifully on a platter with colorful veggies for a stunning display.
  • Pair with Bubbly: For gatherings, pair with sparkling wine or cocktails for a delightful experience.

In conclusion, these creamy deviled eggs are more than just a dish; they are a celebration of flavors, memories, and togetherness. With each bite, you’re not only indulging in a delicious treat but also embracing the love and warmth that comes with sharing food with those you cherish. So gather your loved ones, and let the memories unfold around your table with this classic recipe. Happy cooking!

Classic Creamy Deviled Eggs

Prep Time 15 minutes
Cook Time 15 minutes
Total Time 30 minutes
Servings 12 pieces
Calories 150
A timeless appetizer featuring perfectly boiled eggs filled with a creamy, tangy mixture, topped with paprika and chives for a burst of flavor.

Ingredients

Eggs

  • 12 large eggs
  • 0.5 cup mayonnaise
  • 2 tsp yellow mustard
  • 1 tsp Dijon mustard
  • 1 tbsp white vinegar
  • 0.5 tsp salt ((or to taste))
  • 0.25 tsp black pepper
  • 2 tbsp fresh chives, finely chopped
  • to taste Paprika for garnish

Instructions 

  • Place eggs in boiling water for 10–12 minutes, then cool in an ice bath.
  • Peel eggs, slice in half, and remove yolks into a bowl.
  • Mash yolks and mix with mayonnaise, mustards, vinegar, salt, and pepper until smooth.
  • Fill egg whites with the yolk mixture and garnish with paprika and chives.

Notes

Chill the deviled eggs for at least 30 minutes before serving for best flavor.
Calories: 150kcal
Cost: $10
Course: Appetizer
Cuisine: American
Keyword: Eggs

Welcome to a Heartfelt Journey of Flavor

Cooking is more than just a series of steps—it’s a way to connect with our loved ones and preserve cherished memories. Today, we’re diving into a beloved classic: Chestnut and Herb Bread Stuffing. This dish, rich with the flavors of roasted chestnuts, fresh herbs, and rustic bread, is a comforting reminder of gatherings around the family table. As we explore this recipe, I invite you to embrace the love and warmth that comes from sharing food with those who matter most.

Why You’ll Love This Recipe

  • Comforting Flavors: The combination of chestnuts, herbs, and buttery bread creates a nostalgic taste that warms the heart.
  • Versatile Dish: Perfect as a side for holidays or family dinners, this stuffing complements a variety of main courses.
  • Easy to Customize: With options for ingredient substitutions, you can make this recipe truly your own.
  • Make-Ahead Friendly: Prepare it in advance to save time on busy days, allowing you to focus on what matters most—your loved ones.
  • Healthy Ingredients: Packed with fresh vegetables and herbs, this stuffing is a wholesome addition to your meal.

Ingredient Breakdown

To make this Chestnut and Herb Bread Stuffing, you’ll need a variety of fresh ingredients. Here’s a detailed look at each component:

  • Day-Old Rustic Bread: About 10 cups (1 lb / 450 g) of 3/4-inch bread cubes. Stale bread absorbs flavors better and adds a delightful texture.
  • Unsalted Butter: 7 tablespoons, plus 1 teaspoon for greasing the baking dish. This adds richness and flavor to the stuffing.
  • Olive Oil: 1 tablespoon for sautéing vegetables. It enhances the taste while keeping the stuffing moist.
  • Yellow Onions: 2 medium, finely chopped (about 2 cups). They bring sweetness and depth to the dish.
  • Celery: 4 ribs, diced (about 2 cups). Adds a crisp texture and fresh flavor.
  • Garlic: 3 cloves, minced. A must for aromatic depth.
  • Fresh Herbs: 2 tablespoons of sage, 2 teaspoons of thyme leaves, and 1/4 cup of parsley, all finely chopped. These herbs elevate the stuffing’s aroma and taste.
  • Cooked Chestnuts: 8 oz (225 g), coarsely chopped. They lend a sweet, nutty flavor that is essential for this dish.
  • Eggs: 2 large, for binding the ingredients together.
  • Low-Sodium Chicken or Vegetable Stock: 3 cups (720 ml), plus up to 1/2 cup more if needed. This keeps the stuffing moist without making it soggy.
  • Heavy Cream: 1/4 cup (60 ml). Adds creaminess and richness to the flavor.
  • Kosher Salt: 1 3/4 teaspoons, divided. Essential for seasoning.
  • Freshly Ground Black Pepper: 1 teaspoon, to taste.

Step-by-Step Instructions

Side angle shot of a dish filled with bread stuffing, featuring pieces of chestnut and garnishes of fresh herbs.

Follow these instructions to create your delicious Chestnut and Herb Bread Stuffing:


Professional Chef Knife Set

★ Recommended Kitchen Tool

Professional Chef Knife Set

Make this recipe even easier with a quality Professional Chef Knife Set — a must-have kitchen staple!


🛒 Shop This Tool →

As an Amazon Associate, we earn from qualifying purchases.
  1. Preheat your oven to 350°F (175°C). If your bread isn’t very dry, toast it at 300°F (150°C) for 15–20 minutes. Grease a 9×13-inch baking dish with the reserved teaspoon of butter.
  2. In a large skillet, sauté the onions and celery in 6 tablespoons of butter and 1 tablespoon of olive oil over medium heat for 10–12 minutes. Stir in the minced garlic, sage, and thyme for about 1 minute. Then, add the chopped chestnuts and cook for an additional 2 minutes. Season with 1 teaspoon of salt.
  3. In a separate bowl, whisk together the eggs, stock, cream, remaining 3/4 teaspoon of salt, and black pepper.
  4. Toss the bread cubes with the warm vegetable mixture, herbs, and parsley. Pour the custard mixture over the bread and gently fold everything together. Let it rest for 10 minutes to absorb the liquid, adding up to 1/2 cup more stock if the mixture seems dry.
  5. Spread the stuffing evenly in the prepared baking dish. Dot the top with the remaining 1 tablespoon of butter and cover tightly with foil.
  6. Bake covered for 30 minutes, then uncover and bake for another 25–35 minutes until the top is golden brown, the edges are crisp, and the center is set (165°F/74°C). Allow it to rest for 10 minutes before serving.

Expert Tips for Perfecting Your Stuffing

  • Choosing Bread Wisely: Opt for a mix of rustic and sourdough bread for the best texture and flavor.
  • Moisture Control: Gradually add stock to avoid sogginess. The stuffing should be moist but hold its shape.
  • Add a Crunch: For extra texture, mix in some toasted nuts or seeds.
  • Herb Alternatives: Feel free to experiment! Fresh rosemary or oregano can be delightful substitutes for sage.
  • Make Ahead: Prepare the stuffing a day in advance, cover, and refrigerate. Bake it just before serving.
  • Freezing: You can freeze the stuffing for up to a month. Thaw in the fridge before reheating.
  • Check for Seasoning: Always taste and adjust seasoning before baking for the best results.
  • Presentation Matters: Transfer the stuffing to a beautiful serving dish to impress your guests.

Common Mistakes and Troubleshooting

Even the best cooks can face challenges. Here are common pitfalls and how to avoid them:

  • Using Fresh Bread: Fresh bread can become too mushy. Always use day-old or stale bread for the best texture.
  • Over-Mixing: Be gentle when combining ingredients to avoid breaking down the bread.
  • Not Enough Liquid: If the stuffing seems dry before baking, add more stock to ensure it’s moist.
  • Underbaking: Ensure the center reaches 165°F (74°C) for safe consumption.

Delicious Variations

Feel free to personalize your Chestnut and Herb Bread Stuffing with these delightful variations:

  • Vegetarian Delight: Use vegetable stock instead of chicken stock and add mushrooms for an earthy twist.
  • Sausage Stuffing: Incorporate cooked mild Italian sausage for a heartier version.
  • Dried Fruit: Add dried cranberries or raisins for a touch of sweetness and texture.
  • Gluten-Free Option: Substitute gluten-free bread and ensure your stock is also gluten-free.

Storage and Make-Ahead Instructions

This stuffing is perfect for preparing ahead of time. Here’s how to store it:

  • Refrigerating: Cover the prepared stuffing tightly and refrigerate for up to 2 days before baking.
  • Freezing: Freeze any leftovers in an airtight container for up to 1 month. Thaw overnight in the fridge before reheating.

FAQs About Chestnut and Herb Stuffing

  • Can I use fresh herbs instead of dried? Yes, fresh herbs will enhance the flavor dramatically. Just use about three times the amount.
  • How can I make this stuffing vegan? Substitute eggs with flax eggs and use plant-based stock and cream.
  • What can I serve with this stuffing? It pairs wonderfully with roasted turkey, chicken, or as a side for a hearty salad.
  • Can I cook this stuffing inside a turkey? Yes, just ensure it reaches a safe temperature of 165°F (74°C).
  • Is it okay to reheat stuffing? Absolutely! Just add a splash of stock before reheating to maintain moisture.
  • What’s the best way to reheat leftover stuffing? Cover with foil and reheat in a 350°F (175°C) oven until warmed through.
  • How can I enhance the flavor? Incorporate additional spices like nutmeg or allspice for a warm, festive touch.
  • Can I make this stuffing gluten-free? Yes, just use gluten-free bread and check that your stock is gluten-free.

Nutritional Tips and Dietary Adaptations

This Chestnut and Herb Bread Stuffing can be easily adapted to suit various dietary needs:

  • Lower Fat: Use reduced-fat butter and cream or substitute with vegetable broth.
  • Vegan: Replace eggs with flaxseed meal mixed with water and use plant-based butter and cream.
  • Low Sodium: Opt for low-sodium stock and adjust salt to your preference.

Equipment Recommendations

To create this stuffing, here are some helpful tools to have in your kitchen:

  • Large Skillet: For sautéing vegetables effectively.
  • 9×13-inch Baking Dish: Essential for baking the stuffing evenly.
  • Mixing Bowls: For combining ingredients and whisking the custard.
  • Meat Thermometer: To ensure the stuffing is cooked safely.

Serving Suggestions

Once your Chestnut and Herb Bread Stuffing is ready, consider these serving suggestions:

  • Serve Warm: This dish is best enjoyed warm, straight from the oven.
  • Garnish: Top with additional fresh herbs or a sprinkle of paprika for color.
  • Accompany with Gravy: A drizzle of gravy can enhance the dish’s richness.

A Warm Conclusion

As you prepare this Chestnut and Herb Bread Stuffing, remember that each ingredient carries a story, a memory, and a piece of love. Cooking is a journey we share, and this stuffing, with its delightful flavors and heartwarming essence, is a perfect example of how food can bring us together. So, gather your loved ones around the table, and let this dish be the centerpiece of your next family gathering. Happy cooking!

Chestnut and Herb Bread Stuffing with Sage and Thyme

Prep Time 20 minutes
Cook Time 55 minutes
Total Time 1 hour 15 minutes
Servings 8 servings
Calories 350
A flavorful and hearty stuffing combining roasted chestnuts, fresh herbs, and rustic bread, perfect for holiday tables.

Ingredients

Bread

  • 10 cups day-old rustic bread, 3/4-inch cubes
  • 7 tbsp unsalted butter, divided (plus 1 tsp for greasing)
  • 1 tbsp olive oil
  • 2 medium yellow onions, finely chopped (about 2 cups)
  • 4 ribs celery, diced (about 2 cups)
  • 3 cloves garlic, minced
  • 2 tbsp fresh sage, finely chopped
  • 2 tsp fresh thyme leaves, chopped
  • 1/4 cup fresh parsley, chopped
  • 8 oz cooked chestnuts, coarsely chopped
  • 2 large eggs
  • 3 cups low-sodium chicken or vegetable stock (plus up to 1/2 cup more if needed)
  • 1/4 cup heavy cream
  • 1 3/4 tsp kosher salt, divided
  • 1 tsp freshly ground black pepper

Instructions 

  • Preheat oven to 350°F (175°C). Toast bread if needed and grease a baking dish.
  • Sauté onions and celery in 6 tbsp butter + 1 tbsp oil for 10–12 minutes. Add garlic, sage, thyme, chestnuts, and 1 tsp salt; cook 2 minutes.
  • Whisk eggs, stock, cream, remaining salt, and pepper. Toss bread with vegetables and herbs, pour custard, and rest 10 minutes.
  • Transfer to dish, dot with remaining butter, cover with foil, and bake 30 minutes. Uncover and bake 25–35 minutes until golden and set.

Notes

Ensure bread is slightly dry for best absorption.
Calories: 350kcal
Cost: $15
Course: Side Dish
Cuisine: American
Keyword: Chestnuts

Warm Your Heart with a Bowl of Sunshine: Healing Ginger Turmeric Soup

In the hustle and bustle of life, we often overlook the simple joy that a warm bowl of soup can bring. This ginger turmeric soup is more than just a dish; it’s a hug in a bowl, a soothing remedy crafted from cherished memories and family traditions. Every spoonful is a testament to the healing power of food, reminding us of the love that fills our kitchens. Crafted with fresh ingredients, this soup is perfect for sharing with loved ones, especially during those chilly nights or when you need a little extra comfort. Let’s dive into the heartwarming world of ginger and turmeric, two golden spices that not only uplift your spirits but also nurture your body.

Why You’ll Love This Recipe

This soup is a delightful blend of flavors and wellness benefits. Here are just a few reasons why you’ll adore it:

  • Immune Boosting: With the powerful combination of ginger and turmeric, this soup helps strengthen your immune system, keeping you resilient through the seasons.
  • Anti-Inflammatory Properties: Both ginger and turmeric are known for their anti-inflammatory effects, making this soup a perfect choice for soothing aches and pains.
  • Digestive Aid: The warming spices in this soup can help support digestion, making it a comforting option after a hearty meal.
  • Rich in Antioxidants: The ingredients are packed with antioxidants, promoting overall health and wellness.
  • Simple and Versatile: With easy-to-find ingredients and a straightforward recipe, this soup can be customized to fit various dietary needs.

Ingredients and Thoughtful Swaps

Gather your ingredients with love, knowing each one adds to the heart of this soup. Here’s what you’ll need:


Meal Prep Container Set

★ Recommended Kitchen Tool

Meal Prep Container Set

Make this recipe even easier with a quality Meal Prep Container Set — a must-have kitchen staple!


🛒 See Deals on Amazon →

As an Amazon Associate, we earn from qualifying purchases.
  • 1 tablespoon olive oil
  • 1 onion, chopped
  • 2 cloves garlic, minced
  • 1 tablespoon fresh ginger, grated
  • 1 tablespoon fresh turmeric, grated
  • 4 cups vegetable broth
  • 2 cups carrots, chopped
  • 1 cup celery, chopped
  • 1 cup coconut milk
  • Salt and pepper to taste
  • Fresh cilantro for garnish

Now, if you’re looking to switch things up, here are some thoughtful substitutions:

  • Broth: Use chicken broth for a non-vegetarian option or a low-sodium broth for a healthier choice.
  • Coconut Milk: Swap with almond or cashew milk for a lighter version.
  • Veggies: Feel free to add in other vegetables like spinach or kale for extra nutrition.
  • Herbs: Experiment with fresh herbs like parsley or basil for a unique twist.

How to Make Your Healing Ginger Turmeric Soup

A delicious serving of Healing Ginger Turmeric Soup topped with fresh cilantro.

Let’s get cooking! Follow these simple steps to create your own comforting bowl of sunshine:

  1. Heat the olive oil in a large pot over medium heat.
  2. Add the chopped onion and sauté until translucent.
  3. Stir in the minced garlic, grated ginger, and grated turmeric, cooking for another minute to awaken the flavors.
  4. Pour in the vegetable broth and bring to a gentle boil.
  5. Once boiling, add the chopped carrots and celery, then reduce heat and let simmer until the vegetables are tender.
  6. Stir in the coconut milk and season with salt and pepper to taste.
  7. If desired, blend the soup until smooth for a creamy texture.
  8. Serve hot, garnished with fresh cilantro for a burst of freshness.

Pro Tips for the Perfect Soup

Before you dive in, here are some expert insights to elevate your soup-making game:

  • Texture Matters: For a creamier soup, blend thoroughly; for a rustic feel, leave some chunks.
  • Balance Flavors: Taste as you go and adjust the seasoning to your preference.
  • Fresh Ingredients: Whenever possible, use fresh herbs and spices for the best flavor.
  • Cook with Love: Take your time with each step; enjoy the process as much as the end result.
  • Make It Ahead: This soup keeps well; make a big batch for quick meals throughout the week.
  • Garnish Wisely: Fresh herbs not only add flavor but also enhance the visual appeal.
  • Experiment: Feel free to add your favorite spices or ingredients, like a pinch of cayenne for heat.
  • Store Properly: Let the soup cool before storing in airtight containers for freshness.

Common Mistakes and Troubleshooting

Even the best cooks have hiccups. Here’s how to avoid common pitfalls:

  • Overcooking Vegetables: Keep an eye on your veggies to ensure they retain some crunch.
  • Too Much Salt: If you oversalted, balance it out with more coconut milk or a splash of water.
  • Texture Issues: If your soup is too thick, add more broth to achieve your desired consistency.

Variations to Try

Want to switch things up? Here are some variations to inspire your creativity:

  • Protein-Packed: Add shredded chicken or chickpeas for a heartier meal.
  • Spicy Kick: Incorporate diced jalapeños or a sprinkle of cayenne pepper for added heat.
  • Sweet Twist: Throw in a handful of sweet potatoes for a touch of sweetness.
  • Herbaceous Flavor: Mix in fresh herbs like thyme or rosemary for a fragrant soup.

Storage and Make-Ahead Instructions

This soup is perfect for meal prep! Here’s how to store it:

  • Refrigeration: Keep in an airtight container for up to 5 days in the fridge.
  • Freezing: This soup freezes beautifully; store in freezer-safe containers for up to 3 months.
  • Reheating: Reheat on the stove over low heat, adding a splash of broth or water if it’s too thick.

Frequently Asked Questions

Before you get started, let’s answer some common questions:

  • Can I use dried spices instead of fresh? Yes, but fresh ginger and turmeric will provide a better flavor.
  • Is this soup gluten-free? Absolutely, as long as you use gluten-free broth.
  • Can I make this soup vegan? Yes, simply use vegetable broth and coconut milk.
  • How spicy is this soup? The spice level can be adjusted based on your taste; feel free to omit any hot ingredients.
  • What can I serve with this soup? Pair with crusty bread or a fresh salad for a complete meal.
  • How can I enhance the flavor? Adding a splash of lemon juice before serving can brighten the flavors.
  • Can I add other vegetables? Yes, feel free to add your favorites, like spinach or bell peppers.
  • Is this soup good for detoxing? Yes, the ingredients are known for their detoxifying properties.

Nutritional Tips and Dietary Adaptations

This soup not only warms the soul but nourishes the body. Here are some nutritional insights:

  • High in Vitamins: Carrots and ginger are rich in vitamins A and C, essential for immune health.
  • Low Calorie: This soup is light yet filling, making it a great option for weight management.
  • Customizable: Easily adapt it to fit various dietary needs, whether vegetarian, vegan, or gluten-free.

Essential Equipment Recommendations

Here’s what you’ll need to make this soup:

  • Large Pot: A sturdy pot is essential for even cooking.
  • Blender: An immersion blender or a regular blender will help achieve a creamy texture.
  • Chopping Knife: A good quality knife will make prep work a breeze.
  • Measuring Cups: Ensure precise measurements for the best results.

Serving Suggestions

To make your meal even more delightful, consider these serving ideas:

  • Drizzle of Olive Oil: A finishing drizzle adds richness and flavor.
  • Crusty Bread: Serve with a warm loaf for dipping.
  • Fresh Herbs: Garnish with additional cilantro or parsley for a pop of color.
  • Spicy Topping: A sprinkle of red pepper flakes can add an exciting kick.

As you gather around the table to enjoy this ginger turmeric soup, remember that cooking is not just about the food but the love and memories we share. Embrace the warmth and healing power of this bowl of sunshine and let it bring you and your loved ones closer together. Enjoy every moment, every flavor, and every memory made in your kitchen.

Healing Ginger Turmeric Soup

Prep Time 10 minutes
Cook Time 30 minutes
Total Time 40 minutes
Servings 4 servings
Calories 180
A soothing and nutritious soup packed with anti-inflammatory ingredients like ginger and turmeric, perfect for boosting your health.

Ingredients

olive oil

  • 1 tablespoon olive oil

vegetables

  • 1 onion onion, chopped
  • 2 cloves garlic, minced
  • 1 tablespoon fresh ginger, grated
  • 1 tablespoon fresh turmeric, grated

liquids

  • 4 cups vegetable broth
  • 2 cups carrots, chopped
  • 1 cup celery, chopped
  • 1 cup coconut milk

seasonings

  • to taste Salt and pepper

garnish

  • for garnish Fresh cilantro

Instructions 

  • Heat olive oil in a large pot over medium heat.
  • Add chopped onion and sauté until translucent. Stir in garlic, ginger, and turmeric, cooking for 1 minute.
  • Pour in vegetable broth, add carrots and celery, then simmer until vegetables are tender.
  • Stir in coconut milk, season with salt and pepper, then blend until smooth if desired.
  • Serve hot, garnished with fresh cilantro.

Notes

This soup is perfect for boosting immunity and reducing inflammation.
Calories: 180kcal
Cost: $15
Course: Soup
Cuisine: Healthy
Keyword: Ginger, turmeric, Vegetables

Discover the Heart of a Family Gathering with This Casserole

Gather around the table with a dish that embodies the warmth of shared memories and the joy of togetherness. This Turkey Sausage and Green Chile Egg Casserole isn’t just a meal; it’s a celebration of love, comfort, and nourishment, designed to bring family and friends together for a hearty breakfast. Bursting with flavor and packed with protein, this casserole makes for a satisfying and nutritious start to your day.

In this article, we’ll explore not just how to make this delightful casserole but also the stories and feelings that come with it, reminiscent of mornings spent in my grandmother’s kitchen in Louisiana. Let’s dive in!

Why You’ll Love This Recipe

  • High Protein Content: With a combination of turkey sausage, eggs, and cottage cheese, this casserole delivers a substantial protein punch, making it perfect for fueling your morning.
  • Easy Preparation: This recipe is straightforward and requires minimal prep time, allowing you to whip it up even on busy mornings.
  • Versatility: Customize the ingredients to suit your tastes—whether you’re a fan of spicy jalapeños or prefer a milder flavor, you can make it your own.
  • Make-Ahead Friendly: Prepare it the night before and simply pop it in the oven in the morning, making it ideal for gatherings or meal prep.
  • Comforting and Satisfying: The combination of flavors and textures in this casserole creates a comforting dish that feels like a warm hug on a plate.

Ingredients for Turkey Sausage and Green Chile Egg Casserole

This casserole combines hearty ingredients that not only pack a flavor punch but also evoke memories of home-cooked meals. Here’s what you’ll need:


Meal Prep Container Set

★ Recommended Kitchen Tool

Meal Prep Container Set

Make this recipe even easier with a quality Meal Prep Container Set — a must-have kitchen staple!


🛒 Shop This Tool →

As an Amazon Associate, we earn from qualifying purchases.
  • 16 ounces Turkey Breakfast Sausage: I recommend using Jimmy Dean Premium Turkey Sausage Roll for a lean yet flavorful option.
  • 12 large Eggs: The foundation of our casserole, providing both structure and richness.
  • 1 1/2 cups Cottage Cheese: This adds creaminess without excess fat, enhancing the texture of the casserole.
  • 1/2 teaspoon Salt: For seasoning and bringing out the flavors.
  • 1/2 teaspoon Pepper: A touch of spice to elevate the taste.
  • 4 ounces Diced Green Chiles: For that signature Southwestern kick!
  • 2 cups Shredded Cheddar Cheese: A must-have for a cheesy topping; feel free to reserve some for the top.
  • Optional Add-ins: Sautéed onions, jalapeños, or red peppers for added flavor and texture.

How to Make Turkey Sausage and Green Chile Egg Casserole

Juicy slice of Turkey Sausage Egg Casserole showcasing layers of green chiles and cheese.

Now that we’ve gathered our ingredients, let’s get cooking! Follow these simple steps to create a delicious casserole that will have everyone asking for seconds.

  1. Preheat the oven: Start by preheating your oven to 350°F (175°C) and greasing a 9×13 baking dish to prevent sticking.
  2. Cook the sausage: In a skillet over medium heat, cook the turkey breakfast sausage, breaking it up as it cooks until browned and fully cooked. If you’re adding onions or jalapeños, sauté them with the sausage until softened. Drain any excess liquid and let cool slightly.
  3. Blend the egg base: In a large bowl, whisk together the eggs and cottage cheese until smooth and well combined. Season with salt and pepper to taste.
  4. Add the mix-ins: Stir in the diced green chiles, cooked turkey sausage, and shredded cheddar cheese, setting aside a small handful of cheese for topping if desired.
  5. Assemble the casserole: Pour the mixture into the prepared baking dish, spreading it evenly. Top with the reserved cheese.
  6. Bake: Place in the oven and bake for 32-42 minutes, or until the center is set and the top is lightly golden brown.
  7. Rest and serve: Allow the casserole to rest for a few minutes before slicing into squares. Serve warm, accompanied by fresh salsa, sour cream, or even a dollop of Greek yogurt for added protein.

Expert Tips for the Best Casserole

  • Use fresh ingredients: Always opt for fresh vegetables and quality sausage to enhance the overall flavor of your casserole.
  • Refrigerate overnight: For optimal flavor, consider preparing your casserole a day in advance and refrigerating it overnight before baking.
  • Experiment with cheeses: While cheddar is classic, try using pepper jack for a spicy twist or a blend of cheeses for added depth.
  • Adjust the spice level: If you enjoy heat, add more diced jalapeños or even a sprinkle of cayenne pepper to the egg mixture.
  • Perfect leftovers: This casserole keeps well in the fridge for up to 4 days, making it ideal for meal prep.
  • Freeze for later: You can freeze portions of this casserole for up to 2 months—just ensure it’s airtight!
  • Pair with fresh sides: Complement your casserole with fresh fruit, a green salad, or crispy hash browns.
  • Check doneness: Use a toothpick inserted in the center to ensure the casserole is fully cooked—if it comes out clean, you’re good to go!

Common Mistakes and Troubleshooting

  • Overmixing the eggs: Avoid overmixing as it can create a denser texture. Mix just until combined.
  • Not letting it rest: Don’t skip the resting time after baking. This helps the casserole set and makes slicing easier.
  • Underbaking: Ensure that the center is fully set before removing it from the oven to avoid a soggy casserole.
  • Skipping the cheese: A cheesy topping adds flavor and moisture; don’t omit it!

Variations to Try

This casserole is incredibly versatile—here are some variations to suit your taste:

  • Vegetarian Delight: Replace turkey sausage with sautéed mushrooms and spinach for a hearty vegetarian option.
  • Southwestern Style: Add black beans and corn for a more Tex-Mex flavor profile.
  • Herb-Infused: Incorporate fresh herbs like cilantro or green onions for a burst of freshness.
  • Gluten-Free Option: Swap out traditional ingredients for gluten-free tortillas at the base.

Storage and Make-Ahead Instructions

Planning ahead? This casserole is excellent for meal prep! Here’s how to store it:

  • Refrigerate: Store leftovers in an airtight container in the fridge for up to 4 days.
  • Freeze: For longer storage, freeze the casserole in individual portions for up to 2 months. Thaw in the fridge overnight before reheating.
  • Make Ahead: Assemble the casserole the night before and cover it tightly. Bake it in the morning for a convenient breakfast option.

Comprehensive FAQ

  • Can I use egg whites instead of whole eggs? Yes, you can substitute some or all of the whole eggs with egg whites for a lower-fat version.
  • How do I know when the casserole is done? The center should be set and no longer jiggly, and a toothpick inserted should come out clean.
  • What can I serve with this casserole? Consider fresh fruit, a light salad, or even a side of crispy bacon.
  • Can I prepare this casserole in advance? Absolutely! You can assemble it the night before and bake it in the morning.
  • How long can leftovers be stored? Store leftovers in the fridge for up to 4 days or freeze individual portions for up to 2 months.
  • Can I use a different type of sausage? Yes, you can use pork sausage or even chicken sausage if you prefer.
  • What if I can’t find diced green chiles? Substitute with chopped bell peppers or a can of diced tomatoes for a different flavor.
  • Is this casserole suitable for meal prep? Definitely! It’s great for meal prep and can be reheated easily.

Nutritional Tips and Dietary Adaptations

This casserole is naturally high in protein, making it perfect for anyone looking to fuel their morning. For those watching their calories, consider these adaptations:

  • Low-Fat Option: Use low-fat cottage cheese and reduce the amount of cheese on top.
  • Gluten-Free: Ensure all ingredients are gluten-free; you can use gluten-free tortillas if desired.
  • Low-Carb Variation: Skip the tortillas entirely or use zucchini slices for a low-carb alternative.

Essential Equipment for Your Kitchen

To make this casserole, you’ll need:

  • 9×13 Baking Dish: Essential for baking and serving your casserole.
  • Skillet: For cooking the sausage and any additional veggies.
  • Mixing Bowl: To combine the egg and cottage cheese mixture.
  • Whisk: For blending the eggs and cottage cheese smoothly.

Serving Suggestions

Serve this casserole with:

  • Fresh Salsa: A vibrant salsa adds a fresh kick and pairs beautifully with the creamy casserole.
  • Sour Cream or Greek Yogurt: A dollop of sour cream or Greek yogurt adds creaminess and tang.
  • Fruit Salad: A side of fresh fruit balances the savory flavors of the casserole.
  • Herbed Avocado Slices: Creamy avocado slices with a sprinkle of salt enhance the dish’s richness.

Conclusion: A Dish Made with Love

This Turkey Sausage and Green Chile Egg Casserole is more than just a meal; it’s a way to bring people together, share stories, and create memories. Whether you’re making it for a family breakfast, a special occasion, or simply to enjoy throughout the week, this casserole embodies the essence of home cooking. So, gather your loved ones around the table, serve this dish, and savor the love that goes into every bite. Happy cooking!

High Protein Turkey Sausage Green Chile and Egg Casserole

Prep Time 10 minutes
Cook Time 40 minutes
Total Time 50 minutes
Servings 8 squares
Calories 450
A hearty, protein-packed casserole combining turkey sausage, eggs, and green chiles for a flavorful breakfast or brunch.

Ingredients

Meat

  • 16 ounces Turkey Breakfast Sausage (Jimmy Dean Premium Turkey Sausage Roll)
  • 12 large Eggs
  • 1.5 cups Cottage Cheese
  • 0.5 teaspoon Salt
  • 0.5 teaspoon Pepper
  • 4 ounces Diced Green Chiles
  • 2 cups Shredded Cheddar Cheese
  • Sauteed onions, jalapenos, red peppers

Instructions 

  • Preheat oven to 350°F (175°C). Grease a 9x13 baking dish.
  • Cook sausage in a skillet until browned; sauté onions or jalapenos if using. Drain and set aside.
  • Whisk eggs and cottage cheese; season with salt and pepper.
  • Mix in green chiles, cooked sausage, and cheese. Pour into dish and top with remaining cheese.
  • Bake for 32–42 minutes until set and golden. Rest before slicing and serving.

Notes

For extra flavor, add fresh herbs or hot sauce.
Calories: 450kcal
Cost: $15
Course: Breakfast
Keyword: Turkey Sausage

Bringing Family Together with Parmesan Garlic Roasted Carrots

Ah, the aroma of roasted carrots—there’s something so comforting about it, isn’t there? This recipe for Parmesan Garlic Roasted Carrots is more than just a side dish; it’s a reminder of the warmth of family gatherings around the dinner table in my little Louisiana town. With buttery garlic and a sprinkle of parmesan, these carrots don’t just nourish the body; they nourish the soul. Let’s dive into this recipe that you and your loved ones will cherish, filling your hearts and bellies with love.

Why You’ll Love This Recipe

There’s a world of flavors waiting in this simple dish. Here are some reasons why it will become a new favorite:

  • Quick Preparation: With just 10 minutes of prep time, you can have a delightful side dish ready to roast while you focus on your main course.
  • Health Benefits: Carrots are bursting with beta-carotene—great for eye health and a healthy immune system.
  • Easy to Customize: This recipe is flexible; you can add your favorite herbs or spices to make it your own.
  • Perfect for Any Occasion: Whether it’s a family dinner or a holiday feast, these roasted carrots brighten any table.
  • Rich, Savory Flavor: The combination of garlic and parmesan creates an irresistible flavor that even the pickiest eaters will love.

Ingredients for Parmesan Garlic Roasted Carrots

Here’s what you’ll need to create this delightful dish:


Professional Chef Knife Set

★ Recommended Kitchen Tool

Professional Chef Knife Set

Make this recipe even easier with a quality Professional Chef Knife Set — a must-have kitchen staple!


🛒 See Deals on Amazon →

As an Amazon Associate, we earn from qualifying purchases.
  • 2 pounds carrots: Make sure they are washed, scrubbed, and diagonally cut into about 3-inch pieces for even cooking.
  • 4 tablespoons butter: This will add richness and a lovely texture to the carrots.
  • 4 cloves garlic (minced): Fresh garlic delivers the best flavor, enhancing the dish beautifully.
  • 1 teaspoon Italian seasoning: A blend of herbs that adds a comforting, familiar taste.
  • ¼ teaspoon salt: Adjust according to your taste preference.
  • ¼ teaspoon fresh ground black pepper: Freshly ground pepper brings out the flavors even more.
  • ⅓ cup grated parmesan cheese: This is the star ingredient that adds depth and richness.
  • ¼ cup chopped fresh parsley: For garnish and a hint of freshness.

Step-by-Step Instructions

Juicy oven-roasted carrots with a golden crust and garlic seasoning.

Let’s walk through how to make these roasted carrots that will leave everyone at your table smiling:

  1. Preheat oven to 425˚F.
  2. Prepare baking sheet: Grease a rimmed baking sheet with cooking spray or line it with foil for easy clean-up.
  3. Mix the carrots: Place the prepared carrots in a large mixing bowl.
  4. Melt the butter: In the microwave, melt the butter. Once melted, add the minced garlic, Italian seasoning, salt, and pepper. Whisk until fully combined.
  5. Toss the carrots: Pour the butter mixture over the carrots and toss to coat. Add the grated parmesan cheese and mix well.
  6. Arrange on baking sheet: Transfer the carrots to the prepared baking sheet and spread them out in a single layer.
  7. Bake for 20 to 25 minutes or until they are tender. Be sure to mix them around halfway through cooking for even roasting.
  8. Garnish and serve: Once done, remove them from the oven, taste for seasoning, and adjust as necessary. Sprinkle with fresh parsley before serving.

Pro Tips for Perfect Roasted Carrots

Here are some expert insights to elevate your roasted carrot game:

  • Choose fresh carrots: Look for vibrant, firm carrots without blemishes for the best flavor and texture.
  • Cut evenly: Make sure to cut the carrots into uniform pieces to ensure they cook evenly.
  • Don’t overcrowd: Give them room on the baking sheet to roast properly; overcrowding can lead to steaming instead of roasting.
  • Experiment with herbs: Feel free to experiment with rosemary, thyme, or even a dash of chili flakes for added kick.
  • Balance flavors: If you like a touch of sweetness, consider adding a drizzle of honey or maple syrup before serving.
  • Use parchment paper: For easier clean-up and to prevent sticking, consider lining your baking sheet with parchment paper.
  • Storage tips: If you have leftovers, store them in an airtight container in the fridge and enjoy them within 3 days.
  • Reheat wisely: Reheat in the oven to maintain their crispness rather than using a microwave, which can make them soggy.

Common Mistakes and Troubleshooting

Even the best cooks can make mistakes! Here are some common pitfalls and how to avoid them:

  • Undercooking: Always check for tenderness with a fork; if they aren’t tender, give them a few more minutes in the oven.
  • Over-seasoning: Start with less salt; you can always add more later, but it’s hard to fix an overly salty dish.
  • Not mixing halfway: Don’t forget to toss the carrots halfway through cooking; this step is crucial for even roasting.
  • Using old carrots: Make sure your carrots are fresh; limp or rubbery carrots won’t roast well and will lack flavor.

Variations to Try

Change things up with these delicious variations:

  • Maple-Glazed Carrots: Add a drizzle of maple syrup along with the butter for a sweet, caramelized flavor.
  • Spicy Garlic Carrots: Incorporate a pinch of cayenne pepper or chili flakes for a spicy kick.
  • Lemon Zest Carrots: Add the zest of a lemon before serving for a fresh, citrusy twist.
  • Honey Balsamic Carrots: Toss the carrots with a mixture of balsamic vinegar and honey before roasting for a tangy sweetness.

Storage and Make-Ahead Instructions

Want to prepare ahead of time? Here’s how:

  • Make-Ahead: You can wash, scrub, and cut the carrots a day in advance. Store them in a sealed container in the refrigerator.
  • Storage: Refrigerate leftovers in an airtight container for up to 3 days.
  • Reheating: To reheat, place them on a baking sheet in the oven at 350˚F for about 10 minutes to regain their crispness.

Frequently Asked Questions

Here are some common questions that might pop up while making this recipe:

  • Can I use baby carrots? Yes, baby carrots work well; just adjust the cooking time as they may roast faster.
  • How can I make this dish vegan? Substitute butter with olive oil or a plant-based butter alternative, and skip the parmesan or use a vegan cheese.
  • What can I serve these carrots with? They pair beautifully with roasted chicken, grilled fish, or as part of a vegetarian meal.
  • Can I freeze roasted carrots? It’s best not to freeze them as they may become mushy upon thawing. Freshly roasted is always best!
  • What’s the best way to cut carrots? Cutting them diagonally helps increase surface area for roasting, enhancing their flavor.
  • Can I add other vegetables? Absolutely! Try adding bell peppers or zucchini for a colorful medley.
  • What’s the nutritional value of these carrots? They are low in calories and packed with vitamins A and K, making them a healthy choice.
  • How do I know when they are done? The carrots are done when they are fork-tender and slightly caramelized at the edges.

Nourishing Memories Await

In the end, cooking is about more than just following a recipe; it’s about creating memories that last a lifetime. These Parmesan Garlic Roasted Carrots are a perfect example of how simple ingredients can come together to create something truly special. So, gather your loved ones around the table and enjoy this dish that embodies warmth, love, and the joy of sharing meals together. Thank you for joining me on this culinary journey, and I hope your table is filled with laughter and deliciousness!

Parmesan Garlic Roasted Carrots

Prep Time 10 minutes
Cook Time 20 minutes
Total Time 30 minutes
Servings 4 servings
Calories 180
Enjoy tender, flavorful carrots roasted with garlic, Parmesan, and fresh parsley for a delicious side dish.

Ingredients

Vegetables

  • 2 pounds carrots (washed, scrubbed, diagonally cut into about 3-inch pieces)
  • 4 tablespoons butter
  • 4 cloves garlic (minced)
  • 1 teaspoon Italian Seasoning
  • ¼ teaspoon salt (or to taste)
  • ¼ teaspoon fresh ground black pepper
  • cup grated parmesan cheese
  • ¼ cup chopped fresh parsley

Instructions 

  • Preheat oven to 425°F (220°C). Line a baking sheet with foil or spray with cooking spray.
  • Melt butter, then mix with garlic, Italian Seasoning, salt, and pepper.
  • Toss carrots with butter mixture, then add Parmesan cheese and mix well.
  • Arrange carrots on baking sheet in a single layer and bake for 20-25 minutes until tender, tossing halfway.
  • Remove from oven, sprinkle with parsley, and serve.

Notes

For extra flavor, sprinkle with additional Parmesan or fresh herbs before serving.
Calories: 180kcal
Cost: $15
Course: Side Dish
Cuisine: Italian
Keyword: Carrots

Discover the Heartwarming Recipe for Healthy Starbucks Coffee Cake

Welcome to a delightful journey of flavor and nostalgia with my Healthy Starbucks Coffee Cake recipe. This warm, comforting cake is not just a treat for your taste buds—it’s a way to connect with cherished memories and loved ones. With a grain-free base and a dairy-free option, this cake is perfect for everyone, whether you’re gluten-sensitive or simply seeking a healthier indulgence. Join me as we create something special that evokes the warmth of family gatherings and the joy of sharing food.

Why You’ll Love This Recipe

This coffee cake recipe isn’t just about satisfying your sweet tooth; it’s about embracing a healthier lifestyle without sacrificing flavor. Here are five reasons why you’ll fall head over heels for this recipe:

  • Memorable Flavor: Infused with warm spices like cinnamon, this cake brings back fond memories of family gatherings.
  • Healthy Ingredients: Made with almond flour and coconut sugar, it’s a guilt-free indulgence that won’t spike your blood sugar.
  • Dairy-Free Option: Easily swap Greek yogurt for olive oil, making it suitable for dairy-sensitive individuals.
  • Moist and Tender: The combination of avocado oil and maple syrup ensures a cake that’s incredibly moist.
  • Simple to Make: With straightforward steps, this recipe is perfect for both beginners and experienced bakers.

Ingredient Breakdown and Substitutions

Let’s dive into the ingredients that make this healthy Starbucks coffee cake a standout:


Silicone Baking Cups Set

★ Recommended Kitchen Tool

Silicone Baking Cups Set

Make this recipe even easier with a quality Silicone Baking Cups Set — a must-have kitchen staple!


🛒 View on Amazon →

As an Amazon Associate, we earn from qualifying purchases.
  • Coconut Sugar: A natural sweetener that adds a caramel-like flavor and is lower on the glycemic index.
  • Almond Flour: Provides a grain-free base that results in a moist and tender cake.
  • Ground Cinnamon: Infuses warmth and depth, making every bite comforting.
  • Fine Grain Sea Salt: Balances sweetness and enhances flavor.
  • Avocado Oil: Adds healthy fats while keeping the cake moist.
  • Maple Syrup: A natural sweetener that brings a delightful flavor and moisture to the cake.
  • Greek Yogurt: Adds richness and moisture; substitute with olive oil for a dairy-free version.

How to Make Healthy Starbucks Coffee Cake

Side view of a moist coffee cake, highlighting the crumb and topping.

Follow these simple steps to create your own delicious coffee cake:

  1. Preheat your oven to 350°F (175°C) and line a 9×9 inch baking pan with parchment paper.
  2. In a medium bowl, combine all crumble ingredients, mixing with your hands until it resembles wet sand.
  3. In a large bowl, whisk together all cake ingredients (except Greek yogurt) until smooth. Fold in Greek yogurt.
  4. Pour half the batter into the prepared pan, sprinkle a layer of crumble, add the remaining batter, and top with the rest of the crumble.
  5. Bake for 35-45 minutes, until a toothpick inserted into the center comes out clean. Let cool before slicing.

Pro Tips for the Perfect Coffee Cake

Creating the perfect healthy Starbucks coffee cake involves attention to detail. Here are some expert insights:

  • Ingredient Temperature: Ensure eggs and yogurt are at room temperature for a smoother batter.
  • Don’t Overmix: Mix just until combined to avoid a dense texture.
  • Check for Doneness: Start checking at 35 minutes; every oven is different.
  • Let It Cool: Cooling completely before slicing helps maintain the cake’s structure.
  • Add Flavor: Consider adding a splash of almond extract for extra depth.
  • Serving Warm: Enjoy your coffee cake warm with a cup of coffee or tea for the ultimate experience.

Common Mistakes and Troubleshooting

Even the best of us make mistakes in the kitchen! Here’s how to avoid common pitfalls:

  • Dense Cake: Overmixing can lead to a dense texture; mix gently.
  • Dry Cake: Ensure to measure ingredients accurately; too much flour can dry out the cake.
  • Crumbly Crumble: If your crumble is too dry, add a touch more avocado oil or water.
  • Burnt Edges: Use parchment paper to prevent sticking and burning.

Delicious Variations to Try

Feel free to get creative with these variations:

  • Nutty Delight: Add chopped walnuts or pecans for a crunchy texture and nutty flavor.
  • Fruit-Filled: Incorporate blueberries or sliced bananas into the batter for added sweetness and moisture.
  • Chocolate Lovers: Mix in dark chocolate chips for a decadent twist.
  • Spice It Up: Experiment with pumpkin spice instead of cinnamon for a seasonal variation.

Storage and Make-Ahead Instructions

Let’s ensure your coffee cake stays fresh and delicious:

  • Room Temperature: Store covered at room temperature for up to 2 days.
  • Refrigeration: Keep in the fridge for up to a week; warm before serving.
  • Freezing: Wrap slices in plastic wrap and freeze for up to 3 months. Thaw at room temperature.
  • Make-Ahead: You can prepare the crumble ahead of time and store it in the fridge until you’re ready to bake.

Frequently Asked Questions

Here are some common questions you might have:

  • Can I use regular flour instead of almond flour? Yes, but it will no longer be grain-free.
  • How do I make this recipe vegan? Substitute eggs with flax eggs and use olive oil instead of Greek yogurt.
  • Is coconut sugar healthy? It has a lower glycemic index than regular sugar, making it a better option for blood sugar control.
  • Can I add frosting? A light glaze made from powdered sugar and almond milk can make this cake even more special.
  • How can I make this cake more chocolatey? Incorporate cocoa powder into the batter or fold in chocolate chips.
  • What can I serve with this coffee cake? It pairs wonderfully with coffee, tea, or a scoop of vanilla ice cream.
  • Can I use other oils? Yes, melted coconut oil can be used as an alternative.
  • What’s the best way to slice the cake? Use a serrated knife for clean, even slices.

Nutritional Tips and Dietary Adaptations

This cake is not just delicious; it’s also packed with nutrients:

  • Protein Boost: Greek yogurt adds protein, making it a more filling treat.
  • Healthy Fats: Avocado oil provides monounsaturated fats, good for heart health.
  • Low Glycemic Index: Coconut sugar and almond flour help maintain steady blood sugar levels.

Essential Equipment for Baking

To make this recipe a success, here’s what you’ll need:

  • 9×9 inch Baking Pan: Essential for baking your coffee cake to perfection.
  • Mixing Bowls: Have a variety of sizes for mixing ingredients.
  • Whisk: For smooth batter and evenly mixed ingredients.
  • Parchment Paper: Prevents sticking and makes cleanup a breeze.

Serving Suggestions

When it’s time to enjoy your creation, consider these serving ideas:

  • With Coffee: This cake is a match made in heaven with a steaming cup of coffee.
  • With Fresh Fruit: Serve with seasonal fruits like berries for added freshness.
  • With a Glaze: A light drizzle of maple syrup or a simple icing can take it to the next level.

Conclusion

Creating a Healthy Starbucks coffee cake at home brings together the love of baking and the joy of sharing with friends and family. Each slice is a reminder of the beautiful moments spent around the table, celebrating life’s little victories. So gather your ingredients, and let’s bring a piece of that warmth to your kitchen. Happy baking!

Healthy Starbucks Coffee Cake Recipe (grain free + a dairy free option!)

Prep Time 10 minutes
Cook Time 40 minutes
Total Time 50 minutes
Servings 8 pieces
Calories 350
This delicious, grain-free coffee cake is perfect for a healthy treat, with dairy-free options to suit your needs. Easy to make and full of flavor!

Ingredients

crumble

  • 1/3 cup coconut sugar
  • 2/3 cup almond flour
  • 1 1/2 teaspoon ground cinnamon
  • 1/4 teaspoon fine grain sea salt
  • 3 tablespoons avocado oil

cake batter

  • 2 cups almond flour
  • 1 teaspoon baking powder
  • 1/2 teaspoon baking soda
  • 1/2 teaspoon fine grain sea salt
  • 4 eggs eggs
  • 2/3 cup maple syrup
  • 1.5 teaspoon vanilla extract
  • 1/2 cup greek yogurt (sub olive oil for dairy free) (or substitute with 1/4 cup olive oil for dairy free)

Instructions 

  • Preheat oven to 350°F and line a 9x9 inch pan with parchment.
  • Mix crumble ingredients until sandy; set aside.
  • Combine cake ingredients (except yogurt) until smooth, then fold in yogurt.
  • Pour half batter, add crumble, then remaining batter and crumble on top.
  • Bake for 35-45 minutes until a toothpick comes out clean.
  • Cool completely before slicing and serving.

Notes

You can substitute Greek yogurt with olive oil for a dairy-free version.
Calories: 350kcal
Cost: $15
Course: Dessert
Cuisine: American
Keyword: coffee cake

Rediscover the Comfort of Loaded Baked Sweet Potatoes

In the heart of every cozy kitchen lies a recipe that brings back memories of laughter, warmth, and love. Today, we’re diving into the world of loaded baked sweet potatoes, a dish that marries savory ground beef with creamy cottage cheese and a drizzle of hot honey. Perfect for gatherings or those quiet nights at home, this recipe is more than just a meal—it’s a hug on a plate, reminding us that cooking is about sharing and creating bonds.

Let’s embark on this culinary journey together, where every bite tells a story and every ingredient holds a memory. Whether you’re a seasoned chef or a kitchen novice, this loaded baked sweet potato recipe is designed to bring joy and flavor to your table.

Why You’ll Love This Recipe

  • Comforting Flavor: The combination of sweet and savory in this dish creates a symphony of flavors that will warm your heart and satisfy your cravings.
  • Nutritious Ingredients: Sweet potatoes are rich in vitamins and minerals, providing a healthy base for this hearty meal, perfect for any family gathering.
  • Versatile Dish: Customize your toppings with ingredients like avocado, cheese, or even sautéed vegetables to make it your own.
  • Quick Preparation: This recipe is not only delicious but also quick to prepare, making it ideal for busy weeknights.
  • Make-Ahead Friendly: Prepare components in advance and assemble them right before serving for a hassle-free dinner.

Ingredients Breakdown

Let’s gather our ingredients and make sure we have everything we need for this delightful dish. Here’s what you’ll need:


5-Speed Electric Hand Mixer

★ Recommended Kitchen Tool

5-Speed Electric Hand Mixer

Make this recipe even easier with a quality 5-Speed Electric Hand Mixer — a must-have kitchen staple!


🛒 See Deals on Amazon →

As an Amazon Associate, we earn from qualifying purchases.
  • 4 medium sweet potatoes: Look for firm, blemish-free potatoes for the best flavor.
  • Olive or avocado oil: This will help crisp up the skins and add a richness to the dish.
  • Salt and pepper: Essential seasonings to enhance the natural sweetness of the potatoes.
  • Butter: For serving, adds a creamy texture and flavor.
  • 1 pound ground beef: You can substitute with turkey or a plant-based alternative for a healthier option.
  • 1 tablespoon olive or avocado oil: For cooking the beef.
  • 1 teaspoon minced garlic: Fresh garlic adds depth to the dish.
  • 1/2 teaspoon onion powder: For a subtle onion flavor.
  • 1 teaspoon chili powder: Adds a hint of warmth.
  • 1 teaspoon paprika: For color and a mild smoky flavor.
  • 3/4 teaspoon salt: Adjust to taste.
  • 1/2 teaspoon black pepper: Freshly ground for the best flavor.
  • 1/2 tablespoon Worcestershire sauce: Adds a savory umami kick.
  • 1 teaspoon cornstarch: Helps thicken the sauce.
  • 1/4 cup beef broth: Adds moisture and flavor to the beef mixture.
  • 1/4 cup hot honey: The star of the show, bringing heat and sweetness.
  • 1 tablespoon sriracha: For an extra kick.
  • 1/2 to 1 teaspoon red pepper flakes: Adjust based on your spice preference.
  • 1/2 tablespoon vinegar: A little acidity balances the sweetness.
  • Cottage cheese: Use as needed, it’s creamy and rich, perfect for topping.
  • 1 avocado: Thinly sliced or mashed, it adds creaminess and freshness.

Pro Tips for Perfection

Side view of delicious loaded baked sweet potatoes garnished with cottage cheese and spices.

To ensure your loaded baked sweet potatoes turn out perfectly, consider these helpful tips:

  • Choose the Right Potatoes: Opt for medium-sized sweet potatoes that are uniform in size for even cooking.
  • Oiling the Skins: Rubbing oil on the sweet potatoes before baking helps achieve a crispy skin.
  • Use a Wire Rack: Baking the potatoes on a wire rack allows air to circulate, ensuring they cook evenly.
  • Don’t Overcook the Beef: Cook the ground beef just until browned to avoid a dry texture.
  • Adjust the Spice Level: If you’re sensitive to heat, start with less chili powder and red pepper flakes, then add more to taste.
  • Let Them Rest: Allow the sweet potatoes to rest a few minutes after baking to make them easier to handle.
  • Experiment with Toppings: Try adding shredded cheese, chopped herbs, or even a dollop of sour cream.
  • Make It Ahead: Prep the potatoes and beef mixture a day in advance to save time.

Common Mistakes and Troubleshooting

Cooking can sometimes be tricky, but don’t worry! Here are some common pitfalls and how to avoid them:

  • Overcooked Potatoes: Keep an eye on your potatoes; they should be tender but not mushy. A fork should easily pierce through.
  • Dry Beef Mixture: Ensure to add enough broth and Worcestershire sauce to keep the beef moist.
  • Too Much Spice: If it gets too spicy, balance it with a dollop of cottage cheese or avocado to cool it down.
  • Uneven Cooking: If some potatoes are larger, consider cutting them in half for even baking.

Delicious Variations to Try

Feel free to get creative! Here are some variations that can elevate your loaded baked sweet potatoes:

  • BBQ Chicken Loaded Sweet Potatoes: Substitute ground beef with shredded BBQ chicken for a smoky twist.
  • Vegetarian Delight: Replace the meat with black beans and corn for a hearty vegetarian option.
  • Tex-Mex Style: Top with salsa, jalapeños, and a sprinkle of cheddar cheese for a zesty kick.
  • Breakfast Loaded Sweet Potatoes: Stuff with scrambled eggs, spinach, and crumbled feta for a breakfast twist.

Storage and Make-Ahead Instructions

This recipe is perfect for meal prep! Here’s how to store and prepare in advance:

  • Storing Leftovers: Keep any leftovers in an airtight container in the refrigerator for up to 3 days.
  • Make-Ahead: Prepare the sweet potatoes and beef mixture a day ahead. Store separately and assemble just before serving.
  • Reheating: Reheat in the oven at 350°F until warmed through, or in the microwave for a quick fix.

Frequently Asked Questions

Here are some common questions to help you with your loaded baked sweet potatoes:

  • Can I use regular potatoes instead of sweet potatoes? Yes, but the flavor and texture will be different; sweet potatoes add a natural sweetness.
  • Can this dish be made dairy-free? Absolutely! Omit the cottage cheese and use avocado or vegan sour cream as a topping.
  • How do I prevent the sweet potatoes from getting too soggy? Ensure to bake them until just tender and avoid overcooking.
  • Can I make this in an air fryer? Yes, use the air fryer to cook the sweet potatoes for a crispy skin in less time.
  • What if I don’t have ground beef? You can substitute with ground turkey, chicken, or even lentils for a vegetarian option.
  • How can I make this dish spicier? Add more hot honey, sriracha, or red pepper flakes to amp up the heat.
  • Is this recipe good for meal prep? Yes! It’s perfect for meal prep, and the flavors meld beautifully when reheated.
  • What are some serving suggestions? Pair with a fresh salad or roasted vegetables for a complete meal.

Nutrition Tips and Dietary Adaptations

Loaded baked sweet potatoes can fit into various dietary needs:

  • Low-Carb Option: Skip the sweet potatoes and use cauliflower for a lower-carb version.
  • High-Protein: Add more cottage cheese or Greek yogurt for an extra protein boost.
  • Gluten-Free: This recipe is naturally gluten-free; just ensure all sauces and toppings are certified gluten-free.

Equipment Recommendations

To make the process smoother, here’s a list of recommended kitchen tools:

  • Baking Sheet: For roasting sweet potatoes evenly.
  • Measuring Cups and Spoons: Essential for accurate ingredient measurements.
  • Mixing Bowls: For combining your beef mixture and toppings.
  • Knife and Cutting Board: For prepping your ingredients.

Serving Suggestions

To complete your meal, consider these serving ideas:

  • Fresh Salad: A side of mixed greens dressed with a vinaigrette pairs beautifully with the sweet potatoes.
  • Garlic Bread: Serve with garlic bread to soak up any delicious drippings.
  • Seasonal Veggies: Roasted asparagus or Brussels sprouts add a nutritious touch.

In conclusion, these loaded baked sweet potatoes are not just a recipe; they are a celebration of flavors and memories. Each ingredient is a reminder of the love we put into our cooking, creating a dish that nourishes both body and soul. So, gather your loved ones around the table, share this meal, and create new memories that will last a lifetime. Happy cooking!

Loaded Baked Sweet Potatoes

Prep Time 15 minutes
Cook Time 45 minutes
Total Time 1 hour
Servings 4 servings
Calories 650
Enjoy these hearty sweet potatoes loaded with savory ground beef, spicy sriracha, and creamy avocado for a satisfying meal.

Ingredients

Sweet Potatoes

  • 4 medium sweet potatoes
  • 1 tablespoon olive or avocado oil (for rubbing)
  • 1 teaspoon minced garlic
  • 1 pound ground beef
  • 1 tablespoon olive or avocado oil (for cooking)
  • 1 teaspoon minced garlic
  • 1/2 teaspoon onion powder
  • 1 teaspoon chili powder
  • 1 teaspoon paprika
  • 3/4 teaspoon salt
  • 1/2 teaspoon black pepper
  • 1/2 tablespoon Worcestershire sauce
  • 1 teaspoon cornstarch
  • 1/4 cup beef broth
  • 1/4 cup hot honey
  • 1 tablespoon sriracha
  • 1/2 to 1 teaspoon red pepper flakes (to taste)
  • 1/2 tablespoon vinegar (white or apple cider)
  • as needed cottage cheese
  • 1 avocado avocado (thinly sliced or mashed)

Instructions 

  • Preheat oven and rub sweet potatoes with oil, then bake until tender.
  • Cook ground beef with garlic, onion powder, chili powder, paprika, salt, and pepper.
  • Mix Worcestershire, cornstarch, beef broth, hot honey, sriracha, red pepper flakes, and vinegar to make sauce.
  • Stuff baked sweet potatoes with cooked beef, top with sauce, cottage cheese, and sliced avocado.

Notes

For extra flavor, add chopped cilantro or a squeeze of lime.
Calories: 650kcal
Cost: $15
Course: Main Course
Cuisine: American
Keyword: Sweet Potatoes

Welcome to a culinary journey where nostalgia meets flavor! This Ultimate Cream Cheese Corn Pudding is not just a side dish; it’s a hug on a plate, a celebration of togetherness, and a recipe that brings the warmth of family gatherings right to your kitchen. As someone who grew up in a small Louisiana town, I can tell you that cooking is about more than just ingredients—it’s about love, memory, and sharing moments with those dearest to us. Let’s dive in and discover how to make this delightful Mexican side dish that has a special place at our family table.

Why You’ll Love This Recipe

  • Familiar flavors: The comforting blend of cream cheese and corn evokes memories of family dinners and cherished gatherings.
  • Quick and easy: With minimal prep time, you can whip this up and have it baking while you prepare the rest of your meal.
  • Versatile side dish: Perfect for holidays, potlucks, or just a cozy weeknight dinner—this dish pairs well with almost anything!
  • Kid-approved: The creamy texture and subtle sweetness make it a hit with children and adults alike, ensuring everyone leaves the table happy.
  • Make-ahead friendly: Prepare it ahead of time, and just pop it in the oven when you’re ready to serve.

Ingredients Breakdown

To make this Cream Cheese Corn Casserole, you’ll need the following ingredients:

  • 2 cans (15 oz / 425 g each) whole kernel corn, drained: Provides the base and texture for the pudding.
  • 1 can (15 oz / 425 g) creamed corn: Adds creaminess and a sweet flavor profile.
  • 8 oz (225 g) cream cheese, softened and cubed: The star ingredient that gives the pudding its rich, creamy consistency.
  • ½ cup (115 g) unsalted butter, melted: Enhances flavor and helps bind the ingredients together.
  • 1 cup (100 g) shredded cheddar cheese: For a cheesy, savory kick that complements the sweetness of the corn.
  • ½ cup (30 g) finely chopped onion (optional): Adds a subtle depth of flavor—feel free to omit if you prefer.
  • ½ tsp salt: Balances the flavors.
  • ½ tsp black pepper: Adds a hint of spice.
  • ½ tsp paprika (optional): For a touch of warmth and color.

Feel free to customize these ingredients to suit your taste or dietary needs. For instance, you can use low-fat cream cheese or dairy-free alternatives if you’re looking for a lighter version.


Digital Kitchen Scale

★ Recommended Kitchen Tool

Digital Kitchen Scale

Make this recipe even easier with a quality Digital Kitchen Scale — a must-have kitchen staple!


🛒 View on Amazon →

As an Amazon Associate, we earn from qualifying purchases.

Expert Pro Tips

Before you start, here are some tips that will elevate your corn pudding to the next level:

  • Room temperature ingredients: Let the cream cheese and eggs sit out for about 30 minutes before mixing. This ensures a smooth batter.
  • Don’t overmix: Stir until just combined to maintain a nice texture. It’s okay if there are small lumps of cream cheese!
  • Use fresh corn: If it’s in season, fresh corn can be used instead of canned for an even sweeter flavor.
  • Check for doneness: The pudding should be bubbly and golden on top. A toothpick inserted should come out clean when it’s done.
  • Rest before serving: Letting the pudding sit for about 5 minutes after baking allows it to set and makes serving easier.
  • Enhance with toppings: Consider adding a sprinkle of fresh herbs or a drizzle of hot sauce for an extra kick.
  • Experiment with spices: Feel free to add a pinch of cayenne or chili powder for a twist that gives this dish a little heat.
  • Make it a meal: Add cooked, shredded chicken or diced bell peppers to make this dish a complete meal.

Common Mistakes and Troubleshooting

Side view of creamy corn pudding with ingredients visible, served in a dish.

Even the best of us can run into small hiccups when cooking. Here are some common issues and how to avoid them:

  • Too watery: If your pudding is too loose, it may need more time in the oven. Check it periodically until it sets.
  • Overcooked edges: If the edges are browning too quickly, cover the dish with aluminum foil to prevent further browning while the center cooks.
  • Not enough flavor: Always taste and adjust the seasoning before baking. Don’t be afraid to add a bit more salt or pepper!

Variations on the Classic Recipe

Now that you have the basics down, here are some fun variations you can try:

  • Mexican-style: Add diced jalapeños and cilantro for a spicy twist.
  • Herbed version: Incorporate fresh herbs like thyme or rosemary for a fragrant note.
  • Cheesy jalapeño popper: Mix in jalapeños and cream cheese for a creamy, spicy surprise.
  • Southwestern flair: Add black beans and corn for a heartier, protein-packed version.

Storage and Make-Ahead Instructions

Planning ahead? Here’s how to store your corn pudding:

  • Refrigeration: Store leftovers in an airtight container in the fridge for up to 4 days.
  • Freezing: You can freeze it for up to 3 months. Just ensure it’s well-wrapped to prevent freezer burn.
  • Reheating: To reheat, place it in a preheated oven at 350°F (175°C) until warmed through, about 20-25 minutes.
  • Make-ahead: Prepare the dish a day in advance and refrigerate until you’re ready to bake it. Just add an extra 10-15 minutes to baking time.

Frequently Asked Questions

Got questions? Here are the answers to some common queries:

  • Can I use frozen corn? Yes! Just thaw and drain it before using.
  • What can I substitute for cream cheese? Mascarpone or Neufchâtel cheese are excellent alternatives.
  • Is this recipe gluten-free? Yes, all ingredients are naturally gluten-free, making it a great choice for those with gluten sensitivities.
  • Can I add meat to this dish? Absolutely! Shredded chicken or cooked sausage can make it heartier.
  • Can I make this vegan? Use vegan cream cheese and butter for a plant-based version.
  • How can I make it spicier? Add diced jalapeños or a pinch of cayenne pepper to the mix.
  • What’s the best way to serve it? This dish is best served warm, straight from the oven, but it can also be enjoyed at room temperature.
  • How do I know when it’s done? Look for bubbly edges and a lightly golden top; it should be firm but not dry.

Nutrition Tips and Dietary Adaptations

As with any recipe, you can tailor this corn pudding to fit various dietary needs:

  • Low-carb option: Substitute regular corn with cauliflower rice for a lower-carb dish.
  • Lighten it up: Use low-fat cream cheese and less butter to cut calories.
  • Dairy-free: Use plant-based cream cheese and vegan cheese substitutes.

Equipment Recommendations

Here’s what you’ll need to make this recipe:

  • 8×8-inch baking dish: Perfect for even cooking and easy serving.
  • Mixing bowls: A large bowl for mixing ingredients and a smaller one for combining any optional add-ins.
  • Spatula: For folding in ingredients gently without overmixing.
  • Measuring cups and spoons: Precision is key for consistent results.
  • Oven mitts: Safety first! Protect your hands when taking the hot dish out of the oven.

Serving Suggestions

This creamy corn pudding is a versatile side dish that pairs beautifully with:

  • Grilled meats: Think barbecued chicken or pork chops.
  • Roasted vegetables: A great addition to a plate filled with seasonal veggies.
  • Salads: Serve alongside a fresh garden salad for a balanced meal.
  • Spicy dishes: Complements the heat of Cajun or Mexican cuisine perfectly.

Final thoughts: This Cream Cheese Corn Pudding is more than just food; it’s a recipe that carries the essence of loving gatherings, laughter, and shared memories. Whether you are making it for a special occasion or just a comforting weeknight dinner, it’s sure to be a beloved addition to your family’s table. So preheat that oven, gather your ingredients, and get ready to create a dish that will warm hearts as much as it fills bellies!

Ultimate Cream Cheese Corn Pudding – The Best Easy Mexican Side Dish

Prep Time 10 minutes
Cook Time 40 minutes
Total Time 50 minutes
Servings 8 servings
Calories 350
A creamy, cheesy corn pudding that's perfect as a flavorful side dish for any Mexican meal. Easy to prepare and irresistibly delicious.

Ingredients

Canned Corn

  • 2 cans whole kernel corn, drained
  • 1 can creamed corn
  • 8 oz cream cheese, softened and cubed
  • 0.5 cup unsalted butter, melted
  • 1 cup shredded cheddar cheese
  • 0.5 cup finely chopped onion (optional)
  • 0.25 tsp salt
  • 0.25 tsp black pepper
  • 0.25 tsp paprika (optional)

Instructions 

  • Preheat oven to 350°F (175°C). Grease an 8x8-inch baking dish.
  • Mix drained corn and creamed corn in a large bowl.
  • Add cream cheese and melted butter; stir until smooth.
  • Stir in cheddar, onion (if using), salt, pepper, and paprika.
  • Spread mixture into dish and bake for 35-40 minutes until bubbly and golden.
  • Let rest 5 minutes before serving.

Notes

For extra flavor, sprinkle additional cheese on top before baking.
Calories: 350kcal
Cost: $15
Course: Side Dish
Cuisine: Mexican
Keyword: baking, Cheese, Corn

Embrace the Warmth of Home with Sweet Potato and Black Bean Enchiladas

As a cook raised in the vibrant heart of Louisiana, I’ve always found that the kitchen is where memories are made and traditions are kept alive. Today, I invite you to explore the rich, comforting flavors of my Sweet Potato and Black Bean Enchiladas. This dish is not just a meal; it’s a celebration of love, community, and the joy of gathering around the table with those you cherish. Each bite is a reminder that cooking is about sharing moments, not just following recipes.

In this comprehensive guide, you’ll discover everything you need to know about crafting these delightful enchiladas, from ingredient substitutions to expert tips that ensure success in your kitchen. Let’s dive into the heart of this recipe and embrace the warmth it brings!

Why You’ll Love This Recipe

  • Comforting and Hearty: These enchiladas are packed with flavors and textures that warm your soul, making them perfect for family dinners or cozy nights in.
  • Family-Friendly: With a delightful balance of sweet potatoes and black beans, this dish appeals to both kids and adults, ensuring everyone leaves the table satisfied.
  • Easy to Prepare: Made with simple, wholesome ingredients, you can whip these up quickly, making them an ideal choice for busy weeknights.
  • Customizable: This recipe allows for endless variations. You can easily swap ingredients based on your preferences or what you have on hand.
  • Make-Ahead Friendly: Perfect for meal prep, you can assemble these enchiladas in advance and pop them in the oven when you’re ready to eat.

Ingredient Breakdown

Let’s take a closer look at the ingredients that make these enchiladas shine. Here’s what you’ll need:


Professional Chef Knife Set

★ Recommended Kitchen Tool

Professional Chef Knife Set

Make this recipe even easier with a quality Professional Chef Knife Set — a must-have kitchen staple!


🛒 Shop This Tool →

As an Amazon Associate, we earn from qualifying purchases.
  • 2 tablespoons oil: Any neutral oil works, but olive oil adds a lovely flavor.
  • 1 cup chopped onion: For sweetness and depth.
  • 4 cloves garlic (minced): Infuses the dish with aromatic goodness.
  • 2 tablespoons brown sugar: Balances the savory and sweet elements, enhancing the overall flavor.
  • 1 tablespoon ground cumin: Adds warmth and earthiness.
  • 1 chipotle chile in adobo sauce (minced): Provides a smoky kick; feel free to adjust to your heat preference.
  • 1 teaspoon of adobo sauce: Enhances the richness of the dish.
  • 2 cans (15 oz each) black beans (drained and rinsed): A protein-packed filling that complements the sweet potatoes beautifully.
  • 1 lb sweet potatoes (peeled and diced): The star of the show, offering a creamy texture and natural sweetness.
  • 2 cups water: Needed to cook the sweet potatoes until tender.
  • 2 cans (10 oz each) red enchilada sauce: The sauce ties everything together, creating a delicious coating.
  • 8 6-inch flour tortillas: Soft tortillas are perfect for wrapping around the filling.
  • 2 cups grated Cheddar cheese: Melts beautifully, adding richness to each bite.

How to Make Sweet Potato and Black Bean Enchiladas

Juicy Sweet Potato and Black Bean Enchiladas served on a plate, garnished for presentation.

Now that we have our ingredients ready, let’s get to the heart of the matter: making these enchiladas!

  1. Preheat the oven: Set it to 425ºF, so it’s hot and ready for your enchiladas.
  2. Cook the filling: In a large skillet, heat the oil over medium heat. Add the onion, garlic, brown sugar, cumin, and chipotle pepper with the adobo sauce. Sauté until the onion softens (about 5 minutes).
  3. Add the sweet potatoes and beans: Stir in the diced sweet potatoes, black beans, and 2 cups of water. Bring to a boil, cover, and reduce the heat to low. Simmer until the potatoes are tender and most of the liquid is absorbed (about 10 minutes).
  4. Assemble the enchiladas: Pour one can of enchilada sauce into the bottom of a 9×13-inch baking dish. Take a tortilla, dip it in the sauce, and fill it with 1/8 of the sweet potato mixture. Roll it up and place it seam-side down in the dish. Repeat with remaining tortillas and filling.
  5. Add sauce and cheese: Pour the remaining enchilada sauce over the rolled tortillas and sprinkle with cheese.
  6. Bake: Place the dish in the preheated oven and bake until heated through and cheese is bubbly (about 10-15 minutes). Let it stand for 10 minutes before serving.

Pro Tips for Success

  • Use fresh ingredients: Fresh sweet potatoes and quality black beans make a significant difference in flavor.
  • Adjust the spice: If you prefer a milder taste, reduce the amount of chipotle or use a different pepper.
  • Don’t skip the resting time: Allowing the enchiladas to sit after baking helps the flavors meld and makes them easier to serve.
  • Experiment with cheeses: Try mixing different types of cheese for a unique twist—Monterey Jack or pepper jack can add extra flavor.
  • Make it vegan: Substitute the cheese with vegan cheese or nutritional yeast for a dairy-free version.
  • Freeze for later: Assemble the enchiladas, cover them with foil, and freeze before baking. When ready to eat, bake from frozen, adding extra time.
  • Pair with toppings: Fresh cilantro, avocado, or a dollop of sour cream can elevate your dish.
  • Watch the baking time: Every oven is different; keep an eye on your enchiladas to avoid over-baking.

Common Mistakes and Troubleshooting

Even the best cooks can face challenges. Here are some common pitfalls to avoid:

  • Overfilling the tortillas: If you pack too much filling, they can burst during baking. Stick to about 1/8 of the filling per tortilla.
  • Using stale tortillas: Fresh tortillas roll easier and hold up better. If they break, warm them slightly before filling.
  • Not enough sauce: Ensure you have enough enchilada sauce for both the bottom of the dish and to cover the rolled enchiladas.

Variations to Try

Feel free to get creative with these enchiladas! Here are some variations you can explore:

  • Green Enchiladas: Swap red enchilada sauce for green for a different flavor profile.
  • Protein Boost: Add shredded chicken or turkey to the filling for extra heartiness.
  • Vegetable Add-Ins: Incorporate bell peppers, corn, or spinach into the filling for added nutrition.
  • Cheesy Spinach Variation: Mix in some fresh spinach and a blend of cheeses for a creamy, decadent twist.

Storage and Make-Ahead Instructions

Want to enjoy these enchiladas later? Here’s how to store and prep ahead:

  • Refrigeration: Store leftover enchiladas in an airtight container in the fridge for up to 3 days.
  • Freezing: Assemble and freeze unbaked enchiladas for up to 3 months. To bake, thaw overnight in the fridge and follow the baking instructions.
  • Reheating: To reheat, cover with foil and bake at 350ºF until heated through, about 20 minutes.

Frequently Asked Questions

Here are some common questions I receive about making Sweet Potato and Black Bean Enchiladas:

  • Can I use other beans? Yes! Pinto beans or kidney beans are great alternatives.
  • What if I don’t have chipotle pepper? Use a pinch of smoked paprika for a different but delicious smoky flavor.
  • Are these enchiladas gluten-free? They can be! Use corn tortillas instead of flour tortillas.
  • How spicy are these enchiladas? The spice level can be adjusted by modifying the amount of chipotle pepper used.
  • Can I add meat? Absolutely! Shredded chicken or beef can be added to the filling as a tasty option.
  • How do I make homemade enchilada sauce? Combine tomato sauce, chili powder, garlic, and onion powder to create a quick version.
  • Can I make these enchiladas vegan? Yes! Just omit the cheese or use a plant-based alternative.
  • What to serve with enchiladas? These are fantastic with a side of Mexican rice or a fresh salad.

Nutritional Tips and Dietary Adaptations

These enchiladas can fit various dietary needs:

  • Low-Calorie: Reduce cheese or use low-fat alternatives to cut calories.
  • High-Protein: Add more beans or serve with a side of Greek yogurt for protein.
  • Gluten-Free: Opt for gluten-free tortillas and check your sauces for gluten content.

Equipment Recommendations

Here’s what you’ll need to make the magic happen:

  • Large Skillet: For cooking the filling.
  • 9×13-inch Baking Dish: Perfect for assembling and baking your enchiladas.
  • Sharp Knife and Cutting Board: For chopping vegetables and sweet potatoes.
  • Measuring Cups and Spoons: Essential for accuracy in cooking.
  • Spatula: Great for mixing and serving your delicious enchiladas.

Serving Suggestions

To enhance your enchiladas experience, consider these delightful serving suggestions:

  • Fresh Cilantro: Sprinkle chopped cilantro on top for a burst of freshness.
  • Avocado Slices: Creamy avocado pairs beautifully with the enchiladas.
  • Sour Cream or Greek Yogurt: A dollop adds creaminess and balances the spice.
  • Lime Wedges: A squeeze of lime brightens up the dish and adds a zesty kick.

Conclusion

These Sweet Potato and Black Bean Enchiladas are more than just food; they are a vessel for love shared around a table. They carry the essence of home-cooked comfort, inviting you to savor every bite. So, gather your loved ones, roll up your sleeves, and let’s create something beautiful together. Every recipe is a story, and I’m so excited for you to write your own with these enchiladas. Happy cooking!

Sweet Potato and Black Bean Enchiladas

Prep Time 15 minutes
Cook Time 20 minutes
Total Time 35 minutes
Servings 4 servings
Calories 450
These flavorful enchiladas combine roasted sweet potatoes and black beans wrapped in tortillas, topped with cheese and baked to perfection.

Ingredients

Oil

  • 2 tablespoons oil

Chopped onion

  • 1 cup chopped onion

Garlic cloves

  • 4 cloves garlic (minced)

Brown sugar

  • 2 tablespoons brown sugar

Ground cumin

  • 1 tablespoon ground cumin

Chipotle chile in adobo sauce

  • 1 piece chipotle chile in adobo sauce (minced) (seeds removed for less heat)

Adobo sauce

  • 1 teaspoon adobo sauce

Black beans

  • 2 cans black beans (15 oz each, drained and rinsed)

Sweet potatoes

  • 1 lb sweet potatoes (peeled and diced)

Water

  • 2 cups water

Red enchilada sauce

  • 2 cans red enchilada sauce (10 oz each)

Flour tortillas

  • 8 6-inch flour tortillas

Cheddar cheese

  • 2 cups grated Cheddar cheese

Instructions 

  • Preheat oven to 425ºF (220ºC).
  • Cook onion, garlic, brown sugar, cumin, and chipotle in oil until softened, about 5 minutes.
  • Add beans, sweet potatoes, and water; simmer until potatoes are tender, about 10 minutes.
  • Spread enchilada sauce in a baking dish, fill tortillas with mixture, roll, and place seam side down. Cover with remaining sauce and cheese.
  • Bake for 10-15 minutes until heated through. Let stand 10 minutes before serving.

Notes

For less heat, remove seeds from the chipotle chile.
Calories: 450kcal
Cost: $15
Course: Main Course
Cuisine: Mexican
Keyword: Enchiladas, vegetarian