Author

daniel

Browsing

Welcome to Harvest Harmony: A Sweet Embrace of Honey Roasted Carrots and Parsnips

When you think of cozy family gatherings, what comes to mind? For me, it’s the delightful aroma of roasted vegetables wafting through the kitchen, carrying with it memories of laughter, love, and shared meals. Today, I invite you to join me in preparing a dish that embodies all those warm feelings: Honey Roasted Carrots and Parsnips. This recipe beautifully melds the natural sweetness of these root vegetables with a touch of honey, creating a side dish that is not just delicious but also deeply nostalgic.

In this article, you will discover everything you need to know to make the perfect honey roasted carrots and parsnips. From ingredient breakdowns and cooking tips to variations and storage advice, we’ll ensure that your dish is not just a recipe but a heartfelt experience that brings your loved ones together around the table.

Why You’ll Love This Recipe

There are countless reasons to adore this honey roasted carrots and parsnips dish, but here are five that stand out:


Silicone Baking Cups Set

★ Recommended Kitchen Tool

Silicone Baking Cups Set

Make this recipe even easier with a quality Silicone Baking Cups Set — a must-have kitchen staple!


đŸ›’ See Deals on Amazon →

As an Amazon Associate, we earn from qualifying purchases.
  • Simple Ingredients: With just a handful of fresh ingredients, this recipe is straightforward and accessible for any home cook.
  • Perfectly Balanced Flavors: The combination of honey and earthy root vegetables creates a delightful sweet and savory profile that complements any meal.
  • Health Benefits: Carrots and parsnips are packed with essential vitamins, minerals, and fiber, making this dish a nutritious addition to your table.
  • Versatile Side Dish: Whether for a cozy family dinner or a festive gathering, this dish fits seamlessly into any occasion.
  • Time-Efficient: Ready in under 30 minutes, it’s perfect for busy weeknights or when entertaining guests.

Ingredients for Honey Roasted Carrots and Parsnips

Gathering the right ingredients is essential for crafting this heartwarming dish. Here’s what you’ll need:

  • 4 large carrots: Peeled and cut into sticks. Their natural sweetness shines through when roasted.
  • 4 medium parsnips: Peeled and cut into sticks. These add a nutty flavor that complements the carrots beautifully.
  • 2 tablespoons honey: This is the star ingredient that brings a lovely glaze to your vegetables.
  • 1 tablespoon melted butter: For richness and to help the veggies caramelize.
  • 1 tablespoon olive oil: A splash of quality oil promotes even roasting.
  • 1 teaspoon fresh thyme leaves: This herb enhances the flavor, bringing a touch of warmth.
  • Salt and black pepper: To taste, these basic seasonings elevate the dish.

**Substitutions**: If you don’t have parsnips on hand, feel free to use sweet potatoes or butternut squash for a similar sweet profile. For a vegan option, substitute melted butter with coconut oil or additional olive oil.

How to Make Honey Roasted Carrots and Parsnips

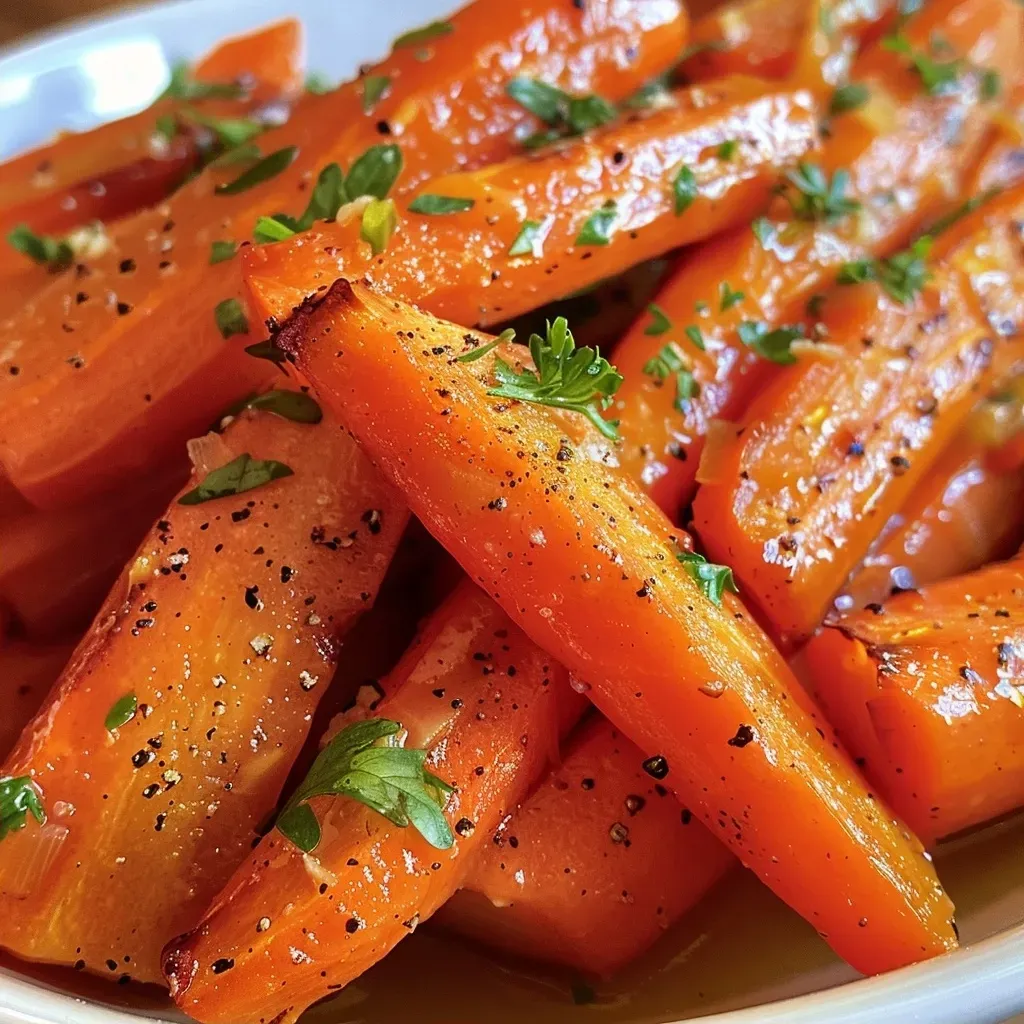
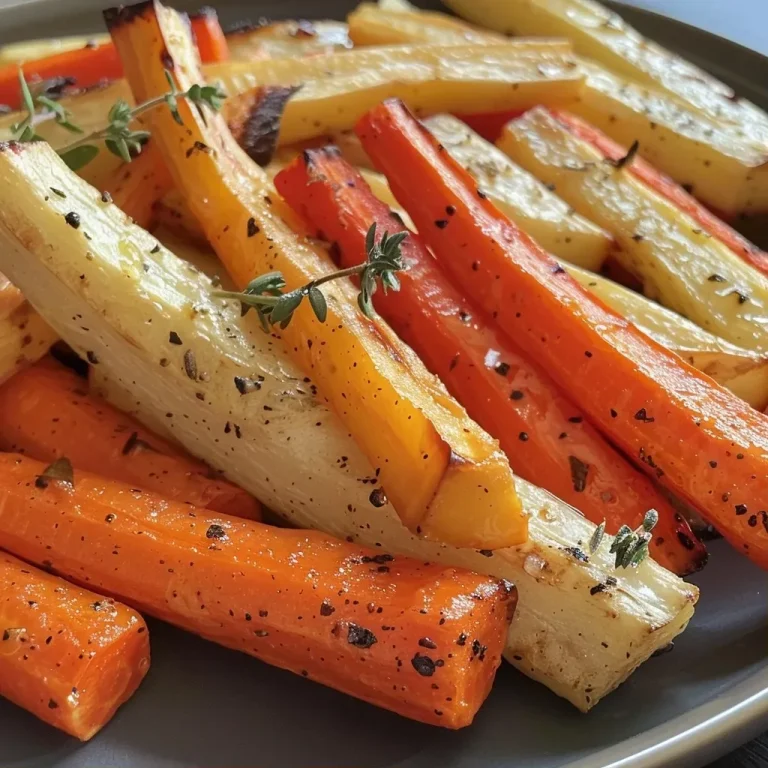
Side view of roasted carrots and parsnips drizzled with honey, sitting on a white plate.

Now that we have our ingredients lined up, let’s dive into the cooking process:

  1. Preheat the oven: Set your oven to 425°F (220°C) and line a baking sheet with parchment paper for easy cleanup.
  2. Prepare the vegetables: Peel and slice the carrots and parsnips into even sticks, ensuring they roast at the same rate.
  3. Make the glaze: In a mixing bowl, whisk together honey, melted butter, olive oil, salt, and pepper until well combined.
  4. Coat the veggies: Toss the sliced carrots and parsnips in the honey mixture until they are evenly coated, allowing the flavors to meld.
  5. Spread and season: Arrange the coated vegetables in a single layer on the prepared baking sheet. Sprinkle fresh thyme over the top for added flavor.
  6. Roast: Bake in the oven for 25–30 minutes, flipping halfway through, until the vegetables are golden and tender.
  7. Serve warm: Garnish with extra thyme or a drizzle of honey before serving to elevate the presentation.

Pro Tips for Perfect Honey Roasted Carrots and Parsnips

To ensure your dish is as delightful as possible, consider these expert tips:

  • Uniform Cutting: Make sure the carrots and parsnips are cut into similar sizes. This ensures they roast evenly, resulting in perfectly tender bites.
  • Don’t Overcrowd: Give your veggies space on the baking sheet to allow them to caramelize rather than steam.
  • Experiment with Spices: Add a pinch of cinnamon or nutmeg for a warm, autumnal twist that pairs beautifully with the honey glaze.
  • Use Fresh Herbs: Fresh herbs can elevate the dish. Try rosemary or parsley for a different flavor profile.
  • Check for Doneness: Use a fork to test the tenderness of the vegetables. They should be soft and slightly caramelized.
  • Adjust Sweetness: If you prefer a sweeter dish, feel free to add more honey, or balance it out with a splash of lemon juice.
  • Try Different Oils: Experiment with flavored oils like sesame or avocado for a unique taste.
  • Make Ahead: Prep your vegetables and glaze a day in advance. Store in the fridge for a hassle-free cooking experience.

Common Mistakes to Avoid

Even the most seasoned cooks make mistakes. Here are some common pitfalls to be aware of:

  • Cutting Vegetables Unevenly: This can lead to inconsistent cooking times. Aim for uniformity.
  • Skipping the Preheating Step: Always preheat your oven to ensure the veggies start roasting immediately.
  • Not Checking the Oven Temperature: Oven temperatures can vary. A quick check with an oven thermometer helps maintain accuracy.
  • Overdoing the Oil: Too much oil can make the dish greasy instead of beautifully caramelized.

Variations to Try

Feeling adventurous? Here are a few variations to put your personal spin on this dish:

  • Maple Glazed: Substitute honey with pure maple syrup for a different sweet note.
  • Spicy Kick: Add a pinch of cayenne pepper to the glaze for a hint of heat that contrasts with the sweetness.
  • Asian-Inspired: Drizzle with soy sauce and a sprinkle of sesame seeds before roasting for an umami twist.
  • Add Nuts: Toss in some pecans or walnuts during the last 10 minutes of roasting for added crunch and flavor.

Storage and Make-Ahead Instructions

Want to prepare this dish in advance? Here’s how:

  • Make Ahead: Prepare the vegetables and glaze and store them in the refrigerator for up to 24 hours before roasting.
  • Storage: Leftovers can be stored in an airtight container in the fridge for 3-4 days.
  • Reheating: To reheat, simply place in the oven at 350°F (175°C) for about 10-15 minutes until warmed through.

FAQs About Honey Roasted Carrots and Parsnips

Here are some commonly asked questions to help you get the most out of this recipe:

  • Can I use frozen carrots and parsnips? Frozen vegetables may not yield the same texture. Fresh is best for roasting.
  • What can I serve with honey roasted carrots and parsnips? This dish pairs wonderfully with roasted meats, grain salads, or as part of a festive spread.
  • How do I know when the vegetables are done? They should be fork-tender and slightly caramelized on the edges.
  • Can I make this dish vegan? Yes, substitute honey with maple syrup and use plant-based butter or oil.
  • Is there a way to make this dish spicier? Adding a pinch of red pepper flakes can introduce a delightful heat.
  • What is the nutritional value of this recipe? This dish is low in calories, high in fiber, and packed with vitamins A and C.
  • Can I roast other vegetables along with carrots and parsnips? Yes! Root vegetables like beets or sweet potatoes roast beautifully alongside.
  • How can I enhance the flavor further? Consider adding garlic or balsamic vinegar to the glaze for additional depth.

Nutritional Tips and Dietary Adaptations

This dish isn’t just comforting; it’s also healthy! Here are some tips:

  • High Fiber: Both carrots and parsnips are excellent sources of dietary fiber, promoting digestive health.
  • Low Calorie: This recipe is naturally low in calories, making it a great side for those watching their intake.
  • Vitamins and Minerals: Rich in vitamins A and C, it supports your immune system and skin health.
  • Gluten-Free: Naturally gluten-free, making it safe for those with gluten sensitivities.
  • Diabetic-Friendly: With a moderate glycemic index, this dish can be a part of a balanced meal for diabetics.

Equipment Recommendations

To make your cooking experience smoother, here’s a quick list of kitchen tools:

  • Baking Sheet: A sturdy baking sheet ensures even roasting.
  • Mixing Bowl: Use a large bowl for tossing the veggies with the glaze.
  • Sharp Knife: A good-quality knife makes slicing the vegetables safe and easy.
  • Parchment Paper: This prevents sticking and makes cleanup a breeze.

Serving Suggestions

Once your honey roasted carrots and parsnips are beautifully caramelized, it’s time to serve! Here are some ideas:

  • Garnish: A sprinkle of fresh herbs or a drizzle of honey adds a lovely finishing touch.
  • Pair with Proteins: This dish complements roasted chicken, pork, or a savory beef dish beautifully.
  • Serve Warm: These vegetables are best enjoyed fresh out of the oven, warm and inviting.

As you gather around the table with loved ones, let this dish serve as a reminder of the warmth and love that cooking brings into our lives. Cooking is not just a task; it’s a way to share stories, create memories, and build connections. I hope you enjoy making these honey roasted carrots and parsnips as much as I cherish sharing this recipe with you. Happy cooking, and may your kitchen always be filled with love and laughter!

Honey Roasted Carrots and Parsnips

Prep Time 10 minutes
Cook Time 30 minutes
Total Time 40 minutes
Servings 4 servings
Calories 150
A sweet and savory side dish featuring tender roasted carrots and parsnips glazed with honey and herbs.

Ingredients

Vegetables

  • 4 large carrots (peeled and cut into sticks)
  • 4 medium parsnips (peeled and cut into sticks)
  • 2 tablespoons honey
  • 1 tablespoon melted butter
  • 1 tablespoon olive oil
  • 1 teaspoon fresh thyme leaves (or ½ teaspoon dried thyme)
  • to taste Salt and black pepper

Instructions 

  • Preheat oven to 425°F (220°C) and line a baking sheet.
  • Peel and cut carrots and parsnips into sticks.
  • Whisk honey, melted butter, olive oil, salt, and pepper to make the glaze.
  • Toss vegetables in the glaze and spread on the baking sheet. Sprinkle with thyme.
  • Roast for 25–30 minutes, flipping halfway, until golden and tender.
  • Serve warm, garnished with extra thyme or honey if desired.
Notes

For extra flavor, add a sprinkle of fresh herbs before serving.
Calories: 150kcal
Cost: $12
Course: Side Dish
Cuisine: American
Keyword: Vegetables

Welcome to the Heartwarming World of Sweet Potato Souffle

Nothing quite says “home” like the aroma of a freshly baked sweet potato souffle, wafting through the air and carrying memories of family gatherings. In this comprehensive guide, we will explore a recipe that not only delights the taste buds but also wraps you in the warmth of nostalgia. This sweet potato souffle is more than just a dish; it is a celebration of love, tradition, and the tender moments shared around the family table. With roots in my Louisiana upbringing, this recipe carries the flavors of my childhood while inviting you to create your own cherished memories.

Why You’ll Love This Recipe

Before we dive into the details, let’s talk about why this sweet potato casserole will become a staple at your gatherings:

  • Family Tradition: This recipe has been passed down through generations, bringing families together during the holidays.
  • Deliciously Sweet: The combination of sweet potatoes and rich brown sugar creates a mouthwatering flavor profile.
  • Versatile Dish: Perfect for Thanksgiving, Christmas, or any cozy family meal.
  • Easy Preparation: Simple steps make it accessible for cooks of all skill levels.
  • Memorable Texture: The fluffy filling paired with a crunchy pecan topping offers delightful contrast.

Ingredients You’ll Need

Let’s gather our ingredients! Here’s what you’ll need to create this lovely sweet potato souffle:


Silicone Baking Cups Set

★ Recommended Kitchen Tool

Silicone Baking Cups Set

Make this recipe even easier with a quality Silicone Baking Cups Set — a must-have kitchen staple!


đŸ›’ View on Amazon →

As an Amazon Associate, we earn from qualifying purchases.
  • 3 cups cooked sweet potatoes (cut into 1 1/2 inch pieces)
  • 3/4 cup granulated sugar
  • 1/2 teaspoon salt
  • 1 teaspoon vanilla extract
  • 2 eggs
  • 1/2 teaspoon cinnamon
  • 12 tablespoons butter (melted, divided use)
  • 1 cup brown sugar
  • 1/3 cup flour
  • 1 cup chopped pecans
  • Cooking spray

Feel free to make substitutions where necessary: use maple syrup instead of sugar for a more natural sweetness, or swap out pecans for walnuts if you prefer.

How to Make Sweet Potato Souffle

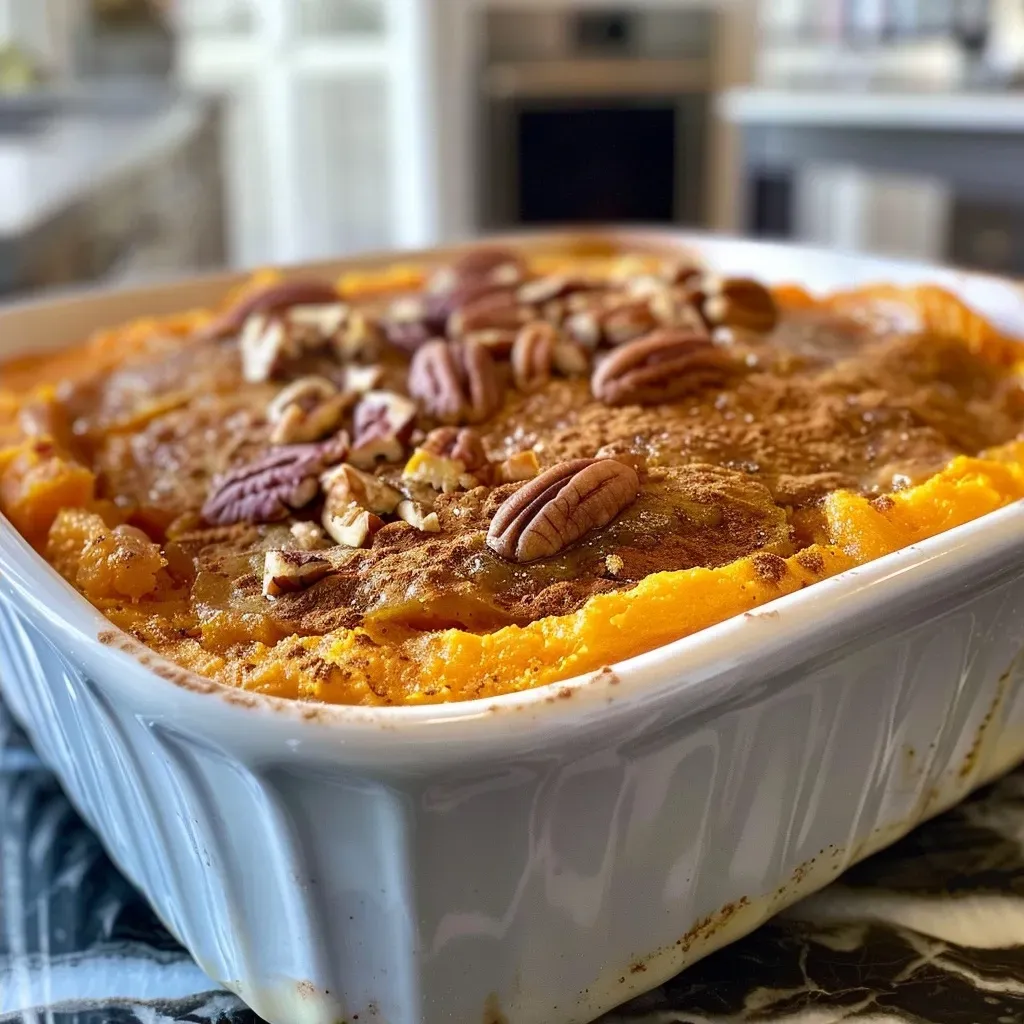
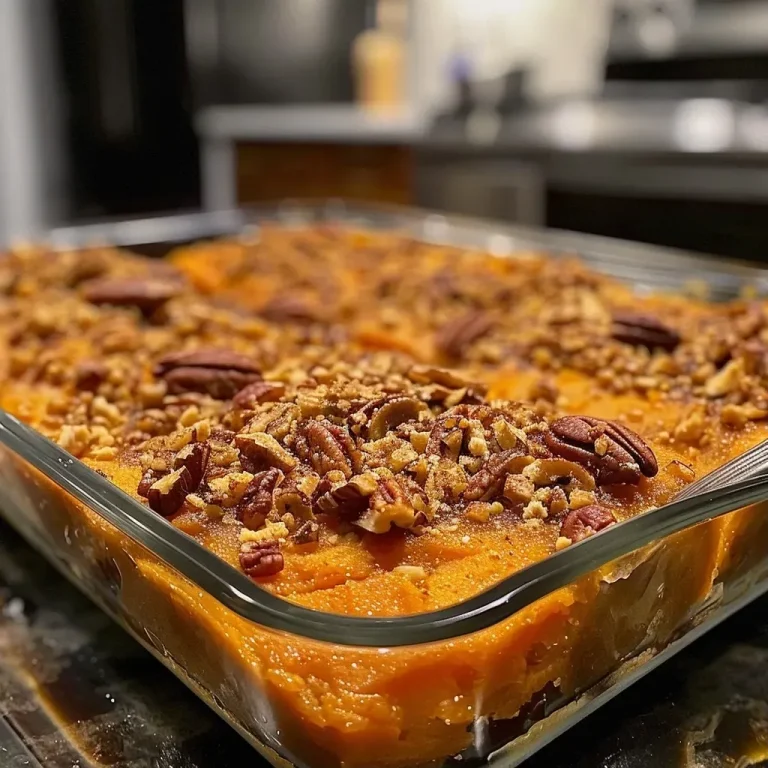
Side view of a fluffy Sweet Potato Souffle, showcasing its rich texture and warm color.

Now that we have our ingredients, let’s get started on this heartwarming recipe:

  1. Preheat the oven: Preheat your oven to 350 degrees F. Coat a 9″ square pan or 2-quart casserole dish with cooking spray.
  2. Blend the base: In the bowl of a food processor, combine the sweet potatoes, granulated sugar, salt, vanilla extract, eggs, cinnamon, and 6 tablespoons of melted butter. Puree until smooth.
  3. Layer the dish: Spoon the sweet potato mixture into the prepared dish in an even layer.
  4. Prepare the topping: In a separate bowl, mix the remaining 6 tablespoons of melted butter, brown sugar, flour, and chopped pecans.
  5. Assemble: Sprinkle the brown sugar mixture evenly over the sweet potato layer.
  6. Bake: Bake for 30-40 minutes or until the sweet potatoes are hot and the topping is lightly browned. If the topping browns too quickly, cover with foil.
  7. Cool and serve: Let the souffle sit for 10 minutes before serving to allow the flavors to settle.

Pro Tips for the Perfect Sweet Potato Souffle

To ensure your sweet potato casserole turns out perfectly every time, consider these expert insights:

  • Choose the right sweet potatoes: Opt for firm, unblemished sweet potatoes for the best flavor and texture.
  • Don’t rush the mashing: Ensure your sweet potatoes are thoroughly pureed for a smooth consistency.
  • Mix the topping by hand: This creates a chunkier texture that contrasts beautifully with the smooth filling.
  • Check for doneness: Use a toothpick to check that the souffle is set and the topping is golden brown.
  • Let it rest: Allowing the dish to sit after baking enhances the flavors and makes serving easier.
  • Add spices: Experiment with adding nutmeg or ginger for an extra flavor kick.
  • Use fresh ingredients: Fresh eggs and real vanilla extract make a noticeable difference in taste.
  • Garnish before serving: A sprinkle of additional pecans or a drizzle of maple syrup can elevate the presentation.

Avoiding Common Mistakes

Even the best chefs can run into a few hiccups. Here are some common mistakes to avoid:

  • Overmixing: Be careful not to overmix your sweet potato base, as it can lead to a dense texture.
  • Skipping the cooling period: Cutting into the souffle too soon can cause it to collapse.
  • Not greasing the pan: Ensure your dish is well-coated to prevent sticking.
  • Ignoring baking times: Every oven is different; keep an eye on your souffle as it bakes.

Delicious Variations to Try

Why not add a personal twist? Here are some variations to consider:

  • Marshmallow Topping: Add mini marshmallows on top for a sweet twist.
  • Spicy Kick: Incorporate a pinch of cayenne pepper for a spicy surprise.
  • Nut-Free Version: Omit the pecans and substitute with crushed graham crackers for a crunchy topping.
  • Coconut Cream: Mix in shredded coconut for added richness and flavor.

Storage and Make-Ahead Instructions

This sweet potato souffle can be made ahead of time to save you stress on busy days:

  • Refrigerate: Store leftovers in an airtight container in the refrigerator for up to 3 days.
  • Freeze: You can freeze the unbaked souffle for up to 2 months. Just thaw in the fridge overnight before baking.
  • Reheat: To reheat, cover with foil and warm in a 350°F oven until heated through.

Frequently Asked Questions

Let’s address some common questions about this beloved dish:

  • Can I use canned sweet potatoes? Yes, but fresh sweet potatoes provide a better texture and flavor.
  • How can I make this recipe vegan? Substitute eggs with flax eggs and use plant-based butter.
  • Is this souffle gluten-free? Use gluten-free flour to make it suitable for gluten-sensitive guests.
  • Can I add other fruits? Yes, consider adding cranberries or apples for a twist!
  • What should I serve with it? Pair it with roasted meats or a fresh salad for a balanced meal.
  • How long does it take to prepare? The total time is about an hour, including baking.
  • Can I use other nuts? Absolutely! Walnuts or almonds work wonderfully as alternatives.
  • What makes a souffle rise? The beaten eggs create air pockets, allowing the souffle to rise beautifully during baking.

Nutritional Tips and Dietary Adaptations

Whether you’re watching your calories or accommodating dietary needs, here are some tips:

  • Lower Sugar: Reduce the sugar content by using natural sweeteners like honey or maple syrup.
  • Healthier Fats: Substitute butter with coconut oil for a plant-based option.
  • Add Fiber: Mix in some oats or chia seeds to boost the nutritional profile.

Essential Equipment for Success

To make this sweet potato souffle, you’ll need:

  • A food processor for smooth blending.
  • A 9″ square pan or 2-quart casserole dish.
  • Measuring cups and spoons for accurate ingredient ratios.
  • A mixing bowl and whisk for the topping.

Serving Suggestions

This sweet potato souffle shines on its own, yet can be paired beautifully with:

  • Roasted Turkey: A classic Thanksgiving companion.
  • Honey-Glazed Ham: The sweetness of the souffle balances the savory ham.
  • Green Bean Casserole: A hearty side for a comforting meal.

Conclusion: A Recipe to Cherish

This sweet potato souffle is truly a dish that whispers family secrets, reminding us of the love and care that goes into every bite. As you gather around your dining table, let this recipe be a bridge between generations, creating new memories while honoring the old. I hope this guide inspires you to create and share this delightful dish with those you love, turning each meal into a celebration of life’s simple pleasures. Happy cooking, and may your kitchen always be filled with warmth and joy!

Sweet Potato Souffle

Prep Time 15 minutes
Cook Time 40 minutes
Total Time 55 minutes
Servings 8 servings
Calories 350
A delicious and comforting sweet potato souffle with a crunchy pecan topping, perfect for holidays or special occasions.

Ingredients

Main

  • 3 cups cooked sweet potatoes (cut into 1 1/2 inch pieces)
  • 3/4 cup granulated sugar
  • 1/2 teaspoon salt
  • 1 teaspoon vanilla extract
  • 2 eggs eggs
  • 1/2 teaspoon cinnamon
  • 12 tablespoons butter (divided use)
  • 1 cup brown sugar
  • 1/3 cup flour
  • 1 cup chopped pecans
  • as needed quantity cooking spray

Instructions 

  • Preheat oven to 350°F and spray a 9" square pan with cooking spray.
  • Puree sweet potatoes, sugar, salt, vanilla, eggs, cinnamon, and 6 tbsp melted butter until smooth; spread into prepared dish.
  • Mix remaining 6 tbsp melted butter, brown sugar, flour, and pecans; sprinkle over sweet potatoes.
  • Bake for 30-40 minutes until hot and lightly browned; cover with foil if topping browns too quickly.
  • Let sit for 10 minutes before serving.

Notes

This sweet potato souffle is a perfect side dish with a rich, sweet flavor and crunchy pecan topping.
Calories: 350kcal
Cost: $15
Course: Dessert
Cuisine: American
Keyword: Sweet Potato

Every time I think of my grandmother’s kitchen, the warm scent of cinnamon wafts through my mind. It’s in this sacred space that I learned that cooking is about more than just the food; it’s about the love and memories we share. Today, we’re diving into a recipe that encapsulates that feeling—a deliciously moist Cinnamon Swirl Bundt Cake. This cake, with its tender crumb and rich cinnamon filling, is not just a treat; it’s a way to create lasting memories with those you love.

In this definitive guide, we’ll explore everything you need to know to bake the perfect bundt cake, from ingredient breakdowns to pro tips. So, grab your aprons, and let’s get started!

Why You’ll Love This Recipe

  • Easy to follow: The step-by-step instructions make this recipe accessible for bakers of all skill levels.
  • Impressive presentation: The bundt shape and swirling cinnamon make it a stunning centerpiece for any gathering.
  • Moist and fluffy: The combination of butter and buttermilk ensures a cake that’s tender and delightful.
  • Customizable: You can easily tweak this recipe to cater to your favorite flavors or dietary needs.
  • Perfect for sharing: This cake invites moments of togetherness, making it ideal for family gatherings or cozy evenings at home.

Ingredients Breakdown

Let’s gather our ingredients and prepare for a cozy baking session! Here’s everything you’ll need to create this delightful Cinnamon Swirl Bundt Cake:


5-Speed Electric Hand Mixer

★ Recommended Kitchen Tool

5-Speed Electric Hand Mixer

Make this recipe even easier with a quality 5-Speed Electric Hand Mixer — a must-have kitchen staple!


đŸ›’ See Deals on Amazon →

As an Amazon Associate, we earn from qualifying purchases.
  • 350 g all-purpose flour: Provides the structure for our cake. If you need a gluten-free option, consider using a 1:1 gluten-free flour blend.
  • 2 teaspoons baking powder: This will help our cake rise to fluffy perfection.
  • 1 teaspoon salt: Balances the sweetness and enhances the other flavors.
  • 320 g unsalted butter: Softened to room temperature, this is the heart of our cake. You can substitute with coconut oil for a dairy-free version.
  • 200 g granulated sugar: Sweetens the batter and contributes to the cake’s texture.
  • 6 large eggs: Room temperature eggs help the batter mix evenly, giving it a rich flavor.
  • 1 tablespoon vanilla extract: Adds warmth and depth to our cake.
  • 170 g milk: Also at room temperature, this helps create a moist crumb.
  • 50 g brown sugar: For the cinnamon swirl, it adds a rich molasses flavor.
  • 1 tablespoon ground cinnamon: The star of the show that brings warmth and nostalgia.
  • 20 g milk: Just a little bit more for the cinnamon swirl mixture.

Step-by-Step Instructions to Create Your Bundt Cake

Now that we have our ingredients ready, let’s dive into the baking process. Follow these steps for a delightful experience:

  1. Preheat your oven to 350°F. Melt 2 tablespoons of butter in the microwave. Grease your bundt pan generously with the melted butter, making sure to reach all the corners. Once cool, dust the pan with flour, shaking out any excess.
  2. In a medium bowl, mix together the flour, baking powder, and salt. Set this mixture aside.
  3. In a large mixing bowl, cream the softened butter until creamy. Add in the granulated sugar and cream together for about 3-4 minutes until fluffy and light.
  4. Incorporate the eggs, one at a time, mixing thoroughly between each addition. After the last egg, add the vanilla extract and combine well.
  5. Sift in the flour mixture and mix on low speed until just combined.
  6. Add the milk and mix until just combined again.
  7. To make the cinnamon swirl batter, take about 500g of the cake batter and place it in another bowl. To this, add the brown sugar, cinnamon, and a splash of milk, folding gently until combined.
  8. In your prepared bundt pan, start layering the batters. Begin with a few dollops of the vanilla batter, smoothing it out into an even layer. Then add the cinnamon swirl batter on top, alternating until all the batter is used.
  9. Bake for 50-55 minutes, or until a toothpick inserted into the center comes out mostly clean.
  10. Once baked, allow the cake to cool in the pan for 20-30 minutes. To release it, place a wire rack upside down on top of the bundt pan, grasp both sides, and gently lift. Sprinkle with powdered sugar before serving!

Pro Tips for Perfecting Your Bundt Cake

Side view of a deliciously sculpted Bundt cake showcasing swirls of cinnamon and a glossy finish.

Here are some expert insights to ensure your Cinnamon Swirl Bundt Cake turns out perfectly:

  • Room temperature ingredients: Ensure all your ingredients are at room temperature for optimal mixing.
  • Grease the pan thoroughly: A well-greased bundt pan is crucial for a clean release.
  • Don’t overmix: Mix until just combined to keep your cake light and fluffy.
  • Test for doneness: Use a toothpick to check for doneness; it should come out with a few moist crumbs, not wet batter.
  • Cool completely: Let the cake cool fully before frosting or slicing to prevent crumbling.
  • Experiment with flavors: Feel free to add chocolate chips or nuts to the batter for a unique twist.
  • Use quality spices: Fresh ground cinnamon gives the best flavor, so consider grinding your own.
  • Make ahead: The batter can be made a day in advance and stored in the fridge for a fresher taste.

Common Mistakes and Troubleshooting

Here are some common pitfalls and how to avoid them:

  • Overmixing the batter: This can lead to a dense cake. Mix until just combined.
  • Insufficient greasing: If the cake sticks to the pan, it can ruin the shape. Be generous with butter and flour.
  • Not testing for doneness: Avoid underbaking, which can lead to a gooey center. Always check with a toothpick!
  • Too much cinnamon: While delicious, too much can overpower the cake. Stick to the recommended amount.
  • Not adjusting baking time: If using a different pan size, adjust the baking time accordingly.

Variations to Try

Want to switch things up? Here are some delightful variations you can try:

  • Chocolate Cinnamon Swirl: Add cocoa powder to the batter for a chocolatey twist.
  • Nutty Addition: Fold in some chopped walnuts or pecans for added texture.
  • Fruit-Infused: Add fresh apples or pears to the batter for a fruity surprise.
  • Gluten-Free Option: Substitute with a gluten-free flour blend to cater to dietary restrictions.

Storage and Make-Ahead Instructions

Here’s how to store your cake and prepare ahead of time:

  • Room Temperature: Store the cooled bundt cake in an airtight container for up to 3 days.
  • Refrigeration: If you need it to last longer, refrigerate for up to a week, but let it come to room temperature before serving.
  • Freezing: To freeze, wrap the cooled cake tightly in plastic wrap and foil. It can last up to 3 months. Thaw in the fridge overnight before serving.
  • Make Ahead: Prepare the batter the night before and refrigerate it. Bake fresh in the morning!

Frequently Asked Questions

Here’s a collection of common questions to help you along your baking journey:

  • Can I use a different type of sugar? Yes, you can use brown sugar instead of granulated sugar for a deeper flavor.
  • What can I use instead of butter? Coconut oil or applesauce can be a good substitute for butter.
  • How do I know when my cake is done? A toothpick inserted into the center should come out clean or with a few moist crumbs.
  • Can I add frosting? Yes! A simple glaze of powdered sugar and milk works beautifully.
  • Why is my cake dense? This might be due to overmixing or using cold ingredients.
  • Can I make mini bundt cakes? Absolutely! Just adjust the baking time accordingly.
  • What’s the best way to slice a bundt cake? Use a serrated knife for clean slices.
  • How can I enhance the flavor? Adding a splash of orange juice or zest can elevate the flavor profile.

Nutrition Tips and Dietary Adaptations

For those mindful of their nutrition or dietary preferences, here are some tips:

  • Lower Sugar: Use a sugar substitute like stevia to cut down on sugar content.
  • Dairy-Free: Substitute milk with almond milk or oat milk and use vegan butter.
  • Whole Grain: Use whole wheat flour for added fiber and nutrition.
  • Portion Control: Enjoy smaller slices to savor the flavor while managing calorie intake.

Equipment Recommendations

For the best results, here’s a list of essential tools:

  • Bundt pan: A high-quality non-stick bundt pan is crucial for easy release.
  • Mixing bowls: Keep a set of various sizes for mixing ingredients.
  • Electric mixer: A stand mixer or hand mixer makes creaming butter and sugar a breeze.
  • Spatula: A silicone spatula is perfect for folding batters without deflating them.
  • Toothpick: A simple toothpick is your best friend for checking doneness.

Serving Suggestions

Now that your cake is baked and cooled, here are some delightful serving ideas:

  • With Coffee: Serve a slice with your morning coffee for a comforting start to the day.
  • Whipped Cream: Top with a dollop of whipped cream or a scoop of vanilla ice cream for a treat.
  • Citrus Zest: A sprinkle of lemon or orange zest adds a fresh touch.
  • Decorative Glaze: A simple glaze made from powdered sugar and milk can elevate the presentation.

As I wrap up this journey through the art of baking a Cinnamon Swirl Bundt Cake, remember that every slice holds a story waiting to be shared. So gather around your family table, take a moment to savor the flavors, and create lasting memories. Happy baking!

Cinnamon Swirl Bundt Cake

Prep Time 20 minutes
Cook Time 55 minutes
Total Time 1 hour 15 minutes
Servings 12 pieces
Calories 420
A moist and flavorful cake with a cinnamon swirl, perfect for special occasions or a cozy treat.

Ingredients

Batter

  • 350 g all-purpose flour
  • 2 teaspoons baking powder
  • 1 teaspoon salt
  • 320 g unsalted butter (softened) (plus 1-2 tablespoons for greasing pan)
  • 200 g granulated sugar
  • 6 large eggs (room temperature)
  • 1 tablespoon vanilla extract
  • 170 g milk (room temperature)
  • 50 g brown sugar
  • 1 tablespoon ground cinnamon
  • 20 g milk (room temperature) (additional for cinnamon swirl)

Instructions 

  • Preheat oven to 350°F. Grease bundt pan with melted butter and dust with flour.
  • Mix flour, baking powder, and salt. Cream butter and sugar until fluffy. Add eggs one at a time, then vanilla.
  • Alternate adding flour mixture and milk to batter. Divide batter; mix cinnamon, brown sugar, and additional milk into one portion.
  • Layer vanilla and cinnamon batters in the pan, swirling gently. Bake for 50-55 minutes.
  • Cool in pan for 20-30 minutes, then invert onto a wire rack. Dust with powdered sugar and serve.

Notes

Ensure the cake is fully cooled before removing from the pan to prevent breaking.
Calories: 420kcal
Cost: $15
Course: Dessert
Cuisine: American
Keyword: Cinnamon

Discover the Heart and Soul of Comfort Food: Classic Beef and Potato Casserole

Welcome to a culinary journey that embraces the essence of home cooking with our Classic Beef and Potato Casserole. This dish isn’t just a meal; it’s a tapestry of flavors and memories, weaving together the warmth of family gatherings and the nostalgia of shared meals. With layers of savory ground beef, tender potatoes, and creamy cheese, this casserole is designed to evoke heartfelt memories around the family table. Let’s dive deep into this comforting recipe, ensuring that every bite feels like a warm hug.

Why You’ll Love This Recipe

There are countless reasons to adore this Classic Beef and Potato Casserole. Here are just a few:

  • Comforting Layers: Each layer of potatoes and beef creates a soothing dish that warms the heart and soul.
  • Family-Friendly: With its delightful flavors and textures, this casserole appeals to both kids and adults alike, making it a perfect family dinner option.
  • Easy to Prepare: This dish requires minimal preparation, making it ideal for busy weeknights or when you want to impress guests without stress.
  • Versatile Ingredients: With simple, everyday ingredients, you can easily customize the dish to suit dietary preferences or use what you have on hand.
  • Leftover Friendly: This casserole is just as delicious the next day, making it a great option for meal prep or leftovers.

Ingredients Breakdown

To create this delicious casserole, you will need the following ingredients:


Digital Meat Thermometer

★ Recommended Kitchen Tool

Digital Meat Thermometer

Make this recipe even easier with a quality Digital Meat Thermometer — a must-have kitchen staple!


đŸ›’ View on Amazon →

As an Amazon Associate, we earn from qualifying purchases.
  • 1 lb ground beef: A staple in many households, ground beef brings a rich flavor to the casserole. You can use lean ground beef or even substitute with turkey or plant-based alternatives for a lighter version.
  • 4 large potatoes: The heart of the casserole, choose Yukon Gold or Russet for their creamy texture when baked. You can also swap them for sweet potatoes for a twist.
  • 1 onion, diced: Onions add a sweet, aromatic base. Consider using shallots for a milder flavor.
  • 2 garlic cloves, minced: Garlic enhances the dish with its warm, fragrant essence.
  • 1 cup cheddar cheese, shredded: For that gooey, melty top. Feel free to mix in other cheeses like mozzarella or Gruyère for added depth.
  • 1 cup cream or milk: This adds richness. Substitute with almond milk or coconut milk for a dairy-free option.
  • 1 tablespoon butter: Used for greasing the baking dish and adding flavor.
  • 1 teaspoon paprika: This spice brings a gentle warmth; smoked paprika can add a lovely depth.
  • 1 teaspoon salt: Essential for enhancing the flavors of the dish.
  • ½ teaspoon pepper: Freshly cracked pepper adds a nice kick.
  • Olive oil for sautĂ©ing: Use any cooking oil you prefer.

Step-by-Step Cooking Instructions

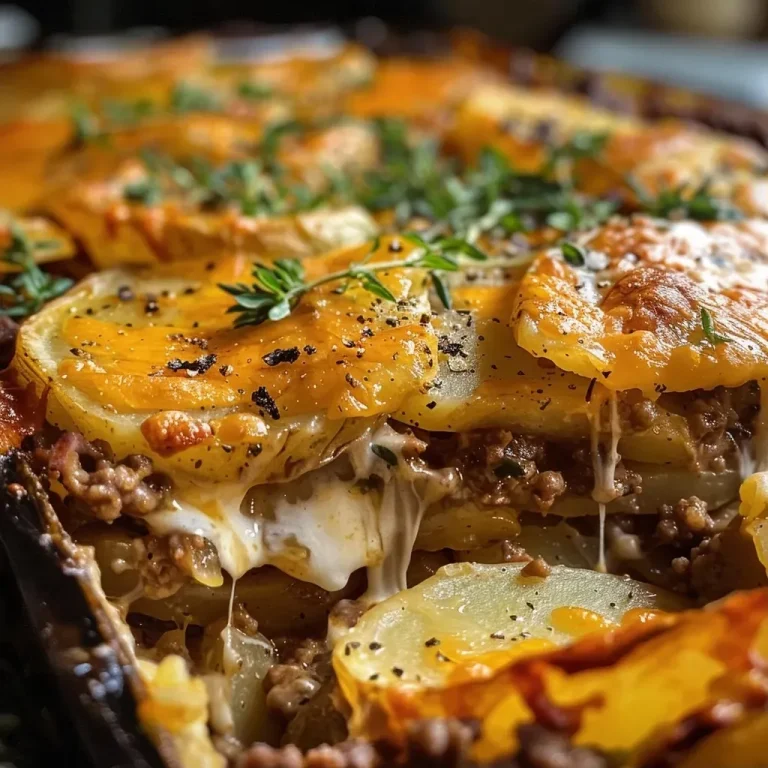
Close-up photo of a bubbling beef and potato casserole layered with sliced potatoes and meat.

Now that we have our ingredients ready, let’s create this heartwarming casserole:

  1. Sauté the Aromatics: In a skillet, warm a little olive oil and sauté the diced onions and minced garlic until soft and fragrant. This will take about 3-4 minutes.
  2. Cook the Beef: Add the ground beef to the skillet, cooking until browned. As it cooks, break it apart gently. Season with salt, pepper, and paprika. Let it simmer for an additional minute to allow the flavors to meld.
  3. Prepare the Potatoes: Slice the potatoes thinly and pat them dry. Generously butter a baking dish to prevent sticking, creating a soft golden edge around the casserole.
  4. Layer the Ingredients: Start with a layer of potatoes across the bottom of the dish, overlapping slightly. Spread half the cooked beef mixture over the potatoes, followed by another layer of potatoes, and finally the remaining beef. Finish with a last layer of potatoes.
  5. Add the Cream: Pour the cream or milk evenly over the layered dish, ensuring it seeps through the layers.
  6. Bake: Cover the casserole tightly with foil and bake at 375°F (190°C) for about 50 minutes.
  7. Cheesy Finish: Remove the foil, sprinkle cheddar cheese on top, and bake for an additional 10-12 minutes until the cheese is golden and melted.
  8. Rest and Serve: Allow the casserole to rest for at least 10 minutes before serving. This helps the layers set and makes for easier serving.

Pro Tips for the Perfect Casserole

Here are some expert insights to elevate your casserole game:

  • Even Slices: Ensure potatoes are sliced evenly for uniform cooking. A mandoline slicer can be a great help!
  • Season Each Layer: Don’t forget to season each layer of beef and potatoes to maximize flavor throughout the casserole.
  • Covering with Foil: Covering the casserole with foil keeps moisture in. Remove it towards the end to achieve a beautifully golden top.
  • Rest Time: Allow the casserole to rest before serving to help the layers set and hold together better.
  • Experiment with Cheese: Mix different cheese varieties for a more complex flavor profile.
  • Add Vegetables: Sneak in some veggies like spinach or bell peppers for added nutrition and color.
  • Store Correctly: Let leftovers cool completely before storing in an airtight container in the fridge for up to 3 days.
  • Freeze for Later: This casserole freezes beautifully; just bake it without cheese, cool, and freeze. Add cheese when you reheat.

Common Mistakes and Troubleshooting

Even the best chefs can run into hiccups. Here are some common mistakes and how to avoid them:

  • Overcrowding the Beef: If your skillet is too full, the beef won’t brown properly. Cook in batches if necessary.
  • Undercooking Potatoes: If sliced too thick, potatoes may not cook through. Aim for thin slices for even cooking.
  • Skipping the Resting Time: Cutting into the casserole immediately can cause it to fall apart. Patience is key for beautiful slices.
  • Not Seasoning Enough: A bland casserole is a sad casserole. Taste as you go!

Delicious Variations to Try

Your Classic Beef and Potato Casserole can easily be adapted to suit different tastes:

  • Shepherd’s Pie Style: Top with creamy mashed potatoes instead of raw potatoes for a richer flavor.
  • Vegetarian Version: Substitute ground beef with lentils or chickpeas and add a variety of vegetables.
  • Spicy Twist: Add jalapeños or your favorite hot sauce to the beef mixture for a kick.
  • Loaded Casserole: Mix in bacon pieces and green onions for a loaded flavor profile that feels indulgent.

Storage and Make-Ahead Instructions

This casserole is perfect for meal prep and can be made ahead of time:

  • Make Ahead: Assemble the casserole a day before, cover, and store in the fridge. Just add extra baking time when you’re ready to bake.
  • Refrigerate Leftovers: Store leftovers in an airtight container and enjoy them within three days for the best taste.
  • Freezing Instructions: To freeze, cool completely, wrap tightly with plastic wrap, and then foil. It can be frozen for up to three months. Thaw overnight in the fridge before reheating.

Frequently Asked Questions (FAQs)

Here are some common questions about making Classic Beef and Potato Casserole:

  • Can I use different meats? Yes, feel free to substitute ground turkey, chicken, or even a plant-based meat alternative.
  • What can I serve with this casserole? A crisp green salad or steamed vegetables make great sides to balance the richness of the casserole.
  • How can I make it dairy-free? Use almond milk and a dairy-free cheese substitute for a delicious dairy-free version.
  • Can I add more vegetables? Absolutely! Chopped carrots, peas, or bell peppers can be excellent additions.
  • What’s the best way to reheat leftovers? Reheat in the oven at a low temperature to maintain its texture, or microwave in short intervals.
  • How do I know when it’s done? The casserole should be bubbly and the top golden brown. A knife inserted into the potatoes should meet little resistance.
  • Can I make it gluten-free? Yes, ensure your cream or milk is gluten-free and use gluten-free cheese.
  • How long does it take to cook? The total cooking time is about 60 minutes, but allow for additional time if you make it ahead.

Nutritional Tips and Dietary Adaptations

While this casserole is comfort food at its finest, you can make it even healthier:

  • Lean Protein: Use lean ground beef or turkey to reduce calories and fat.
  • Whole Grains: Incorporate whole grain bread crumbs or quinoa for added fiber.
  • Veggie Boost: Load it up with veggies for added nutrients without sacrificing flavor.
  • Control Portions: Serve with a side salad to help control portion sizes and balance the meal.

Equipment Recommendations

To make this casserole, you’ll need the following equipment:

  • Skillet: A large skillet to brown the beef and sautĂ© the onions and garlic.
  • Baking Dish: A 9×13 inch baking dish works perfectly for layering.
  • Mandoline Slicer: Optional, but it helps achieve evenly sliced potatoes for uniform cooking.
  • Measuring Cups and Spoons: Essential for accuracy in ingredient amounts.

Serving Suggestions

When it’s time to serve this delightful casserole, consider these ideas:

  • Garnish: Fresh herbs like parsley or chives can brighten the dish and add freshness.
  • Pair with Salad: A simple side salad dressed with lemon vinaigrette complements the richness of the casserole.
  • Top with Sour Cream: A dollop of sour cream or Greek yogurt enhances the flavors and adds creaminess.

In conclusion, our Classic Beef and Potato Casserole is more than just a dish; it’s a celebration of love, family, and cherished memories. As you prepare this recipe, remember that cooking is about connecting with those you love, creating delicious moments that will linger long after the meal is over. So gather your family, share this comforting casserole, and create your own stories around the dinner table. Happy cooking!

Classic Beef and Potato Casserole

Prep Time 15 minutes
Cook Time 1 hour
Total Time 1 hour 15 minutes
Servings 4 servings
Calories 650
A hearty and comforting dish combining seasoned ground beef, tender potatoes, and melted cheese baked to perfection.

Ingredients

Meat and Dairy

  • 1 lb ground beef (browned)
  • 1 cup cheddar cheese (shredded)
  • 1 tablespoon butter

Vegetables and Seasonings

  • 4 large potatoes (thinly sliced)
  • 1 onion onion (diced)
  • 2 garlic cloves garlic (minced)
  • 1 teaspoon paprika
  • 1 teaspoon salt
  • ½ teaspoon pepper

Liquids

  • 1 cup cream or milk
  • 1 tablespoon olive oil (for sautĂ©ing)

Instructions 

  • SautĂ© onions and garlic in olive oil until soft. Add ground beef, season, and cook until browned. Let simmer.
  • Layer sliced potatoes in a buttered baking dish. Spread half the beef mixture over potatoes.
  • Add another layer of potatoes, then remaining beef, and top with final potato layer.
  • Pour cream over the casserole, cover with foil, and bake at 375°F (190°C) for 50 minutes.
  • Remove foil, sprinkle cheese, and bake 10-12 minutes until golden. Rest before serving.

Notes

Use fresh potatoes for best results and ensure the casserole rests before serving for optimal flavor.
Calories: 650kcal
Cost: $15
Course: Main Course
Cuisine: American
Keyword: beef, Potatoes

Welcome to the vibrant world of green smoothie bowls! Not just a meal, but a moment to savor, this delightful recipe is packed with fresh ingredients like spinach, banana, and strawberries. Combining health and happiness, it’s a perfect way to start your day or rejuvenate after a workout. Today, I’ll guide you through creating a green smoothie bowl that’s as nourishing as it is delicious. So grab your blender and let’s create something magical that will remind you of sunny days and family gatherings.

Why You’ll Love This Recipe

When you take a moment to enjoy a green smoothie bowl, you’re not just nourishing your body; you’re also indulging in a delightful experience. Here are five reasons why you’ll adore this recipe:

  • Simple Ingredients: With just a handful of wholesome ingredients, you can whip up a delicious smoothie bowl that’s both refreshing and satisfying.
  • Versatile Toppings: Customize your bowl with your favorite fruits, nuts, or granola to create a unique combination every time.
  • Nutrient-Packed: Each bowl is loaded with vitamins and minerals, making it a perfect post-workout snack or a healthy breakfast option.
  • Quick and Easy: In under 10 minutes, you can make this smoothie bowl, ideal for those busy mornings or when you need a quick pick-me-up.
  • A Family Favorite: Kids and adults alike will love the colorful presentation and delightful flavors, making it a hit for family breakfasts or brunch gatherings.

Ingredients Breakdown

Let’s dive into the heart of our recipe—the ingredients! Here’s what you’ll need to create your own green smoothie bowl:


Glass Mason Jars for Oats

★ Recommended Kitchen Tool

Glass Mason Jars for Oats

Make this recipe even easier with a quality Glass Mason Jars for Oats — a must-have kitchen staple!


đŸ›’ Shop This Tool →

As an Amazon Associate, we earn from qualifying purchases.
  • 2 cups spinach: A powerhouse of nutrients, spinach adds a vibrant green color and a wealth of vitamins.
  • 1 banana: Adds natural sweetness and creaminess to your smoothie bowl. Use a ripe banana for the best flavor.
  • 1/2 cup frozen strawberries: These not only add a lovely color but also a refreshing taste. You can substitute with frozen blueberries or mixed berries.
  • 1/2 cup unsweetened vanilla almond milk: This provides a smooth texture; feel free to use coconut milk or any milk alternative you prefer.
  • 1/4 cup plain yogurt: For added creaminess and protein. Greek yogurt is an excellent substitute if you want a thicker consistency.
  • 1 scoop vanilla protein powder: Optional, but it boosts the protein content, making it a great post-workout snack.
  • Toppings: Choose whatever makes you smile! I recommend blueberries, raspberries, granola, kiwi, and strawberries for a colorful finish.

How to Make Your Green Smoothie Bowl

Now that we have our ingredients ready, it’s time to blend! Follow these simple steps:

  1. Add spinach, banana, frozen strawberries, almond milk, yogurt, and protein powder to your blender. Blend until smooth.
  2. Pour into a bowl and top with your favorite toppings. Make it as colorful and creative as you like!

Pro Tips for the Perfect Smoothie Bowl

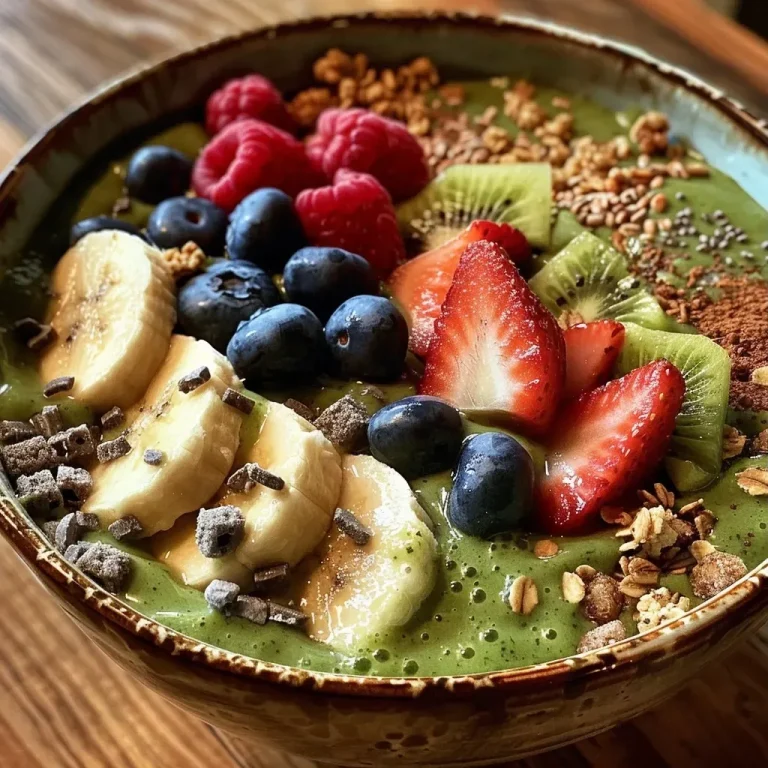
Side view of a colorful green smoothie bowl filled with spinach, banana, and strawberries.

To ensure your smoothie bowl is nothing short of perfection, consider these expert insights:

  • Layer Your Ingredients: For the best blend, add ingredients in the order listed—starting with the leafy greens can help in achieving a smooth consistency.
  • Adjust the Thickness: If you want a thicker smoothie, reduce the amount of liquid. If it’s too thick, add a splash more almond milk.
  • High-Powered Blender: A robust blender will give you the smoothest texture, so if you have one, use it!
  • Frozen Fruit is Key: Using frozen bananas or strawberries helps create that creamy texture without needing ice.
  • Don’t Overblend: Blend just enough until smooth. Overmixing can warm up the mixture and dilute the flavors.
  • Experiment with Greens: While spinach is mild, try kale or Swiss chard for a different flavor profile.
  • Make it Ahead: You can pre-portion your ingredients and freeze them in bags for a quick smoothie bowl any time.
  • Get Creative with Toppings: Think outside the box—try seeds, coconut flakes, or nut butter for added nutrition and flavor.

Common Mistakes and Troubleshooting

Even the best of us can make mistakes. Here’s how to avoid some common pitfalls:

  • Too Thin? If your smoothie bowl turns out too thin, add more frozen fruit to thicken it up.
  • Too Thick? Add a bit of almond milk or water until you reach your desired consistency.
  • Flavorless? Adjust sweetness by adding a bit of honey or maple syrup if needed.
  • Not Blending Smoothly? Make sure you’re using enough liquid and blend in the right order to ensure the greens mix well.

Variations to Try

Once you’ve mastered the basic recipe, here are some fun variations to keep things exciting:

  • Tropical Twist: Swap spinach for kale and add pineapple and mango for a tropical smoothie bowl.
  • Chocolate Delight: Add cocoa powder and a scoop of nut butter for a chocolatey treat.
  • Berry Blast: Use any combination of frozen berries and substitute yogurt with dairy-free options for a vibrant berry bowl.
  • Peanut Butter Banana: Add a tablespoon of peanut butter for a delicious twist that pairs wonderfully with banana.

Storage and Make-Ahead Instructions

Want to enjoy your smoothie bowl later? Here’s how:

  • Make Ahead: You can prep the ingredients and store them in the freezer. Just blend with liquid when ready to serve.
  • Storage: If you have leftovers, store them in an airtight container in the fridge for up to 24 hours. Just note that the texture may change slightly.

Frequently Asked Questions

Here are some common questions about green smoothie bowls:

  • Can I use fresh spinach instead of frozen? Yes, but frozen spinach will give a creamier texture.
  • Is this smoothie bowl gluten-free? Absolutely! All ingredients can be gluten-free if chosen accordingly.
  • Can I use different fruits? Yes! Feel free to mix and match your favorite fruits.
  • How can I make it vegan? Simply omit yogurt or use a plant-based alternative.
  • What’s the best way to blend? Start with the greens, then add softer fruits, and finally any powders or liquids.
  • Can kids help in making this? Yes! Involve them in choosing toppings and blending the ingredients.
  • Is it okay to add supplements? Absolutely! You can include chia seeds, flaxseeds, or protein powder for an extra nutritional boost.
  • How many servings does this recipe make? This recipe serves about two, but you can easily double or halve it as needed.

Nutrition Tips and Dietary Adaptations

For those watching their diet or looking to adapt this recipe:

  • Low-Calorie Option: Use unsweetened almond milk and limit toppings to increase the health factor.
  • Protein Boost: Adding Greek yogurt or protein powder can greatly increase protein content, perfect for muscle recovery.
  • Fiber-Rich: Top with seeds or nuts to add healthy fats and fiber.

Equipment Recommendations

To make the best green smoothie bowl, I recommend:

  • High-Powered Blender: A quality blender can make all the difference in achieving a smooth texture.
  • Serving Bowls: Choose vibrant bowls that make your creation pop and feel inviting.
  • Spatula: For scraping down the sides of the blender and ensuring everything gets blended.

Serving Suggestions

Don’t forget to enjoy your creation! Here are some serving tips:

  • Share with Friends: Smoothie bowls are perfect for sharing. Invite friends over for a smoothie bowl brunch!
  • Pair with a Drink: Consider serving with a refreshing herbal tea or infused water.
  • Garnish Creatively: Use edible flowers or mint leaves for an elegant touch.

As we wrap up this delicious journey into the world of green smoothie bowls, remember that each bowl is not just about the flavors but the love and memories we create while making it. So gather your loved ones, blend up some joy, and savor every delightful spoonful. Happy cooking!

Green Smoothie Bowl Recipe

Prep Time 5 minutes
Total Time 5 minutes
Servings 2 bowl
Calories 250
A vibrant and nutritious smoothie bowl perfect for a quick breakfast or snack. Customize toppings to your liking for added flavor and texture.

Ingredients

Main ingredients

  • 2 cups spinach
  • 1 piece banana
  • 1/2 cup frozen strawberries
  • 1/2 cup unsweetened vanilla almond milk
  • 1/4 cup plain yogurt (Siggis)
  • 1 scoop vanilla protein powder

Toppings

  • blueberries, raspberries, granola, kiwi, strawberries (as desired)

Instructions 

  • Add spinach, banana, strawberries, almond milk, yogurt, and protein powder to a blender. Blend until smooth.
  • Pour into a bowl and top with your favorite toppings.

Notes

Feel free to customize toppings for added flavor and texture.
Calories: 250kcal
Cost: $10
Course: Breakfast
Cuisine: Healthy
Keyword: Smoothie, Vegetables

Embracing Comfort: The Heartwarming Story of Apple Cider Glazed Carrots

Gather around the kitchen table, my friends, and let me share with you a recipe that feels like a warm hug from your grandmother. These Apple Cider Glazed Carrots not only bring sweetness and tang to your meal but also a sense of nostalgia that fills the room with love and laughter. Every bite is a reminder of family gatherings and the joy of sharing a meal together. In this article, we’ll explore everything you need to know to create this delightful dish that’s perfect for your next holiday celebration or cozy dinner.

Why You’ll Love This Recipe

  • Rich Flavor Profile: The combination of apple cider and brown sugar creates a glaze that perfectly balances sweetness and acidity, enhancing the natural flavor of the carrots.
  • Quick and Easy: This recipe requires minimal preparation and cooking time, making it an ideal choice for busy weeknights or last-minute gatherings.
  • Wholesome Ingredients: With just a handful of fresh ingredients, this dish is not only delicious but also nutritious, showcasing the natural goodness of carrots.
  • Versatile Serving Options: Whether served warm or at room temperature, these cider glazed carrots can be enjoyed in various settings, from family dinners to festive feasts.
  • Perfect for Meal Prep: These carrots taste even better the next day, making them an excellent option for meal prep or leftovers.

Ingredients Breakdown

Let’s dive into the ingredients needed for this beautiful dish:

  • 1 Tbsp Olive Oil: This helps sautĂ© the carrots and onions while adding a subtle richness.
  • 1 Lb Package Baby Carrots: Baby carrots are tender and sweet, but feel free to use regular carrots—just peel and chop them into similar-sized pieces.
  • 1/4 Cup Sweet Onion, Sliced: The sweetness of the onion complements the carrots and enhances the glaze.
  • 1 1/2 Cups Apple Cider: Choose a quality unfiltered apple cider for the best flavor.
  • 1/4 Cup Brown Sugar, Packed: This adds a lovely sweetness and helps to create the glaze.

Pro Tips for Success

Side view of juicy apple cider glazed carrots garnished with sliced onions.

Before you roll up your sleeves, here are some expert tips to ensure your Apple Cider Glazed Carrots turn out perfectly:


Professional Chef Knife Set

★ Recommended Kitchen Tool

Professional Chef Knife Set

Make this recipe even easier with a quality Professional Chef Knife Set — a must-have kitchen staple!


đŸ›’ View on Amazon →

As an Amazon Associate, we earn from qualifying purchases.
  • Adjust Sweetness: If you prefer a less sweet dish, reduce the amount of brown sugar to suit your taste.
  • Watch the Cooking Time: Keep an eye on the carrots while they simmer; overcooking can lead to mushy results.
  • Test for Doneness: Carrots should be tender but still have a slight bite. Use a fork to check their texture.
  • Add Herbs: For a fresh twist, consider adding thyme or rosemary during cooking for an extra layer of flavor.
  • Make Ahead: These carrots can be prepped a day in advance and reheated before serving.
  • Experiment with Variations: Don’t be afraid to get creative! Add apples or nuts for added texture and flavor.
  • Use Leftovers Wisely: Leftover carrots can be added to salads or used as a side for sandwiches.
  • Keep the Lid On: Covering the skillet while simmering helps the carrots cook evenly and absorb the glaze.

Avoiding Common Mistakes

To help you navigate through this recipe without a hitch, here are some common pitfalls and how to avoid them:

  • Overcooking Carrots: Keep the simmer time between 20-30 minutes to prevent them from becoming mushy.
  • Using Low-Quality Cider: The flavor of the apple cider is crucial—opt for a natural, high-quality cider.
  • Neglecting to Stir: Stir the mixture occasionally to ensure even coating and cooking.
  • Not Tasting: Always taste the glaze before serving to adjust sweetness or seasoning.

Delicious Variations

Ready to switch things up? Here are a few variations you can try:

  • Maple Glaze: Substitute maple syrup for brown sugar for an earthy sweetness.
  • Spiced Carrots: Add a pinch of cinnamon or nutmeg for a warm, spiced flavor.
  • Carrots with Apples: Toss in diced apples during the last 10 minutes of cooking for a sweet addition.
  • Nutty Crunch: Sprinkle chopped walnuts or pecans before serving for a delightful crunch.

Storage and Make-Ahead Instructions

Planning ahead? Here’s how to store and prepare your Apple Cider Glazed Carrots:

  • Refrigeration: Store leftovers in an airtight container in the fridge for up to 3 days.
  • Freezing: For longer storage, freeze in a sealed bag for up to 3 months. Thaw before reheating.
  • Reheating: Gently reheat in a skillet over low heat, adding a splash of apple cider if needed.

FAQs About Apple Cider Glazed Carrots

Here are some common questions and answers about making this recipe:

  • Can I use regular carrots instead of baby carrots? Yes! Just peel and cut them into even pieces.
  • How do I know when the carrots are done? They should be tender yet firm enough to hold their shape.
  • Can I make this recipe ahead of time? Absolutely! They can be made a day in advance and reheated.
  • What can I serve with these carrots? They pair wonderfully with roast chicken, pork, or even vegetarian dishes.
  • How do I store leftovers? Keep them in an airtight container in the fridge for up to 3 days.
  • Can I add other vegetables? Yes, feel free to include peas or green beans for added color and flavor.
  • Is this recipe gluten-free? Yes, all the ingredients are naturally gluten-free.
  • How do I make this dish vegan? Substitute olive oil for butter and omit any non-vegan ingredients.

Nutritional Tips and Dietary Adaptations

Making healthier choices? Here are some modifications you can consider:

  • Lower Sugar Option: Reduce the brown sugar to cut down on sweetness.
  • Heart-Healthy Fats: Use avocado oil instead of olive oil for a different flavor and health benefits.
  • High-Fiber Boost: Serve with a side of whole grains like quinoa or brown rice for a complete meal.

Essential Equipment Recommendations

To make your cooking experience smooth and enjoyable, here are some tools you’ll need:

  • Large Skillet: A wide, heavy-bottomed skillet ensures even cooking and proper glazing.
  • Wooden Spoon: Ideal for stirring without scratching your cookware.
  • Measuring Cups and Spoons: Accurate measurements are key to achieving the best flavor.

Serving Suggestions

These Apple Cider Glazed Carrots are incredibly versatile. Here are some ideas to serve them:

  • As a Side Dish: Pair them with roasted meats or grilled fish for a balanced meal.
  • Mixed into Salads: Toss them into a green salad or grain bowl for added texture and flavor.
  • On a Charcuterie Board: Their vibrant color makes them a stunning addition to any cheese platter.

So there you have it—a heartfelt guide to making Apple Cider Glazed Carrots that will surely become a beloved staple in your kitchen. Remember, cooking is about creating memories and sharing love, so gather your loved ones, roll up your sleeves, and enjoy the process. Happy cooking!

Apple Cider Glazed Carrots

Prep Time 5 minutes
Cook Time 30 minutes
Total Time 35 minutes
Servings 4 servings
Calories 150
A delicious side dish featuring tender carrots glazed with sweet apple cider and brown sugar, perfect for any meal.

Ingredients

Main

  • 1 Tbsp Olive Oil
  • 1 Lb Baby Carrots
  • 1/4 Cup Sweet Onion, Sliced
  • 1 1/2 Cups Apple Cider
  • 1/4 Cup Brown Sugar, Packed

Instructions 

  • Heat olive oil in a large skillet over medium heat.
  • Add carrots, onion, cider, and brown sugar; stir to combine.
  • Cover and simmer for 20-30 minutes until carrots are tender and liquid is absorbed.

Notes

Stir occasionally to prevent sticking and ensure even glazing.
Calories: 150kcal
Cost: $12
Course: Side Dish
Cuisine: American
Keyword: Carrots

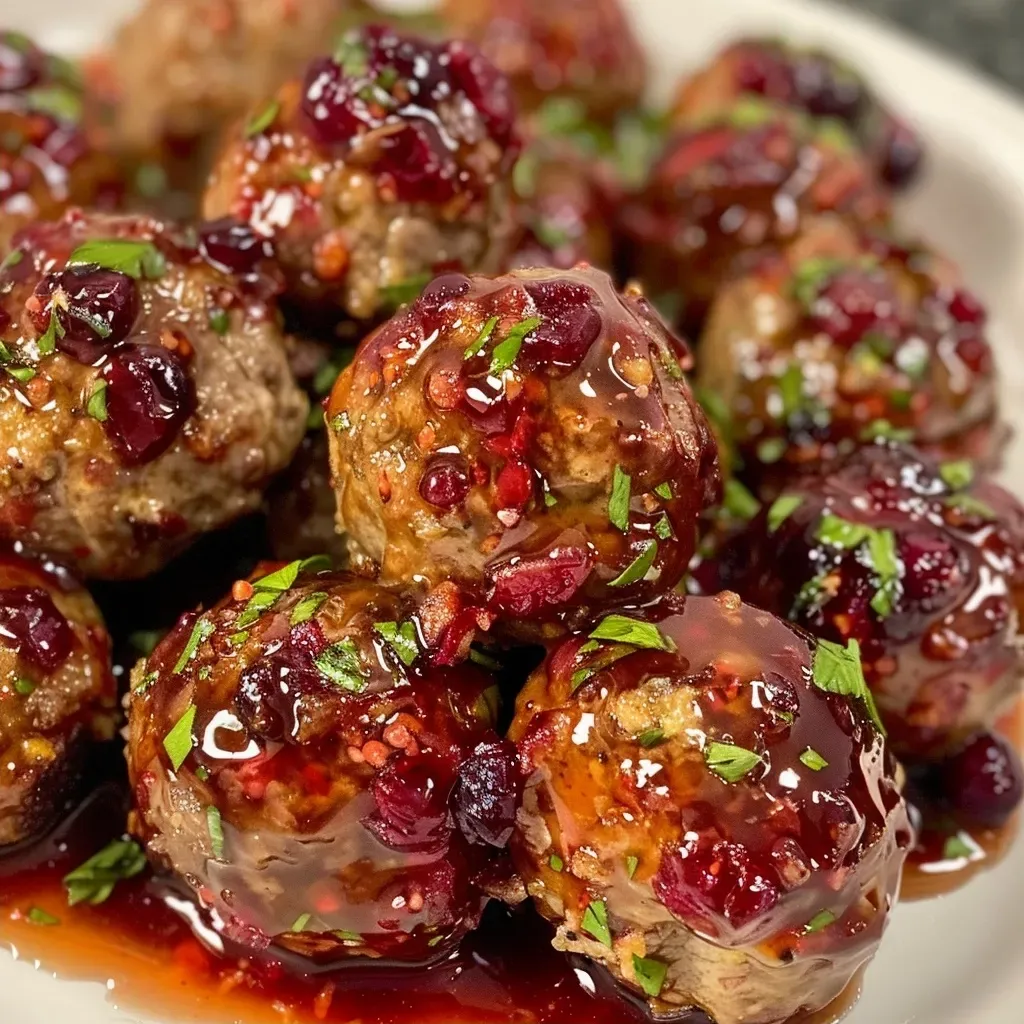
Discover the Heartwarming Joy of Cranberry Glazed Meatballs

As the holiday season approaches, our kitchens become the heart of the home, filled with laughter, love, and delicious aromas. One dish that embodies this spirit is Cranberry Glazed Meatballs. This delightful recipe marries the savory richness of meatballs with the sweet tartness of cranberries, creating a dish that’s perfect for gatherings, family dinners, or even a cozy night in. Let’s dive into why you’ll love this recipe, how to make it, and some tips for making it your own.

Why You’ll Love This Recipe

These cranberry meatballs are not just another dish; they carry with them a sense of warmth and nostalgia. Here are five reasons why this recipe deserves a spot on your table:

  • Family-Friendly Flavor: The sweet and tangy glaze appeals to all ages, making it a hit at family gatherings.
  • Easy Preparation: With minimal hands-on time, this recipe allows you to spend more time with your loved ones.
  • Versatile Serving Options: Whether served as a main dish or a delightful appetizer, these meatballs fit any occasion.
  • Make Ahead Magic: Prepare the meatballs in advance, allowing the flavors to meld and making your cooking stress-free.
  • Customizable Ingredients: This recipe allows for substitutions, ensuring it can cater to various dietary preferences.

Ingredient Breakdown

Let’s explore the ingredients that make these Cranberry Glazed Meatballs so special. Below is a detailed breakdown along with possible substitutions:


Cast Iron Skillet

★ Recommended Kitchen Tool

Cast Iron Skillet

Make this recipe even easier with a quality Cast Iron Skillet — a must-have kitchen staple!


đŸ›’ View on Amazon →

As an Amazon Associate, we earn from qualifying purchases.
  • 1 lb ground meat: Choose from ground chicken, turkey, or beef based on your preference. For a vegetarian option, use plant-based ground meat.
  • 1 large egg: This helps bind the meatballs. If egg-free, substitute with 1/4 cup of unsweetened applesauce.
  • 1/2 cup prepared stuffing: Adds flavor and moisture. You can use bread crumbs as a substitute if you prefer.
  • Seasonings: Onion powder, garlic powder, sage, salt, and pepper enhance the flavor. Feel free to experiment with herbs like parsley or thyme.
  • For the sauce: Whole cranberries, water, sugar, butter, thyme, sage, salt, and pepper combine for a luscious glaze. If you prefer less sugar, try honey or maple syrup as alternatives.

How to Make Cranberry Glazed Meatballs

Close-up view of succulent meatballs coated in a rich cranberry glaze, garnished with herbs.

Follow these steps for a delicious batch of cranberry meatballs that will surely impress:

  1. Preheat: Start by preheating your oven to 400°F (200°C).
  2. Mix: In a large bowl, combine ground meat, egg, stuffing, onion powder, garlic powder, sage, salt, and pepper. Mix until just combined.
  3. Shape: Roll the mixture into 2-inch balls and place them on a parchment-lined baking sheet.
  4. Bake: Bake for 10-15 minutes or until the meatballs are golden brown and cooked through.
  5. Prepare the Sauce: In a saucepan, combine water, cranberries, butter, sugar, thyme, sage, salt, and pepper. Bring to a boil, then reduce to medium heat and simmer until the cranberries are soft.
  6. Blend: Using a food processor, puree the sauce until smooth. If the sauce is too thick, thin it out with a splash of water.
  7. Crockpot Time: Pour the sauce into a crockpot, add the baked meatballs, and heat on low for 1 hour. Switch to ‘keep warm’ to hold until ready to serve.
  8. Serve: Pair with fresh bread or sliced baguette, and enjoy the warmth of togetherness!

Expert Pro Tips

To ensure your meatballs turn out perfect every time, consider these expert tips:

  • Keep it moist: Don’t overmix the meatball mixture; this keeps them tender.
  • Test one first: Always cook one meatball first to check seasoning and adjust as needed.
  • Flavor boost: Let meatballs chill in the fridge for 30 minutes before baking to enhance flavors.
  • Experiment: Try adding chopped vegetables like bell peppers or zucchini for added nutrition.
  • Gravy lover?: For a saucier dish, double the cranberry sauce ingredients.
  • Freezing for later: Freeze uncooked meatballs on a baking sheet, then transfer to a freezer bag for later use.
  • Don’t rush it: Allow the meatballs to simmer gently in the sauce for at least 20 minutes for maximum flavor.
  • Leftover ideas: Use leftover meatballs in sandwiches or salads for a quick lunch!

Common Mistakes and Troubleshooting

A few common pitfalls can occur when making meatballs. Here’s how to avoid them:

  • Dry meatballs: Ensure you’re using enough moisture in the mixture. Stale bread crumbs can also dry them out.
  • Crumbly texture: If your meatballs fall apart, add more egg or breadcrumbs to bind them better.
  • Overcooked meatballs: Keep an eye on cooking times to avoid drying out the meatballs in the oven.

Variations of Cranberry Glazed Meatballs

Feeling adventurous? Here are some delightful variations to try:

  • Spicy Cranberry Meatballs: Add a teaspoon of red pepper flakes to the sauce for a spicy kick.
  • Maple Glazed Meatballs: Substitute sugar with maple syrup for a unique flavor twist.
  • Herbed Turkey Meatballs: Use ground turkey and fresh herbs like basil or dill for fresher flavors.
  • Vegetarian Option: Replace meat with lentils or chickpeas and follow the same preparation method for a hearty vegetarian dish.

Storage and Make-Ahead Instructions

These meatballs can be a lifesaver for meal prep:

  • Refrigerate: Store cooked meatballs in an airtight container for up to 4 days.
  • Freeze: Freeze cooked or uncooked meatballs in a freezer-safe bag for up to 3 months. Thaw in the fridge overnight before reheating.
  • Make-ahead: Prepare meatballs in advance and reheat in the crockpot with sauce before serving.

Frequently Asked Questions

Here are some common questions about cranberry glazed meatballs:

  • Can I use frozen meatballs? Yes, frozen meatballs can be used. Just adjust the cooking time accordingly.
  • What can I serve with these meatballs? They pair wonderfully with rice, mashed potatoes, or a fresh salad.
  • How do I know when the meatballs are done? They should be golden brown and have an internal temperature of 165°F (74°C).
  • Can I make these meatballs in advance? Absolutely! They can be made and stored for later use.
  • Are they gluten-free? Use gluten-free breadcrumbs and check your sauces for gluten-free certification.
  • How do I reheat meatballs? Reheat in the oven or on the stovetop until warmed through, adding a splash of water if needed.
  • Can I double the recipe? Yes, this recipe can easily be doubled to serve a larger crowd.
  • What’s the best way to serve them? Serve warm with toothpicks for appetizers, or over rice for a hearty meal.

Nutrition Tips and Dietary Adaptations

For those mindful of nutrition, here are some tips to keep in mind:

  • Lean proteins: Opt for lean ground turkey or chicken for lower fat content.
  • Reduce sugar: Adjust the amount of sugar in the sauce to suit your taste or dietary needs.
  • Add veggies: Incorporate finely chopped vegetables into the meatball mixture for added fiber and nutrients.

Essential Equipment for Your Kitchen

To make this recipe, you’ll need a few basic kitchen tools:

  • Baking sheet: For baking the meatballs.
  • Mixing bowl: To combine your ingredients.
  • Food processor: For blending the sauce to a smooth consistency.
  • Crockpot: Ideal for keeping your meatballs warm and flavorful.

Serving Suggestions

When it comes to serving these Cranberry Glazed Meatballs, the options are endless:

  • Appetizer platter: Serve with toothpicks alongside cheese and crackers for a festive spread.
  • Over rice: Spoon the meatballs and sauce over a bed of fluffy rice for a complete meal.
  • In sandwiches: Use as a filling in a soft roll for a delicious meatball sub.
  • With pasta: Pair with spaghetti and a side of garlic bread for a comforting dinner.

Final Thoughts

Cooking is a beautiful way to share love and create memories. These Cranberry Glazed Meatballs are more than just a dish—they’re an invitation to gather around the table and celebrate the moments that matter. Whether you’re making them for a holiday feast or just a family dinner, they’re sure to bring joy and warmth to your home. Enjoy every bite and cherish the memories you create!

Cranberry Glazed Crockpot Meatballs

Prep Time 15 minutes
Cook Time 1 hour
Total Time 1 hour 15 minutes
Servings 4 servings
Calories 350
A delicious and festive dish featuring tender meatballs coated in a sweet and tangy cranberry glaze, perfect for holiday gatherings.

Ingredients

Meatballs

  • 1 lb ground chicken, turkey or beef
  • 1 large egg
  • 0.5 cup stuffing, prepared
  • 1 teaspoon onion powder
  • 1 teaspoon garlic powder
  • 1 teaspoon sage
  • Pinch salt & pepper

Sauce

  • 1 bag whole cranberries
  • 1 cup water
  • 1 cup sugar
  • 0.5 cup additional sugar (if needed) (optional, adjust to taste)
  • 3 tablespoons butter
  • 0.5 teaspoon thyme
  • 0.5 teaspoon sage
  • Pinch salt & pepper

Instructions 

  • Mix all meatball ingredients, form into 2-inch balls, and bake at 400°F for 10-15 minutes.
  • In a saucepan, combine water, cranberries, butter, sugar, and seasonings; bring to a boil and cook until cranberries burst and sauce thickens.
  • Puree the sauce in a food processor, adjust thickness with water, and add sugar to taste.
  • Pour sauce into crockpot, add meatballs, and heat on low for 1 hour. Keep warm and serve.

Notes

For a richer flavor, simmer the sauce longer before adding meatballs.
Calories: 350kcal
Cost: $15
Course: Main Course
Cuisine: American
Keyword: Cranberry, holiday, Meatballs

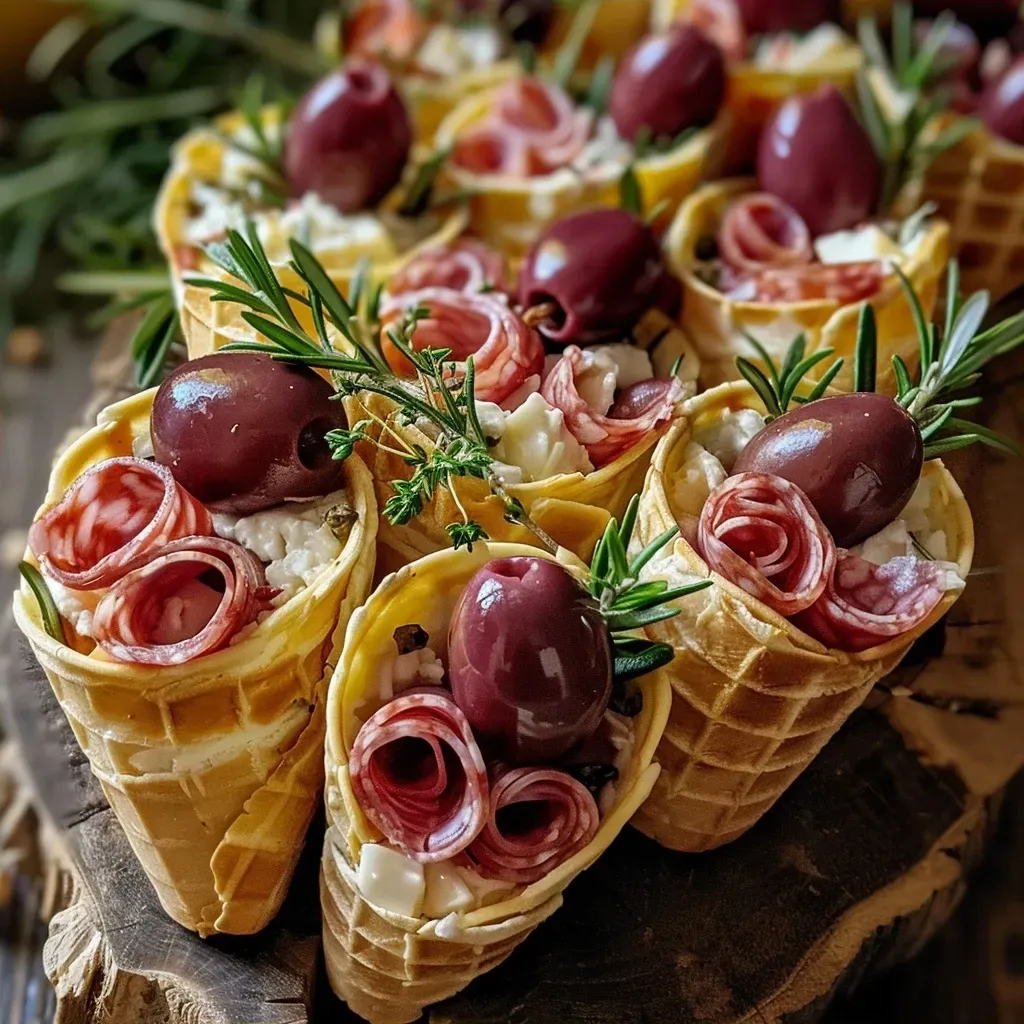
Unleashing Culinary Creativity: The Art of Crafting Charcuterie Cones

Ah, charcuterie cones! Imagine the joy of a vibrant gathering, laughter echoing through the air, and the tantalizing aromas wafting from a beautifully presented charcuterie cone. These delightful creations are not only a feast for the eyes but also a heartwarming way to share flavors and memories. In this article, we will explore how to create these whimsical cones filled with love and flavor while ensuring you have all the tools and tips needed to make your next gathering unforgettable.

With roots deep in Southern hospitality, charcuterie cones evoke a sense of nostalgia—a reminder of family gatherings, holiday celebrations, and the simple joy of sharing food with those we love. Let’s dive into the world of charcuterie cones and discover how to craft these edible delights that are sure to impress your guests and warm your heart.

Why You’ll Love This Recipe

  • Versatile Ingredients: You can fill your charcuterie cones with a variety of ingredients, from cured meats to seasonal fruits, making them adaptable to any occasion.
  • Visual Appeal: The presentation is as important as the taste. These cones are not only delicious but also visually stunning, serving as a centerpiece for gatherings.
  • Easy to Assemble: With minimal prep time, these cones are quick to assemble, allowing you to focus on enjoying time with your guests rather than spending hours in the kitchen.
  • Shareable Portions: Each cone is a perfect individual serving, making it easy for guests to grab and go while mingling.
  • Memorable Experience: Creating charcuterie cones can be a fun activity for families or friends, sparking creativity and conversation around the table.

Ingredients Breakdown: Building Your Perfect Cone

Creating charcuterie cones is all about selecting the right ingredients. Here’s a detailed breakdown of traditional and alternative options:


Digital Kitchen Scale

★ Recommended Kitchen Tool

Digital Kitchen Scale

Make this recipe even easier with a quality Digital Kitchen Scale — a must-have kitchen staple!


đŸ›’ Check Price on Amazon →

As an Amazon Associate, we earn from qualifying purchases.
  • Meats: Salami, prosciutto, and pepperoni are classic choices. For a twist, consider adding smoked turkey or vegan deli slices.
  • Cheeses: Creamy cheese like brie or goat cheese pairs beautifully with savory elements. You can also try sharp cheddar or a tangy blue cheese for added flavor.
  • Fruits: Grapes and figs are popular, but don’t overlook fresh berries or sliced apples for a refreshing crunch.
  • Vegetables: Olives, cherry tomatoes, and pickles add a nice contrast. You can also include roasted bell peppers or cucumber slices for freshness.
  • Herbs & Garnishes: Fresh rosemary or basil not only enhances flavor but also adds an aromatic touch to your cones.

Pro Tips for Perfect Charcuterie Cones

A detailed view of a charcuterie cone showing a variety of meats and cheeses along with fresh fruits and herbs.

Now that you have your ingredients ready, let’s ensure you create the best charcuterie cones possible with these expert insights:

  • Layer Wisely: Start with a base of greens or cheese at the bottom of the cone for stability and flavor.
  • Mix Textures: Combine crunchy, creamy, and chewy elements for a delightful mouthfeel.
  • Color Matters: Aim for a colorful array of ingredients to make your cones visually appealing.
  • Use Cone Holders: If available, use cone holders to avoid spillage and to keep your cones upright while serving.
  • Think Seasonal: Adjust your ingredients based on the season for freshness and flavor.
  • Create a Theme: Tailor your cones to a specific theme or cuisine, such as Mediterranean or Southern-inspired.
  • Prepare Ahead: If you’re hosting, prep ingredients in advance to minimize stress.
  • Taste as You Go: Don’t forget to taste your combinations to ensure a balanced flavor profile.

A Whimsical Variety: Exploring Charcuterie Cone Variations

While traditional charcuterie cones are delightful, exploring variations can elevate your culinary creations. Here are some ideas to spark your imagination:

  • Breakfast Cone: Fill with scrambled eggs, bacon, and avocado for a hearty morning option.
  • Dessert Cone: Use sweet treats like mini donuts, chocolate-covered strawberries, and whipped cream for a playful dessert.
  • Veggie Delight Cone: Incorporate an assortment of raw vegetables, hummus, and pita chips for a healthy snack.
  • Seafood Cone: Include smoked salmon, cream cheese, capers, and dill for a sophisticated touch.

Storing and Making Ahead

Charcuterie cones are best served fresh, but there are ways to prepare ahead of time. Here’s how to store your ingredients:

  • Pre-assemble Ingredients: You can prepare your meats, cheeses, and veggies a day in advance and store them in airtight containers in the refrigerator.
  • Assemble Just Before Serving: For the freshest taste, assemble your cones just before your guests arrive.
  • Storage Tips: If you have leftovers, store individual components separately to maintain freshness. Most meats and cheeses last a few days in the fridge if properly sealed.

Common Mistakes and Troubleshooting

Even the best cooks can face challenges. Here are some common mistakes to avoid when crafting your charcuterie cones:

  • Overstuffing: While it’s tempting to fill your cones to the brim, overstuffing can lead to messiness. Keep portions manageable.
  • Ignoring Flavor Pairing: Not all flavors go together. Take time to think about how your ingredients complement one another.
  • Neglecting Presentation: The visual appeal is key. Arrange your ingredients thoughtfully to entice your guests.
  • Forgetting to Chill: Make sure your ingredients are properly chilled to enhance flavors and prevent spoilage.

Frequently Asked Questions

If you’re still curious about charcuterie cones, here are some common questions and their answers:

  • What are charcuterie cones? They are individual servings of charcuterie, presented in a cone shape for easy handling and enjoyment.
  • Can I make them vegan? Absolutely! Substitute meats with plant-based options, and use dairy-free cheeses and spreads.
  • How do I choose the right cone? You can use paper, plastic, or even edible cones made from baked dough, depending on your theme.
  • What should I serve with charcuterie cones? Pair with wine, craft beer, or non-alcoholic beverages for a delightful experience.
  • How long can I keep leftovers? Most ingredients can last 3-5 days in the fridge. Store them separately for optimal freshness.
  • Can I prepare them the night before? While you can prep ingredients, it’s best to assemble the cones just before serving for freshness.
  • What if I have dietary restrictions? Tailor your ingredients to accommodate any dietary needs. There are countless alternatives available!
  • How do I enhance the flavors? Use fresh herbs, flavored oils, or specialty spreads to elevate the taste of your cones.

Final Thoughts: A Culinary Hug

Creating charcuterie cones is more than just a cooking endeavor; it’s an invitation to share love and joy around the table. With each bite, you’re not just tasting flavors; you’re experiencing memories, traditions, and the warmth of togetherness. So gather your loved ones, roll up your sleeves, and let’s make some magic in the kitchen. Remember, cooking is about connection and celebration, and these delightful cones are a testament to that spirit. Happy cooking!

Charcuterie Cones

Prep Time 10 minutes
Total Time 10 minutes
Servings 4 cones
Calories 250
Enjoy these easy-to-make charcuterie cones, perfect for entertaining or a quick snack with a variety of savory and sweet bites.

Ingredients

Main

  • 8 slices salami
  • 4 oz creamy cheese
  • 20 olives olives
  • 1 cup grapes
  • 2 sprigs rosemary

Instructions 

  • Fill small cones with slices of salami and creamy cheese.
  • Add olives and grapes to each cone for variety.
  • Garnish with sprigs of rosemary for aroma and presentation.

Notes

Use fresh ingredients for the best flavor and presentation.
Calories: 250kcal
Cost: $12
Course: Appetizer
Cuisine: International
Keyword: Charcuterie

There’s something utterly magical about the way food can transport us back in time, wrapping us in a warm embrace of nostalgia. One such delightful recipe that does just that is my Cinnamon and Sugar Sweet Potato Chips. These crispy treats not only tantalize your taste buds but also stir up cherished memories of family gatherings and friendly chats around the kitchen table. In this heartfelt guide, we’ll explore how to create these delicious chips, sharing tips, variations, and the love that goes into every batch.

Why You’ll Love This Recipe

Cinnamon and Sugar Sweet Potato Chips are more than just a snack; they’re a celebration of flavor and togetherness. Here’s why you’ll adore this recipe:

  • Easy to Make: With just a few simple ingredients, you can whip up a batch in no time, perfect for those unexpected guests.
  • Healthier Alternative: These chips are baked, not fried, making them a guilt-free indulgence compared to traditional potato chips.
  • Versatile Flavors: The combination of sweet cinnamon and sugar creates a delightful contrast, pleasing both sweet and savory palates.
  • Customizable: Feel free to experiment with spices and seasonings to make these chips uniquely yours.
  • Perfect for Sharing: Serve them at gatherings or as a snack for movie nights; they’re sure to be a hit with family and friends.

Ingredients for Cinnamon and Sugar Sweet Potato Chips

Let’s gather our ingredients and get ready to create these delicious chips. Here’s what you’ll need:


Silicone Baking Cups Set

★ Recommended Kitchen Tool

Silicone Baking Cups Set

Make this recipe even easier with a quality Silicone Baking Cups Set — a must-have kitchen staple!


đŸ›’ Check Price on Amazon →

As an Amazon Associate, we earn from qualifying purchases.
  • 1 medium sweet potato: Choose one that is firm and free from blemishes for the best quality.
  • Cinnamon & sugar for sprinkling: Feel free to adjust the ratio to suit your taste; more cinnamon for spice, more sugar for sweetness!
  • Pompeian Coconut Oil spray: This adds a lovely flavor while keeping the chips from sticking.
  • Vanilla yogurt for dipping (optional): A creamy dip that pairs beautifully with the sweet flavors.

How to Make Sweet Potato Chips

Follow these steps to create crispy, flavorful sweet potato chips:

  1. Thinly slice the sweet potato using a mandolin or a sharp knife. Aim for even slices to ensure consistent cooking.
  2. Place the slices on a baking sheet and spray them lightly with coconut oil.
  3. Generously sprinkle with cinnamon and sugar for that irresistible sweetness.
  4. Preheat your oven to 400 degrees and bake for 10 minutes.
  5. Flip the chips over, spray again with oil, and add more cinnamon and sugar.
  6. Reduce the oven temperature to 350 degrees and bake for an additional 5-10 minutes, checking often to avoid burning.
  7. Once crispy and golden, remove from the oven and let cool slightly before serving.
  8. If desired, serve with vanilla yogurt for a delightful dipping experience.

Pro Tips for Perfect Chips

Side view of golden-brown sweet potato chips on a plate, glistening with coconut oil.

Here are some expert insights to elevate your sweet potato chip game:

  • Slice uniformly: Consistent thickness ensures even baking and prevents some chips from burning while others remain soft.
  • Experiment with flavors: Try adding a dash of nutmeg or ginger for a unique twist on the classic cinnamon and sugar combo.
  • Don’t overcrowd the pan: Give your chips space to crisp up—overlapping can lead to soggy results.
  • Store properly: Keep cooled chips in an airtight container to maintain their crunch for up to five days.
  • Try different oils: If you want to switch it up, olive oil or avocado oil can also be great alternatives to coconut oil.
  • Check frequently: Since ovens vary, keep an eye on the chips as they bake to prevent burning.
  • Cool before serving: Let the chips cool for a few minutes post-baking to enhance their crunchiness.
  • Use parchment paper: Lining your baking sheet can help with easy cleanup and prevent sticking.

Common Mistakes and Troubleshooting

Even the most seasoned cooks can make mistakes. Here are some common pitfalls and how to avoid them:

  • Chips are too soggy: Ensure you’re using enough oil spray and that the slices are thin enough to bake properly.
  • Chips burn quickly: If you notice burning, lower the oven temperature and check them frequently.
  • Uneven crispiness: Rotate the baking sheet halfway through cooking to ensure even heat distribution.

Recipe Variations

Feel free to customize this recipe with these delightful variations:

  • Spicy Sweet Potato Chips: Add cayenne pepper to the cinnamon and sugar mix for a sweet and spicy kick.
  • Herb-Infused Chips: Sprinkle with dried rosemary or thyme instead of sugar for a savory option.
  • Chocolate Drizzled Chips: After baking, drizzle melted dark chocolate over the chips for a decadent treat.
  • Maple Cinnamon Chips: Swap sugar for maple sugar or drizzle with pure maple syrup before baking for a richer flavor.

Storage and Make-Ahead Instructions

These sweet potato chips can easily be made ahead of time and stored for later enjoyment:

  • Cool completely: Allow chips to cool fully before storing to prevent moisture buildup.
  • Airtight storage: Store in an airtight container at room temperature for up to five days.
  • Freezing tips: While best enjoyed fresh, you can freeze baked chips in a single layer on a baking sheet before transferring them to a freezer bag; re-crisp them in the oven when ready to enjoy.

Frequently Asked Questions

Here are some common questions about making sweet potato chips:

  • Can I use other types of potatoes? Absolutely! Regular potatoes or even beets can work well as substitutes.
  • How thick should I slice the sweet potatoes? Aim for 1/8 inch thick for optimal crispiness.
  • What if I don’t have coconut oil spray? You can use any cooking spray or brush the chips with melted coconut oil instead.
  • Can I bake these chips in an air fryer? Yes, air fryers work wonderfully! Bake at 375 degrees for about 10 minutes, shaking the basket halfway through.
  • How do I know when the chips are done? They should be golden and crispy; a good test is to let one cool and see if it remains crunchy.
  • Can I skip the sugar? Certainly! For a healthy snack, feel free to omit the sugar and just use cinnamon.
  • Are sweet potato chips healthy? Yes! They are packed with vitamins and fiber, making them a nutritious alternative to traditional chips.
  • What dips pair well with sweet potato chips? Besides vanilla yogurt, try hummus, guacamole, or a tangy salsa.

Nutrition Tips and Dietary Adaptations

These sweet potato chips not only taste great but can also be tailored to fit various dietary needs:

  • Gluten-free: Naturally gluten-free, this recipe is safe for those with gluten sensitivities.
  • Vegan-friendly: With no animal products in the ingredients, these chips are perfect for a vegan diet.
  • Low-calorie option: By using less sugar or none at all, you can easily reduce the calorie count.
  • High-fiber snack: Sweet potatoes are rich in fiber, aiding digestion and keeping you full longer.

Equipment Recommendations

Having the right tools can make your cooking experience smoother:

  • Mandolin slicer: A mandolin ensures even, thin slices for crispy chips.
  • Baking sheets: Use high-quality baking sheets to prevent sticking and ensure even baking.
  • Parchment paper: Lining your baking sheets with parchment makes clean-up a breeze.
  • Oven thermometer: Ensures your oven is at the correct temperature for perfect baking.

Serving Suggestions

Serve these delightful sweet potato chips at your next gathering or family meal:

  • Snack platter: Create a colorful snack platter with dips, nuts, and fruits.
  • Movie night treat: Set these chips out while watching a film for a cozy evening.
  • Picnic essential: Pack them for a picnic along with some fresh fruits and sandwiches.
  • Gourmet touch: Replace regular chips in gourmet sandwiches or burgers for a unique twist.

In conclusion, Cinnamon and Sugar Sweet Potato Chips are not just a recipe; they are a heartfelt way to connect with loved ones and celebrate the joy of cooking. So gather your ingredients, turn on that oven, and let the memories crunch through every bite. Happy cooking!

Cinnamon and Sugar Sweet Potato Chips

Prep Time 10 minutes
Cook Time 15 minutes
Total Time 25 minutes
Servings 4 servings
Calories 150
Enjoy crispy, sweet, and spicy homemade sweet potato chips with a hint of cinnamon and sugar, perfect for a healthy snack or treat.

Ingredients

Main

  • 1 medium sweet potato
  • cinnamon & sugar for sprinkling cinnamon & sugar (for sprinkling)
  • 1 spray Pompeian Coconut Oil spray
  • Vanilla yogurt for dipping (optional) Vanilla yogurt (for dipping, optional)

Instructions 

  • Thinly slice the sweet potato.
  • Arrange on a baking sheet, spray with coconut oil, and sprinkle with cinnamon and sugar.
  • Bake at 400°F (200°C) for 10 minutes, then flip, spray, and sprinkle again.
  • Reduce oven to 350°F (175°C) and bake for an additional 5-10 minutes until crispy.
  • Serve with vanilla yogurt for dipping if desired.

Notes

Keep an eye on the chips to prevent burning and enjoy a healthy snack!
Calories: 150kcal
Cost: $10
Course: Snack
Cuisine: American
Keyword: Sweet Potato

A Taste of Home: Crafting the Perfect Masala Nuts

Welcome to the heartwarming world of Masala Nuts! This delightful recipe is not just a snack; it’s a cherished family tradition, a blend of flavors that brings people together. Picture yourself seated around a family table, sharing stories and laughter, with a bowl of these spiced nuts at the center. They are warm, crunchy, and bursting with flavors that evoke memories of home. In this guide, I’ll walk you through how to make Masala Nuts that are sure to become a staple in your kitchen.

Why You’ll Love This Recipe

  • Quick and Easy: This recipe comes together in less than 30 minutes, making it the perfect snack for unexpected guests or a cozy movie night.
  • Flavor Explosion: Each bite offers a blend of spices that dance on your taste buds, from the heat of Kashmiri chili to the tang of aamchur.
  • Nutritious Snack: Packed with protein and healthy fats, these nuts are a guilt-free indulgence that satisfies your cravings.
  • Versatile: Feel free to customize the nuts or spices according to your taste. You can also adjust the heat level to suit your family’s preferences.
  • Perfect for Sharing: Whether it’s a festive occasion like Diwali or a casual get-together, these nuts are a crowd-pleaser that brings everyone together.

Ingredient Breakdown

Let’s dive into the ingredients that make these Masala Nuts shine. Each one plays a crucial role in building the flavors and textures.

  • Nuts: You’ll need equal parts of almonds, walnuts, pistachios, and cashews. Feel free to substitute any nuts you have on hand; the beauty of this recipe is its flexibility!
  • Oil: A light oil like vegetable or coconut oil helps the spices adhere to the nuts while providing a slight richness.
  • Spices: The magic happens here! We use kosher salt, black pepper, aamchur (for tanginess), chaat masala (for complexity), Kashmiri red chili powder (for color and mild heat), and a touch of turmeric for that warm glow.
  • Sugar: Just a teaspoon balances out the spices, but feel free to leave it out if you prefer a sugar-free version.

How to Make Masala Nuts

Side view of assorted masala nuts arranged in a dish, highlighting their vibrant spices and textures.

Now, let’s get cooking! Follow these simple steps to create your very own batch of Masala Nuts.


Professional Chef Knife Set

★ Recommended Kitchen Tool

Professional Chef Knife Set

Make this recipe even easier with a quality Professional Chef Knife Set — a must-have kitchen staple!


đŸ›’ Shop This Tool →

As an Amazon Associate, we earn from qualifying purchases.
  1. Preheat your oven to 300°F (150°C) and line a baking sheet with parchment paper.
  2. In a large mixing bowl, combine all the spices along with the oil and sugar. Mix well to form a paste.
  3. Add the nuts to the bowl, ensuring they are evenly coated with the spice mixture.
  4. Spread the mixture onto the prepared baking sheet in a single layer.
  5. Bake for 20 minutes, stirring every 5-7 minutes to ensure even roasting.
  6. Once they are golden brown and fragrant, remove from the oven and let cool completely before storing in an airtight container.

Pro Tips for Perfect Masala Nuts

  • Don’t Rush the Roasting: Stirring the nuts regularly ensures they roast evenly and prevents burning.
  • Experiment with Spices: Feel free to try different spice blends to find your perfect flavor combination. Adding a pinch of cinnamon can give a warm twist!
  • Store Properly: To keep your nuts fresh and crunchy, store them in an airtight container at room temperature. They can last for up to 2 weeks!
  • Make Ahead: These nuts can also be made ahead and stored for a quick snack or a last-minute addition to a cheese platter.
  • Gift Them: Package your homemade Masala Nuts in a jar with a ribbon for a thoughtful and delicious homemade gift.
  • Try Air Frying: For a healthier version, you can air fry the nuts at 300°F for about 10-12 minutes, shaking the basket halfway through.
  • Watch the Time: Oven times may vary, so keep an eye on the nuts towards the end of the baking time.
  • Adjust the Heat: Add more or less Kashmiri chili powder to adjust the spice level to your liking.

Common Mistakes and Troubleshooting

Even the best chefs can have off days, so here are some common pitfalls and how to avoid them:

  • Burnt Nuts: If you find your nuts are burning, lower the oven temperature and increase the baking time.
  • Uneven Coating: Make sure to mix the nuts well with the spice mixture. You can also add a splash more oil if needed.
  • Too Salty or Not Salty Enough: Always taste the spice mixture before adding the nuts. You can adjust the salt based on your preference.
  • Soggy Nuts: Make sure the nuts are fully cooled before storing, as any residual heat can cause moisture buildup.

Variations of Masala Nuts

Feel free to play around with the recipe! Here are some delicious variations:

  • Sweet and Spicy: Add a touch of honey or maple syrup for a sweet twist alongside the spices.
  • Herb-Infused: Incorporate dried herbs like rosemary or thyme for an aromatic version.
  • Curry Flavored: Swap out some spices for curry powder for an Indian twist.
  • Maple Glazed: Toss the nuts in maple syrup before baking for a sweet glaze that caramelizes beautifully.

Storage and Make-Ahead Instructions

These Masala Nuts can be made in advance, perfect for busy schedules. Store them in an airtight container at room temperature for up to 2 weeks. If you want to keep them fresh longer, consider freezing them. Just remember to let them cool completely before storing them away!

Frequently Asked Questions

  • Can I use different nuts? Yes! Feel free to substitute any of your favorite nuts.
  • Is it possible to make these nuts spicy? Absolutely! Increase the amount of Kashmiri chili powder or add cayenne pepper for more heat.
  • How do I ensure they stay crunchy? Store them in an airtight container and keep them away from moisture.
  • Can I use fresh spices? While fresh spices can be used, dried spices are recommended for a longer shelf life and better flavor.
  • What if I don’t have aamchur? You can substitute it with lemon zest or a bit of vinegar for acidity.
  • Can I air fry these nuts? Yes, air frying is a great alternative to baking. Just adjust the time and temperature accordingly.
  • How can I make them sweeter? Add a little more sugar, honey, or maple syrup to the spice mixture before coating the nuts.
  • Are these nuts suitable for vegans? Yes, this recipe is vegan-friendly!

Nutritional Tips and Dietary Adaptations

These Masala Nuts are not only delicious but also packed with nutrients. Nuts are high in protein, healthy fats, and vitamins, making them a great snack option. For those looking to adapt this recipe for specific dietary needs:

  • Gluten-Free: This recipe is naturally gluten-free, so it’s perfect for those with gluten sensitivities.
  • Low-Carb/Keto: Nuts are low in carbs and high in fats, making them a great choice for a ketogenic diet.
  • Nut Allergies: For those with nut allergies, consider using seeds like pumpkin or sunflower seeds with the same spice blend.

Equipment Recommendations

To create your Masala Nuts, you’ll need:

  • Baking Sheet: A sturdy baking sheet lined with parchment paper ensures even roasting.
  • Mixing Bowl: A large bowl to mix your nuts and spices thoroughly.
  • Measuring Cups and Spoons: Accurate measurements are key to getting the flavors just right.
  • Oven or Air Fryer: Depending on your preferred cooking method, either will work just fine.

Serving Suggestions

These Masala Nuts are perfect for various occasions. Here are a few serving ideas:

  • As a Snack: Serve them in a bowl for a quick and tasty snack any time of the day.
  • Party Platter: They make a fantastic addition to a charcuterie board alongside cheeses and fruits.
  • Gifting Option: Package them in a decorative jar and gift them to friends and family.
  • Movie Night Treat: Pair these nuts with popcorn for a fun movie night at home.

In conclusion, making Masala Nuts is a delightful journey into the heart of flavor and family. I invite you to gather your loved ones, share stories, and enjoy these deliciously spiced nuts together. Remember, cooking is not just about the food; it’s about the love and memories we create along the way. Happy cooking!

Masala Nuts

Prep Time 10 minutes
Cook Time 20 minutes
Total Time 30 minutes
Servings 4 cups
Calories 250
A flavorful and spicy roasted nut mix perfect for snacking or gifting.

Ingredients

Nuts

  • 1 cup almonds
  • 1 cup walnuts
  • 1 cup pistachios
  • 1 cup cashews
  • 3.5 tablespoons oil
  • 2 teaspoons kosher salt
  • 1 teaspoon black pepper
  • 1 teaspoon aamchur
  • 1 teaspoon chaat masala
  • 2 teaspoons Kashmiri red chili powder
  • 0.5 teaspoon turmeric
  • 1 teaspoon sugar

Instructions 

  • Preheat oven to 300°F (150°C). Line a baking sheet with parchment paper.
  • Mix all spices, sugar, and oil in a large bowl. Add nuts and coat evenly.
  • Spread nuts on the baking sheet in a single layer.
  • Bake for 20 minutes, stirring every 5-7 minutes.
  • Cool completely before storing in an airtight container.

Notes

Store in an airtight container for up to a week for best freshness.
Calories: 250kcal
Cost: $12
Course: Snack
Cuisine: Indian
Keyword: Nuts