Author

daniel

Browsing

Welcome to a world where every slice of cake brings back memories of sunny afternoons spent in the kitchen, where laughter and love filled the air. Today, we’re diving into the delightful realm of a Flourless Ricotta Lemon Almond Cake. This recipe is not just a treat; it’s a heartfelt embrace from your childhood, a sweet reminder that food is about sharing joy and creating connections. This cake is moist, zesty, and perfect for any occasion, from brunch gatherings to cozy family dinners. So, let’s gather our ingredients and jump into this baking adventure!

Why You’ll Love This Recipe

There are countless reasons to fall head over heels for this flourless cake, but here are just a few:

  • Gluten-Free Delight: You won’t need to worry about flour substitutes—this cake uses almond flour, making it a naturally gluten-free option that everyone can enjoy.
  • Incredibly Moist: Thanks to the ricotta, every bite is a tender, creamy experience that stays fresh for days (if it lasts that long in your home!).
  • Bright and Zesty: The combination of fresh lemon zest and juice adds a vibrant zing that dances on your taste buds, reminding you of sunny days and warm memories.
  • Simple Ingredients: With just a handful of pantry staples, you can whip up this cake without any fuss, making it perfect for both novice and seasoned bakers.
  • Versatile Serving Options: Whether you enjoy it plain, dusted with powdered sugar, or topped with fresh berries, this cake is a canvas for your creativity.

Ingredients for Flourless Ricotta Lemon Almond Cake

Let’s gather our ingredients. Here’s what you’ll need to create this delicious cake:

  • Zest of 2 lemons: This ingredient brings that zesty brightness, enhancing the cake’s flavor.
  • 1/4 cup fresh lemon juice: Adds a refreshing tang that balances the sweetness.
  • 1/2 cup honey or maple syrup: Choose your preferred sweetener to add depth and flavor.
  • 4 large eggs (separated): The yolks add richness, while the whipped whites give the cake its airy texture.
  • 1 cup whole-milk ricotta cheese: This creamy ingredient is the heart of this cake, keeping it moist.
  • 2 1/2 cups almond flour: A wonderful gluten-free alternative that provides a nutty flavor and tender crumb.
  • 1 1/2 tsp baking powder (gluten-free if needed): Ensures your cake rises beautifully.
  • Pinch of salt: Enhances all the flavors.

How to Make Flourless Ricotta Lemon Almond Cake

Now that we have our ingredients ready, let’s dive into the baking process!

  1. Preheat your oven to 350°F (175°C) and grease a 9-inch round cake pan.
  2. In a large bowl, combine the lemon zest and lemon juice with honey or maple syrup. Mix well until fully incorporated.
  3. Add the egg yolks and ricotta cheese to the bowl, beating until the mixture is smooth and creamy.
  4. In another bowl, whisk together the almond flour, baking powder, and salt.
  5. Gradually fold the dry ingredients into the wet mixture until just combined. Be gentle to keep the batter light.
  6. In a separate bowl, beat the egg whites until stiff peaks form. Gently fold the egg whites into the batter until no white streaks remain.
  7. Pour the batter into the prepared cake pan and smooth the top with a spatula.
  8. Bake for 30–35 minutes, or until the cake is set and a toothpick inserted in the center comes out clean.
  9. Allow the cake to cool in the pan for about 10 minutes before transferring it to a wire rack to cool completely.

Pro Tips for Making the Recipe

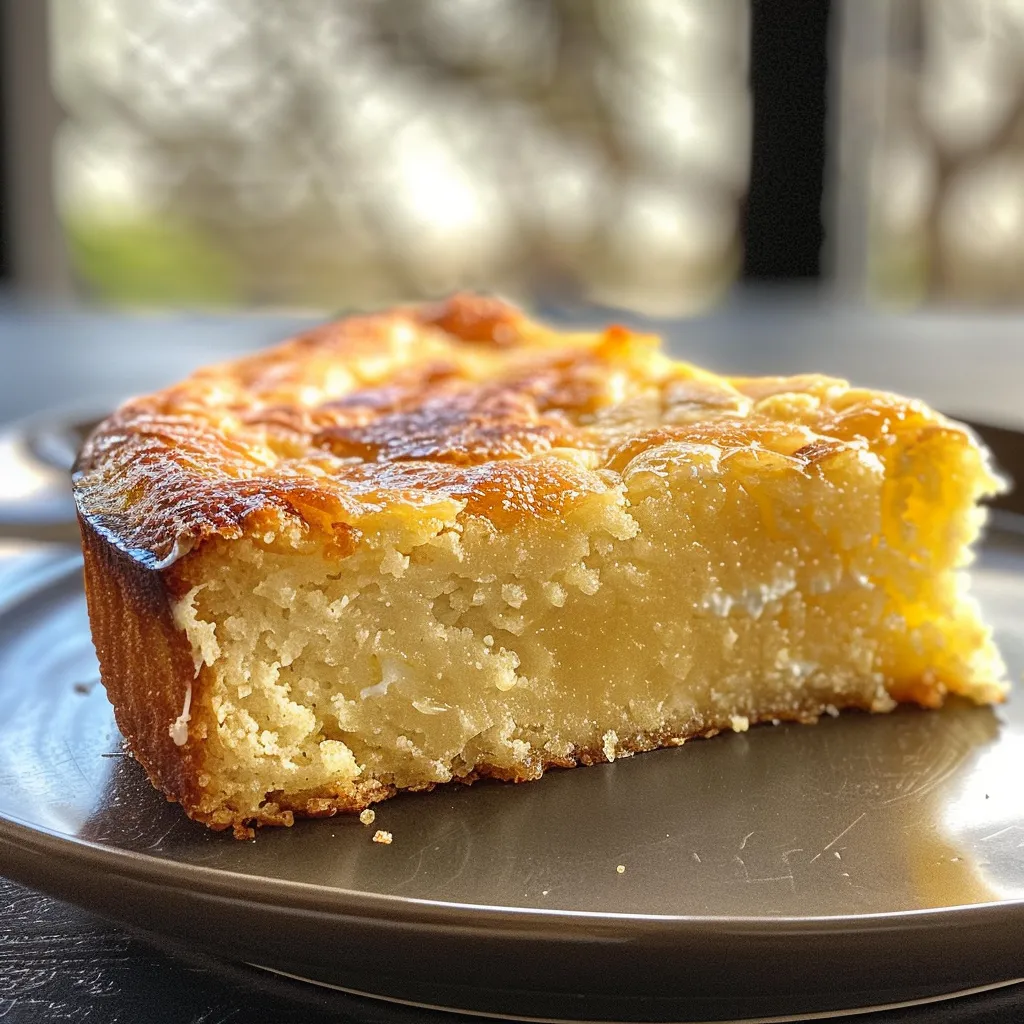
Close-up shot of a Flourless Ricotta Lemon Almond Cake with a soft, creamy interior and a sprinkle of lemon zest.

To ensure your baking experience goes smoothly, here are some expert insights:

  • Room Temperature Ingredients: Make sure your eggs and ricotta are at room temperature for the best mixing results.
  • Don’t Overmix: When combining wet and dry ingredients, mix just until combined to avoid overworking the batter.
  • Fresh Ingredients: Use the freshest lemons and high-quality ricotta for the best flavor.
  • Check for Doneness: Ovens can vary, so start checking your cake a few minutes before the recommended time.
  • Let It Cool: Allow the cake to cool completely before serving to enhance the texture and flavor.
  • Serving Suggestions: Serve with a dollop of whipped cream or a scoop of vanilla ice cream for an extra treat.
  • Storing: Store leftovers in an airtight container at room temperature for up to 3 days.
  • Make Ahead: This cake can be made a day in advance—just keep it covered to maintain moisture.

Common Mistakes and Troubleshooting

Even the best bakers can run into hiccups. Here’s how to solve common issues:

  • Dense Cake: If your cake turns out dense, ensure you folded the egg whites gently to maintain airiness.
  • Overbaking: Keep an eye on the cake as it bakes; check it a few minutes early to avoid drying it out.
  • Too Sweet: If you find it overly sweet, reduce the honey or maple syrup by a couple of tablespoons next time.

Variations for Your Flourless Cake

Feeling adventurous? Try these delightful variations:

  • Chocolate Lovers: Add 1/2 cup of cocoa powder to the dry ingredients for a chocolate twist.
  • Berry Burst: Fold in 1 cup of fresh blueberries or raspberries for added flavor and color.
  • Citrus Medley: Mix in zest and juice from oranges or limes along with the lemons for a unique citrus flavor.
  • Nut-Free Option: Substitute almond flour with sunflower seed flour for a nut-free alternative.

Storage and Make-Ahead Instructions

This cake is perfect for making ahead of time. Here’s how to store it:

  • Room Temperature: Store the cake in an airtight container at room temperature for up to 3 days.
  • Refrigeration: For longer storage, keep it in the fridge for up to a week. Just make sure it’s well covered.
  • Freezing: Freeze individual slices wrapped in plastic wrap for up to 2 months. Thaw them at room temperature when ready to enjoy.

Frequently Asked Questions

Here are some common questions about this delightful cake:

  • Can I use low-fat ricotta? Yes, but for the best texture, full-fat ricotta is recommended.
  • Is this cake suitable for kids? Absolutely! My kids love this cake, and it’s a great way to introduce them to baking.
  • Can I replace honey with sugar? Yes, but you might need to adjust the liquid content in the recipe.
  • What can I serve with this cake? It pairs wonderfully with whipped cream, fresh fruit, or a scoop of ice cream.
  • How do I know when the cake is done? A toothpick inserted into the center should come out clean.
  • Can I make this cake dairy-free? You can try using plant-based ricotta, but results may vary.
  • What if I don’t have almond flour? You can substitute it with ground oats or sunflower seed flour for a nut-free version.
  • Can I make this cake in advance? Yes! It keeps well and can be made a day ahead of serving.

Nutritional Information and Dietary Adaptations

This Flourless Ricotta Lemon Almond Cake is not only delicious but also fits various dietary needs:

  • Gluten-Free: Thanks to the almond flour, this cake is suitable for those with gluten sensitivities.
  • Low Sugar Option: Substitute honey with a sugar alternative to reduce sweetness.
  • High Protein: The ricotta and eggs provide a good source of protein, making it a satisfying treat.
  • Nut-Free Adaptation: Use sunflower seed flour to make this cake nut-free without sacrificing flavor.

Equipment Recommendations

Before you start baking, ensure you have the right tools on hand:

  • 9-inch Round Cake Pan: A sturdy pan is essential for even baking.
  • Mixing Bowls: You’ll need a few different sizes for mixing ingredients.
  • Electric Mixer: This will make whipping egg whites much easier.
  • Rubber Spatula: Perfect for gently folding ingredients without deflating the batter.

Serving Suggestions

Now that your cake is ready, here are some serving ideas:

  • With Fresh Berries: Top with a medley of strawberries, blueberries, and raspberries for a fruity finish.
  • Creamy Topping: A dollop of whipped cream adds a luxurious touch.
  • Dusting of Powdered Sugar: A light sprinkle on top makes for a beautiful presentation.
  • Pair with Ice Cream: Serve warm slices with vanilla or lemon sorbet for a delightful contrast.

As we wrap up, remember that cooking is about love and memories. This Flourless Ricotta Lemon Almond Cake isn’t just a recipe; it’s a celebration of life’s sweetest moments. So gather your loved ones around the table, serve generous slices of this cake, and share stories and laughter. Happy baking, my friends!
Irresistible Flourless Ricotta Lemon and Almond Cake in 6 Steps

Prep Time 15 minutes
Cook Time 35 minutes
Total Time 50 minutes
Servings 8 pieces
Calories 250
A light and flavorful cake combining ricotta, lemon, and almond flour for a delightful treat.

Ingredients

Fruits and liquids

  • 2 pieces lemon zest
  • 0.25 cup fresh lemon juice
  • 0.5 cup honey or maple syrup
  • 4 large eggs (separated)
  • 1 cup whole-milk ricotta cheese
  • 2.5 cups almond flour
  • 1.5 tsp baking powder (gluten-free if needed)
  • pinch salt

Instructions 

  • Preheat oven to 350°F (175°C) and grease a 9-inch round pan.
  • Mix lemon zest, lemon juice, and honey in a bowl.
  • Add egg yolks and ricotta; beat until smooth.
  • Combine almond flour, baking powder, and salt; fold into wet mixture.
  • Whip egg whites until stiff; fold into batter gently.
  • Pour batter into pan, bake 30–35 mins, cool before serving.

Notes

This cake is best enjoyed fresh and can be stored in the refrigerator for up to 2 days.
Calories: 250kcal
Cost: $15
Course: Dessert
Cuisine: fusion
Keyword: almond, Lemon, ricotta

Welcome to the Heart of the Kitchen: An Introduction to Chickpea Flour Naan

Ah, naan! Just the thought of warm, fluffy bread fresh off the skillet brings back memories of my childhood in Louisiana, where the kitchen was always filled with love and laughter. Today, I’m excited to share a recipe that embodies that spirit: Chickpea Flour Naan. This vegan, grain-free delight is not only easy to make, but it also serves as the perfect accompaniment to your favorite dishes, whether it’s a vibrant curry or a simple soup. In under 20 minutes, you can create naan that whispers of love and simplicity, and I promise, you will be so glad you did!

As you journey through this recipe, you’ll discover that cooking is less about perfection and more about sharing joy with those around you. So, let’s gather our ingredients and get started on this adventure of flavors!

Why You’ll Love This Chickpea Flour Naan

  • Quick and Easy: This recipe takes just 15 minutes from start to finish, making it perfect for weeknight dinners or last-minute gatherings.
  • Gluten-Free Goodness: Made entirely with chickpea flour, this naan is naturally gluten-free, catering to those with dietary restrictions.
  • Nutrient-Rich: Chickpea flour is packed with protein and fiber, making this naan not just delicious but also nourishing.
  • Vegan-Friendly: With no animal products, this naan fits beautifully into a vegan diet, allowing everyone to enjoy it.
  • Versatile Pairing: Whether you serve it with a spicy curry, a fresh salad, or simply enjoy it with olive oil and herbs, this naan is a delightful addition to any meal.

Ingredient Breakdown: What You Need to Make Chickpea Flour Naan

Let’s dive into the ingredients that make this naan truly special. Below is a detailed breakdown, including some substitutions to make it your own:

  • Nondairy Milk: 1/2 cup (e.g., soy milk, cashew milk, almond milk)—adds moisture and richness. If you have allergies, feel free to use oat milk or coconut milk for a different flavor.
  • Lemon Juice: 1.5 teaspoons (or light-colored vinegar)—provides acidity that helps activate the baking powder for a fluffy texture.
  • Chickpea Flour: 1 cup—this is the star of the show, giving our naan its unique nutty flavor and structure.
  • Whole Psyllium Husks: 3 tablespoons—these help bind the dough and improve its texture; psyllium powder can be used as a substitute.
  • Baking Powder: 1.5 teaspoons—make sure it’s certified gluten-free if needed.
  • Salt: 1/4 teaspoon—enhances the overall flavor of the naan.
  • Baking Soda: 1/8 teaspoon—adds extra lift to the naan.
  • Optional Garlic Powder: 1.5 teaspoons—if you love garlic, this addition takes your naan to the next level.
  • Vegetable Oil: 2 teaspoons—any variety will work; it adds richness to the dough.
  • Nonstick Cooking Spray: or additional oil for brushing—this ensures your naan cooks perfectly without sticking.

Step-by-Step Instructions: How to Make Chickpea Flour Naan

Freshly cooked Chickpea Flour Naan displaying its appetizing appearance.

Now that we have our ingredients ready, let’s dive into the steps of making this delightful naan. Follow along, and don’t hesitate to let your heart guide you as you create!

  • Step 1: In a small bowl, combine the nondairy milk and lemon juice. Let it stand for about 5 minutes to curdle, creating a lovely buttermilk substitute.
  • Step 2: In a medium mixing bowl, whisk together the chickpea flour, psyllium husks, baking powder, salt, and baking soda. If you’re feeling adventurous, add the garlic powder now!
  • Step 3: Pour the curdled milk mixture and vegetable oil into the dry ingredients. Mix until a cohesive dough forms, scraping down the sides of the bowl as needed. Allow it to rest for 1 to 2 minutes to let the psyllium absorb the liquid.
  • Step 4: Divide the dough into three equal portions. Roll each portion into a ball and place it on a well-floured surface (with chickpea flour).
  • Step 5: Flatten one dough ball in the center of the floured board and sprinkle some chickpea flour on top. Using a rolling pin, roll it out into a wide oval shape, about 7-8 inches long and 4-5 inches wide. Lightly spritz or brush the top with nonstick cooking spray or oil.
  • Step 6: Heat a medium or large cast-iron skillet over medium-high heat. Once hot, add the rolled naan, sprayed side down. Cook for about 1 minute until the top bubbles and the bottom has golden-brown spots.
  • Step 7: Flip the naan with a spatula and cook the other side for an additional minute until it’s perfectly golden. Transfer it to a cooling rack or plate, and cover with a clean dishcloth to keep warm.
  • Step 8: Repeat the process with the remaining dough, and if you desire, sprinkle with fresh parsley or cilantro before serving.

Pro Tips for Perfect Chickpea Flour Naan

To ensure your naan turns out beautifully every time, here are some expert insights:

  • Rest is Key: Allowing the dough to rest after mixing helps the psyllium absorb moisture, making the dough more manageable.
  • Temperature Matters: Ensure your skillet is adequately heated before adding the naan; this will help achieve those lovely golden-brown spots.
  • Don’t Overwork the Dough: Mix just until combined. Overworking can create a tough texture.
  • Experiment with Flavors: Feel free to add spices like cumin or coriander to the dough for extra flavor.
  • Storing Leftovers: If you have extra naan, store it in an airtight container at room temperature for up to 2 days. Reheat in a skillet before serving for the best texture.
  • Use Parchment Paper: For easy cleanup, roll out the naan on parchment paper. This allows you to transfer it to the skillet without sticking.
  • Adjust Thickness: Roll your naan thinner for a crispier texture or thicker for a chewier bite—make it your own!
  • Perfect Pairings: Serve this naan with your favorite dips, such as hummus or tzatziki, for a delightful appetizer.

Troubleshooting Common Mistakes

Even the best cooks encounter challenges. Here are some common mistakes and how to troubleshoot them:

  • Too Sticky: If your dough is too sticky, it might need more chickpea flour. Add a little at a time until it’s manageable.
  • Not Puffing Up: Ensure your skillet is hot enough. If it’s too cool, the naan won’t puff.
  • Overcooked Naan: Keep an eye on the color; if it’s turning too dark, reduce the heat slightly.
  • Flavor Too Bland: Adjust the salt and spices to suit your taste. Remember, cooking is all about personal preference!

Delicious Variations of Chickpea Flour Naan

Once you’ve mastered the basic naan, here are some delightful variations to try:

  • Herbed Naan: Add fresh herbs like rosemary or thyme to the dough for an aromatic twist.
  • Spicy Naan: Mix in a pinch of cayenne pepper for a kick of heat!
  • Cheesy Naan: Incorporate nutritional yeast for a cheesy flavor without dairy—perfect for a vegan option.
  • Sweet Naan: Add a tablespoon of maple syrup or honey and some cinnamon for a sweet version, ideal for breakfast.

Storage and Make-Ahead Instructions

If you want to prepare ahead of time, here’s how to store your naan:

  • Room Temperature: Keep leftover naan in an airtight container at room temperature for up to 2 days. Reheat on a skillet or in the microwave.
  • Freezing: For longer storage, place cooked naan in a freezer-safe bag and freeze for up to a month. Reheat directly from the freezer on a skillet.
  • Make-Ahead Dough: You can prepare the dough ahead of time and store it in the fridge for up to 24 hours. Just roll and cook when you’re ready!

Frequently Asked Questions

As you embark on your naan-making journey, you might have some questions. Here are answers to the most common:

  • Can I use a different flour? While chickpea flour is best for this recipe, you can experiment with other gluten-free flours, but results may vary.
  • How do I know when the naan is done? Look for golden-brown spots on both sides and a slight puffing effect.
  • Can I make this recipe without oil? Yes, but the naan will be less rich. You can skip the oil if desired.
  • What can I serve with chickpea flour naan? This naan pairs beautifully with curries, dips, and salads—let your imagination guide you!
  • Is it possible to make this in an oven? Yes! Preheat your oven to 500°F (260°C), and bake the naan on a pizza stone or baking sheet.
  • Can I add toppings to the naan? Absolutely! Feel free to sprinkle seeds or herbs on top before cooking for added flavor.
  • How long will leftovers last? Stored properly, naan will last 2 days at room temperature or a month in the freezer.
  • Can I reheat naan? Yes! Reheat in a skillet over low heat or in the microwave wrapped in a damp paper towel.

Nutritional Tips and Dietary Adaptations

This Chickpea Flour Naan is not only delicious but also aligns with various dietary needs:

  • Protein-Packed: Chickpea flour provides a good source of plant-based protein, making it a filling option.
  • Rich in Fiber: The fiber content helps keep you full and supports digestive health.
  • Low in Fat: By using minimal oil, this naan remains a low-fat option, great for those watching their intake.
  • Allergy-Friendly: This recipe is naturally free from common allergens like gluten and dairy, making it suitable for many diets.

Essential Equipment for Making Chickpea Flour Naan

Having the right tools at hand can make all the difference in your cooking experience. Here’s what you’ll need:

  • Mixing Bowls: A medium mixing bowl for combining ingredients and a small bowl for curdling milk.
  • Rolling Pin: Essential for rolling out your naan to the perfect thickness.
  • Cast-Iron Skillet: Ideal for achieving those golden-brown spots and a lovely texture.
  • Spatula: Helps you flip the naan without damaging it.
  • Airtight Containers: For storing leftovers and keeping your naan fresh.

Serving Suggestions: Enjoying Your Chickpea Flour Naan

Finally, let’s talk about how to enjoy your homemade naan:

  • With Curries: Serve alongside your favorite curry for a delightful meal.
  • As a Wrap: Use naan as a wrap for sandwiches or as a base for flatbread pizzas.
  • With Dips: Pair with hummus, tzatziki, or your favorite bean dip for a tasty appetizer.
  • As a Breakfast Item: Top with avocado and a sprinkle of salt for a quick and healthy breakfast option.

Conclusion: A Recipe to Cherish and Share

As we wrap up this delicious journey of making Chickpea Flour Naan, I hope you feel inspired to bring this recipe into your home. Remember, cooking is about connection—creating memories around the table, sharing laughter, and enjoying the simple pleasures of life. Whether you make it for a cozy family dinner or a gathering of friends, this naan will surely bring warmth and smiles to your table. Thank you for joining me, and happy cooking!

Chickpea Flour Naan {vegan, grain-free, easy}

Prep Time 10 minutes
Cook Time 10 minutes
Total Time 20 minutes
Servings 3 pieces
Calories 150
This vegan, grain-free chickpea flour naan is quick to make and perfect for a flavorful, healthy bread option.

Ingredients

Dairy Substitutes

  • 0.5 cup nondairy milk (e.g., soy, cashew, almond milk)
  • 1.5 teaspoons lemon juice (or light vinegar)

Main Dry Ingredients

  • 1 cup chickpea flour
  • 3 tablespoons whole psyllium husks (see note for psyllium powder)
  • 1.5 teaspoons baking powder (certified GF, as needed)
  • 1/4 teaspoon salt
  • 1/8 teaspoon baking soda

Optional Flavor

  • 1.5 teaspoons garlic powder

Oils & Sprays

  • 2 teaspoons vegetable oil (any variety)
  • Nonstick cooking spray or additional oil for brushing

Instructions 

  • Combine nondairy milk and lemon juice; let stand 5 minutes.
  • Mix chickpea flour, psyllium, baking powder, salt, and optional garlic powder.
  • Add milk mixture and oil; stir into a cohesive dough. Let rest 1-2 minutes.
  • Divide dough into 3 balls, roll into ovals about 7-8 inches long and 4-5 inches wide. Lightly spray or brush with oil.
  • Cook each naan in a hot skillet 1 minute per side until golden and bubbling. Keep warm.
  • Serve warm, optionally garnished with herbs or salt.

Notes

Ensure psyllium husks are fully absorbed for best dough consistency.
Calories: 150kcal
Cost: $10
Course: bread
Cuisine: Vegan
Keyword: Chickpea Flour

Ah, the kitchen—a sacred space where memories are made, and flavors are shared. Today, we’re diving into a vibrant recipe that encapsulates the heart of community cooking: **Asian Slaw**. This delightful **Oriental cabbage salad** is not just a side dish; it’s a celebration of color, crunch, and heartwarming flavors that bring people together. With its fresh ingredients and zesty **Asian dressing**, this slaw is sure to become a beloved staple at your dining table. Let’s explore why you’ll love this recipe and how to make it a part of your culinary repertoire.

Why You’ll Love This Recipe

  • Vibrant Flavors: The combination of crunchy vegetables and a tangy dressing creates a flavor explosion that excites the palate.
  • Endless Versatility: This slaw can be served as a side, main dish, or even a refreshing topping for tacos and sandwiches, making it a versatile addition to any meal.
  • Quick and Easy: With minimal prep time, this recipe is perfect for busy weeknights or last-minute gatherings.
  • Healthful Ingredients: Packed with nutrient-rich veggies, this salad is not only delicious but also a great way to increase your vegetable intake.
  • Make-Ahead Friendly: This **cabbage salad** can be prepared in advance, allowing the flavors to meld beautifully, making it ideal for potlucks and parties.

Ingredients

To make this **Asian slaw**, you’ll need a blend of fresh vegetables and a zesty dressing. Here’s the detailed ingredient list:

  • 3 cups green cabbage, shredded: Adds a crisp base.
  • 3 cups red cabbage, shredded: Brings vibrant color and a slightly sweeter flavor.
  • 2 large carrots, julienned: For a touch of sweetness and extra crunch.
  • 3 cups bean sprouts: Provides a delightful crunch.
  • 3 green onions, sliced: Adds a mild onion flavor.
  • 1/2 cup coriander leaves: Infuses a fresh, citrusy note.
  • 1/2 cup mint leaves: For a refreshing twist.
  • 3 tbsp rice vinegar: The tangy base of our dressing.
  • 3 tbsp soy sauce: Adds depth and umami.
  • 2 tbsp lime juice: Brightens the entire dish.
  • 3 tbsp peanut oil: For a smooth, nutty flavor.
  • 1 1/2 tbsp sugar: Balances the acidity.
  • 2 garlic cloves, minced: Adds a savory depth.
  • 3 cups shredded cooked chicken (optional): For a heartier meal.

How to Make Asian Slaw

Now, let’s put these ingredients together to create our **crunchy Oriental cabbage salad**. Follow these simple steps:

  • Prepare the dressing: In a jar, combine rice vinegar, soy sauce, lime juice, peanut oil, sugar, and minced garlic. Shake well to blend.
  • Assemble the salad: In a large mixing bowl, combine the shredded green cabbage, red cabbage, julienned carrots, bean sprouts, sliced green onions, coriander leaves, and mint leaves.
  • Combine: Pour the dressing over the salad mixture and toss gently until everything is well coated.
  • Garnish: If desired, top with crispy fried shallots for added texture and flavor.
  • Serve: Enjoy immediately or refrigerate for a short while to let the flavors meld.

Pro Tips for Perfect Asian Slaw

Detail of crunchy Asian slaw salad with bright vegetables and herbs, captured from a side angle.
  • Fresh Ingredients: Always use fresh veggies for the best flavor and crunch. Opt for organic produce if possible.
  • Customize Your Dressing: Feel free to experiment with different oils or vinegars to find your perfect balance of flavors.
  • Chill Time: Allow the slaw to chill in the fridge for 20-30 minutes before serving to enhance the flavors.
  • Crunch Factor: Add ingredients like sliced almonds or sesame seeds for an extra crunch.
  • Mixing Technique: Use your hands to mix the salad gently to avoid bruising the veggies.
  • Meal Prep: Prepare the salad and dressing separately to maintain freshness if making ahead of time.
  • Serving Size: This recipe serves about 6-8 as a side, but feel free to scale it up for larger gatherings.
  • Garnish Ideas: Try topping with fresh herbs or a sprinkle of sesame seeds for an added touch.

Common Mistakes and Troubleshooting

Even the best cooks can make mistakes, so here are some tips to avoid common pitfalls:

  • Overdressing: Be cautious not to drown the salad in dressing; it’s better to start with less and add more to taste.
  • Using Stale Veggies: Always opt for the freshest vegetables; wilted cabbage will compromise the salad’s texture.
  • Neglecting to Chill: If you skip chilling the salad, you might miss out on the full flavor potential.
  • Skipping the Garnish: Don’t skip the garnish—crispy fried shallots or seeds add a delightful crunch and visual appeal.

Variations to Try

This **cabbage salad** is incredibly adaptable. Here are some variations to consider:

  • Spicy Kick: Add sliced jalapeños or a dash of sriracha to the dressing for some heat.
  • Crunchy Asian Noodle Slaw: Incorporate crispy rice noodles for extra texture and flavor.
  • Fruit Infusion: Toss in some diced mango or mandarin oranges for a sweet contrast.
  • Protein-Packed: Include edamame or chickpeas for added protein and a hearty twist.

Storage and Make-Ahead Instructions

This **Asian slaw** can be made ahead of time, making it perfect for meal prep or gatherings.

  • Storage: Keep the salad and dressing separate in airtight containers. The salad will stay fresh for up to 3 days in the fridge.
  • Make-Ahead: You can prepare the slaw a day in advance, but only add the dressing just before serving to maintain the crunch.

Comprehensive FAQ

Here are some frequently asked questions about this **Asian slaw**:

  • Can I use different types of cabbage? Absolutely! You can experiment with Napa or Savoy cabbage for different textures.
  • Is this salad gluten-free? Yes, as long as you use gluten-free soy sauce.
  • How can I make this vegan? Skip the chicken and use maple syrup instead of sugar for a vegan-friendly option.
  • What’s the best way to julienne carrots? Use a sharp knife or a julienne peeler for even, thin strips.
  • Can I freeze this slaw? It’s best enjoyed fresh, but if frozen, the texture will change significantly.
  • How do I make it less tangy? Reduce the amount of vinegar and lime juice in the dressing to suit your taste.
  • What can I serve with Asian slaw? This dish pairs wonderfully with grilled meats, tacos, or as a refreshing side to rich dishes.
  • Can I add nuts? Yes, chopped peanuts or almonds can add a lovely crunch and enhance the flavors.

Nutritional Tips and Dietary Adaptations

This **Oriental cabbage salad** is not only delicious but also nutritious. Here’s how to adapt it for various dietary needs:

  • Low-Carb: Skip the sugar and replace the carrots with shredded zucchini.
  • High-Protein: Add grilled shrimp or tofu for an extra boost of protein.
  • Low-Calorie: Use less peanut oil and add more vinegar for a lighter dressing.

Equipment Recommendations

To make your cooking experience smoother, here are some essential tools:

  • Sharp Chef’s Knife: For precise and easy cutting of vegetables.
  • Cutting Board: A sturdy board will make chopping safer and more efficient.
  • Mixing Bowl: A large bowl for combining all your ingredients easily.
  • Jar for Dressing: Using a jar makes it easy to mix and store your dressing.

Serving Suggestions

Now that you’ve made your **Asian slaw**, here are some ideas to serve it:

  • As a Side Dish: Pair it with grilled chicken or fish for a refreshing complement.
  • In Tacos: Use it as a topping for fish or chicken tacos for a flavorful crunch.
  • On Sandwiches: Add it to your sandwiches or wraps for a delightful twist.

Cooking is about sharing love and memories around the table. This **Asian slaw** is more than just a recipe; it’s a way to connect with one another over delicious food. So gather your loved ones, whip up this crunchy delight, and let the flavors spark joy in every bite. Enjoy!

Asian Slaw - crunchy Oriental Cabbage Salad with Asian Dressing

Prep Time 15 minutes
Total Time 15 minutes
Servings 4 servings
Calories 250
A vibrant and crunchy salad combining shredded cabbages, fresh herbs, and a tangy Asian dressing, perfect for a light and flavorful meal.

Ingredients

Vegetables

  • 3 cups green cabbage, shredded
  • 3 cups red cabbage, shredded
  • 2 large carrots, julienned
  • 3 cups bean sprouts
  • 3 green green onions, sliced
  • 1/2 cup coriander leaves
  • 1/2 cup mint leaves
  • 3 tbsp rice vinegar
  • 3 tbsp soy sauce
  • 2 tbsp lime juice
  • 3 tbsp peanut oil
  • 1 1/2 tbsp sugar
  • 2 cloves garlic, minced
  • 3 cups shredded cooked chicken (optional)

Instructions 

  • Combine rice vinegar, soy sauce, lime juice, peanut oil, sugar, and minced garlic in a jar. Shake well.
  • Mix shredded cabbages, carrots, bean sprouts, green onions, coriander, and mint in a large bowl.
  • Pour dressing over the salad and toss gently to coat.
  • Garnish with fried shallots if desired and serve immediately.

Notes

For extra flavor, add toasted sesame seeds or chopped peanuts.
Calories: 250kcal
Cost: $15
Course: Salad
Cuisine: Asian
Keyword: Cabbage, dressing, Herbs

Ah, the beauty of summer! The sun is shining, gardens are bursting with life, and the air is filled with the sweet scent of ripe tomatoes. This cherry tomato pasta recipe encapsulates all of that joy and warmth, inviting you to gather around the family table. In just under 30 minutes, you can whip up a dish that’s not only vibrant and flavorful but also steeped in love and nostalgia. Let’s dive into this culinary journey that promises to bring everyone together.

Why You’ll Love This Recipe

  • Quick and Easy: Perfect for a weeknight dinner, this dish can be prepared in less than 30 minutes, making it ideal for busy evenings.
  • Fresh Flavors: With juicy cherry tomatoes and fragrant basil, every bite bursts with the essence of summer, transporting you to sun-drenched afternoons.
  • Customizable: Whether you’re a meat lover or a vegetarian, this recipe is versatile enough to cater to all tastes by simply adding or swapping ingredients.
  • Heartwarming Memories: Cooking this dish is like wrapping yourself in a warm hug; it’s about sharing moments and stories around the table, just like I did with my grandmother.
  • Simple Ingredients: Utilizing everyday pantry staples means you can whip this up anytime without needing a last-minute grocery run.

Essential Ingredients

Let’s talk about the ingredients that make this cherry tomato pasta so special. Each component plays a vital role in creating the symphony of flavors that will dance on your palate.

  • Cherry Tomatoes: 1 lb of ripe cherry tomatoes brings sweetness and acidity, creating a delightful balance.
  • Pasta: 8 oz of spaghetti (or your pasta of choice) serves as the canvas for our vibrant sauce.
  • Garlic: 4 cloves of minced garlic add a rich, aromatic depth to the dish.
  • Extra Virgin Olive Oil: 3 tbsp for sautéing, giving a luscious mouthfeel and enhancing the flavors.
  • Fresh Basil: 1 cup of torn fresh basil leaves introduces a fragrant herbal note, elevating the entire dish.
  • Parmesan Cheese: ½ cup of grated Parmesan adds a savory, umami kick that perfectly complements the sweetness of the tomatoes.
  • Salt and Pepper: To taste, ensuring each flavor shines through.

How to Make Cherry Tomato Pasta

Cooking this dish is as simple as it is rewarding. Follow these steps to create a meal that’s sure to impress.

  • **Prepare the cherry tomatoes:** Wash and halve them to release their juices during cooking.
  • **Sauté the garlic:** In a large skillet, heat the olive oil over medium heat. Sauté the minced garlic for about 30 seconds until fragrant, but take care not to burn it.
  • **Simmer the tomatoes:** Add the halved cherry tomatoes to the skillet. Season with salt and pepper, then let them simmer until softened and juicy, about 5-7 minutes.
  • **Cook the pasta:** Meanwhile, bring a pot of salted water to a boil and cook your pasta according to package instructions until al dente. Remember to reserve 1 cup of pasta water before draining.
  • **Combine everything:** Add the cooked pasta to the skillet with the tomato mixture, pouring in reserved pasta water as needed to create a sauce that coats the pasta beautifully.
  • **Finish with basil and cheese:** Fold in the torn basil leaves and top with grated Parmesan cheese before serving. Enjoy the harmony of flavors!

Pro Tips for Perfect Cherry Tomato Pasta

Juicy cherry tomato and pasta meal with a sprinkle of cheese on top.

To ensure your dish turns out perfectly every time, keep these expert insights in mind:

  • Quality matters: Use the freshest cherry tomatoes you can find—great quality makes a world of difference.
  • Don’t skip the pasta water: This starchy water helps the sauce cling to the pasta, creating a luscious texture.
  • Customize your herbs: Feel free to mix in other herbs like parsley or oregano for a new twist on flavor.
  • Don’t overcook the garlic: It should be fragrant and light golden, not browned, to avoid bitterness.
  • Resting time: Let your pasta sit for a minute before serving. This allows the flavors to meld beautifully.
  • Experiment with cheese: Try a sprinkle of crumbled feta or goat cheese for a delightful tang.
  • Make it spicy: Add a pinch of red pepper flakes for a bit of heat if you enjoy a spicy kick.
  • Garnish generously: Finish with extra basil and cheese for a beautiful presentation.

Common Mistakes and Troubleshooting

Even the best chefs make mistakes. Here’s how to avoid common pitfalls:

  • Overcooked pasta: Keep an eye on your timing. Al dente pasta has the best texture and holds up well in the sauce.
  • Too much salt: Season gradually and taste as you go to prevent over-salting.
  • Not enough sauce: If your pasta seems dry, add more reserved pasta water until you achieve the desired consistency.
  • Burnt garlic: If garlic turns too brown, start over with fresh garlic to avoid a bitter taste.

Variations to Try

Want to switch things up? Here are some delightful variations:

  • Cherry Tomato and Spinach: Toss in a couple of cups of fresh spinach at the end for added nutrition and color.
  • Caprese Style: Add fresh mozzarella balls shortly before serving for a creamy twist.
  • Protein-Packed: Include grilled chicken or shrimp to make it a heartier meal.
  • Vegan Option: Omit the cheese and use nutritional yeast for a cheesy flavor without the dairy.

Storage and Make-Ahead Instructions

This dish is perfect for meal prep! Here’s how to store and reheat:

  • Refrigeration: Store leftovers in an airtight container in the fridge for up to 3 days.
  • Freezing: You can freeze the pasta (without cheese) for up to 2 months. Reheat gently when ready to serve.
  • Reheating: Warm on the stove with a splash of olive oil or water to restore moisture.

Comprehensive FAQ

Here are some frequently asked questions that you might find helpful:

  • Can I use other types of pasta? Absolutely! Any pasta can work here, just adjust cooking times accordingly.
  • What if I can’t find fresh basil? Dried basil can be a substitute; just use about one-third of the amount since dried herbs are more concentrated.
  • Can I make this dish gluten-free? Yes! Just use gluten-free pasta, and you’re good to go.
  • How can I add more protein? Consider grilled chicken, shrimp, or even chickpeas for a vegetarian option.
  • What’s the best way to serve this pasta? Serve it warm with a sprinkle of extra cheese and fresh basil on top.
  • Can I make it ahead of time? Yes, you can prepare the sauce in advance and cook the pasta just before serving.

  • How do I prevent the pasta from sticking together? Make sure to toss the pasta with sauce immediately after draining and add a drizzle of olive oil.
  • Is this dish kid-friendly? Absolutely! The flavors are mild and appealing to children, making it an excellent family meal.

Nutrition Tips and Dietary Adaptations

This cherry tomato pasta is not only delicious but also nourishing. Here are some tips for making it even healthier:

  • Whole Grain Pasta: Swap regular pasta for whole grain or legume-based pasta for added fiber and protein.
  • More Vegetables: Incorporate seasonal vegetables like zucchini or bell peppers to boost nutrients.
  • Low-Fat Cheese: Use a reduced-fat cheese or skip it altogether to lower the calorie count.

Equipment Recommendations

Here are a few kitchen tools that will make your cooking experience smoother:

  • Large Skillet: A good-quality skillet is essential for sautéing and simmering.
  • Pot for Pasta: A large pot is key for boiling pasta evenly.
  • Colander: For draining pasta, a sturdy colander is a must.
  • Wooden Spoon: Perfect for stirring without scratching your cookware.

Serving Suggestions

When it comes to serving your cherry tomato pasta, don’t hold back! Here are some ideas:

  • Pair with Garlic Bread: A side of warm garlic bread complements the meal beautifully.
  • Fresh Salad: Serve with a crisp green salad dressed with olive oil and vinegar to balance the rich pasta.
  • Wine Pairing: A chilled white wine, like Sauvignon Blanc, enhances the flavors of this dish.

In conclusion, this cherry tomato pasta is more than just a recipe; it’s an invitation to share love and create memories around the table. Whether you’re cooking for family, friends, or just for yourself, let this dish remind you of the beauty of simple ingredients and the joy of togetherness. So roll up your sleeves, gather your loved ones, and let’s make some magic in the kitchen!

Cherry Tomato Pasta

Prep Time 10 minutes
Cook Time 15 minutes
Total Time 25 minutes
Servings 4 servings
Calories 400
A quick and flavorful pasta dish featuring fresh cherry tomatoes and basil, perfect for a light meal.

Ingredients

Cherry Tomatoes

  • 1 lb cherry tomatoes (washed and halved)
  • 8 oz spaghetti (or pasta of choice)
  • 4 cloves garlic (minced)
  • 3 tbsp extra virgin olive oil
  • 1 cup fresh basil leaves (torn)
  • ½ cup grated Parmesan cheese
  • to taste Salt and pepper

Instructions 

  • Wash and halve the cherry tomatoes.
  • Heat olive oil in a skillet, sauté garlic until fragrant.
  • Add tomatoes, season with salt and pepper, simmer until soft.
  • Cook pasta until al dente, reserve 1 cup pasta water.
  • Mix pasta with tomato sauce, add reserved water as needed.
  • Stir in basil, top with Parmesan, serve.

Notes

Use fresh basil for the best flavor and adjust salt to taste.
Calories: 400kcal
Cost: $12
Course: Main Course
Cuisine: Italian
Keyword: Pasta

Discover the Joy of Air Fryer Chicken Thighs

Welcome to a culinary journey that will fill your kitchen with warmth and nostalgia! Today, we’re diving into a recipe that embodies love, family, and cherished memories—Crispy Air Fryer Chicken Thighs. With the marvelous air fryer, you can bring that extra crispy texture right to your dinner table, reminiscent of those delightful meals enjoyed with loved ones. In this definitive guide, we’ll explore everything from essential ingredients to expert tips, ensuring your chicken thighs are nothing short of perfection.

Why You’ll Love This Recipe

Air Fryer Chicken Thighs are not just delicious; they come with a multitude of benefits that make them a favorite in countless kitchens:

  • Extra crispy skin: Achieve that perfectly crispy skin without the excess oil.
  • Quick cooking time: Get dinner on the table in under 30 minutes, perfect for busy weeknights.
  • Healthy alternative: Enjoy the rich flavors of fried chicken with significantly less fat.
  • Simple clean-up: The air fryer minimizes mess, making post-dinner clean-up a breeze.
  • Family-friendly recipe: Pleasing to palates of all ages, this dish is sure to be a hit at your dinner table.

Essential Ingredients for Air Fryer Chicken Thighs

Let’s take a closer look at what you’ll need to create these crispy delights. Each ingredient plays a vital role in achieving the perfect flavor and texture:

  • 4 Bone-in, skin-on chicken thighs: The star of the show, providing juicy meat and flavorful skin.
  • 1/2 teaspoon Kosher salt: Essential for enhancing flavor.
  • 1 teaspoon Smoked paprika: Adds a smoky depth that elevates the dish.
  • 1 teaspoon Garlic powder: For that irresistible aroma and taste.
  • 1/2 teaspoon Oregano: A sprinkle of herbs brings earthiness to the recipe.
  • 1/2 teaspoon Onion powder: Complements the garlic for a robust flavor profile.

Step-by-Step Instructions for Perfect Air Fryer Chicken Thighs

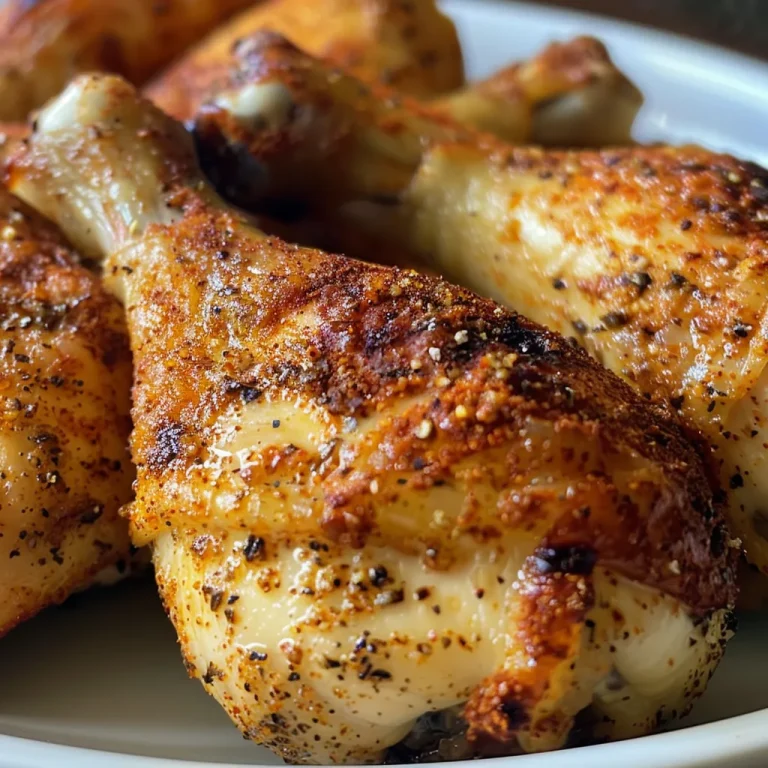
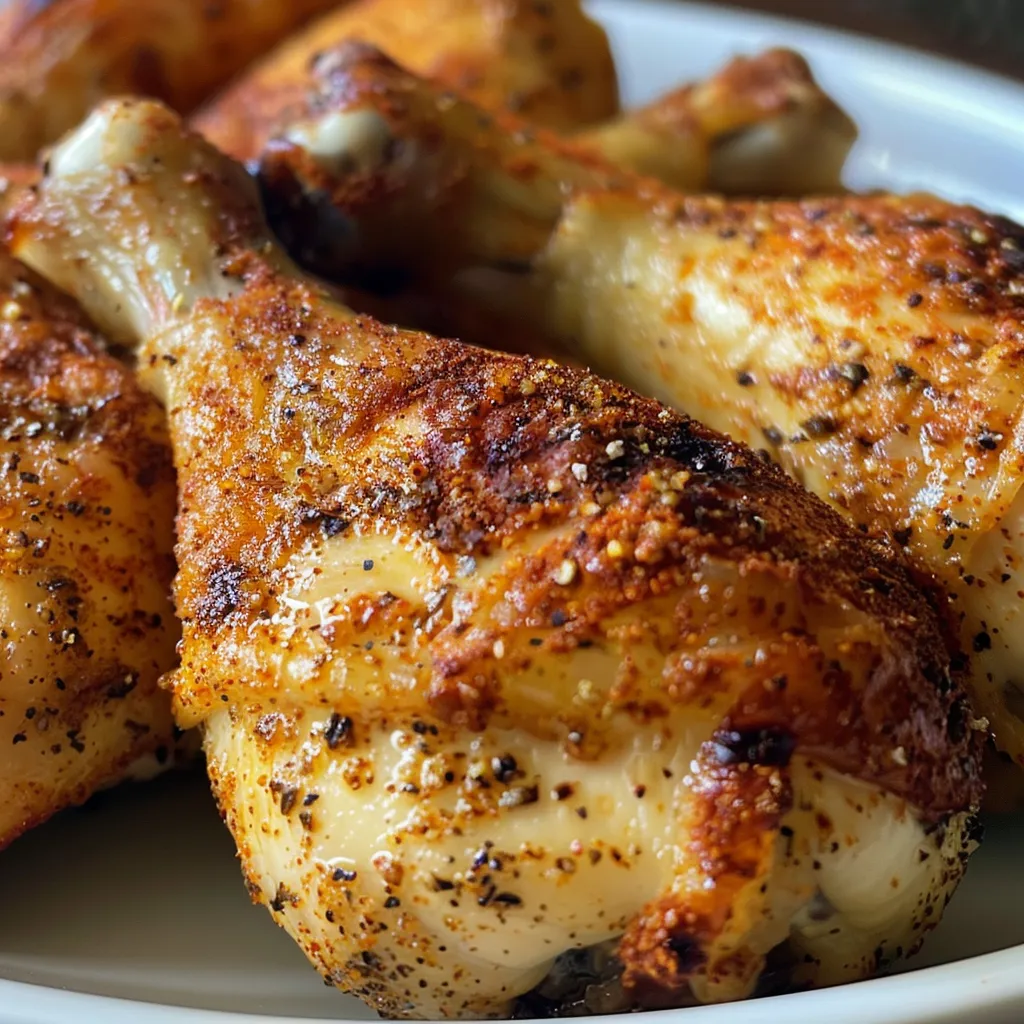
Delicious air fryer chicken thighs with a crunchy texture, captured in vivid detail.

Now that we have our ingredients ready, let’s walk through the simple steps to create these mouthwatering chicken thighs:

  1. Preheat your air fryer to 380°F for at least 5 minutes. This ensures even cooking.
  2. Spray with cooking spray: Optional, but helps achieve that golden crispiness.
  3. Prepare the chicken: Place the chicken thighs in a large zip-top bag or a bowl. Add the kosher salt, smoked paprika, garlic powder, oregano, and onion powder. Shake until well coated.
  4. Cook the chicken: Place chicken thighs skin-side down in the air fryer basket and cook for 12 minutes.
  5. Flip and finish: Turn the thighs skin-side up and cook for an additional 10 to 15 minutes. For extra crispiness, cook in 4-minute increments until your desired crispness is achieved.
  6. Check doneness: Ensure an internal temperature of 165°F is reached using a meat thermometer.
  7. Serve and enjoy: Let the chicken rest for a couple of minutes before serving to lock in the juices.

Expert Tips for Achieving Crispy Chicken Thighs

Here are some pro tips to ensure your air fryer chicken thighs turn out perfectly every time:

  • Pat the skin dry: Moisture is the enemy of crispiness. Use paper towels to thoroughly dry the chicken skin before seasoning.
  • Don’t overcrowd the basket: Give each piece room to breathe. Overcrowding can lead to steaming rather than frying.
  • Use a meat thermometer: This tool is essential for ensuring your chicken is cooked perfectly without drying out.
  • Experiment with spices: Feel free to adjust the seasoning to your taste or try different spice blends for a unique flavor.
  • Let the chicken rest: Allowing the chicken to sit for a few minutes after cooking helps redistribute juices, making every bite juicy.
  • Try different marinades: For added flavor, marinate your chicken thighs overnight in your favorite sauces.
  • Use skin-on thighs: Skin-on chicken thighs are key for achieving that crispy texture.
  • Check air fryer capacity: Each air fryer is different; adjust cooking times based on your specific model.

Common Mistakes and Troubleshooting

Even the most seasoned cooks can encounter challenges. Here are some common mistakes and how to troubleshoot them:

  • Not preheating the air fryer: This can lead to uneven cooking. Always preheat for optimal results.
  • Overcooking: Keep an eye on the time and use a meat thermometer to avoid drying out the chicken.
  • Under-seasoning: Don’t shy away from seasoning! Properly seasoned chicken is key to deliciousness.
  • Skipping the drying process: If the skin is wet, it won’t crisp up. Always pat it dry before cooking.

Delicious Variations of Air Fryer Chicken Thighs

If you’re looking to mix things up, here are some delightful variations you can try:

  • Buffalo Chicken Thighs: Toss cooked chicken in buffalo sauce for a spicy kick.
  • Honey Garlic Chicken Thighs: Glaze with a mixture of honey and garlic for a sweet and savory dish.
  • Lemon Herb Chicken Thighs: Marinate in lemon juice, garlic, and fresh herbs for a zesty flavor.
  • BBQ Chicken Thighs: Brush with your favorite BBQ sauce during the last few minutes of cooking for a smoky sweetness.

Storage and Make-Ahead Instructions

Planning ahead? Here’s how to store and prepare your chicken thighs in advance:

  • Refrigerate leftovers: Store cooked chicken thighs in an airtight container for up to 3 days.
  • Reheat in the air fryer: For the best texture, reheat at 350°F for 5-7 minutes to regain crispiness.
  • Make ahead: You can season chicken thighs a day in advance. Just keep them covered in the refrigerator until you’re ready to cook.

Comprehensive FAQ for Air Fryer Chicken Thighs

Here are some frequently asked questions that might help you navigate your cooking journey:

  • Can I use boneless chicken thighs? Yes, boneless thighs will work, but adjust cooking time as they may cook faster.
  • Can I cook frozen chicken thighs in the air fryer? Absolutely! Just increase the cooking time by about 5-10 minutes.
  • What should the internal temperature be? Chicken should reach an internal temperature of 165°F for safe eating.
  • Can I cook other parts of the chicken? Yes, the air fryer works well for chicken breasts, wings, and drumsticks.
  • What is the best way to season chicken thighs? A mix of herbs and spices to suit your taste is ideal; don’t be afraid to get creative!
  • Can I use olive oil instead of cooking spray? Definitely! A light brushing of olive oil can add flavor and help crisp the skin.
  • How do I know when the chicken is done? Use a meat thermometer to check the thickest part of the thigh.
  • What sides pair well with air fryer chicken thighs? Consider serving with mashed potatoes, coleslaw, or a fresh garden salad for a complete meal.

Nutritional Tips and Dietary Adaptations

This recipe is naturally adaptable to various dietary needs:

  • Low-carb option: Enjoy the chicken thighs as is or pair with low-carb vegetables for a keto-friendly meal.
  • Gluten-free: This recipe is gluten-free, making it suitable for those with gluten sensitivities.
  • Low-sodium adaptation: Reduce the amount of salt or use a salt substitute for a healthier option.

Equipment Recommendations

To make the most of your air fryer chicken thighs, consider these essential tools:

  • Air Fryer: A reliable air fryer is key; choose one with a good capacity for family meals.
  • Meat Thermometer: An instant-read thermometer ensures perfectly cooked chicken every time.
  • Mixing Bowl: For seasoning the chicken, a large bowl or zip-top bag works wonders.

Serving Suggestions for Air Fryer Chicken Thighs

Complete your meal with these serving ideas:

  • Fresh Salad: A crisp garden salad adds freshness and balance to the richness of the chicken.
  • Roasted Vegetables: Pair with seasonal roasted veggies for a wholesome plate.
  • Rice or Quinoa: Serve over rice or quinoa to soak up the juicy flavors.
  • Homemade Sauce: Drizzle with homemade ranch or garlic sauce for an extra layer of flavor.

As we gather around the table, let these Crispy Air Fryer Chicken Thighs be a reminder of the love and memories we create through cooking. With each bite, savor the stories shared and the connections made in the heart of the home. Happy cooking, friends!

Air Fryer Chicken Thighs Extra Crispy

Prep Time 10 minutes
Cook Time 25 minutes
Total Time 35 minutes
Servings 4 pieces
Calories 250
Enjoy perfectly crispy and juicy chicken thighs cooked effortlessly in your air fryer with this simple recipe.

Ingredients

Main

  • 4 pieces Bone in, skin on chicken thighs (trimmed of excess fat and skin)
  • 0.5 teaspoon Kosher salt
  • 1 teaspoon Smoked paprika
  • 1 teaspoon Garlic powder
  • 0.5 teaspoon Oregano
  • 0.5 teaspoon Onion powder

Instructions 

  • Preheat air fryer to 380°F (193°C).
  • Spray with cooking spray, if desired. Season chicken thighs with spices in a bag or bowl.
  • Place thighs skin side down in the air fryer and cook for 12 minutes.
  • Flip and cook skin side up for 10-15 minutes until crispy and internal temp reaches 165°F (74°C).
  • Serve hot once cooked through and crispy.

Notes

Ensure chicken reaches an internal temperature of 165°F for safety.
Calories: 250kcal
Cost: $15
Course: Main Course
Cuisine: American
Keyword: chicken thighs

Gathering Around: The Heartwarming Experience of Making Chickpea Flour Naan

Whether you’re reminiscing about family meals or discovering new culinary delights, homemade chickpea flour naan brings a comforting warmth to your dining table. This easy vegan flatbread recipe invites you to create something truly special in just 10 minutes, making it perfect for busy weeknights or cozy gatherings. With its nutty flavor and fluffy texture, this naan is not just food; it’s an expression of love and connection, a way to nurture relationships while savoring every bite.

Why You’ll Love This Recipe

Chickpea flour naan stands out for many reasons, and here are some compelling benefits that will make you adore this recipe:

  • Quick and Easy: Ready in just 10 minutes, this naan is perfect for those nights when you need something delicious but don’t have time for elaborate cooking.
  • Nutritious Ingredients: Made primarily with chickpea flour, this naan is packed with protein and fiber, making it a healthier alternative to traditional flatbreads.
  • Gluten-Free: Suitable for gluten-sensitive individuals, this chickpea flour naan allows everyone to enjoy warm bread without the worry of gluten.
  • Versatile Pairing: This naan can be served with a variety of dishes, from rich curries to light salads, making it a fantastic addition to any meal.
  • Customizable: With simple variations, you can easily adapt the flavor and texture to suit your taste preferences.

Chickpea Flour Naan Ingredients

Let’s dive into the essential ingredients that make this naan a delightful culinary experience:

  • 1 cup Chickpea Flour: The star of the show, providing a nutty flavor and essential structure for your naan.
  • ¾ cup Nondairy Milk: Almond or cashew milk are great alternatives, adding moisture and softness.
  • 1 tbsp Lemon Juice: Acts as a curdling agent for the milk, creating a buttermilk effect, which enhances the texture.
  • 2 tbsp Whole Psyllium Husks: Helps bind the dough and retain moisture, ensuring a fluffy naan.
  • 1 tbsp Baking Powder: Ensures lightness in texture without the need for yeast.
  • ½ tsp Baking Soda: Works alongside baking powder for a fluffy naan.
  • ½ tsp Salt: Enhances the overall flavor beautifully.
  • 1 tsp Garlic Powder: For a flavorful twist that complements the nuttiness of chickpea flour.
  • 1 tbsp Vegetable Oil: Any neutral oil works well to keep the naan moist.
  • 1 tbsp Nonstick Cooking Spray: To keep your skillet non-stick, ensuring easy cooking.

Step-by-Step Instructions for Chickpea Flour Naan

Close-up image of a warm, vegan Chickpea Flour Naan resting on a wooden surface.

Making chickpea flour naan is a straightforward process. Here’s how to do it:

  1. In a large mixing bowl, combine the chickpea flour, baking powder, baking soda, salt, and garlic powder.
  2. Add the nondairy milk, lemon juice, and vegetable oil to the dry ingredients. Mix until a smooth dough forms.
  3. Incorporate the psyllium husks, which will help the dough bind and retain moisture.
  4. Knead the dough gently for a minute, then let it rest for 5 minutes.
  5. Divide the dough into equal portions (about 4-6 pieces). Roll each piece into a ball.
  6. On a lightly floured surface, flatten each ball into a round shape about ¼ inch thick.
  7. Heat a dry skillet over medium-high heat. Once hot, place the naan in the skillet.
  8. Cook for 1-2 minutes on each side, or until golden brown and puffed up. You may apply a light spray of nonstick cooking spray if desired.
  9. Remove from skillet and keep warm under a towel until ready to serve.

Common Mistakes and Troubleshooting

Even the best cooks can experience hiccups. Here are some common mistakes and how to avoid them:

  • Too Dry Dough: If your dough feels dry, add a little more nondairy milk until you reach the right consistency.
  • Not Enough Rising: Ensure your baking powder is fresh for the best rising action.
  • Overcooking: Keep an eye on the naan while cooking to prevent burning. Each stove varies in heat.
  • Sticky Dough: If the dough is too sticky, sprinkle a little more chickpea flour while kneading.

Chickpea Flour Naan Variations

Here are some delightful variations to try, each adding its unique twist to your chickpea flour naan:

  • Herbed Naan: Add fresh herbs like cilantro or parsley to the dough for an aromatic twist.
  • Spicy Naan: Mix in chili flakes or diced jalapeños for a spicy kick that pairs excellently with curries.
  • Cheesy Naan: Incorporate nutritional yeast or dairy-free cheese into the dough for a cheesy flavor.
  • Caramelized Onion Naan: Top the naan with caramelized onions before cooking for a sweet, savory flavor.

Storage and Make-Ahead Instructions

To keep your chickpea flour naan fresh, consider these storage and make-ahead tips:

  • Airtight Container: Store leftover naan in an airtight container at room temperature for up to 2 days.
  • Freezing: For longer storage, wrap naan in plastic wrap and place in an airtight container or freezer bag. Freeze for up to 3 months.
  • Reheating: To reheat, simply warm in a skillet over medium heat until warmed through.
  • Make-Ahead: You can prepare the dough a day in advance. Just wrap it tightly in plastic wrap and refrigerate until ready to use.

Nutrition Tips and Dietary Adaptations

Chickpea flour is rich in nutrients. Here’s what you should know:

  • High in Protein: Chickpea flour is an excellent source of plant-based protein, helping keep you full and satisfied.
  • Rich in Fiber: This flour promotes digestive health, making it a beneficial addition to your diet.
  • Low Glycemic Index: Ideal for those managing blood sugar levels, chickpea flour naan won’t spike your glucose levels.
  • Vegan-Friendly: All ingredients are plant-based, perfect for a vegan or vegetarian diet.

Equipment Recommendations

To make your cooking experience seamless, here are some equipment suggestions:

  • Nonstick Skillet: A good quality nonstick skillet prevents the naan from sticking and makes for easy flipping.
  • Mixing Bowls: Use large mixing bowls for combining ingredients without mess.
  • Rolling Pin: A rolling pin helps flatten the dough evenly for consistent cooking.
  • Airtight Containers: For storage, these will keep your naan fresh and delicious.

Serving Suggestions

Chickpea flour naan is delicious on its own, but elevating your meal is easy with these serving suggestions:

  • With Dips: Serve with hummus, baba ganoush, or tzatziki for a delightful appetizer.
  • Accompaniment to Curries: Perfect alongside your favorite curries or stews, soaking up every flavorful bite.
  • Wraps: Use naan as a base for wraps filled with grilled vegetables and your choice of protein.
  • Salads: Serve alongside fresh salads for a wholesome meal that balances textures and flavors.

Chickpea Flour Naan Recipe FAQs

Here are some frequently asked questions about making chickpea flour naan:

  • Can I use regular flour instead of chickpea flour? While you can, the flavor and texture will differ. Chickpea flour gives a unique nutty taste and gluten-free option.
  • How do I store leftover naan? Store in an airtight container at room temperature for up to 2 days or freeze for longer storage.
  • Can I add spices to the dough? Absolutely! Feel free to experiment with spices like cumin, coriander, or even turmeric for added flavor.
  • Is this naan suitable for meal prep? Yes, it can be made ahead and stored, making it a great option for meal prep.
  • What can I serve with chickpea flour naan? It pairs well with curries, soups, salads, or can be enjoyed on its own with dips.
  • Why is my naan not puffing up? Ensure the skillet is hot enough and the dough is not too thick. Puffing occurs with the right heat.
  • Can I make this naan without psyllium husks? Psyllium husks help with binding, but you can substitute with ground flaxseeds mixed with water for a similar effect.
  • How many servings does this recipe make? This recipe yields about 4-6 servings, depending on how large you roll the naan.

In conclusion, making chickpea flour naan is not just a quick recipe; it’s a way to connect with those you love and share warmth through food. Each bite carries the essence of home and celebration, reminding us that the kitchen is where memories are made. So gather your loved ones, roll up your sleeves, and let’s create a culinary experience filled with love and laughter. Enjoy your chickpea flour naan, and may it bring you as much joy as it does to those you share it with!

Chickpea Flour Naan – Easy Vegan Flatbread in 10 Minutes

Prep Time 5 minutes
Cook Time 5 minutes
Total Time 10 minutes
Servings 4 pieces
Calories 150
Enjoy quick and delicious vegan naan made with chickpea flour, perfect for a healthy snack or meal accompaniment.

Ingredients

Dough

  • 1 cup Chickpea Flour (The star of the show, providing a nutty flavor and essential structure.)
  • 0.75 cup Nondairy Milk (Almond or cashew milk are great alternatives.)
  • 1 tbsp Lemon Juice (Acts as a curdling agent for the milk.)
  • 2 tbsp Whole Psyllium Husks (Helps bind the dough and retain moisture.)
  • 1 tbsp Baking Powder (Ensures lightness in texture without yeast.)
  • ½ tsp Baking Soda (Works alongside baking powder for a fluffy naan.)
  • ½ tsp Salt (Enhances the overall flavor beautifully.)
  • 1 tsp Garlic Powder (For a flavorful twist.)
  • 1 tbsp Vegetable Oil (Any neutral oil works well.)
  • 1 tbsp Nonstick Cooking Spray (To keep your skillet non-stick.)

Instructions 

  • Mix chickpea flour, baking powder, baking soda, salt, and garlic powder in a bowl.
  • Add lemon juice to nondairy milk and let sit for a minute, then combine with dry ingredients along with psyllium husks and oil to form a dough.
  • Divide dough into 4 balls and roll each into a flat circle.
  • Heat a skillet with nonstick spray over medium heat, then cook each naan for 2-3 minutes per side until golden.

Notes

Ensure the skillet is hot enough before adding the naan for best results.
Calories: 150kcal
Cost: $8
Course: Flatbread, Snack
Cuisine: Vegan
Keyword: Chickpea Flour

Welcome to a Taste of Home: Air Fryer Chicken Thighs

There’s something incredibly comforting about the aroma of chicken thighs cooking in the kitchen, isn’t there? This air fryer chicken thighs recipe is not just a meal; it’s a gateway to cherished memories and shared moments. With the air fryer, you can achieve that crispy, golden skin and juicy meat without standing over the stove for hours. Let’s dive into this easy weeknight dinner that’s perfect for sharing with loved ones around the table.

Why You’ll Love This Recipe

This recipe is more than just a dish; it’s a blend of convenience, flavor, and nostalgia. Here are a few reasons why you’ll love making these amazing air fryer chicken thighs:

  • Quick Cooking Time: With the air fryer, these chicken thighs cook in about 18 minutes, leaving you more time to enjoy with your family.
  • Minimal Ingredients, Maximum Flavor: Using just a handful of ingredients, you’ll create a dish that bursts with flavor, reminding you of those family meals.
  • Healthy Alternative: Enjoy crispy skin and juicy meat while using less oil than traditional frying methods.
  • Easy Cleanup: Line your air fryer basket with parchment paper for a no-fuss cleanup, so you can focus on what truly matters—sharing this meal.
  • Versatile Dish: These chicken thighs are perfect for any occasion, whether it’s a casual dinner or a festive gathering.

Ingredients for Air Fryer Chicken Thighs

Here’s what you’ll need to create these delectable air fryer chicken thighs:

  • 4 chicken thighs (bone-in): The bone-in variety adds flavor and moisture.
  • 2 tbsp paprika: This spice gives the chicken its beautiful color and smoky flavor.
  • 1 tsp Italian seasoning: A blend of herbs that brings warmth and familiarity.
  • 1 tsp garlic powder: For that irresistible aroma and taste.
  • Spray oil: Optional, but helps the spices adhere and creates a nice crispy layer.

Step-by-Step Instructions: How to Make Air Fryer Chicken Thighs

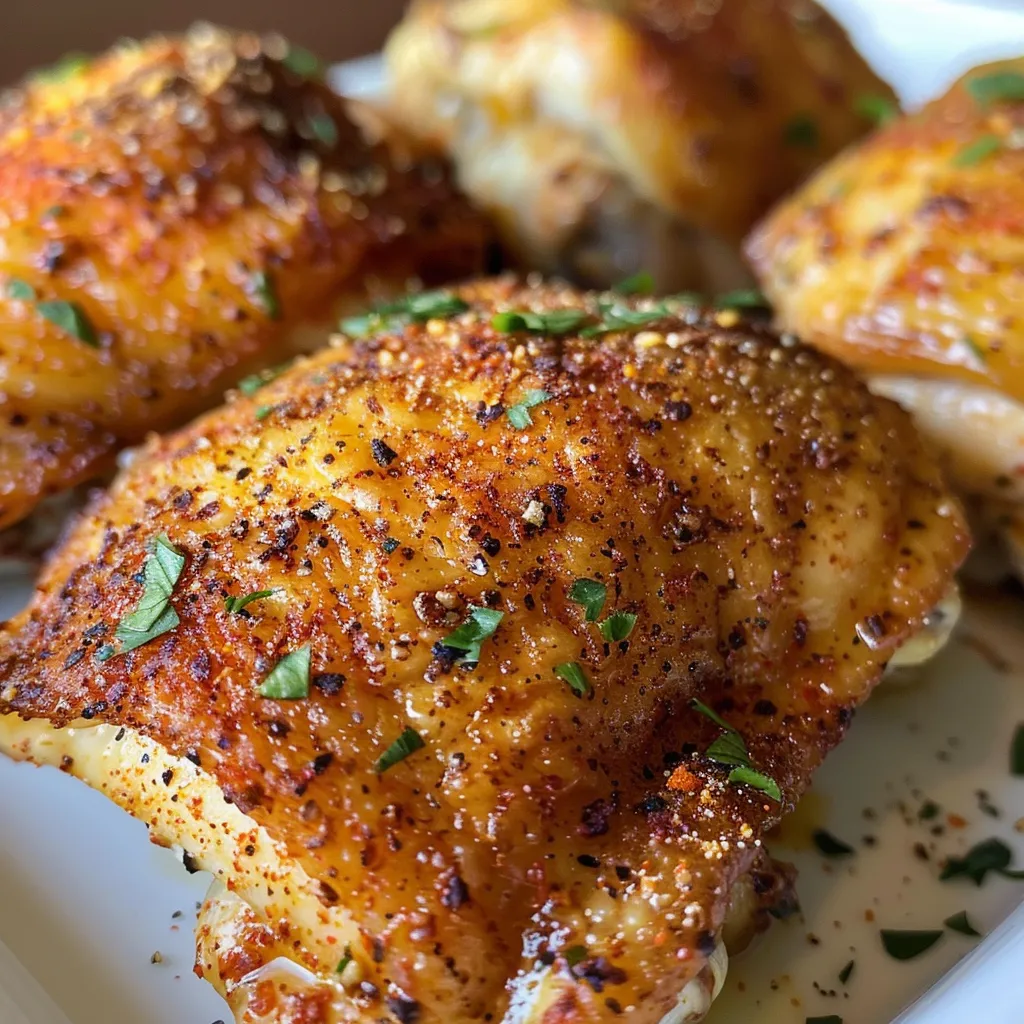
Deliciously seasoned chicken thighs displayed attractively.

Follow these simple steps to create your air fryer chicken thighs:

  1. Trim chicken thighs as needed. Wash and pat dry to ensure the skin gets crispy.
  2. In a small bowl, mix the paprika, Italian seasoning, and garlic powder. Combine well to create a spice blend.
  3. Optionally, spray the chicken thighs with oil to help the spices stick better. Pat the spice mixture onto both sides of the chicken thighs.
  4. Place the seasoned chicken thighs in the air fryer basket. For easy cleanup, line the basket with parchment paper or aluminum foil.
  5. Cook the chicken thighs for about 18 minutes at 400°F (200°C), flipping them halfway through for even cooking.

Pro Tips for Perfect Air Fryer Chicken Thighs

To take your cooking to the next level, consider these expert insights:

  • Preheat Your Air Fryer: Just like an oven, preheating your air fryer ensures even cooking and crispy skin.
  • Use a Meat Thermometer: For perfectly cooked chicken, ensure the internal temperature reaches 165°F (75°C).
  • Experiment with Spices: Don’t hesitate to tweak the spice blend to suit your taste. A little cayenne can add a nice kick!
  • Let It Rest: Allow the chicken to rest for a few minutes post-cooking to keep the juices locked in.
  • Batch Cooking: If cooking for a crowd, don’t overcrowd the basket. Cook in batches for even crispiness.
  • Leftover Love: These chicken thighs are just as delicious the next day. Enjoy them cold in salads or reheated as a quick meal.
  • Try Different Cuts: While this recipe is for thighs, you can use drumsticks or wings, adjusting the cooking time accordingly.
  • Garnish Wisely: A sprinkle of fresh herbs right before serving can elevate the presentation and flavor!

Common Mistakes and Troubleshooting

Even the best of us make mistakes in the kitchen. Here are some common pitfalls and how to avoid them:

  • Too Much Spice: Be cautious with the spice blend. Start with less and add more if needed.
  • Overcrowding the Basket: This can lead to uneven cooking. Always leave space for air circulation.
  • Poorly Patting Dry: Moisture on the chicken skin will prevent crispiness. Ensure it’s dry before seasoning.
  • Ignoring Cooking Time: Always check the chicken a few minutes before the suggested cooking time to avoid overcooking.

Variations: Put Your Own Spin on It!

Once you master the basics, try these variations to keep things exciting:

  • Honey Garlic Chicken Thighs: Drizzle with honey and add minced garlic to the spice mix for a sweet twist.
  • Spicy Buffalo Chicken Thighs: Toss cooked chicken in buffalo sauce for a fiery kick.
  • Lemon Herb Chicken Thighs: Add lemon zest and fresh herbs for a refreshing flavor profile.
  • BBQ Chicken Thighs: Brush with your favorite barbecue sauce in the last few minutes of cooking for a smoky glaze.

Storage and Make-Ahead Instructions

If you want to prepare in advance or store leftovers, here’s how:

  • Storing Leftovers: Allow the chicken to cool completely before placing in an airtight container. It will last in the fridge for up to 3 days.
  • Freezing: For longer storage, freeze cooked chicken thighs for up to 3 months. Thaw in the refrigerator before reheating.
  • Make-Ahead Options: You can season the chicken thighs a day before and store them in the fridge. Just pop them in the air fryer when you’re ready to cook!

Comprehensive FAQ

Here are some frequently asked questions about air fryer chicken thighs:

  • Can I use boneless chicken thighs? Yes, but reduce the cooking time to about 15 minutes.
  • What can I serve with air fryer chicken thighs? Serve with a fresh salad, roasted vegetables, or mashed potatoes for a complete meal.
  • Will the chicken skin be crispy? Absolutely! The air fryer circulates hot air, creating that perfect crispy skin.
  • Can I marinate the chicken thighs? Yes, marinating them for a few hours will enhance the flavor. Just make sure to pat them dry before seasoning.
  • What if my chicken isn’t cooking evenly? Ensure you’re not overcrowding the basket and that you’re flipping the chicken halfway through cooking.
  • Is it necessary to use oil? While it’s optional, a light spray of oil helps to achieve that crispy texture.
  • What other seasonings can I use? Feel free to experiment with Cajun seasoning, lemon pepper, or even a sweet and spicy rub.
  • How do I know when the chicken is done? Use a meat thermometer to ensure the internal temperature reaches 165°F (75°C).

Nutrition Tips and Dietary Adaptations

Making this recipe fit your dietary needs is easy. Here are some tips:

  • Gluten-Free Option: This recipe is naturally gluten-free. Just ensure that your spice blends are gluten-free.
  • Low-Carb Version: Pair with steamed vegetables instead of grains for a low-carb meal.
  • Low-Fat Adaptation: Reduce the amount of oil or skip it altogether for a lighter dish.
  • Protein-Packed Meal: Serve alongside quinoa or lentils for extra protein and fiber.

Equipment Recommendations

To make this recipe, you’ll need:

  • Air Fryer: A reliable air fryer is essential. Look for one with adjustable temperature settings and a spacious basket.
  • Meat Thermometer: To ensure perfect doneness without cutting into the chicken.
  • Mixing Bowls: For preparing your spice blends and coating the chicken.
  • Parchment Paper: Optional, but it helps with cleanup and prevents sticking.

Serving Suggestions

When it comes to serving these amazing air fryer chicken thighs, think of the sides that will bring everything together:

  • Classic Coleslaw: A refreshing crunch that pairs beautifully with the rich flavors of the chicken.
  • Garlic Mashed Potatoes: Creamy and comforting, they make for a perfect companion.
  • Roasted Seasonal Vegetables: Bright colors and flavors add balance to your plate.
  • Fresh Green Salad: A light salad with vinaigrette can cleanse the palate and complement the meal.

Cooking is about love, memories, and sharing. As you gather around the table with these air fryer chicken thighs, remember that it’s not just about the food, but the warmth and connection you create with each meal. Enjoy every crispy, juicy bite, and let it remind you of home.

Foolproof Air Fryer Chicken Thighs Recipe Tonight

Prep Time 5 minutes
Cook Time 18 minutes
Total Time 23 minutes
Servings 4 pieces
Calories 250
Juicy and flavorful chicken thighs cooked to perfection in the air fryer, perfect for a quick and satisfying meal.

Ingredients

Meat

  • 4 pieces chicken thighs bone-in
  • 2 tbsp paprika
  • 1 tsp Italian seasoning
  • 1 tsp garlic powder
  • Spray oil Spray oil (optional)

Instructions 

  • Pat dry chicken thighs and season with spice mixture.
  • Spray with oil and coat evenly.
  • Line air fryer basket with parchment or foil, then place chicken.
  • Cook at 400°F/200°C for 18 minutes, flipping halfway.

Notes

Ensure chicken thighs are cooked to an internal temperature of 165°F (74°C) for safety.
Calories: 250kcal
Cost: $10
Course: Main Course
Cuisine: American
Keyword: chicken thighs

Welcome to the Heart of Home Cooking

In the bustling world we live in, finding time to sit down and share a meal can feel like a luxury. But what if I told you that you can whip up a delightful dish in just 20 minutes? This 20-Minute Easy Veggie Fried Rice is more than just a quick meal; it’s a warm embrace from your kitchen—a reminder that even on the busiest nights, we can bring the warmth of home cooking to our tables. With every bite, you’ll experience the joy of cooking and the love of family traditions, making it the perfect alternative to takeout.

Why You’ll Love This Recipe

This veggie fried rice isn’t just quick and easy; it’s packed with flavor and memories. Here are some reasons why you’ll adore this recipe:

  • Speedy Meal Solution: Ready in just 20 minutes, this dish fits seamlessly into your busy schedule.
  • Endless Customization: Use whatever vegetables you have on hand—this recipe is perfect for cleaning out the fridge!
  • Budget-Friendly: With simple ingredients like rice and eggs, you can feed the whole family without breaking the bank.
  • Healthier Alternative: Skip the takeout and control what goes into your meal, making it healthier and heartier.
  • Kid-Friendly: Even picky eaters will enjoy this colorful, tasty dish! You can involve your little ones in the cooking process, making it a fun family activity.

Gather Your Ingredients

Here’s what you’ll need to create this comforting dish:

  • 2 cups cooked rice (preferably cold): Cold rice helps achieve that perfect texture.
  • 1 cup mixed vegetables: Use a mix of your favorites like carrots, peas, and bell peppers.
  • 2 tbsp vegetable oil: For frying; you can also use sesame oil for added flavor.
  • 2 cloves garlic, minced: This adds a lovely aromatic base.
  • 1 tbsp soy sauce: A splash of soy sauce brings everything together with its umami punch.
  • 1 tsp sesame oil: A drizzle of sesame oil elevates the dish with its nutty flavor.
  • 2 eggs, beaten (optional): For protein and richness, feel free to skip if you prefer a vegetarian option.
  • Salt and pepper to taste: Essential for seasoning and bringing out the flavors.

How to Make Your Veggie Fried Rice

Appetizing close-up of fried rice with eggs, mixed vegetables, and a garnish of herbs.

Let’s get cooking! Follow these simple steps for a delicious plate of veggie fried rice:

  1. Heat the vegetable oil in a large pan over medium heat.
  2. Add the minced garlic and sauté for about 30 seconds until fragrant.
  3. Incorporate the mixed vegetables and stir-fry for 3-4 minutes until they’re tender.
  4. Push the vegetables to one side of the pan and pour in the beaten eggs. Scramble until fully cooked.
  5. Add the cold rice, soy sauce, and sesame oil to the pan. Stir everything together until well combined.
  6. Cook for an additional 3-4 minutes, stirring occasionally, allowing the flavors to meld.
  7. Season with salt and pepper to taste, and serve hot.

Pro Tips for Perfect Fried Rice

To ensure your fried rice turns out perfectly every time, keep these expert tips in mind:

  • Use Day-Old Rice: Freshly cooked rice can be too sticky. Day-old rice is drier and gives a better texture.
  • High Heat is Key: Cooking on high heat helps to fry the rice instead of steaming it.
  • Don’t Crowd the Pan: If you’re making a larger batch, consider cooking in batches to maintain high heat.
  • Experiment with Flavors: Feel free to add ginger, green onions, or even a splash of vinegar for a unique twist.
  • Make it a Meal: Add leftover meats like chicken or shrimp for a heartier dish.
  • Garnish for Appeal: A sprinkle of sesame seeds or chopped green onions adds a beautiful finishing touch.
  • Keep It Simple: The beauty of this dish lies in its simplicity. Don’t overcomplicate the flavors.
  • Involve the Family: Cooking together can be a wonderful bonding experience—get everyone involved!

Common Mistakes and Troubleshooting

Even the best cooks can run into hiccups. Here are some common mistakes to avoid:

  • Using Wet Rice: This can lead to clumpy fried rice. Always use cold, leftover rice for the best results.
  • Overcooking the Vegetables: A quick stir-fry should keep them vibrant and slightly crisp.
  • Not Enough Seasoning: Don’t be shy with salt and pepper; these spices enhance the flavor.
  • Skipping the Soy Sauce: This essential ingredient adds depth and umami to the dish.

Delicious Variations to Try

Feeling adventurous? Here are some tasty variations to put your own spin on this recipe:

  • Thai-Inspired: Add a tablespoon of fish sauce and top with fresh basil and lime juice.
  • Spicy Version: Incorporate sriracha or chili flakes for a kick of heat.
  • Protein-Packed: Toss in diced tofu, chicken, or shrimp for extra nutrition.
  • Breakfast Fried Rice: Top with a fried egg and serve it as a hearty breakfast option.

Storage and Make-Ahead Instructions

This veggie fried rice is perfect for meal prep. You can store leftovers in an airtight container in the fridge for up to 3 days. To reheat, simply place it in a pan over medium heat with a splash of water to help steam it back to life. If you want to make it ahead, prepare everything up to the cooking step and store the ingredients separately. When ready to cook, just follow the steps outlined above.

Frequently Asked Questions

Here are some of the most common questions about making veggie fried rice:

  • Can I use frozen vegetables? Yes! Frozen veggies work great and save you time.
  • Is this recipe gluten-free? You can make it gluten-free by using tamari instead of soy sauce.
  • Can I make this vegan? Absolutely! Omit the eggs and use tofu for added protein.
  • How can I make it more flavorful? Experiment with different sauces or add aromatics like ginger or onion.
  • What type of rice is best? Long-grain rice, such as jasmine or basmati, works best for fried rice.
  • Can I freeze fried rice? Yes, you can freeze it in portions for quick meals later on.
  • What to serve with veggie fried rice? It pairs wonderfully with spring rolls, dumplings, or a simple salad.
  • How do I prevent it from getting mushy? Avoid using freshly cooked rice and stick to cold, day-old rice.

Nutritional Tips and Dietary Adaptations

Fried rice can be a part of a balanced diet. Here are some tips:

  • Add More Veggies: Increase the vegetable content for added fiber and nutrients.
  • Choose Whole Grains: Use brown rice for more fiber and a nuttier flavor.
  • Watch the Sauce: Use low-sodium soy sauce to control the salt content.
  • Protein Boost: Incorporate beans or lentils for a vegetarian protein source.

Essential Kitchen Equipment

To make your cooking experience smooth, here are some tools you may need:

  • Non-stick skillet or wok: Ideal for stir-frying without sticking.
  • Wooden spatula: Helps in stirring and flipping ingredients without damaging your pan.
  • Measuring cups and spoons: For accurate ingredient quantities.
  • Sharp knife: Essential for chopping vegetables efficiently.

Serving Suggestions to Celebrate Togetherness

This veggie fried rice can stand alone as a meal, but it also shines when paired with other dishes. Consider serving it with:

  • Spring Rolls: Crunchy and fresh, they complement the soft texture of fried rice.
  • Grilled Chicken Skewers: A protein-packed option that’s perfect for outdoor meals.
  • Homemade Dumplings: Another family favorite that brings even more heart to your table.
  • Simple Green Salad: A light salad can balance the richness of the fried rice.

As you gather around your table, remember that cooking is not just about the food; it’s about the memories we create and the love we share. This 20-Minute Easy Veggie Fried Rice is a beautiful reminder that meals made with love are the ones we cherish the most. So gather your loved ones, roll up your sleeves, and let’s make some memories together in the kitchen.

20-Minute Easy Veggie Fried Rice That Beats Takeout Every Time

Prep Time 5 minutes
Cook Time 10 minutes
Total Time 15 minutes
Servings 4 servings
Calories 350
This quick and delicious veggie fried rice is a perfect weeknight dinner that rivals takeout in flavor and speed.

Ingredients

Rice

  • 2 cups cooked rice (preferably cold)

Vegetables

  • 1 cup mixed vegetables (carrots, peas, bell peppers)

Oil

  • 2 tbsp vegetable oil

Garlic

  • 2 cloves minced garlic

Sauce & Oils

  • 1 tbsp soy sauce
  • 1 tsp sesame oil

Eggs

  • 2 eggs beaten eggs (optional)

Seasoning

  • to taste Salt and pepper

Instructions 

  • Heat oil in a large pan over medium heat.
  • Sauté garlic for 30 seconds, then add vegetables and stir-fry for 3-4 minutes.
  • Push vegetables aside, pour beaten eggs into the pan, scramble until cooked.
  • Add rice, soy sauce, and sesame oil; stir well and cook for 3-4 minutes.
  • Season with salt and pepper, then serve hot.

Notes

Use cold cooked rice for best results and quick stir-frying.
Calories: 350kcal
Cost: $10
Course: Main Course
Cuisine: Asian
Keyword: Fried Rice

Welcome to a New Family Favorite: Air Fryer Chicken Thighs

Cooking is an act of love, and nothing brings us together quite like the aroma of something delicious wafting through the air. Today, I’m excited to share my recipe for Air Fryer Chicken Thighs that not only captures the essence of home cooked meals but also simplifies the process with a simple yet flavorful marinade. These thighs are juicy, crispy, and oh-so-satisfying—perfect for a weeknight dinner or a cozy gathering with loved ones. Let’s dive into why this recipe will soon become a staple in your kitchen.

Why You’ll Love This Recipe

  • Quick Preparation: With just a few minutes of hands-on time, you can have a hearty meal on the table that everyone will love.
  • Flavorful Marinade: The combination of spices creates a rich flavor that infuses the chicken, making every bite a burst of deliciousness.
  • Healthy Cooking: Using an air fryer reduces the need for excess oil while still achieving that crispy skin we all crave.
  • Family-Friendly: Kids and adults alike will enjoy the tender, juicy meat, making it perfect for family meals.
  • Versatile Ingredients: The marinade can be easily adjusted to suit your taste or dietary needs, allowing you to experiment with different flavors.

Your Ingredient Breakdown

Here’s what you’ll need to create this delightful dish:

  • 1 tablespoon paprika: Adds a warm, smoky flavor.
  • 1/2 tablespoon smoked paprika: For an extra depth of flavor.
  • 2 teaspoons kosher salt: Essential for seasoning.
  • 1 teaspoon garlic powder: A must-have for that aromatic kick.
  • 1/2 teaspoon ground black pepper: To add a little spice.
  • 4 bone-in, skin-on chicken thighs (about 2 to 2 1/2 pounds): The star of the show! You can substitute with boneless thighs if you prefer.
  • 2 tablespoons extra virgin olive oil: Helps the spice mixture adhere to the chicken.
  • Lemon wedges: For squeezing over the top, adding a zesty brightness.
  • Chopped fresh parsley or cilantro: For a fresh, colorful garnish.

Step-by-Step Instructions

A succulent chicken thigh glistening with marinade, ready to be served.

Let’s get cooking! Follow these easy steps to create your air fryer chicken thighs:

  1. In a large bowl, combine the paprika, smoked paprika, salt, garlic powder, and black pepper.
  2. Pat the chicken thighs very dry on both sides, then add them to the bowl. Drizzle with the oil, then toss to coat them in the spice mixture.
  3. Preheat the air fryer to 400°F. Add the chicken thighs in a single layer, skin-side down. Don’t let them touch; cook in batches if necessary.
  4. Air fry the chicken thighs for 16 to 22 minutes, flipping halfway through. Check the thickest part of a thigh with a thermometer; it should read 155°F (it will reach 165°F while resting).
  5. Set the chicken aside, cover it, and let it rest for 5 minutes. Serve hot with lemon wedges squeezed over the top and sprinkled with fresh herbs.

Pro Tips for Perfect Air Fryer Chicken Thighs

  • Pat Dry: Always ensure your chicken is patted dry before seasoning to achieve that crispy skin.
  • Preheat the Air Fryer: This step is crucial for a perfectly cooked exterior and juicy interior.
  • Use a Meat Thermometer: To avoid overcooking, use a thermometer to check the internal temperature.
  • Resting Time: Allowing the chicken to rest helps the juices redistribute, ensuring it stays juicy.
  • Creative Marinades: Feel free to experiment with different spices or even marinades like honey mustard or teriyaki.
  • Batch Cooking: Make extra to have leftovers for salads or sandwiches—delicious and versatile!
  • Check Doneness: If you’re unsure, cut into a thigh; the juices should run clear.
  • Fresh Herbs: Always finish with fresh herbs for that pop of color and flavor.

Common Mistakes to Avoid

To help you achieve the best results, here are some common pitfalls and how to avoid them:

  • Not Using Enough Spice: Don’t skimp on the seasoning; it’s essential for flavor.
  • Crowding the Basket: Avoid overcrowding your air fryer; it leads to uneven cooking.
  • Skipping the Oil: A little oil helps the spices stick and enhances crispiness.
  • Overcooking: Keep a close eye on the cooking time and temperature.

Delicious Variations to Try

If you’re feeling adventurous, here are some variations to switch things up:

  • Spicy Garlic Thighs: Add cayenne pepper and crushed red pepper flakes for a spicy kick.
  • Citrus Herb Marinade: Use lemon juice and fresh herbs like rosemary and thyme for a refreshing twist.
  • BBQ Glaze: Brush your chicken thighs with your favorite BBQ sauce during the last few minutes of cooking.
  • Asian-Inspired: Incorporate soy sauce, ginger, and sesame oil into your marinade for an Asian flavor profile.

Storage and Make-Ahead Instructions

If you want to prep in advance, here’s how to store your chicken thighs:

  • Refrigerate: Store leftovers in an airtight container for up to 4 days.
  • Freeze: You can freeze cooked chicken thighs for up to 3 months. Thaw in the fridge before reheating.
  • Reheat: For best results, reheat in the air fryer at 350°F for about 5-7 minutes.

Frequently Asked Questions

  • Can I use boneless chicken thighs? Absolutely! Just adjust the cooking time to around 12-15 minutes.
  • What can I serve with air fryer chicken thighs? Pair them with roasted vegetables, rice, or a fresh salad for a complete meal.
  • Can I marinate overnight? Yes, marinating overnight enhances the flavor even more.
  • How do I keep the chicken thighs crispy? Ensure they are dry before cooking and don’t overcrowd the air fryer.
  • What is the best way to check doneness? Use a meat thermometer to ensure they reach at least 165°F.
  • Can I cook frozen chicken thighs in the air fryer? Yes, but they may require a few extra minutes to cook through.
  • Is this recipe suitable for meal prep? Yes! These chicken thighs are perfect for meal prep and can be enjoyed throughout the week.
  • How can I add more flavor? Feel free to experiment with different spices or marinades that you enjoy!

Nutritional Tips and Dietary Adaptations

For those keeping an eye on dietary needs, here are some considerations:

  • Low-Carb Option: This recipe is naturally low in carbohydrates, perfect for keto diets.
  • Gluten-Free: All the ingredients are gluten-free, making it suitable for those with sensitivities.
  • Heart-Healthy: Opt for skinless thighs if you’re looking to reduce fat intake.

Essential Equipment for Success

To create this dish, you’ll need:

  • Air Fryer: A reliable air fryer is key for achieving crispy chicken.
  • Meat Thermometer: Essential for checking doneness accurately.
  • Mixing Bowls: For mixing your marinade and seasoning.

Serving Suggestions

Finally, let’s talk about how to serve your delicious air fryer chicken thighs:

  • With Sides: Serve with mashed potatoes, coleslaw, or roasted veggies for a complete meal.
  • In Wraps: Shred the chicken and use it in wraps with fresh vegetables and sauce.
  • On a Salad: Slice and toss on a bed of greens with your favorite dressing.

Cooking is a beautiful way to connect with family and friends, and I hope this recipe for Air Fryer Chicken Thighs brings warmth and nostalgia to your dinner table. Remember, it’s not just about the food but the memories we create around it. So gather your loved ones, share a meal, and enjoy the simple joys of cooking together. Happy cooking!

Air Fryer Chicken Thighs with Simple Marinade

Prep Time 10 minutes
Cook Time 20 minutes
Total Time 30 minutes
Servings 4 servings
Calories 350
Juicy, flavorful chicken thighs cooked to perfection in the air fryer with a simple spice marinade, perfect for a quick and delicious meal.

Ingredients

Spice Mix

  • 1 tablespoon paprika
  • 0.5 tablespoon smoked paprika
  • 2 teaspoons kosher salt
  • 1 teaspoon garlic powder
  • 0.5 teaspoon ground black pepper

Main Ingredients

  • 4 pieces bone-in, skin-on chicken thighs (about 2 to 2 1/2 pounds)
  • 2 tablespoons extra virgin olive oil
  • As needed Lemon wedges (For squeezing over the top)
  • As needed Chopped fresh parsley or cilantro (For sprinkling)

Instructions 

  • Mix paprika, smoked paprika, salt, garlic powder, and black pepper in a large bowl.
  • Pat chicken dry, add to bowl, drizzle with oil, and toss to coat.
  • Preheat air fryer to 400°F. Arrange chicken skin-side down in a single layer, cook in batches if needed.
  • Air fry for 16-22 minutes, flipping halfway. Check for 155°F internal temperature.
  • Rest for 5 minutes, then serve with lemon wedges and herbs.

Notes

Ensure chicken reaches the proper internal temperature for safety and best flavor.
Calories: 350kcal
Cost: $15
Course: Main Course
Cuisine: American
Keyword: chicken thighs

Welcome to the heart of my kitchen, where every recipe tells a story, and every ingredient sings with nostalgia! Today, I’m thrilled to share my beloved Flourless Lemon Cake, a delightful, gluten-free treat that captures the essence of sunshine and love. This cake is not just a dessert; it’s a memory, a connection to family gatherings, and a celebration of the simple joys of life. With its vibrant lemon flavor and tender crumb, this cake is perfect for any occasion—whether it’s a sunny brunch with friends or a quiet afternoon at home.

Let’s dive into this recipe, ensuring that each step is filled with warmth and care, just like the love my grandmother infused into her cooking. Ready your mixing bowls and preheat your oven; a slice of sunshine is just around the corner!

Why You’ll Love This Recipe

  • Gluten-free goodness: Made with almond flour, this cake is naturally gluten-free, allowing everyone to enjoy it without worry.
  • Bright lemon flavor: Packed with fresh lemon juice and zest, every bite bursts with citrusy goodness that can lift your spirits.
  • Simple ingredients: Using just a handful of common ingredients, this cake is easy to whip up, making it perfect for spontaneous gatherings.
  • Perfect for any occasion: Whether you’re celebrating a birthday or enjoying a quiet Sunday, this cake fits beautifully into any moment.
  • Deliciously moist: Thanks to the almond flour and eggs, the cake remains wonderfully moist, ensuring every slice is a treat.

Ingredients Breakdown

Let’s take a closer look at what you’ll need to create this delectable cake:

  • ¾ cup white granulated sugar (150g / 5.3oz): Sweetens the cake and balances the tartness of the lemon.
  • 115 g unsalted butter, softened (½ cup / 1 stick): Adds richness and flavor; be sure it’s softened for easy mixing.
  • 4 large eggs, separated: The egg whites help the cake rise, while the yolks provide moisture and color.
  • 1 teaspoon vanilla extract: A touch of vanilla adds depth to the flavor.
  • 2 tablespoons lemon zest: Freshly grated for an intense lemon flavor—don’t skip this!
  • 1 tablespoon lemon juice: Brightens the cake and enhances the lemon flavor.
  • 2 ½ cups almond meal (almond flour) (250g / 8.8oz): The star ingredient that gives the cake its structure and gluten-free property.
  • 1 teaspoon baking powder: Helps the cake rise, creating a light texture.
  • ¼ teaspoon salt: Balances the sweetness and enhances flavor.
  • 1 ¼ cups icing (powdered / confectioners) sugar (163g / 5.7oz): For the icing, which adds a sweet finish.
  • 6-8 teaspoons lemon juice: To mix with the icing sugar for a zesty and sweet topping.
  • Extra lemon zest: For garnishing the top of the cake, adding a beautiful finish and extra flavor.

Pro Tips for Perfecting Your Cake

To ensure your Flourless Lemon Cake turns out beautifully every time, keep these tips in mind:

  • Use fresh ingredients: Fresh lemons and high-quality almond flour make a noticeable difference in flavor.
  • Room temperature eggs: Ensure your eggs are at room temperature for better mixing and aeration.
  • Whip egg whites thoroughly: Beat the egg whites until stiff peaks form for a light and airy cake.
  • Don’t overmix: Fold in the almond flour gently to maintain the airiness from the whipped egg whites.
  • Cool completely: Allow the cake to cool in the pan before transferring it to a wire rack for icing.
  • Customize the icing: Adjust the lemon juice in the icing to your taste—more juice for a tangy kick!
  • Decorate with zest: A sprinkle of extra lemon zest on top not only looks lovely but also intensifies the flavor.
  • Store properly: Keep the cake in an airtight container in the fridge to maintain freshness.

Common Mistakes and Troubleshooting

Detailed side perspective of a gluten-free lemon cake, showcasing its fluffy layers and fresh lemon garnish.

Even the best of us can face challenges in the kitchen. Here are some common pitfalls and how to avoid them:

  • Overbaking: Keep an eye on the cake during the last few minutes of baking. It’s done when the edges pull away from the pan and a toothpick comes out clean.
  • Dense texture: This can occur from not whipping the egg whites enough or overmixing. Ensure you get those stiff peaks!
  • Too sweet or tart: Adjust the sugar or lemon juice to your preference before mixing into the batter—taste as you go!

Variations to Try

Why stick to one version? Here are some delightful variations to make your Flourless Lemon Cake even more exciting:

  • Blueberry Bliss: Fold in fresh or frozen blueberries for a fruity twist.
  • Coconut Cream: Add shredded coconut to the batter for a tropical flavor.
  • Chocolate Drizzle: Drizzle melted dark chocolate over the cooled cake for a decadent touch.
  • Herbal Infusion: Infuse the cake with fresh herbs like basil or mint for a refreshing flavor profile.

Storage and Make-Ahead Instructions

This cake is perfect for make-ahead preparations! Here’s how to store it:

  • Refrigeration: Store the cake in an airtight container in the fridge for up to 5 days.
  • Freezing: Wrap slices in plastic wrap and freeze for up to 3 months. Thaw at room temperature before serving.
  • Make-ahead icing: You can prepare the icing a day in advance and store it in the fridge. Just give it a good stir before using.

Comprehensive FAQ

Here are some frequently asked questions about this delightful cake:

  • Can I substitute almond flour with other flours? Yes, but the texture may change. Coconut flour can be used but requires adjustments in liquid.
  • Is this cake suitable for vegans? It can be modified by using flax eggs or aquafaba in place of eggs.
  • How can I make the cake less sweet? Reduce the sugar in the batter and adjust the icing to your liking.
  • Can I use a different citrus fruit? Absolutely! Oranges or limes can add a lovely twist.
  • What is the best way to serve this cake? Serve with a dollop of whipped cream or a scoop of vanilla ice cream for an indulgent dessert.
  • Can I add more lemon flavor? Yes, feel free to increase the lemon zest or juice according to your taste preferences.
  • What if I don’t have icing sugar? You can make your own by blending granulated sugar until fine. Just be cautious not to over-blend!
  • How do I know if the cake is done baking? The cake is done when it’s golden brown and a toothpick inserted in the center comes out clean.

Nutritional Tips and Dietary Adaptations

This cake is not only delicious but can be adapted to fit various dietary needs:

  • Lower sugar option: Replace sugar with a suitable sugar substitute or use less sugar for a healthier cake.
  • Nut-free option: Use a gluten-free flour blend instead of almond flour, but the taste and texture will differ.
  • Increase protein: Incorporate protein powder into the almond flour for a nutritious boost.

Equipment Recommendations

To create this Flourless Lemon Cake, here are some essential tools to have on hand:

  • Mixing bowls: A set of mixing bowls in various sizes for easy ingredient handling.
  • Hand mixer or stand mixer: To whip those egg whites to perfection.
  • Rubber spatula: To gently fold ingredients without deflating the egg whites.
  • 8-inch round cake pan: A non-stick pan is ideal for easy removal of the cake.
  • Wire cooling rack: Essential for cooling the cake evenly after baking.

Serving Suggestions

Finally, let’s talk about how to serve this delightful cake:

  • With fresh berries: Serve with a handful of fresh berries for a pop of color and flavor.
  • Whipped cream: A dollop of lightly sweetened whipped cream complements the cake beautifully.
  • Lemon sorbet: Pair with lemon sorbet for a refreshing contrast.
  • Dusting of icing sugar: A light dusting of icing sugar adds an elegant touch.

As we come to the end of this journey through my Flourless Lemon Cake recipe, I hope you feel inspired to create this slice of sunshine in your own kitchen. Remember, cooking is not just about the end result; it’s about the love and memories you share along the way. So gather your loved ones, bake with joy, and enjoy every delicious bite together. Happy baking!

Flourless Lemon Cake (Gluten Free)

Prep Time 15 minutes
Cook Time 30 minutes
Total Time 45 minutes
Servings 8 pieces
Calories 250
A light and tangy gluten-free cake made with almond meal and fresh lemon zest, perfect for a citrusy treat.

Ingredients

Dried ingredients

  • 0.75 cup white granulated sugar (150g / 5.3oz)
  • 115 g unsalted butter, softened (½ cup / 1 stick)
  • 4 large eggs, separated
  • 1 teaspoon vanilla extract
  • 2 tablespoons lemon zest (not packed)
  • 1 tablespoon lemon juice
  • 250 g almond meal (almond flour) (2½ cups)
  • 1 teaspoon baking powder
  • 0.25 teaspoon salt
  • 163 g icing (powdered) sugar (1¼ cups)
  • 6-8 teaspoons lemon juice
  • extra lemon zest

Instructions 

  • Preheat oven to 350°F (175°C). Grease and line a cake pan.
  • Beat egg yolks with sugar, lemon zest, lemon juice, and vanilla until combined.
  • Fold in almond meal and baking powder. In a separate bowl, beat egg whites until stiff peaks form and gently fold into batter.
  • Pour batter into prepared pan and bake for 30 minutes or until a toothpick comes out clean.
  • Allow to cool, then dust with powdered sugar and lemon zest before serving.

Notes

For best flavor, use fresh lemon zest and juice.
Calories: 250kcal
Cost: $15
Course: Dessert
Cuisine: fusion
Keyword: cake, gluten free, Lemon