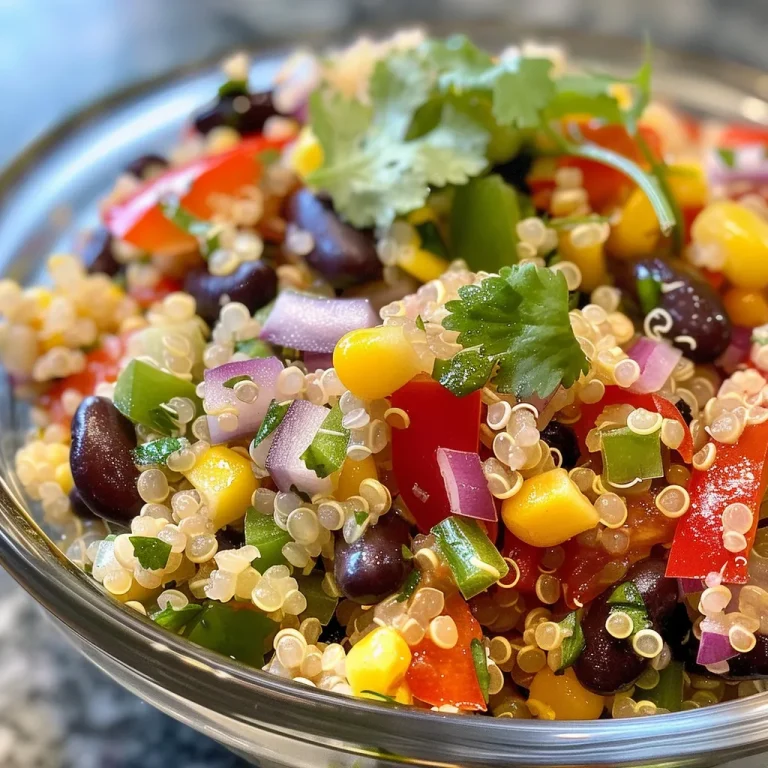
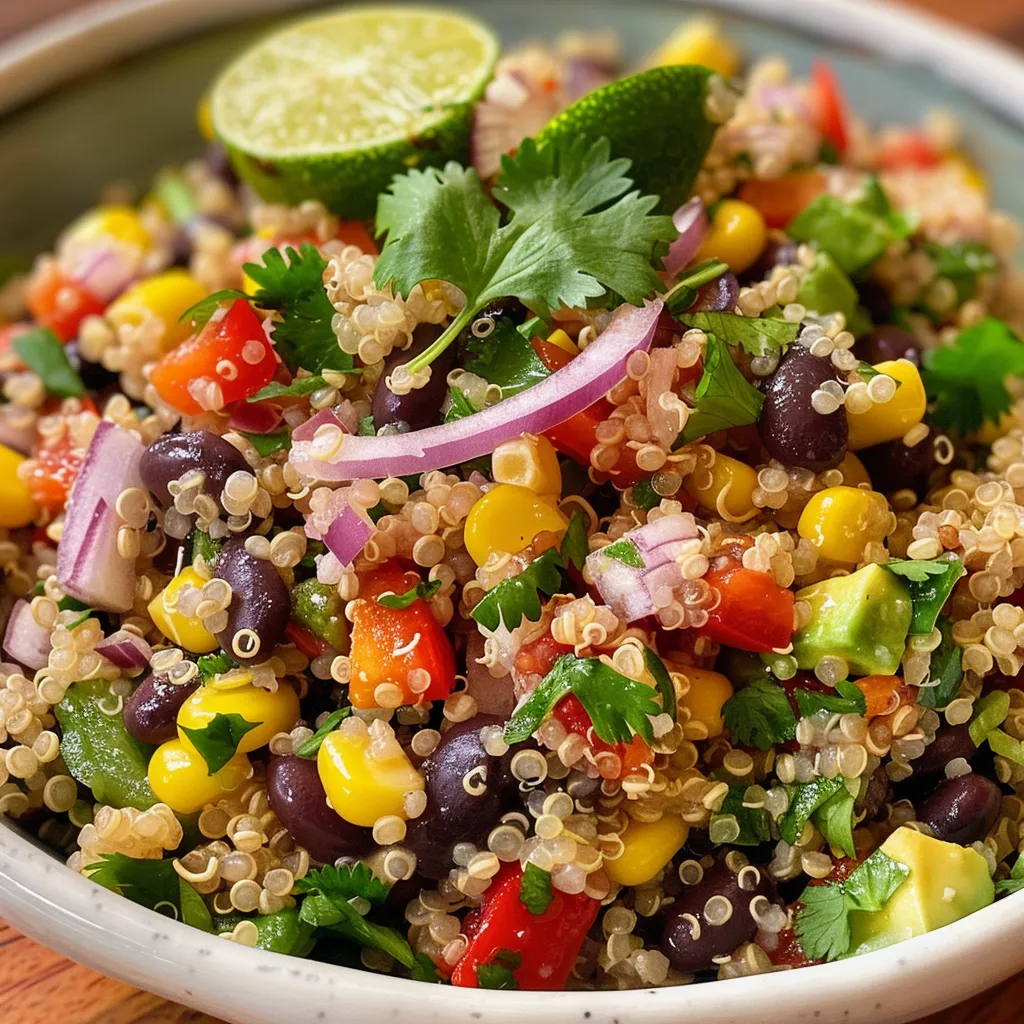
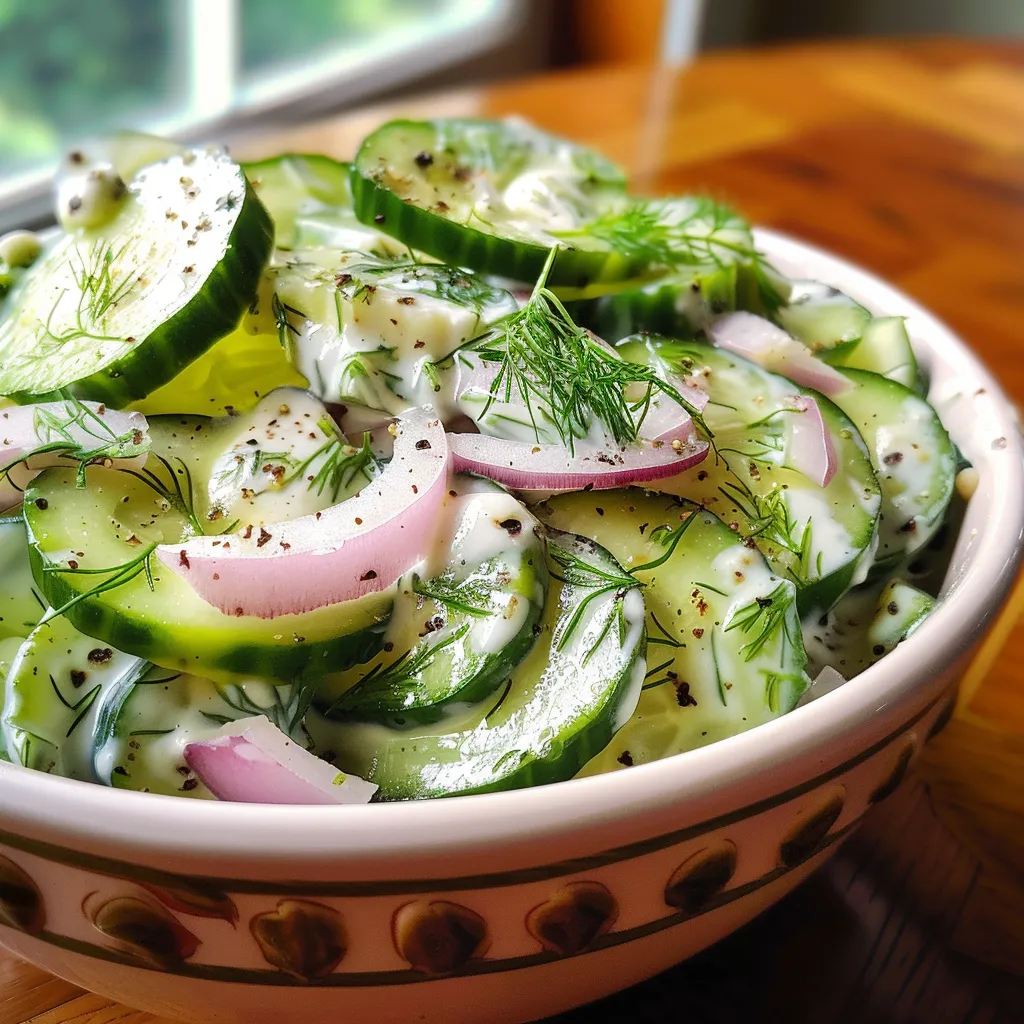
Author

daniel

Browsing

A Refreshing Embrace: Why You’ll Fall in Love with Chickpea Cucumber Avocado Salad

Welcome to a culinary journey that takes you back to the heart of home, where every ingredient tells a story and every bite is a memory. Our Chickpea Cucumber Avocado Salad is not just a recipe; it’s an invitation to gather around the table, sharing laughter and love over vibrant flavors. This salad is a celebration of simplicity, where creamy avocado, crunchy cucumber, and hearty chickpeas come together in a harmonious blend, all kissed with a zesty chili lime dressing. Perfect for a light lunch or as a delightful side dish at your family gatherings, this salad embodies the spirit of togetherness.

In this article, we’ll explore everything you need to know about making this salad, from its essential ingredients to expert tips for success. Let’s dive in!

Why You’ll Love This Chickpea Cucumber Avocado Salad

  • Quick and Easy: This salad comes together in under 15 minutes, making it perfect for busy weekdays or last-minute gatherings.
  • Nutritious Powerhouse: Packed with protein, healthy fats, and fiber, it’s a guilt-free indulgence that fuels your body and soul.
  • Flavor Explosion: The chili lime dressing adds a delightful kick, enhancing the natural flavors of the fresh ingredients.
  • Customizable: Easily adapt this salad by adding your favorite veggies or proteins, making it versatile for any occasion.
  • Perfect for Sharing: This salad is a great centerpiece for any meal, encouraging everyone to gather and enjoy.

Gathering Your Ingredients: A Detailed Breakdown

To create this beautiful salad, you’ll need a handful of fresh ingredients. Here’s what you’ll need along with some tasty substitutions if you’re feeling adventurous.

  • Chickpeas: 1 can (15 oz), drained and rinsed. If you prefer, use cooked dried chickpeas for a fresher taste.
  • Cucumber: 1 large, diced. Feel free to choose English cucumber for its thin skin or Persian cucumbers for their sweetness.
  • Avocado: 1 ripe, diced. Make sure it’s just soft enough for easy slicing but not overripe.
  • Red Onion: 1/4 cup, finely chopped. If you like a milder taste, consider using green onions instead.
  • Cilantro: 1/4 cup, chopped. In case you’re not a cilantro lover, parsley can be a great alternative.
  • Olive Oil: 2 tbsp. You can also use avocado oil for a richer flavor.
  • Lime Juice: 1 tbsp. Fresh lime juice is best, but bottled lime juice can work in a pinch.
  • Chili Powder: 1 tsp. Adjust to your preferred spice level by using cayenne pepper for more heat.
  • Salt: 1/2 tsp. Sea salt enhances flavors beautifully.
  • Black Pepper: 1/4 tsp. Freshly ground black pepper adds the best flavor.

Step-By-Step Instructions for a Flawless Salad

Vibrant salad filled with chickpeas, cucumber, avocado, and garnished with cilantro.

Creating this salad is as easy as pie—no complicated techniques here! Follow these simple steps for the best results:

  1. In a large bowl, mix together the chickpeas, diced cucumber, avocado, finely chopped red onion, and chopped cilantro.
  2. In a separate small bowl, whisk together the olive oil, lime juice, chili powder, salt, and black pepper until well combined.
  3. Pour the dressing over the salad and gently toss everything together, ensuring the avocado is well coated to keep it from browning.
  4. Let the salad sit for about 10 minutes to allow the flavors to meld beautifully.
  5. Chill in the refrigerator until you’re ready to serve. Enjoy!

Pro Tips for Success

Here are some tried-and-true tips to ensure your salad is a hit:

  • Fresh Ingredients: Always use the freshest ingredients available to enhance the salad’s flavor.
  • Perfect Avocado: Use ripe but firm avocados to avoid mushiness in the salad.
  • Texture Matters: For extra crunch, consider adding toasted nuts or seeds.
  • Chill Time: Allowing the salad to chill helps the flavors develop, making each bite even more delightful.
  • Servings: This recipe is perfect for 4 as a side dish or 2 as a light lunch.
  • Leftovers: Store any leftovers in an airtight container in the fridge for up to 2 days.
  • Dressing on the Side: If you’re preparing this salad ahead of time, keep the dressing separate until just before serving.
  • Herb Variations: Experiment with different herbs like basil or mint for a unique twist.

Common Mistakes and Troubleshooting

Even the best chefs make mistakes! Here are some common pitfalls and how to avoid them:

  • Overripe Avocado: If your avocado is too soft, it can make the salad mushy. Always check for firmness before purchasing.
  • Too Much Dressing: Be cautious with the dressing; start with a little and add more if needed.
  • Flavorless Chickpeas: Rinsing chickpeas helps remove excess sodium, but don’t skip this step to ensure they’re tasty!
  • Skipping Chill Time: Allow the salad to meld together; skipping this step can result in muted flavors.

Delicious Variations to Try

Why not add your own flair to this salad? Here are some variations to consider:

  • Mediterranean Twist: Add feta cheese, Kalamata olives, and a sprinkle of oregano for a Mediterranean vibe.
  • Protein Boost: Toss in grilled chicken or shrimp for added protein and heartiness.
  • Spicy Kick: Incorporate diced jalapeños or a dash of hot sauce for an extra kick.
  • Fruit Fusion: Mix in diced mango or pineapple for a sweet contrast to the savory ingredients.

Storage and Make-Ahead Instructions

This salad is perfect for meal prep! Here’s how to store and make it ahead of time:

  • Refrigeration: Store in an airtight container in the fridge for up to 2 days.
  • Make-Ahead Tips: Prepare all the ingredients in advance, but mix them only when you’re ready to serve to keep the avocado fresh.
  • Freezing: Avoid freezing this salad as the texture of the cucumbers and avocado will change.

Frequently Asked Questions

Here are some common questions about our Chickpea Cucumber Avocado Salad:

  • Can I use canned chickpeas? Yes! Canned chickpeas are a great time-saver—just rinse and drain them well.
  • Is this salad vegan? Absolutely! It’s plant-based and perfect for vegans.
  • Can I use lemon juice instead of lime? Yes, lemon juice is a great substitute and adds a different citrus note.
  • What can I serve with this salad? It pairs wonderfully with grilled meats or as a topping for tacos.
  • How can I make it gluten-free? This recipe is naturally gluten-free, so you’re all set!
  • Can I prepare this salad the night before? It’s best served fresh, but you can prep the ingredients a day ahead and mix them just before serving.
  • What if I don’t like cilantro? You can substitute with parsley or simply omit it altogether!
  • How spicy is the chili lime dressing? It’s mild, but you can adjust the chili powder to your taste!

Nutrition Tips and Dietary Adaptations

This salad is not only delicious but also nutritious! Here are some dietary adaptations you can consider:

  • Low-Carb Option: Skip the chickpeas and add more vegetables like bell peppers or zucchini.
  • High-Protein Variation: Add a scoop of quinoa or lentils for an extra protein boost.
  • Low-Fat Dressing: Substitute olive oil with a light vinaigrette to reduce fat content.

Essential Equipment Recommendations

Here’s a list of equipment that will make your salad-making experience smoother:

  • Mixing Bowls: A large bowl for mixing the salad and a smaller bowl for the dressing.
  • Whisk: For combining the dressing ingredients smoothly.
  • Cutting Board and Knife: For chopping vegetables and herbs efficiently.

Serving Suggestions to Elevate Your Meal

Presenting your salad beautifully can make it even more enjoyable! Here are some serving ideas:

  • Garnish: Top with extra cilantro or a sprinkle of chili powder for a pop of color.
  • Plate It Up: Serve in individual bowls for a more personal touch.
  • Pair It Right: Complement with crusty bread or grilled protein for a complete meal.

Conclusion: A Salad to Remember

As we wrap up this journey through the vibrant world of our Chickpea Cucumber Avocado Salad, remember that cooking is not just about the food; it’s about the love and stories we share. This salad embodies the spirit of togetherness, inviting you to gather with family and friends, creating memories that last a lifetime. So, roll up your sleeves, gather your ingredients, and let’s make something beautiful together. Enjoy every bite, and happy cooking!

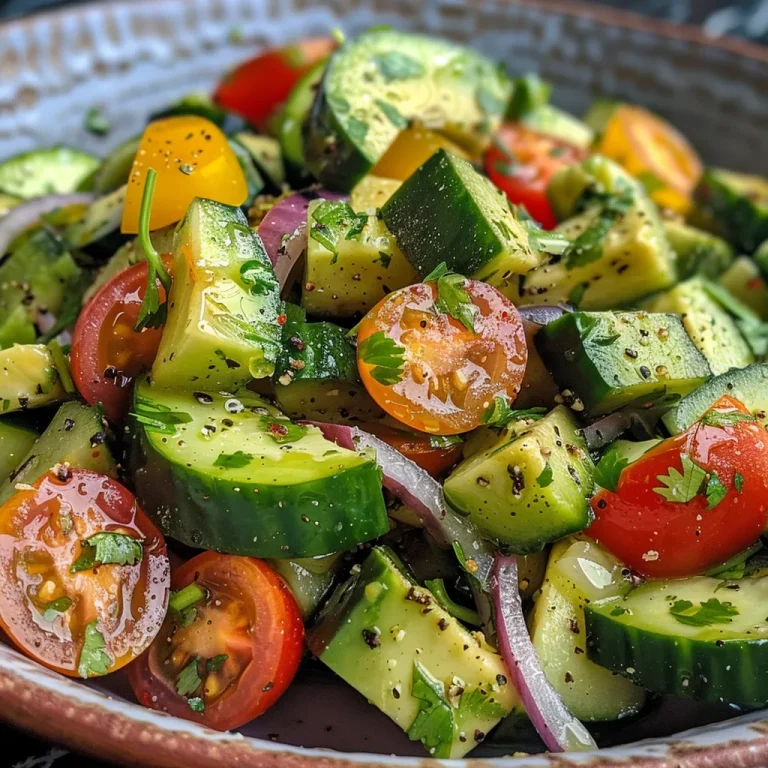
Chickpea Cucumber Avocado Salad with Chili Lime

Prep Time 10 minutes
Total Time 10 minutes
Servings 4 servings
Calories 250
A fresh and vibrant salad combining chickpeas, cucumber, and avocado, tossed in a zesty chili lime dressing.

Ingredients

Canned Goods

  • 1 can chickpeas (15 oz, drained and rinsed)

Vegetables

  • 1 large cucumber (diced)
  • 1 ripe avocado (diced)
  • 0.25 cup red onion (finely chopped)
  • 0.25 cup fresh cilantro (chopped)

Dressing

  • 2 tbsp olive oil
  • 1 tbsp lime juice
  • 1 tsp chili powder
  • 0.5 tsp salt
  • 0.25 tsp black pepper

Instructions 

  • Mix chickpeas, cucumber, avocado, red onion, and cilantro in a large bowl.
  • Whisk olive oil, lime juice, chili powder, salt, and pepper in a small bowl.
  • Pour dressing over the salad and toss gently to coat.
  • Let sit for 10 minutes to meld flavors, then serve.
Notes

For extra flavor, add a pinch of cumin or chili flakes.
Calories: 250kcal
Cost: $8
Course: Salad
Cuisine: fusion
Keyword: Chickpeas

Imagine sitting around a sunlit table, laughter echoing in the air as you share stories with loved ones. This is the spirit of cooking that I cherish, and it’s the essence of this Refreshing Cucumber Avocado Salad. Bursting with vibrant flavors and colors, it’s a dish that evokes memories of summer afternoons spent in the garden. Let’s dive into why this salad will become a staple at your family gatherings, bringing joy and togetherness, just like the cherished recipes passed down through generations.

Why You’ll Love This Recipe

This salad isn’t just a collection of ingredients; it’s a celebration of flavors and memories. Here are five reasons why you’ll adore this cucumber avocado salad:

  • Quick and Easy: With minimal prep time, this salad can be whipped up in under 15 minutes, making it perfect for busy summer days.
  • Fresh Ingredients: Each bite is packed with the freshness of cucumbers, the creaminess of avocados, and the tang of lime, creating a delightful flavor profile.
  • Health Benefits: Rich in healthy fats from avocados and hydrating cucumbers, this salad offers a nutritious side that complements any meal.
  • Versatile: This salad pairs perfectly with grilled chicken, fish, or even served as a light lunch on its own.
  • Family-Friendly: Its vibrant colors and delicious taste make it appealing to both kids and adults, ensuring it’s a hit at any gathering.

Ingredient Breakdown

Let’s take a closer look at the ingredients that make up this delightful salad. Each component has been chosen for its flavor and texture, ensuring a balanced dish that’s as pleasing to the eye as it is to the palate.

  • Cucumbers: Use 2 large cucumbers, diced. They provide a refreshing crunch. Opt for English cucumbers if you prefer fewer seeds.
  • Avocados: 2 ripe avocados, diced. Choose ones that yield slightly to pressure for the best texture. If you’re in a rush, you can substitute with diced mango for a sweet twist.
  • Cherry Tomatoes: 1 cup, halved. They add bursts of sweetness and color, enhancing the salad visually and flavor-wise.
  • Red Onion: 1/4 large onion, thinly sliced. This adds a zesty bite; for a milder flavor, you can soak the slices in cold water for 10 minutes before adding them to the salad.
  • Cilantro: 2 tablespoons, chopped. Fresh herbs elevate the dish; if cilantro isn’t your thing, parsley or basil work wonderfully as substitutes.
  • Lime Juice: 2 tablespoons. This brightens the salad and prevents the avocados from browning. Feel free to adjust to your taste.
  • Olive Oil: 1 tablespoon. Adds richness and helps the flavors meld together.
  • Salt and Pepper: To taste. Simple seasonings that enhance all the flavors.

Pro Tips for the Perfect Salad

To ensure your cucumber avocado salad is delectable every time, consider these expert tips:

  • Choose Ripe Avocados: They should be slightly soft when pressed. If they’re too firm, let them ripen at room temperature for a few days.
  • Cut Ingredients Just Before Serving: This helps maintain the freshness and prevents the avocado from browning too quickly.
  • Dress Right Before Serving: To keep the salad crisp, add the dressing just before you serve it.
  • Experiment with Additions: Feel free to throw in some feta cheese, olives, or even a handful of nuts for extra texture and flavor.
  • Use Fresh Lime: Freshly squeezed lime juice offers a much brighter flavor compared to bottled juice.
  • Chill Before Serving: Allowing the salad to chill in the refrigerator for about 30 minutes enhances the flavors.
  • Taste as You Go: Adjust seasonings as per your liking, especially the lime and salt, to get it just right.
  • Make It Ahead: You can prep the ingredients and store them separately in the fridge for a quick assembly later.

Common Mistakes and Troubleshooting

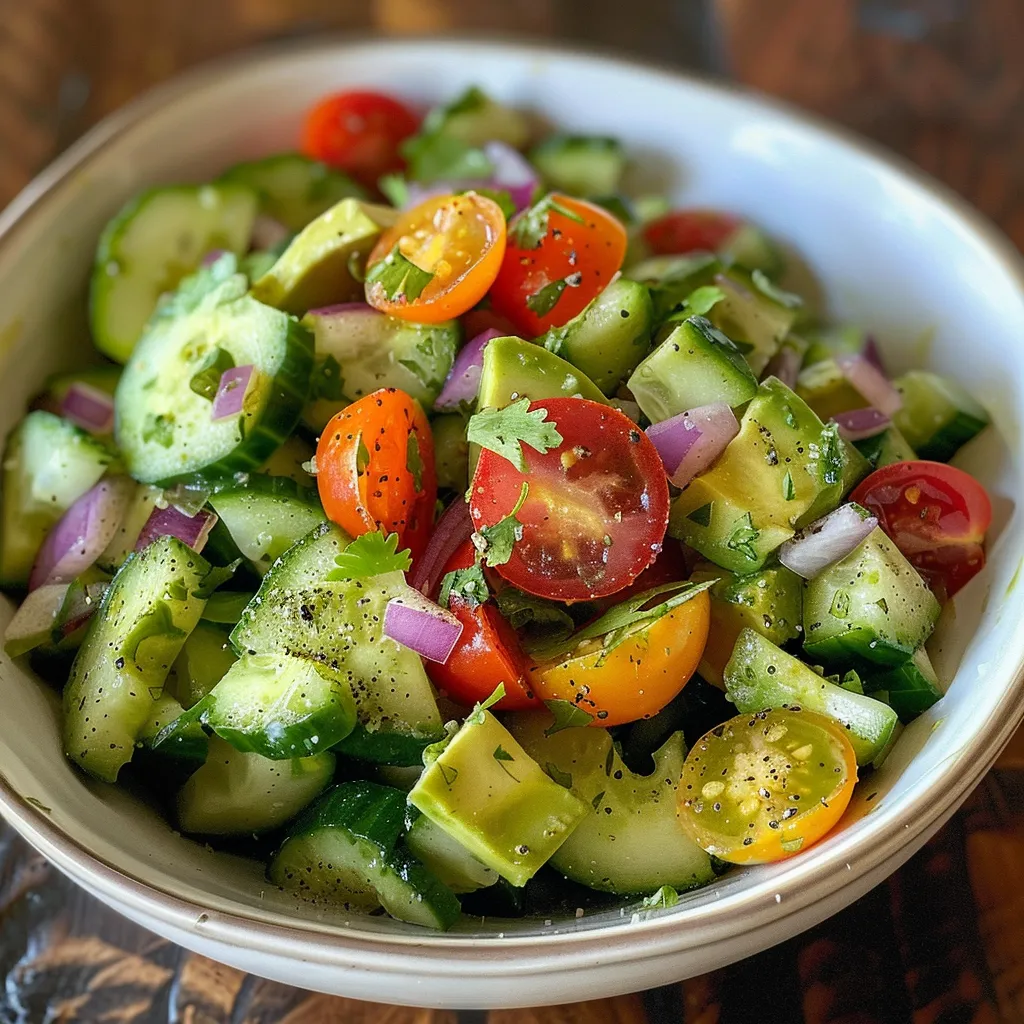
A refreshing salad featuring diced cucumbers, avocados, and cherry tomatoes, with a drizzle of olive oil.

Even the simplest recipes can go awry. Here are some common pitfalls to avoid:

  • Overripe Avocados: If they’re too mushy, they can ruin the texture of your salad. Always check for a slight give when buying.
  • Watery Cucumbers: If your cucumbers are too watery, you can sprinkle them with salt and let them sit for a few minutes to draw out excess moisture.
  • Browning Avocados: To slow this process, ensure you coat the cut avocado in lime juice immediately after cutting.
  • Too Much Dressing: Start with a small amount of dressing and add gradually to avoid overwhelming the salad.

Delicious Variations

Feeling adventurous? Here are some delightful variations to try:

  • Greek Twist: Add crumbled feta cheese, kalamata olives, and oregano for a Mediterranean flair.
  • Southwestern Style: Incorporate black beans, corn, diced red bell pepper, and a sprinkle of cumin for a bold flavor.
  • Fruit Fusion: Mix in diced mango or pineapple for a tropical twist that complements the avocado beautifully.
  • Spicy Kick: Add diced jalapeños or a sprinkle of chili flakes for those who enjoy a little heat in their salad.

Storage and Make-Ahead Instructions

To keep your salad fresh and delicious, follow these storage tips:

  • Refrigeration: Store any leftovers in an airtight container in the refrigerator. It’s best consumed within 1-2 days for optimal freshness.
  • Make-Ahead: You can prepare all ingredients a day in advance and store them separately. Assemble just before serving.
  • Freezing Not Recommended: Avoid freezing this salad, as the texture of avocados and cucumbers will deteriorate.

Frequently Asked Questions

Here are some common questions about this refreshing cucumber avocado salad:

  • Can I use other vegetables? Absolutely! Feel free to add bell peppers, radishes, or any other crunchy veggies you love.
  • What can I serve this salad with? It pairs well with grilled chicken, fish, or as an accompaniment to a picnic spread.
  • Can I make this salad vegan? Yes! The ingredients are naturally vegan, so feel free to enjoy it as is.
  • How long does it last in the fridge? It’s best eaten within 1-2 days, but can last up to 3 days if stored properly.
  • What if I don’t like cilantro? You can easily substitute cilantro with parsley, basil, or even mint for a different flavor.
  • Is this salad gluten-free? Yes, this salad is naturally gluten-free, making it a great option for gluten-sensitive diets.
  • Can I add protein to this salad? Yes! Grilled chicken, shrimp, or beans can be added for extra protein.
  • What’s the best way to serve this salad? Serve it chilled, either as a side dish or a light main course on hot summer days.

Nutritional Benefits and Dietary Adaptations

This salad not only tantalizes your taste buds, but it also offers a host of nutritional benefits:

  • Healthy Fats: Avocados provide heart-healthy monounsaturated fats that are great for your heart health.
  • Hydration: With cucumbers being over 90% water, they help keep you hydrated during hot days.
  • Low-Calorie: This salad is low in calories, making it an ideal choice for those watching their weight.
  • Vitamins and Minerals: Packed with vitamins C and K, this salad supports your immune system and bone health.

Recommended Equipment

To make the preparation of this salad effortless, consider having these tools on hand:

  • Sharp Knife: For easily slicing avocados and cucumbers.
  • Cutting Board: A sturdy cutting board makes prep work safer and easier.
  • Mixing Bowl: A large bowl to mix the ingredients and dressing together.
  • Whisk: For emulsifying the dressing ingredients smoothly together.

Serving Suggestions

To truly enjoy your cucumber avocado salad, consider these serving ideas:

  • On a Bed of Greens: Serve it over a bed of mixed greens or spinach for added nutrients.
  • As a Sandwich Filling: Use it as a filling in sandwiches or wraps for a fresh crunch.
  • Garnished with Nuts: Top with pine nuts or walnuts for added texture and flavor.
  • With a Side of Grains: Pair it with quinoa or brown rice for a wholesome meal.

In conclusion, this Refreshing Cucumber Avocado Salad is more than just a recipe; it’s a way to connect with family and friends, sharing love and joy through food. Whether enjoyed at a summer barbecue or a quiet weeknight dinner, this dish embodies the warmth of togetherness. So gather your ingredients, bring your loved ones close, and let the flavors of this salad remind you of the beautiful moments that food can create. Happy cooking!

Refreshing Cucumber Avocado Salad

Prep Time 10 minutes
Total Time 10 minutes
Servings 4 servings
Calories 250
A light and refreshing salad combining crisp cucumbers, creamy avocados, and juicy cherry tomatoes, perfect for a quick healthy snack or side dish.

Ingredients

Vegetables

  • 2 large cucumbers (diced)
  • 2 ripe avocados (diced (Choose ripe avocados that give slightly when pressed.))
  • 1 cup cherry tomatoes (halved)
  • 0.25 large red onion (thinly sliced)
  • 2 tablespoons fresh cilantro (chopped (Can be replaced with parsley or basil.))
  • 2 tablespoons lime juice (To prevent avocado from browning, add more lime juice if desired.)
  • 1 tablespoon olive oil
  • to taste Salt and pepper

Instructions 

  • Combine diced cucumbers, avocados, cherry tomatoes, and red onion in a bowl.
  • Drizzle lime juice and olive oil over the mixture.
  • Gently toss to combine and season with salt and pepper to taste.
  • Sprinkle chopped cilantro on top before serving.

Notes

Use ripe avocados for the best creaminess and flavor.
Calories: 250kcal
Cost: $10
Course: Salad
Cuisine: fusion
Keyword: Avocado, Cucumber

Welcome to a Taste of Spring!

As the world awakens from its winter slumber, the arrival of spring brings a delightful bounty of fresh produce that beckons us into the kitchen. Among the many treasures this season offers, a spring salad is a celebration of vibrant colors, crisp textures, and bright flavors. Today, I’m excited to share my recipe for a Spring Salad with Asparagus, Goat Cheese, Lemon, and Hazelnuts. This dish is not just a meal; it’s an experience steeped in nostalgia and love, reminiscent of warm family gatherings and shared laughter around the table.

In this article, we will explore not just how to make this salad, but why you will love it, variations you can try, and tips to make it shine every time you serve it. Let’s dive in!

Why You’ll Love This Recipe

  • Bright and Fresh Flavors: This salad combines the earthy taste of asparagus and the zesty punch of lemon, creating a symphony of flavors that evoke the essence of spring.
  • Nutritious Ingredients: Packed with fresh vegetables and wholesome nuts, this spring salad is not only delicious but also a healthy choice for any meal.
  • Versatile and Adaptable: Whether you’re serving it as a light lunch, a side dish for dinner, or even at a picnic, this salad fits perfectly into any occasion.
  • Simple to Prepare: With just a few steps and minimal cooking, you can whip up this beautiful dish in no time.
  • A Feast for the Senses: The vibrant colors and contrasting textures make this salad as pleasing to the eye as it is to the palate, perfect for impressing guests or enjoying at home.

Ingredients Breakdown

Here’s what you’ll need to create this delightful spring salad:

  • Asparagus: 1 bunch, preferably on the thinner side for tenderness.
  • Fresh Peas: 1 cup, or frozen peas that have been defrosted.
  • Fava Beans: ½ cup of cooked beans, though frozen lima beans can also work.
  • Radishes: 5, thinly sliced for a peppery crunch.
  • Zucchini: 2 medium, made into ribbons using a vegetable peeler.
  • Salad Greens: ½ bunch of red leaf lettuce and a handful of arugula, chopped bite-sized.
  • Goat Cheese: 4 oz., preferably with honey for a touch of sweetness.
  • Lemon: Zest of one lemon, plus slices for garnish.
  • Toasted Hazelnuts: ½ cup, slightly cracked open for texture.
  • Parmigiano Reggiano: Shavings for topping your salad.
  • Olive Oil: For dressing—2 parts lemon juice to 4 parts olive oil.

Feel free to substitute or adjust these ingredients based on what you have available or your personal preferences. The beauty of this salad recipe lies in its versatility!

Pro Tips for a Perfect Spring Salad

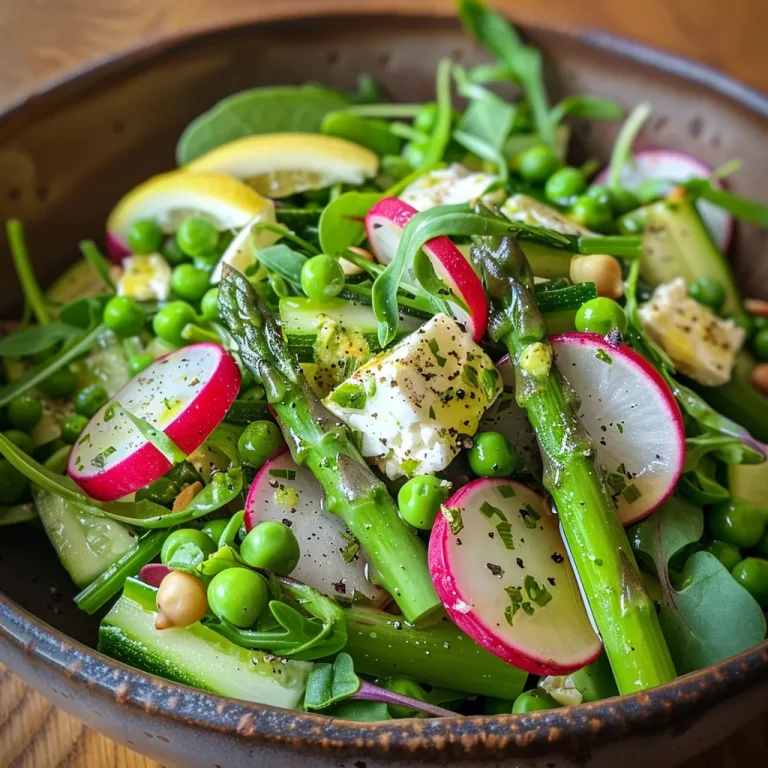
Fresh salad displaying asparagus, peas, and toasted hazelnuts on a plate.
  • Perfectly Roasted Asparagus: Roast your asparagus at 375°F for about 5-10 minutes until tender yet crisp. Check frequently to avoid overcooking!
  • Adjust the Dressing: Taste your dressing as you mix it; you may prefer more or less lemon juice depending on your preference for acidity.
  • Texture Matters: Ensure the vegetables are cut to similar sizes for even texture and easier eating.
  • Presentation is Key: Layer your salad on a large platter for an eye-catching presentation, starting with greens and ending with the goat cheese and nuts.
  • Make Ahead: You can prepare the ingredients ahead of time and toss them together just before serving for maximum freshness.
  • Experiment with Herbs: Fresh herbs like basil or mint can add an extra layer of flavor that elevates this salad even further.
  • Season Well: Don’t forget to season with salt and pepper to enhance the natural flavors of the vegetables.
  • Balance the Flavors: If you find the salad needs more depth, try adding a splash of balsamic vinegar or a drizzle of honey.

Common Mistakes and Troubleshooting

  • Overcooking Asparagus: Keep a close eye on your asparagus while it roasts; it should be tender yet firm. If it’s mushy, it’s been overcooked.
  • Too Much Dressing: Start with half the amount of dressing and add more as needed. It’s easier to add than to take away!
  • Not Enough Seasoning: Always taste your salad before serving. A little extra salt can make all the difference.
  • Skipping the Nuts: The toasted hazelnuts add a crucial crunch and flavor; don’t skip this ingredient!

Delicious Variations to Try

If you want to mix things up, consider these variations:

  • Protein Boost: Add grilled chicken or shrimp to make this a more filling meal.
  • Cheese Alternatives: Swap goat cheese for feta or blue cheese for a different flavor profile.
  • Grain Addition: Toss in cooked quinoa or farro for a hearty twist.
  • Fruit Fusion: Add sliced strawberries or mandarin oranges for a sweet touch that contrasts beautifully with the savory elements.

Storage and Make-Ahead Instructions

This spring salad is best enjoyed fresh, but you can prepare components ahead of time:

  • Prep Ahead: Wash and chop your vegetables a few hours in advance; store them in airtight containers in the refrigerator.
  • Dressing Storage: Make the dressing ahead of time and store it in a jar; shake well before using.
  • Storage: If you have leftovers, store them in an airtight container. However, note that the salad may become soggy over time, so it’s best enjoyed fresh.

Frequently Asked Questions

  • Can I use frozen vegetables? Yes, frozen peas work wonderfully in this salad.
  • What can I substitute for goat cheese? Feta or ricotta can also work well as a substitute.
  • How long does this salad last? It’s best eaten within a day, but the components can last in the fridge for a few days if stored separately.
  • Can I make this salad vegan? Yes, simply omit the cheese and use a vegan dressing.
  • What can I add for more flavor? Fresh herbs like basil or mint can elevate the dish significantly.
  • Is this salad gluten-free? Yes, all ingredients listed are gluten-free.
  • How can I enhance the dressing? Add a pinch of garlic powder or Dijon mustard for an extra flavor kick.
  • Can I use a different nut? Absolutely! Almonds or walnuts can be great alternatives to hazelnuts.

Nutritional Tips and Dietary Adaptations

This spring salad is not only delicious but also packed with nutritional benefits:

  • High in Fiber: The combination of fresh vegetables and nuts provides a good source of dietary fiber.
  • Rich in Vitamins: Asparagus and arugula are loaded with vitamins A, C, and K, which support overall health.
  • Healthy Fats: The olive oil and nuts offer heart-healthy fats that are essential for a balanced diet.
  • Protein Options: For a protein boost, consider adding grilled chicken, chickpeas, or beans.

Equipment Recommendations

To make this spring salad, you will need:

  • Baking Sheet: For roasting the asparagus.
  • Large Mixing Bowl: For tossing the salad ingredients together.
  • Vegetable Peeler: Essential for creating zucchini ribbons.
  • Sharp Knife: For slicing and chopping vegetables.

Serving Suggestions

This salad can shine on its own or alongside a variety of dishes:

  • Grilled Meats: Pair it with grilled chicken, steak, or fish for a complete meal.
  • Sandwiches or Wraps: Serve it alongside your favorite sandwich for a refreshing side.
  • Picnic Fare: This salad is perfect for outdoor gatherings; pack it in a cooler for a tasty treat!

Conclusion: A Salad to Cherish

In the end, this Spring Salad with Asparagus, Goat Cheese, Lemon, and Hazelnuts is more than just a recipe; it’s a reminder of the joy that cooking and sharing meals can bring. As you gather around your table, whether with family or friends, let this salad be a part of those cherished moments. I hope this recipe inspires you to embrace the freshness of spring and fill your kitchen with love and laughter. Happy cooking, and remember: every meal is an opportunity to create memories!

Spring Salad with Asparagus, Goat Cheese, lemon and Hazelnuts

Prep Time 15 minutes
Cook Time 10 minutes
Total Time 25 minutes
Servings 4 servings
Calories 350
A fresh and vibrant spring salad combining tender asparagus, peas, radishes, zucchini, and greens, topped with creamy goat cheese, toasted hazelnuts, and a lemony dressing.

Ingredients

Vegetables

  • 1 bunch asparagus (thin but thick enough to cut in half lengthwise)
  • 1 cup fresh peas (or frozen and defrosted)
  • 0.5 cup cooked fava beans (or defrosted lima beans)
  • 5 radishes radishes (thinly sliced)
  • 2 medium raw zucchini (made into ribbons with a vegetable peeler, no seeds)
  • 0.5 bunch red leaf lettuce (chopped bite size)
  • 1 handful arugula (mixed with lettuce)
  • 4 oz chevre goat cheese (with honey)
  • 1 lemon lemon (zest and slices for garnish)
  • 0.5 cup toasted hazelnuts (slightly cracked open)
  • to taste shaved Parmigiano Reggiano (for topping)
  • extra lemons extra lemons (for dressing)
  • as needed olive oil (for roasting and dressing)

Instructions 

  • Roast asparagus on a sheet pan with olive oil at 375°F for 5-10 minutes until tender but still crisp. Cool and slice lengthwise.
  • Make a lemon and olive oil dressing using 2 parts lemon juice to 4 parts olive oil.
  • Mix goat cheese with 2 tablespoons of lemon dressing until smooth, then toss with sliced asparagus.
  • Assemble greens, peas, fava beans, radishes, zucchini ribbons on a platter. Top with goat cheese-coated asparagus.
  • Sprinkle toasted hazelnuts and shaved Parmigiano Reggiano over the salad. Drizzle with lemon dressing and garnish with lemon slices.

Notes

Use fresh ingredients for the best flavor and texture.
Calories: 350kcal
Cost: $15
Course: Salad
Cuisine: American
Keyword: asparagus

Experience the Joy of Cooking with Zesty Air Fryer Lemon Chicken Bites

Welcome to the heart of the kitchen, where love and flavors come together! If you’re looking for a delightful way to bring warmth to your dining table, then these Air Fryer Lemon Chicken Bites are just the ticket. With juicy chicken marinated in zesty lemon and spices, every bite is like a burst of sunshine. Perfect for family gatherings or a cozy weeknight dinner, these bites are quick, easy, and full of love. Let’s dive into this culinary adventure!

Why You’ll Love This Recipe

  • Quick and Easy: This recipe takes less than 30 minutes from prep to plate, making it perfect for busy weeknights.
  • Flavor-Packed: Marinated in fresh lemon juice and spices, these chicken bites are bursting with flavor that will leave everyone asking for seconds.
  • Healthy Choice: Using an air fryer means less oil and fewer calories, making these bites a guilt-free indulgence.
  • Versatile: Perfect as an appetizer, main course, or salad topping, these chicken bites can fit into various meals.
  • Kid-Friendly: The mild flavor and fun bite-sized pieces make these a hit with kids, encouraging them to enjoy their veggies too!

Ingredients Breakdown

Here’s what you’ll need to create these delicious lemon chicken bites:

  • 1 pound Boneless, skinless chicken breasts: Cut into bite-sized pieces for even cooking. You can substitute with chicken thighs for a richer flavor.
  • 2 tablespoons Olive oil: This helps the marinade stick while adding a touch of richness.
  • 2 tablespoons Lemon juice: Freshly squeezed is best for that vibrant flavor. Bottled juice lacks the freshness.
  • 1 tablespoon Lemon zest: This enhances the lemony aroma and flavor, making every bite a little brighter.
  • 1 teaspoon Garlic powder: Adds depth and a hint of savory goodness.
  • 1 teaspoon Onion powder: Complements the garlic and enhances overall flavor.
  • 1 teaspoon Salt: Essential for bringing out the flavors.
  • 1 teaspoon Black pepper: For a touch of spice.
  • 2 tablespoons Chopped fresh parsley: A lovely garnish that adds color and freshness.
  • 2 pieces Lemon wedges: For serving, allowing your guests to squeeze more lemon over their bites if they like.

Pro Tips for Perfect Lemon Chicken Bites

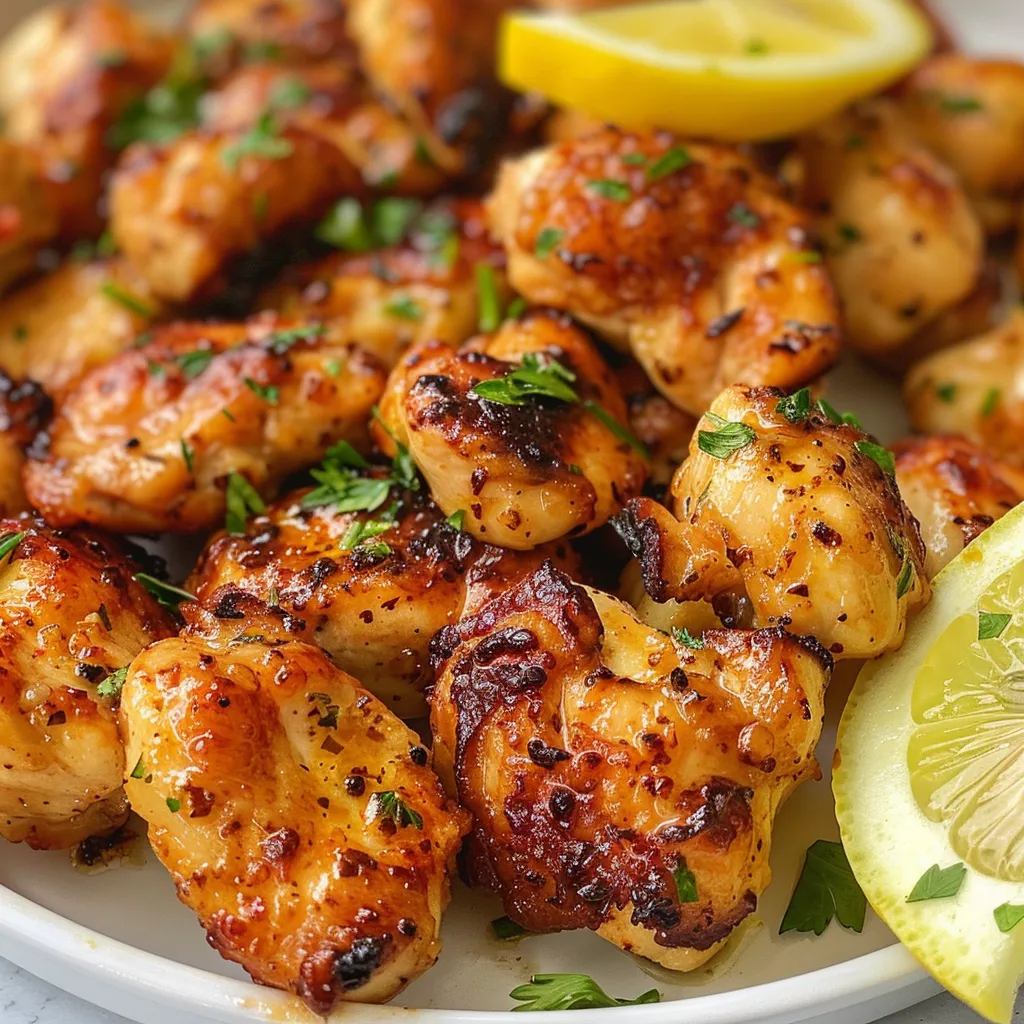
Delicious Air Fryer chicken bites served with bright lemon wedges and herbs.
  • Marinate Longer: For the best flavor, marinate the chicken for at least an hour, or even overnight if you have time.
  • Preheat the Air Fryer: Ensuring your air fryer is hot before adding the chicken helps achieve that crispy texture.
  • Don’t Overcrowd: Place the chicken in a single layer for even cooking. Cook in batches if necessary.
  • Use Fresh Ingredients: Fresh herbs and spices make a significant difference in flavor compared to dried ones.
  • Check for Doneness: Use a meat thermometer; chicken should reach an internal temperature of 165°F for safety.
  • Experiment with Flavors: Feel free to add other spices like paprika or cayenne for a kick!
  • Let Rest: Allow the chicken to rest for a few minutes after cooking to keep it juicy.
  • Garnish Generously: A sprinkle of fresh parsley or a drizzle of lemon juice just before serving elevates the dish.

Common Mistakes & Troubleshooting

Even the best of us have off days in the kitchen. Here are some common pitfalls and how to avoid them:

  • Overcooked Chicken: Keep an eye on the cooking time. If overcooked, the chicken can become dry and tough.
  • Undercooked Chicken: Always check with a meat thermometer to ensure it’s cooked through.
  • Flavorless Bites: If you skip the marination step or use old spices, the flavor may fall flat. Always use fresh ingredients!
  • Texture Issues: Too much moisture can lead to soggy bites. Ensure the chicken is well-drained before marinating.

Delicious Variations

These air fryer lemon chicken bites are versatile and can be customized to suit your taste. Here are some delightful variations:

  • Herb-Infused: Add fresh herbs like rosemary or thyme to the marinade for an aromatic twist.
  • Spicy Kick: Mix in red pepper flakes or a dash of hot sauce for a spicy version.
  • Honey Lemon Glaze: Incorporate honey into the marinade for a sweet and tangy flavor profile.
  • Asian Twist: Use soy sauce, ginger, and sesame oil in place of the lemon for an Asian-inspired dish.

Storage and Make-Ahead Instructions

If you want to prepare these bites ahead of time, here’s how to do it:

  • Make Ahead: Marinate the chicken a day in advance and store it in the refrigerator until you’re ready to cook.
  • Storing Leftovers: Store any leftover chicken bites in an airtight container in the fridge for up to 3 days.
  • Freezing: You can freeze the marinated chicken for up to 3 months. Just thaw overnight in the fridge before cooking.
  • Reheating: Reheat in the air fryer at 350°F for about 5-7 minutes for best results.

Frequently Asked Questions (FAQs)

  • Can I use frozen chicken? Yes, but ensure it’s completely thawed and drained before marinating.
  • What can I serve with lemon chicken bites? They pair wonderfully with a fresh salad, rice, or even in a wrap!
  • How do I know when the chicken is done? Use a meat thermometer; it should read 165°F.
  • Can I make this recipe gluten-free? Absolutely! Just ensure your ingredients are gluten-free.
  • Is this recipe suitable for meal prep? Yes, they store well and can be reheated easily.
  • What if I don’t have an air fryer? You can bake them in the oven at 400°F for 15-20 minutes, flipping halfway.
  • Can I add vegetables? Yes, toss some bell peppers or zucchini in with the chicken for a complete meal.
  • How do I prevent the chicken from sticking to the air fryer? Lightly spray the basket with oil before adding chicken to prevent sticking.

Nutritional Tips and Dietary Adaptations

These air fryer lemon chicken bites are not just delicious; they can fit various dietary preferences:

  • Keto-Friendly: Using chicken thighs and omitting any high-carb sides makes it a perfect option.
  • Paleo-Friendly: Stick with whole ingredients and avoid added sugars.
  • Low-Calorie: This recipe is light, making it a great choice if you’re watching calories.
  • Dairy-Free: This recipe contains no dairy, making it suitable for lactose intolerance.

Equipment Recommendations

To make these delicious chicken bites, you’ll need:

  • Air Fryer: Essential for achieving that crispy texture without excess oil.
  • Meat Thermometer: To check for doneness and avoid undercooking.
  • Mixing Bowl: For marinating the chicken and combining ingredients.
  • Cutting Board and Knife: To chop the chicken and prep ingredients.

Serving Suggestions

These lemon chicken bites can shine on their own or be served with:

  • Fresh Salad: Pair with a light salad for a refreshing meal.
  • Yogurt Dip: A cool yogurt dip balances the zesty flavors beautifully.
  • Rice or Quinoa: Serve over rice or quinoa for a filling dish.
  • Wraps: Use in wraps with lettuce and other fresh vegetables for a fun lunch option.

Conclusion

Cooking is more than just a task; it’s a way to share love and create memories. These Zesty Air Fryer Lemon Chicken Bites are an invitation to gather around the table and enjoy each other’s company. With their bright flavors and quick prep time, they’re sure to become a family favorite. So grab your ingredients, fire up that air fryer, and let’s make some magic in the kitchen together!

Air Fryer Lemon Chicken Bites: Zesty, Juicy Goodness Await!

Prep Time 10 minutes
Cook Time 15 minutes
Total Time 25 minutes
Servings 4 servings
Calories 250
Enjoy tender, flavorful chicken bites infused with fresh lemon, cooked to perfection in the air fryer for a quick and healthy meal.

Ingredients

Chicken

  • 1 pound Boneless, skinless chicken breasts (Cut into bite-sized pieces)
  • 2 tablespoons Olive oil (For marinade)
  • 2 tablespoons Lemon juice (Freshly squeezed)
  • 1 tablespoon Lemon zest
  • 1 teaspoon Garlic powder
  • 1 teaspoon Onion powder
  • 1 teaspoon Salt
  • 1 teaspoon Black pepper
  • 2 tablespoons Chopped fresh parsley (For garnishing)
  • 2 pieces Lemon wedges (For serving)

Instructions 

  • Marinate chicken pieces with olive oil, lemon juice, lemon zest, garlic powder, onion powder, salt, and pepper. Let sit for 10 minutes.
  • Preheat the air fryer to 400°F (200°C).
  • Place marinated chicken in the air fryer basket in a single layer.
  • Cook for 12-15 minutes, shaking halfway through, until chicken is cooked through and slightly crispy.
  • Garnish with chopped parsley and serve with lemon wedges.

Notes

For extra flavor, add a pinch of red pepper flakes to the marinade.
Calories: 250kcal
Cost: $15
Course: Main Course
Cuisine: American
Keyword: Chicken, Lemon

Bring the Colors of Spring to Your Table

Spring is a time for renewal, a season that invites us to freshen up our meals and reconnect with the vibrant colors of nature. This Vibrant Spring Rainbow Salad is more than just a dish; it’s a celebration of the season, combining a medley of fresh ingredients to create a feast for the eyes and palate. With every bite, you’ll experience the crunch of pecan nuts, the sweetness of strawberries, and the tang of a zesty dressing that will transport you straight to a sunlit picnic, surrounded by laughter and love.

Why You’ll Love This Recipe

  • Rich in Nutrients: This salad is filled with vitamins and minerals from fresh produce, ensuring you get a healthy dose of nourishment in every bite.
  • Easy to Customize: Feel free to swap ingredients to suit your taste or dietary needs, making it your own!
  • Perfect for Any Occasion: Whether it’s a family gathering, a picnic, or a simple lunch, this salad shines on any table.
  • Quick Preparation: With a total prep time of under 30 minutes, you can prepare this delightful dish even on your busiest days.
  • Great for Meal Prep: This salad holds up well, making it an excellent choice for your weekly meal prep.

Ingredient Breakdown

Let’s dive into the heart of this spring salad. Here’s what you’ll need to create this colorful dish:

  • Tofu (250 g): Provides a protein boost and absorbs flavors beautifully. For a vegan twist, opt for tempeh.
  • Nutritional Yeast (20 g): Adds a cheesy flavor and is rich in B vitamins. If unavailable, use grated vegan cheese.
  • Lime Juice (1 tsp): Brightens the flavor of the dressing. Lemon juice works just as well!
  • Olive Oil (2 tbsp): A healthy fat that makes the salad dressing smooth and delicious. Avocado oil can be a substitute.
  • Paprika Powder (1 tsp): Adds a smoky depth to the tofu. You can use smoked paprika for extra flavor.
  • Salt (1 tsp): Enhances all the flavors; adjust to taste.
  • Sliced Strawberries (16): Sweet and juicy, they bring a lovely contrast to the salad. Feel free to use blueberries or raspberries.
  • Physalis (12): These little golden berries add a unique tartness. If you can’t find them, try using kiwi slices or mandarin segments.
  • Spring Mix (200 g): A blend of greens that provide a fresh base. Spinach or arugula can be great alternatives.
  • Pomegranate (1): Adds a burst of sweetness and beautiful color. Dried cranberries can be a good substitute.
  • Pecan Nuts (30 g): Crunchy and rich in flavor, they’re a delightful addition. Almonds or walnuts can be swapped in.
  • Pumpkin Seeds (20 g): These seeds add extra crunch and nutrition. Sunflower seeds are another tasty option.
  • Lemon Juice (2 tbsp): For the dressing, it adds brightness. You can use vinegar for a different tang.

Method: How to Create Your Salad

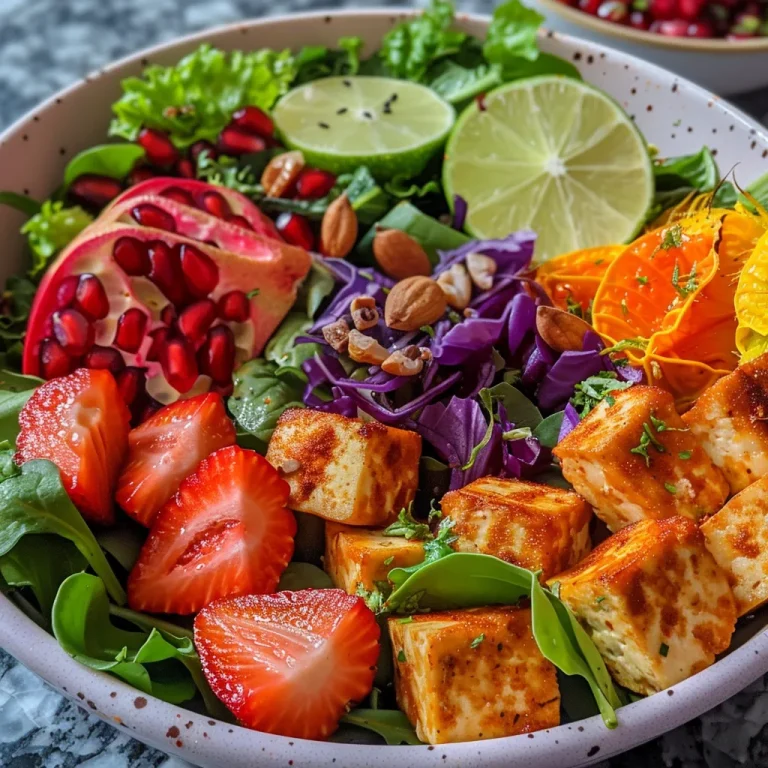
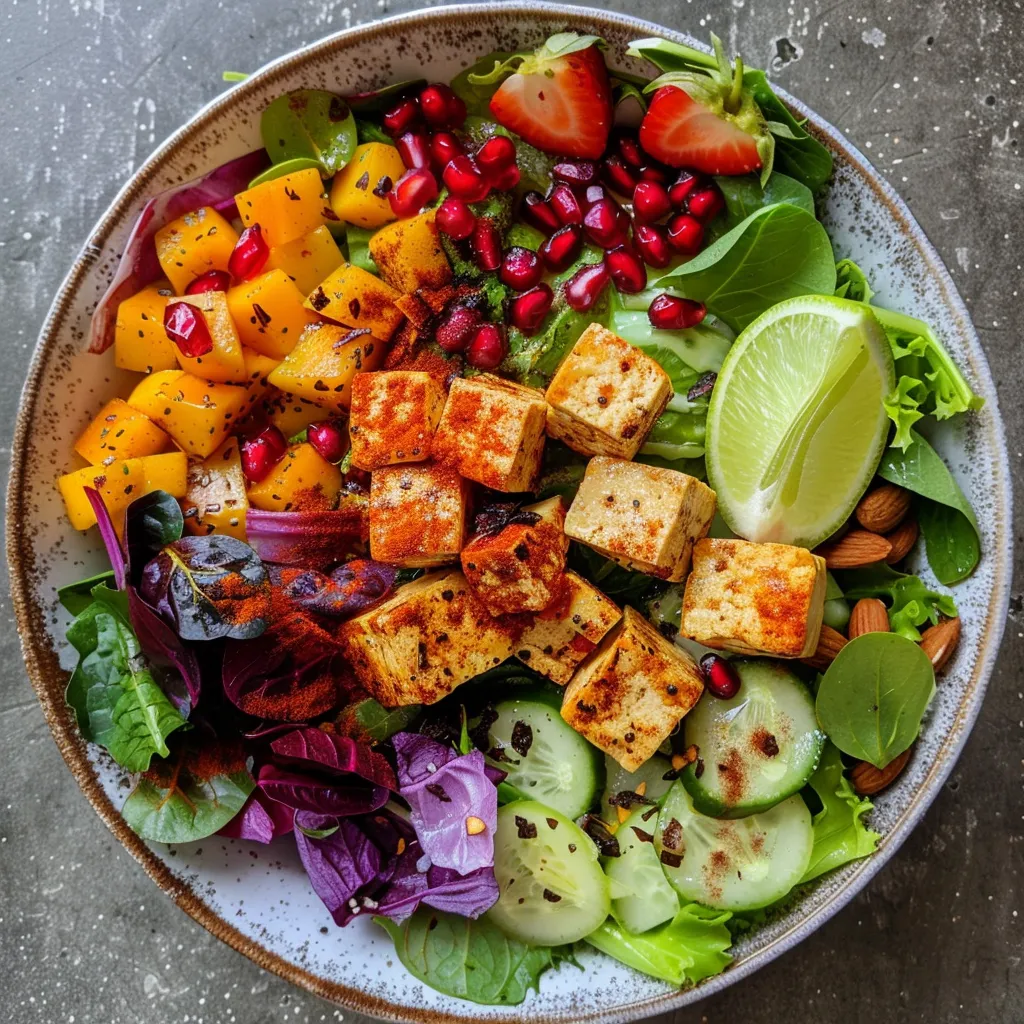
Detailed photo of a spring salad showcasing tofu, seeds, and a mix of greens.

Follow these simple steps to create your Vibrant Spring Rainbow Salad, perfect for sharing and enjoying:

  1. Drain the tofu of excess water and continue to dry by lightly pressing with a paper towel.
  2. Slice the tofu into medium-sized pieces of roughly 2 cm thickness.
  3. In a small bowl, combine the tofu marinade – nutritional yeast, lime juice, salt, paprika, and olive oil. Mix to combine.
  4. Coat the tofu on all sides with the marinade. Place it on a plate and cover with plastic wrap. Allow the tofu to marinate for 10-30 minutes while preparing the salad.
  5. In a medium-sized skillet, cook the tofu over medium heat. Cook each side for 3-4 minutes until each side is evenly cooked. Serve warm with the salad.
  6. In a large salad bowl, combine spring salad mix, sliced strawberries, physalis, and pomegranate seeds.
  7. In a small saucepan, toast the pecan nuts and pumpkin seeds on low heat for 3-5 minutes. Toss them into the salad.
  8. For the salad dressing, combine lemon juice, olive oil, and salt in a small bowl. Drizzle on top of the salad.
  9. Assemble the salad with the salad ingredients, topped with dressing and warm tofu stir fry.

Pro Tips for the Best Rainbow Salad

  • Marinate Wisely: Let the tofu marinate for at least 30 minutes for maximum flavor absorption.
  • Choosing Ingredients: Opt for the freshest seasonal produce to elevate the taste and aesthetics of the salad.
  • Texture Tips: For a satisfying crunch, toast the nuts and seeds just before serving.
  • Layering: Layer your ingredients by placing denser items at the bottom and lighter greens on top for a beautiful presentation.
  • Dressing Variations: Experiment with different dressings like a balsamic vinaigrette or tahini dressing for a unique twist.
  • Adjust Seasoning: Always taste and adjust the seasoning of your dressing before drizzling it onto the salad.
  • Presentation Matters: Consider serving this salad in clear bowls to showcase its vibrant colors.
  • Make it a Meal: Add quinoa or farro for a heartier version that’s perfect as a main dish.
  • Freshness is Key: Use fresh herbs like mint or basil to elevate the flavor profile.
  • Storing Leftovers: Keep the dressing separate if you plan to store leftovers to maintain freshness and crunchiness.

Common Mistakes and Troubleshooting

Even the most seasoned cooks can run into hiccups. Here’s how to avoid common mistakes:

  • Overcooked Tofu: Ensure you monitor the tofu closely while cooking; overcooking can lead to a rubbery texture.
  • Too Much Dressing: Start with less dressing and add more as needed to prevent sogginess.
  • Skipping the Toasting Step: Skipping the toasting of nuts and seeds could result in a less flavorful and crunchy salad.
  • Not Using Fresh Ingredients: Using wilting greens or old produce can drastically affect the taste and nutritional value.

Variations to Try

Your spring salad can be easily tailored to your preferences. Here are some variations to consider:

  • Berry Medley: Swap the strawberries for a mix of blueberries, raspberries, and blackberries for a sweeter twist.
  • Grilled Veggie Rainbow: Add grilled zucchini and bell peppers for a smoky flavor and additional texture.
  • Protein-Packed: Incorporate chickpeas or black beans for a hearty protein boost.
  • Spicy Kick: Add sliced jalapeños or drizzle with sriracha for a spicy version of this salad.

Storage and Make-Ahead Instructions

This salad is perfect for meal prep! Here’s how to store and prepare it ahead of time:

  • Make Ahead: Prepare the salad ingredients in advance but keep the dressing separate until you’re ready to serve.
  • Storage: Store leftovers in an airtight container in the refrigerator for up to 2 days. The tofu can be reheated gently on the stove or in the microwave.

Frequently Asked Questions

Here are some common questions about this Vibrant Spring Rainbow Salad:

  • Can I make this salad vegan?
    Yes! All ingredients in this recipe are plant-based, making it completely vegan-friendly.
  • How long does the salad last?
    The salad can be stored in the fridge for up to 2 days; however, for best freshness, consume it within 24 hours.
  • What can I use instead of tofu?
    Tempeh, seitan, or even grilled chicken can be used as alternatives for a different protein source.
  • Can I use frozen fruits?
    While fresh is best, you can use thawed frozen fruits in a pinch, but be aware they may have a softer texture.
  • Is this salad gluten-free?
    Yes, all ingredients in this recipe are gluten-free, but always check labels for packaged items.
  • Can I add cheese?
    Absolutely! Feta or goat cheese can be added for a creamy, tangy flavor.
  • What type of olive oil should I use?
    A good quality extra virgin olive oil is recommended for its flavor and health benefits.
  • How can I make it more filling?
    Adding grains like quinoa or farro can make this salad a more substantial meal.

Nutrition Tips and Dietary Adaptations

This rainbow salad is not just visually appealing; it also packs a nutritional punch. Here are some tips to enhance its health benefits:

  • Boost Fiber: Add more vegetables like bell peppers, cucumbers, or carrots for added fiber.
  • Healthy Fats: The olive oil provides healthy fats, but you can also add avocado for extra creaminess.
  • Protein Power: For a complete meal, consider adding a plant-based protein source to keep you satiated longer.
  • Reduce Sodium: Control the salt content by using low-sodium soy sauce or omitting added salt.

Equipment Recommendations

Here are a few tools that can make preparing your salad easier:

  • Sharp Knife: For slicing tofu and fresh produce, a sharp knife is essential for clean cuts.
  • Cutting Board: A sturdy cutting board will provide a safe and stable surface for chopping.
  • Non-stick Skillet: Ideal for cooking your tofu to perfection without sticking.
  • Mixing Bowls: Use various sizes for mixing ingredients and preparing dressings.

Serving Suggestions

For the best experience, serve this salad as part of a larger meal. Here are some ideas:

  • Accompany with Bread: Serve with crusty bread or garlic knots for a complete meal.
  • Pair with Soup: A light vegetable soup makes a cozy pairing with this refreshing salad.
  • Perfect Picnic Dish: Pack it for a picnic alongside refreshing drinks and light snacks.
  • Great Side Dish: Serve it as a side to grilled meats or fish during barbecues.

In conclusion, the Vibrant Spring Rainbow Salad is not just a delight for your taste buds, but a beautiful representation of the season’s bounty. By following the steps and tips shared in this article, you can create a dish that not only nourishes the body but also brings people together, reminding us that cooking is about sharing love and joy. Dive into this salad and let it bring a wave of spring freshness to your table, where every bite is a celebration of flavor, color, and cherished memories.

Vibrant Spring Rainbow Salad

Prep Time 15 minutes
Cook Time 10 minutes
Total Time 25 minutes
Servings 4 servings
Calories 450
A colorful and nutritious salad featuring marinated tofu, fresh fruits, and crunchy seeds, perfect for a vibrant spring meal.

Ingredients

Protein

  • 250 g Tofu (firm, drained and pressed)
  • 20 g Nutritional yeast
  • 1 tsp Lime juice
  • 2 tbsp Olive oil
  • 1 tsp Paprika powder
  • 1 tsp Salt
  • 16 pieces Sliced strawberries
  • 12 pieces Physalis
  • 200 g Spring mix
  • 1 whole Pomegranate (seeds)
  • 30 g Pecan nuts (toasted)
  • 20 g Pumpkin seeds (toasted)
  • 2 tbsp Olive oil (for dressing)
  • 1/4 tsp Salt (for dressing)
  • 2 tbsp Lemon Juice (for dressing)

Instructions 

  • Drain and dry the tofu, then slice into 2 cm pieces.
  • Mix nutritional yeast, lime juice, salt, paprika, and olive oil to make marinade.
  • Marinate tofu for 10-30 minutes, then cook in a skillet over medium heat for 3-4 minutes per side.
  • Combine spring mix, strawberries, physalis, and pomegranate seeds in a bowl.
  • Toast pecans and pumpkin seeds for 3-5 minutes, then add to salad.
  • Mix lemon juice, olive oil, and salt for dressing, then drizzle over salad and serve with warm tofu.

Notes

Use fresh, ripe fruits for the best flavor and color vibrancy.
Calories: 450kcal
Cost: $15
Course: Salad
Keyword: Rainbow, Spring, Vegan

Experience the Joy of a Creamy Cucumber Dill Salad

In a world filled with complex recipes and extravagant ingredients, sometimes the simplest dishes can bring the most joy. My Creamy Cucumber Dill Salad is a perfect example of that culinary truth. This Mediterranean-inspired dish, with its crisp cucumbers and velvety dressing, is not only a refreshing side for warm days but also a heartfelt reminder of love and tradition shared around the family table.

As you prepare this salad, you’ll discover how the harmonious blend of fresh ingredients creates a dish that’s both cooling and comforting. Let’s dive into the details of this recipe that celebrates the beauty of simplicity and brings family and friends together.

Why You’ll Love This Recipe

  • Quick and Easy: This creamy cucumber salad can be prepared in less than 20 minutes, making it a fantastic option for busy days or last-minute gatherings.
  • Versatile Dish: Whether served as a side with grilled meats or as a light lunch on its own, this salad fits beautifully into any meal.
  • Health Benefits: Packed with fresh vegetables and yogurt dressing, it’s a dish that’s not only delicious but also nutritious and low in calories.
  • Make-Ahead Friendly: Perfect for meal prep, this salad can be made in advance, allowing the flavors to meld together for an even tastier experience.
  • Family Tradition: This recipe is inspired by my grandmother’s kitchen, where every dish was made with love and the intention of bringing everyone together.

Ingredients Breakdown

Let’s take a closer look at the ingredients that make this salad shine:

  • Cucumbers: 1 ½ lbs of thinly sliced cucumbers (English or Persian varieties work best). These varieties are tender and have a mild flavor.
  • Red Onion: ½ of a red onion, thinly sliced, adds a sweet and slightly sharp note that balances the dish.
  • Fresh Dill: ÂĽ cup of finely chopped fresh dill provides that aromatic touch that elevates the entire salad.
  • Greek Yogurt: Âľ cup of full-fat plain Greek yogurt for a creamy dressing that’s rich yet light.
  • Olive Oil: 1 ½ tablespoons of extra-virgin olive oil adds depth of flavor and richness.
  • Lemon Juice: 1 ½ tablespoons of fresh lemon juice brightens the dish and keeps it refreshing.
  • Garlic: ÂĽ teaspoon of finely minced garlic for a subtle punch that complements the other flavors.
  • Seasoning: ½ teaspoon of fine salt and ÂĽ teaspoon of black pepper to enhance the overall taste.

Pro Tips for the Best Salad

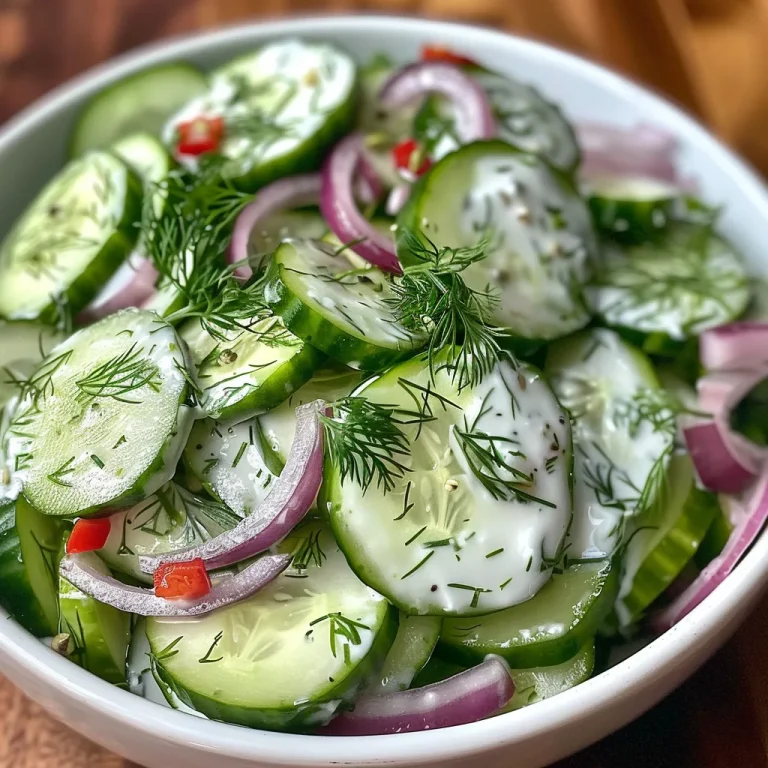
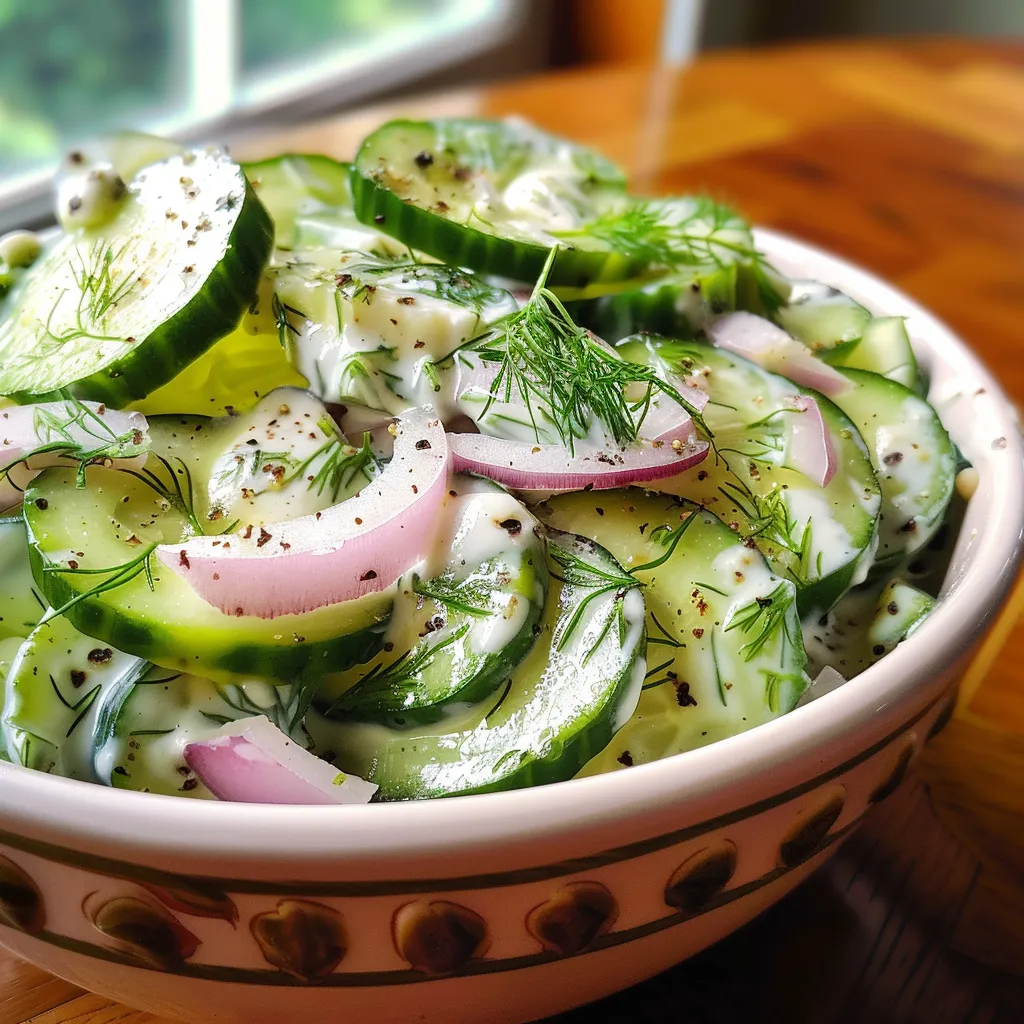
Detailed view of creamy cucumber and red onion salad, highlighted by a rich dressing.

To ensure your Creamy Cucumber Dill Salad is absolutely perfect, consider these expert tips:

  • Choose the Right Cucumbers: Opt for thin-skinned cucumbers like English or Persian. If using a thicker-skinned variety, peel them for a better texture.
  • Minimize Watery Salad: To prevent the salad from becoming watery, sprinkle the cucumbers with salt and let them sit for 10 minutes before mixing with the dressing.
  • Chill Before Serving: Let the salad chill in the refrigerator for at least 30 minutes. This helps the flavors meld beautifully.
  • Customize Your Dressing: Feel free to add a splash of vinegar or a dash of mustard to the yogurt dressing for a flavorful twist.
  • Use Fresh Herbs: While fresh dill is essential, you can also experiment with parsley or mint for a different flavor profile.
  • Don’t Rush the Mixing: Gently toss the salad to ensure the dressing coats every cucumber slice evenly.
  • Adjust Seasoning: Taste before serving and adjust the salt and pepper to your liking.
  • Presentation Matters: Serve the salad in a beautiful bowl and garnish with extra dill or cucumber slices for an elegant touch.

Avoiding Common Mistakes

Even the best recipes can go awry without a bit of attention. Here are some common pitfalls to avoid:

  • Over-salting Cucumbers: While salt helps draw out moisture, too much can make the salad overly salty. Use sparingly.
  • Using Old Ingredients: Freshness is key in this salad. Ensure your cucumbers and herbs are as fresh as possible for the best flavor.
  • Skipping the Chilling Step: Don’t skip the refrigeration step; it’s essential for flavor development.
  • Not Adjusting the Dressing: If you find the dressing too thick, thin it with a bit of water or more lemon juice.

Variations to Try

Feel free to make this salad your own with these variations:

  • Greek Style: Add crumbled feta cheese and kalamata olives for a Mediterranean twist.
  • Spicy Kick: Mix in a pinch of red pepper flakes for a bit of heat.
  • Avocado Delight: Incorporate diced avocado for added creaminess and healthy fats.
  • Herbed Yogurt Dressing: Experiment with different herbs like basil or cilantro mixed into the yogurt dressing for unique flavors.

Storage and Make-Ahead Instructions

This salad is perfect for meal prepping. Here’s how to keep it fresh:

  • Refrigeration: Store the salad in an airtight container in the refrigerator for up to 3 days. The flavors will continue to develop.
  • Make Ahead: Prepare the salad a day in advance to enhance the flavors. Just remember to keep the dressing separate until ready to serve if you prefer crisper cucumbers.

Frequently Asked Questions

Here are some common queries about this delightful dish:

  • Can I use sour cream instead of Greek yogurt? Yes, sour cream can be used for a tangier taste, but Greek yogurt adds a healthier twist.
  • Can I make this salad vegan? Substitute the yogurt with a plant-based yogurt and ensure no dairy ingredients are used.
  • How do I keep my salad from getting soggy? Salt the cucumbers beforehand and avoid adding the dressing until just before serving.
  • What can I serve with this salad? It pairs beautifully with grilled chicken, seafood, or as part of a picnic spread.
  • Is it safe to eat after a few days? Yes, as long as it has been stored properly in the fridge.
  • Can I freeze the salad? It’s not recommended to freeze cucumber salad as it will lose its texture once thawed.
  • Can I add other vegetables? Absolutely! Bell peppers, radishes, or even cherry tomatoes can add color and crunch.
  • How do I make it more filling? Add protein such as chickpeas or grilled shrimp for a heartier meal.

Nutritional Tips and Dietary Adaptations

This Creamy Cucumber Dill Salad is not just tasty; it’s also healthy. Here’s how you can keep it nutritious:

  • Low Carb Option: Stick to the basic recipe for a low-carb side dish, perfect for keto diets.
  • Low-Fat Variation: Use low-fat Greek yogurt for a lighter version without sacrificing too much flavor.
  • Gluten-Free: This salad is naturally gluten-free, making it suitable for those with gluten sensitivities.
  • Rich in Vitamins: With fresh cucumbers and dill, this salad is rich in vitamins A and K, making it a nutrient-dense choice.

Essential Equipment for Preparation

Having the right tools can make your cooking experience much smoother:

  • Sharp Knife: A good knife is crucial for slicing cucumbers and onions thinly.
  • Cutting Board: A sturdy cutting board will provide a safe surface for chopping.
  • Mixing Bowl: Use a large bowl for combining all the ingredients without making a mess.
  • Whisk: A whisk is handy for mixing the dressing until smooth and creamy.

Serving Suggestions

To serve, present your creamy cucumber dill salad in a lovely bowl, and consider these ideas:

  • Garnish: Add extra sprigs of dill or thin cucumber slices on top for a polished look.
  • Accompaniment: Serve alongside grilled meats, sandwiches, or even as a refreshing appetizer.
  • Plating: For a more elegant presentation, layer the salad in individual glasses or bowls.

In conclusion, this Creamy Cucumber Dill Salad is more than just a side dish; it’s a celebration of love, tradition, and the joy of cooking. As you share this salad with your loved ones, may it bring back memories of warmth and togetherness. So gather your ingredients, roll up your sleeves, and create a dish that’s sure to be embraced around your family table.

Creamy Cucumber Dill Salad — Fresh, Cooling, and Mediterranean-Inspired

Prep Time 10 minutes
Total Time 10 minutes
Servings 4 people
Calories 150
A refreshing and creamy cucumber salad infused with fresh dill and lemon, perfect for a light Mediterranean-inspired dish.

Ingredients

Main ingredients

  • 1.5 lb cucumbers (thinly sliced)
  • 0.5 red onion red onion (very thinly sliced)
  • 0.25 cup fresh dill (finely chopped)
  • 0.75 cup full-fat plain Greek yogurt (creates a rich, velvety dressing)
  • 1.5 tablespoons extra-virgin olive oil
  • 1.5 tablespoons fresh lemon juice
  • 0.25 teaspoon garlic (finely minced or paste)
  • 0.5 teaspoon fine salt
  • 0.25 teaspoon black pepper

Instructions 

  • Combine sliced cucumbers, red onion, and chopped dill in a bowl.
  • In a separate bowl, whisk together Greek yogurt, olive oil, lemon juice, garlic, salt, and pepper.
  • Pour the dressing over the vegetables and toss gently to combine.
  • Chill for at least 10 minutes before serving for best flavor.

Notes

Use fresh dill for the best flavor and adjust seasoning to taste.
Calories: 150kcal
Cost: $12
Course: Salad
Cuisine: Mediterranean
Keyword: Cucumber, Dill, Yogurt

Welcome to the Heart of Spring: A Lemony Asparagus Salad

Spring is a time for renewal, a season that brings fresh produce bursting with flavor and color. One such delight is asparagus, a vibrant green vegetable that graces our tables with its delicate taste and nutritional benefits. In this article, I’m thrilled to share my cherished recipe for Lemony Asparagus Salad with Shaved Cheese and Nuts. This dish, filled with crispy asparagus, crunchy nuts, and soft cheese, is not just a salad—it’s a heartfelt expression of love and togetherness, perfect for spring gatherings.

Why You’ll Love This Recipe

Every bite of this Lemony Asparagus Salad tells a story, evoking memories of family dinners and sunny afternoons. Here are just a few reasons to fall in love with this recipe:

  • Fresh and Flavorful: The combination of tender asparagus and zesty lemon creates a refreshing taste that brightens any meal.
  • Textural Harmony: The contrast of crunchy nuts and creamy cheese makes each bite a delightful experience.
  • Quick and Easy: With simple ingredients and straightforward steps, this salad can be prepared in under 30 minutes.
  • Versatile Dish: Perfect as a side for grilled meats or as a light main course, it fits into any meal plan.
  • Perfect for Sharing: This salad encourages gathering around the table, embodying the spirit of community and love.

Ingredient Breakdown

Let’s take a closer look at the ingredients that make this salad shine. Each element can be easily substituted or adjusted to suit your taste or dietary needs:

  • Pistachios (or other nuts): These add a delightful crunch. Feel free to swap with almonds or walnuts for a different flavor.
  • Asparagus: Choose fresh, vibrant green stalks. If unavailable, consider using green beans or snap peas.
  • Soft herbs: A mix of dill, parsley, and tarragon brings brightness; however, basil or cilantro can work as wonderful alternatives.
  • Shallots or red onion: They provide a sweet, mild onion flavor. Green onions can be a lighter option.
  • Lemon juice: Fresh lemon juice adds brightness. Cider vinegar can also work well for a tangy twist.
  • Extra-virgin olive oil: Always opt for high-quality oil for the best flavor; avocado oil is a great substitute.
  • Grated cheese: Young sheep’s milk cheese adds creaminess; feel free to use Parmesan or any firm cheese you enjoy.

Preparation Steps

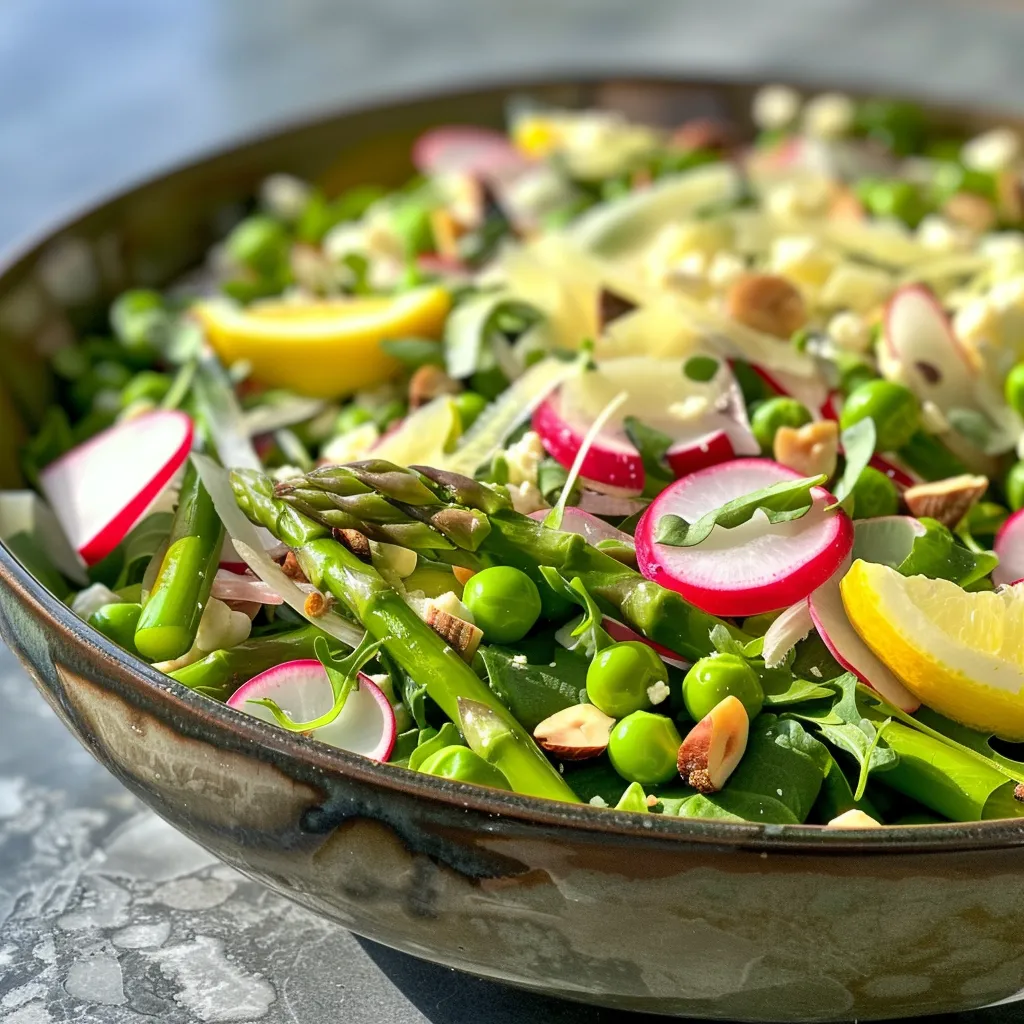
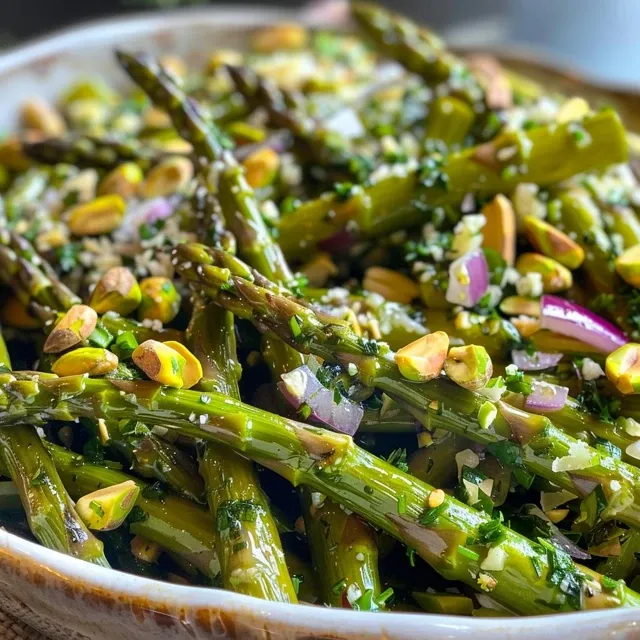
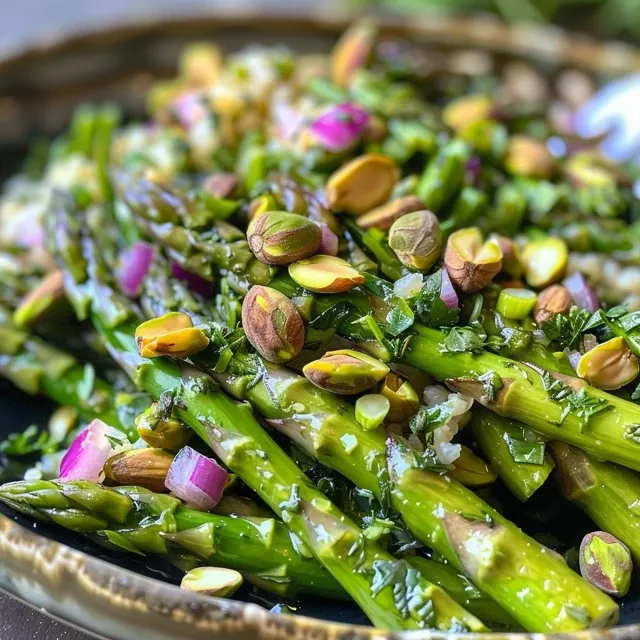
An appetizing display of lemony asparagus salad garnished with nuts and herbs.

Now, let’s dive into the delightful process of creating this salad. Follow these simple steps for a dish that will impress your loved ones:

  1. Preheat your oven to 350°F (175°C). On a rimmed baking sheet, spread the pistachios in an even layer and toast for 5 minutes. Remove from the oven and let cool before roughly chopping.
  2. In a large skillet, fill with about an inch of water. Place a steam basket on top, cover, and bring to a simmer. Steam the asparagus until just tender, about 5 minutes, then drain.
  3. In a medium bowl, finely chop 3 tablespoons of mixed herbs. Combine shallot, lemon juice, a pinch of salt, and pepper, allowing it to sit for 2 minutes. Whisk in the olive oil, then stir in the pistachios, cheese, and chopped herbs.
  4. To serve, drizzle the steamed asparagus with olive oil and salt to taste. Dollop with the dressing, tear remaining herbs on top, and sprinkle generously with additional cheese. Taste and adjust salt as needed.

Pro Tips for a Perfect Salad

To ensure your Lemony Asparagus Salad is a hit, consider these expert tips:

  • Choose the right asparagus: Opt for thin, tender stalks for a more delicate texture; thicker stalks can be woody.
  • Don’t overcook: Keep the asparagus vibrant by steaming until just tender, ensuring it retains its bright green color.
  • Toast nuts for flavor: Toasting nuts enhances their flavor, making them a delightful addition to the salad.
  • Let the dressing meld: Allow the dressing to sit for a bit before mixing with the salad for a more pronounced flavor.
  • Adjust salt to taste: Since cheeses vary in saltiness, taste the dish before adding more salt.
  • Experiment with cheese: Try different cheeses like feta or goat cheese for a tangier twist.
  • Chill before serving: Refrigerating the salad for a short period can enhance the flavors.

Common Mistakes and Troubleshooting

Here are some common pitfalls to avoid when preparing your salad:

  • Overcooked asparagus: This can lead to a mushy texture. Keep an eye on your steaming time.
  • Too much dressing: Start with less dressing; you can always add more if needed.
  • Nuts not toasted: Raw nuts can be bland; always toast for added flavor.

Variations to Try

You can easily customize this salad to fit your taste or the season. Here are some variations:

  • Add fruits: Toss in slices of ripe avocado or segments of citrus fruit for extra freshness.
  • Incorporate grains: Quinoa or farro can turn this salad into a hearty main dish.
  • Spice it up: Add a hint of red pepper flakes for a touch of heat.
  • Change the cheese: Experiment with blue cheese or cheddar for a different flavor profile.

Storage and Make-Ahead Instructions

If you’re planning to make this salad ahead of time, here’s how to store it:

  • Refrigerate: Store the salad in an airtight container in the fridge for up to 2 days. However, keep the dressing separate until you’re ready to serve to maintain freshness.
  • Freezing: While it’s best enjoyed fresh, you can freeze the asparagus before cooking if needed. Just blanch, cool, and freeze.

Frequently Asked Questions

Here are some common questions about this salad:

  • Can I use frozen asparagus? Yes, but the texture may differ. Thaw, and then steam briefly.
  • What if I don’t have fresh herbs? Dried herbs can work in a pinch; use them sparingly for a concentrated flavor.
  • Can I make this salad vegan? Yes, omit the cheese and use a plant-based dressing.
  • What’s the best way to serve this salad? Serve it chilled or at room temperature, making it a great dish for picnics.
  • Can I use different nuts? Absolutely! Almonds, walnuts, or even sunflower seeds work well.
  • How do I know when asparagus is cooked? It should be bright green and tender yet still crisp.
  • Can I add protein to this salad? Yes, grilled chicken or chickpeas can turn it into a complete meal.
  • How can I enhance the lemon flavor? Add more lemon juice or zest for a brighter taste.

Nutritional Insights and Dietary Adaptations

This salad not only delights the palate but also provides numerous health benefits:

  • Low in calories: Asparagus is low in calories and high in nutrients, making it a great addition to any diet.
  • High in fiber: Promotes digestive health and keeps you feeling full longer.
  • Rich in vitamins: Asparagus is packed with vitamins A, C, E, and K, contributing to overall wellness.

Equipment Recommendations

To make your preparation smoother, consider having these tools on hand:

  • Rimmed baking sheet: Essential for toasting nuts evenly.
  • Steamer basket: A great way to cook asparagus while keeping its nutrients intact.
  • Whisk: For emulsifying the dressing to ensure a smooth blend.

Serving Suggestions

This Lemony Asparagus Salad is a versatile dish that pairs beautifully with:

  • Grilled chicken or fish: The lightness of the salad complements heartier proteins.
  • Quinoa or rice: A grain side can make it a well-rounded meal.
  • Fresh bread: Serve with a crusty loaf for a satisfying lunch or dinner.

Conclusion: A Salad to Cherish

As we gather around the table to share meals, let’s remember the stories that each dish tells. This Lemony Asparagus Salad with Shaved Cheese and Nuts is more than just a recipe; it embodies love, community, and the joy of sharing food with those we cherish. I hope you enjoy making this dish as much as I enjoyed sharing it with you. Here’s to spring, family, and the beautiful memories we create together in the kitchen!

Lemony Asparagus Salad With Shaved Cheese and Nuts

Prep Time 10 minutes
Cook Time 10 minutes
Total Time 20 minutes
Servings 4 servings
Calories 350
A fresh and vibrant salad combining tender asparagus, toasted pistachios, soft herbs, and a tangy lemon dressing, topped with shaved cheese and nuts.

Ingredients

Nuts

  • 3/4 cup pistachios or other nuts
  • 1 pound asparagus, woody ends trimmed
  • 1/2 cup soft herbs (dill, parsley, tarragon)
  • 3 tablespoons minced shallots, red onion or scallion
  • 1 1/2 tablespoons fresh lemon juice (or cider vinegar)
  • Large pinch kosher salt (plus more as needed)
  • 1/4 teaspoon freshly ground black pepper
  • 1/3 cup extra-virgin olive oil (plus more for serving)
  • 3/4 cup coarsely grated cheese (preferably pecorino or Manchego) (plus more for serving)

Instructions 

  • Toast pistachios at 350°F (175°C) for 5 minutes, then cool and roughly chop.
  • Steam asparagus in 1-inch water until tender, about 5 minutes, then drain.
  • Mix chopped herbs with shallots, lemon juice, salt, and pepper; let sit 2 minutes. Whisk in oil, then add pistachios, cheese, and herbs.
  • Arrange asparagus on a plate, drizzle with oil, season with salt, and top with dressing, herbs, and cheese. Serve with extra cheese and herbs as desired.

Notes

Use fresh herbs for the best flavor and adjust salt to taste.
Calories: 350kcal
Cost: $15
Course: Salad
Cuisine: Mediterranean
Keyword: asparagus

The Heartwarming Allure of Avocado Cucumber Salad

There’s something incredibly nostalgic about sharing a meal that’s bursting with freshness and flavor. This Avocado Cucumber Salad is not just a dish; it’s a memory waiting to happen. With its vibrant colors and delightful textures, it whispers of sunlit gatherings, laughter, and the love that fills our kitchens. Made from simple, wholesome ingredients, this salad embodies everything that makes cooking special—connection, joy, and a dash of creativity.

In this comprehensive guide, we’ll explore the beauty of this salad, why you’ll adore it, and all the little tips and tricks to make it perfect every time. So grab your apron and let’s dive into this culinary adventure!

Why You’ll Love This Recipe

  • Quick and Easy: This salad comes together in under 15 minutes, making it the perfect dish when you want something fresh without the fuss.
  • Nutritious Delight: Packed with healthy fats from the avocado and hydration from the cucumbers, this salad is not only delicious but also nourishing.
  • Versatile Pairing: Whether as a side dish at a barbecue or a refreshing starter before a hearty meal, it complements a variety of cuisines.
  • Vibrant Flavors: The creamy texture of avocado combined with the crispness of cucumbers and a zesty lime dressing creates a flavor explosion in every bite.
  • Customizable: You can easily adapt this salad to your taste preferences or dietary needs by adding or substituting ingredients.

Ingredient Breakdown

Let’s take a closer look at the ingredients that make this salad shine:

  • 2 English cucumbers: Their thin skin and mild flavor make them a perfect base. If you prefer a crunchier texture, feel free to use Persian cucumbers.
  • 1 large avocado: Choose ripe, creamy avocados that will blend beautifully with the other ingredients. Avoid overly soft ones to prevent mushiness.
  • 1/3 cup green onion: Adds a subtle sharpness. You can substitute with chives or red onion for a different flavor profile.
  • 2 Tbsp lime juice: Freshly squeezed lime juice is key to brightening the dish. Lemon juice can be a nice alternative if you’re out of lime.
  • 2 Tbsp extra virgin olive oil: This adds a rich flavor and healthy fats. You could use avocado oil for an even more intense avocado flavor.
  • 1 tsp sea salt: Adjust according to your taste. If using table salt, reduce the quantity slightly.
  • 1/8 tsp black pepper: Just a pinch will enhance the flavors without overwhelming the dish.

How to Make Avocado Cucumber Salad

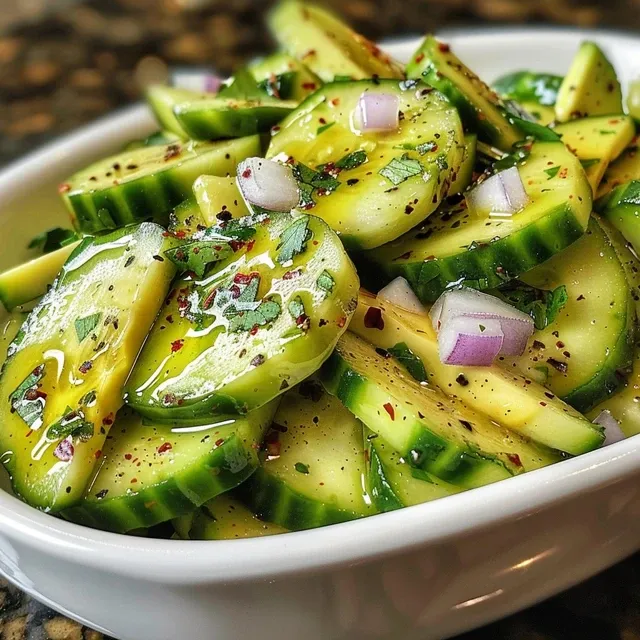
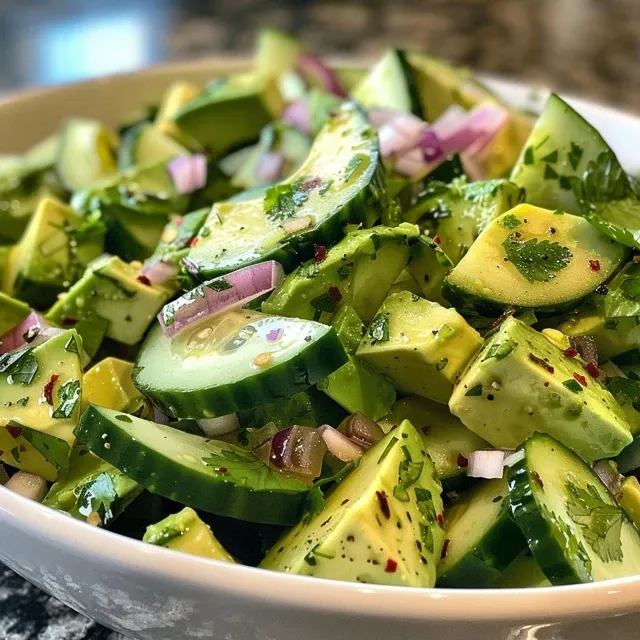
A colorful salad with sliced cucumbers and avocado, drizzled with olive oil and seasoning.

Now, let’s get into the heart of it—how to prepare this delightful salad:

  1. Wash and thinly slice the cucumbers.
  2. Cut the avocado in half, remove the pit, peel, and slice it into chunks.
  3. Chop the green onions and add all the ingredients to a mixing bowl.
  4. Drizzle lime juice and olive oil over the veggies, ensuring even coverage.
  5. Sprinkle with sea salt and black pepper to taste.
  6. Gently toss the salad to coat everything evenly, being careful not to mash the avocado.
  7. Taste and adjust salt or lime juice as needed.
  8. Serve immediately to enjoy the freshness while chilled.

Expert Tips for a Perfect Salad

  • Use Ripe Avocados: Ensure your avocados are just ripe, yielding slightly to gentle pressure. This creates the creamy texture we love.
  • Keep Ingredients Cold: Chill your cucumbers and serve the salad immediately for a refreshing experience.
  • Adjust Lime Juice: If you prefer a tangier flavor, feel free to increase the lime juice. It brightens the salad beautifully.
  • Mix Gently: When tossing the salad, be gentle to keep the avocado chunks intact for that lovely creamy element.
  • Let It Rest: Allow the salad to sit for about 10 minutes before serving to let the flavors meld.
  • Dress Just Before Serving: To maintain the crispiness of the cucumbers, dress the salad right before enjoying it.
  • Explore Herbs: Fresh herbs like cilantro or basil can add a delightful twist to the flavor profile.
  • Experiment with Add-Ins: Consider adding feta cheese or cherry tomatoes for an extra layer of flavor and texture.

Common Mistakes and Troubleshooting

Even the best of us can have mishaps in the kitchen. Here are some common pitfalls to avoid:

  • Overripe Avocados: Using overly soft avocados can lead to a mushy salad. Look for ones that are firm but yield slightly when pressed.
  • Too Much Salt: Salt enhances flavors but can overpower them. Start with a little and adjust to taste.
  • Letting It Sit Too Long: This salad is best enjoyed fresh. If you let it sit too long, the cucumbers may lose their crunch, and the avocado could brown.

Variations to Try

Make this salad your own with these tasty variations:

  • Avocado Cucumber Feta Salad: Sprinkle crumbled feta cheese for a salty contrast.
  • Cucumber Avocado Salad with Chickpeas: Add cooked chickpeas for protein and a hearty twist.
  • Spicy Avocado Cucumber Salad: Toss in diced jalapeños or a sprinkle of cayenne pepper for a kick.
  • Herbed Avocado Cucumber Salad: Add fresh dill or parsley for a refreshing herbal note.

Storage and Make-Ahead Instructions

This salad is best enjoyed fresh, but if you need to prepare it ahead of time, consider these tips:

  • Storing Leftovers: If you have leftovers, store them in an airtight container in the fridge for up to 1 day. The avocado may brown slightly, but it will still be tasty.
  • Prepare Ingredients Ahead: You can slice cucumbers and chop green onions ahead of time. Just wait to add the avocado and dressing until you’re ready to serve.
  • Make It Ahead (Partial Prep): Mix the cucumbers and green onions, then add the avocado and dressing just before serving for the best texture.

Frequently Asked Questions

  • Can I use different types of cucumbers? Yes! Persian cucumbers are an excellent choice, but feel free to use whatever you have on hand.
  • How do I keep avocado from turning brown? Lime juice helps prevent browning. Mix the avocado right before serving to maintain its color.
  • What can I serve with this salad? It pairs well with grilled chicken, fish, or as a refreshing side for tacos.
  • Can I make this salad vegan? Absolutely! This salad is naturally vegan as it contains no animal products.
  • Is this salad gluten-free? Yes! All the ingredients in this recipe are gluten-free, making it suitable for those with gluten sensitivities.
  • How long does this salad last in the fridge? It’s best enjoyed immediately, but leftovers can last for up to 1 day in the fridge.
  • Can I add more vegetables? Certainly! Feel free to add bell peppers, radishes, or even corn for added color and texture.
  • What’s the best way to serve this salad? Serve it chilled and fresh, garnished with additional lime wedges or fresh herbs for a beautiful presentation.

Nutritional Tips and Dietary Adaptations

This Avocado Cucumber Salad is already a healthy choice, but here are some tips to enhance its nutritional profile:

  • Healthy Fats: The avocado provides monounsaturated fats that are heart-healthy and satisfying.
  • Low-Calorie Base: Cucumbers are low in calories and high in water content, making them a great choice for hydration.
  • Rich in Vitamins: The green onions and lime juice add vitamins A and C, boosting your immune system while offering a refreshing taste.

Essential Equipment

To prepare this delightful salad, you’ll need:

  • A sharp knife: For slicing the cucumbers and avocados smoothly.
  • A cutting board: To provide a stable surface for chopping.
  • A mixing bowl: To combine all the ingredients without spilling.
  • A serving bowl: For presenting your beautiful salad to family and friends.

Serving Suggestions

Serve this Avocado Cucumber Salad as a refreshing side dish at your next gathering. Here are some ideas:

  • With Grilled Meats: It complements grilled chicken, steak, or seafood beautifully.
  • As a Light Lunch: Enjoy it on its own or with whole-grain crackers for a satisfying meal.
  • At Picnics: Pack it in a cooler for a refreshing treat on sunny days.

Cooking is an art, and every dish tells a story. This Avocado Cucumber Salad not only celebrates the beauty of fresh ingredients but also the memories we create around the table. So gather your loved ones, share this salad, and let the flavors and stories unfold. Happy cooking!

Avocado Cucumber Salad Recipe

Prep Time 10 minutes
Total Time 10 minutes
Servings 2 servings
Calories 180
A fresh and vibrant salad combining crisp cucumbers and creamy avocado, perfect for a light, healthy meal.

Ingredients

Vegetables

  • 2 pieces English cucumbers (sliced)
  • 1 piece large avocado (pitted, peeled and sliced)
  • 0.33 cup green onion (chopped)
  • 2 Tbsp lime juice (from 1 medium lime)
  • 2 Tbsp extra virgin olive oil
  • 1 tsp sea salt (or to taste)
  • 1/8 tsp black pepper

Instructions 

  • Wash and thinly slice the cucumbers.
  • Cut the avocado in half, remove the pit, peel, and slice.
  • Chop the green onions and add all ingredients to a bowl.
  • Drizzle lime juice and olive oil over the veggies, then sprinkle with salt and pepper.
  • Gently toss to coat evenly, taste, and adjust seasoning if needed.
  • Serve immediately while fresh and chilled.

Notes

Use ripe avocados for best flavor.
Calories: 180kcal
Cost: $10
Course: Salad
Cuisine: fusion
Keyword: Avocado, Cucumber

Welcome to a dish that sings of warmth and togetherness, a vibrant Quinoa and Black Bean Salad that’s more than just a meal—it’s a celebration of shared moments around the family table. Packed with fresh ingredients and bursting with flavor, this salad is perfect for gatherings, picnics, or a comforting weeknight dinner. Let’s dive into the heart of this recipe and discover why it’s sure to become a staple in your home.

Why You’ll Love This Recipe

This salad is not only delicious but also incredibly nutritious and versatile. Here are just a few reasons to cherish this recipe:

  • Nutritious Powerhouse: Quinoa is a complete protein, providing all nine essential amino acids. Paired with black beans, it’s a filling option that keeps you satisfied.
  • Vibrant Flavors: The combination of fresh vegetables and zesty lime dressing brings a delightful explosion of flavors that dance on your palate.
  • Easy to Prepare: With straightforward steps, this recipe comes together in under 30 minutes, making it perfect for quick weeknight meals.
  • Meal Prep Friendly: This salad can be made ahead of time and stored in the fridge, allowing flavors to meld beautifully.
  • Customizable: You can easily adapt this recipe by adding your favorite ingredients or adjusting the dressing to suit your taste.

Ingredients Breakdown

Gathering the right ingredients is essential for this quinoa salad. Below is a detailed list of what you’ll need and some great substitution options:

  • 1 cup quinoa, rinsed: Quinoa can be substituted with bulgur or farro for a different texture.
  • 2 cups water: You can use vegetable broth for added flavor.
  • 1 can (15 oz) black beans, drained and rinsed: Kidney beans or chickpeas can be great alternatives.
  • 1 red bell pepper, diced: Feel free to mix in yellow or orange bell peppers for added sweetness.
  • 1 cup corn (fresh or frozen): Use grilled corn for a smoky flavor, or omit for a lighter salad.
  • 1/2 cup red onion, finely chopped: Green onions or shallots can provide a milder taste.
  • 1/4 cup fresh cilantro, chopped: Parsley or basil can replace cilantro for a different herbaceous note.
  • 1/4 cup olive oil: Avocado oil or sunflower oil can be used as a substitute.
  • Juice of 2 limes: Lemon juice can also work if you don’t have limes on hand.
  • Salt and pepper to taste: Always adjust seasonings according to your preference.

Step-by-Step Instructions

Now that you have your ingredients ready, let’s get cooking! Follow these simple steps to create your masterpiece:

  1. Cook the Quinoa: In a medium saucepan, combine the rinsed quinoa and water. Bring to a boil over medium-high heat. Once boiling, reduce the heat to low, cover, and let it simmer for 15 minutes, or until all the water is absorbed and the quinoa is fluffy. Remove from heat and let it cool.

  2. Mix the Ingredients: In a large mixing bowl, combine the cooled quinoa, black beans, diced red bell pepper, corn, red onion, and chopped cilantro. Stir gently to mix all the ingredients evenly.

  3. Prepare the Dressing: In a small bowl, whisk together the olive oil, lime juice, salt, and pepper until well combined. Pour the dressing over the quinoa mixture and toss gently to coat all the ingredients.

  4. Taste and Adjust: Taste the salad and adjust the seasoning if necessary, adding more salt, pepper, or lime juice to suit your preference.

  5. Chill and Serve: Cover the salad and refrigerate for at least 30 minutes before serving to allow the flavors to meld together. Serve chilled or at room temperature.

Pro Tips for Perfecting Your Salad

Side view of a fresh quinoa salad with black beans and red bell pepper.

Here are some expert insights to elevate your cooking experience and ensure your quinoa salad is a hit:

  • Rinse the Quinoa: Always rinse quinoa before cooking to remove its natural coating, which can taste bitter.
  • Flavor Infusion: Consider cooking quinoa in vegetable broth instead of water for an extra layer of flavor.
  • Chill Time: Allowing the salad to chill for at least 30 minutes enhances the flavors significantly.
  • Mix it Up: Add seasonal vegetables or nuts for added texture and flavor variations.
  • Perfect Presentation: Serve the salad in a clear bowl to showcase the vibrant colors of the ingredients.
  • Leftover Magic: This salad keeps well in the fridge, making it a great option for meal prep.
  • Adjust the Acidity: If you prefer a tangier flavor, don’t hesitate to add more lime juice.
  • Fresh Herbs: Experiment with herbs like dill or mint for a refreshing twist.

Common Mistakes and Troubleshooting

Cooking is a journey, and it’s natural to encounter a few bumps along the way. Here are some common mistakes to avoid:

  • Undercooking Quinoa: Ensure you cook quinoa until all the water is absorbed and the grains are fluffy.
  • Overseasoning: Start with a little salt and pepper, as you can always add more, but it’s hard to take it out.
  • Skipping the Chill Time: Don’t rush this step; flavors develop beautifully when allowed to meld.
  • Ignoring Texture: Aim for a balance of crunchy vegetables and soft quinoa for optimal texture.

Variations to Try

Feeling adventurous? Here are some delightful variations of this recipe:

  • Spicy Southwest: Add diced jalapeños and corn for a zesty kick.
  • Tropical Twist: Incorporate diced mango or pineapple for a sweet and tangy flavor.
  • Protein-Packed: Mix in diced grilled chicken or shrimp to turn this salad into a heartier meal.
  • Asian-Inspired: Use sesame oil instead of olive oil and add edamame and sliced almonds for a crunchy finish.

Storage and Make-Ahead Instructions

This salad is perfect for make-ahead meals. Here’s how to store it:

  • Refrigeration: Store in an airtight container in the fridge for up to 3 days.
  • Freezing: It’s best enjoyed fresh, but you can freeze the quinoa mixture (without dressing) for up to a month. Just thaw and dress before serving.
  • Make Ahead: Prepare the salad a day in advance for enhanced flavors.

Comprehensive FAQ

Here are some frequently asked questions to help you navigate this recipe:

  • Can I use different beans? Yes, feel free to substitute black beans with kidney beans, chickpeas, or any legume you prefer.
  • Is this salad gluten-free? Absolutely! Quinoa and beans are naturally gluten-free.
  • How do I make it vegan? This recipe is already vegan-friendly, using plant-based ingredients.
  • Can I add cheese? Yes, crumbled feta or cotija cheese can add a delightful creaminess.
  • How long will leftovers last? The salad will stay fresh in the fridge for up to 3 days.
  • Can I use canned quinoa? While it’s best to cook your quinoa, canned quinoa can be used in a pinch. Just rinse and drain it well.
  • What can I serve this salad with? This salad pairs wonderfully with grilled meats, as a side dish, or even as a filling main course.
  • Can I eat it warm? Yes, while it’s typically served cold, you can enjoy it at room temperature or warm.

Nutritional Tips and Dietary Adaptations

For those mindful of their nutrition, here are some tips:

  • Watch the Dressing: Use less oil or substitute part of it with low-calorie options like vinegar.
  • Increase Veggies: Add more vegetables like spinach or zucchini to boost fiber and nutrients.
  • Protein Boost: Add nuts or seeds for healthy fats and protein.

Equipment Recommendations

To make your cooking experience smoother, consider the following kitchen tools:

  • Medium saucepan: For cooking quinoa.
  • Large mixing bowl: To combine all ingredients.
  • Whisk: For mixing the dressing.
  • Cutting board and knife: Essential for chopping veggies.

Serving Suggestions

When it’s time to serve, consider these delightful ideas:

  • On a Bed of Greens: Serve the salad atop a bed of fresh greens like spinach or arugula.
  • As a Wrap: Use large lettuce leaves to wrap the salad for a fun, handheld option.
  • With Tortilla Chips: Serve alongside tortilla chips for a crunchy, dippable experience.
  • In a Grain Bowl: Pair with other grains like brown rice or farro for a filling meal.

In conclusion, this Quinoa and Black Bean Salad is not just a dish; it’s a loving reminder of the importance of sharing meals with family and friends. Each bite is a celebration of flavors and memories that tie us together. So roll up your sleeves, gather your ingredients, and create this beautiful salad that’s sure to bring joy to your table. Thank you for joining me on this culinary adventure!

Quinoa and Black Bean Salad

Prep Time 15 minutes
Cook Time 15 minutes
Total Time 30 minutes
Servings 4 servings
Calories 350
A vibrant, healthy salad combining quinoa, black beans, and fresh vegetables, perfect for a quick, nutritious meal.

Ingredients

Grains

  • 1 cup quinoa, rinsed
  • 2 cups water

Beans

  • 1 can (15 oz) black beans, drained and rinsed

Vegetables

  • 1 red bell pepper red bell pepper, diced
  • 1 cup corn (fresh or frozen)
  • 1/2 cup red onion, finely chopped
  • 1/4 cup fresh cilantro, chopped

Dressing

  • 1/4 cup olive oil
  • Juice of 2 limes lime juice
  • to taste Salt and pepper

Instructions 

  • Cook quinoa with water until fluffy, then let it cool.
  • Combine cooled quinoa, black beans, diced red bell pepper, corn, red onion, and cilantro in a bowl.
  • Whisk olive oil, lime juice, salt, and pepper; pour over salad and toss gently.
  • Adjust seasoning if needed, then refrigerate for at least 30 minutes before serving.

Notes

This salad is best served chilled and can be stored in the refrigerator for up to 2 days.
Calories: 350kcal
Cost: $10
Course: Salad
Cuisine: International
Keyword: Black Beans, Quinoa

A Refreshing Embrace: Dive into Creamy Cucumber Dill Salad

As the sweltering days of summer approach, the craving for light and refreshing dishes becomes hard to ignore. One such dish that perfectly embodies the spirit of summer gatherings is the Creamy Cucumber Dill Salad. This salad is not just about the crunchy cucumbers; it’s a treasure trove of flavors, memories, and love, reminiscent of family gatherings and lazy afternoons spent on the porch. With each bite, you’ll feel the crispness of fresh cucumbers intertwined with the aromatic embrace of dill and the creamy goodness of sour cream. Ready to create your masterpiece? Let’s embark on this flavorful journey together.

Why You’ll Love This Recipe

  • Quick and Easy: This recipe is straightforward, requiring minimal preparation and just a few ingredients, making it perfect for busy days or last-minute gatherings.
  • Refreshing Taste: The combination of cucumbers and dill brings a fresh, vibrant flavor that pairs beautifully with any main dish.
  • Versatile Ingredients: You can customize this salad with various additions, ensuring it suits every palate and dietary need.
  • Perfect for Meal Prep: This creamy cucumber salad can be made ahead of time, allowing the flavors to meld and develop, making it even more delicious.
  • Family Tradition: Sharing this salad evokes warm memories of summer picnics and family barbecues, making it a nostalgic addition to any meal.

Ingredients Breakdown

Let’s gather what we need to create this delightful creamy cucumber salad. Each ingredient plays a vital role, adding layers of flavor and texture.

  • ½ cup sour cream: The base of your dressing, providing a creamy texture. For a lighter option, consider using Greek yogurt.
  • 1 ½ Tablespoons white vinegar: This adds a tangy punch to balance the richness of the sour cream.
  • 3 Tablespoons chopped fresh dill: Fresh herbs elevate the salad, imparting a fragrant aroma. If fresh isn’t available, dried dill can be used in a pinch.
  • 1 teaspoon granulated sugar: A touch of sweetness helps to mellow the acidity of the vinegar. Adjust to taste.
  • ½ teaspoon salt: Essential for enhancing flavors; feel free to adjust based on dietary needs.
  • ÂĽ teaspoon black pepper: Adds a subtle heat; freshly ground is best for flavor.
  • ÂĽ teaspoon garlic powder: Gives a gentle garlic flavor without overpowering the dish.
  • 2 English cucumbers: Their thin skin and mild flavor make them ideal for salads. You can substitute with Persian cucumbers if needed.
  • ½ small red onion: For a pop of color and a sweet-sharp bite; soak in water for a milder flavor if desired.

How to Make Creamy Cucumber Dill Salad

Vibrant image of a cucumber dill salad with a creamy dressing and colorful vegetables.

Now that we have our ingredients ready, let’s dive into the steps to create this delightful salad.

  1. In a large bowl, stir together the sour cream, vinegar, dill, sugar, salt, pepper, and garlic powder until well combined.
  2. Add the sliced cucumbers and red onion to the bowl and gently toss to coat them evenly with the creamy dressing.
  3. Transfer the salad to a serving bowl and serve immediately, or chill in the refrigerator for about 30 minutes for a cooler experience.

Pro Tips for the Perfect Salad

To elevate your creamy cucumber salad to new heights, consider these expert insights:

  • Choose the Right Cucumbers: Opt for English or Persian cucumbers for their sweetness and crunch. If using Kirby cucumbers, peel them for a better texture.
  • Let It Chill: Allow the salad to sit in the fridge for at least 30 minutes before serving to let the flavors meld beautifully.
  • Adjust to Your Taste: Don’t hesitate to tweak the seasoning; some may prefer a bit more salt or vinegar for a tangier taste.
  • Add Color: Toss in some cherry tomatoes or bell pepper for a colorful twist that enhances visual appeal.
  • Herb Variations: If you love herbs, consider adding fresh parsley or chives for an extra layer of flavor.
  • Make It Ahead: This salad can be prepared a day in advance, making it a great option for meal prep.
  • Texture Matters: For a crunchier salad, add the cucumbers just before serving to prevent them from getting too soft.
  • Use Seasonal Ingredients: Embrace local, fresh produce whenever possible to enhance flavor and support your community.

Common Mistakes and Troubleshooting

Even the best cooks can run into hiccups. Here are some common mistakes and how to avoid them:

  • Watery Salad: If your cucumbers are too watery, consider salting them and letting them sit for 10 minutes before mixing. This draws out excess moisture.
  • Overpowering Flavors: Be cautious with the vinegar and garlic powder; start with less and adjust according to your taste preference.
  • Skipping Fresh Herbs: Using dried herbs can alter the salad’s flavor profile significantly. Fresh herbs provide a vibrant taste that’s hard to replicate.
  • Not Chilling: Serving immediately is tempting, but chilling enhances flavor. Make it a habit to let it sit in the fridge.

Variations to Explore

Feel free to customize this creamy cucumber salad to suit your tastes and dietary preferences:

  • Greek Yogurt Version: Swap out sour cream for Greek yogurt for a tangy, protein-packed alternative.
  • Vegan Delight: Use a plant-based yogurt and replace sugar with maple syrup for a vegan-friendly option.
  • Spicy Twist: Add a dash of cayenne or diced jalapeños for a spicy kick that contrasts with the creaminess.
  • Crunchy Additions: Toss in some chopped bell peppers, radishes, or nuts for added crunch and nutrition.

Storage and Make-Ahead Instructions

Once you’ve prepared your salad, you may wonder how to store it properly. Here are some tips:

  • Refrigeration: Store the salad in an airtight container in the refrigerator for up to 3 days. However, it’s best enjoyed within 1-2 days for optimal freshness.
  • Make-Ahead: This salad is perfect for meal prep! Make it a day in advance and let the flavors develop in the fridge.
  • Freezing Not Recommended: Due to its creamy nature, freezing is not recommended as it may change the texture upon thawing.

Frequently Asked Questions

To ensure you have all the information you need, here are answers to some common questions:

  • Can I use regular cucumbers instead of English cucumbers? Yes, but you may want to peel them for a better texture.
  • How do I keep cucumber salad from getting watery? Salting the cucumbers beforehand can help draw out excess moisture.
  • Can I make this salad ahead of time? Absolutely! It can be made a day in advance and stored in the refrigerator.
  • How long will creamy cucumber salad last? It’s best consumed within 1-2 days but can last up to 3 days in the fridge.
  • What do I serve with creamy cucumber salad? This salad pairs wonderfully with grilled meats, sandwiches, and other light summer dishes.
  • Can I add other vegetables? Yes! Feel free to add bell peppers, tomatoes, or even radishes for added crunch and flavor.
  • What if I don’t have fresh dill? You can use dried dill but remember to use a smaller amount as it’s more concentrated.
  • Is this salad gluten-free? Yes, all the ingredients are naturally gluten-free, making it suitable for those with dietary restrictions.

Nutritional Tips and Dietary Adaptations

This salad is not just delicious but also packed with nutrients. Here are some tips for making it even healthier:

  • Low-Fat Options: Use low-fat sour cream or yogurt to reduce calories without sacrificing flavor.
  • Fiber Boost: Add shredded carrots or chopped spinach for extra fiber and vitamins.
  • Protein Addition: Incorporate chickpeas or diced chicken for a protein boost, making it a complete meal.

Essential Equipment for Preparation

Having the right tools can make the process easier. Here’s what you’ll need:

  • Sharp Knife: For slicing cucumbers and onions smoothly.
  • Cutting Board: A sturdy surface for all your chopping needs.
  • Mixing Bowl: A large bowl to mix all your ingredients together.
  • Measuring Cups and Spoons: To ensure accurate measurements for perfect flavor balance.

Serving Suggestions

Serving this creamy cucumber salad is as much about presentation as it is about flavor. Here are some ideas:

  • Chilled Bowl: Serve in a chilled bowl to enhance the refreshing experience.
  • Garnish with Fresh Dill: A sprinkle of fresh dill on top adds a lovely touch and aroma.
  • Pair with Grilled Meats: This salad pairs wonderfully with grilled chicken or fish, making it the perfect summer side dish.
  • Picnic Delight: Pack it in a cooler for a refreshing addition to any picnic or barbecue.

In conclusion, the Creamy Cucumber Dill Salad is more than just a side dish; it’s a heartfelt recipe that carries the warmth of shared meals and cherished memories. Every bite is a reminder of summer’s joys, making it a timeless addition to your culinary repertoire. So gather your loved ones, create this dish, and let the laughter and love flow around your family table.

Creamy Cucumber Dill Salad

Prep Time 10 minutes
Total Time 10 minutes
Servings 4 servings
Calories 150
A refreshing and creamy cucumber salad flavored with fresh dill and red onion, perfect for a light side dish.

Ingredients

Dressing

  • 0.5 cup sour cream
  • 1.5 Tablespoons white vinegar
  • 3 Tablespoons chopped fresh dill
  • 1 teaspoon granulated sugar ((or to taste))
  • 0.5 teaspoon salt
  • 0.25 teaspoon black pepper
  • 0.25 teaspoon garlic powder
  • 2 English cucumbers English cucumbers, thinly sliced
  • 0.5 small red onion, halved and thinly sliced

Instructions 

  • Mix sour cream, vinegar, dill, sugar, salt, pepper, and garlic powder in a large bowl.
  • Add sliced cucumbers and red onion; toss to coat.
  • Transfer to a serving bowl and serve immediately.

Notes

For a tangier flavor, add a little more vinegar.
Calories: 150kcal
Cost: $8
Course: Side Dish
Cuisine: American
Keyword: Cucumber, Dill