Author

daniel

Browsing

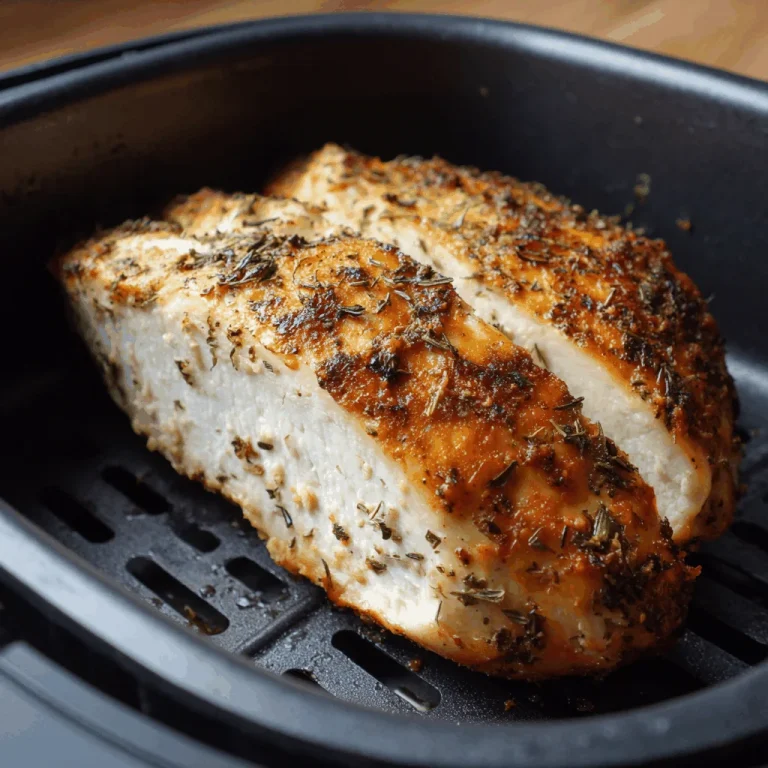
There’s something about the smell of a perfectly cooked chicken breast that takes me back to my grandmother’s kitchen in our small Louisiana town. I remember the warmth of her hugs, the stories she’d share, and the love she’d pour into every meal. Today, I’m sharing a recipe that feels like one of those hugs—a Juicy Chicken Breast in the Air Fryer that’s as comforting as it is delicious.

Why You’ll Absolutely Love This Recipe

  • It’s so easy, it feels like a little kitchen victory!
  • The air fryer keeps it juicy and tender, like a warm embrace.
  • Perfect for family dinners or a quiet night in.
  • A quick way to get that home-cooked taste without the fuss.

Simple Ingredients for a Delicious Treat

In the spirit of keeping things simple and sincere, this recipe uses ingredients that you likely already have in your pantry. We’re talking about chicken breasts, olive oil, salt, pepper, and a sprinkle of your favorite herbs. The beauty of these ingredients is their versatility and the way they come together to create something magical.

You’ll find the full ingredient list with exact measurements in the recipe card below!

Let’s Make Some Magic: Step-by-Step

Ready to get started? I’m right here with you, guiding you through each step:

  1. Preheat your air fryer to 375°F (190°C). This ensures that our chicken cooks evenly and stays tender.
  2. Lightly coat the chicken breasts with olive oil. This helps lock in the moisture and gives a beautiful golden finish.
  3. Season with salt, pepper, and any herbs you fancy. I love a bit of rosemary or thyme for that earthy touch.
  4. Place the chicken breasts in the air fryer basket, ensuring they’re not touching. This allows the hot air to circulate properly.
  5. Cook for 10 minutes, flip, and then cook for another 8-10 minutes until the internal temperature reaches 165°F (75°C).
  6. Let them rest for a few minutes before slicing. This step is crucial as it keeps all the juices locked inside.

A Few of My Favorite Tips

Here are some secrets I’d share with a dear friend:

  • For extra flavor, marinate the chicken in buttermilk overnight. It’s a little trick I picked up from my grandmother.
  • If you’re in a hurry, pound the chicken breasts to an even thickness. It helps them cook faster and more evenly.
  • Experiment with different spices. Cajun seasoning, perhaps? It’s a nod to my Southern roots.

How I Like to Serve This

This dish pairs beautifully with a side of creamy mashed potatoes or a fresh garden salad. Sometimes, I slice the chicken and serve it over a bed of warm quinoa with roasted vegetables. It’s all about comfort and what feels right to you.

Storing & Reheating (If There’s Any Left!)

If you find yourself with leftovers, store them in an airtight container in the fridge for up to three days. To reheat, pop them back in the air fryer for a few minutes. It brings back that freshly-cooked texture, and it’s a trick I’ve come to love.

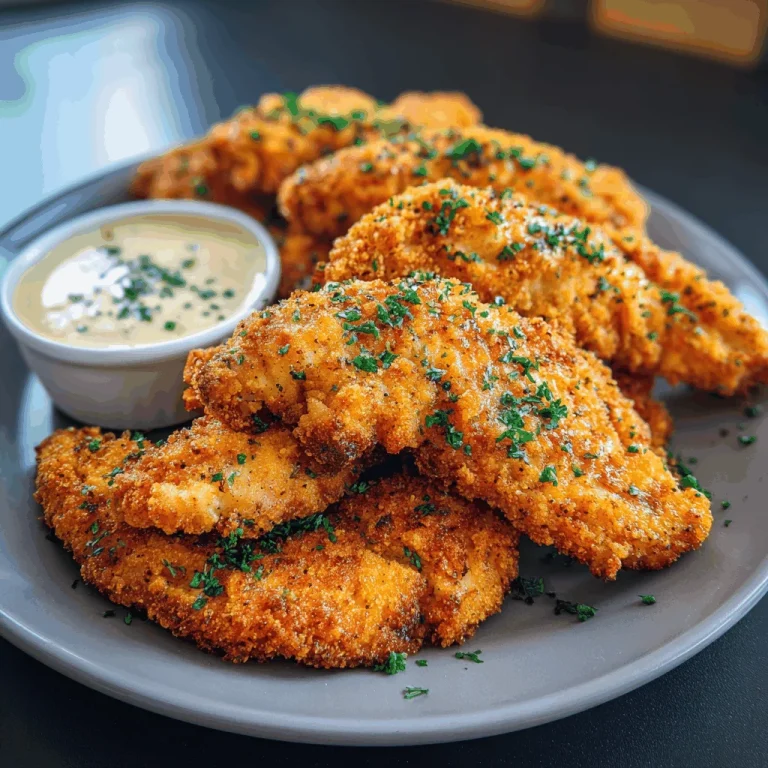
If you enjoyed this recipe, you might also like my Tender Air Fryer Chicken Bites That Bring Back Family Nights, or perhaps the Tender Memories: Juicy No Breading Chicken Tenders for a nostalgic twist. For a quick meal, try the A Quick and Heartfelt Air Fryer Chicken Sausage Delight.

Juicy Chicken Breast in the Air Fryer

Prep Time 10 minutes
Cook Time 20 minutes
Total Time 30 minutes
Servings 4 servings
Calories 250
This juicy chicken breast recipe is quick and easy, perfect for a healthy weeknight dinner.

Ingredients

Chicken

  • 4 pieces Chicken Breasts (Boneless and skinless)

Instructions 

  • Preheat the air fryer to 200°C (400°F).
  • Season the chicken breasts with your favorite spices.
  • Place the chicken in the air fryer basket in a single layer.
  • Cook for 20 minutes, flipping halfway through.
  • Check for doneness; internal temperature should reach 75°C (165°F).
  • Let rest for 5 minutes before slicing.
Notes

For extra flavor, marinate the chicken for a few hours before cooking.
Calories: 250kcal
Cost: $10.00
Course: Main Course
Cuisine: American
Keyword: Chicken

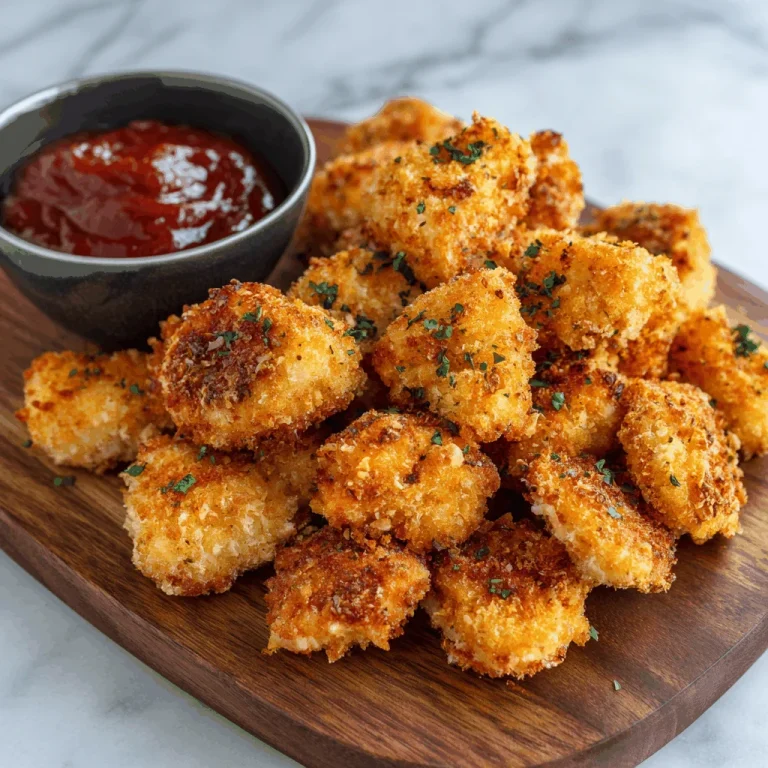
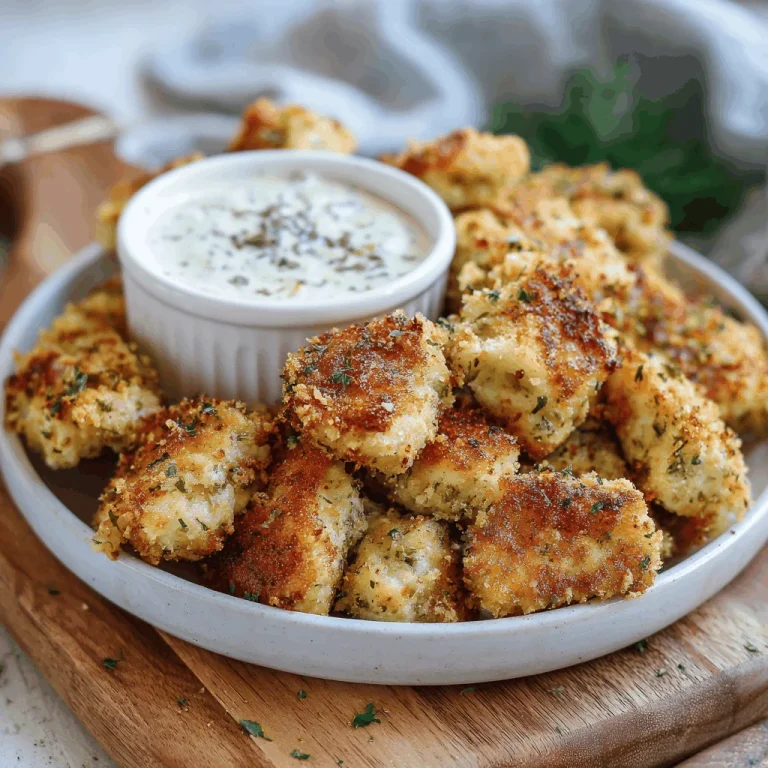
There’s something about the aroma of crispy chicken bites that takes me straight back to my grandmother’s kitchen in Louisiana. I remember those afternoons when the warm Southern sun would pour through the kitchen window, and I’d be standing on a stool, flour dusting the air as I helped her prepare dinner. Those moments were more than just about cooking; they were about love, connection, and creating something beautiful from simple ingredients. Today, as I share my recipe for Crispy Air Fryer Ranch Chicken Bites, I hope to bring a bit of that magic into your home. These bites are not just about the crunch or the flavor—they’re little ranch chicken bites that spark family joy, reminding us that cooking is a form of love.

Why You’ll Absolutely Love This Recipe

  • It’s so easy, it feels like a little kitchen victory!
  • Perfect for sharing, they bring the family together at the table.
  • The air fryer makes them a healthier option without sacrificing the delicious crunch.
  • They bring back those cherished family nights with just one bite.
  • Each bite is packed with the comforting flavors of ranch chicken, making every meal feel special.

Simple Ingredients for a Delicious Treat

When it comes to ingredients, I believe in keeping things simple yet flavorful. For these chicken bites, we’re using chicken fillets marinated in buttermilk and a packet of ranch seasoning. The buttermilk tenderizes the chicken, while the ranch seasoning gives it that irresistible flavor we all know and love. The coating is a mix of all-purpose flour and panko breadcrumbs, seasoned with garlic powder, onion powder, paprika, salt, and pepper. This combination ensures every bite is crispy and full of flavor.

You’ll find the full ingredient list with exact measurements in the recipe card below!

Let’s Make Some Magic: Step-by-Step

Let’s dive into the process, shall we? Begin by marinating your bite-sized chicken pieces in a mix of buttermilk and half of the ranch seasoning. This step is crucial as it infuses the chicken with flavor and tenderness. While the chicken is soaking up all that goodness, prepare your coating by mixing flour, panko breadcrumbs, and the rest of the seasoning. Once your chicken is marinated, dredge each piece in the coating, ensuring it’s well-covered for that perfect crunch.

Preheat your air fryer to 400°F (200°C). This step is key to achieving that golden, crispy exterior. Arrange the chicken in a single layer in the air fryer basket, ensuring they’re not crowded. A light spray of cooking oil will help them turn a beautiful golden brown. Cook for about 8-10 minutes, flipping them halfway through. Remember, a meat thermometer is your best friend here—ensure the chicken reaches an internal temperature of 165°F (74°C).

A Few of My Favorite Tips

Here’s a little secret from my kitchen to yours: always let your chicken bites rest for a couple of minutes after cooking. This keeps them juicy. Also, consider adding a pinch of cayenne pepper to the seasoning mix if you’re in the mood for a little heat. And don’t forget to check out my other recipes like Tender Air Fryer Chicken Bites That Bring Back Family Nights and Wrap Yourself in Joy with Crispy Chicken Mozzarella Delights for more delightful dishes!

How I Like to Serve This

These crispy ranch chicken bites are a joy to serve with a side of ranch dressing or your favorite dipping sauce. They’re perfect as an appetizer for a family gathering or as a main dish accompanied by a fresh salad. Sometimes, I love serving them with a side of homemade coleslaw for that extra crunch and freshness.

Storing & Reheating (If There’s Any Left!)

If you happen to have any leftovers, store them in an airtight container in the fridge for up to three days. To reheat, pop them back in the air fryer for a few minutes to regain that delightful crispiness. They make for a fantastic quick snack or lunch the next day.

Crispy Air Fryer Ranch Chicken Bites

Prep Time 30 minutes
Cook Time 10 minutes
Total Time 40 minutes
Servings 4 servings
Calories 350
Enjoy these crispy and flavorful ranch chicken bites, perfect for a quick snack or appetizer!

Ingredients

Chicken

  • 450 g chicken fillets or pieces, cut into bite-sized pieces
  • 120 ml buttermilk
  • 28 g ranch seasoning mix (1 packet (1 oz))
  • 90 g all-purpose flour
  • 90 g panko breadcrumbs
  • 1 g garlic powder (1/2 tsp)
  • 1 g onion powder (1/2 tsp)
  • 1 g paprika (1/2 tsp)
  • 3 g salt (1/2 tsp)
  • 1 g black pepper (1/4 tsp)
  • cooking spray or oil for spraying

Instructions 

  • Marinate chicken in buttermilk and half of ranch seasoning for 30 minutes.
  • Mix flour, panko, remaining ranch seasoning, garlic powder, onion powder, paprika, salt, and pepper.
  • Preheat air fryer to 400°F (200°C) for 5 minutes.
  • Dredge chicken in the flour mixture and place in air fryer basket, spray lightly with oil.
  • Cook for 8-10 minutes, flipping halfway, until internal temperature reaches 165°F (74°C).
  • Let rest for a few minutes before serving with ranch dressing.

Notes

For extra crispiness, ensure chicken pieces are not crowded in the air fryer.
Calories: 350kcal
Cost: $10.00
Course: Appetizer
Cuisine: American
Keyword: Chicken

Some of my fondest memories come from the kitchen of my grandmother’s modest home in a small Louisiana town. The air was perpetually filled with the aroma of spices and laughter, and the kitchen table was our haven. Today, I’m sharing a recipe that takes me back to those cherished moments, where food was more than sustenance—it was love, shared and savored. These Juicy No-Breading Chicken Tenders remind me of the simple joys of cooking with family, where each bite is a reminder of warmth and tenderness.

Why You’ll Absolutely Love This Recipe

  • It’s so easy, it feels like a little kitchen victory!
  • No breading means you get to enjoy the pure, juicy flavor of the chicken.
  • The smoky paprika and garlic add a delightful depth, reminiscent of Southern comfort.
  • A quick and simple recipe that brings everyone to the table, just like those cherished family nights.

Simple Ingredients for a Delicious Treat

Let’s talk about these humble ingredients. Each one plays its part in crafting a dish that feels both comforting and exciting. The chicken tenders are the star—juicy and tender, they remind me of the care my grandmother put into every meal. Olive oil adds richness, while garlic powder and smoked paprika bring a warmth that wraps around you like a cozy blanket. Onion powder, salt, and pepper round it all off, enhancing the natural flavors without overpowering them.

You’ll find the full ingredient list with exact measurements in the recipe card below!

Let’s Make Some Magic: Step-by-Step

Ready to bring some warmth to your table? Let’s get started! First, pat the chicken tenders dry with paper towels. This little step ensures they cook up nice and juicy. Toss them in a bowl with olive oil, garlic powder, smoked paprika, onion powder, salt, and pepper. Imagine you’re adding a sprinkle of love with each ingredient. Arrange the chicken in a single layer in the air fryer basket, giving each piece its own space to shine. Cook at 400°F for 8–10 minutes, flipping halfway through. Watch as they turn golden and irresistible. Serve hot with your favorite dipping sauce or side dish, and savor the joy of a home-cooked meal.

A Few of My Favorite Tips

Here’s a little secret from my kitchen to yours: if you want your chicken tenders extra juicy, let them rest for a minute or two after cooking. This allows the juices to redistribute, making each bite tender and delicious. And if you’re looking to add a little zing, try a squeeze of fresh lemon juice just before serving. It brightens up the flavors beautifully!

How I Like to Serve This

When I serve these chicken tenders, I love to pair them with a simple salad or some roasted veggies. It’s a meal that brings the family together, much like the way my grandmother’s meals did. And if you’re looking for more air fryer wonders, check out my **[Tender Air Fryer Chicken Bites That Bring Back Family Nights](https://quickflavorfix.com/tender-air-fryer-chicken-bites-that-bring-back-family-nights)**, or indulge in **[Comforting Air Fryer Meatballs That Bring Everyone Together](https://quickflavorfix.com/comforting-air-fryer-meatballs-that-bring-everyone-together)** for a hearty feast.

Storing & Reheating (If There’s Any Left!)

In the rare event you have leftovers, store them in an airtight container in the fridge for up to 3 days. To reheat, pop them back in the air fryer for a few minutes to regain that lovely crispness. They’re just as delightful the second time around, making them a perfect snack or quick lunch option.

Chicken Air Fryer Recipes: Juicy No-Breading Chicken Tenders

Prep Time 10 minutes
Cook Time 10 minutes
Total Time 20 minutes
Servings 4 servings
Calories 300
Enjoy these juicy, flavorful chicken tenders made effortlessly in an air fryer. Perfect for a quick meal or snack!

Ingredients

Chicken

  • 1 lb chicken tenders
  • 1 tbsp olive oil
  • 1 tsp garlic powder
  • 1 tsp smoked paprika
  • 1/2 tsp onion powder
  • 1/2 tsp salt
  • 1/4 tsp black pepper

Instructions 

  • Pat chicken tenders dry.
  • Toss with olive oil and spices.
  • Arrange in air fryer basket.
  • Cook at 400°F for 8–10 minutes, flipping halfway.
  • Serve hot with dipping sauce.

Notes

For extra flavor, marinate the chicken for a few hours before cooking.
Calories: 300kcal
Cost: $10.00
Course: Main Dish
Cuisine: American
Keyword: Chicken

There’s something about the aroma of fried chicken that instantly transports me back to my childhood kitchen in Louisiana. My grandmother would be humming a tune, her hands busy in the flour-dusted air, and the house would be filled with a warmth that no heater could replicate. These Air Fryer Chicken Bites are my homage to those moments, a way to bring that same sense of comfort and nostalgia to your table with a modern twist. Cooking is my love language, and these bites are like little love notes to share with your family and friends. Let’s dive into this recipe that makes every weeknight dinner feel like a cherished family gathering.

Why You’ll Absolutely Love This Recipe

  • It’s so easy, it feels like a little kitchen victory every time you make it!
  • The air fryer gives you that satisfying crunch without the extra oil, making it a great choice for low carb recipes.
  • Perfect for those busy weeknights when you want something quick yet delicious.
  • Brings back the joy of family dinners with every crispy bite.

Simple Ingredients for a Delicious Treat

Let’s talk about the magic that a few simple ingredients can create. The star here is the chicken, of course, tender and juicy on the inside with a crispy coating that hits all the right notes. The combination of garlic powder, onion powder, and smoked paprika is like a warm hug for your taste buds. And the panko breadcrumbs? They add that irresistible crunch that makes you want to keep coming back for more.

You’ll find the full ingredient list with exact measurements in the recipe card below!

Let’s Make Some Magic: Step-by-Step

Alright, let’s get cooking! Preheat your air fryer to 400°F (200°C) for about 5 minutes. While that’s happening, mix the flour, garlic powder, onion powder, smoked paprika, salt, and black pepper in a shallow dish. In another dish, beat the eggs until they’re smooth and ready for action. Place the panko breadcrumbs in a third dish.

Start by dredging each piece of chicken in the flour mixture, shaking off any excess. Dip them into the beaten eggs, letting the extra drip away, and finally, coat them in the panko breadcrumbs, pressing gently to make sure they stick. Lightly spray the basket of the air fryer with cooking spray and arrange the chicken bites in a single layer. Remember, don’t overcrowd them—cook in batches if necessary. Spray the tops with a bit more cooking spray and cook them at 400°F (200°C) for 10-12 minutes, turning halfway through. They should be golden brown and cooked through, with an internal temperature of 165°F (74°C). Let them cool slightly before serving.

A Few of My Favorite Tips

Here’s a little secret from my kitchen to yours: if you want an extra kick, add a pinch of cayenne pepper to the flour mixture. And if you’re looking to make these bites even more special, try mixing in some grated Parmesan cheese with the panko breadcrumbs. It adds a delightful savory note that pairs beautifully with the chicken.

How I Like to Serve This

These chicken bites are perfect on their own, but I love serving them with a side of homemade dipping sauce—think honey mustard or a spicy aioli. Pair them with a fresh salad or some roasted veggies, and you’ve got a meal that feels like a celebration.

Storing & Reheating (If There’s Any Left!)

If you happen to have any leftovers, store them in an airtight container in the fridge for up to three days. To reheat, just pop them back in the air fryer for a few minutes at 350°F (175°C) until they’re warmed through and crispy again. It’s like bringing a bit of that family night magic back to life!

If you enjoyed this recipe, you might also love exploring my other air fryer delights like **[Comforting Air Fryer Meatballs That Bring Everyone Together](https://quickflavorfix.com/comforting-air-fryer-meatballs-that-bring-everyone-together)**, **[A Quick and Heartfelt Air Fryer Chicken Sausage Delight](https://quickflavorfix.com/a-quick-and-heartfelt-air-fryer-chicken-sausage-delight)**, and **[Savoring Memories with Air Fryer Teriyaki Chicken](https://quickflavorfix.com/savoring-memories-with-air-fryer-teriyaki-chicken)**. Each dish is a testament to the joy and comfort that a simple meal can bring.

Air Fryer Chicken Bites

Prep Time 15 minutes
Cook Time 12 minutes
Total Time 27 minutes
Servings 4 servings
Calories 350
Deliciously crispy chicken bites made effortlessly in the air fryer, perfect for a quick snack or appetizer.

Ingredients

Chicken Bites

  • 1 pound chicken fillets, cut into bite-sized pieces
  • 1 cup all-purpose flour
  • 1 teaspoon garlic powder
  • 1 teaspoon onion powder
  • 1/2 teaspoon smoked paprika
  • 1/2 teaspoon salt
  • 1/4 teaspoon black pepper
  • 2 large eggs
  • 1 cup panko breadcrumbs
  • cooking spray or olive oil spray

Instructions 

  • Preheat air fryer to 400°F (200°C) for 5 minutes.
  • Mix flour, garlic powder, onion powder, smoked paprika, salt, and black pepper in a shallow dish.
  • Beat eggs in another shallow dish.
  • Dredge chicken in flour, dip in eggs, then coat with panko breadcrumbs.
  • Spray air fryer basket and arrange chicken bites in a single layer.
  • Cook for 10-12 minutes until golden brown and cooked through.

Notes

For extra crispiness, ensure the chicken bites are not overcrowded in the air fryer.
Calories: 350kcal
Cost: $10.00
Course: Appetizer
Cuisine: American
Keyword: Chicken

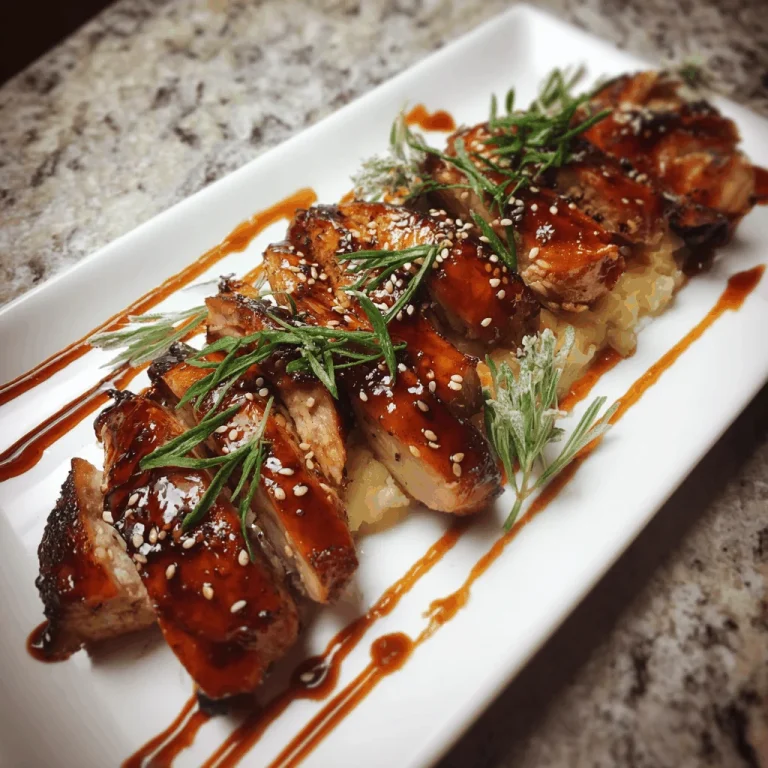
There’s a certain magic in the kitchen, a place where heartbeats sync with the rhythm of chopping, stirring, and simmering. I remember those long afternoons in my grandmother’s kitchen, where the air was always thick with the scent of something delicious. It was there, with flour-dusted hands, that I learned food is more than sustenance; it’s a language of love. Today, I bring you a dish that wraps you in warmth and nostalgia—Air Fryer Teriyaki Chicken. It’s a recipe that echoes the laughter and stories shared over the years, a bridge between old memories and new ones waiting to be made.

Why You’ll Absolutely Love This Recipe

  • It’s so easy, it feels like a little kitchen victory! Just a few simple steps to a meal that feels like a hug in a bowl.
  • The air fryer ensures the chicken is perfectly cooked with a slightly crispy exterior, making every bite a delight.
  • With a homemade teriyaki sauce, you get a flavor that’s rich and authentic, reminding you of family dinners and cherished moments.
  • This recipe is versatile enough for a weeknight dinner but special enough to share with friends and family.

Simple Ingredients for a Delicious Treat

Every ingredient in this recipe is like a note in a melody, each adding its own unique flavor to create a harmonious dish. The soy sauce brings a savory depth, while the brown sugar and honey add a touch of sweetness that balances the tang of rice vinegar. The ginger and garlic? They’re the heart of the sauce, infusing it with warmth and spice. And don’t forget the sesame oil, a little drizzle that adds a nutty aroma, making your kitchen smell like a dream.

You’ll find the full ingredient list with exact measurements in the recipe card below!

Let’s Make Some Magic: Step-by-Step

Imagine us in the kitchen together, aprons on, ready to create something wonderful. Start by simmering the soy sauce, brown sugar, honey, rice vinegar, ginger, and garlic in a saucepan. It’s like watching a symphony unfold as the ingredients meld into a fragrant sauce. Next, mix the cornstarch with water and whisk it into the sauce to thicken it up. Coat the chicken pieces in this liquid gold, letting them soak in all that flavor.

Preheat your air fryer, a modern kitchen marvel that makes cooking feel like magic. Lightly brush the basket with sesame oil, then lay the chicken pieces in a single layer. Cook them until they’re golden and crispy, shaking the basket halfway through to ensure even cooking. Once done, toss the chicken with the remaining teriyaki sauce, letting it coat every piece. And there you have it, a dish that’s as beautiful as it is delicious.

A Few of My Favorite Tips

Want to make this dish even more special? Try marinating the chicken for a few hours before cooking to really let those flavors seep in. And if you’re feeling adventurous, add a sprinkle of red pepper flakes for a bit of heat. Remember, the kitchen is your playground, so don’t be afraid to experiment and make this dish your own.

How I Like to Serve This

When it comes to serving, I love to place this teriyaki chicken atop a bed of steamed jasmine rice, letting the sauce trickle down into the grains. A side of stir-fried vegetables adds color and crunch, making the meal feel complete. And don’t forget to garnish with sesame seeds and green onions for that final touch of elegance.

Storing & Reheating (If There’s Any Left!)

If you happen to have leftovers, store them in an airtight container in the fridge for up to three days. To reheat, simply pop them back in the air fryer or microwave until warmed through. The flavors only deepen with time, making the second serving just as delightful.

For more culinary magic, check out my other recipes like **Savoring Moments: Air Fryer Salmon That Feels Like Home** and **A Quick and Tasty Air Fryer Salmon That Feels Like Home**. They’re dishes that, much like this teriyaki chicken, bring people together and create moments worth savoring.

Air Fryer Teriyaki Chicken

Prep Time 10 minutes
Cook Time 12 minutes
Total Time 22 minutes
Servings 4 servings
Calories 350
This Air Fryer Teriyaki Chicken is a quick and delicious dish, perfect for busy weeknights!

Ingredients

Main Ingredients

  • 1 lb chicken pieces or fillets, cut into bite-sized pieces
  • 1/3 cup soy sauce
  • 1/4 cup brown sugar
  • 3 tablespoons honey
  • 2 tablespoons rice vinegar
  • 1 tablespoon ginger, grated
  • 2 cloves garlic, minced
  • 1 tablespoon cornstarch
  • 1 tablespoon water
  • 1 tablespoon sesame oil
  • sesame seeds and chopped green onions, for garnish

Instructions 

  • Combine soy sauce, brown sugar, honey, rice vinegar, ginger, and garlic in a saucepan; simmer until sugar dissolves.
  • Mix cornstarch and water to create a slurry; add to the saucepan and simmer until thickened.
  • Coat chicken pieces with half of the teriyaki sauce; reserve the rest.
  • Preheat air fryer to 380°F (193°C) for 5 minutes; brush basket with sesame oil.
  • Cook chicken in air fryer for 10-12 minutes, shaking halfway through.
  • Toss cooked chicken with remaining teriyaki sauce; serve garnished with sesame seeds and green onions.

Notes

For extra flavor, marinate the chicken in the sauce for a few hours before cooking.
Calories: 350kcal
Cost: $12.00
Course: Main Course
Cuisine: Asian
Keyword: Chicken

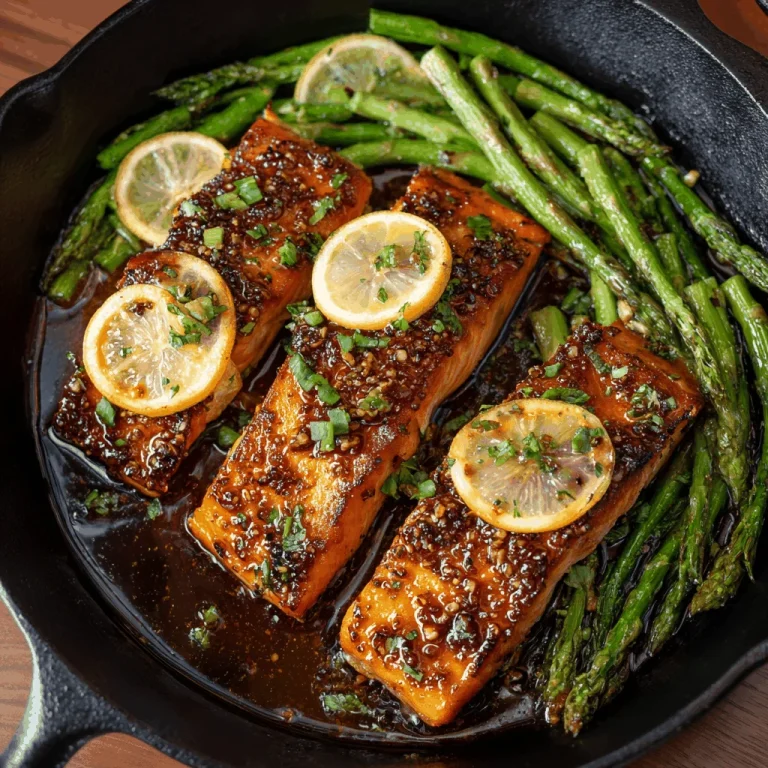
As I sit down to share this recipe with you, I’m transported back to a warm kitchen in Louisiana, where the aroma of honey and garlic would often fill the air. My grandmother, with her soft hands and kind smile, taught me that cooking is not just about feeding the stomach, but also about nourishing the soul. This Honey Garlic Salmon recipe is a testament to that belief—simple, heartfelt, and full of flavor. It reminds me of those cherished family dinners, where every bite was a celebration of love and togetherness.

Why You’ll Absolutely Love This Recipe

  • It’s a Quick Dinner that fits perfectly into busy schedules, and yet it feels like a gourmet treat.
  • With just a handful of ingredients, it’s one of those Easy Salmon Recipes that doesn’t skimp on flavor.
  • The use of an Air Fryer ensures a perfectly cooked salmon every time, with minimal fuss.
  • It’s a Healthy Homemade Recipe, combining the natural sweetness of honey with the savory depth of garlic.

Simple Ingredients for a Delicious Treat

The beauty of this dish lies in its simplicity. We start with fresh salmon fillets, a staple in any Southern kitchen, for their tender and flaky texture. Honey adds a sweet, sticky glaze that caramelizes beautifully in the air fryer, while soy sauce provides a savory balance. Garlic, with its aromatic warmth, ties everything together, creating a symphony of flavors that dance on your palate. A hint of lemon juice brightens the dish, and a drizzle of olive oil adds richness. Finally, a sprinkle of salt and pepper enhances all these flavors, making this one of the best Air Fryer Recipes you’ll ever try.

You’ll find the full ingredient list with exact measurements in the recipe card below!

Let’s Make Some Magic: Step-by-Step

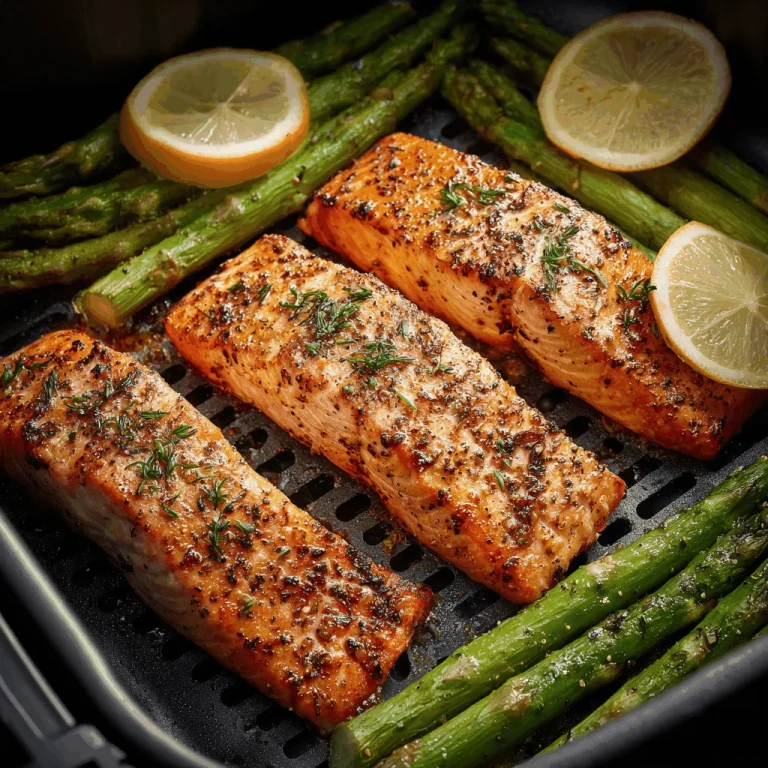
Imagine us in the kitchen together, aprons on, ready to create something special. Begin by patting the salmon fillets dry—this helps the glaze adhere beautifully. Sprinkle them with salt and pepper, a simple yet essential step for flavor. In a small bowl, whisk together honey, soy sauce, garlic, lemon juice, and olive oil until smooth and glossy. As the air fryer preheats to 400°F, lay the salmon fillets skin-side down in the basket. Brush or spoon half of the honey garlic glaze over the tops, reserving the rest for later. Cook for 7 minutes, then brush with the remaining glaze and cook for another 3-5 minutes until the salmon flakes easily with a fork. Once done, carefully lift the salmon out and sprinkle with sesame seeds, green onions, or red pepper flakes if you like a bit of heat. Let it rest for a couple of minutes before serving.

A Few of My Favorite Tips

Here’s a little secret from my kitchen to yours: always preheat your air fryer for even cooking. When applying the glaze, don’t be shy—coating the salmon generously ensures each bite is packed with flavor. If you prefer a bit of crunch, try adding chopped nuts like almonds or pecans as a garnish.

How I Like to Serve This

There’s something about pairing this honey garlic salmon with a light, refreshing salad that just feels right. I love serving it alongside a simple arugula salad tossed with lemon vinaigrette, or perhaps some roasted vegetables for a cozy, comforting meal. And don’t forget a warm slice of crusty bread to mop up any leftover glaze!

Storing & Reheating (If There’s Any Left!)

Should you find yourself with leftovers, store the salmon in an airtight container in the fridge for up to 3 days. To reheat, I recommend using the air fryer again at a lower temperature, around 300°F, just until warmed through. This method helps maintain the texture without drying it out.

If you enjoyed this recipe, you might also like reading about **A Quick and Tasty Air Fryer Salmon That Feels Like Home**, where I share more about bringing that homemade feel to every meal. Or check out **A Cozy Dinner in 15 Minutes: Air Fryer Salmon Delight** for another quick and delightful dinner idea.

Air Fryer Honey Garlic Salmon

Prep Time 10 minutes
Cook Time 12 minutes
Total Time 22 minutes
Servings 4 servings
Calories 350
This Air Fryer Honey Garlic Salmon is a quick and delicious dish, perfect for a healthy weeknight dinner.

Ingredients

Main Ingredients

  • 4 fillets salmon (about 6 oz each, skin-on or skinless)
  • 3 tablespoons honey
  • 2 tablespoons low-sodium soy sauce
  • 3 cloves garlic, minced or grated
  • 1 tablespoon lemon juice
  • 1 tablespoon olive oil
  • 1/2 teaspoon black pepper
  • 1/4 teaspoon salt (adjust to taste)
  • optional garnishes: sesame seeds, chopped green onions, red pepper flakes

Instructions 

  • Pat salmon dry, remove pin bones, and season with salt and pepper.
  • Whisk honey, soy sauce, garlic, lemon juice, and olive oil until smooth.
  • Preheat air fryer to 400°F (200°C) for 3 minutes.
  • Place salmon in basket, brush with half the glaze, and cook for 7 minutes.
  • Brush with remaining glaze and cook for an additional 3-5 minutes until cooked through.
  • Remove salmon, garnish if desired, and let rest for 2 minutes before serving.

Notes

For extra flavor, let the salmon marinate in the glaze for 30 minutes before cooking.
Calories: 350kcal
Cost: $15.00
Course: Main Course
Cuisine: American
Keyword: Salmon

Every time I step into my kitchen, it’s like stepping back into my grandmother’s old country home in Louisiana. The aroma of delicious dishes wafting through the air, the gentle hum of family chatter, and the warmth of shared moments fill my senses. Today, I’m sharing a recipe that brings those feelings to life—Easy Air Fryer Salmon. This dish is more than just a meal; it’s a bridge to cherished memories and a reminder of the love that goes into every bite.

Why You’ll Absolutely Love This Recipe

  • It’s so easy, it feels like a little kitchen victory!
  • Quick enough for those busy weeknights yet special enough for a cozy family gathering.
  • Uses simple, wholesome ingredients that pack a punch of flavor.
  • A modern twist with an air fryer, making it both convenient and healthy.

Simple Ingredients for a Delicious Treat

There’s something magical about simplicity, and this recipe is a testament to that. You’ll need just a handful of ingredients, each bringing their own warmth and depth:

  • Salmon fillets: Fresh or even Frozen Salmon works wonders here. It’s the star of the show, after all!
  • Kosher salt and ground black pepper: The basic duo that enhances any dish.
  • Brown sugar or honey: Adds a touch of sweetness that beautifully balances the savory elements.
  • Dijon mustard: The tanginess of Mustard Salmon gives this dish its unique zing.
  • Extra virgin olive oil: For that rich, smooth finish.
  • Low sodium soy sauce: A healthier option that doesn’t compromise on flavor. Perfect for a Salmon Soy Sauce treat.
  • Garlic powder and ground ginger (optional): These spices add a subtle aromatic depth that ties everything together.

You’ll find the full ingredient list with exact measurements in the recipe card below!

Let’s Make Some Magic: Step-by-Step

Imagine me right there with you, guiding you through this culinary journey:

  1. Start by patting the salmon fillets dry with paper towels. Sprinkle them lightly on both sides with salt and pepper.
  2. Preheat your air fryer to 400°F. If you like easy cleanup (who doesn’t?), line the basket with aluminum foil.
  3. In a small bowl, whisk together the brown sugar, Dijon mustard, oil, soy sauce, garlic powder, and ginger. Spoon this delightful glaze all over the top of your prepared salmon fillets.
  4. Place the fillets in the preheated air fryer basket, ensuring they’re not touching. Give them space to breathe!
  5. Cook the salmon for 6 to 11 minutes, depending on the thickness. A 1-inch thick fillet will typically need about 8-9 minutes. The salmon is ready when it reaches 145°F on an instant-read thermometer.
  6. Transfer the fillets to a serving plate and enjoy them hot.

A Few of My Favorite Tips

Here are a few secrets I’d share with a dear friend:

  • For an extra flavor boost, let the salmon marinate in the glaze for about 15 minutes before air frying.
  • If you love a crispier finish, try brushing a little extra glaze on the fillets halfway through cooking.
  • Experiment with other spices like smoked paprika or cayenne if you’re feeling adventurous!

How I Like to Serve This

In my home, we love serving this salmon with a side of roasted vegetables or a fresh garden salad. The vibrant colors and textures make for a visually stunning and nutritious meal. And if you’re in the mood, a glass of chilled white wine pairs beautifully with this dish.

Storing & Reheating (If There’s Any Left!)

If you find yourself with leftovers, store the salmon in an airtight container in the refrigerator for up to two days. To reheat, pop it back into the air fryer for a few minutes to regain that delightful crispness. Just be sure not to overcook it!

For more inspiration and cozy dinner ideas, check out A Quick and Tasty Air Fryer Salmon That Feels Like Home and A Cozy Dinner in 15 Minutes: Air Fryer Salmon Delight. And if you’re in the mood for something different, consider trying Comforting Air Fryer Meatballs That Bring Everyone Together.

Easy Air Fryer Salmon

Prep Time 10 minutes
Cook Time 9 minutes
Total Time 19 minutes
Servings 2 servings
Calories 350
This easy air fryer salmon recipe is quick, flavorful, and perfect for a healthy weeknight dinner.

Ingredients

Seafood

  • 2 fillets salmon fillets, about 6 ounces each
  • 1 tablespoon brown sugar or honey
  • 1 tablespoon dijon mustard
  • 0.5 tablespoon extra virgin olive oil
  • 0.5 tablespoon low sodium soy sauce
  • 1/4 teaspoon garlic powder
  • pinch kosher salt
  • pinch ground black pepper
  • pinch ground ginger (optional)

Instructions 

  • Pat the salmon fillets dry and season with salt and pepper.
  • Preheat the air fryer to 400°F and line the basket with foil if desired.
  • Whisk together brown sugar, mustard, oil, soy sauce, garlic powder, and ginger. Spoon over salmon.
  • Place fillets in the air fryer basket without touching.
  • Cook for 6 to 11 minutes until salmon reaches 145°F.
  • Transfer to a plate and enjoy hot.

Notes

For best results, do not overcook the salmon.
Calories: 350kcal
Cost: $12.00
Course: Main Course
Cuisine: American
Keyword: Salmon

There’s nothing quite like the feeling of a home-cooked meal coming together in just minutes, especially when it brings back memories of evenings spent in my grandmother’s cozy kitchen in Louisiana. Today, I want to share with you a recipe that’s as heartwarming as it is quick: Air Fryer Salmon Delight. In just 15 minutes, you’ll have a dish that’s perfectly flaky, flavorful, and feels just like a warm hug. This recipe reminds me of the evenings when my grandmother and I would experiment with spices, letting our senses guide us to something delicious. It’s those moments of love and creativity that I cherish and want to pass on to you.

Why You’ll Absolutely Love This Recipe

  • It’s so easy, it feels like a little kitchen victory!
  • Perfect for those nights when time is short but you still want something nourishing and homemade.
  • Minimal cleanup, because who wants to spend their evening washing dishes?
  • The flavors are bold yet comforting, like a familiar tune that’s always welcome.
  • It’s a versatile dish that can be paired with anything from a simple salad to a hearty side.

Simple Ingredients for a Delicious Treat

Let’s talk about the stars of this dish. First, the salmon fillets – they’re the canvas for our flavors. I love how salmon can be both delicate and rich, offering a taste that pairs beautifully with our spice blend. We’ll be using a combination of garlic powder, paprika, onion powder, and a touch of cayenne pepper for a little kick, reminiscent of the bold flavors my grandmother adored. The olive oil brings everything together, while the lemon juice adds a refreshing zing that brightens the dish. And don’t forget the fresh parsley garnish, a nod to the greenery of Louisiana.

You’ll find the full ingredient list with exact measurements in the recipe card below!

Let’s Make Some Magic: Step-by-Step

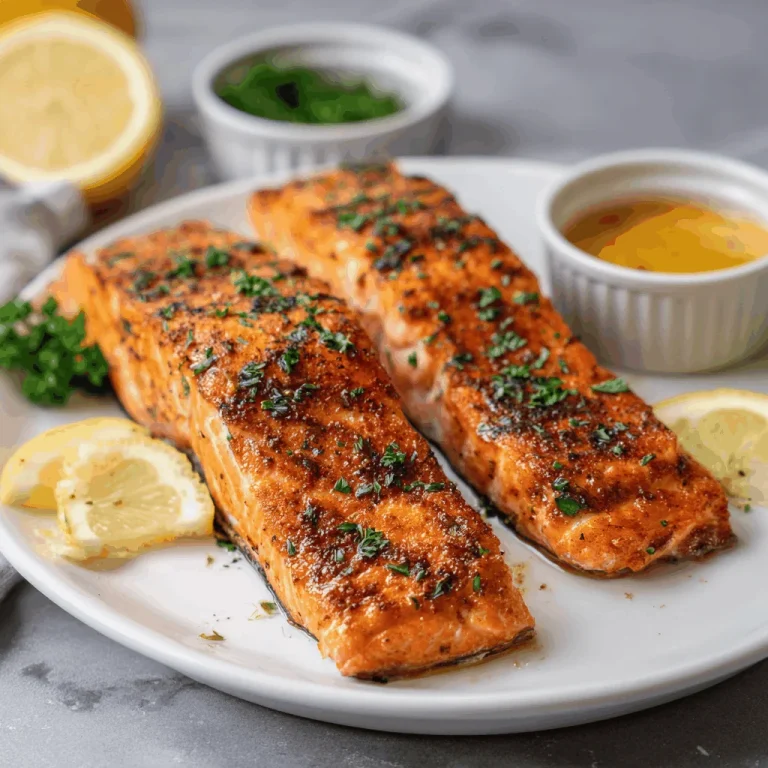
Alright, let’s get cooking! First, grab those salmon fillets and pat them really dry with a paper towel. This ensures they’ll crisp up nicely. In a small bowl, whisk together the olive oil, garlic powder, paprika, salt, black pepper, onion powder, and cayenne pepper (if you’re feeling spicy!). Rub that seasoning all over the salmon fillets and drizzle with lemon juice. Preheat your air fryer to 375°F (190°C) for about 3 minutes. Place the salmon fillets in the air fryer basket, skin-side down. Air fry for 8-10 minutes, checking around 8 minutes for doneness. Once done, take the salmon out and garnish with fresh parsley. Serve with lemon wedges and enjoy your creation!

A Few of My Favorite Tips

Here’s a little secret: if you like your salmon extra crispy, leave it in the air fryer for an additional minute or two. Also, don’t be shy with the lemon juice – it really makes the flavors pop! If you’re cooking for one, this recipe is perfect as an Air Fryer Dinner For One, and leftovers can be tossed into an Air Fryer Salmon Salad the next day.

How I Like to Serve This

Personally, I love serving this salmon with a side of roasted vegetables or a simple green salad. It also pairs wonderfully with some creamy mashed potatoes or a fluffy rice pilaf. For something extra special, try it with my A Quick and Tasty Air Fryer Salmon That Feels Like Home recipe, or if you’re in the mood for more air-fried delights, check out these Comforting Air Fryer Meatballs That Bring Everyone Together.

Storing & Reheating (If There’s Any Left!)

If you have any leftovers, store them in an airtight container in the fridge for up to two days. To reheat, simply place the salmon back in the air fryer for a few minutes at a lower temperature to avoid drying it out. This method keeps it moist and delicious, just like the first time.

Air Fryer Salmon in 15 Minutes: Foolproof Recipe

Prep Time 5 minutes
Cook Time 10 minutes
Total Time 15 minutes
Servings 2 servings
Calories 350
Enjoy perfectly cooked salmon in just 15 minutes with this easy air fryer recipe!

Ingredients

Seafood

  • 2 fillets salmon fillets, about 6 oz each
  • 1 tbsp olive oil
  • 1 tsp garlic powder
  • ½ tsp paprika
  • ½ tsp salt
  • ½ tsp black pepper
  • ½ tsp onion powder
  • ¼ tsp cayenne pepper
  • 1 tbsp lemon juice
  • fresh parsley for garnish
  • lemon wedges for serving

Instructions 

  • Pat salmon fillets dry with a paper towel.
  • Whisk olive oil, garlic powder, paprika, salt, black pepper, onion powder, and cayenne. Rub on salmon and drizzle with lemon juice.
  • Preheat air fryer to 375°F (190°C) for 3 minutes.
  • Place salmon skin-side down in air fryer. Cook for 8-10 minutes, checking for doneness at 8 minutes.
  • Garnish with parsley and serve with lemon wedges.

Notes

For extra flavor, let the salmon marinate in the seasoning for 30 minutes before cooking.
Calories: 350kcal
Cost: $10.00
Course: Main Course
Cuisine: American
Keyword: Salmon

There’s something about salmon that always brings me back to those long, lazy afternoons in my grandmother’s kitchen in Louisiana. She had this way of turning a simple piece of fish into a feast, and although she never had anything as fancy as an air fryer, I like to think she’d appreciate the way this modern method brings out the best in something so simple. This Best Damn Air Fryer Salmon – A Quick and Delicious Recipe is my way of sharing a little piece of home with you, a dish that’s as comforting as a hug and as easy as a Sunday morning.

Why You’ll Absolutely Love This Recipe

  • It’s so easy, it feels like a little kitchen victory!
  • The air fryer gives the salmon a crispy finish that’s hard to beat.
  • You’ll have a delicious meal on the table in under 20 minutes.
  • The flavors are simple yet memorable, perfect for any occasion.
  • A great way to introduce more seafood into your weekly meals.

Simple Ingredients for a Delicious Treat

When it comes to ingredients, I believe in keeping things simple and letting each element shine. You’ll need just a handful of things to create this dish, each bringing its own little piece of magic to the table. From the salmon fillets that are the star of the show to the lemon slices that add a touch of brightness, every ingredient plays its part in creating something truly special. And let me tell you, the blend of garlic and onion powder with a hint of smoked paprika? It’s like a little dance party for your taste buds.

You’ll find the full ingredient list with exact measurements in the recipe card below!

Let’s Make Some Magic: Step-by-Step

Ready to dive in? Let’s make some magic together. First, preheat your air fryer to 400°F (200°C). This step is crucial to ensure even cooking and that crispy finish we all love. While it’s heating up, pat your salmon fillets dry. This helps the seasoning stick and gives you that delightful crust.

Next, drizzle the salmon with olive oil (or melted butter if you’re feeling indulgent) and season with garlic powder, onion powder, smoked paprika, salt, and pepper. If you’re looking to kick things up a notch, you can use a quick marinade of soy sauce, honey, dijon mustard, lemon juice, and a touch more garlic powder.

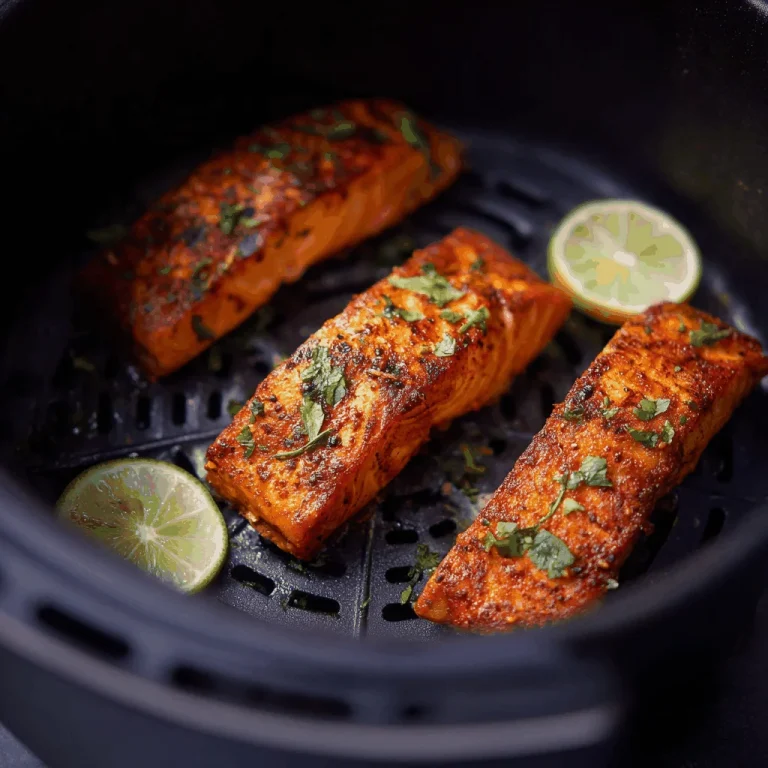
Place the salmon skin-side down in the air fryer basket and let it cook for about 8-10 minutes. You’ll know it’s done when it’s crispy on the outside and tender on the inside. Trust me, this is one of those Salmon Recipes Airfry that will have you coming back for more.

Once it’s done, garnish with fresh lemon slices or zest for that extra pop of flavor. Serve it up with your favorite sides, and you’ve got yourself a meal that feels like home.

A Few of My Favorite Tips

Here’s a little secret from my kitchen to yours: don’t skip the preheating step! It makes all the difference in achieving that perfect texture. Also, if you’re using a marinade, let the salmon sit for at least 10 minutes to really soak up those flavors.

And if you’re feeling adventurous, you might want to try pairing this with a side of Comforting Air Fryer Meatballs That Bring Everyone Together or perhaps a Quick and Heartfelt Air Fryer Chicken Sausage Delight. They’re both family favorites around here!

How I Like to Serve This

Personally, I love serving this salmon with a simple side salad or some roasted vegetables. The freshness of the salad or the earthiness of the veggies complements the rich flavors of the salmon beautifully. And if you’re in the mood for something a bit more hearty, a side of creamy mashed potatoes or fluffy rice would do the trick.

Storing & Reheating (If There’s Any Left!)

In the unlikely event that you have leftovers, store the salmon in an airtight container in the fridge for up to two days. When you’re ready to enjoy it again, I recommend reheating it in the air fryer at a lower temperature to keep it from drying out. Just a few minutes at 350°F should do the trick, and it’ll taste just as delicious as the first time around.

Best Damn Air Fryer Salmon – A Quick and Delicious Recipe

Prep Time 10 minutes
Cook Time 10 minutes
Total Time 20 minutes
Servings 2 servings
Calories 400
This air fryer salmon recipe is quick, easy, and packed with flavor, making it a perfect weeknight dinner option.

Ingredients

Seafood

  • 2 fillets salmon (about 6 oz each)
  • 1 tablespoon olive oil (or melted butter)
  • 1 teaspoon garlic powder
  • 1 teaspoon onion powder
  • 1/2 teaspoon smoked paprika (optional for extra flavor)
  • to taste salt and pepper
  • 1 lemon sliced (for garnish and optional zest)
  • 2 tablespoons soy sauce (or coconut aminos for paleo or gluten-free)
  • 1 tablespoon honey (or maple syrup)
  • 1 tablespoon dijon mustard
  • 1 teaspoon lemon juice
  • 1/2 teaspoon garlic powder

Instructions 

  • Preheat the air fryer to 400°F (200°C) for even cooking and a crispy finish.
  • Pat salmon dry, drizzle with olive oil (or melted butter), and season with garlic powder, onion powder, smoked paprika, salt, and pepper.
  • Place the salmon in the air fryer basket, skin-side down. Air fry at 400°F (200°C) for 8-10 minutes until crispy and tender.
  • Garnish with fresh lemon slices or zest. Serve with your favorite sides.

Notes

For extra flavor, consider marinating the salmon before cooking.
Calories: 400kcal
Cost: $15
Course: Main Course
Cuisine: American
Keyword: Salmon

There’s something magical about the act of sharing food, isn’t there? It’s a silent way of saying, “I care about you.” Growing up in a small Louisiana town, I watched my grandmother bring people together with her cooking. Her kitchen was a sanctuary where every meal was a celebration of love. Today, I want to share with you a recipe that carries a piece of that magic—a wholesome bite of joy wrapped up in crispy air fryer pizza rolls. These little delights are perfect for sharing with family and friends, whether it’s a casual get-together or just a cozy evening at home.

Why You’ll Absolutely Love This Recipe

  • It’s so easy, it feels like a little kitchen victory!
  • Perfect for sharing, or as a delightful snack just for you.
  • A great way to involve the kids in the kitchen—rolling dough is pure joy!
  • Quick to make, using simple ingredients you probably already have.
  • Crispy on the outside, gooey on the inside—a texture lover’s dream.

Simple Ingredients for a Delicious Treat

Let’s talk about the ingredients that make this dish shine. We’re using pizza dough—whether you make it from scratch or pick it up from the store, the choice is yours. The mozzarella cheese melts into a creamy delight, and the pepperoni adds that familiar, comforting zing. A sprinkle of Italian seasoning and a pinch of salt bring everything together. And don’t forget the olive oil spray—it’s the secret to that perfect golden crust. Oh, and what’s a pizza roll without a simple marinara sauce for dipping? It’s like a warm hug for your taste buds.

You’ll find the full ingredient list with exact measurements in the recipe card below!

Let’s Make Some Magic: Step-by-Step

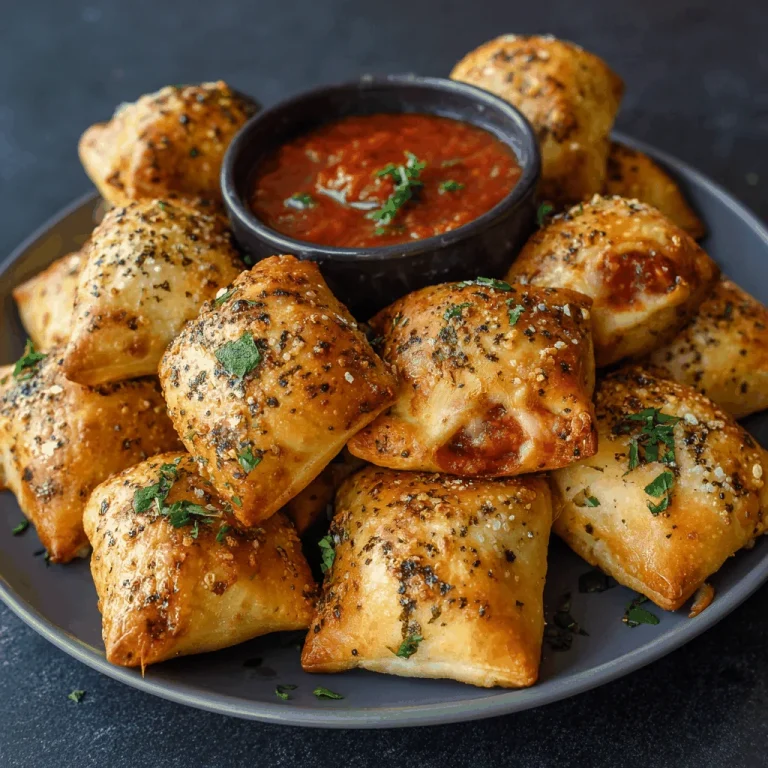
Alright, let’s roll up our sleeves and get to it. First, gather all your ingredients. It’s always nice to have everything ready before you start. If you’re using store-bought dough, let it sit at room temperature for about 20 minutes. This makes it easier to roll out. If you’re feeling adventurous and making your own dough, give yourself a pat on the back! Roll out the dough and cut it into 3×3 inch squares. Now comes the fun part—filling each square with mozzarella, pepperoni, a sprinkle of Italian seasoning, and a pinch of salt. Fold the dough over the filling and crimp the edges to seal. Preheat your air fryer to 375°F (190°C) for 5 minutes. Lightly spray the basket with olive oil and arrange the rolls in a single layer. Cook them for 8-10 minutes, shaking the basket halfway through. Let them cool slightly before serving with marinara sauce. There you have it—a little bundle of joy, ready to be savored.

A Few of My Favorite Tips

Here are a few tips from my kitchen to yours: If you want to get the kids involved, let them help with the filling or crimping the edges. It’s a fun way to spend time together. Also, feel free to experiment with different fillings—maybe some mushrooms or bell peppers. And if you’re making these for a party, you can prepare them in advance and just pop them in the air fryer when guests arrive.

How I Like to Serve This

I love serving these pizza rolls as a snack during game nights or casual gatherings. They’re also a delightful surprise in lunchboxes. Pair them with a simple salad or some roasted veggies for a light meal. And of course, always serve with a generous side of marinara sauce for dipping.

Storing & Reheating (If There’s Any Left!)

If you happen to have leftovers, store them in an airtight container in the fridge for up to three days. To reheat, just pop them back in the air fryer for a few minutes until they’re warm and crispy again. Trust me, they’ll taste just as good the second time around.

If you’re looking for more air fryer inspiration, check out my **[Comforting Air Fryer Meatballs That Bring Everyone Together](https://quickflavorfix.com/comforting-air-fryer-meatballs-that-bring-everyone-together)** or start your day with **[Mornings Made Special: My Favorite Air Fryer Breakfast Burrito](https://quickflavorfix.com/mornings-made-special-my-favorite-air-fryer-breakfast-burrito)**. And for another crispy delight, don’t miss **[Wrap Yourself in Joy with Crispy Chicken Mozzarella Delights](https://quickflavorfix.com/wrap-yourself-in-joy-with-crispy-chicken-mozzarella-delights)**.

Air Fryer Pizza Rolls: Discover the Crispy Delight!

Prep Time 20 minutes
Cook Time 10 minutes
Total Time 30 minutes
Servings 4 servings
Calories 300
Enjoy these crispy and cheesy pizza rolls made effortlessly in an air fryer!

Ingredients

Dough

  • 1 package pizza dough (store-bought or homemade)
  • 1 cup shredded mozzarella cheese
  • 1 cup pepperoni slices
  • 1 tsp italian seasoning
  • 1 pinch salt
  • as needed olive oil (for spraying)
  • 1 cup marinara sauce (for dipping)

Instructions 

  • Gather all your ingredients.
  • Prepare the dough by letting it sit at room temperature for 20 minutes.
  • Cut the dough into 3x3 inch squares and fill with cheese, pepperoni, seasoning, and salt.
  • Seal the rolls and preheat the air fryer to 375°F (190°C) for 5 minutes.
  • Spray the basket with olive oil, arrange rolls, and cook for 8-10 minutes.
  • Let cool slightly before serving with marinara sauce.

Notes

For extra crispiness, spray the rolls lightly with olive oil before cooking.
Calories: 300kcal
Cost: $10
Course: Snack
Cuisine: Italian
Keyword: pizza