Author

daniel

Browsing

A Taste of Fall: Sweet Apple Cider Glazed Carrots

Welcome to a heartwarming journey through the flavors of fall! Today, we’re diving into a delightful side dish that encapsulates the essence of family gatherings: Sweet Apple Cider Glazed Carrots. This simple yet flavorful recipe brings together the natural sweetness of carrots and the rich, tangy notes of apple cider, creating a dish that’s perfect for any occasion. As you prepare this dish, let the aromas fill your kitchen, reminding you of cherished memories and the love that goes into every meal.

Why You’ll Love This Recipe

This Sweet Apple Cider Glazed Carrots recipe isn’t just about flavor; it’s about the experiences and emotions tied to cooking and sharing food. Here are some reasons why this dish will become a staple on your table:

  • Unforgettable Flavor: The combination of roasted carrots and a sweet apple cider glaze creates a perfect balance of sweetness and savory goodness.
  • Quick and Easy: With just a handful of ingredients and straightforward steps, this recipe is both accessible and efficient for busy weeknights.
  • Versatile Side Dish: These glazed carrots pair beautifully with everything from roasted meats to vegetarian dishes, making them a fantastic addition to any meal.
  • Health Benefits: Carrots are packed with vitamins and antioxidants, making this dish not just delicious but nutritious as well.
  • Perfect for Any Occasion: Whether it’s a family dinner, holiday gathering, or potluck, these carrots will impress and satisfy.

Ingredients: A Closer Look

Here’s what you’ll need to create this delightful dish:


5-Speed Electric Hand Mixer

★ Recommended Kitchen Tool

5-Speed Electric Hand Mixer

Make this recipe even easier with a quality 5-Speed Electric Hand Mixer — a must-have kitchen staple!


🛒 Check Price on Amazon →

As an Amazon Associate, we earn from qualifying purchases.
  • 1½ lbs (700g) carrots: Choose fresh, vibrant carrots; they can be orange or even rainbow varieties for a colorful presentation.
  • 1 tablespoon oil: Olive oil or vegetable oil works well for roasting.
  • Salt and pepper to taste: Essential for enhancing the natural flavors of the carrots.
  • 2 cups apple cider (non-alcoholic) or unsweetened apple juice: The star ingredient that brings sweetness and depth to the dish.

Feel free to customize this list with substitutions. For instance, you can use honey instead of maple syrup for a different sweetness profile.

Step-by-Step Instructions

Side view of vibrant orange carrots coated in a shiny apple cider glaze.

Follow these simple steps to prepare your Sweet Apple Cider Glazed Carrots:

  1. Preheat the oven to 425°F (220°C).
  2. Wash, scrub, and trim the carrots. Cut them into sticks about 3 inches (7cm) long.
  3. Put the carrot sticks onto a baking sheet large enough to hold them in a single layer.
  4. Drizzle the carrots with oil, sprinkle with salt and pepper, and toss to coat.
  5. Roast the carrots for about 25 minutes, tossing them a couple of times during roasting, until they are soft and starting to caramelize at the edges.
  6. While the carrots are roasting, pour the apple cider into a saucepan and heat to boiling.
  7. Turn the heat down to medium-high and let the cider boil until it is reduced to about 2 tablespoons.
  8. Watch the cider carefully as it approaches the 2 tablespoon mark, ensuring it becomes thick and syrupy without burning.
  9. Drizzle the syrup over the roasted carrots, toss to coat, and serve warm.

Pro Tips for the Perfect Dish

To ensure your Sweet Apple Cider Glazed Carrots turn out perfectly every time, consider these expert tips:

  • Choose the Right Carrots: Look for firm, unblemished carrots with vibrant color; they will taste fresher and sweeter.
  • Uniform Sizing: Cut the carrots into even sticks to ensure they roast evenly.
  • Don’t Overcrowd the Pan: Give the carrots space on the baking sheet to allow for proper roasting and caramelization.
  • Watch the Glaze: Keep an eye on the apple cider as it reduces; it should become syrupy but not burn.
  • Experiment with Spices: Add ground cinnamon or nutmeg to the glaze for a warm, comforting flavor.
  • Try Different Oils: Using flavored oils, like garlic or herb-infused oils, can add an extra layer of taste.
  • Make it Vegan: Omit any honey or maple syrup for a completely plant-based version.
  • Adjust the Sweetness: Feel free to alter the amount of cider based on your sweetness preference.

Common Mistakes to Avoid

Even the best cooks can make mistakes. Here are some common pitfalls to watch out for:

  • Underestimating Roasting Time: If the carrots are not caramelized, they may lack flavor. Adjust roasting time as needed.
  • Not Tasting the Glaze: Always taste your glaze before drizzling it over the carrots; adjust sweetness or seasoning as necessary.
  • Skipping the Toss: Tossing the carrots during roasting helps achieve an even roast and caramelization.
  • Using Too Much Liquid: If the glaze is too thin, it won’t coat the carrots properly; reduce the cider until thick.

Delicious Variations

Feel free to get creative! Here are some variations to inspire you:

  • Maple-Mustard Glaze: Add a tablespoon of Dijon mustard to the glaze for a tangy twist.
  • Herb-Infused Carrots: Toss in fresh thyme or rosemary before roasting for an aromatic touch.
  • Spicy Kick: Add a pinch of cayenne pepper or red pepper flakes to the glaze for a hint of heat.
  • Carrot and Apple Medley: Mix in diced apples for a delightful combination of flavors and textures.

Storage and Make-Ahead Instructions

This dish is perfect for meal prep! Here’s how to store and reheat:

  • Storing Leftovers: Keep any leftover glazed carrots in an airtight container in the refrigerator for up to 4 days.
  • Reheating: Warm them in the oven at 350°F (175°C) until heated through, or microwave for a quick option.
  • Make Ahead: You can prep the carrots and the glaze a day ahead. Just combine before serving.

Frequently Asked Questions

Here are some common questions about Sweet Apple Cider Glazed Carrots:

  • What kind of carrots should I use for this recipe? Fresh, firm carrots work best. You can use baby carrots too, but they may need less roasting time.
  • Can I make this recipe ahead of time? Yes! You can prepare the carrots and glaze in advance and reheat before serving.
  • How do I know when the carrots are done? The carrots should be tender and caramelized at the edges. A fork should easily pierce them.
  • Can I freeze the glazed carrots? Yes, but they may lose some texture. Store in a freezer-safe container for up to 3 months.
  • How do I serve these carrots? They’re best served warm, but can also be enjoyed at room temperature.
  • Can I add other vegetables? Absolutely! Feel free to add parsnips or sweet potatoes for variety.
  • What if I don’t have apple cider? Unsweetened apple juice can be a suitable substitute.
  • Are these carrots healthy? Yes! Carrots are low in calories and high in vitamins, particularly vitamin A.

Nutritional Tips and Dietary Adaptations

This dish is naturally gluten-free and can easily be made vegan by substituting honey with maple syrup. Here are some nutritional insights:

  • Rich in Vitamins: Carrots are an excellent source of beta-carotene, fiber, and antioxidants.
  • Low-Calorie Option: This recipe is low in calories, making it a great choice for those watching their intake.
  • Heart-Healthy: Olive oil adds healthy fats, supporting heart health.

Essential Equipment for Success

You don’t need much to create this dish, but here are some handy tools:

  • Baking Sheet: A sturdy baking sheet is essential for even roasting.
  • Sharp Knife: A good knife will make prepping the carrots quick and easy.
  • Measuring Cups and Spoons: For accurate measurements of your ingredients.
  • Mixing Bowl: Useful for tossing the carrots with oil and seasoning.

Serving Suggestions

These Sweet Apple Cider Glazed Carrots are incredibly versatile. Here are some ideas for serving:

  • Pair them with roasted chicken or turkey for a classic meal.
  • Serve alongside grilled fish for a light, refreshing dinner.
  • Include them in a vegetarian feast with quinoa and roasted vegetables.
  • For a festive touch, serve them at holiday gatherings with other seasonal dishes.

As you savor the last bite of these Sweet Apple Cider Glazed Carrots, remember that cooking is about more than just feeding the body; it’s about nourishing the soul and creating memories. This recipe will surely become a beloved dish that brings warmth and joy to your table, just like the cherished moments spent with family. Happy cooking, friends!

Sweet Apple Cider Glazed Carrots

Prep Time 10 minutes
Cook Time 30 minutes
Total Time 40 minutes
Servings 4 servings
Calories 150
A delicious side dish featuring tender roasted carrots glazed with a sweet and tangy apple cider reduction.

Ingredients

Vegetables

  • 1.5 lbs carrots (about 700g)
  • 1 tablespoon oil
  • to taste salt and pepper
  • 2 cups apple cider (non-alcoholic) or unsweetened apple juice

Instructions 

  • Preheat oven to 425°F (220°C).
  • Trim and cut carrots into 3-inch sticks; place on a baking sheet.
  • Drizzle with oil, season with salt and pepper, and roast for 25 minutes.
  • Simmer apple cider until reduced to 2 tablespoons, about 10 minutes.
  • Drizzle the cider syrup over roasted carrots and serve.

Notes

Ensure cider is reduced carefully to avoid burning.
Calories: 150kcal
Cost: $12
Course: Side Dish
Cuisine: American
Keyword: apple cider, Carrots, glaze

Unraveling the Joy of Baking: The Apple Cake Roll That Wraps You in Warm Memories

Welcome to the heart of home cooking, where flavors and memories intertwine. Today, I’m thrilled to share my cherished recipe for the Best Apple Cake Roll with Cream Cheese Filling. This delightful dessert is a celebration of the sweet, crisp apples that remind us of fall and family gatherings. With each bite, you’ll experience the warmth of nostalgia and the joy of sharing something made from the heart. Let’s dive into this recipe that’s not just about technique, but about love, laughter, and the beautiful moments spent around the table.

Why You’ll Love This Recipe

  • Deliciously Moist: The grated apples ensure that your apple cake roll remains tender and moist, creating a delightful texture that melts in your mouth.
  • Simple Ingredients: Using everyday pantry staples, you’ll find that baking this cake roll is as easy as it is rewarding.
  • Perfect for Sharing: Whether it’s a family gathering or a cozy dinner with friends, this apple cake roll is a hit that’s sure to delight everyone.
  • Versatile and Customizable: With various filling options and toppings, you can make this recipe your own and adapt it to any occasion.
  • A Heartwarming Experience: Beyond the flavors, this recipe brings back memories of baking with loved ones, making it a special treat you can pass down through generations.

Gathering Your Ingredients

Before we get our hands into the dough, let’s gather everything we need for this rich and creamy apple cake roll. Here’s what you’ll need:

  • 3/4 cup all-purpose flour: The foundation of our cake, providing structure and body.
  • 1/2 teaspoon baking powder: This will help our cake rise and create a light texture.
  • 1/2 teaspoon baking soda: Works in tandem with the baking powder for perfect leavening.
  • 1 teaspoon ground cinnamon: Adds that warm, comforting spice that complements the apples beautifully.
  • 1/4 teaspoon salt: A crucial ingredient that enhances the flavors and balances the sweetness.
  • 3 large eggs: These will give our cake richness and help bind the ingredients together.
  • 1 cup granulated sugar: Sweetness is key here; it brings out the flavors of our apples.
  • 1 teaspoon vanilla extract: For that delightful aroma and flavor boost.
  • 1 cup finely grated apples (about 2 medium apples): The star of our dessert, providing moisture and natural sweetness.
  • 1/2 cup chopped nuts (optional): Adds a lovely crunch—pecans or walnuts work beautifully.
  • 8 oz cream cheese, softened: The creamy filling that takes our cake roll to the next level.
  • 1/2 cup powdered sugar: This sweetens our filling, giving it that perfect creamy texture.
  • 1 tablespoon milk (optional): Adjusts the consistency of your filling for easy spreading.

Steps to Create Your Apple Cake Roll

Close-up image of an apple cake roll, highlighting the cream cheese filling and apple pieces.

Now that we have our ingredients, let’s embark on this baking journey together:


Cake Decorating Set

★ Recommended Kitchen Tool

Cake Decorating Set

Make this recipe even easier with a quality Cake Decorating Set — a must-have kitchen staple!


🛒 Shop This Tool →

As an Amazon Associate, we earn from qualifying purchases.
  1. Preheat your oven: Set your oven to 375°F (190°C). Line a 15×10-inch jelly roll pan with parchment paper, leaving some overhang on the sides for easy removal later.
  2. Mix the dry ingredients: In a medium bowl, whisk together the flour, baking powder, baking soda, cinnamon, and salt. Set this mixture aside.
  3. Beat the eggs and sugar: In a large mixing bowl, beat the eggs and sugar together until the mixture is thick and pale, about 3-5 minutes. Stir in the vanilla extract.
  4. Combine the wet and dry ingredients: Gradually add the dry ingredients to the egg mixture, mixing until just combined. Fold in the grated apples and nuts if you’re using them, ensuring they are evenly distributed.
  5. Spread and bake: Pour the batter into the prepared pan, spreading it evenly. Bake for 12-15 minutes or until the cake springs back when lightly touched.
  6. Roll the cake: Once baked, remove the cake from the oven and immediately flip it onto a clean kitchen towel dusted with powdered sugar. Carefully peel off the parchment paper. Starting at one end, roll the cake up in the towel, rolling it tightly but gently. Allow it to cool completely in this rolled position.
  7. Prepare the cream cheese filling: In a medium bowl, beat the softened cream cheese with an electric mixer until smooth. Gradually add in the powdered sugar and continue to beat until well combined. Stir in the vanilla extract. If the filling is too thick, add a tablespoon of milk at a time until you reach your desired consistency.
  8. Unroll and fill the cake: Carefully unroll the cooled cake. Spread the cream cheese filling evenly over the surface, leaving a small border around the edges.
  9. Roll it back up: Once the filling is spread out, gently roll the cake back up, this time without the towel. Ensure you roll it tightly but not so much that the filling oozes out.
  10. Final touches: Place the rolled cake seam-side down on a serving platter. Dust the top with powdered sugar for a beautiful finish, and if you’d like, garnish with some extra grated apple or chopped nuts.

Pro Tips for the Best Apple Cake Roll

  • Room Temperature Ingredients: Make sure your eggs and cream cheese are at room temperature for a smoother batter and filling.
  • Don’t Overmix: Mix until just combined to maintain a light, fluffy texture in your cake.
  • Use Fresh Apples: Fresh, crisp apples give the best flavor and moisture; Granny Smith or Honeycrisp are great choices.
  • Check for Doneness: Every oven is different—check your cake a minute or two early to avoid overbaking.
  • Cooling Time: Allow the cake to cool completely before filling to prevent melting the cream cheese filling.
  • Experiment with Fillings: Try adding lemon zest or a touch of maple syrup to the cream cheese filling for a unique twist.
  • Garnish Creatively: Top with caramel drizzle or a sprinkle of cinnamon for an extra special touch.
  • Wrap it Well: If storing, wrap the cake roll tightly in plastic wrap to keep it fresh.

Common Mistakes and Troubleshooting

Even the best bakers have off days, so here are some common issues and how to avoid them:

  • Dry Cake: This can happen if you overbake. Keep an eye on it, and trust the spring-back test for doneness.
  • Filling Oozing Out: Ensure you roll the cake tightly but gently without crushing it, and let it cool properly before filling.
  • Uneven Baking: Rotate your pan halfway through baking for even heat distribution.
  • Filling Too Thick: Add milk gradually to achieve the desired consistency; it should be spreadable but not runny.

Delicious Variations to Try

Want to switch things up? Here are some fun variations:

  • Chocolate Chip Apple Cake Roll: Add mini chocolate chips to the batter for a sweet surprise.
  • Spiced Apple Cake Roll: Incorporate ginger and nutmeg with the cinnamon for a spicier flavor profile.
  • Nut-Free Option: Omit the nuts for a smoother texture, perfect for those with allergies.
  • Vegan Version: Substitute eggs with applesauce and use a dairy-free cream cheese alternative for a vegan-friendly treat.

Storage and Make-Ahead Instructions

Want to prepare this cake roll ahead of time? Here’s how:

  • Storing: Keep your apple cake roll wrapped in plastic wrap in the refrigerator for up to 5 days. For longer storage, freeze it unfilled.
  • Make-Ahead: You can bake the cake a day in advance. Just wait to fill it until you’re ready to serve to keep it fresh.
  • Freezing: Wrap the unfilled cake tightly in plastic wrap and foil, and it can be frozen for up to 3 months.

Frequently Asked Questions (FAQs)

  • Can I use different fruits? Yes! Pears or peaches can also work beautifully in this recipe.
  • What can I substitute for cream cheese? Mascarpone or even a dairy-free cream cheese can be good alternatives.
  • How do I know when my cake is done baking? The cake should spring back when lightly touched and should not jiggle in the center.
  • Can I make this gluten-free? Absolutely! Substitute with a 1:1 gluten-free flour blend.
  • What’s the best way to serve this cake? Slice it into generous pieces and serve it with a dollop of whipped cream or a scoop of vanilla ice cream.
  • Is it necessary to use parchment paper? Yes, it helps prevent sticking and makes removal easier.
  • Can I add more spices? Feel free to experiment with spices like cardamom for added depth of flavor.
  • Can this recipe be doubled? Yes! Just use a larger pan and adjust baking time as necessary.

Nutritional Tips and Dietary Adaptations

This recipe can be adjusted to fit various dietary needs:

  • Lower Sugar: Substitute granulated sugar with a sugar alternative or reduce the amount slightly.
  • Gluten-Free: Use a gluten-free flour blend to make this dessert accessible for those with gluten sensitivities.
  • Dairy-Free: Replace cream cheese with a plant-based alternative and use non-dairy milk.
  • Nut-Free: Simply leave out the nuts or substitute with seeds like sunflower seeds for crunch.

Equipment Recommendations

Here’s what you’ll need for successful baking:

  • 15×10-inch Jelly Roll Pan: Essential for achieving that perfect thin layer of cake.
  • Parchment Paper: Helps prevent sticking and makes cleanup a breeze.
  • Electric Mixer: For smooth and creamy filling and well-beaten eggs.
  • Kitchen Towel: A clean, lint-free towel is crucial for rolling your cake without breaking.

Serving Suggestions

To make your apple cake roll even more inviting, consider these serving suggestions:

  • Dust with Powdered Sugar: A light sprinkle adds a touch of sweetness and elegance.
  • Garnish with Fresh Fruit: Serve with slices of fresh apples or a handful of berries for color and flavor.
  • Pair with Ice Cream: A scoop of vanilla or caramel ice cream complements the warm spices perfectly.
  • Drizzle with Caramel Sauce: For those who love a sweet touch, drizzling caramel on top adds a decadent finish.

Conclusion: A Recipe Worth Remembering

As we wrap up this journey through the delightful world of baking, I hope you feel inspired to create your own Best Apple Cake Roll with Cream Cheese Filling. Remember, cooking is about more than just following a recipe; it’s about the love and memories we create along the way. So gather your loved ones, share this recipe, and let the aroma of fresh apples and spices fill your home. Happy baking, and may your kitchen always be a place of warmth, love, and deliciousness!

Best Apple Cake Roll with Cream Cheese Filling

Prep Time 30 minutes
Cook Time 15 minutes
Total Time 45 minutes
Servings 8 slices
Calories 350
A delicious and visually stunning apple cake roll filled with creamy cheese filling, perfect for special occasions or a cozy treat.

Ingredients

Cake Batter

  • 3/4 cup all-purpose flour
  • 1/2 teaspoon baking powder
  • 1/2 teaspoon baking soda
  • 1 teaspoon ground cinnamon
  • 1/4 teaspoon salt
  • 3 large eggs
  • 1 cup granulated sugar
  • 1 teaspoon vanilla extract
  • 1 cup finely grated apples (about 2 medium apples)
  • 1/2 cup chopped nuts (optional)

Cream Cheese Filling

  • 8 oz cream cheese, softened
  • 1/2 cup powdered sugar
  • 1 teaspoon vanilla extract
  • 1 tablespoon milk (optional, for consistency)

Instructions 

  • Preheat oven to 375°F (190°C). Line a 15×10-inch pan with parchment.
  • Mix dry ingredients; beat eggs and sugar, then combine with dry mixture. Fold in apples and nuts.
  • Pour batter into pan and bake for 12-15 minutes. Flip onto a towel dusted with powdered sugar and roll to cool.
  • Beat cream cheese with powdered sugar and vanilla until smooth. Add milk if needed for spreadability.
  • Unroll cooled cake, spread filling, then re-roll. Dust with powdered sugar and garnish as desired.

Notes

Ensure the cake is completely cooled before filling to prevent cracking.
Calories: 350kcal
Cost: $15
Course: Dessert
Cuisine: American
Keyword: apple

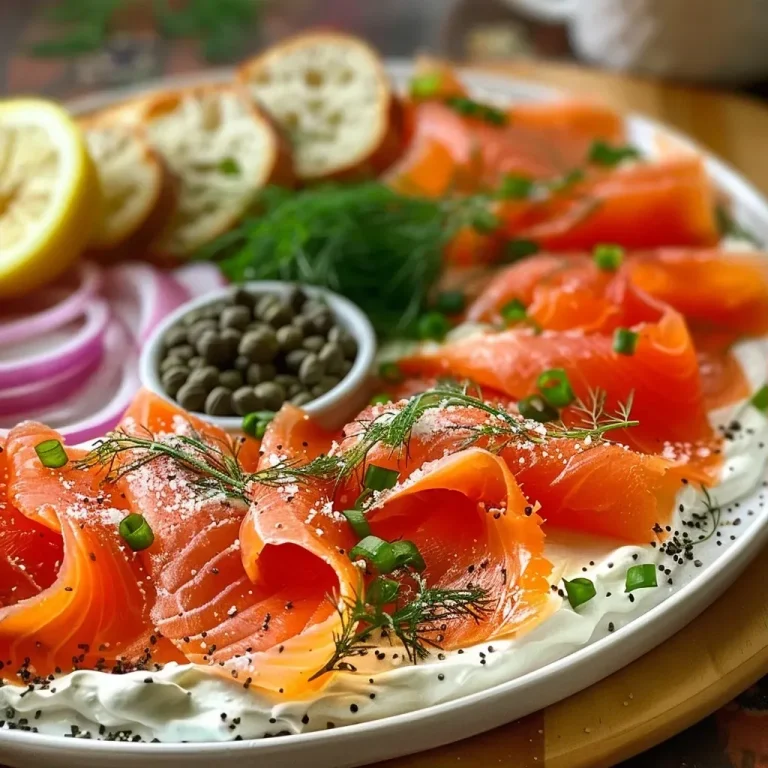
There’s nothing quite like the feeling of gathering around a table filled with good food and even better company. A Smoked Salmon Platter, with its vibrant colors and delightful flavors, embodies that warmth and togetherness. This dish isn’t just a meal; it’s an experience, a chance to share stories and create memories. The combination of creamy lemon-herb whipped cream cheese and tender smoked salmon is a testament to how simple ingredients can come together to create something truly special.

In this guide, we’ll delve into everything you need to know about creating the perfect smoked salmon platter. From ingredients and assembly tips to variations and storage advice, we aim to make this dish a staple at your gatherings. So, let’s dive into the heart of this recipe!

Why You’ll Love This Recipe

This smoked salmon platter is a standout for so many reasons. Here are just a few:


Nonstick Baking Sheet Pan

★ Recommended Kitchen Tool

Nonstick Baking Sheet Pan

Make this recipe even easier with a quality Nonstick Baking Sheet Pan — a must-have kitchen staple!


🛒 Check Price on Amazon →

As an Amazon Associate, we earn from qualifying purchases.
  • Flavorful Harmony: The zesty lemon-herb whipped cream cheese complements the smoky richness of the salmon beautifully, creating a balanced taste that delights the palate.
  • Visually Stunning: With its vibrant colors and artistic arrangement, this platter is sure to be the centerpiece of your table, inviting guests to dig in.
  • Easy to Assemble: No culinary prowess is needed here; even novice cooks can create an impressive spread that looks and tastes gourmet.
  • Customizable: Tailor the platter to your preferences by choosing different toppings and sides, making it suitable for any occasion.
  • Perfect for Sharing: This dish encourages communal dining, fostering connection and conversation among friends and family.

Ingredients You’ll Need

Creating a smoked salmon platter requires a few quality ingredients. Here’s what you’ll need, along with some suggested substitutions:

  • 8 oz whipped cream cheese: Bring it to room temperature for easy spreading. Tip: For a lighter option, consider using Greek yogurt or a vegan cream cheese alternative.
  • 2 tablespoons finely chopped green onions (or chives): These add a mild onion flavor. Tip: Use shallots for a sweeter, more delicate taste.
  • 2 tablespoons finely chopped fresh dill: A classic herb that pairs beautifully with salmon. Tip: Fresh parsley or tarragon can also work well.
  • 1 teaspoon lemon zest: This brings brightness to the cream cheese. Tip: Experiment with lime zest if you prefer a different citrus flavor.
  • Kosher salt and freshly ground black pepper: Essential for seasoning. Tip: Don’t skip the salt; it enhances all the flavors.
  • 10-12 oz thinly sliced smoked salmon or lox: The star of your platter! Tip: Look for high-quality, sustainably sourced salmon.
  • ¼ cup capers, drained: These add a briny kick. Tip: If you’re not a fan of capers, try olives instead.
  • ¼ cup pickled sliced red onion: For a tangy crunch. Tip: Quick-pickle your own onions for a fresher taste.
  • 2 tablespoons fresh dill, chopped or torn: Extra for garnish. Tip: Add microgreens for a modern touch.
  • ½ lemon, cut into half wedges: For garnish and an extra zing. Tip: Offer lemon slices for guests to squeeze over their servings.
  • Freshly ground black pepper, for garnish: A finishing touch. Tip: A sprinkle of smoked paprika can add a lovely color.
  • Toasted baguette slices or toasted mini bagels sliced in half: For serving. Tip: Try different bread types like rye or pumpernickel for a unique twist.

Instructions: How to Assemble a Smoked Salmon Platter

Now that you have your ingredients, let’s get to the fun part—assembling your platter!

  1. In a mixing bowl, stir together the **green onions**, **dill**, **lemon zest**, **salt**, and **pepper** into the **whipped cream cheese** until well combined.
  2. Using a spoon, scoop about 1 to 1½ teaspoons of the lemon-herb whipped cream cheese onto the back of the spoon. Start on the outside of a large plate or platter, pressing the spoon firmly onto the plate and gently dragging it toward the center to create a small smear. Repeat all the way around the plate.
  3. Work on the second layer, repeating the process until you have about 3-4 layers total, creating a beautiful backdrop for your toppings.
  4. Arrange the **capers** in the center of the cream cheese smear.
  5. Place a small piece of **smoked salmon** into each divot of cream cheese, allowing the salmon to showcase its beautiful color.
  6. Scatter the **pickled onions** and extra **dill** over the cream cheese portion for added flavor and visual appeal.
  7. Tuck **lemon wedges** around the platter and finish with a few grinds of **black pepper** for garnish.
  8. Serve immediately with toasted baguette or sliced toasted mini bagels alongside for a delightful crunch.

Expert Tips for Success

A side view of a colorful smoked salmon platter with lemon wedges and capers.

To ensure your smoked salmon platter is a hit, here are some expert insights:

  • Use Quality Ingredients: The better the ingredients, the better your platter will taste. Invest in high-quality salmon and fresh herbs.
  • Room Temperature is Key: Allow the cream cheese to come to room temperature for easier spreading and a creamier texture.
  • Don’t Overdo It: While it’s tempting to overload your platter, a clean presentation allows each element to shine.
  • Garnish Generously: Fresh herbs and citrus not only add flavor but also elevate the visual appeal.
  • Prepare Ahead of Time: You can make the cream cheese spread a day in advance; just store it in the refrigerator and bring it to room temperature before serving.
  • Pair with Drinks: A light white wine or sparkling water with lemon complements the flavors beautifully.
  • Engage Your Guests: Encourage everyone to build their own bites, mixing and matching flavors as they please.
  • Keep it Fresh: If you make your platter in advance, cover it with plastic wrap to keep the salmon and cream cheese fresh.

Common Mistakes and Troubleshooting

Even the best of us can make mistakes in the kitchen. Here are a few common pitfalls and how to avoid them:

  • Too Much Salt: Taste as you go, especially when seasoning your cream cheese. Remember that the salmon and capers are already salty.
  • Dry Cream Cheese: Ensure your cream cheese is at room temperature to avoid a dry texture when you spread it.
  • Overwhelming Flavors: Choose toppings that complement rather than overpower the salmon. Balance is key!
  • Assembling Too Early: If your platter sits out too long, the salmon can dry out. Assemble close to serving time.

Variations to Try

Make this smoked salmon platter your own by trying out these variations:

  • Herbed Cream Cheese: Mix in different herbs such as chives, parsley, or basil for a flavor twist.
  • Fruit Additions: Add slices of fresh figs or apples for a sweet contrast to the smoky salmon.
  • Spicy Kick: Incorporate a drizzle of sriracha or a sprinkle of red pepper flakes for those who enjoy heat.
  • International Flair: Serve with Middle Eastern favorites like za’atar-spiced pita or hummus for a unique take.

Storage and Make-Ahead Instructions

If you want to prepare your platter in advance, here are some storage tips:

  • Make Ahead: You can prepare the whipped cream cheese and store it in the fridge for up to 3 days. Bring it to room temperature before serving.
  • Store Leftovers: Keep any leftover smoked salmon in an airtight container in the fridge for up to 2 days.
  • Keep Components Separate: If you’re preparing in advance, store the cream cheese, salmon, and toppings separately to maintain freshness.

FAQs About Your Smoked Salmon Platter

Here are some common questions and answers that can help you create the perfect platter:

  • What is the difference between smoked salmon and lox? Smoked salmon is typically cured with salt and then smoked, while lox is cured in a brine and usually does not go through the smoking process.
  • Can I use frozen smoked salmon? Yes, you can use frozen smoked salmon. Just ensure it is fully thawed and drained before serving.
  • How do I choose the best smoked salmon? Look for salmon that has a light natural shine and minimal additives—just salmon, salt, and smoke.
  • What can I serve with a smoked salmon platter? Consider serving with mini bagels, crackers, or fresh vegetables like cucumbers and radishes.
  • Can I make this platter vegetarian? Absolutely! Substitute smoked salmon with roasted vegetables or marinated tofu for a vegetarian version.
  • How long can I keep leftovers? Leftover smoked salmon should be consumed within 2 days when stored properly in the fridge.
  • What wines pair well with smoked salmon? Light white wines like Sauvignon Blanc or sparkling wines complement the flavors beautifully.
  • Can I use store-bought cream cheese? Yes, store-bought cream cheese is convenient and can be dressed up with herbs and spices for added flavor.

Nutritional Tips and Dietary Adaptations

This smoked salmon platter is not only delicious but can be adapted to fit various dietary needs:

  • Low-Carb Option: Serve with cucumber slices instead of bread for a low-carb alternative.
  • Dairy-Free: Use a plant-based cream cheese to accommodate dairy-free diets.
  • Low-Sodium: Opt for low-sodium smoked salmon and skip the capers for a heart-healthy version.

Equipment Recommendations

To create the perfect smoked salmon platter, here’s what you might need:

  • Large Platter: A beautiful serving platter enhances the presentation.
  • Mixing Bowl: For preparing the whipped cream cheese.
  • Spatula or Spoon: To spread the cream cheese evenly.
  • Knife: For slicing your bagels or baguette.

Serving Suggestions

To make your gathering even more special, consider these serving suggestions:

  • Set Up a DIY Station: Allow guests to assemble their own bites for a fun and interactive experience.
  • Pair with Simple Sides: Serve with a light salad or fresh fruit for a complete meal.
  • Incorporate Themed Decor: Use linens and tableware that reflect the flavors of your dish, like ocean-inspired colors.

Conclusion

Creating a Smoked Salmon Platter is more than just preparing food; it’s about inviting loved ones to sit together, share stories, and savor each moment. With this guide, you’re equipped to craft a platter that not only tastes incredible but also brings a sense of warmth and nostalgia to your table. So gather your ingredients, invite your favorite people, and let the flavors do the talking. Happy cooking!

Smoked Salmon (Lox) Platter With Lemon-Herb Whipped Cream Cheese

Prep Time 15 minutes
Total Time 15 minutes
Servings 4 people
Calories 350
A beautiful and flavorful platter combining creamy lemon-herb whipped cheese with delicate smoked salmon, perfect for brunch or special occasions.

Ingredients

Dairy

  • 8 oz whipped cream cheese (room temperature)
  • 2 tablespoons finely chopped green onions (or chives)
  • 2 tablespoons finely chopped fresh dill
  • 1 teaspoon lemon zest
  • to taste Kosher salt and freshly ground black pepper
  • 10-12 oz thinly sliced smoked salmon or lox
  • ¼ cup capers, drained
  • ¼ cup pickled sliced red onion (or regular diced red onion)
  • 2 tablespoons fresh dill, chopped or torn
  • ½ lemon cut into half wedges
  • for garnish Freshly ground black pepper
  • as needed toasted baguette slices or toasted mini bagels sliced in half

Instructions 

  • Mix the green onions, dill, lemon zest, salt, and pepper into the whipped cream cheese until well combined.
  • Pipe or dollop the lemon herb whipped cream cheese onto a platter, creating layered smears from outside to center.
  • Arrange capers in the center, place smoked salmon pieces into the cream cheese divots, and scatter onions and dill over the platter.
  • Tuck lemon wedges around the platter and garnish with black pepper. Serve with toasted bread or bagels.

Notes

Use fresh dill for the best flavor and serve immediately for optimal freshness.
Calories: 350kcal
Cost: $15
Course: Appetizer
Keyword: Smoked Salmon

There’s something truly magical about a warm bowl of soup. It brings comfort, nostalgia, and a sense of belonging that transcends generations. My Instant Pot Coconut Curry Lentil Tomato Soup is a heartfelt tribute to those cozy family meals I cherished growing up in Louisiana. It’s a delightful blend of spices, lentils, and creamy coconut milk, perfect for a family gathering or a quiet night in. Let’s embark on this culinary journey together as we unlock the secrets to a bowl of warmth and love.

Why You’ll Love This Recipe

This recipe is not just about flavors; it embodies warmth and community. Here are five reasons why this Coconut Curry Lentil Tomato Soup will become a staple in your kitchen:

  • Quick and Easy: Made in just 15 minutes in the Instant Pot, this soup is a lifesaver for busy weeknights.
  • Nutritious and Filling: Packed with protein from lentils and the goodness of tomatoes, this soup is both healthy and satisfying.
  • Comforting Flavors: The combination of coconut milk, curry powder, and fresh cilantro gives this soup a rich, aromatic flavor that warms the soul.
  • Versatile Ingredients: You can easily customize the recipe with different vegetables or spices, making it adaptable to your pantry.
  • Perfect for Sharing: This recipe is designed to be enjoyed with family and friends, bringing everyone around the table for a shared experience.

Ingredients: A Detailed Breakdown

Let’s gather our ingredients and get ready to create something truly special. Here’s what you’ll need, along with some handy substitutions:


Bamboo Tofu Press

★ Recommended Kitchen Tool

Bamboo Tofu Press

Make this recipe even easier with a quality Bamboo Tofu Press — a must-have kitchen staple!


🛒 Shop This Tool →

As an Amazon Associate, we earn from qualifying purchases.
  • 1 tbsp Coconut Oil: Adds a subtle sweetness and is perfect for sautéing.
  • 1 tbsp Dehydrated Onion Flakes: A time-saver that melts into the broth, but you can use fresh onions if preferred.
  • 1 tsp Dehydrated Garlic: Provides a mellow garlic flavor; fresh garlic can be substituted.
  • 1/2 tsp Ground Ginger: This spice adds warmth; fresh ginger can also brighten the flavor profile.
  • 1 tbsp Madras Curry Powder: Essential for the curry flavor; feel free to adjust based on your spice preference.
  • 1/4 tsp Red Pepper Flakes: For a kick of heat; you can omit or adjust to taste.
  • 1 cup Lentils: Use brown, green, or red lentils based on your texture preference.
  • 14.5 oz Diced Tomatoes: A must-have for a rich and hearty base.
  • 13.5 oz Light Coconut Milk: For creaminess; full-fat can be used for a richer soup.
  • 3 cups Vegetable Stock: Enhances flavor; chicken stock can be a great alternative.
  • 1/2 cup Fresh Cilantro: Adds freshness; parsley can be substituted if cilantro isn’t your favorite.
  • Kosher Salt & Black Pepper: To taste; essential for balancing the flavors.
  • Lime Wedges: A squeeze of lime at serving brightens the entire dish.

Step-by-Step Instructions

Now let’s get cooking! Follow these simple steps to create your delicious Coconut Curry Lentil Tomato Soup:

  1. Plug in your Instant Pot and select the Sauté function. Add the coconut oil. Once melted, stir in the onion flakes, garlic, ginger, curry powder, and red pepper flakes. Toast the spices for about 1 minute until fragrant.
  2. Add the dried lentils, the entire can of diced tomatoes (with juice), the minced cilantro, the coconut milk (remember to save those 2 tablespoons for later!), and the vegetable stock. Stir everything thoroughly.
  3. Secure the lid and ensure the pressure valve is set to the Sealing position. Cancel the Sauté function and select Manual/Pressure Cook on High for 15 minutes.
  4. When the timer beeps, perform a Quick Release by carefully moving the valve to the Venting position.
  5. Once the float valve drops, open the lid and stir the soup. Taste and season with kosher salt and black pepper as needed. Ladle the soup into bowls, drizzle with the reserved coconut milk, and top with fresh cilantro and a squeeze of lime.

Pro Tips for Perfecting Your Soup

Side shot of a bowl filled with rich lentil soup featuring coconut and spices.

Here are some expert insights to elevate your cooking experience:

  • Texture Matters: For a creamier soup, use red lentils; they break down nicely, providing a velvety texture. Brown or green lentils will hold their shape.
  • Season to Taste: Don’t be shy with the salt and pepper; they are key to bringing out all the flavors.
  • Adjust the Spice: If you prefer a milder soup, start with less curry powder and red pepper flakes, then add more as needed.
  • Fresh Ingredients: Whenever possible, opt for fresh herbs and spices; they enhance the flavor exponentially.
  • Make It Ahead: This soup stores well, making it perfect for meal prep. Just reheat on the stovetop or in the microwave.
  • Experiment with Add-ins: Feel free to add vegetables like spinach or carrots for extra nutrition and flavor.
  • Garnish with Care: Don’t skip the lime and cilantro garnish; they brighten the dish and add freshness.
  • Safety First: Ensure the sealing ring is properly seated in the lid before closing. A loose ring can lead to improper sealing and cooking issues.

Common Mistakes and Troubleshooting

Even the best cooks face challenges. Here’s how to troubleshoot common issues:

  • Too Thick: If your soup is too thick, add more vegetable stock or water until you reach your desired consistency.
  • Too Spicy: To balance out the heat, add a bit of sugar or more coconut milk.
  • Underseasoned: If the flavors seem flat, a pinch more salt or a squeeze of lime can elevate the taste significantly.

Delicious Variations

This soup is versatile! Here are some variations to consider:

  • Vegetable-Loaded: Add chopped carrots, bell peppers, or spinach for added nutrients.
  • Protein Boost: Stir in cooked chicken or tofu for a heartier meal.
  • Flavorful Twist: Incorporate ginger or turmeric for an extra layer of warmth and health benefits.
  • Spicy Coconut Version: Increase the red pepper flakes and add a splash of sriracha for those who love heat.

Storage and Make-Ahead Instructions

This soup is perfect for meal prep. Here’s how to store it:

  • Refrigeration: Store leftovers in an airtight container in the fridge for up to 5 days.
  • Freezing: Freeze for up to 3 months in a freezer-safe container. Just thaw and reheat when you’re ready to enjoy.

Frequently Asked Questions

Here are some common queries about this delightful soup:

  • Can I make this soup on the stovetop? Absolutely! Just sauté the ingredients in a pot, add the rest, and simmer until the lentils are tender.
  • Is this soup gluten-free? Yes, all the ingredients are gluten-free, making it a safe choice for those with gluten sensitivities.
  • Can I use dried herbs instead of fresh? Yes, though fresh herbs tend to provide a brighter flavor. Use about 1/3 of the amount if substituting dried.
  • What can I serve with this soup? It pairs wonderfully with crusty bread, rice, or a fresh salad.
  • Can I use different lentils? Yes, you can use green or brown lentils; however, cooking times may vary.
  • How do I reheat leftovers? Reheat on the stovetop or in the microwave, adding a splash of water or stock if it gets too thick.
  • Can I skip the coconut milk? You can replace it with additional vegetable stock, though the soup will lose some creaminess.
  • Is this recipe suitable for meal prep? Yes! It stores and freezes well, making it perfect for preparing in advance.

Nutritional Tips and Dietary Adaptations

This soup is not only delicious but also offers numerous health benefits:

  • High in Fiber: Lentils are rich in dietary fiber, promoting digestive health.
  • Low in Calories: A great option for those looking to enjoy a hearty meal without the extra calories.
  • Rich in Vitamins: The tomatoes and spices provide essential nutrients and antioxidants.

Equipment Recommendations

To make your cooking experience even smoother, here’s what I recommend:

  • Instant Pot: A fantastic tool for quick cooking, allowing for hands-off meal prep.
  • Cutting Board and Knife: Essential for chopping your ingredients with ease.
  • Measuring Cups and Spoons: Accurate measurements ensure the best flavor balance.
  • Sauté Pan: If opting for the stovetop method, a good sauté pan is indispensable.

Serving Suggestions

When it comes to enjoying this soup, consider these delightful pairings:

  • Crusty Bread: A slice of warm, crusty bread is perfect for dipping.
  • Fresh Salad: A light salad with citrus dressing complements the richness of the soup.
  • Rice: Serve over cooked rice for a filling meal.

Cooking is an act of love, and my hope is that this Coconut Curry Lentil Tomato Soup becomes a cherished recipe in your home. Whether you’re sharing it with family or savoring it alone, remember that every spoonful carries the warmth of togetherness and tradition. Happy cooking!

Instant Pot Coconut Curry Lentil Tomato Soup

Prep Time 10 minutes
Cook Time 15 minutes
Total Time 25 minutes
Servings 4 servings
Calories 250
A hearty and flavorful vegan soup combining lentils, tomatoes, and coconut milk, perfect for a quick and comforting meal.

Ingredients

Oil & Spices

  • 1 tbsp Coconut Oil
  • 1 tbsp Dehydrated Onion Flakes
  • 1 tsp Dehydrated Garlic
  • 0.5 tsp Ground Ginger
  • 1 tbsp Madras Curry Powder
  • 0.25 tsp Red Pepper Flakes

Main Ingredients

  • 1 cup Lentils
  • 14.5 oz Diced Tomatoes
  • 13.5 oz Light Coconut Milk
  • 3 cups Vegetable Stock
  • 0.5 cup Fresh Cilantro

Seasoning

  • to taste Kosher Salt & Black Pepper
  • as needed Lime Wedges

Instructions 

  • Select Sauté on the Instant Pot. Add coconut oil, then stir in onion flakes, garlic, ginger, curry powder, and red pepper flakes; toast for 1 minute.
  • Add lentils, diced tomatoes with juice, cilantro, coconut milk, and vegetable stock; stir well.
  • Secure lid, set to Pressure Cook on High for 15 minutes. Perform quick release after cooking.
  • Open lid, stir soup, season with salt and pepper. Serve with coconut milk drizzle, cilantro, and lime wedges.

Notes

Adjust seasoning to taste and enjoy!
Calories: 250kcal
Cost: $15
Course: Soup
Cuisine: fusion
Keyword: Lentils

Gather ‘Round: A Heartfelt Introduction to Enchiladas

Welcome, dear friends! Today, we’re diving into a recipe that brings warmth and togetherness right to your dining table: Black Bean Sweet Potato Enchiladas. This dish is steeped in nostalgia and love, reminding us that cooking is not just about the food; it’s about the memories we create around it. With layers of sweet potatoes and black beans enveloped in soft tortillas and topped with a rich enchilada sauce, these enchiladas are perfect for sharing with family and friends. Whether you’re preparing a cozy weeknight dinner or celebrating a special occasion, this recipe is sure to embrace you like a family hug.

Why You’ll Love This Recipe

  • Comforting and Hearty: Packed with fiber-rich black beans and sweet potatoes, this dish is a fulfilling meal that satisfies both your hunger and your heart.
  • Easy to Make: With straightforward steps and simple ingredients, you can whip these enchiladas up in no time, making it a perfect choice for busy weeknights.
  • Versatile and Customizable: You can easily adapt this recipe to fit your dietary preferences—whether you’re vegan, gluten-free, or just want to add a twist!
  • Great for Meal Prep: These enchiladas can be made in advance and stored, making them perfect for batch cooking or quick lunches throughout the week.
  • Delicious Leftovers: If you happen to have any leftovers, they taste even better the next day, allowing the flavors to meld beautifully.

Ingredients You’ll Need

Let’s gather our ingredients and get ready to create something magical. Here’s what you’ll need to make these delicious Black Bean Sweet Potato Enchiladas:

  • 1 tablespoon oil: For sautéing the onions.
  • 1 small yellow onion (chopped): Adds sweetness and depth to the filling.
  • 2 teaspoons chili powder: For that essential Southwestern flavor.
  • 1 teaspoon ground cumin: Adds warmth and earthiness.
  • 1 teaspoon smoked paprika: Gives a lovely smokiness to the dish.
  • 2 lbs. sweet potatoes (peeled and cut into 1″ cubes): The star ingredient that brings a sweet and creamy texture.
  • 2 tablespoons water: To help cook the sweet potatoes.
  • 15 ounces black beans (rinsed and drained): A protein-packed addition that complements the sweet potatoes.
  • 1 cup corn kernels: Fresh or frozen, for added sweetness and texture.
  • Salt and pepper (to taste): For seasoning.
  • 8 soft taco size tortillas: Use your favorite variety; corn or flour work well.
  • Homemade Enchilada Sauce: You can use store-bought if you’re short on time.
  • 1½ cups grated cheese: A Mexican blend works beautifully for topping.
  • Chopped fresh cilantro and avocado (for serving): Optional, but they add a fresh touch.

How to Make Black Bean Sweet Potato Enchiladas

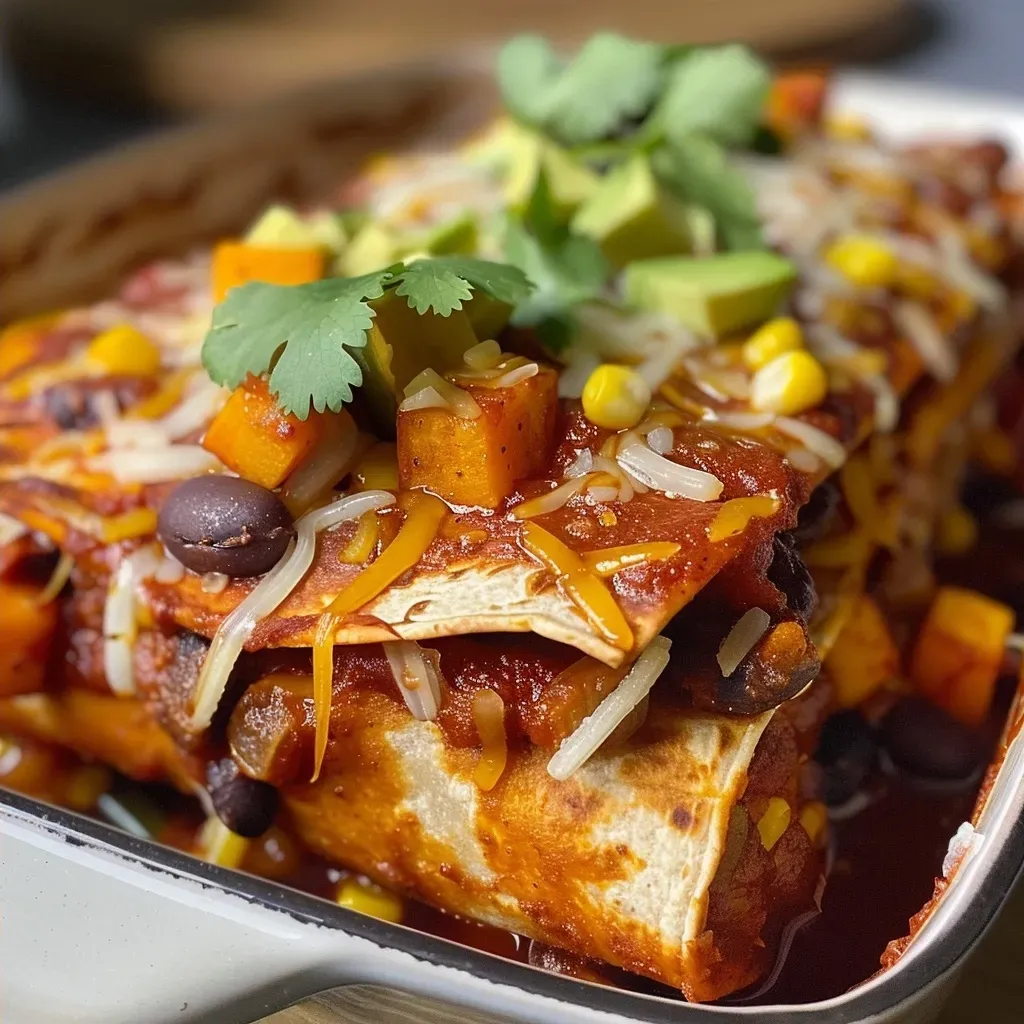
Side angle of a plate filled with Black Bean Sweet Potato Enchiladas, garnished with avocado.

Now, let’s get our hands a little messy and create these delightful enchiladas!


Professional Chef Knife Set

★ Recommended Kitchen Tool

Professional Chef Knife Set

Make this recipe even easier with a quality Professional Chef Knife Set — a must-have kitchen staple!


🛒 Check Price on Amazon →

As an Amazon Associate, we earn from qualifying purchases.
  1. Preheat the oven: Set your oven to 350 degrees F (175 degrees C) and grease a 9×13″ baking dish with cooking spray.
  2. Sauté the onions: Heat the oil in a large skillet over medium heat. Add the chopped onion and cook until softened, about 5 minutes. Stir in the chili powder, cumin, and smoked paprika, cooking for another 30 seconds to bloom the spices.
  3. Cook the sweet potatoes: Add the sweet potatoes and stir to combine. Pour in the water, cover, and cook for about 10 minutes, stirring occasionally, until tender. If it gets too hot, lower the heat.
  4. Combine with beans and corn: Stir in the black beans and corn, cooking for an additional 5 minutes until everything is warm and well combined. Season with salt and pepper to taste and remove from heat.
  5. Assemble the enchiladas: Fill each tortilla with about ½ cup of the sweet potato mixture, adding a drizzle of enchilada sauce and a sprinkle of cheese. Roll them up tightly and place them seam-side down in the greased baking dish.
  6. Top and bake: Pour the remaining enchilada sauce over the rolled enchiladas and sprinkle with the remaining cheese. Bake for 20-30 minutes, or until bubbly and golden brown.
  7. Serve warm: Garnish with chopped fresh cilantro and avocado if desired. Enjoy every bite!

Pro Tips for Making Perfect Enchiladas

  • Use fresh ingredients: Fresh sweet potatoes and quality black beans make a world of difference in flavor.
  • Make your enchilada sauce: If you have time, homemade enchilada sauce can elevate this dish even further with its rich flavors.
  • Don’t overfill the tortillas: Keep your filling moderate to make rolling easier and prevent tearing.
  • Experiment with spices: Feel free to adjust spices to suit your taste or add a pinch of cayenne for heat!
  • Cheese alternatives: For a dairy-free version, try vegan cheese or skip it altogether.
  • Layer flavors: Consider adding sautéed bell peppers or mushrooms for additional depth.
  • Leftover filling: If you have leftover filling, consider serving it as a side or in a salad.
  • Freezing tips: These enchiladas freeze well; just assemble and freeze before baking!

Common Mistakes and Troubleshooting

Even the best chefs make mistakes! Here are some tips to help you troubleshoot common issues:

  • Dry enchiladas: If your enchiladas come out dry, try adding more sauce before baking.
  • Too soggy: Make sure to allow the filling to cool slightly before assembling to prevent the tortillas from getting soggy.
  • Burnt cheese: If the cheese is browning too quickly, cover the dish with foil for part of the baking time.
  • Filling falling apart: Ensure your tortillas are fresh and pliable; warm them slightly if they are stiff.

Delicious Variations

Make this recipe your own by trying out these variations:

  • Mexican Street Corn Enchiladas: Swap black beans for corn and add cotija cheese and lime zest for a fresh twist.
  • Spicy Chipotle Enchiladas: Add chipotle peppers in adobo sauce to the filling for a smoky, spicy kick.
  • Green Chile Enchiladas: Use green enchilada sauce instead of red for a different flavor profile.
  • Protein-Packed Enchiladas: Stir in cooked chicken or quinoa into the filling for added protein.

Storage and Make-Ahead Instructions

This dish is perfect for meal prep! Here’s how to store and prepare it in advance:

  • Make ahead: Assemble the enchiladas and cover tightly with foil or plastic wrap. Refrigerate for up to 2 days before baking.
  • Freezing: Freeze unbaked enchiladas for up to 3 months. When ready to eat, bake straight from the freezer, adding an extra 10-15 minutes to the cooking time.
  • Reheating: Leftover enchiladas can be reheated in the oven at 350°F for about 15 minutes or in the microwave for a quick meal.

Frequently Asked Questions

  • Can I use other beans? Yes! You can substitute black beans with pinto or kidney beans.
  • Can I make this recipe vegan? Absolutely! Just skip the cheese or use vegan cheese alternatives.
  • What can I serve with enchiladas? Pair them with a fresh salad, Mexican rice, or guacamole for a complete meal.
  • How do I store leftovers? Store any leftovers in an airtight container in the fridge for up to 4 days.
  • Can I use store-bought enchilada sauce? Yes! Store-bought works just fine for a quick and easy option.
  • How spicy is this recipe? The spice level can be adjusted based on your preference; simply modify the chili powder and spices.
  • Can I use whole wheat tortillas? Definitely! Whole wheat tortillas are a great healthier option.
  • What’s the best way to reheat enchiladas? Reheat them in the oven for even heat distribution and to maintain the texture.

Nutritional Tips and Dietary Adaptations

These enchiladas are not only delicious but can also be modified to fit various dietary needs:

  • Gluten-Free: Use corn tortillas and ensure your enchilada sauce is gluten-free.
  • Lower Carb: Replace tortillas with thinly sliced zucchini or eggplant for a low-carb option.
  • Increase Fiber: Add more beans or serve with a side of black bean salad for an extra fiber boost.

Kitchen Equipment Recommendations

Before we wrap up, here’s a quick list of tools that will make your cooking experience smoother:

  • Large Skillet: For sautéing the onions and cooking the filling.
  • 9×13″ Baking Dish: Ideal for baking your enchiladas.
  • Sharp Knife: For chopping vegetables quickly and efficiently.
  • Measuring Cups and Spoons: Essential for accurate ingredient portions.

Serving Suggestions

When it comes to serving, let your creativity shine! Here are some ideas:

  • Fresh Toppings: Top with chopped cilantro, diced avocado, or a dollop of sour cream for added flavor.
  • Side Dishes: Serve with a light salad, Mexican rice, or tortilla chips for a complete meal.
  • Drinks: Pair with a refreshing margarita or a chilled glass of horchata to elevate the experience.

A Warm Conclusion

As we wrap up this culinary journey, remember that food is more than just sustenance; it’s a way to connect with each other and create lasting memories. These Black Bean Sweet Potato Enchiladas are a testament to that—each bite bursting with flavor and love. I hope you feel inspired to gather your loved ones around the table and share this delightful dish. Happy cooking, and may your kitchen always be filled with warmth and laughter!

Black Bean Sweet Potato Enchiladas

Prep Time 15 minutes
Cook Time 30 minutes
Total Time 45 minutes
Servings 4 servings
Calories 450
Delicious and hearty enchiladas packed with sweet potatoes, black beans, and cheese, perfect for a satisfying meal.

Ingredients

Main ingredients

  • 1 tablespoon oil
  • 1 small yellow onion (chopped)
  • 2 teaspoons chili powder
  • 1 teaspoon ground cumin
  • 1 teaspoon smoked paprika
  • 2 lbs sweet potatoes (peeled and cut into 1" cubes)
  • 2 tablespoons water
  • 15 ounces black beans (rinsed and drained)
  • 1 cup corn kernels (from 1 ear of fresh or frozen)
  • to taste salt and pepper
  • 8 soft taco size tortillas tortillas (your favorite variety)
  • 1.5 cups grated cheese (Mexican blend)
  • for serving chopped fresh cilantro and avocado (optional)

Instructions 

  • Preheat oven to 350°F and grease a 9x13" baking dish.
  • Cook onion with oil until softened, add spices, then sweet potatoes and water; simmer until tender. Stir in black beans and corn.
  • Fill tortillas with filling, top with sauce and cheese, roll up, and place in dish. Bake until bubbly, about 20-30 minutes.
  • Serve topped with cilantro and avocado if desired.

Notes

Feel free to customize with your favorite toppings or add a dash of hot sauce for extra flavor.
Calories: 450kcal
Cost: $15
Course: Main Course
Cuisine: Mexican
Keyword: Black Beans, Sweet Potatoes

Gathering Around the Table: A Heartfelt Journey of Cooking Turkey Legs and Thighs

Cooking, for me, has always been a tapestry woven with love, memories, and the comforting aromas of cherished family recipes. Today, I invite you to join me in a culinary adventure as we prepare Butter Basted Turkey Legs and Thighs infused with fresh herbs. This dish is not just a meal; it’s an opportunity to create unforgettable moments around your dinner table, filling your home with warmth and nostalgia.

Why You’ll Love This Recipe

  • Moist and Flavorful: The butter basting technique ensures that the turkey legs and thighs remain juicy and packed with flavor, making every bite a delight.
  • Simple Ingredients: With just a handful of pantry staples and fresh herbs, you can create a dish that feels gourmet without the fuss.
  • Perfect for Gatherings: Ideal for family dinners, holiday feasts, or even casual get-togethers, this recipe brings everyone together.
  • Customizable: Whether you prefer bold spices or milder flavors, this recipe allows for personal touches that cater to your taste.
  • Great for Leftovers: The turkey can be easily repurposed into sandwiches, salads, or soups, ensuring none of the love goes to waste.

Ingredient Breakdown

Let’s dive into the heart of our recipe with some details on each ingredient:

  • Turkey Legs and Thighs: Using skin-on, bone-in pieces enhances flavor and keeps the meat tender. Feel free to opt for a whole turkey if you’re feeding a crowd!
  • Butter: The star of the show! It not only adds richness but also helps in achieving that coveted golden finish. You can substitute with olive oil for a lighter version.
  • Fresh Herbs: Summer savoury, thyme, and rosemary work beautifully together, but you can mix it up with whatever herbs you have on hand.
  • Dried Onion Flakes: A sprinkle adds a subtle sweetness and depth to the dish. Fresh onion can also be sautéed and added for a more robust flavor.
  • Salt and Black Pepper: Essential for enhancing all the natural flavors of the ingredients.

Step-by-Step Instructions

Close-up view of golden-brown turkey legs and thighs coated in butter.

Here’s how to lovingly prepare your Butter Basted Turkey Legs and Thighs:


Professional Chef Knife Set

★ Recommended Kitchen Tool

Professional Chef Knife Set

Make this recipe even easier with a quality Professional Chef Knife Set — a must-have kitchen staple!


🛒 See Deals on Amazon →

As an Amazon Associate, we earn from qualifying purchases.
  1. Preheat your oven to 350°F (175°C) and line a rimmed baking sheet with parchment paper.
  2. Thaw: If using frozen turkey pieces, ensure they are fully thawed and at room temperature.
  3. Pat Dry: Use paper towels to dry the turkey legs and thighs thoroughly. This helps achieve a crispy skin.
  4. Mix the Butter: In a bowl, combine the softened butter, chopped summer savoury, thyme leaves, rosemary, onion flakes, salt, and pepper. Whisk until well blended.
  5. Massage the Meat: Take about two tablespoons of the butter mixture and massage it generously onto each piece of turkey.
  6. Arrange the turkey on the baking sheet, avoiding overlap.
  7. Bake: Cover with foil and bake for 1 hour. Remove the foil, baste the turkey with the melted butter and juices, and continue baking uncovered for an additional 30 minutes, basting every 15 minutes.
  8. Once golden, transfer to a serving platter and drizzle with pan juices. Garnish with additional herbs for a beautiful presentation.

Pro Tips for Success

  • Choose Quality Turkey: Opt for fresh, high-quality turkey legs and thighs for the best flavor.
  • Butter Temperature: Ensure your butter is softened but not melted to effectively coat the turkey.
  • Use a Meat Thermometer: The internal temperature should reach 165°F (74°C) for safe consumption.
  • Let it Rest: After baking, allow the turkey to rest for 10-15 minutes before carving to retain juices.
  • Baste Frequently: Basting not only adds flavor but also helps achieve that beautiful golden-brown color.
  • Experiment with Aromatics: Feel free to add garlic cloves or citrus slices to the baking pan for extra flavor.
  • Make Ahead: You can prepare the herb butter a day in advance and store it in the fridge for easy assembly.
  • Serve with a Side: Consider pairing with classic sides like mashed potatoes or sautéed greens to round out the meal.

Common Mistakes and Troubleshooting

Even the best chefs face challenges. Here are some common mistakes to avoid:

  • Overcooking: Keep an eye on the cooking time to prevent drying out the turkey. Use a meat thermometer for accuracy.
  • Not Basting Enough: If you skip basting, the turkey might dry out; make it a habit to baste every 15 minutes!
  • Skipping the Drying Step: Avoid moisture on the surface of the turkey to ensure crispy skin.

Variations to Try

Feel free to switch things up with these variations:

  • Spicy Kick: Add a pinch of cayenne pepper or red pepper flakes to the butter mixture for heat.
  • Citrus Infusion: Incorporate lemon zest or orange zest for a bright, refreshing flavor.
  • Maple Glaze: Drizzle maple syrup over the turkey for a sweet finish.
  • Herb Blend: Try different herb combinations like sage and parsley for a unique twist.

Storage and Make-Ahead Instructions

To keep your delicious turkey legs and thighs fresh:

  • Refrigerate: Store leftovers in an airtight container in the refrigerator for up to 4 days.
  • Freeze: For longer storage, freeze cooked turkey in airtight containers for up to 3 months.
  • Reheat: Gently reheat in the oven or microwave, adding a splash of broth to keep it moist.

Frequently Asked Questions

1. Can I use skinless turkey legs?

While skin adds flavor, you can use skinless legs for a lighter dish. Just be mindful of moisture levels.

2. What side dishes pair well with this recipe?

Classic sides include mashed potatoes, green beans, cornbread, or a fresh salad.

3. Can I cook this on a grill?

Yes! You can grill the turkey legs on medium heat, basting frequently for moisture.

4. Is this recipe suitable for Thanksgiving?

Absolutely! It’s a perfect alternative to a whole turkey and just as festive.

5. How do I ensure my turkey is not dry?

Basting frequently and allowing the meat to rest after cooking will help keep it juicy.

6. What can I substitute for summer savoury?

Thyme or sage can be used as a substitute if you can’t find summer savoury.

7. Can I make this recipe ahead of time?

Yes, you can prepare the herb butter a day ahead and apply it to the turkey before baking.

8. What’s the best way to carve the turkey?

Let the turkey rest, then use a sharp knife to carve along the bone for clean cuts.

Nutritional Tips and Dietary Adaptations

This recipe can easily be adapted for different dietary needs:

  • Low-Fat Option: Substitute butter with olive oil or a low-fat spread.
  • Gluten-Free: All ingredients are naturally gluten-free, perfect for those with sensitivities.
  • Herbal Variants: For a more herbal flavor, you can increase the amount of fresh herbs or use your favorites.

Essential Equipment Recommendations

To create this delightful dish, consider having the following:

  • Roasting Pan: A sturdy roasting pan helps evenly cook the turkey.
  • Meat Thermometer: Essential for ensuring the turkey is cooked to the right temperature.
  • Whisk: For mixing your herb butter, a simple whisk will do the trick.
  • Sharp Knife: Perfect for carving and serving your beautifully roasted turkey.

Serving Suggestions

Present your Butter Basted Turkey Legs and Thighs with pride:

  • Garnish: Fresh herb sprigs on top add a beautiful touch.
  • Accompaniments: Serve with cranberry sauce, stuffing, or gravy for a homestyle experience.
  • Pair with Wine: A light red or white wine complements the rich flavors of the turkey.

In closing, remember that cooking is a journey filled with stories, love, and shared memories. As you savor your Butter Basted Turkey Legs and Thighs, take a moment to reflect on the warmth of your kitchen and the people you cherish. Here’s to many more delicious meals and heartwarming gatherings around your table!


Butter Basted Turkey Legs and Thighs with Fresh Herbs

Prep Time 15 minutes
Cook Time 2 hours
Total Time 2 hours 15 minutes
Servings 4 servings
Calories 650
This flavorful turkey recipe features tender, herb-infused meat basted with a rich butter mixture for a juicy, aromatic dish.

Ingredients

Turkey

  • 4 pieces whole turkey legs (skin on; bone in)
  • 4 pieces whole turkey thighs (skin on; bone in)
  • 1 cup butter (softened)
  • 1 tablespoon fresh summer savoury (chopped)
  • 1 tablespoon fresh thyme leaves
  • 1 tablespoon fresh rosemary (chopped)
  • 1 tablespoon dried onion flakes
  • 1 teaspoon salt
  • 1 teaspoon ground black pepper

Instructions 

  • Preheat oven to 350°F (175°C). Pat turkey pieces dry and set aside.
  • Mix softened butter with herbs, onion flakes, salt, and pepper until well combined.
  • Massage about two tablespoons of herb butter into each turkey piece, coating thoroughly.
  • Arrange turkey on a parchment-lined baking sheet, cover with foil, and bake for 1 hour.
  • Remove from oven, baste with pan juices, and bake uncovered for an additional 15 minutes.
  • Transfer to a platter, spoon over remaining butter and herbs, garnish, and serve.

Notes

Ensure turkey is fully thawed before cooking for best results.
Calories: 650kcal
Cost: $20
Course: Main Course
Cuisine: American
Keyword: Butter, Herbs, Turkey

Welcome to a Cozy Kitchen Adventure

Cooking is not just about following recipes; it’s a journey through memories and flavors that connect us. Today, I invite you to join me in crafting a delightful batch of Gingerbread Granola. This recipe is more than just a crunchy snack; it’s a heartfelt embrace from my childhood, filled with the warm spices of ginger and cinnamon that remind me of cozy winter gatherings. Perfect for breakfast or an afternoon pick-me-up, this granola is a wonderful way to share love and warmth with those around you!

Why You’ll Love This Recipe

  • Comforting Flavors: The blend of ginger, cinnamon, and nutmeg creates an irresistible spiced granola that tastes like the holidays in every bite.
  • Customizable Ingredients: With a variety of nuts and dried fruits, you can easily adjust this granola recipe to suit your taste or dietary needs.
  • Healthy and Wholesome: Packed with oats and nuts, this granola is a great source of protein and fiber, making it a nutritious start to your day.
  • Quick and Easy to Prepare: Following just a few simple steps, you can whip up a batch of this granola in no time, perfect for busy mornings.
  • Perfect for Sharing: Whether it’s a holiday gift or a cozy brunch, this granola brings people together, making it a delightful addition to any gathering.

Ingredients Breakdown

Let’s gather our ingredients to create this heartwarming gingerbread granola. Here’s what you’ll need:

  • 2 cups oats: The base of our granola, providing texture and heartiness.
  • 1 cup almonds: For a satisfying crunch; feel free to substitute with walnuts or any nut you prefer.
  • 1 cup pecan nuts: Adds a rich, buttery flavor; you can switch this out for hazelnuts if you like.
  • 1/2 cup pistachios: A lovely pop of color and flavor, though they can be omitted if you prefer.
  • 1/3 cup goji berries: These little gems provide sweetness and nutrients; raisins or dried cranberries work just as well.
  • 1/3 cup coconut oil: Helps bind the ingredients together and adds a subtle coconut flavor.
  • 1/4 cup peanut butter: For creaminess and protein; almond butter is a great alternative.
  • 2 tbsp honey: Sweetens the mix; maple syrup can be used for a vegan option.
  • 1-2 tbsp ginger extract: Brings that signature ginger flavor; fresh grated ginger can also be used for a more intense taste.
  • 2 tbsp cinnamon: A warm spice that complements the ginger perfectly.
  • 1 tbsp nutmeg: Adds depth to the flavor; you can adjust the amount based on your preference.

Step-by-Step Instructions

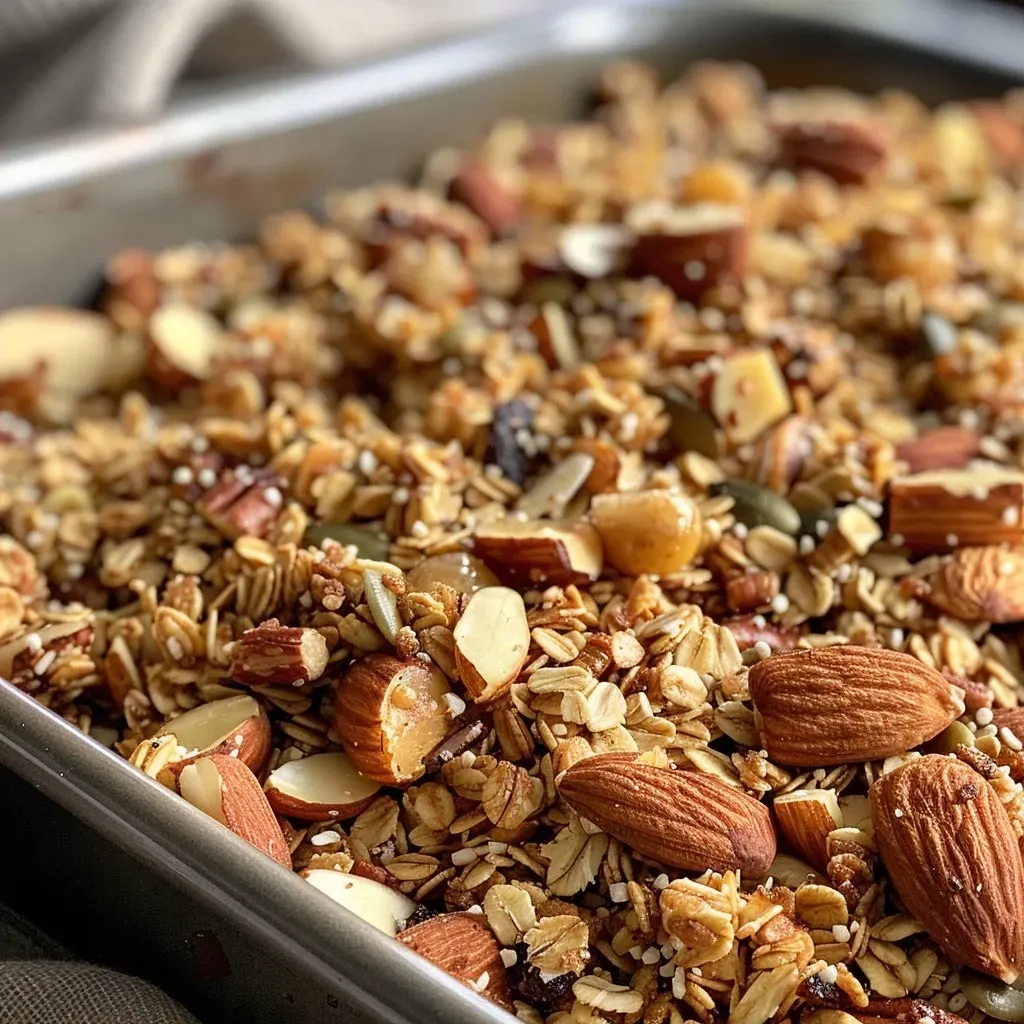
Side view of a hearty gingerbread granola mix featuring oats, nuts, and spices.

Now, let’s transform these ingredients into a delightful gingerbread granola!


Personal Smoothie Blender

★ Recommended Kitchen Tool

Personal Smoothie Blender

Make this recipe even easier with a quality Personal Smoothie Blender — a must-have kitchen staple!


🛒 Check Price on Amazon →

As an Amazon Associate, we earn from qualifying purchases.
  1. Preheat your oven to 325°F (163°C).
  2. In a large mixing bowl, combine oats, almonds, pecans, pistachios, and goji berries.
  3. In a saucepan over low heat, melt together coconut oil, peanut butter, honey, ginger extract, cinnamon, and nutmeg. Stir until well combined.
  4. Pour the liquid mixture over the dry ingredients in the bowl. Mix thoroughly, ensuring all the dry ingredients are coated evenly.
  5. Spread the mixture onto a baking tray lined with parchment paper.
  6. Bake in the preheated oven for 15-20 minutes or until the granola turns golden brown, stirring halfway through to ensure even baking.
  7. Once done, remove from the oven and let it cool completely. The granola will continue to crisp up as it cools.
  8. Store in an airtight container for up to a week.

Pro Tips for Perfect Gingerbread Granola

  • Even Baking: Stir the granola halfway through baking to ensure every piece gets that golden brown color and crunch.
  • Cooling is Key: Allow the granola to cool completely before storing; this helps it stay crunchy.
  • Adjusting Sweetness: Taste the mixture before baking; add more honey or maple syrup if you prefer it sweeter.
  • Spice It Up: Feel free to experiment with spices like allspice or cloves for a unique flavor profile.
  • Make It Nut-Free: Substitute seeds like sunflower or pumpkin seeds if you’re avoiding nuts.
  • Mix and Match: Swap out the dried fruits based on what you have on hand; apricots or dates work beautifully too.
  • Storage Tips: Keep your granola in a cool, dry place to maintain its freshness.
  • Batch Size: Double the recipe if you plan on gifting it or want to make it last longer!

Common Mistakes and Troubleshooting

Even the best cooks encounter hiccups in the kitchen. Here are some common mistakes and how to avoid them:

  • Granola Too Soft: Ensure you bake until it’s golden brown; underbaking will result in a chewy texture.
  • Burnt Granola: Keep a close eye on it towards the end of the baking time; ovens can vary greatly.
  • Clumpy Granola: If you prefer clusters, press the mixture down firmly before baking.
  • Flavor Too Strong: If the spices are overpowering, reduce the amounts next time and adjust to your taste.

Delicious Variations to Try

Get creative with your gingerbread granola by trying these variations:

  • Chocolate Gingerbread Granola: Add cocoa powder and dark chocolate chips for a sweet twist.
  • Vegan Version: Substitute honey with maple syrup and ensure the peanut butter is also vegan.
  • Fruit-Infused Granola: Toss in dried mango or coconut flakes for a tropical spin.
  • Spicy Ginger Granola: Add cayenne pepper for a surprising kick!

Storage and Make-Ahead Instructions

Planning ahead? Here’s how to store your gingerbread granola:

  • Airtight Container: Keep granola in an airtight container at room temperature for up to one week.
  • Freezer-Friendly: For longer storage, freeze in a sealed bag for up to three months. Just let it thaw before enjoying!

Frequently Asked Questions

  • Can I make this granola gluten-free? Yes! Use certified gluten-free oats and ensure your other ingredients are also gluten-free.
  • How can I make this recipe nut-free? Replace the nuts with seeds like sunflower or pumpkin seeds.
  • What can I use instead of honey? Maple syrup or agave nectar are excellent alternatives.
  • Can I add fresh fruits? Dried fruits work best for granola; fresh fruits are best added when serving.
  • How do I make clusters in my granola? Press the mixture down firmly before baking; this helps form clusters.
  • What’s the best way to serve gingerbread granola? It’s delightful over yogurt, with milk, or simply by the handful!
  • Can I add protein powder? Yes, just mix it into the dry ingredients before combining with the wet ingredients.
  • How can I adjust the sweetness? Taste your mixture before baking and adjust honey or maple syrup amounts as needed.

Nutrition Tips and Dietary Adaptations

This gingerbread granola is not just delicious; it’s also nutritious. Here are some tips for making it even healthier:

  • Protein Boost: Add a scoop of your favorite protein powder to increase the protein content.
  • Low Sugar Option: Reduce or substitute the sweeteners to lower the sugar content.
  • Fiber-Rich Additions: Incorporate chia seeds or flaxseeds for additional fiber and healthy fats.

Equipment Recommendations

Here’s what you’ll need to make this granola:

  • Baking Tray: A large, rimmed baking sheet is perfect for spreading out your granola.
  • Mixing Bowls: Use a couple of large bowls for mixing your dry and wet ingredients.
  • Parchment Paper: Lining your baking tray helps with easy clean-up and prevents sticking.
  • Measuring Cups and Spoons: Accurate measurements ensure the best results.

Serving Suggestions

How you serve this gingerbread granola can make it even more delightful:

  • With Yogurt: Layer it with Greek yogurt and fresh fruits for a wholesome breakfast.
  • As a Snack: Enjoy it by the handful as a mid-day snack or a healthy treat.
  • In Smoothies: Blend into smoothies for added texture and flavor.
  • Gifts from the Kitchen: Package it in a cute jar with a ribbon for a heartfelt gift!

Conclusion: A Heartfelt Culinary Journey

This gingerbread granola recipe is a beautiful way to share love and warmth, embodying the spirit of togetherness and nostalgia. Every bite is a reminder of the cozy moments spent in the kitchen, crafting something truly special. I hope you enjoy making and sharing this granola as much as I do. Happy cooking, and may your kitchen be filled with love and laughter!

Gingerbread Granola

Prep Time 10 minutes
Cook Time 20 minutes
Total Time 30 minutes
Servings 8 servings
Calories 350
A flavorful and crunchy gingerbread-inspired granola perfect for a healthy snack or breakfast.

Ingredients

Dry ingredients

  • 2 cups oats
  • 1 cup almonds
  • 1 cup pecan nuts
  • 1/2 cup pistachios
  • 1/3 cup goji berries

Wet ingredients

  • 1/3 cup coconut oil
  • 1/4 cup peanut butter
  • 2 tbsp honey
  • 1-2 tbsp ginger extract
  • 2 tbsp cinnamon
  • 1 tbsp nutmeg

Instructions 

  • Preheat oven to 325°F (163°C).
  • Mix dry ingredients in a bowl. Melt wet ingredients and combine.
  • Pour wet mixture over dry ingredients and mix well.
  • Spread on a baking tray and bake for 15-20 minutes, stirring halfway.
  • Cool completely and store in an airtight container.

Notes

Store in an airtight container for up to a week.
Calories: 350kcal
Cost: $12
Course: Breakfast
Cuisine: American
Keyword: Granola

Embrace the Holidays with Gingerbread Rice Krispie Treats

Ah, the holiday season—a time for warmth, laughter, and sweet memories shared around the table. This year, let’s add a delightful twist to a classic favorite with our Gingerbread Rice Krispie Treats. These treats are not only gluten-free and refined sugar-free, but they also offer a vegan option to ensure everyone can indulge in this festive joy. So, gather your loved ones and let’s dive into a recipe that’s as heartwarming as it is delicious!

Why You’ll Love This Recipe

As you prepare to create these gingerbread rice krispie treats, here are a few reasons why they’ll quickly become a holiday staple in your home:

  • Quick and Easy: With just a handful of ingredients and minimal prep time, you can whip these up in no time.
  • Kid-Friendly Fun: The process of mixing and molding these treats is a fantastic way to engage children in the kitchen.
  • Seasonal Flavors: Infused with warm spices like cinnamon and ginger, these treats give a cozy nod to traditional gingerbread.
  • Customizable: Feel free to add your favorite toppings or mix-ins for a personal touch!
  • Perfect for Sharing: Cut them into fun shapes and share with friends, family, or neighbors as a holiday gift!

Ingredient Breakdown

Every great recipe starts with quality ingredients. Here’s what you’ll need to create these delightful treats, along with some substitutions:


Silicone Baking Cups Set

★ Recommended Kitchen Tool

Silicone Baking Cups Set

Make this recipe even easier with a quality Silicone Baking Cups Set — a must-have kitchen staple!


🛒 See Deals on Amazon →

As an Amazon Associate, we earn from qualifying purchases.
  • 4 cups rice krispie cereal: Ensure it’s gluten-free if necessary.
  • 1 tsp cinnamon: Adds a warm, comforting flavor.
  • 1 tsp ginger: Essential for that gingerbread essence.
  • 1/2 tsp allspice: Brings a rich depth to the flavor profile.
  • 1/2 tsp nutmeg: A hint of nutmeg adds warmth.
  • 1/2 tsp cloves: Provides a fragrant touch.
  • 1/4 tsp salt: Enhances all the flavors (adjust if your nut butter is salted).
  • 1 cup cashew butter: For a creamy texture; can be substituted with almond or peanut butter.
  • 1/2 cup honey or maple syrup: Sweetener options—choose maple for a vegan version.
  • 3 tbsp molasses: Adds depth and a hint of richness.
  • 1 tsp vanilla: A classic flavor enhancer.

How to Make Gingerbread Rice Krispie Treats

Side view of a stack of Gingerbread Rice Krispie Treats garnished with spices, highlighting their rich brown color.

Let’s get to the heart of the matter—making these delicious treats. Follow these simple steps:

  1. Line a 9×9 pan with parchment paper, letting the edges hang over for easy removal later.
  2. In a large mixing bowl, pour in your 4 cups of rice krispie cereal.
  3. In a separate bowl, combine your spices (cinnamon, ginger, allspice, nutmeg, cloves, and salt) and stir until well mixed.
  4. In a small pot, combine cashew butter, honey, and molasses, stirring until well blended. Heat on low until simmering, then remove from heat and stir in the vanilla and spice mixture.
  5. Pour the wet ingredients over the rice krispie cereal and mix together until every piece is well coated.
  6. Spread the mixture evenly in the prepared pan, smoothing the top. If it sticks, spray your spatula with a little non-stick spray.
  7. Chill in the fridge for at least an hour to set.
  8. Once set, lift the treats out using the parchment paper and cut them into 12 bars. Enjoy!

Pro Tips for the Perfect Treat

To ensure your gingerbread rice krispie treats come out perfectly every time, consider these expert tips:

  • Use fresh spices: Fresh spices elevate the flavor of these treats considerably.
  • Don’t overheat the mixture: Heat just until combined to avoid burning the sugars.
  • Grease your tools: Lightly greasing your spatula or spoon will help with sticky mixtures.
  • Mix gently: Stir just until combined—overmixing can lead to hard treats.
  • Let cool properly: Cooling in the fridge ensures they hold their shape and texture.
  • Cut with a sharp knife: A sharp knife will give you clean cuts, making for beautiful treats.
  • Experiment with toppings: Drizzle with dark chocolate or sprinkle with crushed nuts for added texture.
  • Store properly: Keep in an airtight container to maintain freshness.

Common Mistakes and Troubleshooting

Even the best of us can hit a snag in the kitchen. Here are some common mistakes and how to troubleshoot:

  • Too crumbly: If your treats are too dry, add a bit more cashew butter or sweetener next time.
  • Too sticky: If they stick to your pan, try lining with parchment paper or greasing the surface.
  • Burned edges: Keep the heat low and stir continuously to avoid burning the mixture.
  • Uneven texture: Ensure even mixing of the wet and dry ingredients to avoid clumps.

Delicious Variations to Try

Want to mix things up? Here are some tasty variations to consider:

  • Chocolate Drizzle: Melt dark chocolate and drizzle over the top for a rich touch.
  • Nutty Delight: Fold in chopped nuts or seeds for added crunch and nutrition.
  • Fruity Addition: Incorporate dried cranberries or chopped dates for a sweet contrast.
  • Spiced Nut Butter: Swap cashew butter for spiced almond or peanut butter for a unique flavor.

Storage and Make-Ahead Instructions

These treats can be made ahead of time! Here’s how to store them:

  • Room Temperature: Store in an airtight container at room temperature for up to a week.
  • Refrigerator: For longer shelf life, keep them in the fridge for up to two weeks.
  • Freezer: You can freeze these treats for up to three months. Just wrap them tightly in plastic wrap and place in a freezer-safe bag.

Frequently Asked Questions

Here are some common questions about making and enjoying these treats:

  • Can I use different cereals? Yes, feel free to experiment with other gluten-free cereals!
  • How can I make these treats vegan? Simply substitute honey with maple syrup.
  • Do they need to be refrigerated? Not necessarily, but refrigeration helps them set and last longer.
  • Can I make them ahead of time? Absolutely! They store well for up to a week.
  • What’s the best way to cut them? Use a sharp knife and let them cool completely before cutting for best results.
  • Can I add chocolate? Yes, chocolate makes a delicious addition—either mixed in or drizzled on top.
  • What if my mixture is too sticky? If it’s hard to work with, add a little more rice krispies to balance it out.
  • Are they gluten-free? Yes, as long as you use gluten-free rice krispies!

Nutritional Tips and Dietary Adaptations

When making these gingerbread rice krispie treats, consider these nutritional adaptations:

  • Lower Sugar: Use unsweetened apple sauce instead of honey for a lower sugar option.
  • Protein Boost: Add a scoop of your favorite protein powder to the wet mixture for added nutrition.
  • Nut-Free Option: Replace cashew butter with sunflower seed butter for a nut-free alternative.

Equipment Recommendations

To make the process smoother, here’s what I recommend having on hand:

  • 9×9 Pan: Ideal for setting your treats.
  • Parchment Paper: Helps with easy removal and clean-up.
  • Mixing Bowls: A large bowl for mixing and a small bowl for spices.
  • Spatula: Great for spreading and mixing.
  • Sharp Knife: For cutting the treats into perfect squares.

Serving Suggestions

Serving these treats is all about presentation and enjoyment:

  • Festive Platter: Arrange on a decorative platter with holiday-themed garnishes.
  • Gift Packaging: Wrap in cellophane with a festive ribbon for a lovely homemade gift.
  • Pair with Hot Cocoa: Serve alongside a warm mug of cocoa or spiced apple cider for a cozy treat.

In conclusion, these Gingerbread Rice Krispie Treats are more than just a dessert; they are a way to create memories and share love during the holiday season. With each bite, you’ll be reminded of the warmth of home and the joy of togetherness. So, grab your loved ones, make this recipe, and let’s create sweet memories together!

Gingerbread Rice Krispie Treats (gluten-free, refined sugar-free, vegan option)

Prep Time 10 minutes
Cook Time 15 minutes
Total Time 25 minutes
Servings 12 bars
Calories 180
Enjoy these festive, gluten-free, and vegan-friendly gingerbread Rice Krispie Treats, perfect for holiday gatherings or a sweet snack.

Ingredients

Rice Krispie Cereal

  • 4 cups rice krispie cereal (gluten-free)
  • 1 tsp cinnamon
  • 1 tsp ginger
  • 1/2 tsp allspice
  • 1/2 tsp nutmeg
  • 1/2 tsp cloves
  • 1/4 tsp salt (*see notes)
  • 1 cup cashew butter
  • 1/2 cup honey (or maple syrup if vegan)
  • 3 tbsp molasses
  • 1 tsp vanilla

Instructions 

  • Line a 9x9 pan with parchment paper.
  • Mix spices in a small bowl; set aside.
  • Heat cashew butter, honey, and molasses until combined; remove from heat and stir in vanilla and spices.
  • Pour wet mixture over cereal and mix until evenly coated.
  • Press mixture into prepared pan and chill for at least 1 hour. Cut into 12 bars and serve.

Notes

Use maple syrup for vegan option; store in an airtight container.
Calories: 180kcal
Cost: $15
Course: Dessert
Cuisine: holiday
Keyword: gingerbread, gluten free, Vegan

Welcome to a culinary journey that celebrates not just flavors but the memories they evoke. In this recipe for High-Protein Broccoli Cheddar Soup, we blend the nostalgic warmth of home-cooked meals with the nourishing goodness of protein. This soup isn’t just a dish; it’s a heartfelt embrace, perfect for sharing with family and friends. Let’s dive into the comforting world of this creamy broth, rich with cheddar and vibrant broccoli, and explore why this soup is a must-have in your kitchen.

The essence of this recipe lies in its simplicity and the love that goes into making it. With just a few ingredients, you can create a dish that warms the soul and brings people together. So, gather your loved ones around the table, and let’s get started!

Why You’ll Love This Recipe

Every spoonful of this broccoli cheddar soup is packed with flavor and nutrition. Here are just a few reasons to embrace this recipe:


Meal Prep Container Set

★ Recommended Kitchen Tool

Meal Prep Container Set

Make this recipe even easier with a quality Meal Prep Container Set — a must-have kitchen staple!


🛒 Check Price on Amazon →

As an Amazon Associate, we earn from qualifying purchases.
  • High Protein Content: Incorporating white beans and cottage cheese not only thickens the soup but also boosts its protein content, making it a satisfying meal choice.
  • Comfort in a Bowl: The creamy texture and cheesy goodness provide a warm hug on chilly days, reminiscent of cozy family dinners.
  • Easy to Make: With clear steps and simple ingredients, this recipe is perfect for both novice cooks and seasoned chefs.
  • Versatile Ingredients: Most of the ingredients are staples you might already have in your pantry, allowing you to whip up this dish on short notice.
  • Customizable Flavors: Whether you prefer it spicier or with more vegetables, there are plenty of ways to adapt this recipe to your taste.

Ingredients You’ll Need

Let’s gather our ingredients for this delightful soup. Here’s what you’ll need:

  • 4 tablespoons butter
  • 1 small onion, finely diced
  • 2 cloves garlic, minced
  • 1/3 cup all-purpose flour
  • 4 cups low-sodium chicken or vegetable broth
  • 2 cups milk
  • 1 can (15 oz) white beans, drained and rinsed
  • 4 cups broccoli florets, chopped
  • 2 carrots, shredded or finely diced
  • 2 1/2 cups freshly shredded sharp cheddar cheese
  • 1/2 teaspoon ground nutmeg, optional
  • Salt and black pepper, to taste

Feel free to substitute ingredients based on your preferences or dietary needs. For a vegetarian option, stick with vegetable broth and skip the cheese if you prefer a dairy-free version.

How to Make High-Protein Broccoli Cheddar Soup

Now that we have everything ready, let’s get cooking! Follow these simple steps:

  1. Blend the Beans: In a blender, combine the white beans with about 1 cup of the broth until completely smooth. This will give our soup a creamy texture.
  2. Cook the Aromatics: Melt the butter in a large pot over medium heat. Add the diced onion and cook for 3–4 minutes until it becomes translucent.
  3. Add Garlic: Stir in the minced garlic and cook for another 30 seconds, just until fragrant.
  4. Make a Roux: Sprinkle in the flour and cook for 1–2 minutes, stirring constantly to combine with the butter and aromatics.
  5. Whisk in the Broth: Gradually whisk in the remaining broth, along with the blended bean mixture and milk. Stir until smooth.
  6. Simmer the Vegetables: Add the chopped broccoli and shredded carrots to the pot. Simmer gently for 12–15 minutes, until the vegetables are tender.
  7. Add the Cheese: Remove the pot from the heat. Gradually stir in the shredded cheddar until it melts completely into the soup.
  8. Season to Taste: If using, add the nutmeg and season with salt and pepper to your liking. Serve warm and enjoy!

Pro Tips for Making High-Protein Broccoli Cheddar Soup

Close-up of creamy broccoli cheddar soup in a rustic bowl, showcasing chunks of broccoli and carrots.

To elevate your soup-making game, consider these expert tips:

  • Adjust the Thickness: If you prefer a thicker soup, you can reduce the amount of broth or add more beans.
  • Flavor Boost: Experiment with spices like smoked paprika or cayenne pepper for an extra kick.
  • Fresh Herbs: Consider adding fresh thyme or parsley just before serving for added freshness.
  • Cheese Variations: Try different cheeses like gouda or pepper jack for a unique flavor twist.
  • Low-Fat Option: Use low-fat milk or a milk alternative to reduce calories without sacrificing flavor.
  • Meal Prep Friendly: This soup keeps well in the fridge, making it perfect for meal prep.
  • Freezing Tips: Portion out and freeze leftovers for easy meals later on. Just be sure to separate the cheese and add it fresh when reheating.
  • Serving Suggestions: Pair with crusty bread or a fresh salad for a complete meal.

Common Mistakes and Troubleshooting

Even the best cooks can run into hiccups. Here are some common mistakes to avoid:

  • Overcooking the Vegetables: Keep an eye on the broccoli; you want it tender, not mushy. Cook it just until bright green.
  • Curdling the Milk: If you find your soup curdles, lower the heat and avoid boiling after adding the dairy.
  • Underseasoning: Taste as you go and adjust the salt and pepper to enhance the flavor.
  • Skipping the Roux: This step is crucial for achieving a creamy texture. Don’t rush through it!

Variations to Try

Make this soup your own with these fun variations:

  • Spicy Broccoli Cheddar Soup: Add diced jalapeños or a splash of hot sauce for a spicy kick.
  • Vegetable Medley: Toss in other vegetables like peas, corn, or spinach for added nutrition and color.
  • Cheesy Bacon Addition: Crumble crispy bacon on top for a smoky flavor contrast.
  • Herbed Broccoli Cheddar Soup: Infuse with fresh basil or dill for a fresh herbaceous note.

Storage and Make-Ahead Instructions

This soup is perfect for meal prep! Here’s how to store it:

  • Refrigeration: Store leftovers in an airtight container for up to 4 days in the fridge.
  • Freezing: Freeze in portions for up to 3 months. Thaw overnight in the refrigerator before reheating.
  • Reheating: Gently reheat on the stove over low heat, stirring often to prevent sticking.

Frequently Asked Questions

Here are some common questions about making this delicious soup:

  • Can I use frozen broccoli? Yes, frozen broccoli works well; just add it during the last 5 minutes of cooking.
  • Is this soup gluten-free? To make it gluten-free, substitute all-purpose flour with a gluten-free flour blend.
  • Can I make this soup vegan? Absolutely! Use vegetable broth, plant-based milk, and omit the cheese or use a dairy-free cheese alternative.
  • What can I serve with broccoli cheddar soup? Crusty bread, salads, or even a light sandwich pair wonderfully with this soup.
  • How can I add more fiber? Include more beans or add lentils to the mix for a hearty boost.
  • Can I double the recipe? Yes, this recipe can easily be doubled for larger gatherings or meal prep.
  • What’s the best way to store leftovers? Use airtight containers to keep the soup fresh in the fridge or freezer.
  • Can I blend the soup for a smoother texture? Yes, use an immersion blender or regular blender to achieve your desired creaminess.

Nutrition Tips and Dietary Adaptations

This soup is not only comforting but also nourishing. Here are some nutrition tips:

  • Protein Power: With the addition of beans and cheese, this recipe is a fantastic source of protein, making it great for a filling lunch or dinner.
  • Fiber-Rich: Broccoli and beans provide dietary fiber, essential for digestive health.
  • Low-Calorie Option: By using low-fat milk and reducing cheese, you can lower the calorie content without sacrificing flavor.
  • Vitamin Boost: Packed with vitamins A, C, and K from broccoli, this soup supports overall health.

Equipment Recommendations

To make your cooking experience smooth, consider having these tools handy:

  • Large Pot: A heavy-bottomed pot helps distribute heat evenly.
  • Blender: An immersion blender is great for pureeing the soup directly in the pot.
  • Wooden Spoon: Perfect for stirring and preventing scratches on your pot.
  • Measuring Cups and Spoons: Accurate measurements are key to a successful recipe.

Serving Suggestions

Serve your broccoli cheddar soup warm, garnished with a sprinkle of cheese or a dash of fresh herbs. Pair it with:

  • Crusty Bread: Perfect for dipping and soaking up every bit of that creamy goodness.
  • Simple Salad: A light side salad with vinaigrette complements the richness of the soup.
  • Sandwiches: Grilled cheese or turkey sandwiches make a hearty meal alongside the soup.

As we come to the end of this delightful recipe, remember that cooking is a way to express love and share memories. This High-Protein Broccoli Cheddar Soup is more than just a meal; it’s an experience to savor and share. So, gather around the table, enjoy every spoonful, and let the warmth of this dish wrap you in the comfort of home. Happy cooking!

High-Protein Broccoli Cheddar Soup (Panera Copycat)

Prep Time 10 minutes
Cook Time 20 minutes
Total Time 30 minutes
Servings 4 cups
Calories 350
A creamy, hearty soup packed with protein and vegetables, inspired by Panera Bread's popular dish.

Ingredients

Dairy and Broth

  • 4 tablespoons butter
  • 1 small onion, finely diced
  • 2 cloves garlic, minced
  • 1/3 cup all-purpose flour
  • 4 cups low-sodium chicken or vegetable broth
  • 2 cups milk
  • 1 can (15 oz) white beans, drained and rinsed
  • 4 cups broccoli florets, chopped
  • 2 carrots shredded or finely diced
  • 2 1/2 cups shredded sharp cheddar cheese
  • 1/2 teaspoon ground nutmeg, optional
  • to taste Salt and black pepper

Instructions 

  • Blend white beans with 1 cup of broth until smooth.
  • Melt butter in a large pot, cook onion for 3–4 minutes, then add garlic for 30 seconds.
  • Stir in flour and cook 1–2 minutes, then whisk in remaining broth, bean mixture, and milk.
  • Add broccoli and carrots, simmer 12–15 minutes until tender.
  • Remove from heat, stir in cheddar until melted, add nutmeg, season with salt and pepper, then serve.

Notes

For a creamier texture, blend some of the vegetables before adding cheese.
Calories: 350kcal
Cost: $15
Course: Soup
Cuisine: American
Keyword: Broccoli, Cheddar, Protein

Gather ‘Round: A Cozy Introduction to Thanksgiving Egg Rolls

Thanksgiving is a time for family, memories, and of course, delicious food. One dish that captures the essence of the holiday in a unique way is Thanksgiving egg rolls. These delightful pockets are not only a creative way to use up thanksgiving leftovers, but they also deliver a comforting taste of nostalgia with every crispy bite. Imagine gathering around the table, sharing stories, and savoring these warm, hand-held treats filled with turkey, stuffing, and mashed potatoes. In this post, we’ll dive deep into how to make the best Thanksgiving egg rolls, explore their versatility, and connect over the warmth of shared meals.

Why You’ll Love This Recipe

  • Unique twist: Thanksgiving egg rolls transform traditional holiday flavors into a fun and portable dish that everyone will love.
  • Quick and easy: With simple ingredients and straightforward steps, even novice cooks can master this recipe.
  • Perfect for leftovers: These egg rolls are an innovative way to use up turkey and sides, minimizing waste while maximizing flavor.
  • Customizable: Feel free to mix and match ingredients based on what you have on hand, ensuring no two batches are ever the same.
  • Great for gatherings: Serve them as an appetizer or a main dish at holiday parties; they’re always a hit!

Gathering Your Ingredients

To create these delicious Thanksgiving egg rolls, you’ll need a few key ingredients. Here’s a detailed breakdown of what to gather, with helpful substitutions for when you’re in a pinch:

  • 2 cups cooked turkey: Shredded or chopped. You can use leftover turkey or even rotisserie chicken as a substitute.
  • 1 cup prepared stuffing: Any stuffing will do! If you’re short on stuffing, use breadcrumbs mixed with herbs.
  • 1/2 cup mashed potatoes: Leftover mashed potatoes are perfect, but instant mashed potatoes work too for a quicker option.
  • 1/4 cup cranberry sauce: Use whole berry or jellied, based on your preference. This adds a sweet and tart contrast to the savory filling.
  • 1/4 cup shredded cheese (optional): Cheddar or Swiss cheese can add creaminess to the filling; feel free to omit for a lighter version.
  • 12 egg roll wrappers: Available in most grocery stores; spring roll wrappers can also work if you prefer a thinner crust.
  • 1/4 cup water: For sealing the wrappers.
  • Vegetable oil: For frying; you can also use an air fryer for a healthier option.
  • Gravy (optional): For dipping, because who doesn’t love dipping?

Steps to Create Your Thanksgiving Egg Rolls

Juicy Thanksgiving egg rolls arranged neatly, showcasing their golden-brown exterior.

With your ingredients ready, let’s get cooking! Follow these simple steps to assemble and fry your Thanksgiving egg rolls:


Personal Smoothie Blender

★ Recommended Kitchen Tool

Personal Smoothie Blender

Make this recipe even easier with a quality Personal Smoothie Blender — a must-have kitchen staple!


🛒 See Deals on Amazon →

As an Amazon Associate, we earn from qualifying purchases.
  1. Prepare the filling: In a large bowl, mix the shredded turkey, stuffing, mashed potatoes, cranberry sauce, and cheese (if using) until well combined. This mixture is the heart of your egg rolls, so make sure everything is evenly distributed!
  2. Assemble the egg rolls: Lay an egg roll wrapper on a clean surface with one corner pointing towards you (in a diamond shape). Spoon 2-3 tablespoons of the filling into the center of the wrapper. Fold the bottom corner up over the filling, then fold in the sides, and roll tightly. Seal the edge by brushing it with a little water. Repeat with the remaining wrappers and filling.
  3. Heat the oil: In a large skillet or deep pan, heat about 1-2 inches of vegetable oil over medium heat until it reaches 350°F (175°C).
  4. Fry the egg rolls: Carefully fry the egg rolls in batches, turning occasionally, until they are golden brown and crispy (about 2-3 minutes per side). Use a slotted spoon to remove them, and drain on a paper towel-lined plate.
  5. Serve: Enjoy your Thanksgiving egg rolls hot, paired with a side of gravy for dipping. These pockets of joy are best enjoyed fresh!

Pro Tips for Perfect Thanksgiving Egg Rolls

To ensure your Thanksgiving egg rolls turn out perfectly every time, keep these expert insights in mind:

  • Don’t overfill: Avoid the temptation to stuff your egg rolls too full. A little filling goes a long way; overstuffing can lead to messy frying!
  • Seal them well: Make sure to seal the edges tightly using water; this prevents the filling from leaking during frying.
  • Use medium heat: Frying at too high a temperature can burn the wrappers before the filling heats through. Medium heat gives you a golden crisp without burning.
  • Consider the air fryer: If you prefer a healthier option, try cooking your egg rolls in an air fryer. They’ll still get crispy without the excess oil.
  • Make a dipping sauce: Experiment with sauces like ranch, honey mustard, or even a spicy aioli to elevate your egg rolls.
  • Keep them warm: If you’re making a large batch, keep the cooked egg rolls warm in a low oven (200°F) until ready to serve.
  • Test oil temperature: Use a small piece of egg roll wrapper to test the oil; if it sizzles and rises to the top, it’s ready!
  • Rest before serving: Allow the egg rolls to rest for a minute after frying to let the filling set slightly, making them easier to eat.

Common Mistakes and Troubleshooting

Even the best cooks can encounter hiccups along the way. Here are some common challenges and how to overcome them:

  • Egg rolls bursting: This often happens from overfilling or not sealing properly. Make sure to follow the assembly instructions carefully.
  • Wrappers too chewy: This can happen if they’re left out for too long. Keep them covered with a damp towel while working.
  • Greasy egg rolls: If your egg rolls are greasy, the oil might be too cool. Ensure it’s hot enough before frying.
  • Filling too dry: If your filling seems lacking, consider adding more cranberry sauce or a little broth to enhance moisture.

Delicious Variations to Try

Want to customize your Thanksgiving egg rolls? Here are a few variations that put a twist on the classic:

  • Sweet potato egg rolls: Substitute mashed potatoes with sweet potatoes for a sweeter, more vibrant filling.
  • Vegetarian option: Use sautéed veggies like mushrooms, spinach, and carrots instead of turkey for a delicious meatless version.
  • Spicy turkey egg rolls: Add jalapeños or hot sauce to the filling for a kick that will warm up your holiday!
  • Cheesy turkey rolls: Mix in cream cheese with the filling for an extra creamy texture that pairs beautifully with the other ingredients.

Storage and Make-Ahead Instructions

If you want to prepare these egg rolls in advance, here’s how to store and reheat them:

  • Make ahead: Assemble the egg rolls and place them on a baking sheet in a single layer. Freeze them for about 30 minutes, then transfer to a freezer bag.
  • Storage: Cooked egg rolls can be stored in an airtight container in the refrigerator for up to 3 days. For longer storage, freeze them for up to 3 months.
  • Reheating: Reheat leftovers in the oven at 375°F for about 10-15 minutes or until heated through, or use the air fryer for a crisp finish.

Frequently Asked Questions

Here are some common questions about Thanksgiving egg rolls, answered:

  • Can I bake these instead of frying? Yes! Brush the egg rolls with oil and bake at 400°F for about 20 minutes, flipping halfway through.
  • What can I use instead of egg roll wrappers? You can substitute with spring roll wrappers or even make your own with flour and water.
  • How can I spice up the filling? Add herbs like thyme or rosemary, or use flavored stuffing to enhance the taste.
  • Can I use other meats? Absolutely! Ham, chicken, or even beef can work well in this recipe.
  • What’s the best way to seal the wrappers? Use a little water on your fingers to moisten the edges before sealing them tightly.
  • Can I prepare the filling ahead of time? Yes, the filling can be made a day ahead and stored in the fridge until you’re ready to assemble and cook.
  • How do I know when the oil is hot enough? A small piece of bread or wrapper should sizzle and turn golden within seconds when the oil is ready.
  • What should I serve these with? These egg rolls pair beautifully with gravy, cranberry sauce, or even a zesty dipping sauce of your choice.

Nutrition Tips and Dietary Adaptations

While these Thanksgiving egg rolls are a delightful treat, you can also make them fit various dietary needs:

  • Gluten-free: Use gluten-free egg roll wrappers and ensure all other ingredients are gluten-free.
  • Lower calorie: Bake instead of frying and use less cheese, or opt for lean turkey options.
  • Dairy-free: Omit cheese and use dairy-free mashed potatoes or stuffing for a compliant dish.

Essential Equipment to Have

To ensure a smooth cooking experience, here’s a quick list of essential tools:

  • Large mixing bowl: For combining your filling ingredients.
  • Skillet or deep fryer: For frying the egg rolls; a deep fryer can offer more consistent results.
  • Slotted spoon: To remove the egg rolls from the hot oil.
  • Paper towels: For draining excess oil after frying.

Serving Suggestions for a Memorable Feast

To create a memorable Thanksgiving feast, consider serving your egg rolls alongside:

  • Traditional sides: Pair with green bean casserole, mashed potatoes, or a fresh salad.
  • Festive drinks: Serve with apple cider, cranberry spritzers, or your favorite holiday cocktails.
  • Decadent desserts: End the meal with pumpkin pie or pecan pie for a sweet finish.

Conclusion: Cherishing Memories Through Food

Thanksgiving is more than just a meal; it’s about sharing moments and creating memories that last a lifetime. These Thanksgiving egg rolls offer a delicious way to savor the flavors of the holiday while sharing love and laughter around the table. So roll up your sleeves, gather your loved ones, and let’s make some cherished memories together with this heartwarming recipe. Happy cooking, and may your holiday be filled with joy and deliciousness!

Thanksgiving Egg Rolls

Prep Time 15 minutes
Cook Time 10 minutes
Total Time 25 minutes
Servings 4 servings
Calories 250
A creative way to enjoy Thanksgiving leftovers, these egg rolls combine turkey, stuffing, and cranberry sauce in a crispy wrapper for a festive appetizer.

Ingredients

Filling

  • 2 cups cooked turkey, shredded or chopped
  • 1 cup prepared stuffing
  • 0.5 cup mashed potatoes
  • 0.25 cup cranberry sauce (whole berry or jellied)
  • 0.25 cup shredded cheddar or Swiss cheese (optional)

Egg Roll Wrappers

  • 12 pieces egg roll wrappers
  • 0.25 cup water (for sealing the wrappers)

Other

  • to taste Vegetable oil for frying
  • optional Gravy for dipping

Instructions 

  • Mix turkey, stuffing, mashed potatoes, cranberry sauce, and cheese (if using) until combined.
  • Place filling on wrapper, fold bottom corner over, fold sides, roll tightly, and seal with water.
  • Heat oil in a pan to 350°F (175°C).
  • Fry egg rolls until golden and crispy, about 2-3 minutes per side. Drain on paper towels.
  • Serve hot with gravy for dipping.

Notes

You can customize the filling with your favorite leftovers or cheeses for added flavor.
Calories: 250kcal
Cost: $15
Course: Appetizer
Cuisine: American
Keyword: Leftovers, Thanksgiving