Author

daniel

Browsing

Welcome to the Heart of Comfort Food: King Ranch Casserole

When the chill of evening settles in, and the aroma of something warm fills the air, there’s a special magic that happens around the dinner table. Today, we’re diving into a classic comfort dish that transforms leftover turkey into a delightful feast: the King Ranch Casserole. This recipe is not just about filling bellies; it’s about bringing families together, sharing stories, and passing down traditions. So, grab your apron, and let’s make some memories!

Why You’ll Love This Recipe

  • Family-friendly: This dish is perfect for all ages; kids love the cheesy layers, and adults appreciate the hearty flavors.
  • Simple ingredients: Using common pantry staples like chicken broth and cream of chicken soup, you can whip this up without any fuss.
  • Leftover champion: Transform your leftover turkey into a mouthwatering dish that will have everyone asking for seconds.
  • Versatile: Customize with your favorite vegetables or spices to cater to your family’s taste buds.
  • Make-ahead wonder: Prepare in advance and simply pop it in the oven when you’re ready to eat!

Gathering the Ingredients

To create this warm, comforting casserole, you’ll need the following ingredients. Below are some helpful substitutions if you want to switch things up:

  • 1 (10.75 ounce) can condensed cream of chicken soup: Use cream of mushroom for a vegetarian version.
  • 1 (10.75 ounce) can condensed cream of mushroom soup: You can substitute with a homemade sauce for a fresher taste.
  • 2 cups chicken broth: Vegetable broth works great for a meat-free option.
  • 1 (10 ounce) can Rotel: For a spicy kick, choose the hot variety.
  • 1 small can chopped green chiles: Fresh jalapenos can be used for a more robust flavor.
  • 1 (12 ounce) package corn tortillas: Flour tortillas can be used for a different texture.
  • 3 cups cooked, diced chicken breast meat: Leftover turkey is perfect for this recipe.
  • 2 teaspoons canola or vegetable oil: Olive oil can be used for added flavor.
  • 1 medium onion, chopped: Sweet onions or shallots make a lovely alternative.
  • 1 red bell pepper, chopped: Feel free to mix in different colored bell peppers for a vibrant dish.
  • 1 jalapeno, seeded and diced: Omit for a milder dish.
  • 2 cloves of garlic, pressed: Garlic powder can be substituted if you’re in a pinch.
  • 8 ounces shredded cheddar cheese: Monterey Jack or a Mexican blend works well too.
  • 1 ½ teaspoons chili powder: Adjust based on your spice preference.

Cooking Steps to Comfort

Side view of a delicious King Ranch Casserole filled with turkey and colorful ingredients.

Now that we have everything ready, let’s embark on this culinary journey!


Meal Prep Container Set

★ Recommended Kitchen Tool

Meal Prep Container Set

Make this recipe even easier with a quality Meal Prep Container Set — a must-have kitchen staple!


🛒 See Deals on Amazon →

As an Amazon Associate, we earn from qualifying purchases.
  • Preheat your oven to 350 degrees.
  • Soak the tortillas: Pour the chicken broth into a large bowl and soak the tortillas while you prepare the other ingredients.
  • Grate the cheese and toss it with the chili powder to infuse flavor.
  • Sauté the onion and bell pepper in the oil over medium-high heat until soft—about 5 minutes.
  • Add the garlic, cooking until fragrant—around 30 seconds—and then set aside.
  • Cut the soaked tortillas into strips and set them aside.
  • Combine 2 cups of the chicken broth with the cream of chicken soup, cream of mushroom soup, Rotel, chiles, and jalapeno in a large bowl.
  • Layer the casserole: In a greased baking dish, alternate layers of tortilla strips, chicken, onion and bell pepper mixture, and cheese.
  • Pour the soup mixture over the top of the casserole.
  • Bake the dish in the oven for 30-45 minutes until it’s hot and bubbly.
  • Finish by sprinkling the remaining cheese on top about 10 minutes before it’s done baking.

Pro Tips for Perfection

  • Layer wisely: Make sure to distribute the layers evenly to ensure every bite is bursting with flavor.
  • Customize your heat: Adjust the amount of jalapeno and chili powder according to your spice preference.
  • Use a deep dish: A deeper baking dish allows for more layers, making the casserole even heartier.
  • Let it rest: Allow the casserole to sit for about 10 minutes after baking for easier serving.
  • Experiment with toppings: Consider adding crushed tortilla chips or sour cream on top for an extra crunch.
  • Check for doneness: The casserole should be hot in the center and the cheese melted and golden.
  • Make it a meal: Pair with a simple green salad for a complete dining experience.
  • Reheat with care: If you have leftovers, reheat gently to avoid drying out the dish.
  • Freezing tips: You can freeze unbaked casserole for up to 3 months. Just add 10 minutes to the baking time if cooking from frozen.
  • Cheese choices: Experiment with different cheese blends for unique flavor profiles.

Common Mistakes and Troubleshooting

Even the best chefs have their off days! Here are some common mistakes to avoid:

  • Over-soaking tortillas: Ensure tortillas are soaked just enough to soften without falling apart.
  • Poor layering: Skipping layers can lead to uneven cooking; follow the layering instructions carefully.
  • Too dry: If your casserole comes out dry, consider adding more broth or sauce next time.
  • Under-seasoning: Don’t shy away from seasoning; taste as you go to ensure it’s flavorful.

Delicious Variations to Try

Like any great recipe, this King Ranch Casserole is flexible! Here are some variations to explore:

  • Vegetarian Delight: Substitute chicken with black beans and add corn for a plant-based version.
  • Spicy Fiesta: Mix in diced poblano peppers for an extra kick.
  • Southwestern Twist: Incorporate roasted red peppers and cumin for a Southwestern flair.
  • Cheesy Broccoli: Add steamed broccoli to the layers for a veggie boost.

Storage and Make-Ahead Instructions

This casserole is perfect for meal prep! Follow these guidelines:

  • Refrigerate: Store leftovers in an airtight container for up to 3 days.
  • Freeze: You can freeze the assembled casserole (without baking) for up to 3 months. Just cover tightly with foil.
  • Reheat: When ready to enjoy, thaw overnight in the refrigerator, then bake at 350°F until heated through.

Frequently Asked Questions

  • Can I use other meats? Absolutely! Shredded pork or beef can work beautifully in this casserole.
  • Is this recipe gluten-free? Use gluten-free tortillas and soups to make it gluten-free.
  • How spicy is this dish? The heat level depends on the type of Rotel and jalapenos used; adjust to your taste.
  • Can I make this in a slow cooker? Yes! Layer the ingredients in a slow cooker on low for about 4-6 hours.
  • What sides pair well with this casserole? A simple green salad or cornbread makes a lovely accompaniment.
  • Is there a dairy-free version? Use dairy-free cheese and non-dairy soup alternatives for a dairy-free option.
  • How do I know when the casserole is done? It should be bubbly and golden brown on top.
  • Can I prepare this ahead of time? Yes! Assemble it the day before and bake just before serving.

Nutritional Tips and Dietary Adaptations

This King Ranch Casserole can be adapted to fit various dietary needs:

  • Low-carb: Substitute tortillas with zucchini slices or cauliflower.
  • High-protein: Increase the amount of chicken or add beans to boost protein content.
  • Reduced-fat: Opt for low-fat soups and cheese to cut down on calories without sacrificing flavor.

Essential Equipment Recommendations

Here’s what you’ll need to create this comforting dish:

  • Baking dish: A 9×13 inch dish is ideal for layering.
  • Mixing bowls: For combining ingredients and soaking tortillas.
  • Sauté pan: A medium-sized pan for cooking the vegetables.
  • Sharp knife: For chopping and slicing your ingredients effortlessly.

Serving Suggestions

When it comes to serving your King Ranch Casserole, consider:

  • Garnishing: Fresh cilantro or scallions on top adds a lovely pop of color.
  • Accompaniments: Serve with a dollop of sour cream and avocado slices for a creamy contrast.
  • Beverage pairings: A chilled glass of sweet tea or a light white wine complements the flavors beautifully.

Conclusion

The King Ranch Casserole is more than just a recipe; it’s a celebration of family, love, and the joy of sharing meals together. Whether you’re using up leftover turkey or simply craving a taste of home, this dish is sure to warm hearts and bellies alike. So, gather your loved ones, and let’s create a new tradition around the table. Happy cooking!

King Ranch Casserole (with leftover turkey)

Prep Time 15 minutes
Cook Time 40 minutes
Total Time 55 minutes
Servings 6 servings
Calories 650
A hearty and flavorful casserole perfect for using up leftover turkey, layered with tortillas, cheese, and a savory soup mixture.

Ingredients

Canned Soups and Broth

  • 1 can condensed cream of chicken soup
  • 1 can condensed cream of mushroom soup
  • 2 cups chicken broth
  • 1 can Rotel
  • 1 small can chopped green chiles
  • 1 package corn tortillas
  • 3 cups cooked, diced turkey (can substitute chicken)
  • 2 teaspoons Canola or vegetable oil
  • 1 medium onion (chopped)
  • 1 red bell pepper chopped
  • 1 jalapeno seeded and diced
  • 2 cloves garlic (pressed)
  • 8 ounces shredded cheddar cheese
  • 1.5 teaspoons chili powder

Instructions 

  • Preheat oven to 350°F (175°C).
  • Soak tortillas in broth, then cut into strips.
  • Saute onion and bell pepper in oil until soft, then add garlic and cook briefly.
  • Mix soups, Rotel, chiles, and jalapeno with 2 cups broth.
  • Layer tortillas, turkey, vegetables, and cheese in a dish, repeat layers, then pour soup mixture over.
  • Bake for 30-45 minutes, adding remaining cheese 10 minutes before done.

Notes

Use leftover turkey for a quick and delicious meal.
Calories: 650kcal
Cost: $15
Course: Main Course
Cuisine: American
Keyword: casserole, Turkey

Welcome to the Heart of Home Cooking

In the bustling kitchens of our lives, where aromas dance and flavors mingle, there’s a special place for turkey cutlets. Today, we’re diving into a recipe that not only delights the taste buds but also warms the heart: Skillet Herbed Turkey Cutlets with Pan Gravy. This dish brings together the simplicity of everyday ingredients with the warmth of cherished memories. Whether you’re preparing for a quick weeknight dinner or a festive gathering, this recipe embodies the essence of love and togetherness that cooking represents.

Let’s embark on this culinary journey, where every cutlet tells a story, and every bite is a reminder that food is more than sustenance—it’s a way to connect with those we cherish.

Why You’ll Love This Recipe

  • Quick and Easy: Ready in under 30 minutes, this recipe is perfect for busy nights when you want something wholesome without the fuss.
  • Rich, Flavorful Gravy: The pan gravy elevates the turkey cutlets, adding a delicious, savory depth that everyone will adore.
  • Family-Friendly: With familiar flavors and simple preparation, this dish is sure to please even the pickiest eaters at your table.
  • Versatile: Pair these turkey cutlets with a variety of sides—from creamy mashed potatoes to a fresh green salad—making it adaptable for any occasion.
  • Memorable Moments: Cooking together creates lasting memories. This recipe invites family and friends to gather around the table, sharing stories and laughter.

Detailed Ingredient Breakdown

Now, let’s talk about the star of the show: the ingredients. Each one plays a crucial role in creating a dish that is both comforting and delicious.


Professional Chef Knife Set

★ Recommended Kitchen Tool

Professional Chef Knife Set

Make this recipe even easier with a quality Professional Chef Knife Set — a must-have kitchen staple!


🛒 Check Price on Amazon →

As an Amazon Associate, we earn from qualifying purchases.
  • Turkey Breast Cutlets: 1 lb of turkey breast cutlets (¼–½ inch thick) are the foundation of our meal. They are lean, quick-cooking, and perfect for absorbing flavors.
  • Kosher Salt and Black Pepper: Seasoning is key—1 teaspoon of kosher salt and ½ teaspoon of black pepper enhance the natural flavors of the turkey.
  • Olive Oil: 1 tablespoon of olive oil for searing the cutlets adds a lovely richness and helps achieve a golden crust.
  • Butter: Using 2 tablespoons of butter in the gravy adds a silky texture and depth of flavor.
  • Flour: 2 tablespoons of flour thicken the gravy, making it luxuriously smooth.
  • Chicken or Turkey Broth: 1½ cups of low-sodium broth is essential for the gravy, providing moisture and flavor without overwhelming saltiness.
  • Rosemary: ½ teaspoon of chopped rosemary infuses the dish with a lovely herbal note, complementing the turkey beautifully.
  • Dijon Mustard: ½ teaspoon of Dijon adds a slight tang that brightens the overall flavor profile.

Step-by-Step Directions

Close-up view of tender turkey cutlets with a savory herbed gravy.

Follow these simple steps to create your skillet herbed turkey cutlets:

  • Season the turkey cutlets with kosher salt and black pepper; pat dry to ensure a good sear.
  • Heat a large skillet over medium-high heat and add olive oil. Cook the cutlets for 2–3 minutes on each side, or until they reach an internal temperature of 165°F. Transfer them to a plate and keep warm.
  • Reduce the heat to medium and add butter to the skillet. Whisk in flour for about 1 minute until it forms a roux.
  • Slowly add warm broth while whisking continuously to avoid lumps. Stir in rosemary and Dijon, then let it simmer for 2–3 minutes until the gravy is glossy.
  • Spoon the gravy over the turkey cutlets and serve warm, allowing the flavors to meld beautifully.

Pro Tips for Perfect Turkey Cutlets

  • Resting Time: Allow the turkey cutlets to rest for a few minutes after cooking; this helps retain their juices and keeps them tender.
  • Use a Meat Thermometer: To ensure accuracy, use an instant-read thermometer to avoid overcooking.
  • Customize Your Seasonings: Feel free to experiment with herbs like thyme or sage for different flavor profiles.
  • Gravy Consistency: If you prefer a thinner gravy, add a bit more broth when whisking in; for a thicker gravy, let it simmer longer.
  • Make it Ahead: You can prepare the gravy in advance and reheat it just before serving.
  • Leftover Ideas: Leftover turkey cutlets make a great sandwich filling or can be added to salads for extra protein.
  • Pairing Suggestions: Serve with roasted vegetables or creamy polenta to create a balanced and satisfying meal.
  • Batch Cooking: This recipe scales up easily—double the ingredients for family gatherings or meal prep.

Common Mistakes and Troubleshooting

Even the best of cooks can run into a few hiccups. Here’s how to avoid some common pitfalls:

  • Dry Cutlets: Overcooking is the main culprit. Ensure your cooking time is accurate and use a thermometer to check.
  • Lumpy Gravy: If your gravy becomes lumpy, continue whisking vigorously while adding the broth to help smooth it out.
  • Too Salty: Opt for low-sodium broth to control the saltiness of your gravy, and adjust seasoning to taste.
  • Sticking Cutlets: Ensure your skillet is properly heated and greased before adding the turkey to prevent sticking.

Variations to Explore

One of the beauties of cooking is the ability to adapt and change recipes. Here are a few variations to try:

  • Herb Variations: Swap rosemary for fresh thyme or oregano for a different flavor twist.
  • Vegetable Additions: Sauté mushrooms or spinach in the skillet before making the gravy for added nutrition and flavor.
  • Gluten-Free Option: Substitute all-purpose flour with cornstarch or a gluten-free flour blend for a gluten-free gravy.
  • Different Proteins: Try this recipe with chicken cutlets or pork chops for variety.

Storage and Make-Ahead Instructions

Planning ahead? Here’s how to store and reheat your delicious turkey cutlets:

  • Storing Leftovers: Keep any leftover turkey cutlets and gravy in an airtight container in the refrigerator for up to 3 days.
  • Freezing: You can freeze cooked turkey cutlets for up to 2 months. Thaw overnight in the refrigerator before reheating.
  • Reheating: Gently reheat in a skillet over low heat, adding a splash of broth to prevent drying out.

Nutritional Tips and Dietary Adaptations

This recipe is not only delicious but can also be adapted to meet various dietary needs:

  • Low-Calorie Version: Use less oil and butter, and opt for a leaner cut of turkey.
  • Keto-Friendly: Serve without the gravy or use a keto-friendly thickener for the sauce.
  • Paleo-Friendly: Replace flour with almond flour or coconut flour for a paleo twist.

Equipment Recommendations

To prepare this dish, you’ll need a few essential tools:

  • Skillet: A large, heavy-bottom skillet is ideal for even cooking and browning.
  • Instant-Read Thermometer: Ensures your turkey is cooked perfectly every time.
  • Whisk: A good whisk is essential for creating a smooth gravy.

Serving Suggestions

Now that you’ve prepared your skillet herbed turkey cutlets, here are some delightful ways to serve them:

  • Classic Pairing: Serve alongside creamy mashed potatoes and steamed green beans for a comforting meal.
  • Fresh Salad: A light arugula salad with lemon vinaigrette complements the richness of the turkey.
  • Festive Touch: Add cranberry relish on the side for a pop of color and tartness, perfect for holiday gatherings.

Frequently Asked Questions

Let’s address some common queries about this recipe:

  • Can I use frozen turkey cutlets? Yes, just ensure they are fully thawed before cooking.
  • What can I serve with turkey cutlets? Pair with potatoes, rice, or roasted veggies for a complete meal.
  • How do I know when the turkey is done? An internal temperature of 165°F indicates it’s safe to eat.
  • Can I make the gravy ahead of time? Yes, the gravy can be made in advance and reheated.
  • What if my gravy is too thick? Simply whisk in a bit more broth to reach your desired consistency.
  • Can I double this recipe? Absolutely! Just scale up the ingredients accordingly.
  • How do I store leftovers? Keep in an airtight container in the fridge for up to 3 days.
  • Is this recipe suitable for meal prep? Yes, these cutlets reheat well, making them perfect for meal prep!

In the end, cooking is a celebration of flavors, memories, and love. With these skillet herbed turkey cutlets, you’re not just preparing a meal—you’re crafting moments that will be cherished long after the last bite. Gather your loved ones, share the joy of cooking, and let this recipe become part of your family’s legacy. Happy cooking!

Skillet Herbed Turkey Cutlets with Pan Gravy

Prep Time 10 minutes
Cook Time 15 minutes
Total Time 25 minutes
Servings 4 servings
Calories 350
A quick and flavorful dish featuring tender turkey cutlets topped with a rich, herbed gravy.

Ingredients

Main

  • 1 lb turkey breast cutlets (¼–½ inch thick)
  • 1 teaspoon kosher salt
  • ½ teaspoon black pepper
  • 1 tablespoon olive oil
  • 2 tablespoon butter
  • 2 tablespoon flour
  • cups low-sodium chicken/turkey broth
  • ½ teaspoon chopped rosemary
  • ½ teaspoon Dijon

Instructions 

  • Season turkey with salt and pepper; pat dry.
  • Heat skillet with olive oil; cook cutlets 2–3 minutes per side until 165°F, then transfer to plate.
  • Add butter; whisk in flour for 1 minute to make gravy base.
  • Gradually whisk in warm broth; stir in rosemary and Dijon; simmer 2–3 minutes until glossy.

Notes

Ensure turkey reaches 165°F for safety.
Calories: 350kcal
Cost: $15
Course: Main Course
Cuisine: American
Keyword: Turkey

A Comforting Twist on Holiday Leftovers

As the holiday season wraps up, our kitchens are often filled with remnants of festive feasts, from succulent turkey to savory stuffing. If you find yourself staring down a mountain of leftover stuffing, fear not! This recipe for **Crispy Leftover Stuffing Cakes** is your golden ticket to transforming those leftovers into a delightful dish that brings warmth, nostalgia, and community right back to your table. These cakes are more than a recipe; they are a way to celebrate the love and joy of family gatherings, ensuring that every bite is filled with heartfelt memories.

Why You’ll Love This Recipe

This isn’t just another way to use up leftover stuffing; it’s a heartfelt creation that will delight your family and friends. Here are five reasons to fall in love with these crispy cakes:

  • Comfort Food Redefined: Each bite echoes the warmth of family gatherings, reminding us of shared meals and cherished moments.
  • Simple and Quick: With just a handful of ingredients and minimal prep time, you can create a dish that’s both delicious and easy to prepare.
  • Versatile Pairings: Serve these stuffing cakes with turkey gravy, a fresh salad, or even a dollop of cranberry sauce for a delightful contrast.
  • Great for All Diets: Easily adaptable for various dietary needs, these cakes can be made vegetarian or gluten-free with simple substitutions.
  • Waste Not, Want Not: This recipe is the perfect way to avoid food waste, turning what could be discarded into a beloved dish.

Ingredient Breakdown

Let’s dive into the ingredients that will bring your leftover stuffing to life. Each component is crucial in creating the perfect texture and flavor.


5-Speed Electric Hand Mixer

★ Recommended Kitchen Tool

5-Speed Electric Hand Mixer

Make this recipe even easier with a quality 5-Speed Electric Hand Mixer — a must-have kitchen staple!


🛒 Check Price on Amazon →

As an Amazon Associate, we earn from qualifying purchases.
  • 3 cups leftover stuffing: Whether homemade or boxed (like Stove Top), this is the star of the show. Aim for a consistency similar to a boxed mix to help the cakes hold together.
  • 1 egg, beaten: This acts as a binder, ensuring your cakes maintain their shape while frying.
  • 2 tablespoons whole milk or cream: Adds moisture; you can substitute with plant-based milk if needed.
  • Salt and pepper to taste: Enhance the flavor profile of your cakes.
  • 4 tablespoons butter: For frying—this adds a rich flavor and helps achieve that crispy texture.
  • Leftover Turkey Gravy: Optional, but highly recommended for serving, adding an extra layer of comfort.

How to Make Crispy Leftover Stuffing Cakes

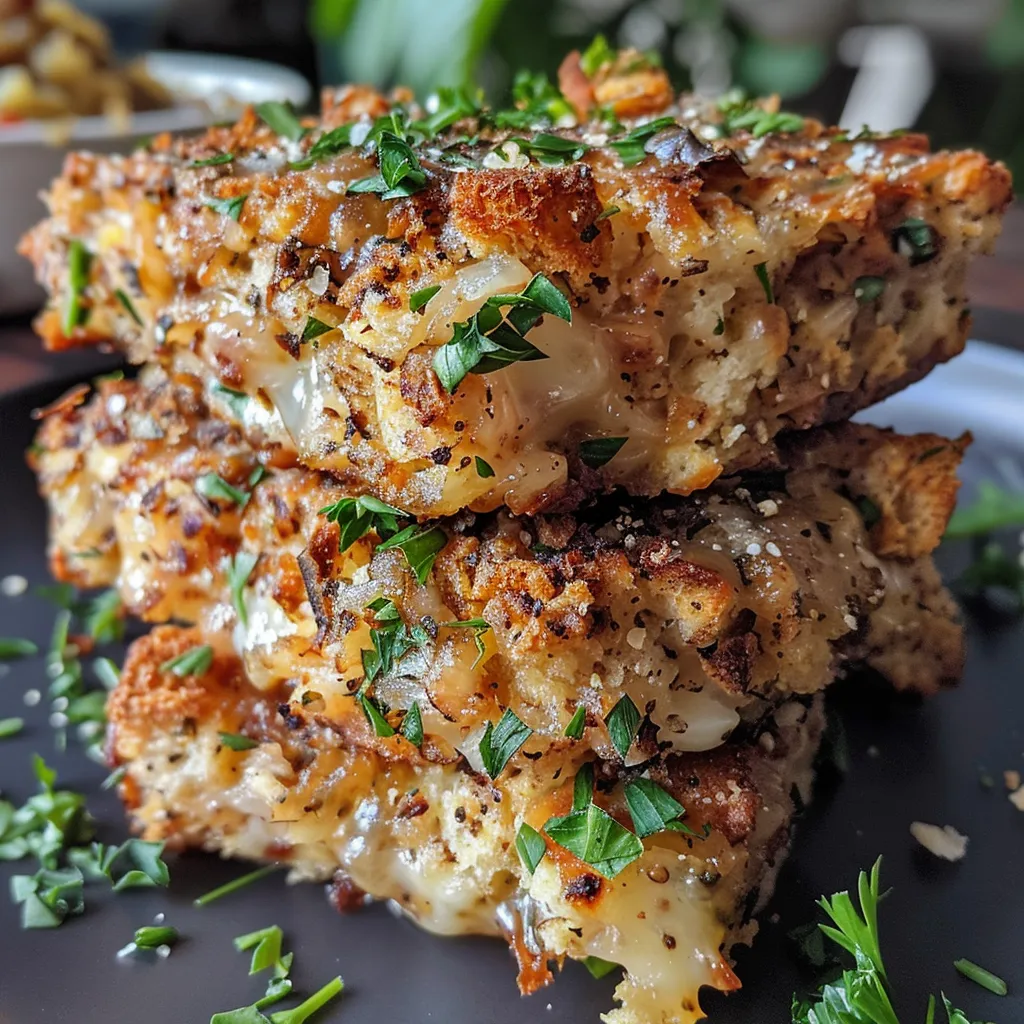
Side view of delicious stuffing cakes with a crispy exterior and moist interior.

Now, let’s get cooking! Follow these simple steps to create your delicious stuffing cakes.

Step-by-Step Instructions

  1. Add the leftover stuffing to a bowl. If your stuffing has larger pieces, you may pulse it in a food processor for a finer texture. Adjust with extra salt and pepper as needed.
  2. Mix in the beaten egg and cream until thoroughly combined.
  3. Form the mixture into cakes, about the size of crab cakes. You should yield 4-5 cakes from the mixture.
  4. Chill the formed cakes in the refrigerator for at least an hour, or up to overnight. This helps them firm up.
  5. In a skillet over medium heat, melt the butter. Fry the cakes for about 4-5 minutes on each side, or until they are golden brown and crispy.
  6. Serve warm with turkey gravy or your favorite sauce for dipping.

Pro Tips for Perfect Stuffing Cakes

To ensure your **leftover stuffing cakes** turn out perfectly, consider these expert tips:

  • Right Consistency: Ensure your stuffing is not too dry or too wet. If it’s too loose, add more stuffing; if it’s too firm, a splash of milk can help.
  • Chill Time: Don’t skip the chilling step! It helps the cakes hold their shape while frying.
  • Fry in Batches: Avoid overcrowding the pan; fry in batches for even cooking and crispiness.
  • Use Enough Butter: For that perfect golden crust, ensure the skillet has enough butter.
  • Flipping Technique: Use a spatula to gently flip the cakes to prevent breaking.
  • Experiment with Herbs: Add fresh herbs like parsley or thyme to elevate the flavor.
  • Leftover Add-ins: Feel free to incorporate leftover meats or vegetables into the mixture for added flavor.
  • Texture Check: If your mixture feels too dry, add a bit more milk or egg; if it feels too wet, add extra stuffing.

Common Mistakes and Troubleshooting

Even the best cooks stumble sometimes! Here are some common pitfalls and how to avoid them:

  • Cakes Falling Apart: If your cakes crumble while frying, they may need more binding (like an extra egg) or chilling time.
  • Too Much Grease: If the cakes are greasy, reduce the amount of butter in the skillet or ensure the heat is properly regulated.
  • Uneven Cooking: Make sure the skillet is heated evenly; adjust the temperature as necessary.
  • Flavor Lacking: Taste your mixture before frying; adjust seasoning accordingly.

Delicious Variations

Get creative with your stuffing cakes! Here are some fun variations to try:

  • Cheesy Delight: Add shredded cheese into the mixture for a gooey center.
  • Herbed Spinach: Mix in cooked spinach and a bit of garlic for a green twist.
  • Spicy Kick: Incorporate diced jalapeños or hot sauce for a spicier version.
  • Sweet and Savory: Add a touch of cranberry sauce or apple slices to the mixture for a sweet contrast.

Storage and Make-Ahead Instructions

If you find yourself with extra cakes, here’s how to store them:

  • Refrigeration: Store leftover stuffing cakes in an airtight container in the refrigerator for up to 3 days.
  • Freezing: For longer storage, freeze the uncooked cakes on a baking sheet, then transfer to a freezer-safe bag. They can be kept for up to 3 months.
  • Reheating: Reheat in a skillet or oven to restore crispiness—microwaving may make them soggy.

Comprehensive FAQ

Here are some common questions about making leftover stuffing cakes:

  • Can I make stuffing cakes without leftover stuffing? Yes! You can use fresh stuffing, or even create a mixture from scratch.
  • How can I make stuffing cakes vegetarian? Use vegetable broth and omit any meat from the stuffing.
  • Can I bake instead of fry? Yes, bake at 400°F for about 20 minutes, flipping halfway through.
  • What can I serve with stuffing cakes? They pair well with gravy, cranberry sauce, or a fresh salad.
  • How long can I store these cakes? They can be stored in the refrigerator for up to 3 days or frozen for up to 3 months.
  • Can I add additional vegetables? Absolutely! Carrots, peas, or any leftover veggies work great.
  • What is the best way to reheat them? Reheat in a skillet for best results, ensuring they regain their crispness.
  • Can I double the recipe? Yes, simply double the ingredients and follow the same steps for larger batches.

Nutritional Tips and Dietary Adaptations

These stuffing cakes can be tailored to fit various dietary needs:

  • Gluten-Free: Use gluten-free stuffing and ensure all ingredients are certified gluten-free.
  • Dairy-Free: Substitute the butter and milk with plant-based alternatives.
  • Low Carb: Use cauliflower stuffing or a low-carb bread for a healthier option.

Equipment Recommendations

To make your cooking experience seamless, here are some essential tools:

  • Skillet: A heavy-bottomed skillet will ensure even cooking.
  • Spatula: A sturdy spatula helps in flipping the cakes without breaking them.
  • Mixing Bowl: A large bowl for mixing your ingredients is a must.
  • Food Processor: Optional, but helpful for achieving the right texture in your stuffing.

Serving Suggestions

When it comes to serving your crispy leftover stuffing cakes, consider these delightful options:

  • Turkey Gravy: Serve with a generous ladle of warm turkey gravy for that classic touch.
  • Cranberry Sauce: A side of sweet cranberry sauce adds a delightful contrast.
  • Fresh Greens: Pair with a light salad to balance the richness of the cakes.

Conclusion: A Hug in Every Bite

With this recipe for **Crispy Leftover Stuffing Cakes**, you’re not just cooking; you’re creating memories. Each bite is a reminder of the love shared around the dinner table, of laughter echoing through the kitchen, and of traditions that linger long after the meal is over. So, gather your family, whip up these delightful cakes, and relish in the comfort they bring. Cooking is not just about the food; it’s about the heart behind it. Happy cooking, and may your kitchen always be filled with love and laughter!

Leftover Stuffing Cakes

Prep Time 10 minutes
Cook Time 15 minutes
Total Time 25 minutes
Servings 4 cakes
Calories 250
Transform your leftover stuffing into crispy, savory cakes served with gravy for a delicious twist on holiday leftovers.

Ingredients

Main

  • 3 cups leftover stuffing (can use boxed stuffing like Stove Top)
  • 1 egg egg, beaten
  • 2 tablespoons whole milk or cream
  • to taste Salt and pepper Salt and pepper
  • 4 tablespoons butter
  • Leftover Turkey Gravy or make our Brown Gravy Recipe, no drippings needed! Turkey Gravy or Brown Gravy

Instructions 

  • Mix leftover stuffing with beaten egg and milk until combined. Adjust salt and pepper as needed.
  • Form the mixture into 4-5 cakes and chill for at least 1 hour.
  • Heat butter in a skillet over medium heat. Fry the cakes until crispy and heated through, about 3-4 minutes per side.
  • Serve the cakes warm with gravy on the side.

Notes

Chilling the cakes helps them hold together during frying.
Calories: 250kcal
Cost: $10
Course: Appetizer
Cuisine: American
Keyword: Cakes, Leftover, stuffing

Indulge in the Warmth of Gingerbread Hot Chocolate

As the chill of winter settles in, there’s nothing quite like wrapping your hands around a steaming mug of hot chocolate. Imagine sipping a cozy cup of gingerbread hot chocolate, where the rich flavors of chocolate intertwine with the warm spices of gingerbread, creating a delightful drink that warms not just your body, but your soul. This recipe is more than just a drink; it’s a nostalgic journey back to cherished memories spent around the family table. Every sip is a reminder of love, warmth, and the joy of togetherness. Let’s dive into this comforting concoction and discover why it’s the perfect treat for your cozy evenings.

Why You’ll Love This Recipe

  • Heartwarming Experience: Each cup is infused with love, taking you back to cozy family gatherings during the holidays.
  • Delightfully Creamy: The cashew milk gives the drink a creamy texture, making each sip feel indulgent without guilt.
  • Spiced to Perfection: The blend of spices like cinnamon and ginger creates a warm embrace that dances on your taste buds.
  • Customizable Sweetness: Adjust the sweetness to your liking using honey or maple syrup, making it accessible for everyone.
  • Nutritious Ingredients: This recipe harnesses the power of cacao, which is rich in antioxidants, making your indulgence a bit healthier.

Ingredients Breakdown

Creating the perfect gingerbread hot chocolate is simple, and each ingredient plays a role in crafting a delightful flavor experience. Here’s what you’ll need:

  • 1 cup cashew milk (or soy milk): A creamy base that adds richness without dairy. You can substitute with almond or oat milk if preferred.
  • 1/2 teaspoon vanilla extract: This adds a lovely aromatic sweetness that complements the spices.
  • 2 tablespoons cacao powder: The star of the show, providing that deep chocolate flavor. Feel free to use raw cacao for an even richer taste.
  • 1 teaspoon blackstrap molasses: This adds a depth of flavor and a hint of sweetness, reminiscent of traditional gingerbread.
  • 1 teaspoon Ceylon cinnamon: A warm spice that enhances the cozy aspect of this drink.
  • 1/2 teaspoon ginger powder: For that unmistakable gingerbread flavor.
  • 1/4 teaspoon nutmeg: A pinch of nutmeg adds a warm undertone.
  • Pinch of ground cloves: To round out the spice profile, giving a slight kick.
  • Honey or maple syrup to taste: Sweeten to your preference.
  • Whipped coconut cream: For topping, adding a luxurious finish.
  • Cacao beans or dark chocolate (for dusting): Optional, but a delightful touch for presentation.

Pro Tips for Perfecting Your Drink

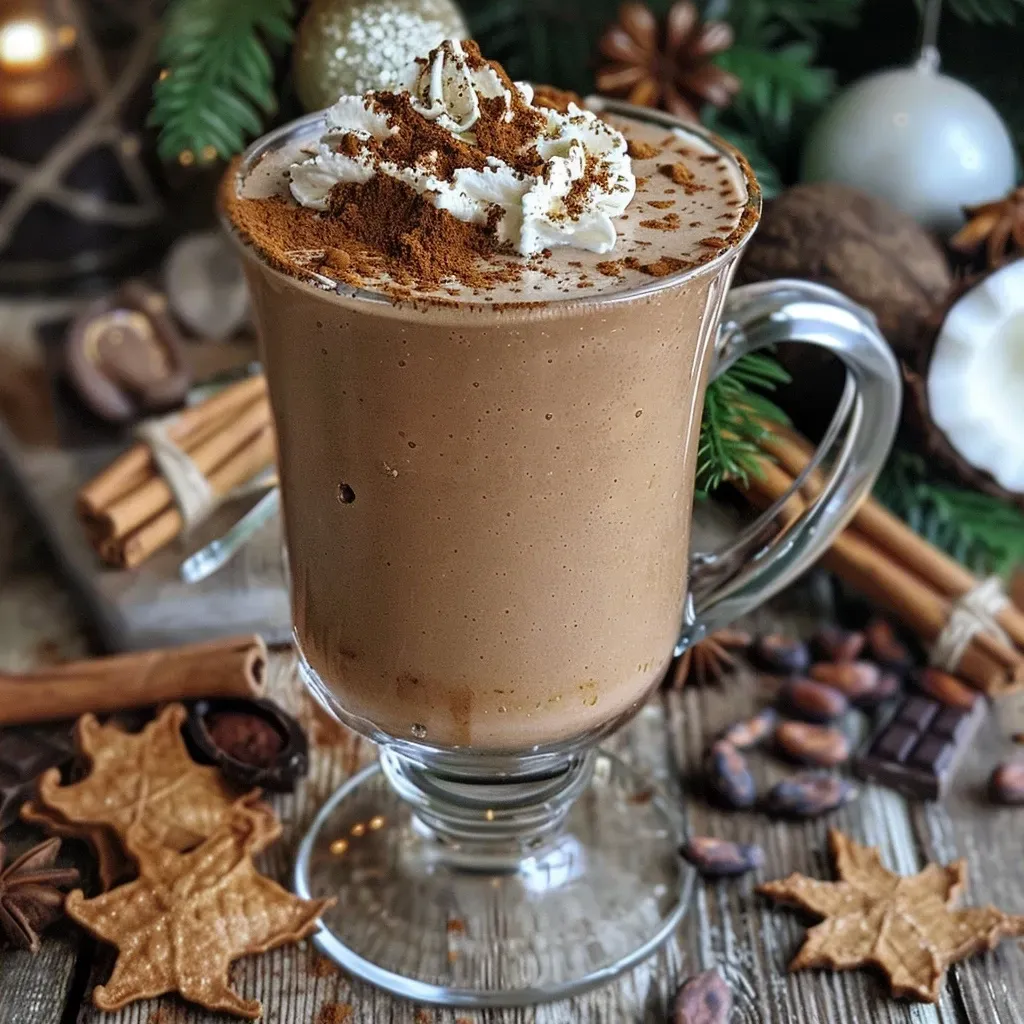
Side view of a creamy Gingerbread Hot Chocolate in a clear mug with cacao dusting.
  • Use Fresh Spices: Freshly ground spices deliver a more vibrant flavor compared to pre-ground. If you can, grind your own cinnamon and ginger.
  • Don’t Overheat: Heat the milk gently to prevent scalding. You want it steaming, not boiling, to maintain the creamy texture.
  • Adjust Sweetness Gradually: Start with a small amount of sweetener and add more if needed, allowing the natural sweetness of the spices to shine through.
  • Experiment with Toppings: Feel free to top with crushed cookies, a sprinkle of nutmeg, or even a drizzle of caramel for a twist.
  • Make It Vegan: This recipe is naturally vegan, but ensure your toppings align with your dietary preferences.
  • Chill the Milk First: Chilling your milk before heating can help it froth up nicely if you’re blending it.
  • Use High-Quality Chocolate: For the best flavor, opt for high-quality dark chocolate or cacao powder.
  • Storage Tips: Leftover hot chocolate can be stored in the fridge for up to three days. Reheat gently on the stove or in the microwave.

Common Mistakes and Troubleshooting

Even the best cooks can run into issues. Here are some common mistakes to avoid:


Silicone Baking Cups Set

★ Recommended Kitchen Tool

Silicone Baking Cups Set

Make this recipe even easier with a quality Silicone Baking Cups Set — a must-have kitchen staple!


🛒 Check Price on Amazon →

As an Amazon Associate, we earn from qualifying purchases.
  • Boiling the Milk: Overheating can lead to a grainy texture. Always heat slowly.
  • Too Much Sweetness: If your drink turns out too sweet, balance it with an extra pinch of salt or a splash of unsweetened milk.
  • Not Enough Spice: Adjust your spices to your taste. If it’s lacking warmth, add a bit more cinnamon or ginger.
  • Skipping the Toppings: Toppings add texture and flavor. Don’t skip them!

Delicious Variations to Try

Once you’ve mastered the classic, why not explore some unique twists?

  • Pumpkin Spice Hot Chocolate: Add 1/4 cup of pumpkin puree and a pinch of pumpkin pie spice for a fall-inspired drink.
  • Mint Gingerbread Hot Chocolate: Incorporate a few drops of peppermint extract for a refreshing twist.
  • Spicy Gingerbread Hot Chocolate: Add a dash of cayenne pepper for a warm kick that complements the spices.
  • Marshmallow-Topped Hot Chocolate: Top with vegan marshmallows for a classic touch.

How to Store and Make Ahead

This gingerbread hot chocolate can easily be made ahead of time. Prepare the base and store it in the refrigerator. When you’re ready to enjoy, simply reheat on the stove.

  • Store in the Fridge: Keep in an airtight container for up to three days.
  • Freeze for Later: You can also freeze the hot chocolate base in ice cube trays. Pop them into a blender with a bit of milk when you’re ready!

Frequently Asked Questions

  • Can I use regular milk instead of cashew milk? Absolutely! Any milk will work, but cashew milk keeps it creamy and dairy-free.
  • How can I make this hot chocolate richer? Try adding more cacao or some dark chocolate shavings for an extra indulgent treat.
  • Is this recipe gluten-free? Yes, it is naturally gluten-free as all ingredients used are gluten-free.
  • Can I use other sweeteners? Yes, agave syrup or coconut sugar are great alternatives.
  • What if I don’t have blackstrap molasses? You can substitute it with regular molasses or omit it altogether; just add a little extra sweetness.
  • Can I make this recipe in a slow cooker? Yes! Combine all ingredients in a slow cooker on low heat for 2-3 hours.
  • Is it possible to double the recipe? Yes, simply double all the ingredients and follow the same instructions.
  • How do I make this hot chocolate less sweet? Reduce the amount of sweetener or use unsweetened cocoa powder.

Nutritional Tips and Dietary Adaptations

When making your gingerbread hot chocolate, consider these nutritional insights:

  • Antioxidants: Raw cacao is rich in antioxidants, providing health benefits while indulging.
  • Lower Calorie Options: Use unsweetened almond milk and skip the sweeteners for a lower-calorie version.
  • Protein Boost: Add a scoop of protein powder for a filling post-workout treat.

Essential Equipment for Your Hot Chocolate

To make your gingerbread hot chocolate, you won’t need much:

  • Medium saucepan: For heating the milk and combining the ingredients.
  • Whisk: To mix everything smoothly and prevent lumps.
  • Measuring cups and spoons: For accuracy in your ingredients.
  • Mugs: To serve your delightful drink in style.

Serving Suggestions

Serve your gingerbread hot chocolate in festive mugs, topped with whipped coconut cream and a sprinkle of cocoa powder. Pair it with gingerbread cookies, biscotti, or a slice of your favorite cake for a truly indulgent experience. This drink is perfect for cozy movie nights, holiday gatherings, or simply savoring on a chilly evening.

As you prepare your gingerbread hot chocolate, remember that cooking, like life, is about the stories we create and the joy we share. May this recipe bring you warmth, comfort, and sweet memories around your family table.

Gingerbread Hot Chocolate

Prep Time 5 minutes
Cook Time 10 minutes
Total Time 15 minutes
Servings 2 cups
Calories 180
A cozy, spiced hot chocolate infused with gingerbread flavors, perfect for chilly days.

Ingredients

Dairy Alternatives

  • 1 cup cashew milk (or soy milk)
  • 0.5 teaspoon vanilla extract
  • 2 tablespoons cacao powder
  • 1 teaspoon blackstrap molasses
  • 1 teaspoon Ceylon cinnamon
  • 0.5 teaspoon ginger powder
  • 0.25 teaspoon nutmeg
  • Pinch ground cloves
  • to taste Honey or maple syrup (optional)
  • as needed Whipped coconut cream
  • a handful Cacao beans
  • for dusting Cocoa Powder or dark chocolate

Instructions 

  • Heat the milk with vanilla in a saucepan over medium heat.
  • Add cocoa powder, molasses, and spices; stir until fully dissolved and warmed.
  • Remove from heat, sweeten with honey or maple syrup if desired, and pour into mugs.
  • Top with whipped coconut cream and dust with cocoa powder or crushed cacao beans.

Notes

Adjust sweetness to taste and enjoy warm.
Calories: 180kcal
Cost: $12
Course: Beverage
Cuisine: fusion
Keyword: gingerbread, hot chocolate

Gather ‘Round: A Heartwarming Introduction to Low Histamine Turkey Skewers

Welcome to a cozy corner of culinary joy where family traditions and heartfelt recipes come together! Today, we’re diving into the delightful world of low histamine turkey skewers, a dish that not only celebrates flavor but also caters to those managing histamine intolerance. This recipe is a beautiful reminder that cooking is an act of love, a way to gather your dear ones around the table, sharing stories and laughter over a warm meal. Here, we combine tender turkey breast with roasted sweet potatoes and a creamy dip, crafting a dish that’s not just nourishing but also rich in memories and comfort.

Why You’ll Love This Recipe

There’s so much to adore about these low histamine turkey skewers! Here are just a few reasons why this dish deserves a spot on your dining table:

  • Quick and Simple: Ready in under an hour, this recipe is perfect for busy weeknights or impromptu gatherings.
  • Flavorful Marination: The blend of olive oil, maple syrup, and herbs creates a mouthwatering flavor that your family will crave.
  • Health-Conscious Dish: Packed with lean protein and nutritious sweet potatoes, this meal promotes well-being without sacrificing taste.
  • Versatile Ingredients: Easily swap ingredients based on what’s in your pantry or your dietary needs.
  • Perfect for Sharing: The skewers make it fun and easy to serve, inviting everyone to dig in and enjoy together.

Ingredients Breakdown: What You Need and Substitutions

Let’s gather our ingredients to create this comforting meal. Below is a detailed list along with possible substitutions to suit your preferences:


5-Speed Electric Hand Mixer

★ Recommended Kitchen Tool

5-Speed Electric Hand Mixer

Make this recipe even easier with a quality 5-Speed Electric Hand Mixer — a must-have kitchen staple!


🛒 Check Price on Amazon →

As an Amazon Associate, we earn from qualifying purchases.
  • 500 g fresh turkey breast: You can use chicken breast as a substitute if you prefer.
  • 1 tbsp olive oil: Avocado oil works well too.
  • 1 tbsp maple syrup (if tolerated): Honey can be used as an alternative for sweetness.
  • 1 tsp dried thyme: Fresh thyme is a fantastic option if you have it on hand.
  • 1 tsp dried oregano: Basil or Italian seasoning can also add unique flavors.
  • ½ tsp sweet paprika (if tolerated): Smoked paprika gives a delicious depth, but feel free to omit if sensitive.
  • Garlic powder (optional, if tolerated): Fresh minced garlic is a great substitute if you can handle it.
  • Sea salt: Use Himalayan salt for a touch of mineral goodness.
  • Black pepper (optional, if tolerated): Consider using a pinch of cayenne for a spicy kick instead.
  • 1 large sweet potato: Any root vegetable, like carrots or butternut squash, can be roasted as a delightful alternative.
  • 3 tbsp unsweetened coconut yogurt: Greek yogurt or avocado can serve as creamy substitutes.
  • 2 cooked egg yolks (if tolerated): Omit if you prefer, or use a flaxseed meal mixture for a vegan option.
  • 1 tsp chopped dill: Fresh parsley or chives are lovely replacements.
  • Mixed greens: Any salad greens of your choice will brighten up the dish.
  • Pumpkin seeds (optional): Sunflower seeds or chopped nuts can add a delightful crunch.

Steps to Create Your Low Histamine Turkey Skewers

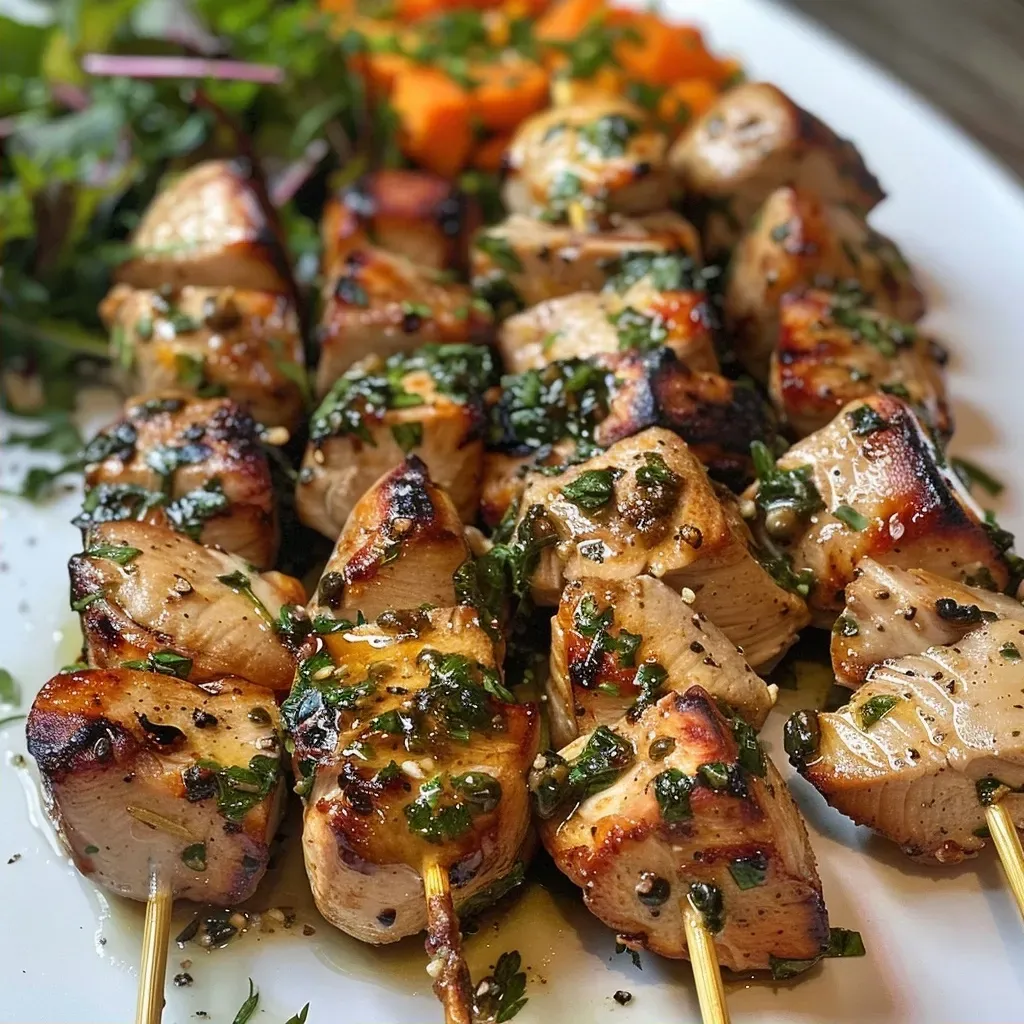
Close-up of low histamine turkey skewers on a plate, with a side of roasted sweet potato and coconut yogurt dip.

Let’s roll up our sleeves and get cooking! Here’s how to bring this dish to life:

  1. Cut the turkey into large cubes.
  2. In a bowl, mix the olive oil, maple syrup, thyme, oregano, salt, and any optional spices. Coat the turkey cubes in this marinade and let them rest for 20–30 minutes.
  3. Thread the marinated turkey onto skewers, ensuring they’re well spaced for even cooking.
  4. Cook the skewers in an air fryer or oven preheated to 390°F (200°C) for 12–15 minutes, turning halfway through for even browning.
  5. While the turkey cooks, slice the sweet potato into wedges. Toss them with olive oil and your favorite seasonings, then roast at 400°F (200°C) for 25–30 minutes until crispy and golden.
  6. For the creamy dip, mash the cooked egg yolks with the coconut yogurt until smooth, then stir in dill, parsley, salt, and garlic powder (if tolerated). Add a splash of water if needed to achieve a creamy consistency.
  7. Serve your turkey skewers with the roasted sweet potato, creamy dip, and a side of fresh mixed greens.

Pro Tips for Perfect Skewers

To elevate your cooking experience, consider these expert tips:

  • Marinate Longer: For deeper flavor, marinate the turkey overnight if time permits.
  • Uniform Cuts: Ensure all turkey pieces are similar in size for even cooking.
  • Wooden Skewers: Soak wooden skewers in water for 30 minutes to prevent burning while grilling.
  • Experiment with Herbs: Don’t shy away from using different herbs to customize the flavor profile.
  • Check Temperature: Use a meat thermometer to ensure the turkey reaches an internal temperature of 165°F (75°C).
  • Rest the Meat: Let the skewers rest for a few minutes before serving to retain juices.
  • Make it a Meal: Pair these skewers with a quinoa salad for a balanced meal.
  • Kid-Friendly Fun: Let kids help thread the skewers for a fun family cooking activity!

Avoiding Common Mistakes

Here are some pitfalls to watch out for when making your low histamine turkey skewers:

  • Overcrowding the Pan: Avoid placing too many skewers in the air fryer at once to ensure even cooking.
  • Skipping the Marinade: Don’t skip marinating; it’s crucial for flavor and tenderness.
  • Not Preheating: Always preheat your air fryer or oven for the best results.
  • Using High Histamine Ingredients: Be mindful of ingredient choices to maintain the low histamine quality of the dish.

Variations on a Classic

Here are some variations to keep things interesting:

  • Herb-Infused Skewers: Add fresh herbs like rosemary or basil for an aromatic twist.
  • Sweet and Spicy: Incorporate a bit of chili powder into the marinade for a spicy kick.
  • Veggie Skewers: Add bell peppers, zucchini, or mushrooms alongside the turkey for extra veggies.
  • Different Dips: Swap the coconut yogurt dip for a tahini sauce or guacamole for a different flavor experience.

Storage and Make-Ahead Instructions

If you’re prepping in advance, here’s how to store your skewers:

  • Refrigerate: Store leftover skewers in an airtight container in the fridge for up to 3 days.
  • Freeze: Uncooked marinated turkey can be frozen for up to 2 months. Thaw overnight in the fridge before cooking.
  • Make-Ahead Dip: Prepare the creamy dip a day ahead and store it in the refrigerator to let the flavors meld.

Frequently Asked Questions

Here are some common queries regarding low histamine turkey skewers:

  • Can I use frozen turkey? Yes, just ensure it’s fully thawed and well-drained before marinating.
  • Is this recipe suitable for kids? Absolutely! It’s a great way to introduce them to healthy eating.
  • Can I make this recipe vegan? Replace turkey with firm tofu or tempeh and skip the egg yolks in the dip.
  • What can I serve with these skewers? Quinoa, brown rice, or a fresh salad would complement the meal beautifully.
  • How do I know if the turkey is cooked? Use a meat thermometer to check for an internal temperature of 165°F (75°C).
  • What’s the best way to reheat leftovers? Gently reheat in the oven or air fryer to keep them crispy.
  • Can I use other meats? Yes, chicken or pork can also be delicious in this recipe.
  • How do I make the dip dairy-free? The coconut yogurt is already dairy-free, making this dip perfect for various dietary needs!

Nutrition Tips and Dietary Adaptations

Cooking with health in mind? Here are some dietary tips:

  • Low Carb Option: Swap sweet potatoes for zucchini noodles to cut carbs.
  • Boost Fiber: Add additional vegetables to your skewers for extra fiber.
  • Protein Power: For a protein boost, include chickpeas in your salad side.

Recommended Cooking Equipment

To whip up these delightful skewers, here’s a list of handy tools:

  • Air Fryer: For quick and healthy cooking with less oil.
  • Skewers: Metal skewers are reusable and great for grilling.
  • Mixing Bowls: A good set of mixing bowls will make marinating easy.
  • Meat Thermometer: Essential for checking your turkey’s doneness.

Serving Suggestions for Family Gatherings

When it comes to serving, these skewers shine! Here are some ideas:

  • Family Style: Serve skewers on a large platter with the dip in the center for a communal feel.
  • As Part of a Buffet: Include these skewers in a buffet spread alongside salads, grains, and roasted vegetables.
  • Picnic Ready: Pack them up for a picnic, paired with fresh fruit and a light salad.

Conclusion: Bringing Love to the Table

Cooking is an expression of love, and this recipe for low histamine turkey skewers beautifully embodies that sentiment. As you gather around the table with your family and friends, remember that each bite carries not just flavor but also the warmth of shared memories. Enjoy this heartwarming meal, and may it inspire you to create more moments of joy and connection in your kitchen!

Low Histamine Turkey Skewers with Roasted Sweet Potato & Creamy Dip

Prep Time 15 minutes
Cook Time 30 minutes
Total Time 45 minutes
Servings 4 servings
Calories 450
A delicious and wholesome dish featuring tender turkey skewers, roasted sweet potatoes, and a creamy coconut yogurt dip, perfect for a low histamine diet.

Ingredients

Protein

  • 500 g fresh turkey breast
  • 1 tbsp olive oil
  • 1 tbsp maple syrup (if tolerated)
  • 1 tsp dried thyme
  • 1 tsp dried oregano
  • ½ tsp sweet paprika (if tolerated)
  • to taste garlic powder (optional, if tolerated)
  • Sea salt Sea salt
  • Black pepper (optional, if tolerated) Black pepper (optional, if tolerated)
  • 1 large sweet potato
  • 1 tbsp olive oil
  • Sea salt Sea salt
  • Dried parsley Dried parsley
  • Sweet paprika (optional, if tolerated) Sweet paprika (optional, if tolerated)
  • 3 tbsp unsweetened coconut yogurt
  • 2 cooked egg yolks (if tolerated) cooked egg yolks (if tolerated)
  • ½ tsp garlic powder (optional, if tolerated)
  • 1 tsp chopped dill
  • 1 tsp chopped parsley
  • Splash of water if needed Splash of water if needed for a smoother texture

Salad & Garnish

  • Mixed greens Mixed greens
  • Olive oil Olive oil
  • Pumpkin seeds (optional) Pumpkin seeds (optional)

Instructions 

  • Cut the turkey into large cubes and marinate with oil, maple syrup, herbs, and salt for 20–30 minutes.
  • Thread turkey onto skewers and cook at 200°C for 12–15 minutes, turning halfway.
  • Slice sweet potato into wedges, toss with oil and seasonings, and roast at 200°C for 25–30 minutes.
  • Mash egg yolks with coconut yogurt, add herbs, salt, garlic powder, and water for a creamy dip.
  • Serve skewers with roasted sweet potato, dip, and greens.

Notes

Adjust spices according to tolerance. Use fresh herbs for best flavor.
Calories: 450kcal
Cost: $15
Course: Main Course
Keyword: low histamine, Sweet Potato, Turkey

Cozy Up with Gingerbread Latte Cupcakes

As the holiday season approaches, the air turns crisp, and our hearts yearn for warmth and comfort. There’s no better way to embrace this spirit than with a batch of gingerbread latte cupcakes. These delightful treats are not just desserts; they’re a nostalgic journey into cherished memories spent around the family table. Each bite offers a rich blend of spices, a hint of coffee, and a dollop of love, making them perfect for sharing with friends and family. Join me as we dive into this heartwarming recipe that will wrap you in cozy memories.

Why You’ll Love This Recipe

  • Irresistible Flavor: A perfect marriage of spiced gingerbread and rich coffee creates a flavor profile that is both comforting and festive.
  • Simple Ingredients: Made with pantry staples, these cupcakes are easy to whip up without any fuss.
  • Versatile Treat: Ideal for holiday gatherings, cozy nights in, or as a thoughtful gift for loved ones, these cupcakes fit any occasion.
  • Decadent Frosting: The coffee buttercream frosting adds a creamy touch that beautifully balances the spiced cupcakes.
  • Memorable Moments: Baking these cupcakes can become a cherished tradition, filled with laughter and love as you create something special.

Ingredients for Gingerbread Latte Cupcakes

To ensure that your gingerbread latte cupcakes turn out perfectly, here’s a detailed list of the ingredients you’ll need, along with some helpful substitutions to cater to your preferences:

  • 1 ¼ cups all-purpose flour: The foundation of your cupcakes. For a gluten-free option, substitute with almond flour.
  • 1 ½ tsp baking powder: Essential for that light, fluffy texture.
  • 2 tsp ground cinnamon: Adds warmth and spice, making your kitchen smell heavenly.
  • 1 tsp ground ginger: The star spice in gingerbread, imparting a distinct flavor.
  • ¼ tsp ground cloves: A little goes a long way in enhancing the spice blend.
  • ½ tsp salt: Balances sweetness and enhances flavor.
  • ¾ cup granulated sugar: Sweetens the cupcakes beautifully.
  • ¼ cup unsalted butter (room temperature): Adds richness and moisture.
  • ¼ cup vegetable oil: Ensures the cupcakes remain moist.
  • 1 large egg (room temperature): Binds the ingredients together.
  • 2 tbsp sour cream (room temperature): For a tender crumb.
  • 1 tbsp molasses: Gives that authentic gingerbread flavor.
  • 1 tsp vanilla extract: Enhances the overall taste.
  • ½ cup milk (room temperature): Keeps the batter smooth and pourable.
  • 1 cup unsalted butter (room temperature): The base for your frosting.
  • 2 ½ cups powdered sugar: Sweetens the frosting and gives it a creamy texture.
  • 2 tbsp heavy cream: Helps achieve a smooth consistency in the frosting.
  • 1 tbsp instant espresso powder: Deepens the coffee flavor in the frosting.
  • 2 tsp vanilla extract: Again, to enhance the flavor.
  • ¼ tsp salt: Balances the sweetness of the frosting.
  • 1 tbsp instant espresso powder: For an extra kick of coffee flavor.
  • 12 mini gingerbread men: These can be used as charming decorations on top of the cupcakes.

How to Make Gingerbread Latte Cupcakes

Side shot of gingerbread latte cupcakes with rich frosting and festive decorations.

Follow these simple steps to create your own batch of delightful gingerbread latte cupcakes:


Silicone Baking Cups Set

★ Recommended Kitchen Tool

Silicone Baking Cups Set

Make this recipe even easier with a quality Silicone Baking Cups Set — a must-have kitchen staple!


🛒 Check Price on Amazon →

As an Amazon Associate, we earn from qualifying purchases.
  1. Preheat the oven: Start by preheating your oven to 350°F (175°C) to ensure it’s ready for your cupcakes.
  2. Mix dry ingredients: In a bowl, whisk together the flour, baking powder, cinnamon, ginger, cloves, and salt.
  3. Cream butter and sugar: In a separate bowl, beat the butter and sugar until light and fluffy, about 3-4 minutes.
  4. Add eggs and wet ingredients: Incorporate the egg, sour cream, molasses, and vanilla into the butter mixture until well combined.
  5. Combine mixtures: Gradually add the dry ingredients to the wet mixture, alternating with the milk, until just combined.
  6. Fill cupcake liners: Spoon the batter into lined cupcake tins, filling them about 2/3 full.
  7. Bake the cupcakes: Bake for 18-20 minutes or until a toothpick inserted in the center comes out clean.
  8. Cool completely: Allow the cupcakes to cool in the pan for 5 minutes before transferring them to a wire rack to cool completely.

Pro Tips for Perfect Gingerbread Latte Cupcakes

Achieving the perfect cupcake is an art, and here are some expert tips to keep in mind:

  • Room temperature ingredients: Ensure all your wet ingredients are at room temperature for a smoother batter.
  • Don’t overmix: Mix just until combined to keep your cupcakes tender and light.
  • Check for doneness: Use a toothpick to check if they’re done; it should come out clean or with a few crumbs.
  • Cool before frosting: Make sure your cupcakes are completely cool before adding the frosting to prevent it from melting.
  • Use fresh spices: Fresh ground spices can elevate the flavor significantly.
  • Decorate with love: Top with mini gingerbread men or festive sprinkles for a personal touch.
  • Experiment with flavors: Don’t hesitate to add a splash of bourbon or rum to the frosting for an adult twist.
  • Store properly: Keep the cupcakes in an airtight container to maintain their freshness.

Common Mistakes and Troubleshooting

Even the best bakers can make mistakes. Here are some common issues and how to avoid them:

  • Flat cupcakes: This can happen if your baking powder is old. Always check for freshness!
  • Dry texture: Overbaking or not enough liquid can lead to dryness. Stick to the recommended baking time and ensure you’re using the right amount of liquid.
  • Frosting too runny: If your frosting is too thin, add more powdered sugar to thicken it up.
  • Flavor imbalance: If the spice flavor isn’t strong enough, consider increasing the spices slightly or using fresh ones.

Delicious Variations

Get creative with your gingerbread latte cupcakes by trying these variations:

  • Chocolate Gingerbread: Add 1/4 cup of cocoa powder to the dry ingredients for a chocolatey twist.
  • Maple Frosting: Replace the vanilla in the frosting with maple extract for a unique flavor.
  • Nutty Addition: Incorporate chopped walnuts or pecans into the batter for added texture.
  • Caramel Drizzle: Top with a drizzle of caramel sauce for an extra indulgent treat.

Storage and Make-Ahead Instructions

These cupcakes can be made ahead of time, making them perfect for busy holiday preparations:

  • Storing: Keep them in an airtight container at room temperature for up to 3 days or refrigerate for up to a week.
  • Freezing: Freeze unfrosted cupcakes in an airtight container for up to 2 months. Thaw before frosting.
  • Frosting ahead: You can make the coffee buttercream ahead of time and store it in the refrigerator. Just give it a quick whip before using.

Frequently Asked Questions

Here are some common questions about making gingerbread latte cupcakes:

  • Can I use whole wheat flour instead of all-purpose flour? Yes, but it may alter the texture slightly.
  • Is there a dairy-free option? You can substitute the butter and milk with plant-based alternatives like coconut oil and almond milk.
  • How can I make them spicier? Feel free to increase the amounts of cinnamon, ginger, and cloves to suit your taste.
  • What if I don’t have espresso powder? Instant coffee can be used as a substitute, but the flavor may differ slightly.
  • Can I make these cupcakes gluten-free? Absolutely! Just use a 1:1 gluten-free flour blend.
  • How long do they last? When stored properly, they can last up to a week in the fridge.
  • Can I make mini versions? Yes, just adjust the baking time and monitor closely.
  • What should I serve with these cupcakes? A cozy cup of hot cocoa or coffee pairs beautifully with these treats!

Nutritional Tips and Dietary Adaptations

If you’re mindful of dietary needs, here are some tips:

  • Lower Sugar: Reduce the sugar in the recipe slightly for a less sweet cupcake.
  • Gluten-Free: Use certified gluten-free flour to make this recipe suitable for gluten-sensitive individuals.
  • Vegan Option: Substitute the egg with a flax egg and use plant-based butter and milk.

Equipment Recommendations

To make your baking experience smooth and enjoyable, here’s a list of useful tools:

  • Mixing Bowls: A good set of mixing bowls is essential for separating dry and wet ingredients.
  • Electric Mixer: For quick and efficient mixing of butter and sugar.
  • Measuring Cups and Spoons: Accurate measurements are key to successful baking.
  • Cupcake Liners: Choose festive liners to add a touch of cheer to your cupcakes.
  • Cooling Rack: Essential for allowing your cupcakes to cool evenly.

Serving Suggestions

As you serve up your gingerbread latte cupcakes, consider these delightful ideas:

  • Festive Platter: Arrange the cupcakes on a decorative platter with some holiday-themed décor.
  • Pair with Beverages: Serve alongside coffee, tea, or hot apple cider for a complete experience.
  • Gift Wrapping: Package a few cupcakes in a cute box or tin as a thoughtful gift for neighbors or friends.

Conclusion

These gingerbread latte cupcakes are more than just a dessert; they’re a celebration of warmth, love, and cherished memories. Each bite brings back the nostalgia of cozy holiday gatherings spent with loved ones. Whether you bake them for a special occasion or just to enjoy with your family, these cupcakes will surely bring smiles and joy to your table. So gather your loved ones, roll up your sleeves, and let’s create some delicious memories together!

Gingerbread Latte Cupcakes

Prep Time 20 minutes
Cook Time 25 minutes
Total Time 45 minutes
Servings 12 cupcakes
Calories 350
Delight in these spiced gingerbread cupcakes topped with creamy latte frosting, perfect for holiday celebrations or cozy treats.

Ingredients

Batter

  • 1 ¼ cups all-purpose flour
  • 1 ½ tsp baking powder
  • 2 tsp ground cinnamon
  • 1 tsp ground ginger
  • ¼ tsp ground cloves
  • ½ tsp salt
  • ¾ cup granulated sugar
  • ¼ cup unsalted butter (room temperature)
  • ¼ cup vegetable oil
  • 1 large egg (room temperature)
  • 2 tbsp sour cream (room temperature)
  • 1 tbsp molasses
  • 1 tsp vanilla extract
  • ½ cup milk (room temperature)

Frosting

  • 1 cup unsalted butter (room temperature)
  • 2 ½ cups powdered sugar
  • 2 tbsp heavy cream
  • 1 tbsp instant espresso powder
  • 2 tsp vanilla extract
  • ¼ tsp salt
  • 1 tbsp instant espresso powder
  • 12 mini gingerbread men

Instructions 

  • Preheat oven to 350°F (175°C) and prepare cupcake liners.
  • Mix dry ingredients, then add wet ingredients and combine until smooth.
  • Fill cupcake liners and bake for 20-25 minutes until a toothpick comes out clean.
  • Prepare frosting by beating butter, powdered sugar, espresso, vanilla, and cream until fluffy.
  • Frost cooled cupcakes and garnish with mini gingerbread men.

Notes

Store cupcakes in an airtight container for up to 2 days for best freshness.
Calories: 350kcal
Cost: $15
Course: Dessert
Cuisine: holiday
Keyword: cupcakes, gingerbread, Latte

Embrace the Warmth of Fall with This Irresistible Bundt Cake

As the leaves turn golden and the air fills with the scent of cinnamon and nutmeg, there’s no better way to celebrate the season than with a slice of moist vegan pumpkin bundt cake. This recipe takes me back to my childhood in Louisiana, where the kitchen was always alive with laughter, love, and the comforting aroma of baked goods. With a luscious maple pecan glaze and a creamy filling, this cake is perfect for sharing with family and friends, making it a centerpiece of any gathering. Let’s dive into the details of creating this delightful dessert that combines nostalgia and joy!

Why You’ll Love This Recipe

  • Rich Flavor: The combination of pumpkin puree and warm spices creates an irresistibly cozy flavor that captures the essence of fall.
  • Vegan-Friendly: This cake is entirely plant-based, allowing everyone to enjoy a slice without compromising on taste or texture.
  • Moist and Delicious: The inclusion of vegan buttermilk and cream cheese filling ensures a moist and tender crumb that melts in your mouth.
  • Easy to Make: With simple steps and common ingredients, this recipe is perfect for both novice bakers and seasoned pros.
  • Perfect for Sharing: Whether it’s a holiday gathering or a cozy family dinner, this bundt cake is sure to impress and delight your loved ones.

Ingredients Breakdown

To create this delightful pumpkin bundt cake, gather the following ingredients. Each item plays a vital role in achieving the moistness and flavor:

  • 12 ounces vegan cream cheese: Adds a rich, creamy filling that swirls beautifully through the cake.
  • 1/2 cup (100 g) granulated sugar: Sweetens the cream cheese filling, balancing the flavors.
  • 1 tbsp maple syrup: Infuses a natural sweetness and depth to the glaze.
  • 3 tbsp cornstarch or arrowroot starch: Acts as a thickener for the cream cheese filling.
  • 1 1/4 cup (300 mL) vegan buttermilk: Ensures the cake remains moist and tender.
  • 4 cups (500 g) all-purpose flour: The foundation of our bundt cake. Consider gluten-free 1:1 baking flour if needed.
  • 1 tbsp pumpkin pie spice: A blend that encapsulates the essence of fall.
  • 3 tsp baking powder: Helps the cake rise beautifully.
  • 1/2 tsp baking soda: Adds lightness to the cake.
  • 1/4 tsp sea salt: Enhances the overall flavors.
  • 1 cup (200 g) granulated sugar: Sweetens the cake, providing balance.
  • 1 cup (200 g) light brown sugar: Contributes moisture and a hint of caramel flavor.
  • 1/2 cup (113 g) vegan butter: Brings richness and flavor to the cake.
  • 1/2 cup (110 g) neutral cooking oil: Ensures the cake stays moist.
  • 1 can (15 ounces) pumpkin puree: The star ingredient that gives the cake its flavor and color.
  • 1/4 cup (60 g) dairy-free yogurt: Adds moisture and richness to the batter.
  • 1 tbsp vanilla extract: A must-have for enhancing flavor.
  • 1 cup chopped pecans: Provides a delightful crunch in every bite.
  • 2 cups (280 g) powdered sugar: Essential for the maple glaze.
  • 2 tbsp maple syrup: Sweetens and adds depth to the glaze.
  • 1-2 tbsp vegan heavy cream or cashew cream: Makes the glaze smooth and luscious.

Pro Tips for the Best Pumpkin Bundt Cake

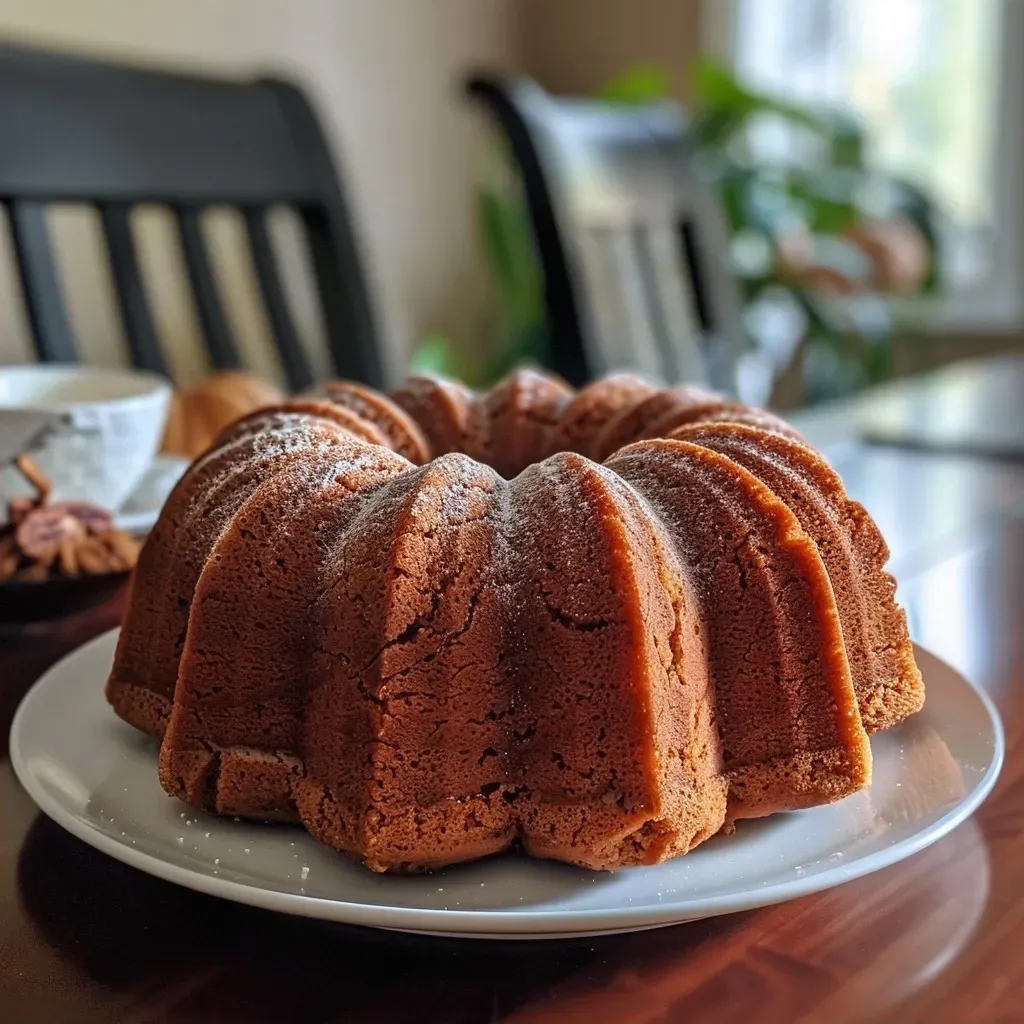
Close-up side view of a vegan pumpkin bundt cake topped with a shiny maple glaze and pecans.
  • Room Temperature Ingredients: Ensure all ingredients, especially the vegan cream cheese and butter, are at room temperature for better mixing.
  • Don’t Overmix: Mix the batter just until incorporated to keep your cake tender.
  • Grease the Bundt Pan Well: A well-greased pan ensures the cake releases easily, preventing any messy breakage.
  • Cool Before Inverting: Let the cake cool for at least 40 minutes in the pan to avoid breaking apart.
  • Swirl It In: When adding the cream cheese filling, you can gently swirl it into the batter for a beautiful marbled effect.
  • Experiment with Glaze: Try adding spices like cinnamon or nutmeg to the glaze for an extra flavor boost.
  • Store Properly: Keep any leftovers in an airtight container to maintain freshness.
  • Use Quality Pumpkin Puree: Opt for pure pumpkin puree (not pumpkin pie filling) for the best flavor.

Common Mistakes and Troubleshooting

Even the best bakers face challenges. Here are some common mistakes and how to avoid them:


Silicone Baking Cups Set

★ Recommended Kitchen Tool

Silicone Baking Cups Set

Make this recipe even easier with a quality Silicone Baking Cups Set — a must-have kitchen staple!


🛒 View on Amazon →

As an Amazon Associate, we earn from qualifying purchases.
  • Too Dense: This may occur if the batter is overmixed or if too much flour is added. Measure carefully.
  • Cake Sticking to the Pan: Ensure thorough greasing and flouring of the bundt pan to prevent sticking.
  • Dry Cake: Overbaking can lead to dryness. Keep an eye on the cake and test for doneness with a toothpick.
  • Not Enough Flavor: If your cake lacks flavor, consider adding more spices or adjusting the sugar levels.

Delicious Variations to Try

  • Pecan-Streusel Swirl: Add a layer of pecan streusel in the middle for extra texture and flavor.
  • Chocolate Chip Pumpkin Bundt: Fold in vegan chocolate chips for a delightful twist.
  • Spiced Maple Glaze: Incorporate a pinch of cinnamon into your glaze for an added layer of warmth.
  • Frosted Pumpkin Bundt: Top your cake with a vegan cream cheese frosting for an indulgent treat.

Storage and Make-Ahead Instructions

To keep your pumpkin bundt cake fresh and delicious, follow these storage tips:

  • Room Temperature: Store in an airtight container at room temperature for up to 5 days.
  • Refrigeration: For longer storage, keep it in the refrigerator for up to a week.
  • Freezing: Wrap slices in plastic wrap and store in an airtight container for up to 3 months. Thaw overnight in the refrigerator before serving.

Frequently Asked Questions

  • Can I use regular cream cheese? Yes, but this recipe is designed to be vegan-friendly, so vegan cream cheese is recommended for the best results.
  • How do I know when the cake is done? Insert a toothpick in the center; it should come out clean or with a few moist crumbs.
  • Can I make this gluten-free? Absolutely! Substitute the all-purpose flour with a gluten-free 1:1 baking flour.
  • Can I add nuts to the cake batter? Yes, feel free to fold in additional chopped pecans or walnuts for more texture.
  • What can I use instead of vegan buttermilk? Combine plant-based milk with a tablespoon of lemon juice or vinegar and let it sit for a few minutes.
  • How do I prevent the cream cheese filling from sinking? Make sure to spoon the filling gently and layer it properly in the batter.
  • Can I make this cake ahead of time? Yes, you can bake the cake a day in advance; just keep it covered at room temperature.
  • What should I serve with this cake? It pairs beautifully with a warm cup of spiced tea or coffee, perfect for cozy gatherings.

Nutritional Insights and Dietary Adaptations

This vegan pumpkin bundt cake can be enjoyed by many dietary preferences, but here are some insights:

  • Low Sugar Option: Substitute some of the sugars with a natural sweetener like maple syrup or coconut sugar.
  • High-Fiber Boost: Add in some ground flaxseed or oats for added nutrition.
  • Nut-Free Variation: Replace nuts in the recipe with seeds like sunflower or omit them entirely for a nut-free option.

Essential Equipment for Best Results

Having the right tools can make a world of difference in your baking journey:

  • Bundt Pan: A quality non-stick bundt pan ensures easy release and beautiful shapes.
  • Mixing Bowls: Use a variety of sizes for efficient mixing and preparation.
  • Electric Mixer: A stand or hand mixer makes creaming butter and sugar a breeze.
  • Measuring Cups and Spoons: Accurate measurements are crucial for baking success.
  • Whisk: Essential for mixing liquids and dry ingredients together smoothly.

Serving Suggestions

Presentation is key when serving this delightful bundt cake:

  • Dust with Powdered Sugar: A light dusting on top adds a touch of elegance.
  • Pair with Fresh Fruits: Serve alongside fresh berries or orange slices for a refreshing contrast.
  • Add Whipped Cream: Top with vegan whipped cream for an indulgent finish.
  • Slice and Serve Warm: For a cozy touch, serve slices warm from the oven or microwave.

Conclusion

This moist vegan pumpkin bundt cake isn’t just a dessert; it’s a heartfelt creation that brings people together. From the rich flavors to the simple preparation, every aspect of this cake is infused with love and care. Whether you’re sharing it at a family gathering or enjoying a quiet moment with a cup of tea, this cake will surely become a cherished recipe in your home. So gather your ingredients, turn on your oven, and create memories that will last a lifetime. Happy baking!

MOIST Vegan Pumpkin 'Cream Cheese' Bundt Cake with Maple Pecan Glaze

Prep Time 20 minutes
Cook Time 1 hour
Total Time 1 hour 20 minutes
Servings 10 slices
Calories 420
A moist and flavorful vegan pumpkin bundt cake layered with a creamy vegan cream cheese filling and topped with a sweet maple pecan glaze. Perfect for fall celebrations or cozy gatherings.

Ingredients

Cream Cheese Filling

  • 12 ounces vegan cream cheese, room temperature
  • 0.5 cup granulated sugar
  • 1 tbsp maple syrup
  • 3 tbsp cornstarch or arrowroot starch

Pumpkin Cake Batter

  • 1.25 cup vegan buttermilk
  • 4 cups all-purpose flour (or gluten free 1:1 baking flour + 1 tbsp arrowroot or cornstarch)
  • 1 tbsp pumpkin pie spice
  • 3 tsp baking powder
  • 0.5 tsp baking soda
  • 0.25 tsp sea salt
  • 1 cup granulated sugar
  • 1 cup light brown sugar
  • 0.5 cup vegan butter, melted
  • 0.5 cup neutral cooking oil
  • 1 can pumpkin puree (15 ounces)
  • 0.25 cup dairy free yogurt, room temperature
  • 1 tbsp vanilla extract

Topping & Glaze

  • 1 cup chopped pecans
  • 2 cups powdered sugar
  • 2 tbsp maple syrup
  • 1-2 tbsp vegan heavy cream or cashew cream (adjust for consistency)

Instructions 

  • Whisk together dairy free milk and vinegar; set aside to curdle.
  • Preheat oven to 350°F (175°C). Prepare bundt pan with oil and flour.
  • Mix pumpkin, sugars, vegan butter, oil, yogurt, vanilla, salt, baking powder, baking soda, and spices. Add flour and buttermilk; combine.
  • Pour half batter into pan, add cream cheese layer, then top with remaining batter. Swirl gently.
  • Bake for 55-60 minutes until a toothpick comes out clean. Cool for 40 minutes, then invert onto a plate.
  • Toast pecans, prepare glaze with powdered sugar, maple syrup, and cream. Stir in pecans and pour over cooled cake.

Notes

Store leftovers in the fridge for up to 5 days or freeze for longer storage.
Calories: 420kcal
Cost: $15
Course: Dessert
Cuisine: Vegan
Keyword: bundt cake, Pumpkin, Vegan

Embrace the Heartwarming Tradition of Twice Baked Sweet Potatoes

Cooking is a dance of flavors, memories, and love—especially when it comes to sweet potatoes, a staple that brings warmth to our tables. In this recipe for easy twice baked sweet potatoes, we blend the creamy texture of sweet potatoes with the richness of Fontina cheese and the aroma of fresh thyme. This dish is more than just a recipe; it’s an invitation to gather around the family table, share stories, and create lasting memories.

As you embark on this culinary journey, you’ll discover why this dish has become a cherished part of my life, echoing the laughter and connection found in every kitchen. So, let’s roll up our sleeves and dive into the delightful world of twice baked sweet potatoes!

Why You’ll Love This Recipe

  • Versatile Side Dish: Perfect for any occasion, whether it’s a cozy family dinner or a festive holiday gathering.
  • Comforting Flavors: The combination of sweet potatoes, creamy cheese, and aromatic herbs will warm your heart and soul.
  • Make-Ahead Friendly: Prepare them in advance and bake just before serving, making your life easier during busy days.
  • Customizable: Add your favorite toppings or spices to create a unique twist each time you make them.
  • Nutrient-Rich: Packed with vitamins and minerals, sweet potatoes offer a wholesome option that doesn’t compromise on flavor.

Ingredient Breakdown

Let’s gather our ingredients and explore some possible substitutions to customize this dish just to your liking:


Silicone Baking Cups Set

★ Recommended Kitchen Tool

Silicone Baking Cups Set

Make this recipe even easier with a quality Silicone Baking Cups Set — a must-have kitchen staple!


🛒 View on Amazon →

As an Amazon Associate, we earn from qualifying purchases.
  • 3 medium sweet potatoes: Look for firm, smooth potatoes for the best texture. You can also use yam if you prefer a different flavor.
  • 5-1/2 Tbsp unsalted butter: At room temperature, this helps create a creamy filling. For a dairy-free option, use coconut oil.
  • 1/2 cup shallots: Finely minced, they add a sweet, mild onion flavor. You can replace them with green onions or onion powder if needed.
  • 1 tsp fresh thyme leaves: Minced, this herb adds depth. Dried thyme can work in a pinch, but adjust the amount since it’s more concentrated.
  • Kosher salt and black pepper: Essential for seasoning; feel free to use your preferred salt.
  • 1 extra-large egg: It binds the filling together; for a vegan version, try flaxseed meal mixed with water as a substitute.
  • 4 ounces Fontina cheese: Cut into small cubes, it melts beautifully. You can swap with cheddar or goat cheese for different flavor profiles.

How to Make Easy Twice Baked Sweet Potatoes

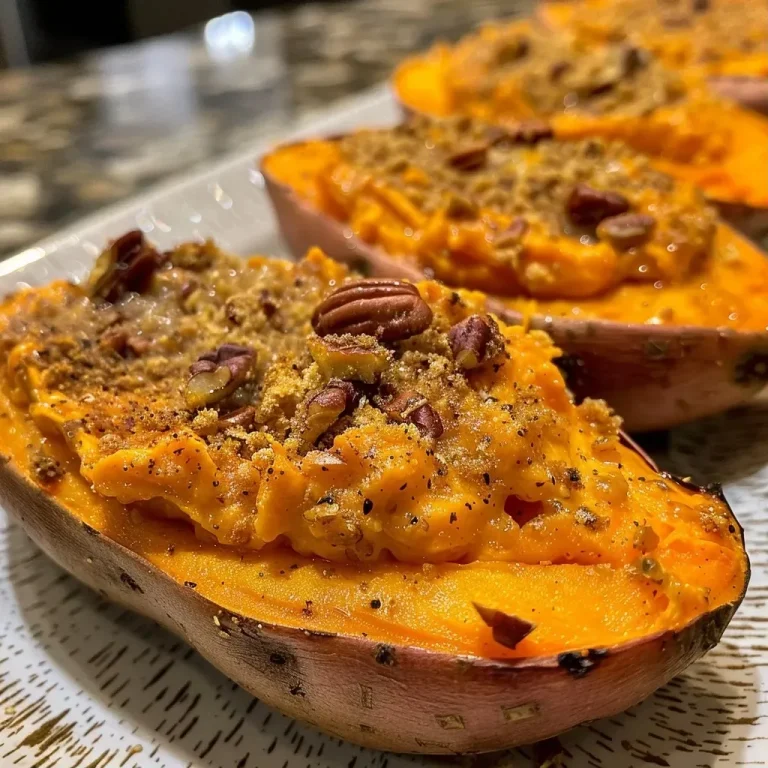
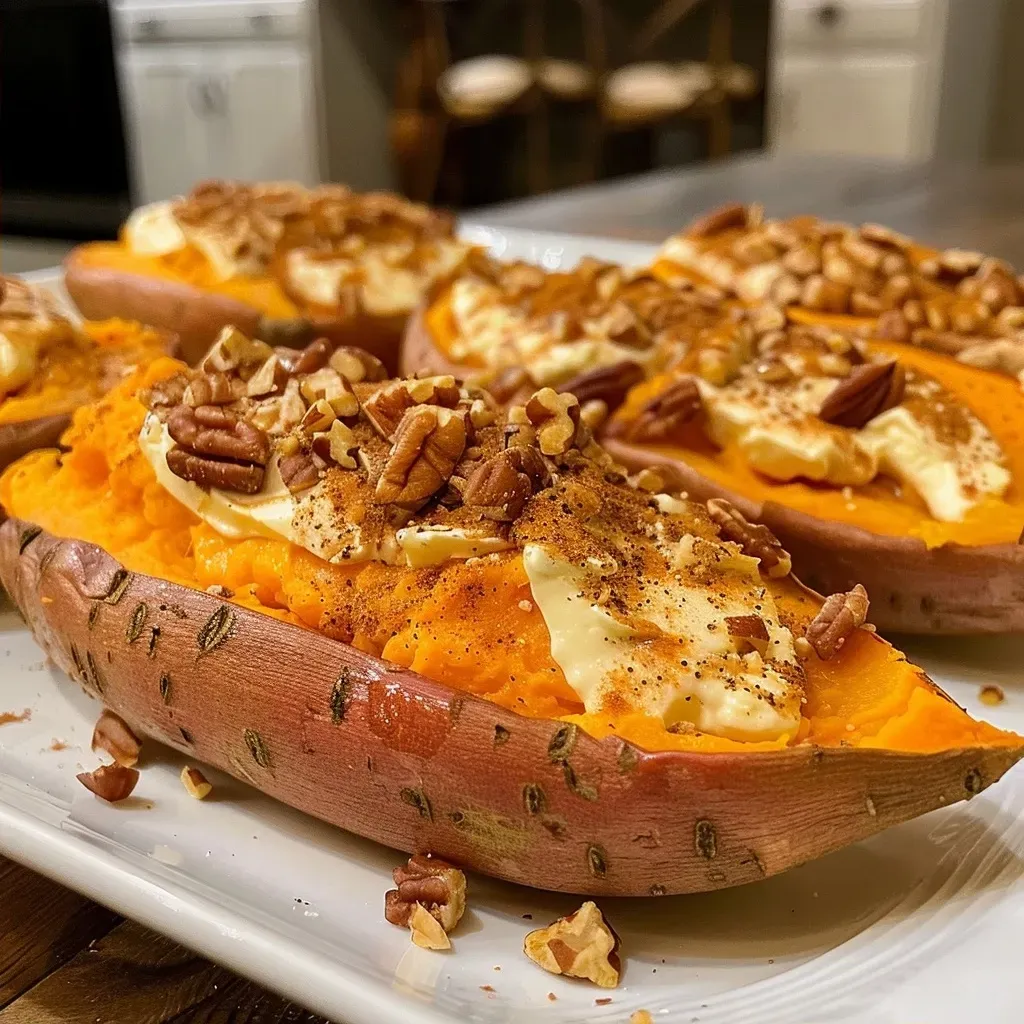
Side view of a creamy twice baked sweet potato dish with melted cheese.

Let’s get cooking! Follow these simple steps for a delightful dish:

  1. Preheat your oven to 400 degrees.
  2. Line a sheet pan with aluminum foil for easy cleanup.
  3. Scrub the sweet potatoes and place them on the pan. Using a knife, cut a few slits in the top to allow steam to escape.
  4. Bake the potatoes for about 50 minutes. Squeeze one gently to check for softness; if they aren’t soft, bake for an additional 10 minutes.
  5. In a small sauté pan, heat 1-1/2 Tbsp of butter over medium heat. Add the minced shallots and cook for about 4 minutes, until tender. Add the minced thyme and cook for another minute. Remove from the heat and set aside.
  6. Once the potatoes are cool enough to handle, cut them in half lengthwise. Carefully scoop out some of the warm potato into a medium bowl, leaving about a ½ inch layer next to the skin.
  7. Sprinkle kosher salt and pepper inside the potato halves.
  8. Add the remaining softened butter to the potato mixture and mash with a fork or potato masher.
  9. Mix in shallots, egg, cheese, and additional seasoning. Spoon this mixture back into the sweet potato shells and top each with a sprig of fresh thyme.
  10. Bake uncovered for 20-30 minutes, or until puffed and lightly browned. Serve hot and enjoy!

Pro Tips for Perfect Twice Baked Sweet Potatoes

  • Choose the Right Potatoes: For consistent cooking, select sweet potatoes that are similar in size.
  • Don’t Overcook: Keep an eye on your potatoes while baking; you want them tender but not mushy.
  • Season Generously: Don’t skimp on salt and pepper; they enhance the natural sweetness of the potatoes.
  • Use High-Quality Cheese: A good Fontina will elevate the flavor—choose a brand that melts well.
  • Let Them Rest: Allow the potatoes to cool slightly after baking; this helps set the filling.
  • Experiment with Toppings: Try adding crispy bacon, chopped pecans, or a drizzle of hot honey for a flavor explosion.
  • Keep It Simple: Sometimes, a sprinkle of fresh herbs can be all the extra flavor you need.
  • Store Properly: If you have leftovers, store them in an airtight container in the fridge for up to 3 days.

Common Mistakes and Troubleshooting

Even the most seasoned cooks can encounter hiccups. Here are some common pitfalls and how to avoid them:

  • Overcooked Potatoes: This can lead to a mushy filling. Keep an eye on the bake time and test for doneness.
  • Undercooked Filling: Ensure the shallots are sautéed until soft; crunchy shallots can disrupt the texture.
  • Too Dry Filling: If your mixture feels dry, add a touch more butter or a splash of milk to achieve creaminess.
  • Flavorless Potatoes: Don’t forget to season the inside of the potato skins generously with salt and pepper!

Variations to Try

Feel free to get creative! Here are some variations to inspire you:

  • Mexican Twist: Add black beans, corn, and cumin to the filling for a zesty flavor.
  • Sweet and Savory: Mix in chopped caramelized onions and a touch of maple syrup for a unique taste.
  • Herb Infusion: Swap thyme for rosemary or sage for a different herbal note.
  • Spicy Kick: Incorporate diced jalapeños or a dash of cayenne pepper for heat.

Storage and Make-Ahead Instructions

These twice baked sweet potatoes can be prepared ahead of time:

  • Make-Ahead: Prepare the filling and stuff the potatoes, then cover and refrigerate for up to 24 hours before baking.
  • Storage: Leftover stuffed potatoes can be stored in the fridge for up to 3 days. Reheat in the oven at 350°F until warmed through.

Frequently Asked Questions

Here are some common questions about twice baked sweet potatoes:

  • Can I use other types of potatoes? Yes, you can use regular potatoes, but sweet potatoes add a wonderful sweetness and nutrition.
  • What can I serve with twice baked sweet potatoes? They pair beautifully with roasted meats, salads, or can even be enjoyed on their own as a meal.
  • Can I freeze twice baked sweet potatoes? Yes, freeze them before the second bake. Thaw in the fridge overnight and bake when ready.
  • How do I know when the potatoes are done baking? They should be soft and tender when squeezed gently.
  • What if I don’t have Fontina cheese? Feel free to substitute with any cheese that melts well, like cheddar or mozzarella.
  • Can I make them vegan? Yes, substitute butter with olive oil and use a flax egg instead of a regular egg.
  • How do I enhance the flavor? Try adding spices like cinnamon or nutmeg to the sweet potato mixture for a warm touch.
  • Can I add meat to the filling? Absolutely! Crumbled sausage or bacon can add a savory richness.

Nutritional Tips and Dietary Adaptations

Here are some nutritional insights to consider:

  • Health Benefits: Sweet potatoes are high in fiber, vitamins A and C, and antioxidants, making them a nutritious choice.
  • Gluten-Free Option: This recipe is naturally gluten-free; ensure all your ingredients are certified gluten-free if necessary.
  • Dairy-Free Adaptation: Use plant-based butter and cheese alternatives to accommodate dairy sensitivities.
  • Low-Carb Variation: For a low-carb alternative, consider using cauliflower as a substitute for sweet potatoes.

Equipment Recommendations

A few kitchen tools will make your cooking experience smoother:

  • Baking Sheet: A sturdy, non-stick baking sheet is essential for roasting the sweet potatoes.
  • Sauté Pan: A small sauté pan for cooking shallots will help achieve that perfect, tender texture.
  • Potato Masher: For creating a creamy filling, a simple potato masher or fork will do the trick.
  • Storage Containers: Airtight containers are perfect for storing leftovers or make-ahead ingredients.

Serving Suggestions

Finally, let’s talk about how to present your beautiful twice baked sweet potatoes:

  • Garnish with Fresh Herbs: A sprinkle of fresh thyme or parsley adds color and freshness to your plate.
  • Pair with a Salad: A light green salad dressed with vinaigrette complements the richness of the potatoes.
  • Serve with Sauces: Consider drizzling with a balsamic reduction or a bit of hot honey for an extra layer of flavor.
  • Family Style: Serve them on a large platter for a communal dining experience, encouraging everyone to dig in together.

Conclusion

In every bite of these twice baked sweet potatoes, you’ll taste the love, warmth, and nostalgia that comes from sharing meals with family and friends. This recipe not only satisfies the palate but also nourishes the soul, creating moments that linger long after the last bite. So, gather your loved ones, share stories, and enjoy the comfort of home with these delightful potatoes. Happy cooking!

Easy Twice Baked Sweet Potatoes

Prep Time 15 minutes
Cook Time 1 hour
Total Time 1 hour 15 minutes
Servings 4 servings
Calories 250
A delicious and comforting dish featuring tender sweet potatoes filled with a cheesy shallot mixture, perfect for a cozy dinner or side.

Ingredients

Sweet Potatoes

  • 3 medium sweet potatoes
  • 5-1/2 Tbsp unsalted butter (divided)
  • 1/2 cup shallots (finely minced)
  • 1 tsp fresh thyme leaves (minced)
  • kosher salt and black pepper kosher salt and black pepper
  • 1 extra-large egg egg (lightly beaten)
  • 4 ounces Fontina Cheese (cut into small cubes (buy 6 ounces with the rind))

Instructions 

  • Preheat oven to 400°F (200°C). Bake sweet potatoes for 50-60 minutes until soft.
  • Let potatoes cool, then halve lengthwise and scoop out some flesh, leaving a ½ inch border.
  • Cook shallots in 1-1/2 Tbsp butter until tender, then add minced thyme and remove from heat.
  • Mix scooped potato with remaining butter, shallots, egg, cheese, salt, and pepper. Fill potato shells and top with thyme sprigs.
  • Bake uncovered for 20-30 minutes until puffed and browned. Serve hot.

Notes

For extra flavor, sprinkle with fresh herbs before serving.
Calories: 250kcal
Cost: $15
Course: Side Dish
Cuisine: American
Keyword: Sweet Potatoes

Embrace the Warmth of Autumn with a Spiced Pear Bourbon Smash

As the leaves turn golden and the air fills with a crispness that whispers of cozy nights, there’s no better way to celebrate the season than with a drink that embodies warmth and nostalgia. Join me, Daniel, as we craft the Spiced Pear Bourbon Smash Cocktail—a delightful blend of bourbon, pear juice, and warm spices that create cherished moments around the table. This cocktail isn’t just a drink; it’s a memory, a story waiting to be shared with friends and family.

Why You’ll Love This Recipe

The Spiced Pear Bourbon Smash is more than just a cocktail; it’s an experience! Here are some reasons to fall in love with this recipe:

  • Perfectly Balanced Flavors: The combination of sweet pear, rich bourbon, and zesty lemon creates a harmonious sip that dances on your palate.
  • Seasonal Ingredients: Using fresh pears and warming spices connects you to the essence of fall, making every sip a taste of the season.
  • Easy to Make: This cocktail can be whipped up in just a few minutes, making it perfect for unexpected guests or a cozy night in.
  • Customizable: Adjust the sweetness or spice levels to suit your taste, ensuring your drink is just as you like it.
  • Great for Gatherings: Perfect for autumnal celebrations, this cocktail brings people together, sparking laughter and storytelling.

Ingredient Breakdown

Let’s gather our ingredients and explore some substitutions to ensure you can make this cocktail no matter what.


Meal Prep Container Set

★ Recommended Kitchen Tool

Meal Prep Container Set

Make this recipe even easier with a quality Meal Prep Container Set — a must-have kitchen staple!


🛒 See Deals on Amazon →

As an Amazon Associate, we earn from qualifying purchases.
  • 2 oz bourbon: The star of the show! Choose a smooth, quality bourbon for the best flavor.
  • 1 oz pear juice: Freshly squeezed is best, but store-bought works in a pinch—just look for 100% juice.
  • ½ oz lemon juice: Freshly squeezed lemon juice brightens the cocktail; avoid bottled for the best taste.
  • ½ oz maple syrup: Adds depth and a touch of sweetness. Honey or agave syrup can be used as alternatives.
  • ¼ tablespoon cinnamon powder: A warm spice that enhances the flavor profile. Feel free to use fresh ground cinnamon for a more robust flavor.
  • Fresh pear slices: These not only add flavor but also make a beautiful garnish.
  • Cinnamon stick (for garnish): An aromatic touch that completes your drink.

How to Make It: Step-by-Step Instructions

A side view of a cocktail glass filled with a golden Spiced Pear Bourbon Smash, garnished with pear and cinnamon.

Now that we have everything ready, let’s dive into the process of making this delightful cocktail!

  1. Muddle the fresh pear slices with the maple syrup and powdered cinnamon in a cocktail shaker. This releases the pear’s juices and infuses the sweetness.
  2. Add the bourbon, pear juice, and lemon juice to the shaker.
  3. Fill the shaker with ice and shake vigorously for 10-15 seconds until well-chilled. The goal is to mix the flavors and cool the drink.
  4. Strain the mixture into a glass filled with fresh ice, allowing the flavors to flow smoothly.
  5. Garnish the drink with a cinnamon stick and a slice of fresh pear for a beautiful presentation.

Pro Tips for the Perfect Cocktail

Want to elevate your cocktail game? Here are some expert insights to ensure your Spiced Pear Bourbon Smash turns out perfectly every time:

  • Choose the Right Bourbon: A bourbon with hints of vanilla and caramel complements the pear beautifully. Look for brands like Buffalo Trace or Maker’s Mark.
  • Use Fresh Ingredients: Fresh pears and juices make all the difference. They offer vibrant flavors that bottled versions can’t match.
  • Experiment with Spices: Try adding nutmeg or ginger to the mix for a twist on the classic flavors.
  • Chill Your Glasses: For an extra refreshing drink, chill your glasses in the freezer before serving.
  • Adjust Sweetness: Everyone’s taste is different; feel free to add more or less maple syrup based on your preference.
  • Muddle Gently: When muddling the pears, be gentle to avoid creating too much pulp in your cocktail.
  • Shake Well: Don’t skip the shaking step; it’s crucial for mixing the flavors and chilling the drink.
  • Serve Immediately: This cocktail is best enjoyed fresh, so serve it right after mixing.

Common Mistakes and Troubleshooting

Even the best can stumble sometimes! Here are some common pitfalls and how to avoid them:

  • Too Sweet?: If your cocktail turns out too sweet, add a splash more lemon juice to balance the flavors.
  • Weak Flavor?: Ensure you’re using fresh ingredients. Bottled juices often lack the vibrant flavor of fresh.
  • Spilled Cocktail?: Use a fine mesh strainer while pouring to catch any pulp or ice shards that could make serving messy.
  • Not Chilled Enough?: If your drink isn’t cold enough, consider shaking it for a few more seconds or adding more ice to your glass.

Variations to Try

Feeling adventurous? Here are some delightful variations on the Spiced Pear Bourbon Smash:

  • Spiced Apple Bourbon Smash: Substitute pear juice with fresh apple juice for a twist on this classic.
  • Maple Ginger Smash: Add a splash of ginger beer for a fizzy kick that complements the spices.
  • Herbal Twist: Incorporate fresh rosemary or thyme for an aromatic element that enhances the drink.
  • Frozen Delight: Blend the ingredients with ice for a refreshing frozen cocktail perfect for warm days.

Storage and Make-Ahead Instructions

Want to prep ahead of time? Here’s how to handle the Spiced Pear Bourbon Smash:

  • Make-Ahead: You can prepare the pear juice and simple syrup in advance. Store them in the refrigerator for up to a week.
  • Pre-Mixed Cocktail: Mix the bourbon, pear juice, lemon juice, and syrup in a pitcher. Store it in the fridge and shake with ice when ready to serve.
  • Storage: While best enjoyed fresh, if you have leftovers, keep them in a sealed container in the fridge for up to 2 days. Shake well before serving.

Frequently Asked Questions

Here are some common questions about the Spiced Pear Bourbon Smash:

  • Can I use whiskey instead of bourbon? Yes! Any whiskey can work, but bourbon adds a unique flavor profile.
  • Is the drink kid-friendly? You can create a non-alcoholic version by replacing bourbon with sparkling apple cider.
  • Can I use a different sweetener? Absolutely! Honey or agave syrup can be substituted for maple syrup.
  • What if I don’t have fresh pears? You can use high-quality pear juice, but fresh is always best for flavor.
  • How strong is this cocktail? With 2 oz of bourbon, it’s a bit stronger than your average cocktail. Enjoy responsibly!
  • Can I add more spices? Yes! Feel free to experiment with cardamom or cloves for a unique flavor.
  • What’s the best way to garnish? Fresh pear slices and a cinnamon stick are perfect for a beautiful presentation.
  • How should I serve it? Serve in a chilled rocks glass or any glass you love for cocktails.

Nutritional Tips and Dietary Adaptations

Keeping an eye on nutritional content? Here are some tips:

  • Calorie Conscious: Reduce the amount of maple syrup to lower the sugar content.
  • Gluten-Free: This cocktail is naturally gluten-free, making it suitable for those with gluten sensitivities.
  • Vegan Option: Ensure that the syrup you use is vegan-friendly if you are following a vegan diet.
  • Low-Carb Variation: Swap maple syrup for a sugar-free sweetener to enjoy a low-carb version.

Recommended Equipment

To make the Spiced Pear Bourbon Smash, here’s what you’ll need:

  • Cocktail Shaker: Essential for mixing and chilling your cocktail perfectly.
  • Muddler: A handy tool for crushing the fresh pears and releasing their juices.
  • Fine Mesh Strainer: This will help keep your drink smooth by filtering out any pulp or ice shards.
  • Jigger: For precise measurement of your ingredients, ensuring a perfect balance.
  • Glassware: Choose a rocks glass or a fun cocktail glass that suits your style.

Serving Suggestions

To make your gathering even more special, here are some serving suggestions:

  • Pair with Appetizers: This cocktail complements savory bites like cheese platters or spiced nuts.
  • Cozy Up by the Fire: Enjoy your Spiced Pear Bourbon Smash by the fireplace for a warm, inviting atmosphere.
  • Share with Friends: This cocktail is perfect for parties, so consider making a pitcher to share.
  • Seasonal Decor: Serve in festive glassware and add autumnal decorations like mini pumpkins for a charming touch.

As we close our journey through the world of the Spiced Pear Bourbon Smash, remember that cooking—and cocktail making—is about love, memories, and gathering around the table. Each sip of this cocktail is an invitation to share laughter and stories with those you cherish most. So, gather your ingredients, invite your loved ones, and toast to the beautiful moments that life brings. Cheers!

Spiced Pear Bourbon Smash Cocktail

Prep Time 5 minutes
Total Time 5 minutes
Servings 1 glass
Calories 180
A delightful cocktail combining the warmth of cinnamon with the sweetness of pear and bourbon for a perfect sip.

Ingredients

Beverages

  • 2 oz bourbon
  • 1 oz pear juice
  • 0.5 oz lemon juice
  • 0.5 oz maple syrup
  • 0.25 tablespoon cinnamon powder

Garnish

  • 1 slices fresh pear slices
  • 1 stick cinnamon stick

Instructions 

  • Muddle pear slices with maple syrup and cinnamon in a shaker.
  • Add bourbon, pear juice, and lemon juice; shake with ice.
  • Shake vigorously for 10-15 seconds.
  • Strain into a glass with fresh ice.
  • Garnish with a cinnamon stick and pear slice.

Notes

Use fresh pear slices for best flavor.
Calories: 180kcal
Cost: $15
Course: Cocktail
Keyword: bourbon, pear, Spiced

Welcome to the Heart of Home Cooking: Summer Sausage Skillet

Gather ’round, friends! Today, we’re diving deep into a delightful dish that resonates with warmth and comfort—the Summer Sausage Skillet. This recipe, rich in flavor and memories, combines juicy chicken sausage with fresh garden veggies, all drizzled in a sweet and tangy glaze. It’s not just a meal; it’s a celebration of love, laughter, and togetherness at the family table. Let’s get started on this savory journey that promises to bring everyone to the table.

Why You’ll Love This Recipe

Every bite of this summer sausage skillet is a reminder of home, but it also brings with it a host of benefits that make it a must-try:

  • Quick and Easy Preparation: This dish comes together in just 30 minutes, making it perfect for busy weeknight dinners.
  • Flavorful and Filling: Packed with protein and fresh veggies, this skillet meal is both satisfying and healthy.
  • Customizable Ingredients: Feel free to swap in your favorite sausage or seasonal vegetables to suit your taste.
  • One-Pan Wonder: Minimal cleanup is required since everything is cooked in one skillet, leaving you with more time to enjoy your meal.
  • Perfect for Sharing: This dish serves 4-6, making it ideal for family gatherings or friendly get-togethers.

Summer Sausage Skillet Ingredients

Before we jump into the cooking, let’s break down the ingredients you’ll need for this delightful dish, along with some handy substitutions:


Meal Prep Container Set

★ Recommended Kitchen Tool

Meal Prep Container Set

Make this recipe even easier with a quality Meal Prep Container Set — a must-have kitchen staple!


🛒 Shop This Tool →

As an Amazon Associate, we earn from qualifying purchases.
  • 24 ounces chicken sausage links (sliced): You can also use turkey sausage or even a spicy andouille sausage for a kick.
  • 2 zucchinis (cubed): Try yellow squash or bell peppers if zucchini isn’t available.
  • 1 red bell pepper (cubed): Feel free to mix in green or yellow bell peppers for added color.
  • 1 green bell pepper (cubed): Again, any color works here!
  • 1 small red onion (cubed): Substituting with yellow onion or shallots will work perfectly.
  • 1 tsp salt: Adjust to taste, especially if using pre-seasoned sausages.
  • 1/2 tsp pepper: Freshly cracked black pepper enhances the flavor.
  • 3 corn riblets (or 1/2 cup of canned corn): Fresh corn adds sweetness but frozen corn works too!
  • 1/2 cup yellow mustard: This adds a tangy depth—consider Dijon for a twist.
  • 2 tbsp brown sugar: Honey can be a good substitute for sweetness.
  • 2 tbsp honey: Maple syrup can be used for a different flavor profile.
  • 2 tbsp apple cider vinegar: White vinegar or lemon juice can also brighten the dish.
  • 1/2 tbsp tomato paste: Improves the richness of the sauce; you can use ketchup in a pinch.
  • 1 tsp Worcestershire sauce: This adds umami; soy sauce can be a substitute.
  • 1/2 tsp chicken bouillon: A vegetarian version can use vegetable bouillon.
  • 1/2 tsp kosher salt (plus more to taste): Essential for enhancing all the flavors.
  • 1 tsp smoked paprika: Adds a lovely smokiness; regular paprika is fine, too.
  • 1 small clove garlic (grated): Fresh garlic is best, but garlic powder can work in a pinch.
  • 1/2 tsp onion powder: Perfect for a flavor boost.
  • 1/8 tsp cayenne pepper (adjust to taste): For those who like a bit of heat!

How to Make Summer Sausage Skillet

Juicy chicken sausage links mixed with zucchini and bell peppers in a skillet.

Now, let’s cook! Follow these steps to create your delicious summer sausage skillet:

  1. In a small pot, combine all the BBQ sauce ingredients mentioned above. Stir until well combined and bring to a gentle simmer over low heat. Cook for 2-3 minutes, stirring occasionally, until warmed through.
  2. Heat a large skillet over medium-high heat. Add the sliced chicken sausage and cook for 6-8 minutes, stirring occasionally, until browned and crispy around the edges. Remove the sausage from the skillet and set aside.
  3. In the same skillet, add the chopped vegetables. Cook for 7-10 minutes, stirring occasionally, until they are lightly browned and tender-crisp. The goal is to soften them while keeping a little bite.
  4. Add the chicken sausage back to the skillet and toss everything together. Top with freshly cracked black pepper and drizzle with the Carolina Gold BBQ sauce before serving.

Expert Tips for a Perfect Sausage Skillet

Looking to elevate your dish further? Here are some pro tips to keep in mind:

  • Use fresh ingredients: The quality of vegetables and sausage directly impacts the flavor of your dish.
  • Adjust seasoning: Taste as you go! This allows you to customize the flavor.
  • Don’t overcrowd the skillet: Cooking in batches ensures everything gets the right amount of heat and browning.
  • Experiment with herbs: Fresh basil or cilantro can add a pop of freshness to your dish.
  • Allow the skillet to rest: Letting it sit for a few minutes off the heat allows the flavors to meld beautifully.
  • Serve with sides: Pair your skillet with crusty bread or a light salad for a balanced meal.
  • Make it a breakfast dish: Add eggs to the skillet for a hearty breakfast option.
  • Consider a creamy sauce: A drizzle of cilantro crema or basil cilantro crema can elevate the flavors.

Common Mistakes and Troubleshooting

Even the best cooks can face challenges. Here are some common mistakes to avoid:

  • Overcooking vegetables: Keep an eye on them to ensure they stay vibrant and retain a slight crunch.
  • Not seasoning adequately: Season with salt and pepper at each stage of cooking for depth of flavor.
  • Using too many soft vegetables: They can turn mushy in the skillet; balance is key!
  • Skipping the resting time: Allowing the dish to rest enhances the flavors.

Variations of Summer Sausage Skillet

This recipe is incredibly versatile. Here are some variations you might consider:

  • Spicy Andouille Sausage Skillet: Swap chicken sausage for spicy andouille for a kick.
  • Vegetarian Skillet: Replace sausage with chickpeas or tempeh for a hearty vegetarian option.
  • Italian-Style Skillet: Add Italian herbs and serve with marinara sauce.
  • Southwestern Skillet: Incorporate black beans, corn, and spices like cumin and chili powder.

How to Store and Freeze Summer Sausage Skillet

If you have leftovers (though I doubt you will!), here’s how to store them:

  • Refrigerate: Store in an airtight container for up to 3 days.
  • Freeze: Allow to cool completely, then transfer to a freezer-safe container. It can be frozen for up to 3 months.
  • Reheat: Gently reheat in the skillet over low heat, adding a splash of water or broth to restore moisture.

Summer Sausage Skillet Questions Answered

Curious minds often have questions! Here are some FAQs regarding this dish:

  • Can I use other types of sausage? Absolutely! Feel free to experiment with your favorite types of sausage.
  • Is this recipe gluten-free? Yes, it can be gluten-free if you use gluten-free sausage and check your condiments.
  • Can I make this ahead of time? Yes! Prepare it a day in advance and reheat when ready to serve.
  • What can I serve with this dish? Crusty bread, a light salad, or even over rice or quinoa work well.
  • How do I adjust the spice level? Simply add more cayenne pepper for heat or omit it altogether for a milder flavor.
  • Can I add more vegetables? Definitely! Feel free to include any seasonal vegetables you love.
  • What’s the best way to reheat leftovers? Reheat gently in a skillet or microwave, adding a splash of water or broth to keep it moist.
  • How long does this dish last? Leftovers can be stored in the fridge for up to 3 days.

Nutritional Tips and Dietary Adaptations

Cooking is also about nourishing our bodies. Here are some tips to make this dish even healthier:

  • Increase the veggie ratio: Add more vegetables to boost fiber and nutrients.
  • Choose leaner sausage: Opt for turkey or chicken sausage to reduce fat content.
  • Control sugar levels: Adjust or omit sugar in the sauce for a healthier option.

Equipment Recommendations

To make your cooking experience smooth, here’s what you’ll need:

  • Large skillet: A non-stick or cast-iron skillet works wonders for even cooking.
  • Small pot: Perfect for making your BBQ sauce.
  • Spatula or wooden spoon: To stir and serve with ease.

Serving Suggestions for Your Skillet Delight

Once your summer sausage skillet is ready, here are some ways to serve it:

  • Garnish: Top with fresh herbs like parsley or cilantro for a pop of color and flavor.
  • Pair with sides: Complement with a fresh garden salad or crusty garlic bread.
  • Make it a feast: Serve alongside mashed potatoes or rice for a more filling meal.

As we wrap up this journey, remember that cooking is about sharing moments and nurturing bonds. This Summer Sausage Skillet is here to help you create new memories around your table, filled with love and laughter. Enjoy every bite, and may your kitchen always be a haven of warmth and joy!

Summer Sausage Skillet

Prep Time 10 minutes
Cook Time 20 minutes
Total Time 30 minutes
Servings 4 servings
Calories 450
A flavorful and colorful skillet dish combining chicken sausage with fresh vegetables and a tangy BBQ sauce, perfect for a quick summer meal.

Ingredients

Protein

  • 24 ounces chicken sausage links, sliced
  • 2 cups zucchini, cubed
  • 1 cup red bell pepper, cubed
  • 1 cup green bell pepper, cubed
  • 1 small red onion, cubed
  • 1 tsp salt
  • 0.5 tsp pepper
  • 3 riblets corn riblets (or 1/2 cup canned corn)
  • 0.5 cup yellow mustard
  • 2 tbsp brown sugar
  • 2 tbsp honey
  • 2 tbsp apple cider vinegar
  • 0.5 tbsp tomato paste
  • 1 tsp worcestershire sauce
  • 0.5 tsp chicken bouillon
  • 0.5 tsp kosher salt, plus more to taste
  • 1 tsp smoked paprika
  • 1 small clove garlic, grated
  • 0.5 tsp onion powder
  • 0.125 tsp cayenne pepper, adjust to taste

Instructions 

  • Combine BBQ sauce ingredients in a small pot, simmer for 2-3 minutes, then set aside.
  • Cook sliced sausage in a skillet over medium-high heat for 6-8 minutes until browned, then remove.
  • Sauté vegetables in the same skillet for 7-10 minutes until tender-crisp.
  • Return sausage to skillet, toss with vegetables, top with black pepper, and drizzle with BBQ sauce before serving.

Notes

Adjust cayenne and salt to taste for desired spice and saltiness.
Calories: 450kcal
Cost: $15
Course: Main Course
Cuisine: American
Keyword: Sausage, skillet, Vegetables