Author

daniel

Browsing

Why Praline Pumpkin Pie is a Must-Make for Your Family Table

As the leaves turn and the air fills with the crisp scent of autumn, there’s a certain magic that comes alive in our kitchens. One of my fondest memories from childhood is gathering around the table with my family, eagerly anticipating the arrival of my grandmother’s legendary praline pumpkin pie. This isn’t just a dessert; it’s a celebration of love, tradition, and the warmth that food brings to our lives. In this article, I’ll share my treasured recipe for Praline Pumpkin Pie that you can create with your loved ones, ensuring that the sweet aroma of baked pumpkin and pecans fills your home.

Why You’ll Love This Recipe

  • Rich Flavor: The combination of creamy pumpkin and sweet, crunchy pecans creates a symphony of flavors that dance on your palate.
  • Comforting Tradition: This pie carries with it the nostalgia of family gatherings and cherished moments shared around the table.
  • Versatile Dessert: Perfect for Thanksgiving, holiday parties, or simply as a comforting treat on a chilly evening.
  • Simple Ingredients: With just a few pantry staples, you can whip up this delightful pie without any fuss.
  • Make-ahead Friendly: This pie can be made in advance, saving you time on busy holiday mornings.

Ingredients for Praline Pumpkin Pie

Let’s gather our ingredients and prepare to create something truly special. Here’s what you’ll need:

  • 1 pie crust recipe (homemade or store-bought)
  • 1 cup pecans (chopped)
  • 1/3 cup brown sugar (packed)
  • 1 3/4 cup pumpkin puree
  • 14 oz sweetened condensed milk
  • 2 large eggs
  • 2/3 cup brown sugar (packed)
  • 1 teaspoon ground cinnamon
  • 1/2 teaspoon salt
  • 1/2 teaspoon ground ginger
  • 1/2 teaspoon ground nutmeg
  • 1/4 teaspoon ground cloves
  • 1 cup pecans (finely chopped)
  • 3 tablespoons butter (melted)
  • 1/3 cup brown sugar (packed)

Step-by-Step Instructions for Making Praline Pumpkin Pie

A slice of Praline Pumpkin Pie showcasing a golden crust and a rich pecan topping.

Now that we have our ingredients, let’s dive into the process of making this delightful pie. Follow these steps to create something truly special.

  1. Prepare the Pie Crust: Start by par-baking your pie crust. Preheat your oven to 425°F. Pierce the bottom of the pie dough lightly with a fork (just a few piercings will do). Line it with parchment paper and fill with pie weights or dried beans. Bake until the edges begin to brown, approximately 15-20 minutes. Remove the weights and parchment, and let cool.
  2. Create the Praline Bottom: In a bowl, mix together the chopped pecans and 1/3 cup of brown sugar. Spread this mixture evenly on the bottom of your cooled pie crust.
  3. Make the Pumpkin Filling: In a large mixing bowl, whisk together the pumpkin puree, sweetened condensed milk, eggs, 2/3 cup of brown sugar, cinnamon, salt, ginger, nutmeg, and cloves until smooth and well combined.
  4. Assemble the Pie: Pour the pumpkin filling over the pecan praline base in the pie crust. Bake in the oven for 15 minutes at 425°F, then reduce the temperature to 350°F and continue baking for another 35-40 minutes, or until the filling is set and a knife inserted in the center comes out clean.
  5. Prepare the Topping: In a small bowl, combine the finely chopped pecans, melted butter, and remaining brown sugar. Spread this mixture over the pie in the last 10 minutes of baking.
  6. Cool and Serve: Once baked, remove the pie from the oven and allow it to cool completely. This pie is best served chilled or at room temperature. Enjoy with a dollop of whipped cream or a scoop of vanilla ice cream for that extra touch of indulgence!

Pro Tips for Perfect Praline Pumpkin Pie

  • Use fresh spices: Freshly ground spices elevate the flavor profile of this pie dramatically.
  • Check for doneness: The filling should be set but slightly jiggly in the center when done. It will firm up as it cools.
  • Let it cool: Allow the pie to cool for at least two hours before slicing to ensure clean cuts.
  • Serve with love: Always serve this pie with a smile and a story to make it even more special.

Common Mistakes and Troubleshooting

Even the best of us can run into a few bumps along the road when making this pie. Here are some common pitfalls and how to avoid them:

  • Overbaking: Keep a close eye on your pie during the last few minutes to prevent a dry filling. Remember, it will continue to set as it cools.
  • Crust issues: If your crust shrinks while baking, it might be due to overworking the dough. Handle it gently to keep it tender.
  • Too sweet: If you’re concerned about sweetness, reduce the amount of brown sugar in the filling slightly without compromising the flavor.

Variations to Try

Feel free to get creative with your praline pumpkin pie! Here are some variations to consider:

  • Chocolate Swirl: Add melted chocolate to the pumpkin filling for a rich twist.
  • Spiced Rum: A splash of spiced rum in the filling adds warmth and depth.
  • Nut-free Version: Substitute the pecans with sunflower seeds for a nut-free alternative.
  • Vegan Twist: Replace eggs with flaxseed meal and use coconut milk instead of sweetened condensed milk.

Storage and Make-Ahead Instructions

This pie can be made ahead of time, which is perfect for busy holiday schedules. Here’s how to store it:

  • Refrigeration: Store the pie in the refrigerator for up to 3 days.
  • Freezing: You can freeze the pie for up to a month. Make sure to wrap it tightly in plastic wrap and foil.
  • Defrosting: To thaw, place in the refrigerator overnight before serving.

Frequently Asked Questions (FAQs)

  • Can I make this pie ahead of time? Absolutely! This pie can be made up to two days in advance and stored in the refrigerator.
  • Can I use a premade crust? Yes, a premade crust works perfectly for this recipe if you’re short on time.
  • What’s the best way to serve praline pumpkin pie? Serve it chilled with whipped cream or a scoop of vanilla ice cream for a delightful treat.
  • How do I know when the pie is done? The filling should be set but slightly jiggly in the center when done. It will firm up as it cools.
  • Can I make this pie gluten-free? Yes! Use a gluten-free pie crust for your base, and you’re all set.
  • What can I substitute for sweetened condensed milk? You can use coconut cream or homemade evaporated milk as a substitute.
  • How do I keep the crust from getting soggy? Ensure you par-bake the crust properly and avoid overfilling the pie.
  • Can I add more spices? Feel free to adjust the spices to your preference for a more robust flavor!

Nutrition Tips and Dietary Adaptations

This praline pumpkin pie can be adapted to fit various dietary preferences:

  • Lower Sugar: Use a sugar substitute to reduce the sweetness without sacrificing flavor.
  • Dairy-Free: Substitute sweetened condensed milk with coconut milk for a dairy-free option.
  • Whole Grain: Use a whole wheat pie crust for added nutrition.

Essential Equipment for Making Praline Pumpkin Pie

For this recipe, you’ll need:

  • Mixing Bowls: A set of mixing bowls in various sizes for combining ingredients.
  • Pie Dish: A 9-inch pie dish works best for this recipe.
  • Whisk: For mixing the pumpkin filling thoroughly.
  • Oven Thermometer: Ensures your oven is at the right temperature for baking.

Serving Suggestions

To elevate your praline pumpkin pie experience, consider serving it with:

  • Whipped Cream: A dollop of fresh whipped cream adds a delightful creaminess.
  • Vanilla Ice Cream: The combination of warm pie and cold ice cream is simply divine.
  • Coffee or Tea: Pair your pie with a warm beverage to enhance the flavors and provide a cozy experience.

As you embark on this culinary journey to make praline pumpkin pie, remember that each step is infused with love and the spirit of sharing. This pie will surely bring warmth and joy to your family gatherings, just as it has for mine. So roll up your sleeves, gather your loved ones, and create a tradition that will be passed down for years to come. Happy baking!

Praline Pumpkin Pie

Prep Time 30 minutes
Cook Time 20 minutes
Total Time 50 minutes
Servings 8 pieces
Calories 350
A rich and flavorful pumpkin pie topped with praline pecans, perfect for fall celebrations.

Ingredients

Pie crust

  • 1 recipe pie crust

Pecans

  • 1 cup chopped pecans
  • 1/3 cup brown sugar (packed)

Pumpkin puree

  • 1 3/4 cups pumpkin puree

Sweetened condensed milk

  • 14 oz sweetened condensed milk

Large eggs

  • 2 large eggs
  • 2/3 cup brown sugar (packed)
  • 1 teaspoon ground cinnamon
  • 1/2 teaspoon salt
  • 1/2 teaspoon ground ginger
  • 1/2 teaspoon ground nutmeg
  • 1/4 teaspoon ground cloves
  • 1 cup finely chopped pecans
  • 3 tablespoons butter (melted)
  • 1/3 cup brown sugar (packed)

Instructions 

  • Par bake the pie crust: pierce with a fork, line with parchment, add pie weights, and bake at 425°F for 15-20 minutes until lightly browned.
  • Remove parchment and weights, cool the crust, then fill with pumpkin mixture.
  • Mix pumpkin puree, sweetened condensed milk, eggs, spices, and sugars; pour into the crust.
  • Bake at 350°F for 50-60 minutes until set. Top with praline pecans before serving.

Notes

Ensure the pie crust is fully baked before filling to prevent sogginess.
Calories: 350kcal
Cost: $15
Course: Dessert
Cuisine: American
Keyword: Pecans, Pumpkin

A Flavorful Journey into Comfort: Everything But the Bagel Protein Packed Dip

There’s something deeply nostalgic about sharing a meal, especially when it comes to dips that invite everyone to gather around the table. As we dive into this Everything But the Bagel Protein Packed Dip, you’ll discover a delightful blend of cottage cheese and Greek yogurt, harmonizing with the unique flavors of everything bagel seasoning. This dip not only satisfies your taste buds but also nurtures the heart, turning simple snacking into cherished moments.

This dip is more than just a recipe; it’s an experience that brings back warm memories of family gatherings. Whether you’re hosting game night, a potluck, or just craving a cozy evening snack, this dip is your perfect companion. Let’s explore the depths of what makes this dish a staple in any home!

Why You’ll Love This Recipe

Here are just a few reasons to fall in love with this dip:

  • High Protein Content: Packed with protein from cottage cheese and Greek yogurt, it’s a wonderful choice for satisfying hunger without the guilt.
  • Quick and Easy: With just a few ingredients and a blender, this dip can be whipped up in minutes, making it perfect for last-minute gatherings.
  • Versatile Pairing: Whether you’re dipping fresh veggies, pita chips, or spreading it on a bagel, it complements a variety of snacks beautifully.
  • Rich Flavor: The everything bagel seasoning brings a savory crunch that elevates the dip into something truly special.
  • Healthy & Delicious: Combining health and flavor, this dip proves that you don’t have to sacrifice taste for nutrition.

Ingredients: A Closer Look

To create this delightful dip, you’ll need the following ingredients:

  • 2 cups cottage cheese: Provides a creamy base and is high in protein.
  • 1/2 cup plain Greek yogurt: Adds tanginess and a smooth texture.
  • 3 tbsp Everything but the Bagel seasoning: The star of the show, this seasoning adds depth and a crunch.

Feel free to customize your ingredients based on what you have at home. Here are some substitutions:

  • Cottage Cheese: For a dairy-free option, swap with silken tofu.
  • Greek Yogurt: You can use plant-based yogurt for a vegan twist.
  • Everything Bagel Seasoning: If you don’t have it, mix sesame seeds, poppy seeds, garlic powder, onion powder, and salt for a homemade version.

How to Make This Dip: Step-by-Step Instructions

Close-up side view of a creamy protein-packed dip in a bowl, showcasing its texture.

Creating this dip is as easy as pie—well, maybe easier! Follow these simple steps:

  1. Put all of the ingredients into a blender or food processor.
  2. Blend until you reach your desired consistency. You can leave it chunky or smooth, based on your preference.
  3. Transfer the dip to an airtight container and store it in the fridge for up to a week.

Pro Tips for the Perfect Dip

Here are some expert insights to elevate your dip game:

  • Chill Before Serving: Letting your dip chill for a couple of hours enhances the flavors.
  • Fresh Herbs: Consider adding fresh herbs like chives or dill for even more flavor.
  • Experiment with Texture: Try adding finely chopped veggies like bell peppers or cucumbers for a crunch.
  • Serving Style: Serve your dip in a beautiful bowl and garnish with extra seasoning or herbs for visual appeal.
  • Double the Recipe: If you’re serving a crowd, don’t hesitate to double the ingredients—this dip disappears fast!
  • Perfect for Meal Prep: Make it ahead of time for busy weeks; it stays fresh for several days.
  • Adjust Seasoning: Taste and adjust the seasoning according to your preference; don’t be shy to experiment!
  • Pair with a Variety of Dippers: Think outside the box—try it with apple slices or crackers for a sweet-savory combo.

Common Mistakes and Troubleshooting

To ensure your dip turns out perfectly, avoid these common pitfalls:

  • Over-blending: Blending too long can turn your dip too smooth; pulse it for a chunky texture instead.
  • Skipping the Seasoning: Don’t skip the everything bagel seasoning; it’s what makes this dip special!
  • Not Chilling: Serving it right away is fine, but chilling it enhances the flavors significantly.
  • Ignoring Texture: Adjust the consistency to your liking before serving; if it’s too thick, add a splash of water or extra yogurt.

Variations to Try

Feeling adventurous? Here are some fun variations to keep things exciting:

  • Spicy Kick: Add a teaspoon of hot sauce or diced jalapeños for a spicy version.
  • Herbed Delight: Incorporate fresh herbs such as dill or parsley for a garden-fresh flavor.
  • Smoky Flavor: Mix in smoked paprika for a unique twist that brings depth.
  • Cheesy Addition: Fold in grated cheese, like Parmesan or cheddar, for an extra layer of flavor.

Storage and Make-Ahead Instructions

To keep this dip fresh and delicious:

  • Refrigeration: Store in an airtight container in the fridge for up to a week.
  • Make Ahead: Prepare it a day in advance to allow the flavors to meld together beautifully.
  • Freezing: This dip isn’t ideal for freezing, as the texture may change; it’s best enjoyed fresh!

Frequently Asked Questions

Here are some common questions about this dip:

  • Can I use low-fat cottage cheese? Absolutely! Low-fat options work just as well.
  • Is this dip gluten-free? Yes, it’s naturally gluten-free, making it a safe choice for those with gluten sensitivities.
  • Can I add protein powder? Yes, stir in unflavored protein powder for an extra protein boost!
  • What can I serve with this dip? It’s perfect with veggies, chips, crackers, or as a spread on sandwiches.
  • Is this recipe vegan? To make it vegan, substitute the dairy with plant-based options mentioned earlier.
  • How can I adjust the flavor? Feel free to add more seasoning or a splash of lemon juice to brighten the taste.
  • What is the best way to store leftovers? Keep it in an airtight container in the fridge to maintain freshness.
  • Can I serve this at room temperature? While it’s best served chilled, you can serve it at room temperature if preferred.

Nutritional Benefits and Dietary Adaptations

This dip not only pleases the palate but also offers several nutritional benefits:

  • High in Protein: Ideal for muscle recovery and satiety.
  • Low in Carbs: A great option for those following a low-carb diet.
  • Calcium-Rich: Cottage cheese and Greek yogurt provide essential calcium for bone health.
  • Customizable for Dietary Needs: Easily adaptable for gluten-free, vegetarian, or vegan diets.

Equipment Recommendations

To make your dip-making process seamless, here are some essential tools:

  • Blender or Food Processor: A good-quality blender will help achieve the perfect consistency.
  • Airtight Container: Essential for storing leftovers and keeping the dip fresh.
  • Measuring Cups and Spoons: Accurate measurements are key to a delicious dip.

Serving Suggestions

Presenting your dip beautifully can make all the difference. Consider these serving ideas:

  • Garnish: Top with extra everything bagel seasoning or fresh herbs for a pop of color.
  • Accompanying Dippers: Create a colorful platter with an array of fresh veggies and crispy chips.
  • Creative Spread: Use it as a spread on sandwiches or wraps for a delightful twist.

Wrap-Up: Share the Love

As we come to the end of this flavorful journey, I hope you feel inspired to create this Everything But the Bagel Protein Packed Dip in your own kitchen. Remember, cooking is not just about the food; it’s about the connections and memories we create together. So gather your loved ones, share this dip, and let the warmth of togetherness fill your home. Happy dipping!

Everything But the Bagel Protein Packed Dip

Prep Time 5 minutes
Total Time 5 minutes
Servings 4 servings
Calories 180
A creamy, protein-rich dip infused with the flavors of everything bagel seasoning, perfect for snacking or spreading.

Ingredients

Dairy

  • 2 cups cottage cheese
  • 0.5 cup plain Greek Yogurt

Seasoning

  • 3 tbsp Everything but the bagel seasoning

Instructions 

  • Put all ingredients into a blender and blend until smooth.
  • Transfer to a container and refrigerate.

Notes

Store in an airtight container for up to a week.
Calories: 180kcal
Cost: $8
Course: Appetizer, Snack
Keyword: bagel, Dip, Protein

Discover the Magic of Crispy Sweet Potato Cubes

There’s something undeniably heartwarming about cooking sweet potatoes. Growing up in Louisiana, my grandmother would often have a pot simmering away on the stove, and the sweet, earthy aroma would fill the air, welcoming us home. Today, I want to share a recipe that not only evokes those cherished memories but also brings the family together around the dinner table: Crispy Sweet Potato Cubes. This delightful dish, cooked in an air fryer, is an easy, healthy side that pairs beautifully with any meal. Let’s dive into why you’ll absolutely love making this dish!

Why You’ll Love This Recipe

Crispy Sweet Potato Cubes offer a wonderful blend of flavors and textures that everyone will adore. Here are just a few reasons to try this recipe:

  • Quick Preparation: With just a few simple steps, you can have delicious sweet potato cubes ready in under 20 minutes.
  • Health Benefits: Sweet potatoes are packed with vitamins A and C, fiber, and antioxidants, making them a nutritious choice for your family.
  • Versatile Serving Options: These crispy cubes can be enjoyed as a side dish, a salad topping, or even as a healthy snack.
  • Customizable Flavors: The recipe is easy to modify with your favorite spices or herbs, allowing you to create your unique flavor profile.
  • Kid-Friendly: The crispy texture and natural sweetness of the potatoes make this dish appealing to both kids and adults alike.

Ingredients and Substitutions

Here’s what you’ll need to create these delightful air fryer sweet potato cubes:

  • 2-3 medium sweet potatoes: About 3.5 cups peeled and cubed. You can use garnet or jewel varieties for the sweetest flavor.
  • 2 tablespoons extra virgin olive oil: This enhances the flavor and helps achieve that crispy texture. Alternatively, use olive oil spray for a lighter touch.
  • 1 teaspoon paprika: Adds a smoky depth. Feel free to substitute with smoked paprika for an extra kick.
  • 1 teaspoon garlic powder: A must for flavor. Onion powder works well if you prefer it.
  • 1/2 teaspoon kosher salt: Enhances all the flavors. Adjust to taste.
  • 1/4 teaspoon ground black pepper: Adds a hint of spice. You can use cayenne pepper for a spicier version.

How to Make Crispy Sweet Potato Cubes

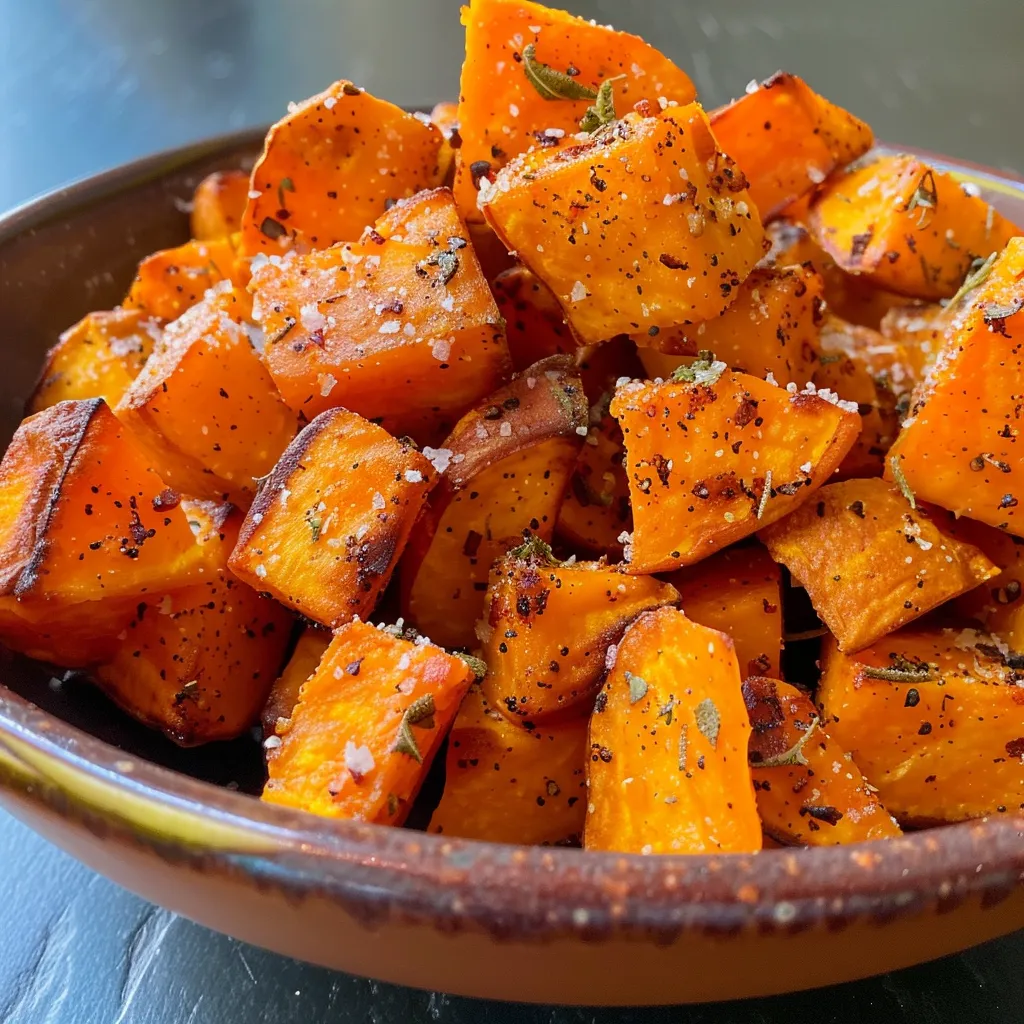
Close-up view of juicy Air Fryer sweet potato cubes on a plate.

Now, let’s get cooking! Follow these simple steps to prepare your air fryer sweet potato cubes:

  1. Wash and dry the sweet potatoes. Use a vegetable peeler to remove the skin and cut the potatoes into cylinders, then into 1/2-3/4 inch even-sized cubes.
  2. Place the cubed sweet potatoes into a medium-sized mixing bowl. Drizzle with olive oil and toss to coat evenly. In a separate bowl, mix the paprika, garlic powder, kosher salt, and black pepper, then sprinkle over the potatoes. Toss once more until well coated.
  3. Preheat your air fryer to 400°F (200°C). If your air fryer doesn’t have a preheat setting, set it to cook for 2-3 minutes with an empty basket before adding the sweet potatoes. Spray the air fryer basket with cooking spray and spread the sweet potato cubes in an even layer. Shake the basket gently to ensure even cooking.
  4. Cook for 14-17 minutes, flipping the cubes halfway through the cooking time. If you’re working with a smaller air fryer, do this in batches for the best results.
  5. Once they are golden and crispy, let the potatoes rest in the air fryer without heat for 3-5 minutes. This will help them crisp up even more. Serve warm and enjoy!

Pro Tips for Perfecting Your Sweet Potato Cubes

To ensure you get the best out of your air fryer sweet potato cubes, consider these expert tips:

  • Uniform Size: Cut your sweet potato cubes into even sizes to ensure they cook uniformly.
  • Don’t Overcrowd: Air fryers work by circulating hot air. If you overcrowd the basket, the cubes won’t crisp up as well.
  • Experiment with Seasonings: Try adding cinnamon for a sweet twist or chili powder for some heat.
  • Use Fresh Ingredients: Fresh sweet potatoes will yield the best flavor and texture.
  • Check for Doneness: Sweet potatoes should be fork-tender and golden brown when done. Adjust cooking time based on your air fryer model.
  • Let Them Rest: Allowing the sweet potatoes to rest after cooking enhances their crispiness.
  • Batch Cooking: If cooking large quantities, consider doing it in batches for the best results.
  • Try Different Oils: Avocado oil or coconut oil can be great alternatives for added flavor.

Common Mistakes and Troubleshooting

Even the best of us can run into a few hiccups while cooking. Here are some common mistakes to avoid:

  • Not Preheating: Skipping the preheating step can lead to uneven cooking.
  • Using Too Much Oil: While oil is essential for crispiness, too much can make the cubes soggy.
  • Ignoring Size Consistency: Inconsistent cube sizes will lead to some being undercooked and others burnt.
  • Not Flipping: Forgetting to shake or flip the cubes halfway through can result in uneven browning.

Flavor Variations

If you’re feeling adventurous, here are some fun variations to try:

  • Spicy Sweet Potato Cubes: Add cayenne pepper or chili powder for a spicy kick.
  • Herb-Infused Cubes: Toss with fresh rosemary or thyme for an aromatic twist.
  • Maple Glazed Sweet Potatoes: Drizzle with maple syrup before air frying for a sweet, caramelized flavor.
  • BBQ Sweet Potato Cubes: Mix in your favorite BBQ seasoning for a smoky flavor.

Storage and Make-Ahead Instructions

These sweet potato cubes are best enjoyed fresh, but if you have leftovers, here’s how to store them:

  • Storage: Place cooled sweet potato cubes in an airtight container in the refrigerator for up to 3 days.
  • Reheating: Reheat in the air fryer for 3-4 minutes at 350°F for the best crispiness.
  • Freezing: For longer storage, freeze the uncooked cubes. Toss them in oil and seasonings, then place them in a single layer on a baking sheet. Once frozen, transfer to a freezer bag for up to 3 months.

Frequently Asked Questions

Here are some common questions about making air fryer sweet potato cubes:

  • Can I peel the sweet potatoes?: Yes, peeling is optional. Leaving the skin on adds extra nutrients and crunch!
  • Do I need to soak sweet potatoes before cooking?: Soaking is not necessary. Just rinse and dry them well.
  • How long does it take to cook sweet potato cubes in the air fryer?: Cook them for about 14-17 minutes, flipping halfway through.
  • What can I serve with air fryer sweet potato cubes?: They pair wonderfully with grilled chicken, fish, or as part of a salad.
  • Can I use other types of potatoes?: Absolutely! This method works well with regular potatoes or even butternut squash.
  • What’s the best way to season sweet potatoes?: Feel free to experiment! Paprika, garlic, and herbs are always a hit.
  • Can I make these sweet potatoes ahead of time?: Yes, you can prep them ahead, but they’re best enjoyed fresh.
  • Are sweet potatoes healthy?: Yes! They’re rich in vitamins, fiber, and antioxidants.

Equipment Recommendations

To make this recipe, you’ll need:

  • Air Fryer: Any model will work, but a digital one allows for precise temperature control.
  • Mixing Bowls: For tossing the potatoes with oil and spices.
  • Vegetable Peeler: If you choose to peel your sweet potatoes.
  • Cutting Board and Knife: For cutting the sweet potatoes into cubes.

Serving Suggestions

To make your meal complete, consider serving the crispy sweet potato cubes with:

  • Grilled Chicken Thighs: Juicy and flavorful, perfect alongside the sweet potatoes.
  • Salad with Arugula and Feta: The peppery greens and creamy cheese balance the sweetness beautifully.
  • Roasted Brussels Sprouts: Another healthy side that complements the dish perfectly.
  • Yogurt Dip: A tangy yogurt or tzatziki sauce makes a great dipping accompaniment.

Cooking is about love, sharing, and creating memories. I hope these crispy sweet potato cubes bring joy to your table, just as they do to mine. Let’s cherish the moments spent around the dinner table, filled with laughter, stories, and the warmth of good food. Happy cooking!

Air Fryer Sweet Potato Cubes

Prep Time 10 minutes
Cook Time 15 minutes
Total Time 25 minutes
Servings 4 servings
Calories 150
Enjoy crispy, flavorful sweet potato cubes cooked effortlessly in your air fryer, perfect as a snack or side dish.

Ingredients

Sweet Potatoes

  • 2-3 medium sweet potatoes (about 3.5 cups peeled and cubed)
  • 2 tablespoons extra virgin olive oil (or olive oil cooking spray)
  • 1 teaspoon paprika
  • 1 teaspoon garlic powder
  • 1/2 teaspoon kosher salt
  • 1/4 teaspoon ground black pepper

Instructions 

  • Peel and cut sweet potatoes into 1/2-3/4 inch cubes.
  • Toss cubes with olive oil and season with paprika, garlic powder, salt, and pepper.
  • Preheat air fryer to 400°F (200°C). Cook the sweet potatoes in a single layer for 14-17 minutes, flipping halfway.
  • Let rest in the air fryer for 3-5 minutes to crisp up, then serve warm.

Notes

Adjust cooking time based on your air fryer model for best results.
Calories: 150kcal
Cost: $10
Course: Side Dish
Cuisine: American
Keyword: Sweet Potato

Welcome to the World of Mini Pumpkin Hand Pies

As the leaves turn and the air becomes crisp, there’s something undeniably comforting about the aroma of pumpkin spices wafting through the kitchen. These mini pumpkin hand pies are more than just a delightful treat; they’re a heartfelt reminder of cozy family gatherings and cherished memories. Made with love and care, each bite offers a perfect blend of creamy pumpkin filling wrapped in a flaky crust, creating a delicious experience that captures the essence of autumn.

Why You’ll Love This Recipe

Embrace the season with these charming hand pies. Here are five reasons why this recipe will become a favorite in your home:

  • Perfect for Sharing: These mini pumpkin hand pies are ideal for gatherings, allowing everyone to enjoy a personal-sized treat.
  • Simple Yet Delicious: With easy-to-follow steps and common ingredients, you’ll create a delightful dessert without stress.
  • Customizable: You can easily adapt the filling or crust to fit your dietary needs, making them suitable for everyone.
  • Make-Ahead Friendly: These hand pies can be prepared in advance and frozen, ensuring you always have a sweet option on hand.
  • Kid-Friendly Fun: Get the little ones involved in the kitchen! They’ll love helping to cut out shapes and fill the pies.

Ingredients You’ll Need

Gathering the right ingredients is the first step towards creating delicious mini pumpkin hand pies. Here’s what you’ll need:

  • 1 box store-bought pie dough: Contains 2 sheets; for a gluten-free option, consider using a gluten-free pie crust.
  • 4 oz cream cheese: Make sure it’s at room temperature for easy mixing.
  • 1/2 cup light brown sugar: Packed to enhance the sweetness and depth of flavor.
  • 1/2 cup pumpkin puree: Fresh or canned works, but make sure it’s pure pumpkin, not pie filling.
  • 1/2 tsp pumpkin pie spice: A warm blend that captures the essence of fall.
  • Pinch of salt: To balance the sweetness.
  • 1 large egg: For egg wash, which gives the pies a golden finish.
  • 1/2 cup granulated sugar: For sprinkling on top for added sweetness and crunch.
  • 1 tsp ground cinnamon: To dust the tops, enhancing both flavor and appearance.

Step-by-Step Instructions

Close-up view of golden-brown mini pumpkin hand pies on a white plate.

Now let’s dive into the heart of the matter—making these delightful hand pies. Follow these steps to create your own batch:

  1. Remove the pie dough from the refrigerator and allow the sheets to come to room temperature while you prepare the filling.
  2. In a bowl, mash together the cream cheese and brown sugar with a fork until smooth.
  3. Incorporate half of the pumpkin puree into the mixture. Once combined, add the remaining pumpkin puree along with the pumpkin pie spice and a pinch of salt.
  4. Preheat your oven to 400°F (200°C) and line a large baking sheet with parchment paper.
  5. Lightly dust your work surface with flour and roll out one of the pie sheets. Smooth out any wrinkles with a rolling pin.
  6. Using a pumpkin-shaped cookie cutter or a homemade template, cut out pumpkin shapes from the dough. Roll out scraps to cut additional shapes, aiming for about 10 pumpkins per sheet.
  7. Transfer the cutouts to the refrigerator while you prepare the second sheet.
  8. On the baking sheet, place half of the pumpkin cutouts evenly spaced apart. If there’s leftover dough, keep it in the fridge for later.
  9. Fill each pumpkin with a tablespoon of the filling, leaving a small border around the edges.
  10. Beat the egg with 2 teaspoons of water, then brush the edges of each filled pumpkin with the egg wash.
  11. Cut slits in the remaining pumpkin shapes to create vents and place them over the filled ones. Press to seal, then crimp the edges with a fork.
  12. Brush the tops with egg wash and sprinkle with cinnamon sugar.
  13. Bake for 12-14 minutes, until golden brown. Allow to cool for about 5 minutes before transferring to a cooling rack.

Pro Tips for Perfect Mini Pumpkin Hand Pies

Let’s ensure your hand pies are just as delightful as intended. Here are some expert insights:

  • Chill the Dough: For flakier crusts, refrigerate your pie dough before rolling it out.
  • Don’t Overfill: Stick to about one tablespoon of filling to prevent leakage during baking.
  • Seal Well: Press firmly and crimp edges to keep the filling from escaping while baking.
  • Temperature Matters: Ensure your oven is preheated fully for even baking.
  • Experiment with Spices: Feel free to adjust spices in the filling to match your family’s taste preferences.
  • Use Parchment Paper: This will help prevent sticking and makes cleanup a breeze.
  • Brush with Milk: Instead of egg wash, milk can add a nice sheen to the crust.
  • Stay Vigilant: Every oven is different; keep an eye on your pies to avoid over-baking.

Common Mistakes and Troubleshooting

Even the best of us can make mistakes in the kitchen. Here are some common pitfalls and how to avoid them:

  • Leaking Filling: Make sure to properly seal the edges and avoid overfilling.
  • Hard Crust: If overworked, the dough can become tough. Handle it gently.
  • Burnt Tops: If the tops brown too quickly, cover them with aluminum foil to shield from direct heat.
  • Filling Too Runny: If your filling is too runny, consider adding a bit more cream cheese or an extra pinch of cornstarch.

Variations to Try

Feel free to get creative with your mini pumpkin hand pies. Here are some variations:

  • Apple Pumpkin Combo: Mix in some grated apples for a delightful twist.
  • Chocolate Chip Delight: Add chocolate chips to the filling for a sweet surprise.
  • Nutty Crust: Substitute part of the pie crust with crushed nuts for added flavor.
  • Spiced Up Filling: Incorporate cayenne or nutmeg for a little heat or extra warmth.

Storage and Make-Ahead Instructions

Planning ahead can save you time and stress. Here’s how to prepare and store your hand pies:

  • Freezing Before Baking: Assemble the pies, then freeze them on a baking sheet. Once frozen, transfer to a freezer-safe bag. Bake from frozen, adding a few extra minutes to the baking time.
  • Storing Baked Pies: Keep baked pies in an airtight container in the fridge for up to 3 days.
  • Reheating: To enjoy leftovers, reheat in a 350°F (175°C) oven until warm, about 10 minutes.

Frequently Asked Questions

Still have questions? Here are some common inquiries about mini pumpkin hand pies:

  • Can I use fresh pumpkin instead of canned? Yes! Just ensure it’s cooked and pureed to a smooth consistency.
  • How do I make these gluten-free? Use a gluten-free pie crust, and check your filling ingredients for gluten content.
  • What can I serve with these hand pies? They pair beautifully with a scoop of vanilla ice cream or a dollop of whipped cream.
  • How long do these hand pies last? Stored in an airtight container, they will last up to 3 days in the fridge.
  • Can I make the filling ahead of time? Absolutely! The filling can be made a day in advance and stored in the fridge.
  • What is the best way to reheat them? Oven reheating is best to maintain the crust’s crispiness; avoid the microwave.
  • Can I add nuts to the filling? Yes! Chopped pecans or walnuts can add a delightful crunch.
  • How do I prevent soggy crusts? Ensure the filling isn’t too wet, and bake until golden and crisp.

Nutritional Tips and Dietary Adaptations

For those mindful of dietary preferences, here are some tips:

  • Reduced Sugar: Substitute some sugar with a natural sweetener like stevia or monk fruit.
  • Vegan Option: Use vegan cream cheese and an egg substitute for the wash.
  • Lower Fat: Swap full-fat cream cheese with a lighter version or Greek yogurt for a healthier twist.

Equipment Recommendations

Having the right tools can make all the difference in your baking experience:

  • Rolling Pin: Essential for smoothing out your dough.
  • Cookie Cutters: Pumpkin-shaped cutters add a festive touch; a glass can also work in a pinch.
  • Baking Sheet: A sturdy, rimmed baking sheet ensures even cooking.
  • Parchment Paper: Prevents sticking and simplifies cleanup.

Serving Suggestions

Ready to serve your mini pumpkin hand pies? Here are some ideas:

  • Dust with Powdered Sugar: A light sprinkle adds a sweet touch.
  • Pair with Hot Beverages: Serve with spiced cider or coffee for a cozy pairing.
  • Create a Dessert Platter: Arrange with other fall treats for a beautiful presentation at gatherings.

Conclusion

As you gather around the table to enjoy these nostalgic mini pumpkin hand pies, remember that each bite is a celebration of love, tradition, and the warmth of home. Share them with family and friends, and create new memories that will linger long after the last crumb is gone. Happy baking, and may your kitchen always be filled with joy and delicious aromas!

Mini Pumpkin Hand Pies

Prep Time 20 minutes
Cook Time 14 minutes
Total Time 34 minutes
Servings 10 pieces
Calories 150
Delight in these adorable pumpkin-shaped hand pies filled with spiced pumpkin cream cheese, perfect for fall treats or festive gatherings.

Ingredients

Dough

  • 1 box store bought pie dough (containing 2 sheets)
  • 4 oz cream cheese (room temp)
  • 0.5 cup light brown sugar (packed)
  • 0.5 cup pumpkin puree
  • 0.5 tsp pumpkin pie spice
  • pinch salt
  • 1 large egg
  • 0.5 cup granulated sugar
  • 1 tsp ground cinnamon

Instructions 

  • Allow pie dough to come to room temperature and prepare filling by mixing cream cheese and brown sugar until smooth.
  • Mix in half of the pumpkin puree, then add remaining pumpkin, spices, and salt.
  • Preheat oven to 400°F (200°C). Roll out dough, cut out pumpkin shapes, and refrigerate scraps.
  • Fill pumpkin shapes with a tablespoon of filling, cut slits on vented pumpkins, seal with top shapes, and brush with egg wash.
  • Sprinkle with cinnamon sugar and bake for 12-14 minutes. Cool before serving.
Notes

You can use gluten-free pie dough as a substitute for a gluten-free option.
Calories: 150kcal
Cost: $10
Course: Dessert
Cuisine: American
Keyword: Pumpkin

Indulge in Nostalgia: The Heartwarming Sea Salt Caramel Brownies

Welcome to a delightful journey in baking, where every bite of these Sea Salt Caramel Brownies brings back warm memories and sweet moments shared around the family table. As you prepare this recipe, you’ll find that cooking is not just about ingredients, but also about love, connection, and the joy of creating something beautiful together. Here’s why you’ll want to gather your loved ones and make these indulgent brownies today.

Why You’ll Love This Recipe

These Sea Salt Caramel Brownies are more than just a dessert; they are a celebration of flavors and emotions. Here are five reasons to fall in love with this recipe:

  • Rich Flavor Profile: The combination of fudgy brownies and homemade sea salt caramel creates a perfect balance of sweetness and saltiness, making each bite unforgettable.
  • Textural Delight: The brownies are incredibly moist and chewy, while the caramel adds a luscious, creamy layer that melts in your mouth.
  • Sharing Made Easy: This recipe yields generous portions, perfect for gatherings, parties, or simply enjoying with family over coffee.
  • Memorable Moments: Each batch tells a story, inviting you to reminisce about cherished times spent baking with loved ones.
  • Customizable Options: With several variations included, you can tailor this recipe to suit your taste and dietary needs.

Ingredients Breakdown

Let’s dive into what you’ll need to create these delightful brownies:

  • ⅔ cup heavy cream: This adds richness and creaminess to our caramel.
  • ¼ vanilla bean: For a touch of aromatic flavor that elevates the dessert.
  • 1¼ cup granulated sugar: Essential for creating the sweet base of our brownies and caramel.
  • ¼ cup water: Helps dissolve sugar for a smooth caramel consistency.
  • ¼ teaspoon salt: Enhances the flavors and balances sweetness.
  • 2 tablespoons light corn syrup: Prevents crystallization in your caramel for a silky finish.
  • ¾ teaspoon fresh lemon juice: Adds a hint of acidity to balance the sweetness.
  • 4 tablespoons unsalted butter, cut into pieces: Adds a rich, buttery flavor to the caramel.
  • 16 oz mascarpone: For a creamy topping that complements the brownies beautifully.
  • 2 cups heavy cream (480 ml): Whipped to add lightness and volume to the mascarpone layer.
  • ¼ cup granulated sugar (50 g): Sweetens the whipped cream for the topping.
  • ¼ teaspoon salt: To enhance flavors in the topping as well.
  • 2 tablespoons vanilla bean paste: For a flavorful and aromatic component.
  • 1 cup salted butter (227 g): The base for our fudgy brownie texture.
  • 14 ounces 70% bittersweet chocolate, coarsely chopped: For a deep chocolate flavor that’s essential in brownies.
  • ½ cup unsweetened Dutch cocoa powder (60 g): Intensifies the chocolate flavor.
  • 1 cup all-purpose flour (120 g): Provides structure to our brownies.
  • 5 large eggs: Essential for binding and providing moisture.
  • 1 cup packed dark brown sugar (140 g): Adds depth of flavor and moisture to the brownies.
  • 1 cup granulated sugar (200 g): For sweetness in the brownie base.
  • 1 teaspoon salt (½ teaspoon if iodized): To balance the sweetness.
  • 1 tablespoon vanilla extract: Enhances the overall flavor of the brownies.

You can always substitute ingredients based on what you have on hand or dietary preferences; for example, use coconut cream instead of heavy cream for a dairy-free option, or swap brown sugar for granulated sugar for a different flavor profile.

Pro Tips for Perfect Brownies

A close-up side view of rich sea salt caramel brownies with a glossy top layer.

To ensure your Sea Salt Caramel Brownies turn out perfect every time, consider these expert insights:

  • Room Temperature Ingredients: Ensure all your ingredients, especially eggs and butter, are at room temperature for a smooth batter.
  • Don’t Overmix: When combining your dry and wet ingredients, mix just until combined to keep the brownies fudgy.
  • Use Quality Chocolate: The better the chocolate, the richer the flavor. Opt for high-quality bittersweet chocolate.
  • Chill Your Caramel: Allow your caramel to cool slightly before adding it to the brownies to achieve a perfect layering effect.
  • Check for Doneness: Every oven is different; bake until a toothpick comes out with moist crumbs, not wet batter.
  • Let Them Rest: Allow the brownies to cool completely before cutting to get clean edges.
  • Use Parchment Paper: Line your baking dish with parchment for easy removal and clean-up.
  • Experiment with Toppings: Add nuts, sprinkles, or chocolate chips to the brownie batter for added texture.

Avoiding Common Mistakes

Even seasoned bakers can make mistakes. Here’s how to troubleshoot common issues:

  • Too Crumbly?: This could be due to too much flour or underbaking. Measure carefully and ensure they are fully baked.
  • Caramel Too Hard?: If your caramel hardens, it may have been cooked too long. Keep an eye on the temperature.
  • Brownies Falling Apart?: Ensure they are cool before cutting and use a sharp knife for clean slices.
  • Too Sweet?: Balance sweetness with a pinch of salt or add more cocoa to the brownie batter.

Variations to Try

Feel free to mix things up with these variations:

  • Nutty Brownies: Incorporate chopped walnuts or pecans into the brownie batter for added crunch.
  • Mint Chocolate: Add peppermint extract to the brownie batter for a refreshing twist.
  • Spicy Caramel: Infuse your caramel with a pinch of cayenne pepper for a surprising kick.
  • Fruit-Infused: Top with fresh raspberries or strawberries before serving for a fruity contrast.

Storage and Make-Ahead Instructions

Planning ahead? Here’s how to store your brownies:

  • Room Temperature: Store in an airtight container for up to 3 days.
  • Refrigerator: Extend their life to about a week when stored in the fridge.
  • Freezer: Wrap individual brownies in plastic wrap and freeze for up to 3 months for a sweet treat anytime.

Frequently Asked Questions

Here are some common queries about our Sea Salt Caramel Brownies:

  • Can I use a different type of chocolate? Yes, feel free to substitute your favorite chocolate, but ensure it’s high quality for the best flavor.
  • Is it necessary to use sea salt? While it enhances flavor, you can use regular salt in a pinch.
  • How can I make these brownies gluten-free? Substitute all-purpose flour with a gluten-free blend.
  • Can I make the caramel ahead of time? Absolutely! You can make caramel a day ahead and store it in the fridge.
  • What if my caramel crystallizes? Gently reheat it with a little water or cream to bring it back to a smooth consistency.
  • Are these brownies suitable for a vegan diet? You can create a vegan version by using plant-based butter, aquafaba for eggs, and coconut cream.
  • What can I serve with these brownies? They pair beautifully with vanilla ice cream or whipped cream and fresh berries.
  • How long should I bake these brownies? Bake for 25-30 minutes, but keep an eye on them as oven temperatures can vary.

Nutritional Tips and Dietary Adaptations

If you’re watching your nutrition, here’s how to adapt this recipe:

  • Lower Sugar: Reduce the sugar in the brownie batter and topping by substituting with a natural sweetener like honey or agave.
  • Healthy Fats: Use avocado oil instead of butter for a healthier fat option.
  • Incorporate Whole Grains: Substitute all-purpose flour with whole wheat flour for added fiber.
  • Portion Control: Cut smaller squares to enjoy the flavors without overindulging.

Essential Equipment for Success

To bring your Sea Salt Caramel Brownies to life, consider using:

  • 9×13-inch Baking Pan: Perfect size for baking these brownies.
  • Mixing Bowls: For combining your ingredients seamlessly.
  • Whisk: Essential for a smooth batter.
  • Silicone Spatula: Great for folding in ingredients and scraping down the sides of your bowls.
  • Measuring Cups and Spoons: Accurate measurements are crucial for baking success.
  • Paring Knife: For cutting clean slices of brownies.

Serving Suggestions

When it’s time to serve, consider these delightful ideas:

  • Warm with Ice Cream: Serve warm brownies with a scoop of vanilla ice cream melting on top.
  • Drizzle with Chocolate Sauce: A warm drizzle of chocolate sauce adds an extra layer of indulgence.
  • Fresh Berries: Add a side of raspberries or strawberries to brighten the plate and add a touch of freshness.
  • Whipped Cream: A dollop of freshly whipped cream can elevate the experience.

These Sea Salt Caramel Brownies are not just a dessert; they embody the love, warmth, and joy of cooking together. So gather your loved ones, start mixing, and create beautiful memories that will last a lifetime. Happy baking!

Sea Salt Caramel Brownies

Prep Time 20 minutes
Cook Time 30 minutes
Total Time 50 minutes
Servings 16 pieces
Calories 350
Indulge in rich, fudgy brownies topped with luscious sea salt caramel for a perfect balance of sweet and salty flavors.

Ingredients

Dairy and Sweeteners

  • 0.67 cup heavy cream
  • 0.25 cup vanilla bean (split and scraped)
  • 1.25 cup granulated sugar
  • 0.25 cup water
  • 0.25 teaspoon salt
  • 2 tablespoon light corn syrup
  • 0.75 teaspoon fresh lemon juice
  • 4 tablespoons unsalted butter (cut into pieces)
  • 1 recipe sea salt caramel (above)
  • 16 oz mascarpone
  • 2 cups heavy cream (additional)
  • 0.25 cup granulated sugar (additional)
  • 0.25 teaspoon salt (additional)
  • 2 tablespoon vanilla bean paste
  • 1 cup salted butter
  • 14 oz bittersweet chocolate (coarsely chopped)
  • 0.5 cup unsweetened dutch cocoa powder
  • 1 cup all-purpose flour
  • 5 large eggs
  • 1 cup dark brown sugar
  • 1 cup granulated sugar
  • 1 teaspoon salt (½ teaspoon if iodized)
  • 1 tablespoon vanilla extract

Instructions 

  • Prepare the sea salt caramel and set aside.
  • Combine melted chocolate, butter, sugars, eggs, and vanilla; mix until smooth.
  • Stir in flour, cocoa powder, and salt until just combined.
  • Pour batter into a prepared pan, swirl in caramel, and sprinkle with sea salt.
  • Bake at 350°F (175°C) for 30 minutes, then cool before serving.

Notes

For best results, use high-quality chocolate and fresh sea salt.
Calories: 350kcal
Cost: $15
Course: Dessert
Cuisine: American
Keyword: brownies, Caramel, sea salt

Welcome to the Comfort of Sweet Potato Gnocchi Skillet

There’s something truly magical about the aroma of sweet potatoes nestled in a warm skillet, mingling with savory chicken sausage and earthy mushrooms. This Sweet Potato Gnocchi Skillet doesn’t just fill your stomach; it fills your heart with warmth and nostalgia, reminiscent of evenings spent with family around the dinner table. It’s a dish that celebrates love, tradition, and the simple joys of cooking.

In this comprehensive guide, we’ll explore every aspect of creating this delightful dish, from the ingredients to expert tips, making it easier than ever to whip up this comforting meal in your kitchen. Whether you’re a seasoned cook or just starting out, this recipe is designed to bring joy to your cooking journey.

Why You’ll Love This Recipe

Here are just a few reasons why this Sweet Potato Gnocchi Skillet will become a staple in your home:

  • Flavorful Harmony: The combination of sweet potatoes, savory sausage, and fresh herbs creates a delightful medley that dances on your palate.
  • Nutritious Ingredients: Packed with vitamins and minerals, sweet potatoes are not only delicious but also great for your health.
  • Comfort Food: This dish is perfect for cozy family dinners, fulfilling cravings for something hearty and satisfying.
  • Easy to Make: With clear instructions and simple ingredients, this recipe is approachable for cooks of all skill levels.
  • Versatile Dish: You can customize it with different proteins, vegetables, or sauces to suit your taste or dietary needs.

Ingredients Breakdown

To create the perfect sweet potato gnocchi skillet, you’ll need the following ingredients:

  • 2 pounds sweet potatoes: Peeled and cubed, these form the base of your gnocchi, providing sweetness and texture.
  • 1/4 cup tapioca flour: This helps to bind the gnocchi together, creating a chewy texture.
  • 1 teaspoon sea salt: Enhances the overall flavor of the dish.
  • 2 1/2 cups oat flour: Used to create the dough; it’s gluten-free and adds a nutty flavor.
  • 2 tablespoons olive oil: For frying the gnocchi to a golden perfection.
  • 1 pound nitrate-free chicken andouille sausage: Adds a hearty, savory element to the dish.
  • 1 cup quartered mushrooms: Their earthy flavor complements the sweetness of the potatoes.
  • 1/2 yellow onion: Chopped to add sweetness and depth.
  • 3 large garlic cloves: Minced for a robust flavor boost.
  • 1 tablespoon fresh rosemary: Provides a fragrant touch that elevates the dish.
  • 1 tablespoon fresh thyme leaves: Adds a subtle earthiness.
  • 1/2 teaspoon sea salt: For the sauce.
  • 1/4 teaspoon freshly ground black pepper: To add a hint of spice.
  • 1 cup full-fat coconut milk: Creaminess that brings everything together.
  • 2 cups fresh spinach: For a pop of color and nutrition.

Pro Tips for Perfect Gnocchi

Close-up view of a skillet filled with sweet potato gnocchi, sausage, and spinach.

Mastering this recipe is simple with these expert tips:

  • Use the right sweet potatoes: Choose starchy varieties like Garnet or Jewel for a smooth texture.
  • Don’t overwork the dough: Knead just until combined to keep gnocchi tender.
  • Test the dough: Boil a small piece of gnocchi before shaping the entire batch to ensure it holds together.
  • Flour generously: Use oat flour to prevent gnocchi from sticking to surfaces while shaping.
  • Use a slotted spoon: This helps to gently lift cooked gnocchi from water without breaking them.
  • Fry until golden: This adds flavor and texture; don’t rush this step!
  • Adjust seasonings: Taste as you go, especially with herbs and spices.
  • Mix it up: Feel free to add seasonal vegetables or different proteins for variety.

Avoid Common Mistakes

Even the best cooks make mistakes. Here’s how to avoid some common pitfalls:

  • Using too much flour: This can lead to dense gnocchi; use just enough to bring the dough together.
  • Boiling gnocchi too long: Overcooking can make them mushy; they’re done when they float to the top.
  • Skipping the frying step: This is essential for flavor; don’t skip it!
  • Not tasting as you cook: Always season throughout the cooking process for the best flavor.

Variations to Try

Here are some delicious variations you can try with this gnocchi skillet:

  • Vegetarian Option: Substitute sausage with chickpeas or lentils for a meat-free meal.
  • Spicy Kick: Add red pepper flakes or diced jalapeños to the sauce for some heat.
  • Herb Infusion: Try basil or parsley instead of rosemary and thyme for a fresh twist.
  • Cheesy Goodness: Top with grated Parmesan or mozzarella before serving for a rich finish.

Storage and Make-Ahead Instructions

If you want to prepare this dish ahead of time or store leftovers, follow these guidelines:

  • Make-Ahead: Prepare the gnocchi and sauce separately a day in advance. Reheat gently before serving.

  • Storage: Store any leftovers in an airtight container in the refrigerator for up to 3 days.
  • Freezing: Freeze uncooked gnocchi on a baking sheet, then transfer to a freezer bag. Cook from frozen in boiling water.

Frequently Asked Questions

Here are some common questions about this recipe:

  • Can I use other types of potatoes? Yes, but sweet potatoes give the best flavor and texture for gnocchi.
  • What if my dough is too sticky? Add a little more oat flour until it reaches the right consistency.
  • Can I make this gluten-free? Substitute the oat flour with a gluten-free blend.
  • How do I know when the gnocchi are cooked? They’re done when they float to the surface of the boiling water.
  • Can I use frozen gnocchi? Absolutely! Just cook them straight from frozen without thawing.
  • What can I serve with this dish? A simple green salad or crusty bread pairs beautifully.
  • Can I omit the sausage? Yes, feel free to leave it out or substitute it with your favorite protein.
  • How can I add more veggies? Consider adding bell peppers, zucchini, or kale to the skillet.

Nutritional Tips and Dietary Adaptations

This dish can easily be adapted to fit various dietary needs:

  • Low-Carb: Use cauliflower instead of sweet potatoes for a lower-carb option.
  • Dairy-Free: The coconut milk is already dairy-free; just ensure any cheese you add is also dairy-free.
  • High-Protein: Add beans or additional sausage for extra protein.
  • Vegan: Substitute the sausage with plant-based alternatives and omit any dairy.

Essential Equipment Recommendations

Having the right tools can make cooking easier:

  • Large Pot: For boiling the sweet potatoes and cooking the gnocchi.
  • Mixing Bowl: For combining the gnocchi ingredients.
  • Nonstick Skillet: Essential for frying the gnocchi and sausage.
  • Slotted Spoon: For safely removing cooked gnocchi from boiling water.

Serving Suggestions

To truly elevate your Sweet Potato Gnocchi Skillet, consider these serving ideas:

  • Garnish with Fresh Herbs: A sprinkle of fresh parsley or basil adds a beautiful touch.
  • Pair with a Side Salad: A simple mixed greens salad tossed with vinaigrette complements the richness of the dish.
  • Serve with Crusty Bread: Perfect for soaking up any extra sauce left on your plate.
  • Top with Cheese: A sprinkle of Parmesan or crumbled feta can add delicious creaminess.

Conclusion: Bringing It All Together

Cooking is more than just a task; it’s a way to express love, share stories, and create cherished memories. This Sweet Potato Gnocchi Skillet is a beautiful reflection of that philosophy, combining wholesome ingredients into a dish that warms not only the stomach but also the heart. I invite you to gather your loved ones in the kitchen, embrace the process, and savor the delightful flavors that emerge from this recipe. Happy cooking!

Sweet Potato Gnocchi Skillet

Prep Time 30 minutes
Cook Time 20 minutes
Total Time 50 minutes
Servings 4 servings
Calories 520
A delicious and hearty skillet dish combining homemade sweet potato gnocchi with sausage and greens in a flavorful coconut sauce.

Ingredients

Sweet Potatoes

  • 2 pounds sweet potatoes, peeled and cubed

Tapioca Flour

  • 0.25 cup tapioca flour

Sea Salt

  • 1 teaspoon sea salt

Oat Flour

  • 2.5 cups oat flour, divided

Olive Oil

  • 2 tablespoons olive oil, to fry
  • 1 tablespoon olive oil

Chicken Andouille Sausage

  • 1 pound nitrate-free chicken andouille sausage, sliced into bite-size pieces

Mushrooms

  • 1 cup quartered mushrooms

Yellow Onion

  • 0.5 yellow onion yellow onion, chopped

Garlic Cloves

  • 3 large garlic cloves, chopped

Tapioca Flour

  • 1 tablespoon tapioca flour

Fresh Rosemary

  • 1 tablespoon fresh rosemary, chopped

Fresh Thyme Leaves

  • 1 tablespoon fresh thyme leaves

Black Pepper

  • 0.25 teaspoon freshly ground black pepper

Coconut Milk

  • 1 cup full-fat coconut milk

Fresh Spinach

  • 2 cups fresh spinach

Instructions 

  • Boil sweet potatoes until tender, then mash and mix with tapioca, salt, and oat flour to form dough.
  • Shape dough into ropes, cut into 1-inch pieces, and boil until they float. Drain and set aside.
  • Fry gnocchi in oil until golden, then set aside. Cook sausage until browned and set aside.
  • Sauté mushrooms, onion, and garlic; add spices and coconut milk, simmer to thicken. Stir in spinach until wilted.
  • Combine gnocchi and sausage with sauce, toss to coat, and serve hot.

Notes

For extra flavor, press a fork into each gnocchi piece to create ridges.
Calories: 520kcal
Cost: $15
Course: Main Course
Cuisine: American
Keyword: Sweet Potato

Awakening Memories: The Comfort of Brown Sugar Shaken Espresso

Welcome to a delightful journey through warmth and flavor, where we explore the art of making a Brown Sugar Shaken Espresso. This recipe is more than just a drink; it’s an invitation to relive cherished moments spent around the family table. Inspired by sweet memories and shared laughter, this espresso concoction combines rich flavors with a creamy touch, perfect for any time of day. Let’s get started and create something truly special.

Why You’ll Love This Recipe

  • Quick and Simple: In just a few minutes, you can whip up this café-worthy drink at home, making it perfect for busy mornings or cozy evenings.
  • Customizable Flavors: Adjust the sweetness and creaminess to suit your taste by experimenting with different types of milk or sweeteners.
  • Rich, Balanced Taste: The combination of espresso and brown sugar creates a delightful harmony that’s both energizing and comforting.
  • Perfect for Sharing: This recipe serves as a wonderful conversation starter when enjoyed with friends or family, making it ideal for gatherings.
  • Healthier Option: By making it at home, you control the ingredients, allowing you to opt for healthier alternatives like oat milk or coconut sugar.

Ingredients You’ll Need

To create your Brown Sugar Shaken Espresso, gather the following ingredients:

  • Espresso shots: Freshly brewed for the best flavor.
  • Light brown sugar: Adds a caramel-like sweetness.
  • Unsweetened oat milk: For a creamy finish that complements the coffee.
  • Ice cubes: Essential for that refreshing chilled effect.
  • Cinnamon: A pinch for added warmth and spice.

Substitutions and Add-Ins

If you’re looking to mix things up, consider these substitutions and add-ins:

  • Coconut sugar: A delightful alternative to brown sugar, offering a similar sweetness with a hint of coconut flavor.
  • Almond milk: For a nutty taste that pairs beautifully with coffee.
  • Vanilla extract: Add a splash for a warm, aromatic twist.
  • Nutmeg: A sprinkle for an extra layer of spice.

How to Make Brown Sugar Shaken Espresso

Close-up side view of a Brown Sugar Shaken Espresso in a clear glass, showcasing its layers and color.

Follow these simple steps to bring your Brown Sugar Shaken Espresso to life:

  • In a cocktail shaker or a tightly sealed jar (like a Mason jar), combine:
  • Espresso shots
  • Light brown sugar or coconut sugar
  • Ice
  • Cinnamon
  • Seal the shaker tightly and shake vigorously for about 30 seconds. This ensures the ingredients are mixed well and the coffee gets cold.
  • Fill a glass with ice cubes. Adjust the amount based on your preference for a stronger or colder coffee.
  • Pour the shaken espresso mixture over the ice and top it with oat milk.
  • Sprinkle a dash of cinnamon on top for an extra touch of flavor.
  • Give your drink a gentle stir to ensure the flavors are evenly distributed.

Pro Tips for Making the Perfect Brown Sugar Shaken Espresso

  • Fresh Coffee: Always use freshly brewed espresso for the best flavor. If you can, grind your beans just before brewing.
  • Chill Your Ingredients: For an extra refreshing drink, chill your espresso and milk beforehand.
  • Shake it Well: Don’t skip the shaking! It’s what brings the ingredients together and creates a frothy texture.
  • Experiment: Feel free to adjust the sweetness and cinnamon level to find your perfect balance.
  • Serving Glass: A clear glass showcases the beautiful layers of your drink, making it visually appealing.
  • Garnish: Try adding whipped cream or a sprinkle of cocoa powder for a dessert-like treat.
  • Use a Thermometer: If you’re particular about temperatures, aim for your espresso to be around 195°F before shaking.
  • Store Your Ingredients: Keep leftover brown sugar and oat milk in airtight containers in the fridge for freshness.

Common Mistakes and Troubleshooting

Even the best cooks make mistakes. Here are some common pitfalls and how to avoid them:

  • Too Sweet: If it turns out too sweet for your taste, add more oat milk to dilute the sweetness.
  • Weak Espresso: If your espresso lacks flavor, make sure you’re using freshly ground coffee and the right brewing method.
  • Watery Drink: Ensure you’re using a good amount of ice and that you shake it long enough to mix properly.
  • Cinnamon Clumps: To avoid clumping, mix the cinnamon with the sugar before adding it to the shaker.

Variations on the Classic Recipe

Here are some delightful variations to keep your coffee routine exciting:

  • Chocolate Brown Sugar Shaken Espresso: Add a tablespoon of chocolate syrup to the shaker for a mocha twist.
  • Vanilla Brown Sugar Shaken Espresso: Incorporate a splash of vanilla extract for a fragrant, flavorful enhancement.
  • Spiced Pumpkin Shaken Espresso: Add pumpkin spice to the shaker for a fall-inspired drink.
  • Nutty Brown Sugar Shaken Espresso: Blend in a tablespoon of nut butter for a creamy, rich texture.

Storage and Make-Ahead Instructions

If you want to prepare your drink ahead of time, here are some tips:

  • For the best flavor, prepare the espresso and shake it, but do not add the oat milk until you’re ready to serve.
  • Store any leftover espresso in the fridge for up to 2 days, reheating it gently before shaking again.

Frequently Asked Questions

Here are some common questions about making Brown Sugar Shaken Espresso:

  • Can I use decaf espresso? Absolutely! Decaf espresso works just as well for this recipe.
  • What if I don’t have a shaker? A tightly sealed jar will do the trick if you don’t have a cocktail shaker.
  • How long does the espresso stay fresh? Brewed espresso is best enjoyed within 30 minutes, but you can refrigerate it for up to 2 days.
  • Can I make this drink vegan? Yes, using oat milk or almond milk keeps it vegan-friendly!
  • How can I make it sweeter? Adjust the amount of brown sugar or consider adding flavored syrups.
  • Is it possible to use cold brew instead? Yes, you can substitute cold brew coffee, but adjust the ratio for taste.
  • Can I add protein powder? Definitely! A scoop of protein powder can be added for an extra boost.
  • What are good side dishes to pair with this drink? Pastries, biscotti, or a light breakfast sandwich complement this espresso beautifully.

Nutritional Tips and Dietary Adaptations

If you’re mindful of your dietary choices, here are some tips:

  • For a low-calorie option: Use unsweetened almond milk and reduce the sugar to suit your preference.
  • For a protein boost: Consider adding protein powder or a tablespoon of nut butter to your drink.
  • For a sugar-free version: Use erythritol or stevia in place of brown sugar.
  • For gluten-free: This recipe is naturally gluten-free, making it suitable for various dietary needs.

Equipment Recommendations

Here’s what you’ll need for this recipe:

  • Cocktail shaker: Essential for mixing the ingredients well.
  • Espresso machine: For brewing your espresso shots, though a strong coffee can be an alternative.
  • Measuring spoons: Precise measurements make for the best flavor balance.
  • High-quality glass: To showcase your beautiful drink.

Serving Suggestions

To enhance your drinking experience:

  • Serve in a clear glass to show off the layers of your drink.
  • Add a slice of lemon or a sprig of mint for a refreshing garnish.
  • Pair with a light pastry or a slice of cake for a delightful afternoon treat.

As you sip on your Brown Sugar Shaken Espresso, remember that it’s not just about the flavors but the memories created in the process. Cooking, like life, is about sharing moments with those we love. Enjoy this delightful drink with family and friends, and let every sip remind you of the warmth of home.

Brown Sugar Shaken Espresso (Starbucks copycat)

Prep Time 5 minutes
Total Time 5 minutes
Servings 1 cup
Calories 150
A delicious homemade version of the popular Starbucks shaken espresso, featuring sweet brown sugar and a hint of cinnamon.

Ingredients

espresso shots

  • 0.5 cup light brown sugar
  • 1 cup unsweetened oat milk
  • 1 cup ice cubes
  • 1 tsp cinnamon

Instructions 

  • Combine espresso, brown sugar, ice, and cinnamon in a shaker.
  • Shake vigorously for 30 seconds.
  • Fill a glass with ice and pour the shaken mixture over it.
  • Add oat milk and stir gently.
  • Sprinkle a dash of cinnamon on top and serve.

Notes

Adjust the amount of ice for your preferred strength and chill.
Calories: 150kcal
Cost: $15
Course: Beverage
Cuisine: coffee
Keyword: espresso

Welcome to the Joy of Homemade Protein Pretzels

There’s something magical about the smell of freshly baked pretzels wafting through the kitchen. It’s a scent that calls back to family gatherings, where laughter and love blend together over a shared snack. Today, I’m excited to share my recipe for Soft and Doughy Protein Pretzels—a delightful treat that not only fills your home with warmth but also nourishes your body. These pretzels are perfect for sharing, whether you’re hosting a game night or simply enjoying a quiet evening at home. With just a handful of ingredients, you can create a high-protein snack that’s as comforting as a hug from Grandma.

Why You’ll Love This Recipe

  • Quick and Easy: With only a few ingredients and straightforward steps, these pretzels come together in under an hour—making them perfect for weeknight cravings.
  • High Protein Power: Each pretzel is packed with Greek yogurt, giving you around 10 grams of protein per serving. It’s a filling option that feels indulgent without the guilt.
  • Customizable Tastes: Whether you prefer classic salt toppings or adventurous spices, these pretzels are a blank canvas ready for your favorite flavors.
  • Gluten-Free Friendly: You can easily substitute the flour with gluten-free alternatives, so everyone can enjoy these little delights.
  • Perfect for Sharing: These pretzels are not just a snack; they’re an experience! Serve them warm with your favorite dips—like spicy mustard or marinara—for a truly memorable treat.

Ingredients Breakdown

Let’s dive into what you need to create these scrumptious pretzels. Here’s the ingredient list along with some substitution ideas:

  • 2 cups white-whole wheat flour: This flour gives a nutty flavor and a hint of fiber. You can substitute with all-purpose flour or gluten-free flour if needed.
  • 1 tablespoon baking powder: This is essential for giving the pretzels their fluffy texture.
  • 1 teaspoon kosher salt: A little salt enhances the flavor of the pretzels beautifully.
  • 2 cups nonfat plain Greek yogurt: This is the main ingredient that keeps the pretzels soft and high in protein. You can use whipped cottage cheese for a twist!
  • 1 egg (beaten for egg wash): This helps achieve a golden-brown crust when baked.
  • Optional toppers: Consider using coarse sea salt or everything bagel seasoning for extra flavor.
  • Optional dips: Serve with spicy mustard, warm marinara, or even a cheese dip for a delightful pairing.

Step-by-Step Instructions

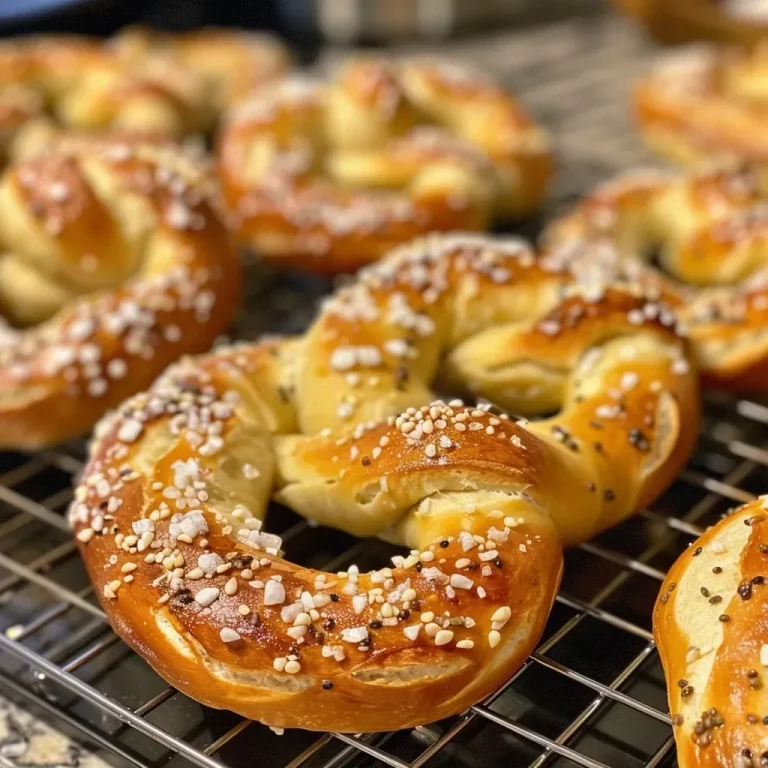
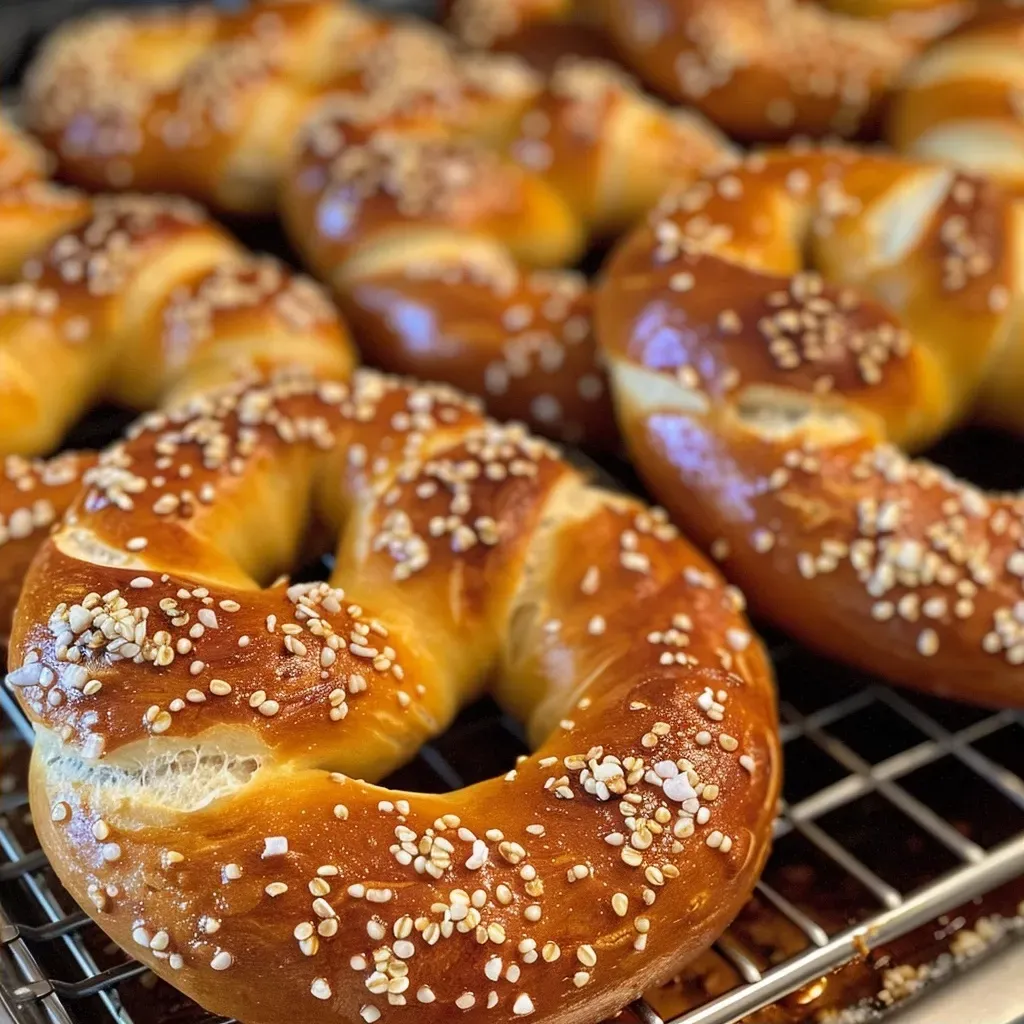
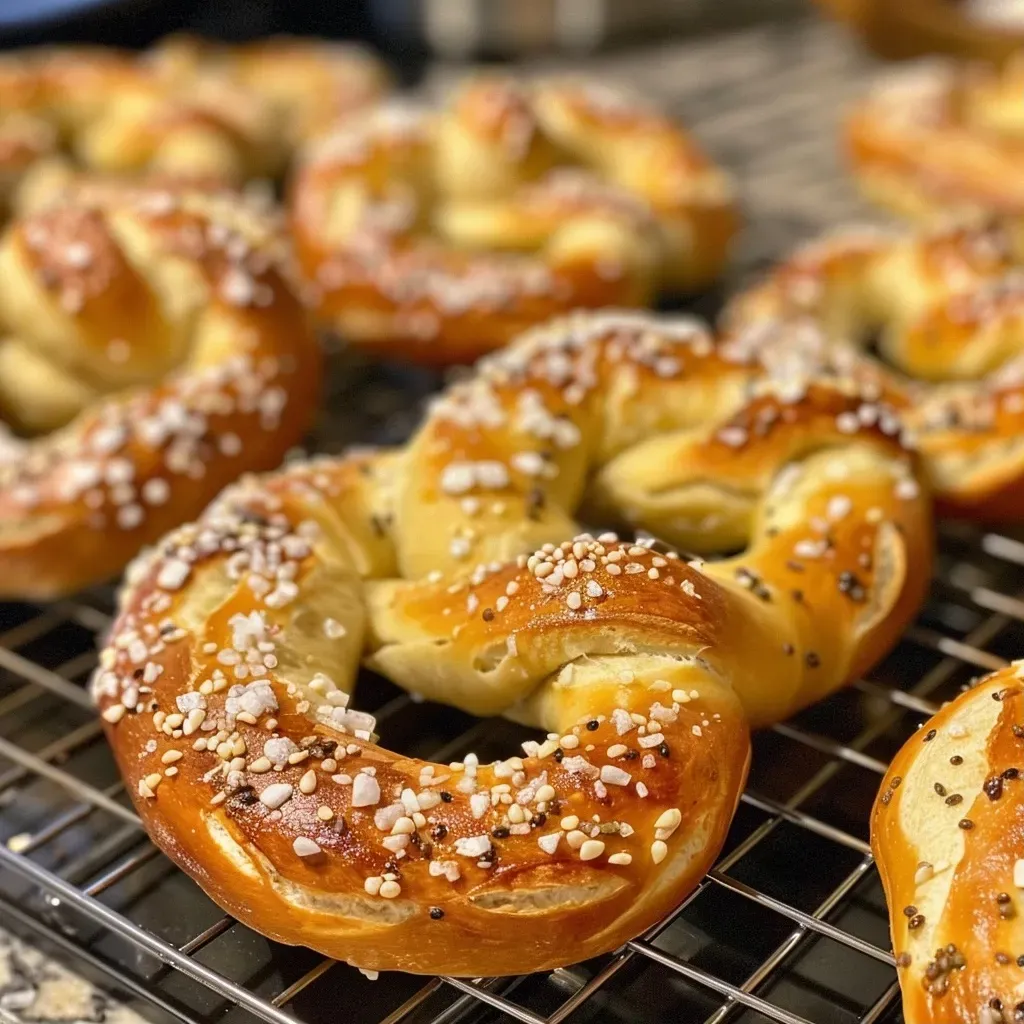
Close-up of golden brown protein pretzels with a soft texture.

Now that we have our ingredients ready, let’s make these pretzels step by step:

  1. Preheat your oven to 350°F (175°C). Line a baking sheet with parchment paper and set aside.
  2. In a large bowl, whisk together the flour, baking powder, and salt. Add the Greek yogurt and stir until a shaggy dough forms.
  3. Knead the dough by hand for about 1 minute until it becomes smooth and elastic. If the dough sticks to your hands, add a tablespoon of flour and knead again.
  4. Divide the dough into 8 equal pieces. Roll each piece into a ball and then shape into ropes about 12 inches long. If the dough tears, simply press it back together—this dough is forgiving!
  5. Twist each rope into a classic pretzel shape (or get creative with other shapes) and place them on the prepared baking sheet.
  6. Brush the tops with the beaten egg and sprinkle with coarse salt.
  7. Bake for 20 to 25 minutes, or until the pretzels are puffed and lightly golden. For a firmer texture, leave them in for an extra 3 to 5 minutes.
  8. Enjoy warm or at room temperature with your favorite dip!

Pro Tips for Perfect Pretzels

  • Don’t rush the kneading: Take your time to knead the dough until it’s smooth. This ensures a better texture.
  • Experiment with shapes: Feel free to twist, knot, or even braid the dough for fun shapes. Kids love getting involved in this part!
  • Double the egg wash: For an even richer golden crust, brush the pretzels with egg wash twice.
  • Use a baking stone: If you have one, it helps distribute heat evenly, giving you that perfect golden finish.
  • Add spices: Incorporate herbs or spices into the dough for added flavor—think garlic powder or dried herbs!
  • Try different flours: If you’re feeling adventurous, experiment with spelt flour or almond flour for unique flavors.
  • Make them ahead: Prepare the dough, shape the pretzels, and refrigerate. Bake them fresh when you’re ready to enjoy.
  • Keep an eye on baking time: Ovens can vary, so start checking for doneness a few minutes early to prevent overbaking.

Common Mistakes and Troubleshooting

Even the best cooks encounter hiccups. Here are some common mistakes and how to fix them:

  • Dough is too sticky: Add a little more flour, a tablespoon at a time, until workable.
  • Pretzels are too hard: They may have baked too long. Keep an eye on them in the last few minutes of baking.
  • Pretzels spread out too much: Ensure the dough is well-kneaded and not overly wet.
  • Flavor is bland: Don’t shy away from seasoning the dough or adding toppings!

Delicious Variations to Try

Once you get the hang of the basics, you can play around with these variations:

  • Cinnamon Sugar Pretzels: After baking, toss warm pretzels in a mixture of sugar and cinnamon for a sweet treat.
  • Cheese-Stuffed Pretzels: Roll your dough around a piece of cheese before shaping for a gooey surprise inside.
  • Herb and Garlic Pretzels: Add dried herbs and minced garlic into the dough for a savory twist.
  • Chocolate-Dipped Pretzels: Dip cooled pretzels in melted chocolate and sprinkle with sea salt for a sweet-savory snack.

Storage and Make-Ahead Instructions

If you find yourself with leftover pretzels (though I doubt you will!), here’s how to store them:

  • Room Temperature: Store in an airtight container for up to 2 days.
  • Refrigerator: For longer freshness, keep in the fridge for up to a week.
  • Freezer: Freeze baked pretzels in a single layer, then transfer to a freezer bag. Reheat in the oven before serving.
  • Make-Ahead: Prepare the dough and shape the pretzels. Cover and refrigerate for up to 24 hours before baking.

Frequently Asked Questions

Here are some common questions about making these delicious pretzels:

  • Can I use non-Greek yogurt? Yes, but Greek yogurt gives a better texture and protein boost.
  • What if I don’t have baking powder? You can make a substitute using baking soda and cream of tartar.
  • Can I make these vegan? Substitute the egg with a plant-based egg wash and use dairy-free yogurt.
  • How do I get the pretzels to shine? The egg wash is key! For an even shinier finish, you can add a little honey to the wash.
  • What’s the nutritional information? Each pretzel has approximately 150 calories, 10g protein, and 4g fat, depending on your ingredients.
  • Can I add seeds? Absolutely! Sprinkling sesame or poppy seeds before baking adds a delightful crunch.
  • Is it okay to use whole wheat flour? Yes! Whole wheat flour adds more fiber and a heartier flavor.
  • How long do they take to bake? Bake for 20-25 minutes, but keep an eye on them towards the end.

Nutritional Tips and Dietary Adaptations

To ensure everyone can enjoy these pretzels, here are some nutritional tips:

  • Low-Carb Option: Use almond flour instead of traditional flour for a lower-carb version.
  • High-Fiber Boost: Add ground flaxseed or chia seeds to the dough for added fiber.
  • Low-Calorie Alternative: Use low-fat Greek yogurt and reduce the amount of salt and toppings.

Equipment Recommendations

Having the right tools can make your pretzel-making experience even smoother:

  • Mixing Bowl: A large bowl for mixing your ingredients.
  • Baking Sheet: A sturdy baking sheet lined with parchment paper for easy cleanup.
  • Rolling Pin: Useful for shaping dough into ropes.
  • Whisk: For blending dry ingredients effortlessly.

Serving Suggestions

These pretzels shine on their own, but here are some suggestions for pairing:

  • Mustard Dips: A tangy mustard pairs wonderfully with the doughy texture.
  • Cheese Sauce: A warm, gooey cheese sauce makes for a decadent dip.
  • Marinara Sauce: A classic combo that brings a touch of Italy to your snack table.
  • Pesto: For a herby twist, try serving these with a side of pesto.

Conclusion

These Soft and Doughy Protein Pretzels are more than just a recipe; they’re a way to create warmth and connection in your home. With each bite, you’re not just enjoying a snack—you’re indulging in the love and memories that come with it. So gather your loved ones, roll up your sleeves, and let’s make some pretzels that will bring everyone together around the table. Happy baking!

Soft and Doughy Protein Pretzels

Prep Time 10 minutes
Cook Time 20 minutes
Total Time 30 minutes
Servings 8 pieces
Calories 150
Enjoy these healthy, soft, and doughy protein pretzels that are quick to make and perfect for a snack or appetizer.

Ingredients

Dough

  • 2 cups white-whole wheat flour
  • 1 tablespoon baking powder
  • 1 teaspoon kosher salt
  • 2 cups nonfat plain Greek yogurt
  • 1 egg beaten (for egg wash)

Toppings

  • Optional coarse sea salt or kosher salt for sprinkling

Dips

  • Optional spicy mustard, warm marinara

Instructions 

  • Preheat oven to 350°F (175°C). Line a baking sheet with parchment.
  • Mix flour, baking powder, and salt. Add yogurt and knead until smooth. Divide into 8 pieces and roll into ropes.
  • Shape each rope into a pretzel, place on sheet, brush with beaten egg, and sprinkle with salt.
  • Bake for 20-25 minutes until golden. For crispier pretzels, bake an extra 3-5 minutes.

Notes

Start with small amounts of flour if dough sticks to hands, and adjust as needed.
Calories: 150kcal
Cost: $10
Course: Snack
Cuisine: American
Keyword: Healthy, Pretzels, Protein

Embrace the Convenience of Freezer Smoothie Packs

In our fast-paced lives, finding ways to enjoy nutritious meals can be challenging. That’s where freezer smoothie packs come into play, offering a delightful solution to busy mornings or a quick afternoon snack. These packs are not just about convenience; they’re a way to share joy and flavor with loved ones, each sip bursting with the freshness of vibrant fruits and wholesome ingredients. Let’s dive into the world of smoothie packs, and discover how they can transform your culinary routine.

Why You’ll Love This Recipe

  • Quick and Easy: Whip up a delicious smoothie in minutes; simply grab a pack from the freezer, blend, and enjoy!
  • Customizable: You can mix and match fruits, greens, and add-ins to suit your taste, dietary needs, or what you have on hand.
  • Healthy Convenience: Packed with nutrients, these smoothie packs ensure you get your daily dose of fruits and veggies without the fuss.
  • Perfect for Meal Prep: Make several packs at once to streamline your breakfast or snack routine for the entire week.
  • Kid-Friendly: Kids love smoothies! These packs can be a fun way to get them involved in the kitchen and excited about healthy eating.

Ingredient Breakdown

Creating the perfect freezer smoothie pack starts with selecting the right ingredients. Here’s a detailed breakdown of our basic smoothie ingredients, along with some substitutions you can consider:

  • Fruits: Fresh or frozen fruits like strawberries, bananas, mangoes, blueberries, and cherries work beautifully. You can also use canned fruits in juice, but avoid those in syrup.
  • Greens: Spinach or kale adds nutrients without altering the flavor too much. Consider using frozen greens for added convenience.
  • Liquid: Use milk (dairy or non-dairy), yogurt, or fruit juice as your base. For a tropical twist, coconut water is refreshing and hydrating.
  • Add-ins: Chia seeds, flaxseeds, nut butter, or protein powder can enhance nutrition. Look for options that suit your dietary preferences.

How to Make Smoothie Packs

Colorful freezer smoothie packs arranged with fresh ingredients on a wooden table.

Making smoothie packs is a simple affair. Follow these steps to ensure delicious results:

  • Set out four freezer-safe quart-sized zip-top bags.
  • Divide the ingredients evenly among the bags, except for the liquid.
  • Extract as much air as possible from each bag, then seal tightly.
  • Label each bag with the contents and date, then place them in the freezer until you’re ready to enjoy.

Pro Tips for Perfect Smoothie Packs

To make your smoothie packs even better, consider these expert insights:

  • Freeze fruits individually: For the best texture, freeze fruits like bananas or berries on a tray first before adding them to bags.
  • Layer wisely: Place greens at the bottom of the bag and softer fruits on top to prevent browning.
  • Experiment with flavors: Don’t shy away from adding herbs like mint or basil for an unexpected twist.
  • Portion control: Aim for 1-2 servings per pack to keep things manageable.
  • Consider spices: A sprinkle of cinnamon or a dash of vanilla extract can elevate the flavor profile.
  • Use quality bags: Invest in sturdy freezer bags to prevent freezer burn and maintain freshness.
  • Stay organized: Keep a list of what’s in your freezer to avoid forgotten ingredients.
  • Mix textures: Combine creamy and crunchy add-ins for a delightful mouthfeel.

Common Mistakes and Troubleshooting

Even the best of us can encounter hiccups in the kitchen. Here are some common mistakes to avoid when making smoothie packs:

  • Overfilling bags: Too much contents can lead to spillages when blending. Keep it simple!
  • Using only frozen fruits: This can lead to a dense smoothie. Balance with fresh fruits when possible.
  • Forgetting the liquid: Always remember to add your chosen liquid when blending; smoothies can be thick without it.
  • Not blending enough: Ensure you blend until smooth, adding more liquid as needed. Nobody wants chunks!

Variations to Spice Up Your Smoothie Game

Get creative with your smoothie packs! Here are a few variations to try:

  • Chocolate Peanut Butter Delight: Combine banana, cocoa powder, peanut butter, and milk for a decadent treat.
  • Tropical Green Machine: Blend spinach, mango, banana, and coconut water for a refreshing tropical smoothie.
  • Berry Protein Boost: Mix mixed berries, Greek yogurt, and almond milk for a protein-packed option.
  • Pineapple Coconut Dream: Combine pineapple chunks, coconut milk, and spinach for a vacation in a glass.

Storage and Make-Ahead Instructions

Proper storage is key to maintaining the quality of your smoothie packs:

  • Freezer-friendly: Smoothie packs can be stored in the freezer for up to 3 months without sacrificing taste.
  • Thawing options: When ready to blend, you can let them sit in the fridge overnight or run the bag under warm water for a few minutes.
  • Labeling: Always label your packs with the contents and date for easy identification.

Frequently Asked Questions

Here are some common questions about smoothie packs:

  • Are frozen smoothie packs healthy? Yes! They’re packed with nutrients and can be a convenient way to consume fruits and veggies.
  • Can you make smoothies and freeze them? Yes, making smoothie packs ensures your smoothies are fresh and quick to prepare.
  • Is it cheaper to make your own smoothies? Absolutely! Making your own packs saves money compared to store-bought options.
  • What kind of liquid can I use? You can use milk (dairy or plant-based), yogurt, juice, or coconut water.
  • How long do smoothie packs last in the freezer? They can last up to 3 months if stored properly.
  • Can I add supplements like protein powder? Yes, adding protein powder or other supplements can enhance the nutritional value of your smoothies.
  • What’s the best way to blend frozen packs? Always add liquid before blending to achieve the right consistency.
  • Can I use vegetables in my smoothie packs? Definitely! Greens like spinach or kale work great without overpowering the flavor.

Nutrition Tips and Dietary Adaptations

For those watching their nutrition, here are some tips:

  • Watch your portions: Smoothies can be calorie-dense; keep an eye on the amount of high-calorie add-ins.
  • Choose organic: When possible, opt for organic fruits and vegetables for cleaner living.
  • Adjust for dietary needs: Substitute liquid or yogurt for dairy-free options to cater to allergies.
  • Increase fiber: Add oats or chia seeds for additional fiber in your smoothies.

Recommended Equipment

To make your smoothie-making experience seamless, consider these essential tools:

  • High-Powered Blender: A strong blender will ensure your smoothies are creamy and smooth.
  • Freezer Bags: Invest in quality freezer bags to store your smoothie packs efficiently.
  • Measuring Cups: For precise measurements of liquids and ingredients.
  • Label Maker or Marker: Helpful for organizing and labeling your packs.

Serving Suggestions

Once your smoothie is blended, here are some delightful serving ideas:

  • Garnish: Top with fresh fruits, nuts, seeds, or granola for added texture and nutrition.
  • Pair with breakfast: Serve alongside a piece of whole-grain toast or a handful of nuts for a balanced meal.
  • Make it a smoothie bowl: Pour your smoothie into a bowl and top with your favorite toppings for a refreshing bowl.

Conclusion: A Tradition of Sharing Love Through Smoothies

As you embark on your journey of crafting freezer smoothie packs, remember that cooking is more than following a recipe—it’s about sharing love, memories, and flavors with those around you. Whether it’s a busy morning or a moment of indulgence, these smoothie packs are a heartfelt way to embrace nourishment and care. So gather your ingredients, share a smile, and let’s blend our way to joy, one smoothie at a time!

Freezer Smoothie Packs

Prep Time 10 minutes
Total Time 10 minutes
Servings 4 packs
Calories 350
Prepare healthy and delicious smoothie packs in advance to enjoy quick, nutritious smoothies anytime.

Ingredients

Fruits and Add-ins

  • 1 cup strawberries (halved)
  • 1 banana sliced banana
  • 1 tablespoon honey
  • 1 tablespoon chia seeds
  • 2 cups milk (or liquid of choice, per pack when ready to enjoy)
  • 2 bananas sliced bananas
  • ½ cup quick oats
  • 2 tablespoons peanut butter
  • 2 tablespoons cocoa powder
  • 2 cups milk of choice (per pack when ready to enjoy)
  • 1 cup mango chunks
  • 1 banana sliced banana
  • 1 cup baby spinach
  • 2 tablespoons unsweetened shredded coconut
  • 2 tablespoons ground flaxseeds
  • 2 cups coconut water (per pack when ready to enjoy)
  • 1 cup blueberries
  • 1 cup cherries (pitted)
  • 1 cup Greek yogurt
  • 2 tablespoons honey
  • 1 cup coconut water (per pack when ready to enjoy)

Instructions 

  • Divide all ingredients except liquids into four freezer-safe bags, remove air, and freeze.
  • When ready, add contents of a bag to a blender, loosen with warm water if needed.
  • Add liquid and honey, then blend until smooth, adding more liquid as desired.

Notes

Use ripe fruits for best flavor and sweetness.
Calories: 350kcal
Cost: $15
Course: Breakfast
Cuisine: American
Keyword: Freezer, Smoothie

Unleashing the Spirit of Halloween: A Festive Punch to Share

As the leaves turn and the air becomes crisp, it’s time to celebrate one of the most delightful seasons of the year—Halloween! What better way to embrace the spooky spirit than with a Halloween punch that brings friends and family together? Today, we’re diving into the world of fizzy, fruity drinks with our Fizzy Potion Halloween Punch. This refreshing concoction is not only simple to make, but it also adds a splash of joy to your celebrations, making it a must-have at any Halloween gathering.

Imagine the laughter of children, the aroma of autumn spices, and the excitement of costume-clad friends all around a punch bowl filled with a vibrant, bubbling potion. Whether you’re hosting a themed party, a cozy get-together, or a fun-filled family night, this punch is the perfect way to toast to the season. Let’s get started on crafting this delightful drink that’ll have your guests raising their glasses with glee!

Why You’ll Love This Recipe

  • Quick and Easy Preparation: With just a few ingredients, you can whip up this punch in less than 10 minutes, leaving you more time to enjoy the festivities.
  • Non-Alcoholic Delight: Perfect for all ages, this punch is a fun, alcohol-free option that everyone can enjoy.
  • Customizable Flavors: Feel free to experiment with different juices or garnishes, allowing you to make this punch uniquely yours.
  • Festive Presentation: The vibrant colors and bubbles create a visually stunning drink that’s sure to impress your guests.
  • Perfect for Sharing: This punch is designed to be served in a large bowl, encouraging friends and family to gather around and share joyful moments.

What You’ll Need to Make This Recipe

Gathering your ingredients is the first step towards creating this delightful punch. Here’s what you’ll need:

  • 3 ½ oz. Sprouts Lemon Sparkling Water: This adds a fizzy, refreshing base.
  • 1 oz. cranberry juice (unsweetened): Provides a lovely tartness.
  • 2 oz. grape juice: Sweetens the mix and adds depth to the flavor.
  • ¼ cup frozen blackberries (for garnish): These not only look appealing but also keep the punch chilled.

Let’s Talk Ingredients!

Close-up of a colorful Halloween punch in a clear glass with frozen blackberries on top.

Understanding the ingredients can elevate your punch-making game. Here’s a closer look at each component:

  • Sparkling Water: For a fun twist, try using flavored sparkling water, like lemon-lime or berry, to enhance the punch’s taste.
  • Cranberry Juice: Opt for unsweetened to control the sweetness of your punch. You can also substitute with pomegranate juice for a different flavor.
  • Grape Juice: White grape juice can be used for a lighter flavor profile while still maintaining the sweetness.
  • Frozen Blackberries: Substitute with other frozen fruits like raspberries or blueberries or fresh fruits like apple slices for a colorful touch.

How to Make This Fizzy Potion Halloween Punch

Now that you have your ingredients ready, let’s get into the fun part—making the punch!

  1. In a large glass or punch bowl, pour in the cranberry juice followed by the grape juice.
  2. Carefully drizzle the Sparkling Lemon Water on top, allowing it to mix gently with the juices.
  3. Add the frozen blackberries as a garnish. They’ll keep the punch chilled and add a pop of color.
  4. Stir gently and serve immediately in punch glasses or festive cups.

Pro Tips for Crafting the Perfect Punch

  • Make it Ahead: Prepare the juices and refrigerate them before your gathering. Just add the sparkling water and garnishes right before serving.
  • Garnish Creatively: Enhance the spooky aesthetic with Halloween-themed ice cubes, made by freezing juice in fun shapes.
  • Adjust Sweetness: Depending on your taste, you can increase or decrease the grape juice for a sweeter or more tart punch.
  • Experiment with Herbs: Fresh mint or rosemary can add a unique twist and an aromatic element to your punch.
  • Chill Your Ingredients: For an extra refreshing experience, chill all your ingredients beforehand.
  • Use a Punch Bowl: Serve this punch in a large bowl to encourage sharing and socializing.
  • Add Dry Ice: For a spooky fog effect, consider adding food-safe dry ice to your punch bowl (handle with care!).
  • Pair with Snacks: Serve with light appetizers like cheese platters or veggie sticks for a balanced spread.

Common Mistakes and Troubleshooting

Even the best of us can make a few mistakes when crafting a punch. Here are some common pitfalls and how to avoid them:

  • Overly Sweet Punch: If your punch turns out too sweet, balance it with more lemon sparkling water or a squeeze of fresh lime juice.
  • Flat Punch: If the punch loses its fizz, make sure to add the sparkling water just before serving.
  • Too Tart: If the punch is too tart, add a little more grape juice or sweetener to balance the flavors.
  • Not Chilling Properly: Always use frozen fruits or ice cubes made from the punch to keep it cool without watering it down.

Variations of Your Halloween Punch

If you’re feeling adventurous, here are a few variations to spice up your Halloween punch:

  • Spooky Citrus Punch: Replace the grape juice with orange juice and add slices of oranges and lemons for a bright, citrusy twist.
  • Berry Blast Punch: Use a mix of different berry juices (like raspberry and blueberry) and garnish with assorted fresh berries.
  • Apple Cider Punch: Swap the juices with apple cider and add cinnamon sticks for a warm, autumnal flavor.
  • Spicy Ginger Punch: Incorporate ginger ale instead of sparkling water for a spicy kick, and garnish with thin slices of fresh ginger.

Storage and Make-Ahead Instructions

This punch is best enjoyed fresh, but you can prepare components in advance:

  • Mix the juices and store them in the refrigerator for up to 2 days.
  • Keep the sparkling water separate until ready to serve to maintain its fizz.
  • Frozen fruits can be prepared ahead and stored in the freezer until you’re ready to use them.

Frequently Asked Questions

Here are some common questions about our Halloween punch:

  • Can I make this punch alcoholic?: Absolutely! You can add your favorite spirit, like rum or vodka, for an adult version.
  • How long can I store the punch?: While it’s best enjoyed fresh, you can store the juice mixture in the refrigerator for 2 days. Add sparkling water just before serving.
  • What can I use instead of blackberries?: Feel free to substitute any frozen fruit you have on hand, like raspberries or strawberries.
  • Is this punch gluten-free?: Yes! All the ingredients are gluten-free, making it suitable for everyone.
  • Can I use fresh fruit instead of frozen?: Yes, but fresh fruit may not keep the punch as cold. You might consider adding ice cubes instead.
  • What’s the best way to serve this punch?: Serve it in a festive punch bowl with a ladle, and offer cups alongside for easy serving.
  • Can I add other juices?: Definitely! Feel free to experiment with your favorite juices to find the perfect blend.
  • How do I make this punch more festive?: Use Halloween-themed decorations or serve with spooky snacks to enhance the atmosphere.

Nutrition Tips and Dietary Adaptations

This Halloween punch is not only delicious but can also be adapted to fit various dietary needs:

  • Low-Calorie Option: Use diet versions of juices or sparkling water to reduce the calorie count.
  • No Sugar Added: Choose unsweetened juices for a healthier option while still enjoying flavorful drinks.
  • Vegan-Friendly: All ingredients are plant-based, making it a great choice for vegan celebrations.

Essential Equipment for Making Punch

Here’s a quick list of items you’ll need:

  • Punch Bowl: A large bowl to mix and serve your punch.
  • Punch Ladle: For easy serving of your delicious concoction.
  • Measuring Cups: To ensure accurate ingredient measurements.
  • Ice Cube Trays: For freezing fruit or making ice cubes from the punch.

Serving Suggestions to Elevate Your Halloween Gathering

To make your gathering even more special, consider these serving suggestions:

  • Festive Cups: Use Halloween-themed cups or mason jars for that extra touch.
  • Appetizer Pairings: Serve with light bites like cheese platters, spooky-themed snacks, or caramel apples.
  • Decorative Garnishes: Add sprigs of mint or edible flowers for a beautiful presentation.
  • Interactive Stations: Set up a DIY garnish station where guests can personalize their punch.

Conclusion: Celebrate with Love and Laughter

This Halloween, let your kitchen be a place of joy, laughter, and sweet memories created over a glass of Fizzy Potion Halloween Punch. With its blend of sparkling flavors and vibrant colors, it’s not just a drink—it’s an experience, a moment to share with loved ones. So gather your ingredients, prepare to mix, and let the spirit of Halloween fill your home. Cheers to creating memories that last a lifetime, one sip at a time!

Fizzy Potion Halloween Punch

Prep Time 5 minutes
Total Time 5 minutes
Servings 4 cups
Calories 80
A fun and spooky Halloween punch perfect for parties, combining fruity flavors with sparkling water for a fizzy delight.

Ingredients

Beverages

  • 3 ½ oz Sprouts Lemon Sparkling Water
  • 1 oz cranberry juice (unsweetened)
  • 2 oz grape juice
  • ¼ cup frozen blackberries (for garnish)

Instructions 

  • Pour cranberry and grape juices into a glass.
  • Top with sparkling water and stir gently.
  • Add frozen blackberries for garnish and serve immediately.

Notes

Use chilled ingredients for a refreshing drink.
Calories: 80kcal
Cost: $10
Course: Beverage
Cuisine: Halloween
Keyword: Fruit, Sparkling Water