Author

daniel

Browsing

Welcome, dear friends, to a delightful culinary journey where we transform humble sweet potatoes into crispy, sugary snacks that echo the warmth of family gatherings and cherished memories. These Cinnamon Sugar Sweet Potato Chips are not just delicious; they are a celebration of flavors, love, and tradition. With each bite, you’ll find the perfect blend of sweetness and spice, making them ideal for sharing or enjoying solo with a cup of tea. Let’s embark on this adventure together, shall we?

Why You’ll Love This Recipe

  • Easy to Prepare: With just a few ingredients, you can whip up a batch of these sweet potato chips in no time at all.
  • Customizable Flavor: Feel free to adjust the sugar and cinnamon levels to reflect your personal taste or try different spices like nutmeg or allspice.
  • Healthier Snack Option: Compared to regular potato chips, these sweet potato chips offer a nutrient boost, making them a healthier choice for snacking.
  • Perfect for Any Occasion: Whether it’s a family gathering, a cozy night in, or a picnic, these chips fit right in.
  • Great for Kids: Kids love the sweet flavor and crunch, making them a fantastic addition to lunchboxes or after-school snacks.

Ingredient Breakdown

Now, let’s dive deeper into what you’ll need for this tasty treat:

  • 1 large sweet potato: The star of the show! Choose one that’s firm and free of blemishes for the best results.
  • 1/4 cup sugar: Regular granulated sugar works well, but feel free to substitute with brown sugar for a richer flavor.
  • 1 tsp cinnamon: This spice adds warmth and a nostalgic touch to the chips, but you can also experiment with other spices.

Pro Tips for Perfect Sweet Potato Chips

  • Slice Evenly: Use a mandolin slicer for uniform thickness, ensuring even baking and crispiness.
  • Soak in Water: Soaking the sweet potato slices in cold water for about 30 minutes can help remove excess starch, leading to a crisper chip.
  • Don’t Overcrowd the Baking Sheet: Give each slice some space on the baking sheet to promote even cooking and prevent sogginess.
  • Check Frequently: Keep an eye on the chips as they bake, especially towards the end, to avoid burning.
  • Experiment with Flavors: Try adding cayenne pepper for a spicy kick or drizzle with honey after baking for extra sweetness.
  • Store Properly: For the best crunch, store in an airtight container to keep moisture at bay.

Common Mistakes and Troubleshooting

Side angle photo of crispy cinnamon sugar sweet potato chips on a white plate.

Even the best of us can encounter hiccups in the kitchen. Here are a few common issues and how to solve them:


Silicone Baking Cups Set

★ Recommended Kitchen Tool

Silicone Baking Cups Set

Make this recipe even easier with a quality Silicone Baking Cups Set — a must-have kitchen staple!


🛒 Shop This Tool →

As an Amazon Associate, we earn from qualifying purchases.
  • Chips are too soft: Ensure they are sliced thinly and baked long enough at the right temperature.
  • Burnt edges: If you notice the edges burning, consider lowering the oven temperature slightly and extending the baking time.
  • Uneven cooking: Rotate your baking sheet halfway through to ensure even baking.

Delicious Variations to Try

Why stop at just one flavor? Here are a few delightful variations:

  • Spicy Cinnamon Sweet Potato Chips: Add a pinch of cayenne pepper to the sugar and cinnamon mixture for a spicy twist.
  • Honey Glazed Sweet Potato Chips: Drizzle with honey after baking for an extra layer of sweetness.
  • Herbed Sweet Potato Chips: Mix dried herbs like rosemary or thyme with the cinnamon for a savory-sweet combination.
  • Chocolate Drizzled Sweet Potato Chips: After baking, drizzle with melted dark chocolate for an indulgent treat.

Storage and Make-Ahead Instructions

These chips are best enjoyed fresh, but if you have leftovers (which is rare!), here’s how to store them:

  • Room Temperature: Keep in an airtight container for up to three days to maintain their crispiness.
  • Reheating: To refresh them, pop them back into a preheated oven at 350°F for a few minutes.

Frequently Asked Questions

Here are some common questions I hear about these sweet potato chips:

  • Can I use other types of potatoes? Yes, regular potatoes can be used, but the flavor and texture will differ.
  • Are these chips gluten-free? Absolutely! Sweet potatoes are naturally gluten-free.
  • Can I make them in an air fryer? Yes, an air fryer works wonderfully for these chips and will give them an extra crunch!
  • What can I serve these chips with? They pair beautifully with dips like guacamole or salsa, or simply enjoy them on their own.
  • How can I make them less sweet? Reduce the sugar in the recipe to suit your taste preferences.
  • Can I bake them at a lower temperature? Yes, but keep in mind that they may take longer to crisp up.
  • What if I don’t have cinnamon? Try using pumpkin spice or a mix of your favorite spices.
  • Can they be frozen? It’s best not to freeze them as they may lose their crispiness.

Nutritional Tips and Dietary Adaptations

If you’re looking to make this recipe even healthier, consider these options:

  • Reduce Sugar: You can cut down on the sugar without sacrificing flavor. Try using a sugar substitute like stevia.
  • Add Protein: Pair these chips with a protein-rich dip like hummus for a balanced snack.
  • Vegan Option: This recipe is naturally vegan, making it a great choice for those following a plant-based diet.

Essential Equipment Recommendations

To make your cooking experience seamless, here are a few kitchen tools I recommend:

  • Mandolin Slicer: Perfect for achieving uniform slices effortlessly.
  • Baking Sheets: A good quality, non-stick baking sheet is essential for even cooking.
  • Parchment Paper: This helps prevent sticking and makes cleanup a breeze.

Serving Suggestions

When it comes to enjoying your Cinnamon Sugar Sweet Potato Chips, the options are endless:

  • As a Snack: Enjoy them solo with a cup of coffee or tea.
  • As a Side: Serve alongside sandwiches or salads for a crunchy contrast.
  • For Gatherings: Create a beautiful platter with dips, fresh veggies, and these sweet chips.

In conclusion, dear friends, these Cinnamon Sugar Sweet Potato Chips are more than just a recipe; they are a way to connect with memories, flavors, and loved ones. As you prepare and share this delightful snack, remember that cooking is about love and togetherness. I hope you enjoy making them as much as I do. Happy cooking!

Cinnamon Sugar Sweet Potato Chips

Prep Time 10 minutes
Cook Time 15 minutes
Total Time 25 minutes
Servings 4 servings
Calories 150
Enjoy these crispy, sweet, and spicy homemade sweet potato chips perfect for a snack or appetizer.

Ingredients

Main

  • 1 large sweet potato
  • 1/4 cup sugar
  • 1 tsp cinnamon

Instructions 

  • Preheat oven to 400°F (200°C).
  • Slice sweet potato thinly and mix sugar with cinnamon in a bowl.
  • Dip slices into the sugar mixture, coat well, and arrange on a parchment-lined baking sheet.
  • Bake for 10 minutes, flip, then reduce temperature to 350°F (175°C) and bake for an additional 5-10 minutes.
  • Let cool and serve.

Notes

Use a mandolin for even slices and watch closely to prevent burning.
Calories: 150kcal
Cost: $5
Course: Snack
Cuisine: American
Keyword: Sweet Potato

Gather ‘Round for Comfort: The Ultimate Cheesy Scalloped Potatoes Recipe

In the heart of every home lies the kitchen, filled with the scents of love and memories waiting to be shared. Today, I invite you to join me in crafting a dish that embodies comfort and warmth: Easy Cheesy Scalloped Potatoes. This recipe is not just about food; it’s about bringing family and friends together around the table, sharing stories, and creating lasting memories. With layers of tender potatoes enveloped in a rich, creamy cheese sauce, this dish is perfect for any occasion, from festive gatherings to cozy weeknights at home.

As we dive into this recipe, you’ll discover why these scalloped potatoes have become a cherished favorite in my family. So grab your apron and let’s make something beautiful together!

Why You’ll Love This Recipe

  • Comfort Food Classic: This dish combines the creamy, cheesy goodness that warms the soul and makes any meal feel special.
  • Simple Ingredients: Using just a few everyday staples, you can create something extraordinary without fuss.
  • Customizable Layers: Whether you prefer extra cheese or a sprinkle of herbs, this recipe invites you to put your own spin on it.
  • Perfect for Sharing: Ideal for gatherings, these scalloped potatoes are a dish everyone will rave about, ensuring you’re the star of the table.
  • Make-Ahead Friendly: Prepare them in advance and simply pop them in the oven when it’s time to eat, making your life easier!

Ingredients You’ll Need

To create your own delicious cheesy scalloped potatoes, gather the following ingredients:


Digital Kitchen Scale

★ Recommended Kitchen Tool

Digital Kitchen Scale

Make this recipe even easier with a quality Digital Kitchen Scale — a must-have kitchen staple!


🛒 View on Amazon →

As an Amazon Associate, we earn from qualifying purchases.
  • 2 cups freshly grated cheddar cheese
  • 1 cup freshly grated parmesan cheese
  • 3 pounds Russet or Yukon Gold potatoes
  • 1 tablespoon butter
  • 3 cloves garlic (minced)
  • 2 cups heavy/whipping cream
  • 1 teaspoon salt
  • Pepper (to taste)

Ingredient Breakdown & Substitutions

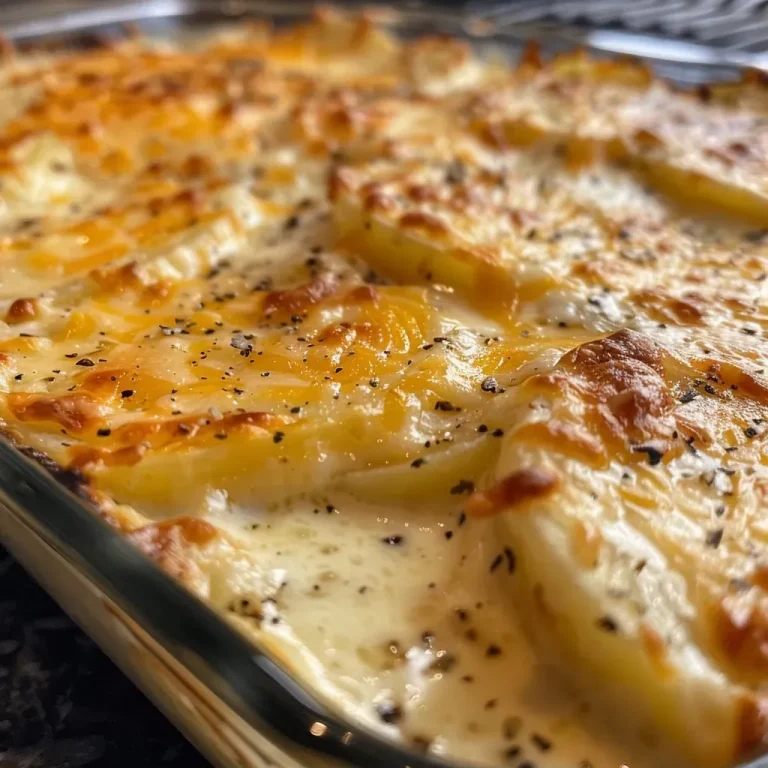
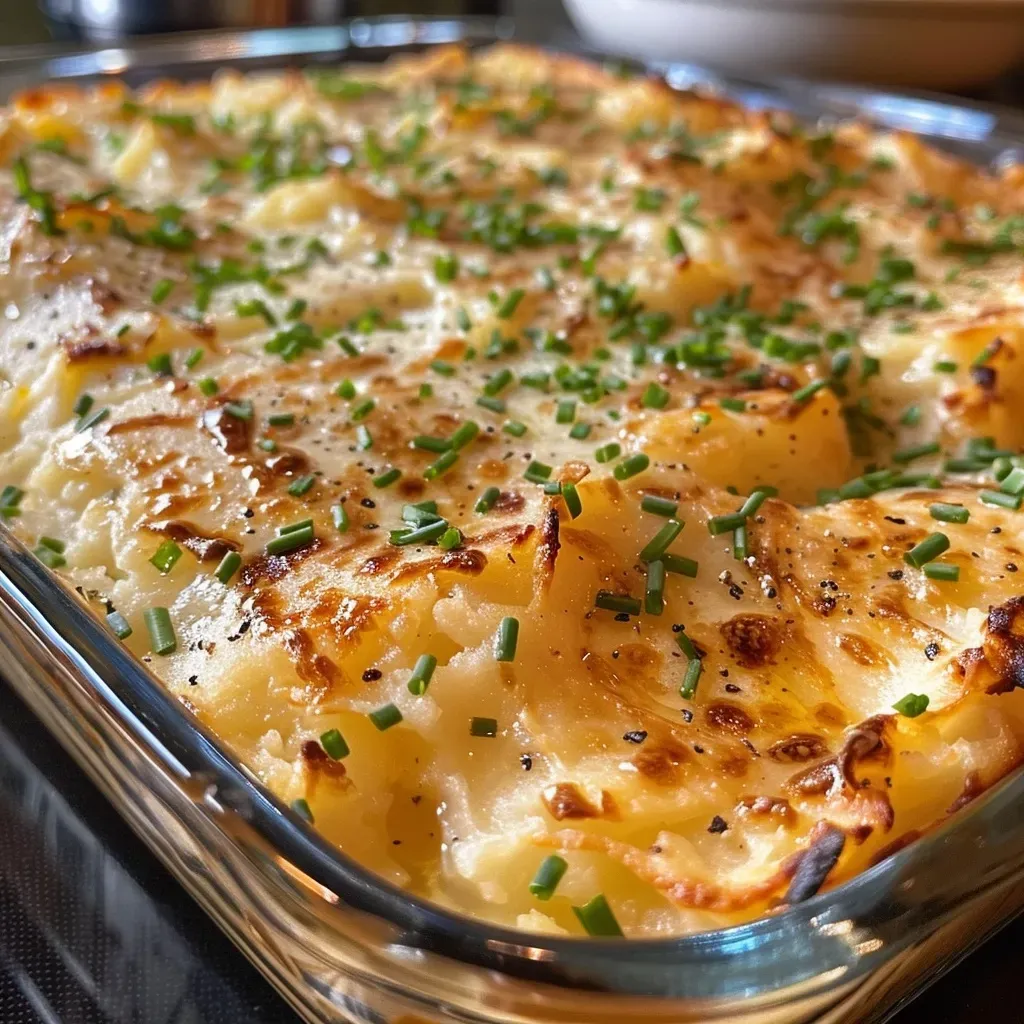
Side view of creamy scalloped potatoes layered with melted cheese.

Understanding your ingredients can elevate your dish. Here’s a closer look:

  • Potatoes: Both Russet and Yukon Gold work beautifully, offering different textures. Russets are starchy and fluffy, perfect for a creamy finish, while Yukon Golds provide a buttery flavor.
  • Cheese: Feel free to experiment! Use a blend of cheddar and Gruyère for a nutty depth or add some fontina for extra creaminess.
  • Heavy Cream: For a lighter option, substitute half of the cream with milk or use a blend of cream and broth for added flavor.
  • Garlic: Fresh is best, but you can use garlic powder in a pinch—just adjust the amount to taste.

How to Make Easy Cheesy Scalloped Potatoes: Step-by-Step

Let’s walk through this delicious recipe together:

  1. Preheat your oven to 350°F (175°C) and position the rack in the center.
  2. Prepare the potatoes: Peel and slice the potatoes into 1/8″ (3 mm) rounds using a mandoline slicer for even thickness.
  3. Make the cream mixture: In a saucepan, melt the butter over medium heat. Add minced garlic and sauté for about 30 seconds. Stir in heavy cream, salt, and pepper, warming until just boiling. Remove from heat.
  4. Layer it up: In a greased 9×13 baking dish, arrange half of the sliced potatoes. Pour half of the cream mixture over the potatoes and sprinkle half of each cheese. Repeat with the remaining potatoes, cream, and cheese, finishing with a generous layer of cheese on top.
  5. Bake: Cover the dish with foil and bake for 40 minutes. Remove the foil and bake for an additional 25-35 minutes, or until a toothpick easily slides through the potatoes. Ovens can vary, so keep an eye on them!
  6. Rest before serving: Allow the dish to sit for 5-10 minutes for the flavors to settle and make serving easier.

Pro Tips for Perfect Scalloped Potatoes

Here are some tried-and-true tips to ensure your scalloped potatoes are perfect every time:

  • Even Slices: Use a mandoline slicer for uniform potato thickness, ensuring they cook evenly.
  • Grate Your Own Cheese: Pre-shredded cheese often contains anti-caking agents which can affect meltability. Freshly grated cheese melts smoother and creamier.
  • Don’t Rush the Layers: Take your time layering the potatoes and cheese; this enhances the flavor and texture.
  • Season Each Layer: Lightly season each layer of potatoes with salt and pepper to build depth in flavor.
  • Experiment with Flavors: Add herbs like thyme or rosemary to the cream mixture for an aromatic twist.
  • Cover with Foil: Covering the dish with foil during the first part of baking traps moisture, making the potatoes tender.
  • Check for Doneness Early: Ovens can vary, so start checking for doneness a bit earlier to avoid overcooking.
  • Resting Time: Allowing the dish to rest after baking helps the layers set, making it easier to serve.

Common Mistakes & Troubleshooting

Even the best chefs can run into snags. Here’s how to avoid common pitfalls:

  • Watery Sauce: If your cream mixture is too thin, consider using less cream or adding a thickening agent like cornstarch.
  • Undercooked Potatoes: Ensure your potato slices are uniformly cut for even cooking; thicker slices will remain crunchy.
  • Overcooked Cheese: If the top is browning too quickly, cover it with foil to prevent burning while allowing the potatoes to cook through.
  • Too Salty: Always taste as you go! Adjust seasoning gradually to avoid oversalting.

Delicious Variations to Try

Feeling adventurous? Here are some fun twists on the classic recipe:

  • Loaded Scalloped Potatoes: Add crumbled bacon, chopped green onions, and sour cream for a loaded version.
  • Vegetable Medley: Incorporate layers of sautéed spinach, mushrooms, or broccoli for a colorful and nutritious addition.
  • Spicy Kick: Mix in diced jalapeños or a sprinkle of cayenne pepper for a spicy touch.
  • Herbed Delight: Infuse the cream with fresh herbs like sage or basil for a fragrant twist.

Storage & Make-Ahead Instructions

This dish is fantastic for meal prep! Here’s how to store and reheat:

  • Refrigerate: Store leftovers in an airtight container in the fridge for up to 4 days.
  • Freeze: You can freeze unbaked scalloped potatoes. Just wrap tightly in foil and freeze for up to 3 months. Thaw in the fridge overnight before baking.
  • Reheat: To reheat, cover with foil and warm in a 350°F (175°C) oven until heated through, about 30-40 minutes.

Frequently Asked Questions

Here are some common questions about making scalloped potatoes:

  • Can I use different types of cheese? Yes! Mixing cheeses adds depth to the flavor. Just ensure they melt well.
  • What can I serve with scalloped potatoes? They pair wonderfully with roasted meats, grilled chicken, or a fresh salad.
  • Can I make this dish vegan? You can substitute dairy products with plant-based alternatives, like cashew cream and nutritional yeast.
  • How do I know when they’re done? The potatoes should be tender when pierced with a fork. The top should be golden and bubbly.
  • Can I make this gluten-free? Yes! All the ingredients listed are naturally gluten-free.
  • What’s the best way to slice potatoes? A mandoline slicer ensures even thickness, which is key for even cooking.
  • How long can I store leftovers? Leftovers can be kept in the refrigerator for up to 4 days.
  • Can I prepare this dish ahead of time? Absolutely! Assemble the dish and refrigerate until ready to bake.

Nutritional Tips and Dietary Adaptations

For those watching their diet, here are some tips:

  • Reduce Fat: Substitute half of the heavy cream with low-fat milk or use a non-dairy alternative.
  • Increase Veggies: Add layers of vegetables like zucchini or cauliflower to boost fiber and nutrition.
  • Portion Control: Serve in smaller portions to enjoy the flavors without overindulging.

Equipment Recommendations

To ensure success in making these scalloped potatoes, consider having the following tools handy:

  • Mandoline Slicer: For perfectly even potato slices that cook uniformly.
  • 9×13 Baking Dish: A classic size for baking and serving.
  • Sharp Knife: For chopping garlic and any additional vegetables.
  • Measuring Cups and Spoons: To ensure the right ingredient ratios.

Serving Suggestions

To create a beautiful meal, serve your scalloped potatoes alongside:

  • Glazed Ham: The sweetness pairs perfectly with the creamy potatoes.
  • Herb-Roasted Chicken: A classic combo that never disappoints.
  • Mixed Greens Salad: Lightens up the meal and adds freshness.
  • Grilled Steak: For a hearty, satisfying dinner.

As we wrap up, I hope this recipe not only fills your belly but also your heart with the warmth of shared meals and cherished memories. Remember, the kitchen is a place of love, and every dish you prepare is a step toward making those beautiful connections. Enjoy your cooking journey, and may your table always be filled with laughter and joy!

Easy Cheesy Scalloped Potatoes

Prep Time 15 minutes
Cook Time 1 hour 5 minutes
Total Time 1 hour 20 minutes
Servings 8 servings
Calories 450
A creamy, cheesy side dish featuring tender sliced potatoes baked to perfection with rich cheeses and garlic.

Ingredients

Cheeses

  • 2 cups freshly grated cheddar cheese
  • 1 cup freshly grated parmesan cheese

Potatoes

  • 3 pounds Russet or Yukon Gold potatoes
  • 1 tablespoon butter
  • 3 cloves garlic (minced)
  • 2 cups heavy/whipping cream
  • 1 teaspoon salt
  • Pepper to taste pepper

Instructions 

  • Preheat oven to 350°F (175°C). Slice potatoes thinly and grate cheeses.
  • Cook garlic in butter, add cream, salt, and pepper; warm until just boiling.
  • Layer potatoes in a greased dish, pour half of the cream, and sprinkle half of the cheeses. Repeat with remaining ingredients.
  • Cover with foil and bake for 40 minutes. Remove foil and bake an additional 25-35 minutes until tender and bubbly.
  • Let sit for 5-10 minutes before serving.

Notes

Use a mandoline for even potato slices for best results.
Calories: 450kcal
Cost: $15
Course: Side Dish
Cuisine: American
Keyword: Potatoes

Welcome to a culinary journey where we embrace the warmth of family traditions and the joy of using leftover turkey to create something truly special! If you’ve ever found yourself wondering what to do with those delicious Thanksgiving leftovers, you’re in for a treat. Picture this: crispy, golden tortillas filled with savory turkey, melty cheese, and zesty salsa, all ready to be shared around the family table. These leftover turkey quesadillas are not just a meal; they are a celebration of flavors, memories, and love. Let’s dive into why this recipe will become a cherished favorite in your home.

Why You’ll Love This Recipe

  • Quick and Easy: In just 30 minutes, you can whip up a batch of these quesadillas, perfect for busy weeknights or surprise guests.
  • Family-Friendly: This recipe is a hit with both kids and adults, making it a delicious way to bring everyone together.
  • Versatile Ingredients: You can customize the fillings with whatever you have on hand, from vegetables to your favorite type of cheese.
  • Zero Waste: Transforming leftovers into a delightful dish means no turkey goes to waste, honoring the love that went into that holiday meal.
  • Perfect for Sharing: These quesadillas are easy to cut into wedges and serve, making them ideal for gatherings and celebrations.

Ingredients Breakdown

Let’s gather our ingredients for these leftover turkey quesadillas. Here’s what you’ll need, along with some helpful substitutions:

  • 2 cups turkey leftovers (shredded): Any leftover turkey works, from roasted to smoked. You can also use chicken if needed.
  • 10 tortillas (wheat flour or corn): Choose your favorite! Corn tortillas add a delightful authenticity, while flour tortillas offer a softer bite.
  • 2 cups melty cheese: A shredded Mexican blend, Monterey Jack, or mozzarella will provide that gooey, stretchy goodness.
  • 1-2 cups salsa roja: Spice it up with your favorite salsa. If you prefer mild, opt for a classic tomato salsa.
  • 1 ½ cups refried beans: These add creaminess and depth. You can substitute with black beans for a different flavor profile.
  • Vegetable oil: For cooking the quesadillas; you can also use butter for a richer flavor.
  • Guacamole, pico de gallo, and sour cream: For serving, these classic toppings enhance the flavor and add freshness.

How to Make Leftover Turkey Quesadillas

  1. Prepare the Turkey: Place the shredded turkey in a pan and add 1-2 tablespoons of salsa roja. Reheat over medium heat, stirring constantly for 4-5 minutes, until warmed through. Adjust the salsa quantity for desired flavor.
  2. Heat the Skillet: Preheat a cast-iron skillet or non-stick pan over medium-high heat. Brush lightly with vegetable oil.
  3. Assemble the Quesadilla: Place a tortilla in the skillet. On one half, spread a spoonful of refried beans, followed by a generous amount of cheese and the turkey mixture. Fold the tortilla in half.
  4. Cook to Perfection: Cook for about 2-3 minutes on each side until the cheese melts and the tortilla is crispy and golden brown. Repeat with remaining tortillas.
  5. Serve Immediately: Cut the quesadillas into wedges and serve with guacamole, pico de gallo, and sour cream on the side.

Pro Tips for Perfect Quesadillas

Juicy leftover turkey quesadillas served on a plate with salsa and guacamole.
  • Don’t Overfill: Less is more! Overfilling can lead to messy quesadillas that are hard to flip.
  • Control the Heat: Maintain medium heat to ensure the tortilla cooks evenly without burning.
  • Experiment with Cheese: Try different cheeses for varied flavors—pepper jack adds a nice kick!
  • Use Fresh Ingredients: Fresh herbs, like cilantro, can elevate the flavor and add freshness.
  • Make Ahead: Assemble your quesadillas ahead of time and store them in the fridge for a quick meal later.

Common Mistakes and Troubleshooting

Even the best cooks have a mishap now and then! Here are some common mistakes and how to avoid them:


Meal Prep Container Set

★ Recommended Kitchen Tool

Meal Prep Container Set

Make this recipe even easier with a quality Meal Prep Container Set — a must-have kitchen staple!


🛒 View on Amazon →

As an Amazon Associate, we earn from qualifying purchases.
  • Too Much Oil: Using too much oil can make your quesadilla greasy. A light brush is all you need.
  • Cold Filling: Make sure your filling is warm before assembling; this helps the cheese melt nicely.
  • Burnt Tortilla: Keep an eye on the skillet; if the tortillas are browning too quickly, reduce the heat.
  • Sticking Quesadillas: Ensure your skillet is well-heated and oiled to prevent sticking.

Variations on Leftover Turkey Quesadillas

If you want to switch things up, here are some delightful variations to try:

  • Veggie Delight: Add sautéed bell peppers, onions, or spinach for a veggie-loaded quesadilla.
  • Spicy Kick: Incorporate sliced jalapeños or a dash of hot sauce for a spicy version.
  • BBQ Turkey Quesadillas: Swap out salsa for BBQ sauce and add smoked gouda for a smoky flavor.
  • Breakfast Quesadilla: Use eggs, cheese, and turkey for a hearty breakfast option, adding diced tomatoes and avocado.

Storage and Make-Ahead Instructions

Want to save some for later? Here’s how to store and reheat your quesadillas:

  • Refrigeration: Store leftover quesadillas in an airtight container for up to 3 days.
  • Freezing: You can freeze assembled, uncooked quesadillas. Wrap them tightly in plastic wrap and place them in a freezer bag for up to 2 months.
  • Reheating: To reheat, bake in a preheated oven at 375°F (190°C) for about 15 minutes or until heated through.

Frequently Asked Questions

Here are some common questions about making leftover turkey quesadillas:

  • Can I use fresh turkey instead of leftovers? Absolutely! Just cook the turkey thoroughly before assembling your quesadillas.
  • What’s the best way to cut quesadillas? Use a sharp knife or pizza cutter to cut them into wedges for easy serving.
  • Can I make these quesadillas gluten-free? Yes! Use gluten-free tortillas and ensure all other ingredients are gluten-free.
  • What can I serve with quesadillas? Serve with fresh salsa, guacamole, or a salad on the side for a complete meal.
  • How can I make this a vegetarian dish? Omit the turkey and add more beans and veggies for a hearty vegetarian option.
  • Can I make quesadillas in advance? Yes! Assemble them ahead of time and store them in the fridge until you’re ready to cook.
  • What type of cheese is best? A blend of cheeses works best, but feel free to experiment with your favorites!
  • How do I get the cheese extra gooey? Adding a bit of cream cheese or sour cream to the mixture can make it extra creamy and gooey.

Nutritional Tips and Dietary Adaptations

Cooking with love also means considering health and dietary needs. Here are some tips:

  • Low Sodium: Choose low-sodium beans and salsa to keep the dish heart-healthy.
  • Increase Fiber: Use whole grain tortillas and add extra vegetables for added fiber.
  • Reduce Fat: Opt for less cheese or use low-fat cheese options to make this dish lighter.

Equipment Recommendations

To make your cooking experience smooth and enjoyable, here are some essential tools:

  • Cast-Iron Skillet: Perfect for achieving crispy edges and melty cheese.
  • Spatula: A sturdy spatula helps flip the quesadillas without breaking them apart.
  • Measuring Cups: For accurate ingredient measurements, especially with salsas and cheeses.

Serving Suggestions

To elevate your quesadilla experience, consider these serving ideas:

  • Garnish: Fresh cilantro or sliced green onions can add a pop of color and flavor.
  • Dipping Sauces: Offer a variety of dips like ranch, spicy mayo, or even a zesty yogurt sauce.
  • Pair with Drinks: Serve with refreshing drinks like iced tea, lemonade, or a light beer for a perfect meal.

Conclusion

As you gather around the table with loved ones, these leftover turkey quesadillas will not only satisfy your hunger but also fill your hearts with warmth and nostalgia. Cooking is about creating memories, and this dish encapsulates the essence of love and togetherness. So, let’s get cooking and make every meal a memory worth sharing!

Leftover Turkey Quesadillas

Prep Time 10 minutes
Cook Time 15 minutes
Total Time 25 minutes
Servings 5 pieces
Calories 650
Enjoy a quick and delicious meal using leftover turkey, perfect for a flavorful lunch or dinner.

Ingredients

Protein

  • 2 cups turkey leftovers (shredded)

Dairy

  • 2 cups melty cheese (shredded Mexican blend, Monterey Jack, or mozzarella)

Grains

  • 10 tortillas wheat flour or corn tortillas

Sauces & Condiments

  • 1-2 cups salsa roja (or your favorite Mexican salsa)

Legumes

  • 1.5 cups refried beans

Oils & Fats

  • as needed vegetable oil

Garnishes

  • guacamole
  • pico de gallo
  • salsa

Instructions 

  • Cook turkey with 1-2 cups salsa roja over medium heat for 4-5 minutes, stirring.
  • Heat a skillet over medium-high heat, brush with oil, and place a tortilla.
  • Spread refried beans, add cheese, turkey mixture, fold, and cook 2-3 minutes per side until crispy and melted.
  • Repeat for remaining tortillas and serve with guacamole, pico de gallo, and salsa.

Notes

Use shredded Mexican blend cheese for best flavor.
Calories: 650kcal
Cost: $15
Course: Main Course
Cuisine: Mexican
Keyword: Turkey

Embrace the Warmth of Fall with This Cozy Loaf

As the leaves turn and the crisp air signals the arrival of fall, there’s nothing quite like the aroma of a freshly baked Spiced Apple Cider Donut Loaf wafting through your home. This recipe is more than just a treat; it’s a heartfelt reminder of those cozy family gatherings spent around the kitchen table. Each slice of this loaf captures the essence of autumn, infused with sweet apple cider, warm spices, and topped with a delightful cinnamon sugar crust. Whether you’re enjoying it for breakfast or sharing it with loved ones, this loaf is sure to become a cherished favorite in your home.

Why You’ll Love This Recipe

  • Perfect for Sharing: This loaf is a wonderful way to bring family and friends together, making it ideal for gatherings or cozy evenings at home.
  • Warm Spices: Infused with cinnamon, nutmeg, and allspice, this loaf offers a comforting flavor profile that embodies the essence of fall.
  • Easy to Make: With simple ingredients and straightforward steps, even novice bakers will find joy in creating this delicious treat.
  • Versatile Enjoyment: Serve this loaf for breakfast, dessert, or as an afternoon snack with a cup of tea or coffee.
  • Kid-Friendly: The sweet flavors and soft texture make it a hit with kids, ensuring it’s a family favorite.

Ingredients You’ll Need

Gather these ingredients to make your Spiced Apple Cider Donut Loaf:

  • 1 1/2 cups all-purpose flour
  • 1 tsp baking powder
  • 1/2 tsp baking soda
  • 1/4 tsp salt
  • 1 tsp ground cinnamon
  • 1/2 tsp ground nutmeg
  • 1/2 tsp ground allspice
  • 1/2 cup unsalted butter, melted
  • 1/2 cup granulated sugar
  • 1/4 cup brown sugar
  • 2 large eggs
  • 1/2 cup apple cider
  • 1 tsp vanilla extract
  • 1/4 cup granulated sugar (for crust)
  • 1 tsp ground cinnamon (for crust)
  • 2 tbsp melted butter (for crust)

Ingredient Substitutions

  • All-purpose flour: You can use whole wheat flour for a nuttier flavor or gluten-free flour for a gluten-free version.
  • Unsalted butter: Substitute with coconut oil or vegetable oil if you prefer a dairy-free option.
  • Apple cider: If you don’t have apple cider, apple juice can work in a pinch, though the flavor will be slightly different.
  • Granulated sugar: For a healthier option, consider using coconut sugar or maple syrup (adjust liquid content accordingly).

How to Make Your Spiced Apple Cider Donut Loaf

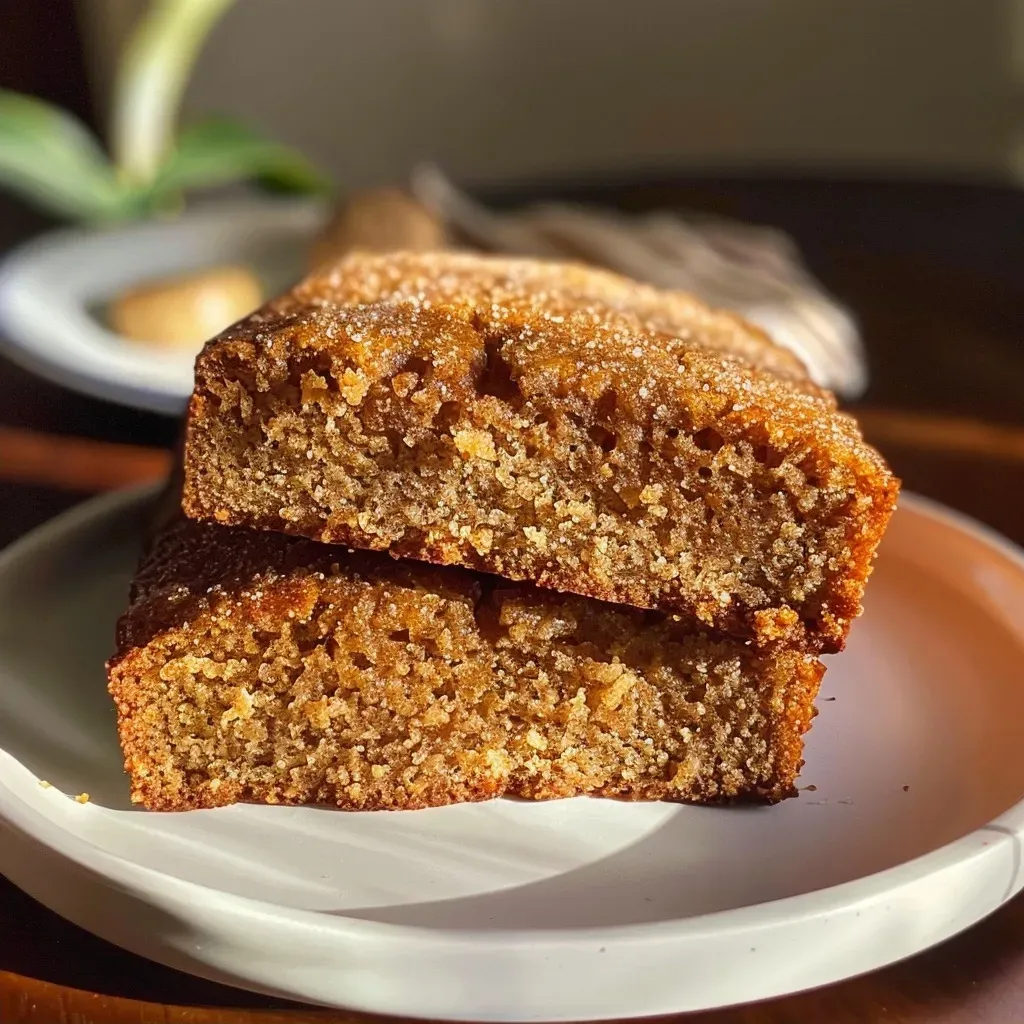
Side profile of a freshly baked Spiced Apple Cider Donut Loaf, showcasing a fluffy texture and a warm cinnamon topping.

Follow these simple steps to create your delicious loaf:


Meal Prep Container Set

★ Recommended Kitchen Tool

Meal Prep Container Set

Make this recipe even easier with a quality Meal Prep Container Set — a must-have kitchen staple!


🛒 Check Price on Amazon →

As an Amazon Associate, we earn from qualifying purchases.
  1. Preheat the Oven: Preheat your oven to 350°F (175°C) and grease a 9×5-inch loaf pan with butter or cooking spray.
  2. Mix the Dry Ingredients: In a medium bowl, whisk together the flour, baking powder, baking soda, salt, cinnamon, nutmeg, and allspice until well combined.
  3. Mix the Wet Ingredients: In a large bowl, whisk together the melted butter, granulated sugar, brown sugar, and eggs until smooth. Then, mix in the apple cider and vanilla extract.
  4. Combine Everything: Gradually add the dry ingredients to the wet mixture, stirring gently until just combined. Be careful not to overmix; this will ensure a tender loaf.
  5. Pour and Bake: Pour the batter into the prepared loaf pan. Bake for 45–50 minutes, or until a toothpick inserted into the center comes out clean.
  6. Prepare the Cinnamon Sugar Crust: While the loaf is baking, mix the granulated sugar and cinnamon in a small bowl. Once the loaf is baked and slightly cooled, brush the top with melted butter and generously sprinkle the cinnamon sugar mixture over it.
  7. Slice and Serve: Allow the loaf to cool in the pan for about 10 minutes, then transfer it to a wire rack to cool completely. Slice and serve warm for the best flavor and texture.

Pro Tips for Perfecting Your Loaf

  • Room Temperature Ingredients: Make sure your eggs and butter are at room temperature for better mixing and texture.
  • Don’t Overmix: Overmixing can lead to a dense loaf; mix until just combined.
  • Check for Doneness: Ovens can vary; check your loaf a few minutes before the suggested baking time.
  • Use Fresh Spices: Freshly ground spices can elevate the flavor significantly, making your loaf even more aromatic.
  • Cool Completely: Let the loaf cool completely before slicing to ensure clean cuts and prevent it from falling apart.
  • Experiment with Add-ins: Consider adding chopped apples, walnuts, or raisins for added texture and flavor.

Common Mistakes and Troubleshooting

Here are some common pitfalls to avoid:

  • Dense Texture: Overmixing the batter can lead to a dense loaf. Always mix until just combined.
  • Dry Loaf: Overbaking can dry out your loaf. Keep an eye on it as it approaches the end of the baking time.
  • Burnt Crust: If the top is browning too quickly, loosely cover it with foil to prevent burning while the inside finishes baking.
  • Uneven Baking: Ensure your oven is calibrated correctly and rotate the loaf halfway through baking for even cooking.

Variations to Try

For a fresh twist on this classic recipe, consider these variations:

  • Chocolate Chip Apple Cider Loaf: Add 1/2 cup of semi-sweet chocolate chips to the batter for a delightful contrast.
  • Maple Glaze: Drizzle a maple syrup glaze over the cooled loaf for a sweet finish.
  • Nutty Banana Cider Loaf: Incorporate mashed bananas and chopped nuts for a unique flavor combination.
  • Vegan Version: Substitute eggs with flax eggs and use plant-based butter for a vegan-friendly option.

Storage and Make-Ahead Instructions

This loaf can be made ahead of time and stored for later enjoyment. Here’s how:

  • Room Temperature: Store the cooled loaf at room temperature in an airtight container for up to 3 days.
  • Refrigeration: For longer storage, wrap the loaf tightly in plastic wrap and refrigerate for up to a week.
  • Freezing: To freeze, wrap the loaf in plastic wrap and then in aluminum foil. It can be frozen for up to 3 months. Thaw in the refrigerator overnight before serving.

Frequently Asked Questions

  • Can I use whole wheat flour instead of all-purpose flour? Yes, whole wheat flour can be used, but it may alter the texture slightly.
  • What can I substitute for apple cider? Apple juice can work in place of apple cider, though the flavor will differ slightly.
  • How do I know when the loaf is done baking? A toothpick inserted into the center should come out clean or with a few moist crumbs.
  • Can I add nuts to the loaf? Absolutely! Chopped walnuts or pecans can add a delightful crunch.
  • What’s the best way to store leftovers? Store in an airtight container at room temperature for a few days or refrigerate for longer storage.
  • Can I make this gluten-free? Yes, you can substitute with a gluten-free flour blend.
  • How can I enhance the flavor? Use fresh spices and consider adding a touch of vanilla extract or citrus zest for added depth.
  • What is the best way to serve this loaf? Serve warm, with a pat of butter or a dollop of cream cheese for an extra treat.

Nutritional Tips and Dietary Adaptations

This loaf can be adapted to fit various dietary needs:

  • Lower Sugar: Reduce the sugar content by half and replace with a natural sweetener like honey or agave.
  • Dairy-Free Option: Use plant-based butter and non-dairy milk to make it suitable for dairy-free diets.
  • Nut-Free: Ensure all ingredients are nut-free for those with allergies.

Equipment Recommendations

To get started, here are some essential tools you’ll need:

  • 9×5-inch Loaf Pan: A sturdy loaf pan ensures even baking and a perfect loaf shape.
  • Mixing Bowls: Use one large bowl for wet ingredients and a medium bowl for dry ingredients.
  • Whisk and Mixing Spoon: Essential for combining ingredients smoothly.
  • Measuring Cups and Spoons: Accurate measurements are key to baking success.
  • Cooling Rack: A cooling rack allows air to circulate around the loaf, preventing sogginess.

Serving Suggestions

Enjoy your Spiced Apple Cider Donut Loaf in various delightful ways:

  • With a Cup of Tea: Pair with your favorite tea for a relaxing afternoon treat.
  • As a Dessert: Serve warm with a scoop of vanilla ice cream or whipped cream.
  • With Breakfast: Enjoy slices toasted with butter and a sprinkle of cinnamon sugar for a cozy breakfast.
  • Garnished with Cream Cheese: A spread of cream cheese adds richness and balances the sweetness.

As you gather around the table with your loved ones, remember that this Spiced Apple Cider Donut Loaf isn’t just a recipe; it’s a way to create memories, share warmth, and connect over the simple joys of life. Happy baking!

Spiced Apple Cider Donut Loaf

Prep Time 15 minutes
Cook Time 50 minutes
Total Time 1 hour 5 minutes
Servings 8 slices
Calories 320
A moist and flavorful loaf combining warm spices and apple cider, topped with cinnamon sugar for a delightful treat.

Ingredients

Dry ingredients

  • 1 1/2 cups all-purpose flour
  • 1 tsp baking powder
  • 1/2 tsp baking soda
  • 1/4 tsp salt
  • 1 tsp ground cinnamon
  • 1/2 tsp ground nutmeg
  • 1/2 tsp ground allspice

Wet ingredients

  • 1/2 cup unsalted butter, melted
  • 1/2 cup granulated sugar
  • 1/4 cup brown sugar
  • 2 large eggs
  • 1/2 cup apple cider
  • 1 tsp vanilla extract

Cinnamon sugar topping

  • 1/4 cup granulated sugar
  • 1 tsp ground cinnamon
  • 2 tbsp melted butter

Instructions 

  • Preheat oven to 350°F (175°C). Grease and flour a loaf pan.
  • Mix dry ingredients in a bowl. Whisk wet ingredients in another. Combine until just mixed.
  • Pour batter into pan and bake for 45–50 minutes. Cool slightly.
  • Mix cinnamon sugar. Brush loaf with melted butter and sprinkle with topping.
  • Slice and serve warm.

Notes

For extra flavor, add a sprinkle of powdered sugar before serving.
Calories: 320kcal
Cost: $15
Course: Dessert
Cuisine: American
Keyword: apple, loaf, spice

There’s something deeply comforting about a warm dish shared among family and friends. Turkey Enchilada Casserole encapsulates that feeling, blending tender turkey with vibrant flavors, perfect for those cherished gatherings around the family table. With every bite, you’ll be reminded of home, love, and the cherished moments spent in the kitchen. This recipe is not just a meal; it’s a way to create lasting memories, all while utilizing leftover turkey in a way that brings excitement back to the dinner table.

Why You’ll Love This Recipe

Here are five reasons why this Turkey Enchilada Casserole will quickly become a family favorite:

  • Quick to Prepare: With just a few simple steps, you can have this delicious casserole ready to bake in under 30 minutes, making it perfect for busy weeknights.
  • Versatile Ingredients: Feel free to use leftover turkey, chicken, or even pulled pork. This is a recipe that adapts to what you have on hand, making it easy to enjoy year-round.
  • Gluten-Free Options: You can easily make this dish gluten-free by using corn tortillas and ensuring your enchilada sauce is gluten-free, accommodating dietary needs without sacrificing flavor.
  • Feed a Crowd: This casserole is hearty and filling, yielding enough to serve a large family or to prepare for meal prep for the week ahead.
  • Comforting and Flavorful: The combination of tender turkey, vibrant enchilada sauce, and gooey cheese creates a dish that is soothing and satisfying, sure to warm hearts and bellies.

Detailed Ingredient Breakdown

Understanding your ingredients is key to making this Turkey Enchilada Casserole shine. Here’s a detailed look at what you’ll need and some substitutes you can use:


Digital Kitchen Scale

★ Recommended Kitchen Tool

Digital Kitchen Scale

Make this recipe even easier with a quality Digital Kitchen Scale — a must-have kitchen staple!


🛒 See Deals on Amazon →

As an Amazon Associate, we earn from qualifying purchases.
  • Shredded Turkey: 4 cups of tender shredded turkey adds substance. You can substitute with leftover chicken or even shredded pork for a different flavor profile.
  • Enchilada Sauce: 3 cups of homemade or store-bought gluten-free enchilada sauce brings zest and moisture to the dish. If you prefer, you can make your own sauce with tomatoes, chili powder, and spices.
  • Corn: 1 can (15.25 ounces) of drained corn adds sweetness and texture. Feel free to use frozen corn if that’s what you have.
  • Diced Tomatoes: 1 can (14.5 ounces) of drained diced tomatoes adds juiciness and flavor. You can also use fresh tomatoes if they’re in season.
  • Tortillas: 26-30 small corn tortillas are the base of your casserole. If you’re looking for a gluten-free option, corn tortillas are perfect. Alternatively, you can use whole wheat tortillas.
  • Cheese: 1 cup of shredded cheddar cheese gives that gooey, melty finish we all crave. You can substitute with Monterey Jack or a dairy-free cheese if preferred.
  • Garnish: Chopped cilantro or flat-leaf parsley can be sprinkled on top for a fresh finish.

Pro Tips for Success

Here are some expert insights to elevate your casserole-making game:

  • Prep Ahead: You can assemble the casserole a day in advance and keep it in the fridge until you’re ready to bake it.
  • Use Leftover Sauce: If you have leftover enchilada sauce or even taco sauce, feel free to incorporate that into the filling for an extra flavor boost.
  • Don’t Overfill Tortillas: Use about 2 tablespoons of filling per tortilla to ensure they roll up nicely without bursting.
  • Crispy Edges: For the best texture, bake the casserole until the edges are crispy, which typically takes about 20 minutes at 350°F.
  • Layering Is Key: When layering your casserole, it’s beneficial to alternate between filling and sauce to ensure even flavor distribution.
  • Garnish Before Serving: Always add fresh herbs right before serving for a burst of color and freshness.
  • Experiment with Spices: Don’t hesitate to add spices like cumin or smoked paprika to the turkey mixture for a smoky depth of flavor.
  • Make It a Meal: Serve this casserole with a side salad or some roasted vegetables for a complete meal.

Common Mistakes and Troubleshooting

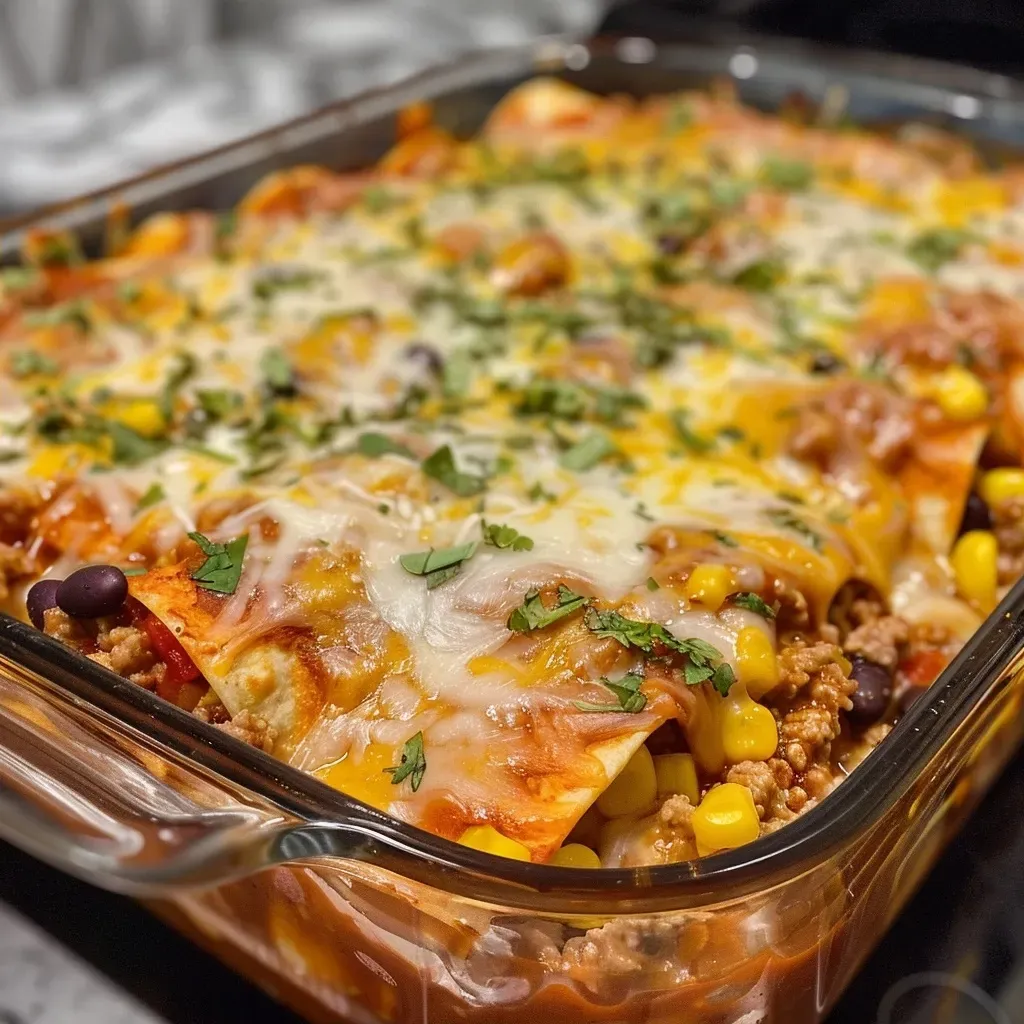
Side view of a juicy Turkey Enchilada Casserole, showcasing its colorful ingredients and melted cheese.

Even the best of us can run into hiccups while cooking. Here are common mistakes to avoid:

  • Dry Casserole: Make sure you’re using enough enchilada sauce. If your casserole looks dry before baking, add a little more sauce.
  • Overcooked Tortillas: If you’re using regular flour tortillas, be cautious not to overfill them, as they can tear easily.
  • Uneven Cooking: For the most even cooking, make sure to rotate your casserole halfway through baking.

Variations to Try

Feel like changing things up? Here are some delicious variations to consider:

  • Vegetarian Enchilada Casserole: Swap the turkey for black beans and add extra veggies like bell peppers and zucchini.
  • Spicy Kick: Add diced jalapeños or a splash of hot sauce to your filling for a spicy version.
  • Cheesy Spinach: Mix in some fresh or frozen spinach with the turkey for added nutrition and a pop of color.
  • Sweet Potato Addition: Add diced sweet potatoes into the filling for a hint of sweetness and a hearty texture.

Storage and Make-Ahead Instructions

Planning ahead is a great way to save time. Here’s how to store and prepare your casserole:

  • Refrigerate: If you have leftovers, store them in an airtight container in the fridge for up to 4 days.
  • Freeze: You can freeze the unbaked casserole for up to 3 months. Just thaw it in the fridge before baking.
  • Reheat: To reheat, cover with foil and bake at 350°F for about 25 minutes or until heated through.

Comprehensive FAQ

Here are some frequently asked questions to help you navigate this recipe:

  • Can I use chicken instead of turkey? Absolutely! Leftover chicken works wonderfully in this recipe.
  • Is this casserole gluten-free? Yes, if you use gluten-free tortillas and enchilada sauce.
  • How do I make this vegetarian? Substitute the turkey with black beans and add lots of veggies.
  • Can I make this in advance? Yes, you can prep it a day ahead or freeze it for later.
  • What can I serve with this casserole? A fresh salad or some roasted vegetables make great sides.
  • How long does it take to bake? Bake for about 20 minutes until the edges are crispy.
  • Can I use homemade enchilada sauce? Definitely! Homemade sauce adds a personal touch and flavor.
  • Is it okay to double the recipe? Yes, just use two pans and adjust the baking time as needed.

Nutrition Tips and Dietary Adaptations

For those watching their nutritional intake, here are some tips:

  • Low-Calorie Option: Use lean turkey and low-fat cheese to reduce calories.
  • Protein Boost: Add beans or legumes to increase protein content.
  • Lower Carb: Substitute tortillas with sliced zucchini or eggplant for a low-carb option.

Equipment Recommendations

To make your cooking experience smoother, here are a few essential tools to have on hand:

  • 9 x 13 Baking Dish: Perfect size for this casserole.
  • Mixing Bowls: A few different sizes for prepping ingredients.
  • Spray Bottle: For easy application of cooking spray on your baking dishes.
  • Sharp Knife: For chopping vegetables and herbs efficiently.

Serving Suggestions

This Turkey Enchilada Casserole is versatile enough to be served in various ways:

  • Top with Fresh Ingredients: Before serving, add fresh avocado slices or a dollop of sour cream for extra creaminess.
  • Pair with a Side Salad: A refreshing side salad balances the richness of the casserole.
  • Offer Extra Toppings: Set up a toppings bar with olives, jalapeños, and diced onions for a fun, interactive meal.

In conclusion, this Turkey Enchilada Casserole is more than just a recipe; it’s a heartwarming dish that brings people together, creating memories around the table. Whether you’re using leftovers or trying out a new variation, embrace the joy of cooking and sharing. Let each bite remind you of love, warmth, and the beauty of gathering loved ones around the table. Happy cooking!

Turkey Enchilada Casserole

Prep Time 15 minutes
Cook Time 20 minutes
Total Time 35 minutes
Servings 6 servings
Calories 350
A flavorful and easy-to-make casserole combining shredded turkey, enchilada sauce, and tortillas, baked to crispy perfection.

Ingredients

Main ingredients

  • 4 cups shredded turkey
  • 3 cups enchilada sauce (gluten free - homemade or store-bought)
  • 1 can (15.25 ounces) corn, drained
  • 1 can (14.5 ounces) diced tomatoes, drained
  • 26-30 small corn tortillas
  • 1 cup shredded cheddar cheese
  • Chopped cilantro or flat-leaf parsley for garnish (optional) Chopped cilantro or parsley (for garnish (optional))

Instructions 

  • Mix shredded turkey, 1 1/2 cups enchilada sauce, corn, and tomatoes.
  • Spray two 9×13 pans with cooking spray.
  • Fill tortillas with filling, roll, and place in pans. Use two per row.
  • Add remaining sauce to leftover filling, pour over pans, then sprinkle with cheese.
  • Bake at 350°F for 20 minutes until edges are crispy. Garnish before serving.

Notes

You can add chopped cilantro or parsley for extra flavor.
Calories: 350kcal
Cost: $15
Course: Main Course
Cuisine: Mexican
Keyword: Turkey

A Cozy Morning Embrace: Discovering the Joys of Apple Cider Donut French Toast Casserole

There’s something magical about the smell of warm, sweet apple cider wafting through the kitchen, mingling with the comforting scent of baked bread. This Apple Cider Donut French Toast Casserole is not just a recipe; it’s a heartfelt invitation to gather around the table and share stories, memories, and laughter. Perfect for fall mornings or festive brunches, this casserole transforms day-old donuts into a delightful dish that everyone will love. Let’s dive into the ingredients, tips, and variations that will make this recipe a cherished part of your family gatherings.

Why You’ll Love This Recipe

  • Quick and Easy: With minimal prep time, you can whip up this delicious casserole in under 15 minutes, leaving you more time to enjoy your morning.
  • Uses Leftovers: Transform those day-old donuts into something extraordinary, reducing waste and maximizing flavor.
  • Customizable: Whether you prefer pecans, walnuts, or none at all, this dish can be tailored to your taste and dietary needs.
  • Perfect for Sharing: This casserole serves a crowd, making it ideal for brunches, family gatherings, or holiday celebrations.
  • Heartwarming Flavor: The combination of apple cider, spices, and creamy custard creates a nostalgic flavor that evokes memories of cozy family moments.

Ingredient Breakdown

Let’s take a closer look at what you’ll need to create this comforting casserole. Each ingredient plays a crucial role in delivering flavor and texture.

  • Unsalted Butter: 1 stick, softened. This adds richness to the dish and helps create a golden crust.
  • Cake Flour: 4 oz. Light and fluffy, cake flour ensures a tender texture.
  • Light Brown Sugar: 6 oz + 4 oz for streusel. This adds sweetness and depth of flavor.
  • Apple Pie Spice or Cinnamon: 1/4 teaspoon and another 1/2 teaspoon. These spices infuse the casserole with warmth and familiarity.
  • Salt: A heavy pinch for balancing flavors.
  • Whole Milk: 3 cups. You can substitute with 2% milk if preferred for a lighter option.
  • Eggs: 3 large, providing structure and richness to the custard.
  • Apple Cider: 32 oz. This is the star of the show, giving the casserole its unique flavor.
  • Day-Old Apple Cider Donuts: 6, either homemade or store-bought. They are key to the casserole’s base.
  • Apple Pie Filling: 1 cup. Homemade or store-bought, it adds a delightful fruitiness.
  • Chopped Pecans or Walnuts: 1/2-1 cup, toasted for added crunch (optional).
  • Heavy Cream: 1 cup for a rich, creamy finish.
  • Brown Sugar: to taste, 2-4 tablespoons for additional sweetness.

Pro Tips for Making the Best Casserole

Side perspective of a deliciously baked Apple Cider Donut French Toast Casserole with nuts sprinkled on top.
  • Don’t Rush the Soaking: Allow the donuts to soak in the custard for at least 30 minutes, or even overnight, for maximum flavor absorption.
  • Use Day-Old Donuts: Fresh donuts might fall apart; day-old donuts hold their shape better.
  • Experiment with Flavors: Try adding different spices or extracts, like nutmeg or vanilla, to enhance the flavor profile.
  • Toast Your Nuts: Toasting pecans or walnuts before adding them to the mix enhances their flavor and adds a delightful crunch.
  • Use a Deep Dish: A deeper casserole dish allows for even cooking and a beautiful rise.
  • Cover While Baking: If the top browns too quickly, cover the dish with foil for part of the baking time.
  • Let It Rest: Allow the casserole to cool for about 10 minutes before slicing. This helps it set and makes serving easier.
  • Serve with Syrup: Drizzle with warm apple cider syrup or maple syrup for an extra touch of sweetness.

Common Mistakes and Troubleshooting

Even the best of us can make mistakes in the kitchen. Here are some common pitfalls and how to avoid them:


Glass Mason Jars for Oats

★ Recommended Kitchen Tool

Glass Mason Jars for Oats

Make this recipe even easier with a quality Glass Mason Jars for Oats — a must-have kitchen staple!


🛒 See Deals on Amazon →

As an Amazon Associate, we earn from qualifying purchases.
  • Too Dry: If your casserole is dry, it likely needed more custard or soaking time. Ensure the donuts are well-soaked before baking.
  • Not Sweet Enough: Adjust the brown sugar to your taste; remember, you can always add more sweetness later with syrup.
  • Overbaking: Keep an eye on the casserole in the oven; it should be golden brown but still slightly jiggly in the middle.
  • Soggy Bottoms: If the bottom is soggy, try increasing the baking time or using a higher rack in the oven for better airflow.

Delicious Variations to Try

This recipe is wonderfully versatile. Here are some variations you might enjoy:

  • Berry Delight: Add 1 cup of mixed berries for a fruity twist.
  • Chocolate Chip: Stir in 1 cup of chocolate chips for a decadent dessert version.
  • Maple Pecan: Replace the apple pie spice with maple syrup and add chopped pecans for a different flavor.
  • Banana Foster: Incorporate sliced bananas and a splash of rum for a tropical take.

Storage and Make-Ahead Instructions

This casserole is great for meal prep! Here’s how to store it:

  • Refrigerate: Cover leftovers in an airtight container for up to 3 days.
  • Freeze: Freeze baked casserole for up to 2 months. Thaw overnight in the refrigerator before reheating.
  • Make Ahead: Prepare the casserole the night before and let it soak in the fridge overnight. Bake it in the morning for a ready-to-go breakfast.

Frequently Asked Questions

  • Can I use other types of donuts?
    Absolutely! Any type of cake donut will work, just ensure they are not too soft.
  • How can I make this recipe gluten-free?
    Substitute the cake flour with a gluten-free flour blend.
  • Can I substitute the milk?
    You can use almond milk or any other non-dairy milk if you prefer.
  • Is it necessary to use apple cider?
    While it’s recommended for flavor, you can use milk or cream as a substitute.
  • What can I serve with this casserole?
    It pairs beautifully with fresh fruit, whipped cream, or a drizzle of caramel sauce.
  • Can I add more eggs?
    Yes, adding another egg can make the custard richer, but be cautious not to make it too eggy.
  • How do I know when it’s done?
    The casserole should be puffed and golden brown, with a slight jiggle in the center.
  • How should I reheat leftovers?
    Microwave individual portions or reheat the entire casserole in the oven at 350°F until warmed through.

Equipment Recommendations

Having the right tools can make a big difference. Here are my top picks:

  • 9×13-inch Baking Dish: Ideal size for this casserole, providing even cooking.
  • Whisk: For beating eggs and mixing the custard smoothly.
  • Mixing Bowls: A set of various sizes for ingredient prep.
  • Measuring Cups and Spoons: Accurate measurements are key to success.
  • Spatula: Essential for mixing and folding ingredients.

Serving Suggestions

When it’s time to serve, consider these delightful accompaniments:

  • Maple Syrup: A classic choice adds a sweetness that pairs perfectly with the flavors.
  • Fresh Fruit: Serve with slices of apples or pears for a refreshing contrast.
  • Whipped Cream: A dollop of homemade whipped cream makes this dish feel extra special.
  • Cinnamon Sugar: Dusting the top with a sprinkle of cinnamon sugar can add a delightful crunch.

Conclusion: A Recipe to Cherish

As we gather around the table to enjoy this Apple Cider Donut French Toast Casserole, we’re not just sharing a meal; we’re creating memories. Each bite carries with it the warmth of family, the sweetness of tradition, and the joy of connection. So, let’s embrace the cozy mornings, the laughter, and the love that fills our kitchens. Happy cooking, and may your table always be filled with the warmth of good food and good company!

Apple Cider Donut French Toast Casserole

Prep Time 15 minutes
Cook Time 45 minutes
Total Time 1 hour
Servings 8 servings
Calories 450
A delicious breakfast casserole combining apple cider, donuts, and warm spices for a cozy morning treat.

Ingredients

Dairy & Baking

  • 113 g unsalted butter (softened)
  • 113 g cake flour
  • 113 g light brown sugar
  • 0.25 teaspoon apple pie spice or cinnamon
  • pinch salt
  • 720 ml whole milk (can use 2%)
  • 170 g light brown sugar
  • 3 large eggs
  • 0.5 teaspoon apple pie spice
  • 0.5 teaspoon vanilla extract
  • 946 ml apple cider ((1 quart))
  • pinch salt
  • pinch apple pie spice
  • 6 doughnuts day-old apple cider doughnuts (homemade or store-bought)
  • 1 cup prepared apple pie filling
  • 0.5 teaspoon apple pie spice (only if filling isn't seasoned)
  • 0.5 cup chopped pecans (toasted (or walnuts), optional)
  • 1 cup heavy cream
  • 2-4 tablespoons brown sugar (to taste)
  • pinch salt
  • pinch apple pie spice

Instructions 

  • Preheat oven to 350°F (175°C). Grease a baking dish.
  • Mix milk, eggs, sugars, spices, vanilla, and cider in a bowl.
  • Layer sliced doughnuts and apple pie filling in the dish, then pour custard mixture over.
  • Top with chopped pecans and bake for 45 minutes until golden.
  • Serve warm with heavy cream or syrup.

Notes

For extra flavor, toast the nuts before adding.
Calories: 450kcal
Cost: $15
Course: Breakfast
Cuisine: American
Keyword: apple cider, donuts, French Toast

Cooking is more than just a task; it’s a love language, a way of connecting, and a tradition that binds us. Each recipe holds a story, a memory of flavors shared around the family table. Today, I’m excited to share my cherished recipe for Honey Glazed Parsnips. This dish transforms simple parsnips into a sweet, sticky delight, perfect for any gathering. Let’s dive into this heartwarming recipe that will not only nourish your body but also your spirit.

Why You’ll Love This Recipe

There are countless reasons to fall in love with honey glazed parsnips. Here are just a few:

  • Sweet Meets Savory: The natural sweetness of parsnips pairs beautifully with honey, creating a balanced flavor profile that pleases everyone.
  • Easy Preparation: With just a handful of ingredients and simple steps, this recipe is perfect for both novice and seasoned cooks.
  • Versatile Side Dish: Whether it’s a holiday feast or a casual weeknight dinner, these honey glazed parsnips fit right in.
  • Health Benefits: Parsnips are rich in vitamins and minerals, making this dish a nutritious addition to your meals.
  • Comforting Aroma: As they roast, the sweet scent fills your kitchen with warmth, reminiscent of family gatherings.

Ingredients: Simple Elegance

Gather the following ingredients to prepare your honey glazed parsnips:


Professional Chef Knife Set

★ Recommended Kitchen Tool

Professional Chef Knife Set

Make this recipe even easier with a quality Professional Chef Knife Set — a must-have kitchen staple!


🛒 Check Price on Amazon →

As an Amazon Associate, we earn from qualifying purchases.
  • 1 pound parsnips: Peeled and cut into 3-inch sticks for even cooking.
  • 2 tablespoons unsalted butter: Melted, to add a rich flavor.
  • 2 tablespoons raw honey: Enhances sweetness and creates that wonderful glaze.
  • 1 teaspoon fresh thyme leaves: For a hint of herbal freshness.
  • 1/4 teaspoon ground cinnamon: Adds warmth and depth.
  • Salt and freshly ground black pepper: To taste, enhancing all the flavors.
  • 1 tablespoon olive oil: For tossing the parsnips before roasting.
  • 1/2 teaspoon garlic powder: For an extra flavor kick.
  • Zest of 1 small lemon: Brightens the dish with a citrusy note.

Making Your Honey Glazed Parsnips

Follow these steps to create your delightful dish:

  1. Preheat the oven: Set it to 400 degrees Fahrenheit and line a baking sheet with parchment paper or lightly grease it with olive oil.
  2. Mix the glaze: In a mixing bowl, combine melted butter, raw honey, fresh thyme, ground cinnamon, garlic powder, lemon zest, salt, and black pepper until well mixed.
  3. Toss the parsnips: Coat the parsnip sticks with olive oil, then add them to the bowl with the honey mixture, stirring thoroughly to coat each piece.
  4. Prepare for roasting: Spread the parsnips out in a single layer on the baking sheet, ensuring no pieces overlap for even roasting.
  5. Roast: Place in the oven and roast for 25 to 30 minutes, turning once halfway through, until parsnips develop golden edges and the glaze is sticky and caramelized.
  6. Let them rest: Remove from the oven and let rest for a few minutes on the baking sheet before serving to set the glaze.

Pro Tips for Perfect Parsnips

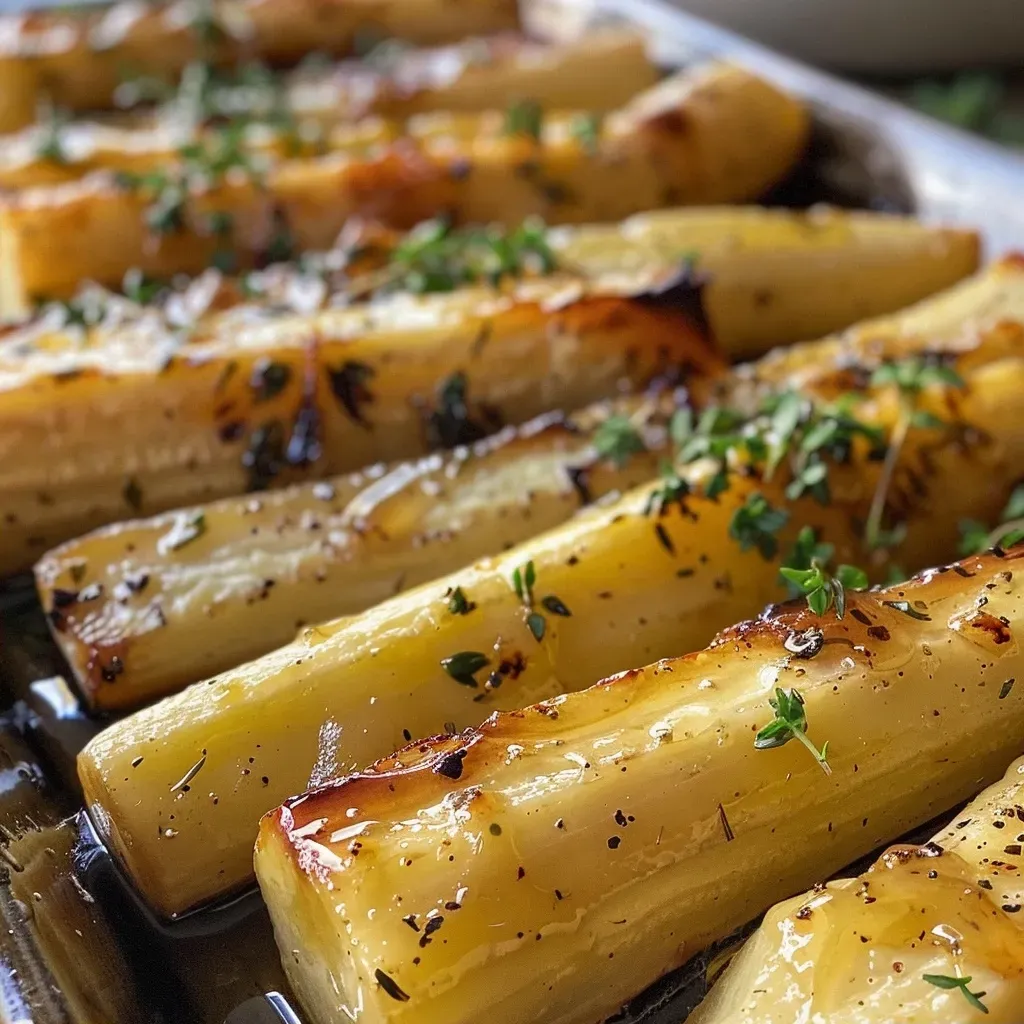
Side view of juicy roasted parsnips drizzled with honey.

To ensure the best results, consider these expert tips:

  • Choose the right parsnips: Look for firm, medium-sized parsnips. Larger ones may be woody in the center, affecting texture.
  • Freshness matters: Use fresh thyme for the best flavor; dried thyme can be used but will be less aromatic.
  • Don’t overcrowd the pan: Spacing is key! Crowded parsnips will steam rather than roast, preventing that lovely caramelization.
  • Taste before serving: Adjust seasoning after roasting. A pinch more salt or a drizzle of honey can elevate the dish!
  • Experiment with sweetness: Try using maple syrup instead of honey for a different flavor twist.
  • Make it crispy: If you prefer extra crispy edges, broil them for the last 2-3 minutes of cooking.
  • Try variations: Don’t hesitate to mix in other root vegetables like carrots or sweet potatoes for a colorful medley.

Common Mistakes and Troubleshooting

Even the best cooks have mishaps! Here’s how to avoid common pitfalls:

  • Overcooking: Keep an eye on your parsnips. If they’re too soft, they can lose their delightful texture.
  • Too sweet?: Balance the sweetness by adding a splash of lemon juice before serving, which can brighten the dish.
  • Not enough glaze?: If you find the glaze is too thin, increase the honey or butter slightly to achieve a richer coating.

Delicious Variations

Feel free to customize your honey glazed parsnips with these variations:

  • Maple Glazed Parsnips: Substitute honey with maple syrup for a unique twist.
  • Spicy Honey Parsnips: Add a pinch of cayenne or red pepper flakes to the glaze for a spicy kick.
  • Herbed Variations: Swap thyme for rosemary or sage for a different herbal note.
  • Nutty Addition: Toss in some chopped walnuts or pecans halfway through roasting for a crunchy texture.

Storage and Make-Ahead Instructions

If you’re preparing for a gathering, you can make these honey glazed parsnips in advance:

  • Refrigeration: Prepare the parsnips up to the roasting step, cover, and refrigerate for up to 24 hours. When ready, simply roast them as instructed.
  • Freezing: While not ideal for this dish, you can freeze leftover roasted parsnips in an airtight container for up to three months. Reheat in the oven for best results.

Frequently Asked Questions (FAQs)

  • Can I use other vegetables? Yes! Carrots, sweet potatoes, or turnips work wonderfully with this glaze.
  • How do I know when they’re done? Look for golden edges and a sticky glaze, along with a tender bite when pierced with a fork.
  • Can I make these vegan? Absolutely! Substitute butter with coconut oil or vegan butter and use maple syrup instead of honey.
  • What’s the best way to reheat? Reheat in the oven for the best texture. Microwaving can make them soggy.
  • Can I add nuts? Yes! Chopped walnuts or pecans can be mixed in for added crunch.
  • Are parsnips healthy? Yes, they are a great source of vitamins C, K, and fiber while being low in calories.
  • Can I use dried thyme? Yes, but fresh thyme will give a more vibrant flavor.
  • What can I serve with honey glazed parsnips? They pair beautifully with roasted meats, hearty grain salads, or as part of a festive spread.

Nutritional Tips and Dietary Adaptations

Honey glazed parsnips are not only delicious but offer a range of health benefits:

  • Low-Calorie Side: Perfect for those watching their waistlines, parsnips are a satisfying alternative to starchy sides.
  • High in Fiber: Great for digestion, they help keep you feeling full and satisfied.
  • Vitamin-Rich: Packed with vitamins C and K, parsnips contribute to overall health.

Equipment Recommendations

To make your cooking experience smoother, consider these essential tools:

  • High-Quality Chef’s Knife: For easy and precise cutting of parsnips.
  • Cutting Board: A sturdy board protects your countertops while providing a safe cutting surface.
  • Baking Sheet: Ensure even roasting with a heavy-duty baking sheet that can withstand high temperatures.
  • Mixing Bowl: A large bowl for tossing ingredients ensures even coating with the honey mixture.

Serving Suggestions

These honey glazed parsnips shine as a side dish. Here are a few serving ideas:

  • With Roasted Chicken: Their sweetness complements the savory notes of roasted chicken beautifully.
  • As Part of a Grain Bowl: Serve over quinoa or farro for a hearty vegetarian meal.
  • Alongside a Holiday Feast: Perfect for Thanksgiving or Christmas dinners, adding a festive touch to the table.

As you gather around your family table, let these honey glazed parsnips bring warmth and joy to your meals. Each bite is a reminder of love, tradition, and the delicious memories we create together. Happy cooking!

Honey Glazed Parsnips

Prep Time 10 minutes
Cook Time 30 minutes
Total Time 40 minutes
Servings 4 servings
Calories 150
Sweet and savory honey glazed parsnips roasted to perfection, a delightful side dish with a hint of lemon and thyme.

Ingredients

parsnips

  • 1 pound parsnips, peeled and cut into 3-inch sticks
  • 2 tablespoons unsalted butter, melted
  • 2 tablespoons raw honey
  • 1 teaspoon fresh thyme leaves
  • 1/4 teaspoon ground cinnamon
  • Salt to taste Salt
  • Freshly ground black pepper to taste Black pepper
  • 1 tablespoon olive oil
  • 1/2 teaspoon garlic powder
  • Zest of 1 small lemon lemon zest

Instructions 

  • Preheat oven to 400°F (200°C) and prepare baking sheet.
  • Mix melted butter, honey, thyme, cinnamon, garlic powder, lemon zest, salt, and pepper.
  • Toss parsnips with olive oil, then coat with the honey mixture.
  • Arrange on baking sheet and roast for 25-30 minutes, turning halfway.
  • Let rest briefly before serving to set the glaze.

Notes

For extra flavor, sprinkle with fresh herbs before serving.
Calories: 150kcal
Cost: $15
Course: Side Dish
Keyword: Parsnips

Embrace the Flavors of Fall with Chewy Apple Cider Cookies

As autumn blankets the world in its golden hues and the air grows crisp, there’s nothing quite like the warm, inviting aroma of freshly baked cookies wafting through your home. These Chewy Apple Cider Cookies are more than just a treat; they’re a heartfelt embrace of the season, crafted with love and nostalgia. Imagine gathering with family around your kitchen table, sharing stories and laughter over these delightful cookies, each bite infused with the essence of apple cider and spices that evoke cozy memories. Let’s explore why these cookies deserve a place in your heart and on your plate this fall.

Why You’ll Love This Recipe

These cookies aren’t just delicious; they bring a multitude of benefits to your baking experience:

  • Perfectly Chewy Texture: These cookies have a delightful contrast, being crispy on the outside while remaining soft and chewy in the center, creating a comforting mouthfeel.
  • Seasonal Flavors: Infused with apple cider and warm spices, these cookies encapsulate the essence of fall, making them perfect for festive gatherings.
  • Easy to Make: Even if you’re new to baking, this recipe is straightforward, requiring minimal ingredients and time—ideal for cozy afternoons.
  • Versatile Treat: Perfect for holiday parties, school lunches, or simply enjoying with a cup of tea, these cookies fit any occasion.
  • Family Tradition: Baking together can create lasting memories, making this recipe a wonderful way to bond with loved ones.

Ingredients for Chewy Apple Cider Cookies

Here’s what you’ll need to create these delicious cookies:


5-Speed Electric Hand Mixer

★ Recommended Kitchen Tool

5-Speed Electric Hand Mixer

Make this recipe even easier with a quality 5-Speed Electric Hand Mixer — a must-have kitchen staple!


🛒 Shop This Tool →

As an Amazon Associate, we earn from qualifying purchases.
  • 2 cups apple cider
  • 2 ¼ cups all-purpose flour
  • 2 teaspoons baking soda
  • 1 teaspoon ground cinnamon
  • 1 teaspoon ground ginger
  • A pinch of ground nutmeg (about ⅛ teaspoon)
  • ¼ teaspoon kosher salt
  • ¾ cup (1 ½ sticks) unsalted butter, softened
  • 1 cup light brown sugar
  • 1 large egg
  • 1 cup confectioner’s sugar (powdered sugar)
  • 2 tablespoons apple cider
  • 2 teaspoons pure maple syrup

**Note**: Feel free to experiment with substitutions to suit your dietary needs. For instance, you can use gluten-free flour or a dairy-free butter alternative.

Step-by-Step Instructions

Side view of delicious apple cider cookies on a plate, showcasing their chewy texture.

Follow these simple steps to bake your Chewy Apple Cider Cookies:

  1. Add the apple cider to a medium saucepan. Place on the stove over medium heat. Bring to a rolling boil. Allow cider to reduce for about 20 to 23 minutes, stirring occasionally, until there’s only ¼ cup remaining and it has a syrup-like consistency. Set aside to cool completely.
  2. In a medium-sized mixing bowl, whisk together the flour, baking soda, cinnamon, ginger, nutmeg, and salt.
  3. In a stand mixer fitted with a paddle attachment, cream together the softened butter and brown sugar for about 1 minute until light and fluffy.
  4. Add the egg to the mixture and beat until smooth. Incorporate the cooled reduced apple cider, mixing well and scraping down the sides of the bowl as needed.
  5. Gradually pour in the flour mixture, mixing until just combined and no dry flour remains. Be careful not to overmix.
  6. Refrigerate the cookie dough for at least 10 to 15 minutes to help maintain their shape while baking.
  7. Preheat your oven to 375°F (190°C) and line two baking sheets with parchment paper.
  8. Using a scoop, portion out 1 ½ to 2 tablespoons of dough onto the prepared baking sheets, leaving about 2 inches of space between each cookie. Lightly flatten the tops of the dough balls with your hand.
  9. Bake the cookies for 7 to 9 minutes or until the tops start to crack and turn lightly golden brown. It’s okay if the middle looks slightly under-baked; it will continue to cook on the baking sheet as it cools.
  10. Prepare the apple cider glaze by whisking together the confectioner’s sugar, apple cider, and maple syrup in a small bowl until smooth.
  11. Drizzle the glaze over the tops of the cookies and allow it to set for a few minutes before serving.

Pro Tips for Perfect Cookies

Enhance your baking experience with these expert insights:

  • Use Reduced Cider: For the best flavor, make sure to reduce your apple cider to a syrupy consistency; this intensifies the apple flavor.
  • Room Temperature Ingredients: Ensure your butter and egg are at room temperature to achieve a smooth batter.
  • Don’t Overmix: Mix your cookie dough just until combined to keep the cookies tender.
  • Chill the Dough: Chilling helps the cookies maintain their shape and enhances the flavors.
  • Watch the Baking Time: Keep a close eye on your cookies as they bake; they should look slightly under-baked when you take them out.
  • Store Properly: Keep your cookies in an airtight container to maintain their chewy texture.
  • Experiment with Spices: Feel free to add other spices like allspice or cloves to create your own unique flavor profile.
  • Mix-Ins: Consider adding chopped nuts or dried fruits for an extra layer of texture and flavor.

Common Mistakes and Troubleshooting

Even seasoned bakers can run into issues. Here’s how to avoid common pitfalls:

  • Cookies Spread Too Much: Ensure your butter isn’t too soft; if it is, chill the dough again before baking.
  • Dry Cookies: This can happen from overbaking or too much flour. Use a scale for precision and keep an eye on the time.
  • Taste is Off: Ensure your spices are fresh, and don’t skip the salt; it enhances the sweetness and flavors.
  • Glaze Isn’t Setting: If your glaze is too runny, add more powdered sugar until you reach the desired consistency.

Delicious Variations

Want to switch things up? Try these delightful variations:

  • Maple Pecan Cider Cookies: Add chopped pecans to the dough for a nutty crunch.
  • Caramel Apple Cookies: Incorporate diced dried apples and drizzle with caramel sauce.
  • Spiced Cider Cookies: Experiment with additional spices like cardamom or clove for a warm flavor.
  • Chocolate Chip Cider Cookies: Fold in semi-sweet chocolate chips for a sweet twist.

How to Store and Make-Ahead

Your cookies can be stored and enjoyed later with proper care:

  • Storing: Keep cookies in an airtight container at room temperature for up to 1 week.
  • Freezing: For longer storage, freeze the cookie dough in balls. They can be kept for up to 3 months. When ready to bake, simply add a couple of minutes to the baking time.
  • Make-Ahead Glaze: The glaze can also be made a day in advance and stored in the refrigerator. Just whisk again before using.

Frequently Asked Questions

Here are some common questions about making Chewy Apple Cider Cookies:

  • Can I use apple juice instead of apple cider? While possible, apple cider provides a more robust flavor.
  • How do I know when my cookies are done baking? Look for a slight golden color on the edges and a cracked top; the center should still look a bit soft.
  • Can I double the recipe? Absolutely! These cookies are perfect for sharing, so feel free to double or even triple the batch.
  • What if I don’t have maple syrup? You can substitute with honey or agave syrup for a different flavor profile.
  • Are these cookies gluten-free? You can use a gluten-free flour blend, but the texture may vary.
  • Can I add nuts to the dough? Yes! Chopped walnuts or pecans can add a lovely crunch.
  • How do I prevent my cookies from sticking? Using parchment paper or silicone baking mats can help prevent sticking.
  • What’s the best way to reheat these cookies? Microwave for a few seconds or place in a warm oven briefly to enjoy their fresh-baked taste.

Nutritional Tips and Dietary Adaptations

For those looking to enjoy these cookies while keeping health in mind:

  • Lower Sugar Option: Substitute some of the brown sugar with coconut sugar for a lower glycemic index.
  • Dairy-Free: Use coconut oil or a dairy-free butter substitute to make this recipe vegan-friendly.
  • Whole Wheat Flour: Substitute all-purpose flour with whole wheat flour for added fiber.
  • Reduced-Calorie Cookies: Consider using unsweetened applesauce in place of some butter for a lighter version.

Recommended Equipment

To make the process smoother, here’s a list of handy tools you might need:

  • Stand Mixer: For effortless mixing and creaming of ingredients.
  • Medium Saucepan: For reducing the apple cider to syrup.
  • Parchment Paper: To line your baking sheets for easy clean-up and to prevent sticking.
  • Cookie Scoop: Ensures uniform cookie sizes for even baking.

Serving Suggestions

Enhance your cookie experience by pairing them with:

  • Hot Apple Cider: Keep the autumn vibe alive by serving these cookies with warm apple cider.
  • Vanilla Ice Cream: A scoop of vanilla ice cream can create a delightful a la mode treat.
  • Tea or Coffee: Enjoy your cookies with a warm cup of your favorite beverage for a cozy snack.

As you gather around the table, sharing these Chewy Apple Cider Cookies, remember that every bite holds a piece of tradition and love, just like the warmth of your home. Baking is not just about the food; it’s about creating memories, bonding, and celebrating the flavors of life. May your kitchen be filled with laughter, love, and the delightful aroma of these cookies this autumn season!

Chewy Apple Cider Cookies

Prep Time 15 minutes
Cook Time 10 minutes
Total Time 25 minutes
Servings 12 cookies
Calories 150
These chewy cookies feature a rich apple cider flavor, topped with a sweet glaze for a delightful treat.

Ingredients

liquids

  • 2 cups apple cider
  • 2 ¼ cups all purpose flour
  • 2 teaspoons baking soda
  • 1 teaspoon ground cinnamon
  • 1 teaspoon ground ginger
  • teaspoon ground nutmeg
  • ¼ teaspoon kosher salt
  • ¾ cup unsalted butter, softened
  • 1 cup light brown sugar
  • 1 large egg
  • 1 cup confectioner’s (powdered) sugar
  • 2 tablespoons apple cider
  • 2 teaspoons pure maple syrup

Instructions 

  • Reduce apple cider in a saucepan over medium heat until ¼ cup remains, then cool.
  • Mix flour, baking soda, cinnamon, ginger, nutmeg, and salt in a bowl.
  • Cream butter and brown sugar, then beat in egg and reduced cider.
  • Gradually add dry ingredients, then chill dough for 10-15 minutes.
  • Preheat oven to 375°F, shape dough into balls, and bake for 7-9 minutes.
  • Whisk powdered sugar, cider, and maple syrup for glaze, then drizzle over cookies.

Notes

Chill the dough for better handling and flavor development.
Calories: 150kcal
Cost: $15
Course: Dessert
Keyword: apple cider

Welcome to the Heart of Southern Cooking

In the bustling kitchens of New Orleans, where the air is rich with the scent of spices and the laughter of family, we find one dish that transcends generations: mashed potatoes. These baked mashed potatoes are not merely a side dish; they carry the warmth of home and the love of those who gather around the table. This recipe combines creamy textures, a buttery topping, and a sprinkle of nostalgia, making it perfect for family gatherings or cozy nights in. Join me as we explore this beloved dish and discover why it holds a special place in the hearts of so many.

Why You’ll Love This Recipe

There’s something magical about a comforting dish of baked mashed potatoes. Here are five reasons why this recipe will become a staple in your kitchen:

  • Deliciously Creamy: The combination of cream cheese and half & half creates a rich and smooth texture that melts in your mouth.
  • Community and Tradition: Sharing these potatoes at family gatherings fosters connection, reminding us that cooking is about love.
  • Easy to Prepare: This recipe is straightforward, allowing even novice cooks to whip up a dish that impresses.
  • Customizable: Feel free to experiment with flavors—add garlic, cheese, or herbs to make it your own!
  • Make-Ahead Friendly: Prepare in advance and simply heat in the oven before serving, making your hosting duties a breeze.

Ingredients You’ll Need

Gather these simple ingredients to create your own delicious baked mashed potatoes:


Meal Prep Container Set

★ Recommended Kitchen Tool

Meal Prep Container Set

Make this recipe even easier with a quality Meal Prep Container Set — a must-have kitchen staple!


🛒 View on Amazon →

As an Amazon Associate, we earn from qualifying purchases.
  • 5 pounds russet potatoes: Peeled and cubed for the best texture.
  • 8 tablespoons unsalted butter: Melted, plus 2 tablespoons for topping to add richness.
  • 8 ounces cream cheese: Softened, this adds creaminess and depth of flavor.
  • 1 cup half & half: Warmed, for that luscious, smooth finish.
  • 1/2 teaspoon salt: With more to taste, salt enhances all the flavors.
  • 1/4 teaspoon black pepper: A pinch adds warmth and character.
  • Chives (optional): Chopped for garnish, bringing a touch of freshness.

How to Make Oven Baked Mashed Potatoes

Side view of golden baked mashed potatoes topped with melted butter.

Follow these simple steps to create the perfect baked mashed potatoes:

  • Preheat your oven: Set it to 350°F (175°C) to prepare for baking.
  • Cook the potatoes: Place the peeled and cubed potatoes in a large pot, cover with water, and season with salt. Bring to a boil and cook until tender, about 15 minutes.
  • Drain and dry: Drain the potatoes and return them to the pot. Allow them to dry out over low heat for a few minutes, shaking the pot occasionally.
  • Mash the potatoes: Transfer to a large mixing bowl and mash until smooth, using a potato masher or electric mixer.
  • Add the creamy goodness: Gradually mix in melted butter, cream cheese, salt, and pepper. Slowly add warmed half and half until you achieve your desired creaminess.
  • Taste and adjust: Sample your creation and add more seasoning if needed.
  • Spread and bake: Transfer the mixture to a greased 9×13-inch baking dish and dot the top with remaining butter. Bake for 45 minutes or until golden brown and bubbly.
  • Garnish: Sprinkle with chopped chives before serving, if desired.

Pro Tips for Perfect Baked Mashed Potatoes

Here are some expert insights to elevate your dish:

  • Choose the right potatoes: Russets are ideal for their fluffy texture, but Yukon Golds can add a buttery flavor.
  • Don’t rush the drying process: Allowing the potatoes to dry after boiling ensures a creamy final product without excess moisture.
  • Use room temperature ingredients: Ensuring cream cheese and butter are at room temperature helps them incorporate smoothly.
  • Experiment with flavors: Consider adding roasted garlic, sour cream, or even a splash of your favorite hot sauce for a twist.
  • Make them ahead: You can prepare the mashed potatoes a day in advance. Just cover and refrigerate, then bake when ready to serve.
  • Perfectly golden top: For an extra crispy topping, broil for the last few minutes of baking, watching closely to avoid burning.
  • Garnish wisely: Fresh herbs like rosemary or thyme can enhance the flavor and presentation.
  • Pair with gravy: A rich gravy can take your mashed potatoes to another level of comfort.

Common Mistakes and Troubleshooting

Even the best cooks face challenges. Here are common pitfalls and how to avoid them:

  • Gummy potatoes: This happens when potatoes are over-mixed. Mash gently and stop as soon as they are creamy.
  • Too watery: If your potatoes are too wet, ensure they dry sufficiently after boiling and avoid overcooking.
  • Undersalted flavor: Taste as you go! Seasoning in stages can help achieve the best flavor.
  • Burnt edges: If baking longer than suggested, cover with foil to prevent burning while the center cooks through.

Variations to Try

Let your creativity shine with these flavorful variations:

  • Cheesy Mashed Potatoes: Add shredded cheddar or Parmesan cheese for a cheesy twist.
  • Garlic Mashed Potatoes: Incorporate roasted garlic for a savory depth that elevates this classic dish.
  • Herbed Mashed Potatoes: Mix in fresh herbs like parsley, dill, or chives for a fresh flavor boost.
  • Loaded Mashed Potatoes: Top with crispy bacon, cheese, and green onions for a loaded twist that’s sure to please!

Storage and Make-Ahead Instructions

Planning ahead can make your cooking experience smoother:

  • Refrigerate: Store leftovers in an airtight container in the fridge for up to 3 days.
  • Freezing: You can freeze mashed potatoes for up to a month. Thaw in the fridge overnight before reheating.
  • Reheating: For best results, reheat in the oven at 350°F (175°C) until warmed through, adding a splash of milk or half & half to restore creaminess.

Frequently Asked Questions

Here are answers to some common questions about baked mashed potatoes:

  • Can I use sweet potatoes? Absolutely! Sweet potatoes can be substituted for a different flavor and nutrient profile.
  • What’s the best way to mash potatoes? A potato masher or a ricer gives the best texture; avoid food processors to prevent gumminess.
  • How can I make them vegan? Substitute butter with vegan butter and use plant-based cream cheese and milk alternatives.
  • Can I add cream? Yes, heavy cream can be used instead of half & half for an even richer taste.
  • What’s the secret to fluffy mashed potatoes? Use starchy potatoes, dry them well after boiling, and avoid over-mixing.
  • Can I prepare them the night before? Yes, prepare and refrigerate them, then bake before serving.
  • How do I keep them warm? If serving later, place them in a slow cooker on the warm setting.
  • What can I serve with baked mashed potatoes? They pair beautifully with roasted meats, gravy, or a fresh green salad.

Nutritional Tips and Dietary Adaptations

Understand the nutritional value and how to adapt this recipe for dietary needs:

  • Low-Fat Option: Use low-fat cream cheese and reduced-fat milk for a lighter version.
  • Gluten-Free: This recipe is naturally gluten-free, making it a safe option for those with gluten sensitivities.
  • Protein Boost: Mix in some Greek yogurt for added protein without sacrificing creaminess.

Equipment Recommendations

To achieve the best results, consider these essential tools:

  • Large Pot: A sturdy pot for boiling your potatoes ensures even cooking.
  • Potato Masher or Ricer: Choose one for achieving the perfect texture.
  • Mixing Bowl: A large bowl allows for easy mixing and mashing.
  • Baking Dish: A 9×13-inch baking dish is perfect for baking and serving your creation.

Serving Suggestions

When it’s time to serve, consider these delightful pairings:

  • Classic Gravy: A rich brown gravy enhances the comfort of baked mashed potatoes.
  • Roasted Vegetables: A side of seasonal roasted veggies adds color and nutrition to your meal.
  • Fresh Salad: A crisp salad balances the richness of the potatoes.
  • Fried Chicken: Southern fried chicken and baked mashed potatoes are a match made in culinary heaven.

As we conclude this culinary journey, remember that cooking is more than just following a recipe. It’s about the memories made and the love shared around the dining table. I hope these baked mashed potatoes bring you as much joy and comfort as they do for me. Enjoy every bite and the laughter that comes with it!

Baked Mashed Potatoes

Prep Time 20 minutes
Cook Time 45 minutes
Total Time 1 hour 5 minutes
Servings 8 servings
Calories 350
A creamy and flavorful baked mashed potatoes recipe perfect for any occasion. Easy to prepare and topped with chives for a fresh touch.

Ingredients

Main

  • 5 pounds russet potatoes (peeled and cubed)
  • 8 tablespoons unsalted butter (melted, plus 2 tablespoons for topping)
  • 8 ounces cream cheese (softened)
  • 1 cup half & half (warmed)
  • 0.5 teaspoon salt (plus more to taste)
  • 0.25 teaspoon black pepper
  • Chives chopped chives for garnish (optional)

Instructions 

  • Preheat oven to 350°F (175°C).
  • Boil potatoes until tender, then drain and mash.
  • Mix mashed potatoes with melted butter, cream cheese, salt, and pepper. Add warmed half & half gradually.
  • Spread in a greased baking dish, dot with remaining butter, and bake for 45 minutes until golden.
  • Garnish with chopped chives before serving, if desired.

Notes

For extra flavor, add grated cheese or a dash of garlic powder.
Calories: 350kcal
Cost: $15
Course: Side Dish
Cuisine: American
Keyword: Potatoes

Embrace the Flavor of Fall with Pumpkin Waffles

As the leaves turn golden and the air becomes crisp, there’s nothing quite like savoring pumpkin waffles on a cozy morning. This delightful recipe not only fills your kitchen with the warm aroma of pumpkin spice but also evokes the comforting memories of family gatherings and shared meals. Gather your loved ones, and let’s dive into this heartwarming dish that’s perfect for all ages!

Why You’ll Love This Recipe

  • Deliciously Fluffy: The combination of eggs and milk creates waffles that are both light and airy, making every bite a joyous experience.
  • Rich in Flavor: With the addition of pumpkin puree and warm spices, these waffles bring the essence of autumn right to your table.
  • Easy to Customize: From toppings to mix-ins, this recipe allows you to personalize each serving to your taste.
  • Perfect for Meal Prep: Make a batch ahead of time, freeze them, and enjoy homemade pumpkin waffles whenever the craving strikes.
  • A Family Favorite: Whether for a weekend brunch or a special breakfast, these waffles are sure to bring smiles and satisfaction.

Ingredients You’ll Need

Here’s what you’ll need to whip up these delicious pumpkin waffles:

  • 2 large eggs: Essential for fluffiness and structure.
  • 3/4 cup milk: Whole milk or your favorite non-dairy alternative works wonderfully.
  • 1/4 cup melted butter: For richness; can substitute with coconut oil for a dairy-free option.
  • 1/2 cup pumpkin puree: Adds moisture and flavor; make sure it’s pure pumpkin, not pumpkin pie filling.
  • 1 1/2 teaspoons vanilla extract: A touch of sweetness and depth.
  • 1 cup all-purpose flour: The base of our waffles; can be swapped for whole wheat or gluten-free flour.
  • 1 tablespoon baking powder: To make the waffles rise perfectly.
  • 1 1/2 teaspoons sugar: Just a hint of sweetness; adjust to your liking.
  • 1/4 teaspoon salt: Balances the flavors.
  • 1 1/2 teaspoons pumpkin pie spice mix: Or use a combination of 1 teaspoon cinnamon and 1/2 teaspoon nutmeg.

How to Make Pumpkin Waffles

Side view of fluffy pumpkin waffles adorned with whipped cream and chopped pecans.

Let’s get started on creating these beautiful waffles:


Glass Mason Jars for Oats

★ Recommended Kitchen Tool

Glass Mason Jars for Oats

Make this recipe even easier with a quality Glass Mason Jars for Oats — a must-have kitchen staple!


🛒 Shop This Tool →

As an Amazon Associate, we earn from qualifying purchases.
  1. Preheat your waffle iron to the appropriate setting for crispy waffles.
  2. In a large mixing bowl, beat the 2 large eggs until frothy. Stir in 3/4 cup milk, 1/4 cup melted butter, 1/2 cup pumpkin puree, and 1 1/2 teaspoons vanilla until well combined.
  3. Gently fold in the 1 cup all-purpose flour, 1 tablespoon baking powder, 1 1/2 teaspoons sugar, 1/4 teaspoon salt, and 1 1/2 teaspoons pumpkin pie spice mix. Be careful not to overmix; small lumps are perfectly fine.
  4. Spray the waffle iron with nonstick cooking spray and pour the batter onto the hot surface. Use the back of a spoon to spread it evenly.
  5. Cook until the waffles are crisp and golden brown. Serve hot with your favorite toppings.

Pro Tips for Perfect Pumpkin Waffles

  • Preheat the Waffle Iron: Always ensure your waffle iron is hot before adding the batter for a crisp exterior.
  • Don’t Overmix: Overmixing can lead to tough waffles; stir until just combined.
  • Use Fresh Pumpkin: If you’re feeling adventurous, roast a fresh pumpkin and puree it for a richer flavor!
  • Experiment with Flours: Try using oat flour or almond flour for different textures and flavors.
  • Check Doneness: Waffle irons vary; keep an eye on your waffles as they cook to prevent burning.
  • Enhance with Add-ins: Consider adding chocolate chips or nuts to the batter for extra flavor.
  • Rest the Batter: Letting the batter sit for a few minutes can help improve the texture.
  • Serve Immediately: For the best experience, serve your waffles right off the iron!

Common Mistakes and Troubleshooting

Here are some common pitfalls to avoid:

  • Waffles are soggy: Ensure your waffle iron is preheated and not overcrowded with batter.
  • Too dense: This can happen from overmixing; remember, lumps are okay!
  • Burnt on the outside: Adjust the cooking time or temperature on your waffle iron.

Delicious Variations

Want to switch things up? Here are some variations to try:

  • Pumpkin Pecan Waffles: Add chopped pecans to the batter for a delightful crunch.
  • Pumpkin Chocolate Chip Waffles: Fold in chocolate chips for a sweet twist.
  • Spiced Apple Waffles: Mix in diced apples and a sprinkle of cinnamon for a fruity flavor.
  • Vegan Pumpkin Waffles: Substitute eggs with flaxseed meal and use non-dairy milk and a vegan butter alternative.

Storage and Make-Ahead Instructions

These pumpkin waffles are perfect for meal prep!

  • To Store: Allow waffles to cool completely, then store in an airtight container in the refrigerator for up to 3 days.
  • To Freeze: Place waffles in a single layer on a baking sheet to freeze. Once frozen, transfer them to a freezer bag. They can last up to 2 months.
  • Reheating: Reheat in a toaster or oven for optimal crispness.

Frequently Asked Questions

  • Can I use pumpkin pie filling instead of puree? No, pumpkin pie filling contains added sugars and spices that will alter the flavor.
  • Can I make these gluten-free? Yes! Use a gluten-free all-purpose flour blend for delicious results.
  • How can I make these waffles dairy-free? Substitute the milk with almond milk or oat milk and use plant-based butter.
  • What toppings pair well with pumpkin waffles? Maple syrup, whipped cream, chopped nuts, and fresh fruit are all great choices.
  • Can I make the batter ahead of time? Yes, you can prepare the batter the night before and store it in the refrigerator.
  • How do I know when the waffles are done? Waffles are ready when they are golden brown and crisp on the outside.
  • Can I double the recipe? Absolutely! Just double all ingredients and make waffles in batches.
  • What should I serve with pumpkin waffles? These waffles are delightful with a side of crispy bacon, fresh fruit, or a warm cup of coffee.

Nutritional Tips and Dietary Adaptations

For those mindful of nutrition:

  • Reduce Sugar: Feel free to cut back on sugar or use a sugar substitute to make these waffles healthier.
  • Add Protein: Consider adding a scoop of protein powder to the batter for an extra nutrient boost.
  • Incorporate Whole Grains: Using whole wheat flour increases fiber content, making these waffles more filling.

Equipment Recommendations

To make your cooking experience smoother, here are some tools you might find handy:

  • Waffle Iron: A reliable waffle iron is essential for crispy waffles.
  • Mixing Bowls: Having various sizes makes mixing ingredients a breeze.
  • Measuring Cups and Spoons: Accurate measurements ensure the best results.
  • Spatula: A rubber spatula is perfect for folding and mixing without damaging your batter.

Serving Suggestions

To elevate your pumpkin waffle experience, consider:

  • Pairing with Fresh Fruit: Slices of banana or berries add a fresh contrast to the rich waffles.
  • Drizzling with Maple Syrup: A generous pour of warm maple syrup enhances the sweetness.
  • Adding Whipped Cream: A dollop of whipped cream makes for a decadent treat.
  • Sprinkling with Nuts: Chopped pecans or walnuts provide a satisfying crunch.

As you gather around the table with your loved ones, these pumpkin waffles will not just fill your bellies but also your hearts. They’re more than just a breakfast item; they’re a celebration of the season, a reminder of cherished moments, and a way to create new memories. So, roll up your sleeves, pour that batter, and let the essence of autumn fill your home!

Pumpkin Waffles

Prep Time 10 minutes
Cook Time 15 minutes
Total Time 25 minutes
Servings 4 servings
Calories 250
Enjoy cozy fall flavors with these fluffy pumpkin waffles, perfect for a delightful breakfast or brunch.

Ingredients

Eggs and Dairy

  • 2 large eggs
  • 3/4 cups milk
  • 1/4 cup melted butter

Pumpkin and Flavorings

  • 1/2 cup pumpkin puree
  • 1 1/2 teaspoons vanilla

Dry Ingredients

  • 1 cup all-purpose flour
  • 1 tablespoon baking powder
  • 1 1/2 teaspoons sugar
  • 1/4 teaspoon salt
  • 1 1/2 teaspoons pumpkin pie spice mix ((or cinnamon and nutmeg))

Optional Toppings

  • butter, maple syrup, powdered sugar, whipped cream, chopped pecans (for serving)

Instructions 

  • Preheat waffle iron. Mix eggs, milk, melted butter, pumpkin puree, and vanilla until smooth.
  • Stir in flour, baking powder, sugar, salt, and pumpkin pie spice until just combined.
  • Spray waffle iron with nonstick spray. Pour batter and cook until golden and crisp. Serve with toppings.

Notes

For extra flavor, add a dash of cinnamon or nutmeg to the batter.
Calories: 250kcal
Cost: $12
Course: Breakfast
Cuisine: American
Keyword: Pumpkin