Author

daniel

Browsing

Embrace the Comfort of Cauliflower Cheese

Nothing warms the heart quite like a serving of Cauliflower Cheese. This dish is more than just a recipe; it’s a cozy embrace that brings back cherished memories of family gatherings and laughter around the dinner table. Today, I’m excited to share with you my heartfelt version of this classic comfort food, a dish that captures the essence of love and nostalgia with every bite. Let’s dive into what makes this recipe so special and why it deserves a place on your family table.

Why You’ll Love This Recipe

  • Simple Ingredients: This recipe uses everyday ingredients, making it accessible for any home cook. You likely have most of them in your pantry already!
  • Rich and Creamy Sauce: The cheese sauce is luxuriously smooth, enveloping tender roasted cauliflower in a delightful embrace that’s both comforting and satisfying.
  • Customizable: You can easily adapt this recipe with your favorite cheeses or add-ins, ensuring that it caters to your family’s taste preferences.
  • Perfect for Any Occasion: Whether it’s a weekday dinner or a holiday feast, this dish shines on any table, evoking warmth and joy.
  • Nutrient-Rich: Cauliflower is packed with vitamins and minerals, making this dish a healthier alternative to traditional cheesy casseroles.

Ingredient Breakdown

Before we get cooking, let’s take a closer look at the ingredients that make this dish so special:

  • Cauliflower: One head of cauliflower, broken into florets. It’s the star of our dish and provides a lovely texture.
  • Olive Oil: Just a tablespoon to help roast the cauliflower to golden perfection.
  • Salted Butter: A small amount (20g) for creating a rich roux, which is the base of our cheese sauce.
  • Plain Flour: Another 20g to thicken the sauce.
  • Milk: One cup of milk brings creaminess to the dish; you can use whole or low-fat milk depending on your preference.
  • Dijon Mustard: One teaspoon adds a lovely depth of flavor that complements the cheese.
  • Garlic Powder: Half a teaspoon for that aromatic touch.
  • Cheddar Cheese: A blend of 50g and 30g of grated cheddar cheese gives our dish its delicious cheesy goodness.
  • Parmigiano Reggiano: 25g + 10g of this hard Italian cheese enhances the flavor and adds a delightful saltiness.
  • Salt & Pepper: To taste, these pantry staples ensure your dish is perfectly seasoned.

Pro Tips for Success

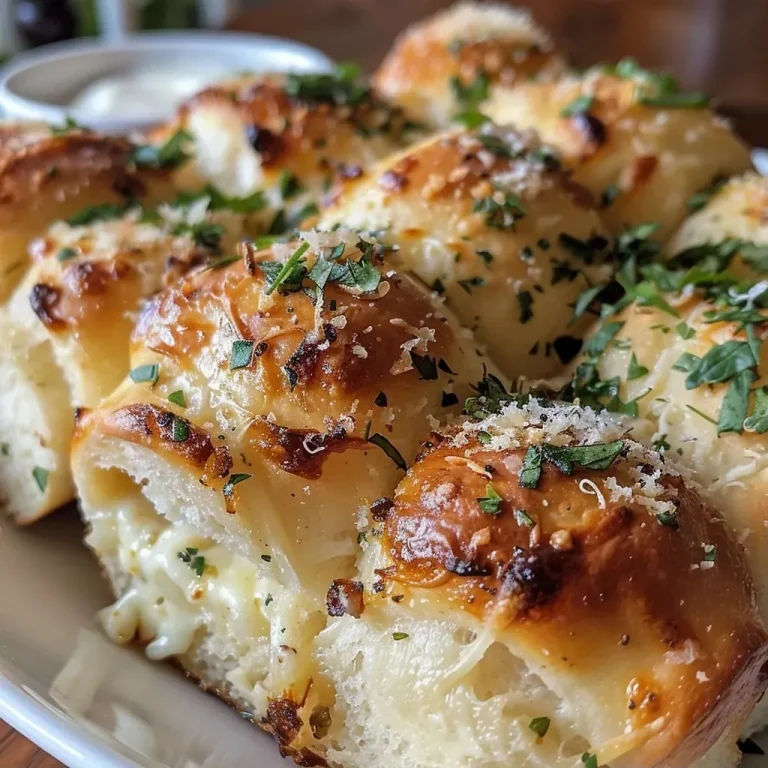
Juicy cauliflower cheese topped with melted cheese and a golden crust.

To ensure your Cauliflower Cheese turns out perfectly every time, consider these expert insights:


Digital Kitchen Scale

★ Recommended Kitchen Tool

Digital Kitchen Scale

Make this recipe even easier with a quality Digital Kitchen Scale — a must-have kitchen staple!


🛒 View on Amazon →

As an Amazon Associate, we earn from qualifying purchases.
  • Pre-roast the Cauliflower: Roasting the cauliflower before adding the cheese sauce enhances its flavor and gives it a lovely texture.
  • Make a Smooth Roux: When melting the butter and flour, stir continuously to avoid lumps in your sauce.
  • Gradually Add Milk: Incorporating the milk slowly while whisking will help achieve a creamy consistency without lumps.
  • Taste as You Go: Don’t forget to taste your cheese sauce as you go, adjusting the seasoning to your liking.
  • Layer Your Cheese: For an extra cheesy top, sprinkle additional cheese before returning the dish to the oven.
  • Experiment with Cheeses: Try different cheese combinations, such as Gruyère or Gouda, for various flavor profiles.
  • Make Ahead: Prepare the dish in advance and store it in the fridge for up to two days before baking.
  • Don’t Overcook: Keep an eye on your cauliflower to ensure it remains tender but not mushy.
  • Use Fresh Ingredients: Fresh cheese will give you a better flavor and texture than pre-packaged shredded cheese.

Common Mistakes and Troubleshooting

Even the best recipes can encounter hiccups. Here’s how to troubleshoot common issues:

  • Grainy Sauce: If your cheese sauce turns out grainy, it may be due to adding cheese too quickly. Always make sure your sauce is smooth before incorporating cheese.
  • Too Thick: If your sauce is too thick, add a splash of milk to thin it out while stirring over low heat.
  • Undercooked Cauliflower: Ensure that your cauliflower is tender before adding the cheese sauce; it should easily pierce with a fork.
  • Cheese Not Melting: If your cheese isn’t melting well, it may be too cold. Ensure your cheese is at room temperature before adding it to the sauce.

Delicious Variations

Here are some delightful variations to try, allowing you to make this dish your own:

  • Spicy Kick: Add a pinch of cayenne pepper or some chopped jalapeños for a spicy twist.
  • Vegetarian Delight: Stir in some cooked spinach or broccoli for added nutrition and flavor.
  • Herb Infusion: Mix in fresh herbs like thyme or rosemary to elevate the flavor profile.
  • Meat Lover’s Option: Add crispy bacon or ham pieces for a heartier meal.

Storage and Make-Ahead Instructions

This Cauliflower Cheese can be made ahead of time and stored in the refrigerator for up to two days before baking. Here’s how to store it:

  • Refrigerator: Cover it tightly with plastic wrap or aluminum foil to prevent drying out.
  • Freezer: For longer storage, freeze the unbaked dish. Just be sure to wrap it well in freezer-safe packaging.

Frequently Asked Questions

Curious minds often have questions. Here are some FAQs to guide you:

  • Can I use frozen cauliflower? Yes, but make sure to thaw and drain any excess moisture before roasting.
  • Is this dish gluten-free? Replace the plain flour with a gluten-free alternative, like cornstarch or almond flour.
  • What can I serve with Cauliflower Cheese? This dish pairs beautifully with roasted meats, a fresh salad, or even as a standalone meal.
  • Can I use different cheeses? Absolutely! Feel free to experiment with your favorite cheeses for a unique flavor profile.
  • How do I reheat leftovers? Reheat in the oven at 180°C until warmed through, or microwave for a quicker option.
  • Can I add protein to this dish? Yes, cooked chicken or sausage can be mixed in for a heartier version.
  • How do I prevent my sauce from curdling? Use gentle heat and add cheese gradually to maintain a smooth texture.
  • Can this be made vegan? Substitute the butter with olive oil, use plant-based milk, and choose a vegan cheese option.

Nutritional Tips and Dietary Adaptations

This Cauliflower Cheese is naturally low in carbs and rich in vitamins. Here are some tips to make it more suitable for specific dietary needs:

  • Low-Carb: Stick to cauliflower and cheese, avoiding any starchy additions.
  • Dairy-Free: Use cashew cream and nutritional yeast instead of cheese for a creamy texture without dairy.
  • Low-Fat Option: Use skim milk and reduce the amount of cheese for a lighter version.

Equipment Recommendations

To make this recipe with ease, here’s what you’ll need:

  • Roasting Pan: A sturdy roasting pan for the cauliflower.
  • Whisk: Essential for making a smooth cheese sauce.
  • Measuring Cups and Spoons: Accurate measurements ensure your recipe turns out just right.
  • Baking Dish: A casserole dish for baking the final creation to golden perfection.

Serving Suggestions

To truly enjoy your Cauliflower Cheese, serve it hot from the oven alongside:

  • Roast Chicken: The savory flavors complement each other beautifully.
  • Grilled Steaks: A hearty meal with a creamy side.
  • Mixed Green Salad: Bright, fresh flavors balance the richness of the cheese.
  • Crusty Bread: Perfect for scooping up that delicious cheese sauce.

Conclusion

In the end, this Cauliflower Cheese is not just a dish; it’s a celebration of memories, flavors, and love. As you gather your loved ones around the table, let this recipe remind you that food is about sharing, caring, and creating lasting memories together. I hope you enjoy making and sharing this cozy classic as much as I do. Happy cooking!

Cauliflower Cheese

Prep Time 10 minutes
Cook Time 40 minutes
Total Time 50 minutes
Servings 4 servings
Calories 350
A comforting baked cauliflower dish topped with a rich cheese sauce and extra cheese for a golden finish.

Ingredients

Vegetables

  • 1 head cauliflower, broken into florets
  • 1 tbsp olive oil
  • 20 g salted butter
  • 20 g plain flour
  • 1 cup milk
  • 1 tsp Dijon mustard
  • 0.5 tsp garlic powder
  • 50 g cheddar cheese, grated
  • 30 g cheddar cheese, grated
  • 25 g Parmigiano Reggiano, grated
  • 10 g Parmigiano Reggiano, grated

Seasoning

  • to taste Salt & pepper

Instructions 

  • Preheat oven to 200°C (fan) or 220°C (conventional). Toss cauliflower with olive oil and roast for 20 minutes.
  • Make a cheese sauce by melting butter, stirring in flour, then whisking in milk, mustard, garlic, and cheeses until smooth. Season with salt and pepper.
  • Pour sauce over roasted cauliflower, sprinkle with remaining cheeses, and bake for 20 minutes until golden and bubbling.

Notes

Use freshly grated cheese for best melting results.
Calories: 350kcal
Cost: $12
Course: Main Course
Cuisine: British
Keyword: Cauliflower

Harvesting Memories: A Journey into Apple Cider Donut Bread Pudding

There’s something undeniably magical about the aroma of baked goods wafting through the house, especially when those treats are as heartwarming as Apple Cider Donut Bread Pudding. This recipe is not just about indulging in a delicious dessert; it’s a tribute to cherished memories, family gatherings, and the love that fills a kitchen. Imagine tender donut pieces soaked in a rich custard, layered with sweet apples, and topped off with a drizzle of vanilla sauce—every bite brings a nostalgic smile to your face.

In this article, we will explore everything you need to know about making this delightful dish, ensuring you can recreate those cozy moments in your own home. From ingredient tips to variations, let’s dive into the world of cider donut bread pudding and transform your kitchen into a place of warmth and love.

Why You’ll Love This Recipe

This isn’t just any ordinary bread pudding. Here’s why this Apple Cider Donut Bread Pudding will become a beloved staple in your recipe repertoire:


Professional Chef Knife Set

★ Recommended Kitchen Tool

Professional Chef Knife Set

Make this recipe even easier with a quality Professional Chef Knife Set — a must-have kitchen staple!


🛒 Check Price on Amazon →

As an Amazon Associate, we earn from qualifying purchases.
  • Comforting flavors: The blend of spiced cider donuts and creamy custard creates a cozy, comforting dessert that warms the soul.
  • Perfect for gatherings: This recipe is great for serving a crowd, making it the ideal choice for family dinners or holiday celebrations.
  • Easy to prepare: With straightforward steps, this dish is accessible for both novice and experienced cooks alike.
  • Versatile variations: You can easily customize this pudding with your favorite fruits or toppings, ensuring every batch is unique.
  • Make-ahead option: Prepare it in advance, allowing the flavors to meld beautifully, so you can spend more time with loved ones.

Ingredients You’ll Need

Gathering the right ingredients is essential for making the best donut bread pudding. Here’s what you’ll need:

  • 12 Cider Donuts: The star of the show! Their sweet, spiced flavor is what makes this pudding special.
  • 4 eggs (room temperature): Essential for a rich custard base.
  • 3/4 cup granulated sugar: For sweetness and to enhance the flavors of the donuts.
  • 1/4 cup brown sugar (light or dark): Adds a lovely caramel note to the mix.
  • 1 cup half and half (room temperature): For a creamy texture.
  • 1/4 cup whole milk (room temperature): Balances the richness of the half and half.
  • 1 ½ teaspoon cinnamon: A warm spice that complements the cider donuts perfectly.
  • 1 ½ teaspoon vanilla: For depth of flavor.
  • 1/2 teaspoon baking soda: Helps the custard rise slightly.
  • 1/2 teaspoon salt: Balances the sweetness.
  • 4 tbsp melted butter (unsalted): Adds richness to the pudding.
  • 1 cup heavy cream: For the vanilla sauce, to drizzle over the serving.
  • 1/2 cup granulated sugar: Sweetens the sauce.
  • 2 tsp pure vanilla extract: Enhances the flavor of the sauce.
  • 1/2 stick butter: For greasing the baking dish.
  • 1/4 tsp cinnamon: For extra flavor in the sauce.
  • 2 Granny Smith apples (diced, peels on): Adds a tart contrast to the sweet donuts.
  • 2 tablespoons butter (unsalted): For sautéing the apples.
  • 2 tablespoons brown sugar: To caramelize the apples.

Simple Steps to Make This Bread Pudding

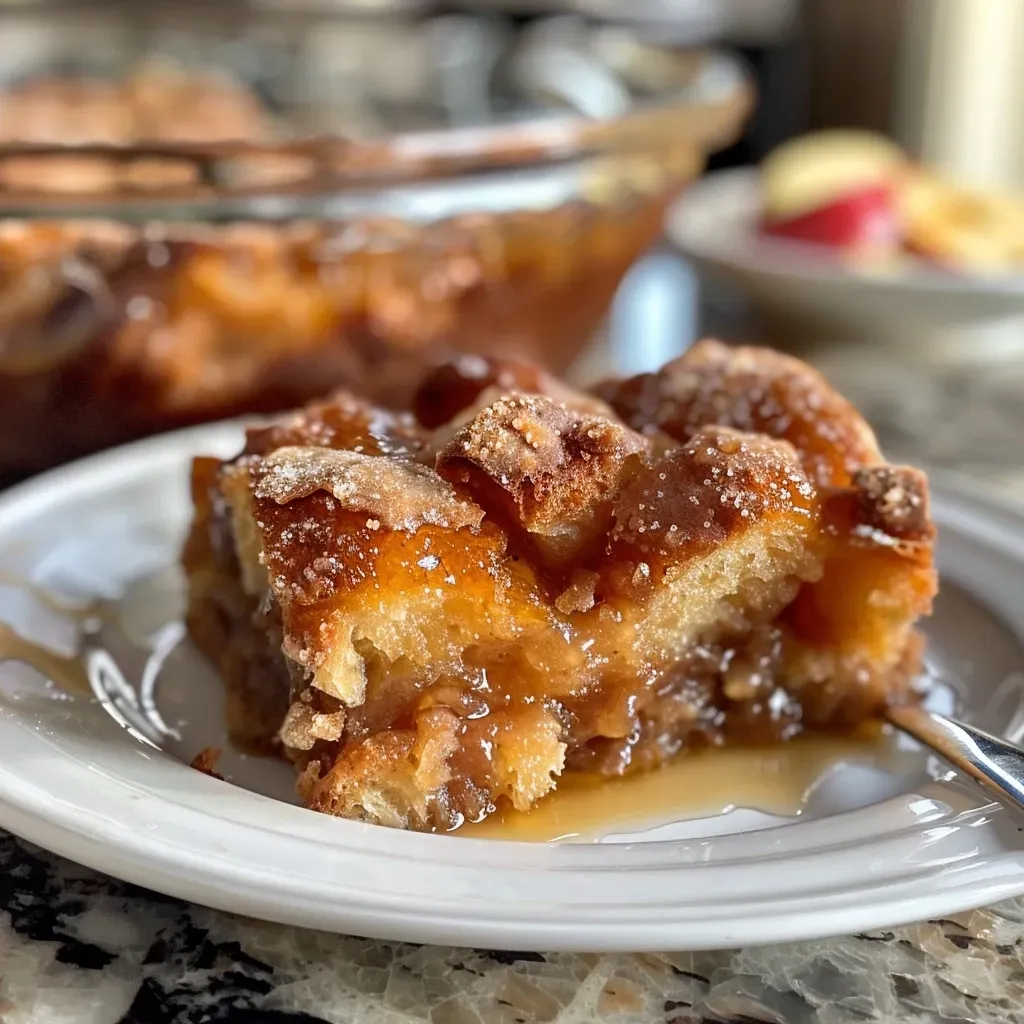
Side view of apple cider donut bread pudding, revealing a golden crust and chunks of Granny Smith apples.

Now that you have your ingredients, let’s walk through the steps to create this warm, comforting dish.

Preparation Steps:

  • Prepare the Donuts: Cut the cider donuts into bite-sized pieces and place them in a greased baking dish.
  • Make the Custard: In a large bowl, whisk together the eggs, granulated sugar, brown sugar, half and half, milk, cinnamon, vanilla, baking soda, and salt until well combined.
  • Combine: Pour the custard mixture over the donut pieces, ensuring they are well soaked. Let it sit for about 30 minutes, allowing the bread to absorb the flavors.
  • Prepare the Apples: In a skillet, melt the butter over medium heat. Add the diced apples, brown sugar, and a sprinkle of cinnamon. Sauté until the apples are tender, about 5-7 minutes.
  • Layer the Apples: Gently fold the sautéed apples into the donut and custard mixture.
  • Bake: Preheat the oven to 350°F (175°C). Bake the pudding for 45-55 minutes, or until the custard is set and the top is golden brown.
  • Make the Vanilla Sauce: In a small saucepan, combine the heavy cream, sugar, and vanilla extract. Heat gently until the sugar dissolves, then simmer for a few minutes until slightly thickened.

Pro Tips for the Best Results

To ensure your Apple Cider Donut Bread Pudding turns out perfectly every time, keep these tips in mind:

  • Use stale donuts: Stale donuts absorb the custard better, resulting in a creamier texture.
  • Let it rest: Allowing the mixture to sit for 30 minutes before baking helps the flavors meld and the bread soak up the custard.
  • Check for doneness: The pudding should be set in the center and slightly puffed up around the edges.
  • Customize your spices: Feel free to add nutmeg or allspice for an extra layer of flavor.
  • Serve warm: This pudding is best enjoyed warm, drizzled with vanilla sauce.
  • Add toppings: Consider serving with whipped cream, a scoop of vanilla ice cream, or a sprinkle of powdered sugar.
  • Experiment with fruits: Pears or berries can be delicious additions to the apples.
  • Use a water bath: For a creamier texture, place your baking dish in a larger pan filled with hot water while baking.

Common Mistakes and Troubleshooting

Even the best cooks can run into hiccups. Here are some common mistakes and how to avoid them:

  • Overbaking: Keep an eye on your pudding; if it’s dry or crumbly, it’s been in the oven too long.
  • Not enough soaking time: If your pudding feels dry, ensure the donuts are soaked adequately in the custard before baking.
  • Too sweet: Adjust the sugar according to your taste—some donuts are sweeter than others.
  • Using fresh donuts: Freshly made donuts can be too soft; let them sit out for a day or use stale ones for the best texture.

Delicious Variations to Try

Once you’ve mastered the classic version, consider trying these fun variations:

  • Chocolate Lovers: Add chocolate chips to the mixture for a rich, indulgent twist.
  • Nutty Crunch: Stir in chopped walnuts or pecans for added texture and flavor.
  • Berry Bliss: Incorporate fresh or frozen berries for a fruity burst.
  • Spiced Pumpkin: Substitute pumpkin puree for half of the milk for a seasonal spin.

Storage and Make-Ahead Instructions

Planning ahead? Here’s how to store and prepare your pudding:

  • Storing leftovers: Keep any leftover bread pudding in an airtight container in the refrigerator for up to 3 days.
  • Freezing: You can freeze the unbaked pudding for up to 2 months. Thaw in the refrigerator before baking.
  • Reheating: Reheat individual portions in the microwave or warm in the oven at 350°F (175°C) until heated through.

FAQs About Apple Cider Donut Bread Pudding

Here are some frequently asked questions that may help you:

  • Can I use regular bread instead of cider donuts? Yes, but the flavor will change significantly. Cider donuts provide a unique sweetness and spice.
  • What can I substitute for half and half? You can use a mixture of equal parts milk and cream for a similar consistency.
  • Can I make this dish vegan? Yes, substitute eggs with flaxseed meal and use plant-based milk and donuts.
  • How do I know when it’s done? The center should be set and the top golden brown. A knife inserted should come out clean.
  • Can I add raisins or nuts? Absolutely! Feel free to customize with your favorite mix-ins.
  • How should I serve it? Drizzle warm vanilla sauce over the top and serve with a scoop of ice cream or whipped cream.
  • Can I use frozen donuts? Yes, thaw them before using. They may be slightly softer but will work well.
  • How long does it last? It can last up to 3 days in the fridge, but it’s best enjoyed fresh!

Nutritional Tips and Dietary Adaptations

This recipe can be adjusted to fit various dietary needs:

  • Gluten-free option: Use gluten-free donuts and bread for a suitable alternative.
  • Lower sugar: Reduce the sugar in both the pudding and sauce or use sugar substitutes.
  • High-protein version: Add protein powder to the custard for an extra boost.

Equipment Recommendations

To make your cooking experience seamless, here are some tools that will help:

  • 9×13-inch baking dish: Perfect for holding all the deliciousness!
  • Mixing bowls: For combining your ingredients.
  • Whisk: Essential for beating the eggs and mixing the custard.
  • Spatula: Great for folding ingredients together gently.
  • Measuring cups and spoons: Accurate measurements are crucial for baking success.

Serving Suggestions

When it’s time to enjoy your Apple Cider Donut Bread Pudding, consider these delightful serving ideas:

  • Warm vanilla sauce: Always serve with a generous drizzle of your homemade vanilla sauce for extra flavor.
  • Ice cream scoop: A scoop of vanilla or caramel ice cream pairs beautifully with the warm pudding.
  • Whipped cream: Lightly sweetened whipped cream adds a lovely touch.
  • Fresh fruit: Serve with slices of fresh apples or berries for a refreshing contrast.

As you gather around the table, sharing this Apple Cider Donut Bread Pudding with family and friends, remember that cooking is about the memories we create and the love we share. I hope this recipe brings warmth to your home and joy to your gatherings. Happy baking!

Apple Cider Donut Bread Pudding

Prep Time 15 minutes
Cook Time 45 minutes
Total Time 1 hour
Servings 8 pieces
Calories 450
A decadent dessert combining apple cider donuts and fresh apples in a rich bread pudding.

Ingredients

Bread and Donuts

  • 12 pieces Cider Donuts
  • 4 pieces eggs (room temp)
  • 0.75 cup granulated sugar
  • 0.25 cup brown sugar (light or dark)
  • 1 cup half and half (room temp)
  • 0.25 cup whole milk (room temp)
  • 1.5 teaspoon cinnamon
  • 1.5 teaspoon vanilla
  • 0.5 teaspoon baking soda
  • 0.5 teaspoon salt
  • 4 tablespoons melted butter (unsalted)

Apple Filling

  • 2 pieces Granny Smith apples (diced, peels on)
  • 2 tablespoons butter (unsalted)
  • 2 tablespoons brown sugar
  • 1 teaspoon cinnamon

Instructions 

  • Preheat oven to 350°F (175°C). Grease a baking dish.
  • Mix eggs, sugars, half and half, milk, cinnamon, vanilla, baking soda, salt, and melted butter. Add torn donuts and diced apples, then combine.
  • Pour mixture into prepared dish and bake for 45 minutes until golden.
  • Meanwhile, cook apples with butter, brown sugar, and cinnamon until tender. Serve pudding topped with warm apple mixture.

Notes

For extra flavor, sprinkle with powdered sugar before serving.
Calories: 450kcal
Cost: $15
Course: Dessert
Cuisine: American
Keyword: apple cider donuts

Discover the Heart of Savoury Trail Mix: A Culinary Journey

In the bustling kitchen of my childhood home in Louisiana, I often found myself beside my grandmother, learning the delicate art of cooking. Each dish was a story, a memory infused with love and warmth. Today, I’m excited to share a recipe that embodies that spirit—my Savoury Trail Mix. This isn’t just a snack; it’s a delightful mix that brings together wholesome nuts, seeds, and spices, making it perfect for gatherings, road trips, or cozy evenings spent reminiscing with family. Let’s dive into the details of this recipe that unites generations.

Why You’ll Love This Savoury Trail Mix

This Savoury Trail Mix is more than just a healthy snack; it’s a celebration of flavors and textures that satisfies both your cravings and your nutrition goals. Here are some reasons why this trail mix will become your go-to snack:

  • Nutrient-Dense Ingredients: Packed with almonds, cashews, and pumpkin seeds, this mix is a powerhouse of protein and healthy fats.
  • Quick and Easy Preparation: With just a few simple steps, you can whip up a batch in no time, making it ideal for busy lifestyles.
  • Customizable Flavors: Feel free to experiment with different nuts, seeds, and spices to make it your own.
  • Perfect for Any Occasion: Whether it’s a family gathering or a solo movie night, this trail mix fits right in.
  • Heart-Healthy Benefits: Ingredients like linoleic acid contribute to healthy cholesterol levels, supporting overall heart health.

Ingredients Breakdown

Here’s what you’ll need to create this Savoury Trail Mix. Feel free to adjust based on your preferences or dietary needs!


Digital Kitchen Scale

★ Recommended Kitchen Tool

Digital Kitchen Scale

Make this recipe even easier with a quality Digital Kitchen Scale — a must-have kitchen staple!


🛒 Shop This Tool →

As an Amazon Associate, we earn from qualifying purchases.
  • 2 cups almonds: A great source of vitamin E and magnesium.
  • 1 cup cashews: Creamy and rich, they provide healthy fats and protein.
  • 1 cup peanuts: A budget-friendly nut that adds crunch and flavor.
  • 1/2 cup pumpkin seeds: Packed with zinc and iron, they are small but mighty.
  • 1/4 cup sesame seeds: These tiny seeds add a nutty flavor and are rich in calcium.
  • 1/2 cup nutritional yeast: Adds a cheesy flavor while being a great source of B vitamins.
  • 1/4 cup soy sauce or tamari: For those looking for a gluten-free option, tamari is a perfect substitute.
  • 2 tbsp maple syrup: A touch of sweetness to balance the savory elements.
  • 1 tbsp rice vinegar: Adds a bit of tanginess.
  • 1 tbsp olive oil (or avocado oil): For roasting and enhancing flavors.
  • 1 tsp smoked paprika: Infuses a lovely smokiness.
  • 1 tsp onion powder: Adds depth and flavor.
  • 1 tsp garlic powder: A must-have for that aromatic essence.

Cooking Instructions

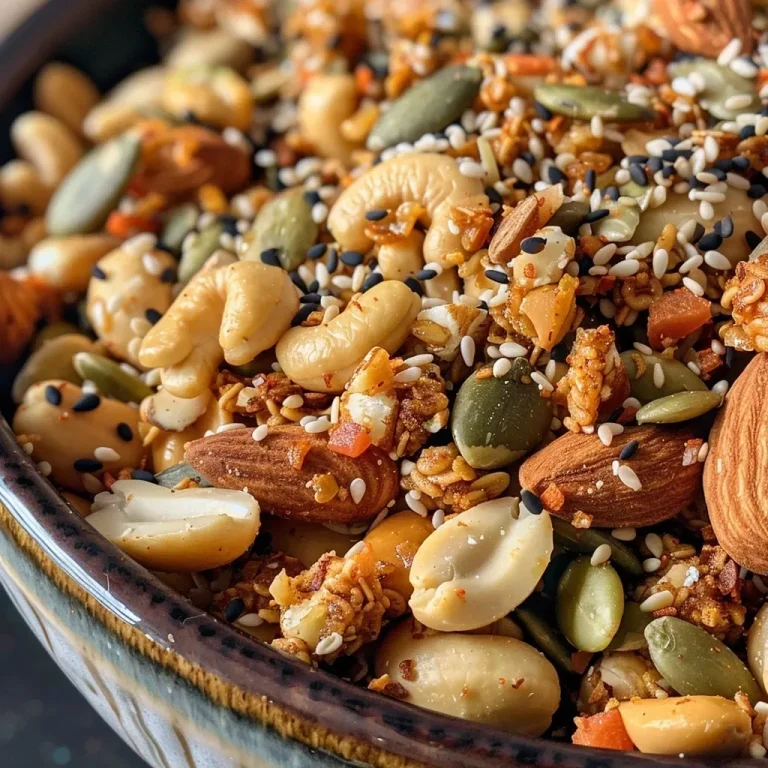
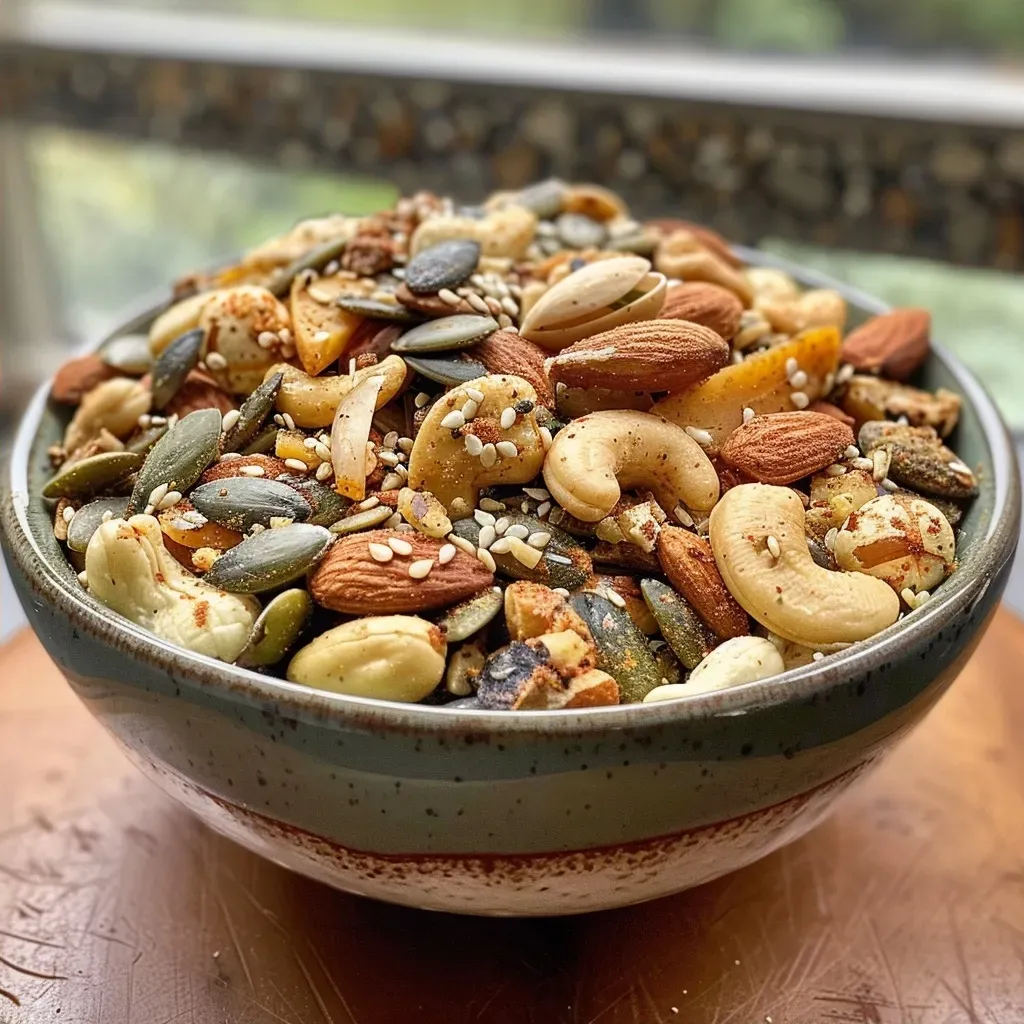
Side view of a vibrant Savoury Trail Mix with almonds, cashews, and pumpkin seeds displayed.

Bringing this Savoury Trail Mix to life is as easy as pie! Just follow these simple steps:

  1. Preheat the Oven: Set your oven to 325°F (163°C).
  2. Mix Nuts & Seeds: In a large bowl, combine the almonds, cashews, peanuts, pumpkin seeds, sesame seeds, and nutritional yeast.
  3. Prepare the Seasoning: In another bowl, whisk together the soy sauce (or tamari), maple syrup, rice vinegar, olive oil, smoked paprika, onion powder, and garlic powder until well combined.
  4. Combine: Pour the seasoning mixture over the nuts and seeds. Stir well to coat everything evenly.
  5. Bake: Spread the mixture on a lined baking sheet with parchment paper. Bake for 12 minutes, then stir and bake for another 10 minutes. Keep an eye on it to ensure it doesn’t burn.
  6. Cool: Allow the trail mix to cool completely on the baking sheet. This helps it dry and harden, creating the perfect crunch.

Pro Tips for the Perfect Savoury Trail Mix

To ensure your Savoury Trail Mix reaches its full potential, consider these expert insights:

  • Use Fresh Ingredients: Fresh nuts and seeds enhance flavor and texture.
  • Don’t Rush the Cooling Process: Cooling helps the mix crisp up beautifully.
  • Experiment with Seasonings: Try adding your favorite spices for a personal touch.
  • Store in Airtight Containers: Keep your trail mix fresh and crunchy by using airtight jars.
  • Make it a Family Activity: Get everyone involved in mixing and seasoning for a fun kitchen experience.
  • Adjust Sweetness to Taste: You can add more or less maple syrup based on your preference.
  • Monitor Baking Time: Ovens can vary; keep an eye on your mix to prevent burning.
  • Use a Variety of Nuts: Mixing different nuts can enhance flavor and texture.

Common Mistakes and Troubleshooting

Even the best chefs can make mistakes! Here are some common pitfalls and how to avoid them:

  • Overbaking: Keep a close watch during baking to avoid a burnt flavor.
  • Uneven Coating: Make sure to mix thoroughly so every nut and seed is coated with the seasoning.
  • Storing in a Humid Environment: This can lead to sogginess; store in a cool, dry place.

Delicious Variations to Try

Feel free to put your own spin on this Savoury Trail Mix with these tasty variations:

  • Spicy Kick: Add cayenne pepper or chili powder for an extra heat.
  • Herb-Infused: Use dried herbs like rosemary or thyme for a fragrant twist.
  • Cheesy Flavor: Incorporate a sprinkle of grated Parmesan cheese for a savory kick.
  • Sweet and Savory: Add dried fruits like cranberries or apricots for a delightful contrast.

Storage and Make-Ahead Instructions

Planning to make this trail mix ahead of time? Here’s how to store it properly:

  • Cool Completely: Allow the mix to cool fully before storing to prevent moisture buildup.
  • Airtight Containers: Store in glass jars or plastic containers with tight-fitting lids to maintain freshness.
  • Refrigerate for Longer Shelf Life: If you want to keep it for weeks, consider refrigeration, especially in humid climates.

Frequently Asked Questions

Here are some common questions about Savoury Trail Mix that might help you:

  • Can I use different nuts? Absolutely! Feel free to substitute with your favorites.
  • Is this recipe gluten-free? Yes, if you use tamari instead of soy sauce.
  • How long does it last? Stored properly, it can last up to 2 weeks.
  • Can I add dried fruits? Yes! Dried fruits can add a nice sweetness to balance the savory flavors.
  • Is it suitable for kids? Definitely! Just monitor the seasoning level for younger palates.
  • Can I make it vegan? Yes, this recipe is naturally vegan-friendly!
  • What can I serve it with? It’s great on its own, or you can pair it with yogurt or cheese.
  • How can I enhance the flavor? Consider adding spices like cumin or coriander for a unique twist.

Nutritional Tips and Dietary Adaptations

This Savoury Trail Mix can easily be adapted to meet various dietary needs:

  • Low-Carb Option: Skip the maple syrup for a keto-friendly version.
  • Nut-Free Version: Substitute nuts with roasted chickpeas or sunflower seeds.
  • High Protein Addition: Add protein powder to the mix for an extra boost.

Essential Equipment for Making Savoury Trail Mix

Here’s what you’ll need in your kitchen to make this trail mix:

  • Large Mixing Bowl: To combine all your ingredients.
  • Whisk: For mixing the seasoning ingredients smoothly.
  • Baking Sheet: A lined baking sheet to roast your mix.
  • Parchment Paper: Helps prevent sticking and makes cleanup easier.

Serving Suggestions

This Savoury Trail Mix is versatile enough to suit any occasion:

  • On-the-Go Snack: Perfect for road trips or busy workdays.
  • Party Platter: Serve it alongside other snacks at your next gathering.
  • Cozy Movie Night: Enjoy it as a crunchy companion during your favorite films.

In conclusion, this Savoury Trail Mix is not just a recipe; it’s a way to connect with loved ones and share stories, just like those cherished moments in my grandmother’s kitchen. So gather your ingredients, invite your family, and create your own memories around the table. Happy snacking!

Savoury Trail Mix

Prep Time 10 minutes
Cook Time 22 minutes
Total Time 32 minutes
Servings 8 servings
Calories 450
A flavorful and crunchy snack perfect for on-the-go or as a topping, combining nuts, seeds, and savory seasonings.

Ingredients

Nuts and Seeds

  • 2 cups almonds
  • 1 cup cashews
  • 1 cup peanuts
  • 1/2 cup pumpkin seeds
  • 1/4 cup sesame seeds
  • 1/2 cup nutritional yeast
  • 1/4 cup soy sauce or tamari
  • 2 tbsp maple syrup
  • 1 tbsp rice vinegar
  • 1 tbsp olive oil (or avocado oil)
  • 1 tsp smoked paprika
  • 1 tsp onion powder
  • 1 tsp garlic powder

Instructions 

  • Preheat oven to 325°F (160°C).
  • Mix nuts, seeds, and nutritional yeast in a bowl.
  • Whisk soy sauce, maple syrup, vinegar, oil, and spices; pour over mixture and coat.
  • Spread on a lined baking sheet; bake for 12 minutes, stir, then bake 10 more minutes.
  • Cool completely before serving.

Notes

Store in an airtight container for up to a week.
Calories: 450kcal
Cost: $15
Course: Snack
Keyword: Nuts, savory, seeds

Brighten Your Table with Fresh Cranberry Relish

There’s something magical about the holiday season, where the air is filled with the scents of spices, roasting meats, and sweet treats. Among these delightful aromas, one dish stands out for its vibrant color and zesty flavor: **Fresh Cranberry Relish**. This simple yet remarkable recipe combines the tartness of cranberries with the brightness of orange, evoking warmth and cherished memories around the family table. In this comprehensive guide, we’ll explore everything you need to know about making this beloved side dish, ensuring your gatherings are filled with joy and flavor.

As you embark on this culinary journey, rest assured that cooking is not a competition but a celebration of love, tradition, and shared moments. Whether you’re preparing for Thanksgiving, Christmas, or simply a cozy family dinner, this **Fresh Cranberry Relish** is sure to brighten your table.

Why You’ll Love This Recipe

  • Quick and Easy: With just a few ingredients and a food processor, you can whip up this relish in no time, making it a perfect last-minute addition to your holiday spread.
  • Bold Flavor: The combination of tart cranberries and zesty orange creates a refreshing contrast that complements savory dishes beautifully.
  • Versatile Use: This relish isn’t just for turkey! Use it as a topping for pancakes, spread it on sandwiches, or serve it alongside cheese for a delightful appetizer.
  • Healthy Choice: Packed with antioxidants, cranberries are a nutritious addition to your meal, offering health benefits without compromising on taste.
  • Make-Ahead Friendly: Prepare this relish a day in advance to let the flavors meld together, saving you time on the big day.

Ingredients Breakdown

To create your **Fresh Cranberry Relish**, you’ll need the following ingredients:


Digital Kitchen Scale

★ Recommended Kitchen Tool

Digital Kitchen Scale

Make this recipe even easier with a quality Digital Kitchen Scale — a must-have kitchen staple!


🛒 Shop This Tool →

As an Amazon Associate, we earn from qualifying purchases.
  • 10 ounces frozen cranberries (fresh works too): The star of the dish, cranberries are naturally tart and add a burst of color.
  • 1 orange (with the peel on): The orange peel adds a wonderful fragrant note and additional zest to the relish.
  • 1 cup granulated sugar: Balances the tartness of the cranberries; adjust to taste if you prefer a less sweet relish.

Ingredient Substitutions

  • Sweetener Alternatives: You can use honey or maple syrup instead of granulated sugar for a natural sweetener.
  • Spice It Up: Consider adding a pinch of cinnamon or nutmeg for a warm flavor profile.
  • Citrus Variations: Experiment with lemon or lime instead of orange for a different citrus twist.

Step-by-Step Instructions

Side view of vibrant red cranberry relish in a bowl.

Making this refreshing relish is a breeze. Follow these simple steps:

  1. If using frozen cranberries, let them thaw slightly on the counter for about 10 minutes while preparing the remaining ingredients. (Fresh cranberries can also be used.)
  2. Slice off the stem and root ends of the orange, leaving the peel on. Cut the orange into 8 slices.
  3. Add the cranberries, orange slices, and sugar to a food processor.
  4. Process until smooth or until no large chunks remain.
  5. Transfer to a serving bowl or container and refrigerate for at least 1 hour to allow the flavors to combine.
  6. Stir well right before serving and enjoy!

Pro Tips for Perfecting Your Cranberry Relish

  • Texture Matters: For a chunkier relish, pulse the mixture a few times instead of blending it until smooth.
  • Flavor Infusion: Letting the relish sit in the fridge overnight enhances the flavors, making it even more delicious.
  • Serving Temperature: Serve chilled for the best flavor experience.
  • Batch Cooking: Double the recipe for larger gatherings, ensuring everyone gets a taste of this delightful treat.
  • Presentation: Use a decorative bowl to serve, and garnish with a few whole cranberries or orange slices for a festive touch.

Common Mistakes and Troubleshooting

Even the most seasoned cooks can run into hiccups. Here are some common mistakes and how to avoid them:

  • Over-processing: Blending for too long can turn the relish into a puree. Stop once the mixture is well-combined but still has some texture.
  • Too Sweet or Too Tart: Adjust the sugar to your taste. Start with less and add more if needed.
  • Serving Too Soon: Give the flavors time to develop by refrigerating the relish for at least an hour before serving.

Variations to Explore

Don’t hesitate to get creative with your **Fresh Cranberry Relish**. Here are some fun variations:

  • Cranberry Pineapple Relish: Add 1 cup of chopped fresh pineapple for a tropical twist.
  • Maple Pecan Cranberry Relish: Mix in 1/2 cup of chopped pecans and substitute sugar with maple syrup for a nutty flavor.
  • Spiced Cranberry Relish: Incorporate a teaspoon of grated ginger or a dash of allspice for a warming note.
  • Jello Cranberry Relish: For a unique dessert, mix in a packet of gelatin for a firmer texture.

Storage and Make-Ahead Instructions

This **Fresh Cranberry Relish** can be made ahead of time and stored properly:

  • Refrigeration: Store in an airtight container in the refrigerator for up to one week.
  • Freezing: If you wish to prepare it in advance, freeze the relish for up to three months. Thaw in the fridge before serving.

Frequently Asked Questions

  • Can I use canned cranberries? While fresh or frozen are recommended for the best flavor, you can use canned cranberries in a pinch, though the texture will differ.
  • Is this relish vegan? Yes, this recipe is naturally vegan-friendly!
  • What can I serve this relish with? This relish pairs beautifully with turkey, ham, or even as a topping for desserts like cheesecake.
  • Can I add nuts? Absolutely! Chopped nuts like walnuts or pecans can add great texture and flavor.
  • How do I adjust the sweetness? Start with less sugar and adjust according to your taste preference.
  • What’s the best way to serve it? Chilled is ideal, but you can also serve it at room temperature for a different experience.
  • Can I make this without a food processor? Yes, finely chop the ingredients by hand for a rustic texture if you don’t have a food processor.
  • What’s the nutritional information for this relish? While this varies based on sugar used, cranberries are low in calories and high in fiber—making this a healthy addition to your meal.

Nutritional Tips and Dietary Adaptations

This relish not only bursts with flavor but also comes with numerous health benefits:

  • Antioxidant Powerhouse: Cranberries are rich in antioxidants, which help fight inflammation and promote overall health.
  • Low Calorie: This dish is low in calories, making it a guilt-free addition to your holiday spread.
  • Gluten-Free: Naturally gluten-free, it can be enjoyed by everyone at your table.
  • Customizable Sweetness: Adjust the sweetness to fit dietary needs, especially for those monitoring sugar intake.

Essential Equipment for Making Cranberry Relish

To whip up this delightful relish, you’ll need:

  • Food Processor: Essential for quick and easy blending.
  • Measuring Cups: For accurate ingredient measurements.
  • Mixing Bowl: To combine and store the relish before serving.

Serving Suggestions

When it comes to serving your **Fresh Cranberry Relish**, the possibilities are endless:

  • As a Side Dish: Serve alongside your favorite roasted meats for a refreshing contrast.
  • On Toast: Spread over warm toast or bagels for a delicious breakfast option.
  • Cheese Board Addition: Pair with cheeses for a delightful appetizer at your next gathering.
  • In Desserts: Use as a topping for ice cream or mix into yogurt for a sweet treat.

Conclusion

As we gather around the table this holiday season, let this **Fresh Cranberry Relish** serve as a reminder of the love and warmth that cooking brings. Embrace the simplicity of this recipe, share it with family and friends, and most importantly, enjoy the moments spent together. After all, cooking is not just about the food; it’s about creating memories that last a lifetime. So, roll up your sleeves, gather your loved ones, and let the joy of cooking fill your home!

Fresh Cranberry Relish

Prep Time 10 minutes
Total Time 10 minutes
Servings 8 servings
Calories 80
A vibrant and tangy cranberry relish perfect for holiday gatherings or any festive occasion.

Ingredients

Fruits

  • 10 ounces frozen cranberries (can use fresh)
  • 1 orange orange (with peel) (slice into 8 pieces)
  • 1 cup granulated sugar

Instructions 

  • Thaw cranberries for 10 minutes.
  • Slice orange with peel into 8 pieces.
  • Add cranberries, orange slices, and sugar to a food processor.
  • Process until smooth.
  • Refrigerate for at least 1 hour before serving.
  • Stir well and enjoy!

Notes

This relish can be made ahead and stored in the refrigerator for up to 3 days.
Calories: 80kcal
Cost: $10
Course: Side Dish
Cuisine: American
Keyword: cranberries

A Taste of Home: Healthy Cranberry Orange Bread

Welcome to a delightful journey of flavors and memories! This Healthy Cranberry Orange Bread recipe is not just about satisfying your taste buds; it’s about evoking the warmth of shared moments around the family table. With the vibrant zest of fresh oranges and the tart burst of cranberries, this bread embodies the essence of love, tradition, and joy. Perfect for breakfast, brunch, or as a sweet treat during gatherings, you’ll soon discover why this recipe is a must-try.

Let’s dive into the heart of this recipe and learn why it stands out among quick breads!

Why You’ll Love This Recipe

  • Healthier Choice: Made with whole wheat flour and Greek yogurt, this bread is both nourishing and satisfying.
  • Easy to Make: With simple ingredients and straightforward steps, you can whip this up even on busy mornings.
  • Perfect for Sharing: This recipe yields a loaf that’s ideal for gatherings, bringing everyone together for a taste of home.
  • Versatile Flavor: The combination of tart cranberries and sweet orange creates a delightful balance that pairs well with tea or coffee.
  • Make-Ahead Friendly: Prepare this bread in advance and store it for a quick breakfast or snack option throughout the week.

Ingredients Breakdown

Here’s what you’ll need to create this moist and flavorful cranberry orange bread, along with some helpful substitutions:


Meal Prep Container Set

★ Recommended Kitchen Tool

Meal Prep Container Set

Make this recipe even easier with a quality Meal Prep Container Set — a must-have kitchen staple!


🛒 Shop This Tool →

As an Amazon Associate, we earn from qualifying purchases.
  • 1/3 cup unsalted butter: Melted and slightly cooled, or substitute with vegetable oil for a dairy-free option.
  • ½ cup pure maple syrup: A natural sweetener that enhances flavor; honey can also be used for a different twist.
  • ¼ cup freshly squeezed orange juice: For the freshest taste, use juice from real oranges; store-bought juice works in a pinch.
  • 1 heaping tablespoon fresh orange zest: Adds vibrant flavor; feel free to increase this for a stronger citrus kick.
  • ¼ cup plain Greek yogurt: Provides moisture and richness; non-dairy yogurt can be a suitable alternative.
  • 1 teaspoon vanilla extract: A touch of sweetness that rounds out the flavors.
  • 2 eggs: At room temperature for better incorporation into the batter.
  • 1 ¾ cups whole wheat flour: A wholesome base; all-purpose flour can be used for a lighter loaf.
  • 1 teaspoon ground cinnamon: Warm spice that complements the fruit beautifully.
  • 1 teaspoon baking powder: For leavening and rise.
  • 1 teaspoon baking soda: Works with the yogurt for a fluffy texture.
  • ½ teaspoon fine sea salt: Enhances the overall flavor.
  • 1 ½ cups fresh cranberries: Rinsed and dried; frozen cranberries can also be used without thawing.

How to Make Healthy Cranberry Orange Bread

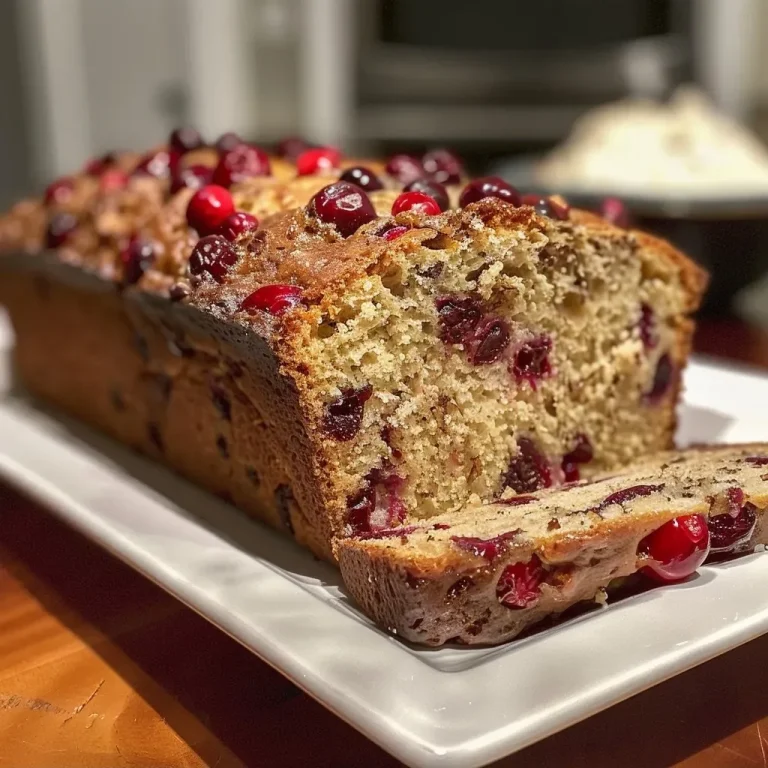
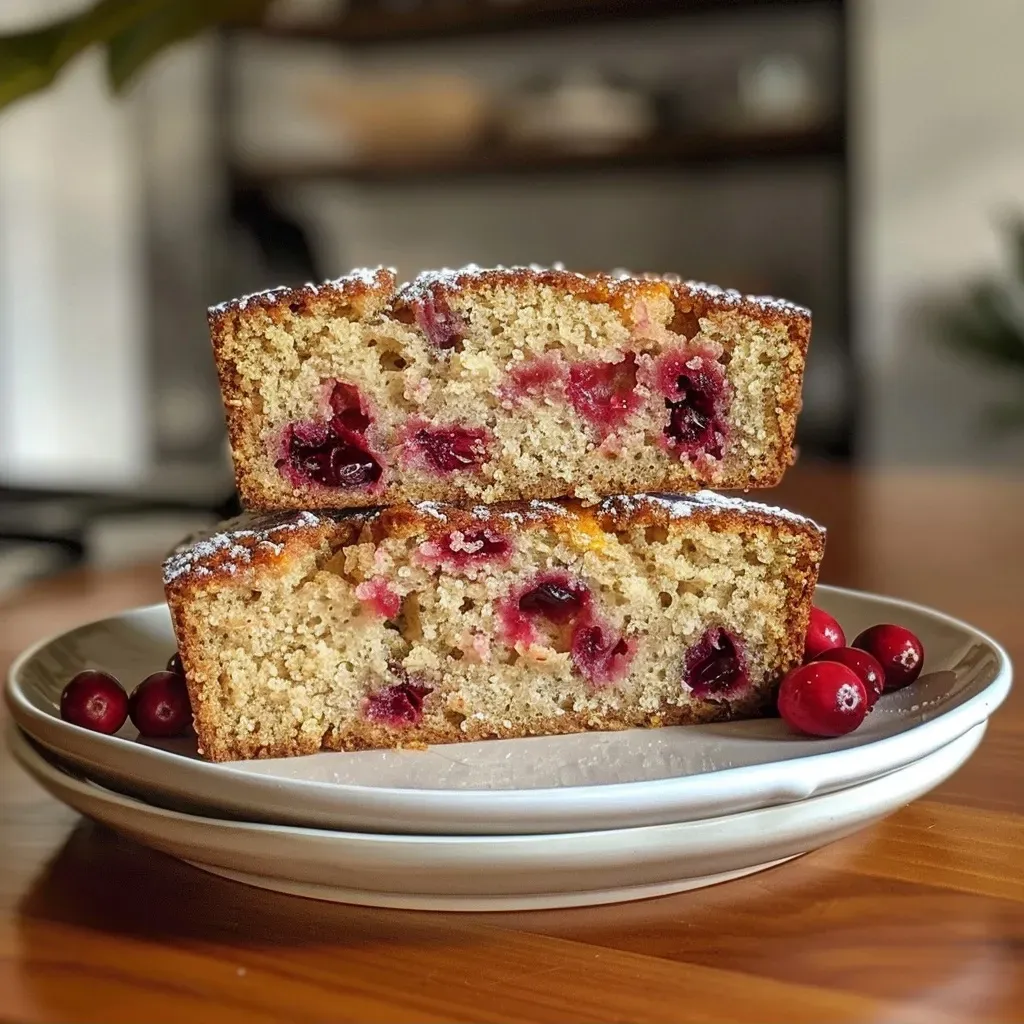
Side view of freshly baked cranberry orange bread, highlighting its golden crust and colorful fruit filling.

Follow these simple steps to create your loaf of joy:

  1. Adjust the oven rack to the lower third position and preheat to 350°F. Line an 8.5″ x 4.5″ loaf pan with parchment paper and grease it to prevent sticking.
  2. In a large bowl, whisk together the melted butter (or oil), maple syrup, freshly squeezed orange juice, orange zest, Greek yogurt, and vanilla extract until smooth. Add the eggs and whisk again until well incorporated.
  3. In a medium bowl, combine the whole wheat flour, ground cinnamon, baking powder, baking soda, and salt. Mix until well blended.
  4. Gently stir the dry ingredients into the wet ingredients, mixing just until combined. Avoid overmixing. Gently fold in the fresh cranberries and pour the batter into the prepared loaf pan.
  5. Bake in the preheated oven for 45-55 minutes or until a toothpick inserted into the center comes out clean with a few moist crumbs. Keep an eye on the bread; if it starts to brown too much on top, cover it with foil after about 30 minutes.
  6. Allow the loaf to cool in the pan for 10 minutes before transferring it to a wire rack to cool completely. Once cooled, drizzle with the orange glaze.

Creating the Perfect Orange Glaze

To add a sweet, zesty finish, prepare the orange glaze with these ingredients:

  • 1 cup powdered sugar: Sifted for a smooth consistency.
  • ½ tablespoon butter: Softened, optional for richness.
  • 1 to 2 tablespoons orange juice or milk: Adjust for desired thickness.
  • 1 teaspoon orange zest: Enhances the glaze with fresh flavor.
  • 1/8 teaspoon vanilla extract: Adds depth to the glaze.

In a small bowl, whisk together the powdered sugar, softened butter, orange juice, orange zest, and vanilla extract until smooth. Add more juice or milk to thin it out or more powdered sugar to thicken as needed. Drizzle over the cooled bread for a beautiful finish.

Tips for Perfecting Your Bread

  • Measure Carefully: Ensure accurate measurements for consistent results, especially with flour and baking powder.
  • Don’t Overmix: Gently combine wet and dry ingredients; overmixing can lead to a dense loaf.
  • Check for Doneness: Ovens vary, so start checking for doneness a few minutes before the suggested time.
  • Cool Completely: Let the bread cool fully before glazing to prevent the glaze from melting off.
  • Storage Tips: Store leftovers in an airtight container at room temperature for up to 3 days, or refrigerate for up to a week.

Common Mistakes and Troubleshooting

To ensure your cranberry orange bread turns out perfectly every time, here are a few common pitfalls to avoid:

  • Using Cold Ingredients: Always use room temperature eggs and yogurt for better mixing.
  • Skipping the Zest: Don’t skip the orange zest; it’s essential for flavor!
  • Not Prepping the Pan: Always line and grease your pan to avoid sticking.
  • Ignoring Oven Temperature: Use an oven thermometer to check that your oven is accurately calibrated.

Delicious Variations

Feel free to get creative with your cranberry orange bread! Here are some tasty variations to consider:

  • Nutty Addition: Add ½ cup chopped walnuts or pecans for a delightful crunch.
  • Berry Blast: Mix in ½ cup of blueberries for an extra burst of flavor.
  • Spiced Version: Add a pinch of nutmeg or ginger for a warm, spiced twist.
  • Chocolate Delight: Fold in ½ cup of chocolate chips for a sweet touch that kids will love.

Storage and Make-Ahead Instructions

This healthy cranberry orange bread can be made in advance for those busy mornings or unexpected guests. Here’s how to store it:

  • Room Temperature: Keep in an airtight container for up to 3 days.
  • Refrigeration: It can be stored in the refrigerator for up to a week.
  • Freezing: Wrap tightly in plastic wrap and aluminum foil, then freeze for up to 3 months. Thaw in the refrigerator overnight before serving.

Frequently Asked Questions

  • Can I use frozen cranberries? Yes! There’s no need to thaw them; just rinse and dry before adding.
  • Can I substitute whole wheat flour with all-purpose flour? Absolutely! It will yield a lighter loaf.
  • What can I use instead of Greek yogurt? You can use sour cream or a non-dairy yogurt alternative.
  • How can I tell when the bread is done? Insert a toothpick into the center; it should come out clean or with a few moist crumbs.
  • Can I make mini loaves? Yes! Adjust the baking time to about 25-30 minutes for mini loaves.
  • Is this bread gluten-free? You can use a gluten-free flour blend, but results may vary.
  • How do I store leftovers? Keep them in an airtight container at room temperature or refrigerate.
  • Can I add more sugar? Feel free to adjust the sweetness to your preference, but the maple syrup adds a lovely flavor.

Nutrition Tips and Dietary Adaptations

This recipe is already on the healthier side, but here are some adjustments:

  • Reduce Sugar: Cut down the maple syrup if you prefer a less sweet bread.
  • Substitute Greek Yogurt: Use a dairy-free yogurt for a vegan option.
  • Boost Fiber: Add 1 tablespoon of chia seeds or flaxseeds to the batter.

Equipment Recommendations

To make this recipe a breeze, here are some tools you might find helpful:

  • Loaf Pan: A non-stick or glass loaf pan works best for even baking.
  • Mixing Bowls: Use mixing bowls of varying sizes for wet and dry ingredients.
  • Whisk: A good whisk helps to thoroughly combine wet ingredients.
  • Measuring Cups and Spoons: Accurate measurements ensure the best results.

Serving Suggestions

This lovely cranberry orange bread can be enjoyed in various ways:

  • Breakfast Delight: Serve warm with a pat of butter or a dollop of cream cheese.
  • Brunch Treat: Pair it with a fresh fruit salad or yogurt for a delightful brunch spread.
  • Gift Idea: Wrap in parchment and twine to give as a homemade gift for friends or family.

In Conclusion

As you gather around your table, let this Healthy Cranberry Orange Bread be a centerpiece of warmth and togetherness. Each slice is a testament to the joy of cooking and sharing with loved ones. So roll up your sleeves, embrace the memories, and bake a loaf that’s sure to bring smiles to your home. Happy baking!

Healthy Cranberry Orange Bread

Prep Time 15 minutes
Cook Time 50 minutes
Total Time 1 hour 5 minutes
Servings 8 slices
Calories 250
A moist and flavorful bread combining the tartness of cranberries with bright orange zest, perfect for breakfast or a snack.

Ingredients

Wet ingredients

  • 1/3 cup unsalted butter, melted and slightly cooled (or vegetable oil)
  • ½ cup pure maple syrup
  • ¼ cup freshly squeezed orange juice
  • 1 heaping tablespoon fresh orange zest
  • ¼ cup plain Greek yogurt (2% Greek yogurt)
  • 1 teaspoon vanilla extract
  • 2 eggs eggs, at room temperature

Dry ingredients

  • 1 ¾ cups whole wheat flour
  • 1 teaspoon ground cinnamon
  • 1 teaspoon baking powder
  • 1 teaspoon baking soda
  • ½ teaspoon fine sea salt
  • 1 ½ cups fresh cranberries (rinsed and dried)

Glaze ingredients

  • 1 cup powdered sugar (icing sugar), sifted
  • ½ tablespoon butter, softened (optional)
  • 1 to 2 tablespoons orange juice or milk (plus more as needed)
  • 1 teaspoon orange zest
  • 1/8 teaspoon vanilla extract

Instructions 

  • Preheat oven to 350°F (175°C), line and grease loaf pan.
  • Whisk wet ingredients, then add eggs and mix until smooth.
  • Mix dry ingredients, then combine with wet mixture. Fold in cranberries and pour into pan.
  • Bake for 45-55 minutes until a toothpick comes out clean. Cover with foil if browning too quickly.
  • Cool in pan for 10 minutes, then transfer to wire rack. Drizzle with orange glaze before serving.

Notes

For a richer glaze, add more powdered sugar or orange juice as needed.
Calories: 250kcal
Cost: $15
Course: Breakfast
Cuisine: American
Keyword: Bread, Cranberry, Orange

Welcome, dear reader, to a culinary journey that celebrates the rich flavors of fall and the warmth of home. Today, we’re diving into a delightful recipe for **Apple Cider Vinaigrette** that will not only elevate your salads but also bring a touch of nostalgia to your dining table. This homemade vinaigrette is a blend of sweet and tangy notes that are perfect for drizzling over greens, roasted vegetables, or even as a marinade for your favorite proteins. Let’s roll up our sleeves and get cooking!

Why You’ll Love This Recipe

This isn’t just any vinaigrette; it’s a heartfelt creation that brings together the essence of autumn and the love for home-cooked meals. Here are some reasons you’ll adore this recipe:

  • Easy to Make: With just a few simple ingredients, you can whip this up in minutes, making it a perfect addition to your weeknight meals.
  • Natural Sweetness: The addition of maple syrup balances the tartness of the apple cider vinegar, creating a harmonious flavor profile.
  • Versatile Use: Not only is this vinaigrette great for salads, but it can also be used as a marinade for chicken or roasted veggies, enhancing any dish!
  • Storage Friendly: This dressing stays fresh in your fridge for up to a week, allowing you to prepare in advance and enjoy it throughout the week.
  • Personal Touch: Each batch can be customized with your favorite herbs or spices, making it uniquely yours.

Ingredients Breakdown

Let’s take a closer look at the ingredients that make this vinaigrette sing:


Meal Prep Container Set

★ Recommended Kitchen Tool

Meal Prep Container Set

Make this recipe even easier with a quality Meal Prep Container Set — a must-have kitchen staple!


🛒 See Deals on Amazon →

As an Amazon Associate, we earn from qualifying purchases.
  • ¼ cup apple cider vinegar: The star of the show! It adds tangy depth and pairs beautifully with salads and roasted dishes.
  • ¼ cup avocado oil: A lovely oil with a mild flavor that complements the dressing without overpowering it. You can substitute with olive oil if you prefer.
  • 2 tbsp apple cider (or apple juice): This ingredient adds a touch of sweetness and enhances the apple flavor.
  • 1 tbsp maple syrup: For that natural sweetness. Feel free to adjust based on your preference!
  • 1 tbsp Dijon mustard: This contributes a lovely creaminess and subtle heat.
  • 1 tsp minced garlic: Fresh garlic adds a punch of flavor; you could also use garlic powder if that’s what you have on hand.
  • ½ tsp salt: A must for enhancing all the flavors.
  • ¼ tsp black pepper: For a little kick.
  • ¼ tsp cinnamon: A surprising yet delightful addition that brings warmth to the dressing.

Pro Tips for the Perfect Vinaigrette

Creating the perfect vinaigrette is an art, and I’m here to share some of my best-kept secrets:

  • Use quality ingredients: Since this dressing is so simple, the quality of each ingredient matters. Opt for organic apple cider vinegar and fresh garlic for the best flavor.
  • Emulsify properly: If using a jar, shake vigorously until well combined. If using a blender, blend until smooth to create a creamy texture.
  • Adjust to taste: Feel free to tweak the sweetness or acidity based on your personal preference; it’s all about balance.
  • Experiment with herbs: Fresh herbs like thyme or rosemary can be added for an extra layer of flavor. Just chop finely and mix in!
  • Make it a day ahead: Allowing the vinaigrette to sit for a few hours or overnight lets the flavors meld beautifully.
  • Store it right: Keep it in a sealed jar in the fridge for up to a week. Just give it a good shake before using!
  • Try different oils: While avocado oil is my go-to, feel free to experiment with walnut or flaxseed oil for unique flavors.
  • Use it creatively: Beyond salads, this vinaigrette is fantastic drizzled over grain bowls, as a marinade for meats, or even as a dip for veggies.

Common Mistakes and Troubleshooting

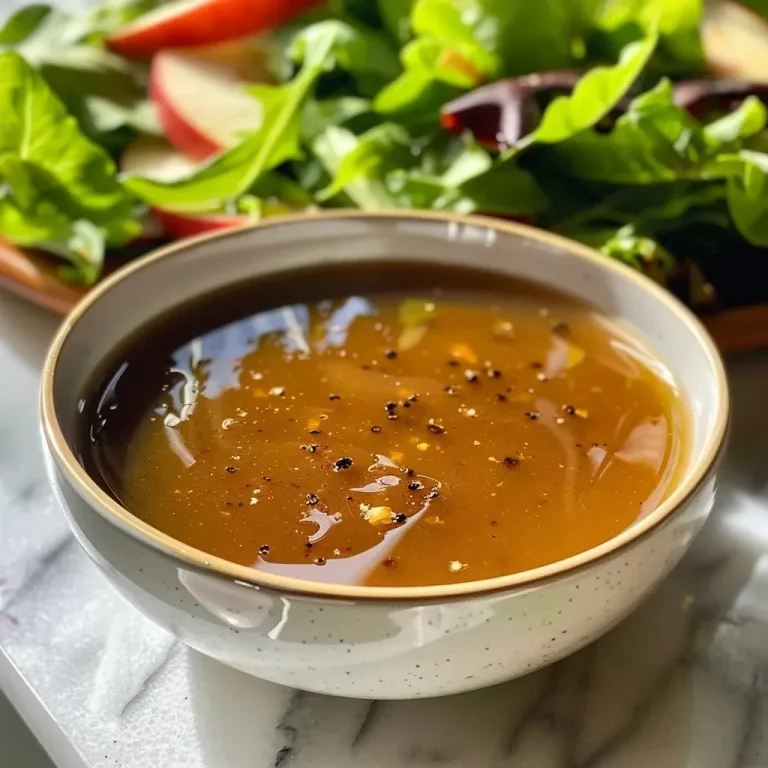
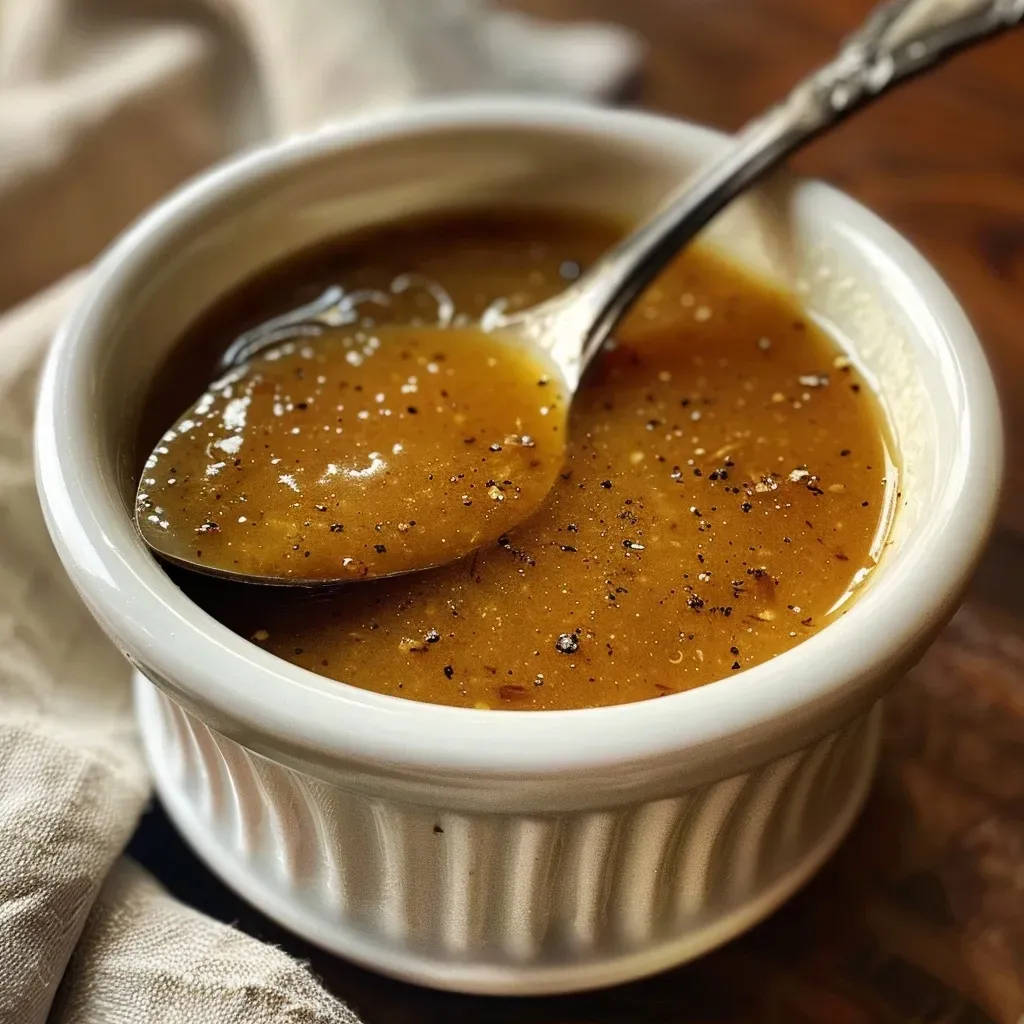
Side view of a jar filled with apple cider vinaigrette, showcasing its texture.

Even the best of us can make mistakes in the kitchen. Here’s how to avoid common pitfalls:

  • Too tangy? Add a touch more maple syrup to balance the acidity.
  • Too thick? If the vinaigrette is too thick, add a bit of water or extra oil to loosen it up.
  • Not flavorful enough? Be sure to taste as you go. Adjusting salt, pepper, or maple syrup can make a big difference.
  • Separation? Homemade dressings tend to separate. Just give it a good shake before serving.

Delightful Variations

Let your creativity shine with these variations of the classic apple cider vinaigrette:

  • Honey Mustard Vinaigrette: Swap maple syrup for honey and add a bit more mustard for a zesty kick.
  • Herb-Infused Vinaigrette: Add finely chopped fresh herbs such as basil or parsley for a fresh touch.
  • Spicy Kick: Mix in a pinch of red pepper flakes or a dash of hot sauce for those who enjoy a little heat.
  • Berry Bliss Vinaigrette: Blend in some fresh or frozen berries for a fruity twist that pairs beautifully with mixed greens.

Storage and Make-Ahead Instructions

This vinaigrette is perfect for meal prep! Here’s how to store it:

  • Refrigeration: Store in an airtight container in the refrigerator for up to 7 days. Just shake or stir before using.
  • Freezing: While it’s not ideal, you can freeze it for later use. Just ensure it’s in a freezer-safe container, but fresh is always best!

Frequently Asked Questions

Here are some common questions folks have about this lovely dressing:

  • Can I use other types of vinegar? Absolutely! Try balsamic or red wine vinegar for a different flavor profile.
  • Is it gluten-free? Yes, this vinaigrette is naturally gluten-free!
  • Can I make it vegan? Yes, it’s already vegan-friendly thanks to the use of maple syrup!
  • How can I use this vinaigrette beyond salads? Use it as a marinade, drizzle over roasted vegetables, or mix it into grain bowls.
  • What salads pair well with apple cider vinaigrette? It complements mixed greens, kale, quinoa salads, and even fruit salads beautifully.
  • Can I adjust the sweetness? Yes, feel free to add more or less maple syrup to suit your taste.
  • What’s the best way to emulsify my vinaigrette? Use a blender for a smooth texture, or whisk vigorously if mixing by hand.
  • How long can I store this vinaigrette? It stays fresh in the fridge for up to 7 days.

Nutritional Insights and Dietary Adaptations

As with any recipe, it’s essential to understand the nutritional benefits:

  • Low Calorie: This vinaigrette is low in calories, making it a guilt-free addition to your meals.
  • Healthy Fats: The avocado oil provides heart-healthy fats that are beneficial for your well-being.
  • Vegan-Friendly: Naturally fits into a plant-based diet.
  • Customizable: You can adjust the ingredients to tailor it to your dietary needs.

Equipment Recommendations

To make your cooking experience easier, here are some equipment recommendations:

  • Mason Jar: Perfect for mixing your vinaigrette and easy to store in the fridge.
  • High-Speed Blender: Great for achieving a smooth, creamy texture.
  • Whisk: If you prefer the classic method, a whisk works wonders for emulsifying your ingredients.
  • Measuring Cups and Spoons: Essential for getting the right proportions when mixing.

Serving Suggestions

Finally, let’s talk about how to enjoy this lovely apple cider vinaigrette:

  • On Fresh Salads: Drizzle generously over mixed greens, adding your favorite toppings like nuts and cheese.
  • Grain Bowls: Toss with quinoa or farro, adding roasted veggies and protein for a complete meal.
  • As a Marinade: Use it to marinate chicken, tofu, or fish for an extra layer of flavor.
  • With Roasted Vegetables: Drizzle over roasted veggies to enhance their natural sweetness.

In conclusion, this **Apple Cider Vinaigrette** is more than just a dressing; it’s a celebration of flavors and memories. I hope you find joy in creating this recipe and sharing it with your loved ones around the dinner table. Remember, cooking isn’t about perfection—it’s about love, sharing, and the stories we tell through food. Happy cooking!

Homemade Apple Cider Vinaigrette

Prep Time 5 minutes
Total Time 5 minutes
Servings 4 tablespoons
Calories 80
A simple and flavorful homemade vinaigrette made with apple cider vinegar and fresh ingredients, perfect for salads.

Ingredients

liquid ingredients

  • 0.25 cup apple cider vinegar
  • 0.25 cup avocado oil
  • 2 tbsp apple cider ((or apple juice))
  • 1 tbsp maple syrup
  • 1 tbsp Dijon mustard
  • 1 tsp minced garlic ((or 2 garlic cloves))
  • 0.5 tsp salt
  • 0.25 tsp black pepper
  • 0.25 tsp cinnamon

Instructions 

  • Add all ingredients to a mason jar and blend with an immersion blender. Alternatively, blend until smooth in a high-speed blender.
  • Store in the fridge for up to 7 days.

Notes

Shake well before using. Adjust seasonings to taste.
Calories: 80kcal
Cost: $5
Course: dressing
Keyword: apple cider vinegar

Unpacking the Comfort of Maple Browned Butter Roasted Sweet Potato Wedges

In the heart of every home, the kitchen stands as a sanctuary where love is kneaded into dough and memories are simmered into sauces. Today, I invite you to gather around the table and explore the delightful world of Maple Browned Butter Roasted Sweet Potato Wedges. This recipe is not just about cooking; it’s about embracing tradition, warmth, and the sweet nostalgia of family gatherings. With the perfect blend of flavors that evoke the spirit of Thanksgiving dinner, these sweet potato wedges are destined to become a cherished part of your culinary repertoire.

Why You’ll Love This Recipe

There are countless reasons to fall in love with these roasted sweet potato wedges, but let me share just a few:

  • Flavor Harmony: The combination of sweet potatoes, browned butter, and maple syrup creates a rich, sweet-savory experience that dances on your palate.
  • Heartwarming & Wholesome: This dish captures the essence of home-cooked meals, reminding us of family and tradition.
  • Quick & Easy: With just a few simple steps, you can have a delicious side ready in less than 30 minutes.
  • Versatile Dish: Perfect for any occasion, these wedges pair beautifully with meats, salads, or stand alone as a satisfying snack.
  • Nutritious Choice: Sweet potatoes are packed with vitamins, antioxidants, and fiber, making this a guilt-free indulgence.

Ingredients Breakdown

To make these delectable Maple Browned Butter Roasted Sweet Potato Wedges, you will need the following ingredients:


Cake Decorating Set

★ Recommended Kitchen Tool

Cake Decorating Set

Make this recipe even easier with a quality Cake Decorating Set — a must-have kitchen staple!


🛒 Shop This Tool →

As an Amazon Associate, we earn from qualifying purchases.
  • 4 medium sweet potatoes: Cut into 2-inch wedges. Choose firm, smooth potatoes for the best results.
  • 1/4 cup butter: Brown the butter to enhance its nutty flavor—this is a crucial step!
  • 1/4 cup maple syrup: Use 100% pure maple syrup for an authentic taste.
  • 1 teaspoon ground cinnamon: Adds warmth and depth to the dish.
  • 1/4 teaspoon ground nutmeg: A pinch of nutmeg elevates the sweet profile beautifully.
  • 3 tablespoons minced fresh rosemary: This herb brings a fragrant touch that pairs excellently with sweet potatoes.
  • 1/3 cup chopped pecans: For a delightful crunch and added flavor.

Don’t have some ingredients on hand? Here are a few substitutions:

  • Butter Substitute: Use olive oil or coconut oil for a dairy-free version.
  • Maple Syrup Alternative: Honey or agave syrup can work in a pinch, though they will alter the flavor slightly.
  • Herb Variations: Thyme or sage can replace rosemary for a different aromatic experience.

Instructions: Your Step-by-Step Guide

Side view of golden-brown sweet potato wedges drizzled with maple syrup and sprinkled with rosemary.

Now that you have your ingredients ready, let’s dive into the preparation of these delicious sweet potato wedges:

  1. Toss the sweet potatoes in a large bowl with the browned butter, maple syrup, cinnamon, nutmeg, rosemary, and pecans until well combined.
  2. Spread the sweet potatoes in a single layer on a greased baking sheet, making sure to place them cut-side down for optimal roasting.
  3. Roast in a preheated oven at 425°F for 20-25 minutes or until the sweet potatoes are golden-brown and tender. Flip halfway through cooking for even browning.
  4. Once done, remove from the oven and let them cool for a few minutes before serving.

Pro Tips for Perfect Sweet Potato Wedges

To ensure your maple browned butter roasted sweet potato wedges turn out perfectly, consider these expert insights:

  • Uniform Sizing: Cut your sweet potatoes evenly to ensure uniform cooking.
  • Don’t Rush the Browning: Patience is key when browning butter; cook it slowly until it reaches a nutty aroma and golden color.
  • Temperature Matters: Ensure your oven is fully preheated for crispy edges and tender interiors.
  • Use Parchment Paper: Lining the baking sheet with parchment prevents sticking and aids in cleanup.
  • Experiment with Spices: Feel free to adjust the spices to suit your taste—cayenne pepper for heat or garlic powder for savory notes can be delightful!
  • Fresh Herbs: Always use fresh herbs when possible; they make a significant difference in flavor.
  • Batch Cooking: Double the recipe if you’re serving a crowd; these wedges disappear quickly!

Avoiding Common Mistakes

Even the best cooks can stumble. Here are some common pitfalls and how to avoid them:

  • Overcrowding the Pan: Ensure there’s space between each wedge to allow for even roasting; otherwise, they can steam instead of crisp.
  • Undercooking: Keep an eye on the cooking time; you want them tender with a slight caramelization.
  • Using Imitation Maple Syrup: Stick to pure maple syrup for the best flavor; imitation syrup lacks depth.

Variations to Try

Feeling adventurous? Here are some fun twists on the classic recipe:

  • Spicy Maple Wedges: Add a pinch of cayenne or chili powder for a spicy kick.
  • Sweet and Savory: Mix in crispy bacon bits or prosciutto for a flavor contrast.
  • Cheesy Delight: Sprinkle crumbled feta or goat cheese on top before serving for a creamy finish.
  • Maple Glazed Veggies: Combine with other root vegetables like carrots or parsnips for a colorful medley.

Storage & Make-Ahead Instructions

Want to prepare ahead of time? Here are some tips:

  • Make-Ahead: You can assemble the sweet potatoes with butter and spices a day in advance—just roast them before serving.
  • Storing Leftovers: Keep any leftovers in an airtight container in the fridge for up to 3 days.
  • Reheating: Reheat in the oven or air fryer for best results to retain crispiness.

Frequently Asked Questions

Here are some common questions about making these sweet potato wedges:

  • Can I use other types of potatoes? Yes, you can use regular potatoes, but the sweetness of sweet potatoes is what makes this dish special.
  • Why is my butter turning dark too quickly? Make sure to keep the heat low and stir frequently to prevent burning.
  • Can I freeze the cooked sweet potato wedges? Yes, you can freeze them, but they may lose some texture upon reheating.
  • What can I serve with these wedges? They pair wonderfully with grilled meats, salads, or can be enjoyed as a snack with your favorite dipping sauce.
  • Can I make this dish vegan? Absolutely! Substitute the butter with coconut oil or vegan butter and use maple syrup.
  • How can I add more flavor? Consider marinating the sweet potatoes in the maple mixture for an hour before baking for a deeper flavor.
  • What is the best way to cut sweet potatoes? Using a sharp knife, cut them lengthwise and then into wedges for even cooking.
  • Can I add nuts or seeds? Yes, feel free to top with nuts or seeds of your choice for added crunch and nutrition.

Nutritional Tips & Dietary Adaptations

Sweet potatoes are not just delicious; they are a powerhouse of nutrients. Here’s what you need to know:

  • Rich in Vitamins: Sweet potatoes are high in vitamin A, which supports eye health and boosts immunity.
  • Low Glycemic Index: They are a great option for those monitoring blood sugar levels.
  • Dietary Fiber: High fiber content aids digestion and promotes a feeling of fullness.

Essential Equipment Recommendations

Here are some must-have tools for the perfect preparation:

  • Sharp Chef Knife: For clean and precise cuts on your sweet potatoes.
  • Baking Sheet: A sturdy baking sheet is essential for even roasting.
  • Mixing Bowl: Use a large bowl to toss your ingredients thoroughly.

Serving Suggestions

Serve these sweet potato wedges warm, drizzled with extra maple syrup or topped with a sprinkle of sea salt. They make a delightful side dish for roasted meats, a hearty salad, or even a delightful snack enjoyed on their own.

As you gather around the table with loved ones, let these Maple Browned Butter Roasted Sweet Potato Wedges serve as a reminder of the warmth and joy that home cooking brings. Remember, it’s not just about the food; it’s about the love and memories shared around the table.

So roll up your sleeves, embrace the spirit of cooking, and let the flavors of these wedges fill your home with warmth and happiness.

Maple Browned Butter Roasted Sweet Potato Wedges

Prep Time 10 minutes
Cook Time 25 minutes
Total Time 35 minutes
Servings 4 servings
Calories 250
Enjoy these flavorful roasted sweet potato wedges glazed with maple syrup and browned butter, topped with aromatic spices and crunchy pecans.

Ingredients

Sweet Potatoes

  • 4 medium sweet potatoes (cut into 2-inch wedges)
  • 1/4 cup butter (browned)
  • 1/4 cup maple syrup
  • 1 teaspoon ground cinnamon
  • 1/4 teaspoon ground nutmeg
  • 3 tablespoons minced fresh rosemary
  • 1/3 cup chopped pecans

Instructions 

  • Toss sweet potatoes with butter, maple syrup, spices, rosemary, and pecans until combined. Spread on a greased baking sheet, cut-side down.
  • Roast at 425°F (220°C) for 20-25 minutes until golden and tender. Serve and enjoy!

Notes

For extra crunch, sprinkle with additional pecans before serving.
Calories: 250kcal
Cost: $15
Course: Side Dish
Cuisine: American
Keyword: Sweet Potato

Gather Around: The Heartwarming Journey of Cooking a Crockpot Turkey Breast

Every bite of a well-cooked turkey breast carries with it the echoes of family gatherings and shared laughter. In this recipe, I’m thrilled to share a delightful way to prepare a juicy turkey breast in your crock pot. Imagine the aroma wafting through your home as it slowly cooks, filling the air with warmth and love, just like Grandma used to do. This recipe is not just about the food; it’s about creating memories that last a lifetime.

Why You’ll Love This Recipe

  • Effortless Preparation: With just a few ingredients and minimal prep time, you can set it and forget it. Perfect for busy days!
  • Moist and Tender Meat: The slow cooking process ensures the turkey breast turns out incredibly juicy and flavorful, making every bite a delight.
  • Versatile Meal: This recipe is perfect for any occasion—be it a family dinner, holiday gathering, or meal prep for the week.
  • Health-Conscious Option: Using low-sodium broth and fresh herbs keeps this dish wholesome without sacrificing flavor.
  • Leftover Magic: Not only is this turkey breast delicious fresh, but it also makes for outstanding leftovers that can be used in sandwiches, salads, or soups.

Ingredients Breakdown & Substitutions

Here’s what you’ll need to create this heartwarming dish, along with some handy substitutions:

  • Turkey Breast: 1 (3-4 lb) boneless turkey breast is ideal, but you can also use a bone-in turkey breast for added flavor.
  • Olive Oil: 2 tablespoons help the seasoning adhere. You can substitute with melted butter or avocado oil.
  • Spices: A mix of 1½ teaspoons salt, 1 teaspoon black pepper, garlic powder, onion powder, dried thyme, dried rosemary, and smoked paprika adds depth. Feel free to adjust based on your taste preferences.
  • Onions and Garlic: 1 onion (sliced) and 4 cloves of garlic (smashed) enhance flavor. You can swap onions for shallots or leeks for a sweeter note.
  • Broth: 1½ cups of low-sodium chicken broth keeps the turkey moist. Vegetable broth or even water can serve in a pinch.
  • Butter: 4 tablespoons cut into pieces, or use a herb butter mix for an extra flavor kick.
  • Fresh Herbs: Garnish with fresh rosemary or thyme for a beautiful finish.

Pro Tips for the Perfect Crockpot Turkey Breast

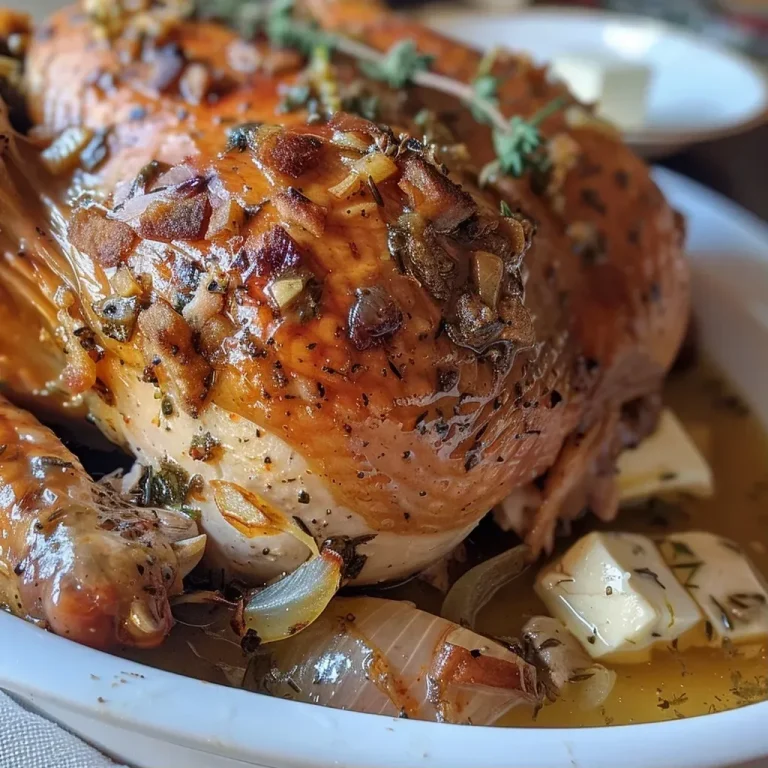
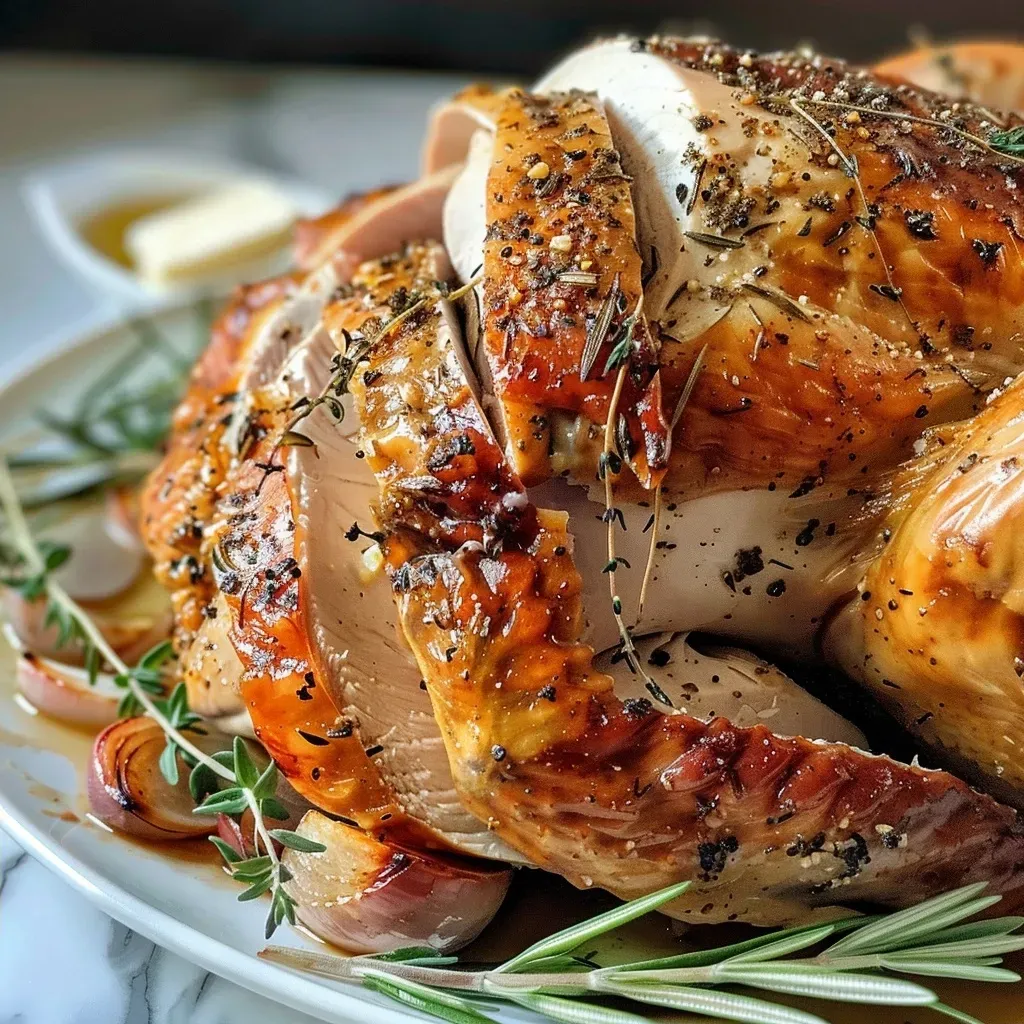
Side view of succulent turkey breast garnished with fresh rosemary.
  • Pat It Dry: Always pat the turkey breast completely dry before seasoning to promote browning and flavor absorption.
  • Herb Butter: If you’re using herb butter, gently loosen the skin and rub half under it for maximum flavor.
  • Temperature Check: Aim for an internal temperature of 150-155°F before resting to ensure the turkey reaches 165°F as it rests.
  • Resting Time: Allow the turkey to rest for 15-20 minutes before slicing to help the juices redistribute.
  • Slice Against the Grain: This ensures tender slices that are easier to chew.
  • Cook Low and Slow: Cooking on LOW for 6-7 hours is best, but if you’re in a hurry, HIGH for 3-4 hours works too.
  • Use a Meat Thermometer: An instant-read thermometer can save you from over or undercooking your turkey.
  • Flavor Boost: Don’t hesitate to add other aromatics like carrots or celery in the broth for added flavor.

Common Mistakes & Troubleshooting

Even the best cooks make mistakes. Here are some common pitfalls and how to avoid them:


Professional Chef Knife Set

★ Recommended Kitchen Tool

Professional Chef Knife Set

Make this recipe even easier with a quality Professional Chef Knife Set — a must-have kitchen staple!


🛒 Shop This Tool →

As an Amazon Associate, we earn from qualifying purchases.
  • Dry Turkey: If the turkey turns out dry, it may have been overcooked. Always monitor the temperature closely.
  • Under-seasoned: If it lacks flavor, ensure that you’re using enough seasoning and consider adjusting it before cooking.
  • Sticking to the Pot: If the turkey sticks, ensure that the bottom of the pot is well coated with broth or oil.
  • Flavors Not Infusing: If the flavors aren’t as robust as you’d like, consider adding more herbs or spices to the broth.

Delicious Variations

Once you master this recipe, feel free to experiment with these variations:

  • Herbed Citrus Turkey: Add slices of lemon and orange with fresh herbs for a zesty twist.
  • Spicy Kick: Rub the turkey with cayenne pepper or chili powder for a spicy version.
  • Maple Glaze: Drizzle a little maple syrup over the turkey before cooking for a sweet, caramelized finish.
  • BBQ Style: Use your favorite BBQ sauce in place of broth for a smoky, tangy flavor.

Storage & Make-Ahead Instructions

This crockpot turkey breast is perfect for meal prepping!

  • Refrigeration: Store leftovers in an airtight container in the refrigerator for up to 4 days.
  • Freezing: Freeze slices in freezer bags for up to 3 months. Just ensure to remove as much air as possible to prevent freezer burn.
  • Reheating: Reheat in the microwave or gently in a skillet over low heat, adding a splash of broth to keep it moist.

Frequently Asked Questions

  • How long does it take to cook a turkey breast in a slow cooker? Typically, it takes about 6-7 hours on LOW or 3-4 hours on HIGH.
  • Can I cook a frozen turkey breast in the crock pot? It’s not recommended to cook a frozen turkey in a slow cooker due to uneven cooking. Always thaw first.
  • What can I do with leftover turkey? Leftover turkey can be used in sandwiches, salads, soups, or even casseroles.
  • How do I know when the turkey breast is done? The internal temperature should reach 165°F. Use an instant-read thermometer for accuracy.
  • Can I double this recipe? Yes, you can double the ingredients, but ensure your slow cooker is large enough to accommodate the turkey.
  • What if I don’t have chicken broth? You can use vegetable broth or water as a substitute.
  • Can I cook this overnight? Yes, you can cook on LOW overnight, but ensure your slow cooker has a timer feature for safety.
  • What side dishes pair well with turkey breast? Consider classic sides like mashed potatoes, green beans, or a fresh salad.

Nutritional Tips & Dietary Adaptations

This turkey breast recipe is not only delicious but also adaptable for various dietary needs:

  • Low-Sodium Option: Use low-sodium broth and reduce added salt.
  • Gluten-Free: This recipe is naturally gluten-free. Just ensure any broth or seasonings used are certified gluten-free.
  • Dairy-Free: Omit butter or use a dairy-free alternative to keep it dairy-free.
  • Paleo-Friendly: Stick to whole, unprocessed ingredients and avoid added sugars.

Essential Equipment Recommendations

To make this recipe truly shine, you’ll need:

  • Crock Pot: A reliable slow cooker is essential. I recommend one with a timer function for convenience.
  • Meat Thermometer: To ensure perfectly cooked turkey every time.
  • Cutting Board and Sharp Knife: For easy slicing and serving.

Serving Suggestions

When it comes time to serve your beautifully cooked turkey breast, consider these delightful pairings:

  • Traditional Sides: Mashed potatoes, stuffing, and cranberry sauce are classic companions.
  • Fresh Salads: A crisp green salad with a light vinaigrette can balance the richness of the turkey.
  • Comforting Sauces: Serve with homemade gravy or a flavorful sauce to enhance the meal.

In conclusion, cooking a crock pot turkey breast isn’t just about following a recipe; it’s about embracing the love and memories that come with every meal. With each ingredient and step, you’re not just creating food, but nurturing connections that last. So gather your loved ones, set your slow cooker, and let the magic unfold. I’m so glad to share this journey with you—thank you for letting me be part of your kitchen stories!

The Juiciest Crockpot Turkey Breast

Prep Time 15 minutes
Cook Time 6 hours 30 minutes
Total Time 6 hours 45 minutes
Servings 8 servings
Calories 350
This tender and flavorful crockpot turkey breast is perfect for a stress-free, juicy main dish. Simple ingredients and slow cooking ensure maximum flavor and moisture.

Ingredients

Meat

  • 1 lb boneless turkey breast (3-4 lb or bone-in (see note))
  • 2 tablespoons olive oil
  • 1.5 teaspoons salt
  • 1 teaspoon black pepper
  • 1 teaspoon garlic powder
  • 1 teaspoon onion powder
  • 1 teaspoon dried thyme
  • 1 teaspoon dried rosemary
  • 0.5 teaspoon smoked paprika

Vegetables

  • 1 piece onion (sliced)
  • 4 cloves garlic, smashed

Liquids

  • 1.5 cups low-sodium chicken broth

Butter

  • 4 tablespoons butter, softened
  • 2 cloves garlic, minced
  • 1 tablespoon fresh rosemary, chopped
  • 1 tablespoon fresh thyme, chopped

Instructions 

  • Pat the turkey dry. Mix herb butter with garlic, rosemary, and thyme, then loosen skin and rub under and over it. If not using herb butter, season the turkey with spices and olive oil.
  • Place sliced onion and smashed garlic in the slow cooker, pour in chicken broth, then place turkey on top. Scatter butter pieces over the turkey.
  • Cover and cook on LOW for 6-7 hours or on HIGH for 3-4 hours, until internal temperature reaches 150-155°F. Rest for 15-20 minutes before slicing.

Notes

Use a meat thermometer to ensure perfect doneness. Resting the turkey is essential for juicy results.
Calories: 350kcal
Cost: $15
Course: Main Course
Cuisine: American
Keyword: Turkey

Creating Bite-Sized Memories: The Ultimate Guide to Easy Pie Cookies

Welcome to a delightful journey where we celebrate the beauty of cooking and the joy of sharing delicious treats with our loved ones. Today, we’re diving into the world of easy pie cookies—a nostalgic dessert that brings back cherished memories of family gatherings and the warmth of the kitchen. With these bite-sized wonders, you’ll discover how to craft cookies that encapsulate the flavors of traditional pies, all while being easy to make and share.

These sweet little creations are perfect for any occasion, whether it’s a family gathering, a picnic in the park, or just a simple treat to enjoy with a cup of tea. The beauty of pie cookies lies in their versatility; they can be filled with fruity fillings, creamy delights, or even chocolate, making them a hit for everyone. So roll up your sleeves and let’s get to baking!

Why You’ll Love This Recipe

  • Quick and easy preparation: With pre-made pie crusts, you can whip up these cookies in no time, making them a perfect last-minute dessert.
  • Customizable fillings: Choose from a variety of fillings—apple, cherry, blueberry, or even chocolate—allowing you to cater to everyone’s taste.
  • Perfect for sharing: These mini delights are ideal for parties, gatherings, or simply to enjoy at home, spreading joy with every bite.
  • Kid-friendly fun: Get the little ones involved in the kitchen! They’ll love helping to fill and shape these cookies, making it a fun family activity.
  • Nostalgic flavors: Each bite is reminiscent of grandma’s kitchen, bringing warmth and comfort that only homemade desserts can provide.

Ingredients Needed

Before we start baking, let’s gather our ingredients. Here’s what you’ll need to create these delicious pie cookies:


Cake Decorating Set

★ Recommended Kitchen Tool

Cake Decorating Set

Make this recipe even easier with a quality Cake Decorating Set — a must-have kitchen staple!


🛒 Shop This Tool →

As an Amazon Associate, we earn from qualifying purchases.
  • 2 boxes of store-bought double pie crust (4 pie doughs in total, thawed to room temperature)
  • 1 can of E.D.SMITH® Apple Pie Filling
  • 1 can of E.D.SMITH® Cherry Pie Filling
  • 1 can of E.D.SMITH® Blueberry Pie Filling
  • 1 large egg (for egg wash)
  • 1 tablespoon sugar or coarse sugar (optional)
  • 1 1/2 cups powdered sugar
  • 3 tablespoons heavy cream
  • 1 teaspoon pure vanilla extract

Feel free to experiment with your favorite pie fillings or even homemade options if you’re feeling adventurous!

How to Make Pie Cookies

Juicy Easy Pie Cookies displayed from the side, highlighting a golden brown crust and vibrant fillings.

Let’s dive into the steps to create these delightful bite-sized cookies. Follow this simple process, and you’ll have a tray full of deliciousness in no time:

  1. Preheat your oven to 350 degrees F. Line two baking sheets with parchment paper or silicone baking mats.
  2. Prepare the dough: On a lightly floured surface, unroll the pie dough. Using a 3-inch cookie cutter, cut out 12 bottoms. Reroll the dough scraps to make a total of 24 bottoms, placing each on the prepared baking sheets.
  3. Add the filling: Place 1 tablespoon of your preferred filling flavor on each bottom. If using apple filling, chop it into smaller pieces for better distribution.
  4. Create the lattice: Unroll a third pie dough on a floured surface. Cut thin strips using a pizza wheel. Beat the egg in a small bowl and brush it around the edges of each bottom. Lay the strips across the filling in a crisscross pattern, brushing egg wash on top of each strip.
  5. Add the tops: Unroll the fourth pie dough and cut out tops to cover the remaining bottoms. Make an “X” shaped slit in each top, place them over the filled bottoms, and crimp the edges using a fork.
  6. Brush and bake: Brush the tops with egg wash and sprinkle with sugar if desired. Bake for 20-25 minutes until they are golden brown. Allow to cool on a rack.
  7. Prepare the glaze: While the cookies are baking, whisk together powdered sugar, heavy cream, and vanilla extract until smooth. Adjust the consistency as needed and pipe onto cooled cookies.

Pro Tips for Perfect Pie Cookies

  • Chill your dough: For the best results, chill your pie dough before cutting. This helps maintain the shape during baking.
  • Don’t overfill: A tablespoon of filling is perfect; overfilling can cause the cookies to burst open while baking.
  • Experiment with flavors: Try incorporating spices like cinnamon or nutmeg into the fillings for an extra flavor kick.
  • Use a piping bag: For neat icing application, use a piping bag with a small tip to drizzle the glaze over the cookies.
  • Mix fillings: Combine different pie fillings for a unique twist, like a cherry-apple mix!
  • Keep an eye on baking time: Ovens can vary, so check on your cookies a few minutes before the recommended bake time.
  • Use a silicone mat: Baking mats can help prevent sticking and ensure even cooking.
  • Try different toppings: Consider adding sprinkles or a dash of cocoa powder to the icing for added flair.

Common Mistakes and Troubleshooting

Even the best of us can make mistakes in the kitchen. Here are some common pitfalls and how to avoid them:

  • Overbaking: Keep an eye on your cookies. They should be golden brown but not too dark.
  • Underfilled cookies: Make sure to add enough filling to keep them moist and flavorful.
  • Sticky dough: If your dough is too sticky, add a little flour while rolling it out to prevent it from sticking.
  • Uneven baking: Rotate your baking sheets halfway through baking for even results.

Variations to Try

Once you’ve mastered the basic recipe, try these fun variations:

  • Chocolate Cream Pie Cookies: Fill with chocolate pudding and top with whipped cream.
  • Peach Pie Cookies: Substitute peach filling for a summer twist.
  • Mini Pumpkin Pie Cookies: Use pumpkin filling for a fall-inspired treat.
  • Nutty Pecan Pie Cookies: Incorporate chopped pecans into your filling for a crunchy texture.

Storage and Make-Ahead Instructions

These pie cookies are best enjoyed fresh, but you can store them for later:

  • Room Temperature: Keep in an airtight container for up to 3 days.
  • Refrigerator: For longer freshness, store in the fridge for up to a week.
  • Freezing: They can be frozen for up to 3 months. Layer between parchment paper and seal in an airtight container.

Frequently Asked Questions

  • Can I use homemade pie crust? Yes! Homemade crust adds a personal touch, just ensure it’s chilled before use.
  • What is the best filling? It depends on personal preference! Traditional fruit fillings are popular, but feel free to experiment.
  • How do I know when they are done? They should be golden brown. Keep an eye on the edges for best results.
  • Can I make these gluten-free? Absolutely! Use gluten-free pie crust for a delicious alternative.
  • Can I use store-bought filling? Yes, store-bought fillings are a convenient option and work wonderfully.
  • How can I make these healthier? Consider using whole wheat pie crust and reducing sugar in the glaze.
  • What if my cookies are too soft? Ensure they are cooled completely before storing to prevent them from becoming soggy.
  • Can I make these ahead of time? Yes! You can prepare the cookies and freeze them before baking.

Nutritional Tips and Dietary Adaptations

While these cookies are a treat, you can make them a bit healthier:

  • Use less sugar: Reduce the amount of sugar in the glaze for a lighter option.
  • Whole grain crust: Opt for whole wheat pie crust for added fiber.
  • Fruit fillings: Choose natural fruit fillings without added sugars for a healthier choice.

Equipment Recommendations

Here’s what you’ll need to get started:

  • Rolling pin: For rolling out your dough smoothly.
  • Cookie cutter: A 3-inch cutter works perfectly for these cookies.
  • Pizza cutter: Great for cutting lattice strips quickly.
  • Parchment paper: Essential for non-stick baking.
  • Baking sheets: Use two to maximize your baking time.

Serving Suggestions

When it comes to serving these delightful pie cookies, here are a few ideas:

  • Dust with powdered sugar: A light dusting adds a beautiful touch.
  • Pair with ice cream: Serve warm cookies with a scoop of vanilla or cinnamon ice cream.
  • Drizzle with chocolate: For a decadent treat, drizzle melted chocolate over the top.
  • Offer a variety: Create a dessert platter with different fillings for everyone to sample.

Final Thoughts

As we wrap up this journey into the world of easy pie cookies, remember that cooking is not just about the food; it’s about the love and memories you create in the kitchen. These delightful treats are a beautiful way to share moments with family and friends, reminding us that every bite carries a story. So gather your loved ones, bake some cookies, and enjoy the sweet moments together. Happy baking!

Easy Pie Cookies

Prep Time 20 minutes
Cook Time 25 minutes
Total Time 45 minutes
Servings 24 cookies
Calories 150
Delight in these adorable pie cookies filled with fruit fillings and topped with icing, perfect for a quick and tasty treat.

Ingredients

Pie Crusts

  • 2 boxes store-bought double pie crust (thawed to room temp)

Filling

  • 1 can E.D.SMITH® Apple Pie Filling
  • 1 can E.D.SMITH® Cherry Pie Filling
  • 1 can E.D.SMITH® Blueberry Pie Filling

Egg Wash & Topping

  • 1 large egg
  • 1 tbsp sugar or coarse sugar (optional)
  • 1 1/2 cup Powdered Sugar
  • 3 tbsp Heavy Cream
  • 1 tsp Pure Vanilla Extract

Instructions 

  • Preheat oven to 350°F (175°C). Cut out 12 bottoms from each pie crust and place on baking sheets.
  • Place 1 Tbsp of filling on each bottom, then cut lattice strips from the third dough and assemble with egg wash.
  • Cut out tops from the fourth dough, make slits, and seal with crimped edges. Brush with egg wash and sprinkle sugar if desired.
  • Bake for 20-25 minutes until golden brown. Cool on a rack.
  • Whisk powdered sugar, heavy cream, and vanilla to make icing. Pipe onto cooled pie cookies and enjoy!

Notes

Use different fruit fillings for variety, and reroll scraps to maximize yield.
Calories: 150kcal
Cost: $15
Course: Dessert
Cuisine: American
Keyword: cookies, Fruit Filling, pie

Welcome to the Heart of Culinary Comfort

There’s something truly magical about the aroma of freshly baked bread wafting through your home, wrapping you in a warm embrace of nostalgia. Today, we’re diving into a cherished recipe: Garlic Parmesan Pull-Apart Rolls. These rolls are not just a side dish; they’re an experience that brings families and friends together, much like the gatherings around my grandmother’s table in Louisiana. With a delicate garlic flavor and a touch of cheesy goodness, each roll is a reminder that cooking is about sharing love and memories.

Why You’ll Love This Recipe

These pull-apart rolls are the perfect blend of flavor, texture, and heart. Here’s why this recipe deserves a spot in your kitchen:

  • Easy to Prepare: The dough comes together quickly and doesn’t require any advanced baking skills.
  • Versatile Serving Options: Ideal for family dinners, holiday feasts, or casual gatherings—perfect for any occasion.
  • Memorable Flavor: The combination of garlic and Parmesan creates a savory burst of flavor that will have everyone coming back for seconds.
  • Perfect for Sharing: These rolls are meant to be pulled apart, making them a fun and interactive addition to your meal.
  • Make-Ahead Friendly: You can prepare the dough in advance, allowing for stress-free entertaining.

Ingredients Breakdown

Let’s gather our ingredients! Here’s what you’ll need to create these delightful rolls:


Professional Chef Knife Set

★ Recommended Kitchen Tool

Professional Chef Knife Set

Make this recipe even easier with a quality Professional Chef Knife Set — a must-have kitchen staple!


🛒 View on Amazon →

As an Amazon Associate, we earn from qualifying purchases.
  • 1/3 cup (80g) whole milk: Provides moisture and richness.
  • 2 tablespoons (16g) bread flour: Essential for making the tangzhong (a key technique in this recipe).
  • 1/3 cup plus 1 tablespoon (100ml) whole milk: Used for proofing the yeast.
  • 1 1/2 teaspoons (5.4g) active dry yeast: The magic ingredient that makes the rolls rise.
  • 2 1/3 cups (314g) bread flour: High protein content gives the rolls their chewy texture.
  • 2 large eggs (114g) at room temperature, divided: One for the dough and one for the egg wash.
  • 1 teaspoon (6g) kosher salt: Enhances flavor.
  • 4 teaspoons (16g) sugar: Balances the savory notes.
  • 3 tablespoons (42g) unsalted butter at room temperature, cut into 1/2-inch pieces: Adds richness to the dough.
  • Neutral oil: For greasing the baking pan.
  • A pinch of flaky salt: For topping the rolls before baking.
  • 1/4 cup (56g) unsalted butter at room temperature: For making the compound butter.
  • 1/2 teaspoon garlic powder: Infuses flavor into the compound butter.
  • 1 tablespoon fresh parsley, minced: Adds a fresh touch.
  • 2 tablespoons grated Parmigiano-Reggiano cheese, plus more for topping: Elevates the cheese flavor.

If you need to make substitutions, here are some suggestions:

  • Milk: You can use almond milk or oat milk for a dairy-free version.
  • Bread flour: All-purpose flour works, though it may yield slightly denser rolls.
  • Butter: Coconut oil or vegan butter can replace unsalted butter for a dairy-free option.
  • Garlic powder: Fresh minced garlic can be used for a stronger flavor.

Steps to Create Your Pull-Apart Rolls

Side view of soft, gooey garlic Parmesan rolls with flaky salt sprinkled on top.

Now, let’s get our hands a little floury and create these delicious rolls. Here’s a step-by-step guide:

  1. Make the Tangzhong: In a small saucepan, whisk together the milk and flour until no lumps remain. Set the saucepan over medium heat and whisk constantly until the mixture starts to thicken into a paste, reaching about 149°F. Remove from heat and let cool to room temperature.
  2. Proof the Yeast: In a microwave-safe measuring cup, heat the additional milk for about 20 seconds until it’s warm but not hot (less than 110°F). Whisk in the yeast and let sit for 5 to 10 minutes until foamy.
  3. Prepare the Dough: In the bowl of a stand mixer, combine the bread flour, one egg, salt, sugar, and butter. Add the cooled tangzhong and proofed yeast mixture. Attach the dough hook and mix on low speed for 30 seconds to 1 minute until a shaggy dough forms.
  4. Knead the Dough: Increase the mixer speed to medium and knead for 8 to 10 minutes until the dough is strong enough to pass the windowpane test. If the dough tears easily, continue kneading.
  5. First Rise: Lightly grease the mixing bowl with oil. Shape the dough into a ball, cover it, and let it proof at room temperature for about 1 1/2 hours or until doubled in size.
  6. Prepare the Baking Pan: Grease a baking pan on all sides with oil and line it with parchment paper, leaving an overhang to lift the rolls out easily.
  7. Shape the Rolls: Gently deflate the dough and divide it into nine equal portions. Shape each portion into a ball by bringing the corners to the center and sealing tightly. Place the balls seam side down in the pan.
  8. Second Rise: Cover the pan and let the rolls rise for another 45 minutes to 1 hour, until doubled. To test, gently press a fingertip into the dough; if the indent fills back halfway, they’re ready.
  9. Preheat the Oven: Towards the end of the final proof, preheat your oven to 375°F.
  10. Egg Wash: In a small bowl, whisk together the remaining egg with a teaspoon of water and brush the tops of the rolls. Sprinkle with flaky salt.
  11. Bake the Rolls: Bake in the preheated oven for about 20 minutes, rotating halfway through. The rolls should be golden brown and puffed up.
  12. Make the Compound Butter: While the rolls bake, mix the remaining butter, garlic powder, parsley, and Parmesan until well combined.
  13. Serve: If serving immediately, brush the hot rolls with the garlic compound butter. Let cool for 10 minutes, then transfer to a wire rack. For make-ahead, cool completely and store in an airtight container.

Pro Tips for Success

Here are some expert insights to elevate your roll-making game:

  • Room Temperature Ingredients: Ensure all dairy and eggs are at room temperature for better incorporation.
  • Don’t Rush the Proofing: Allow the dough to rise until it has doubled; this is crucial for light, fluffy rolls.
  • Windowpane Test: Master this test to ensure your dough is sufficiently kneaded and will rise well.
  • Use a Kitchen Scale: For precise measurements, especially with flour, a kitchen scale can ensure consistency.
  • Flour Your Surface: Lightly flour your work surface when dividing and shaping the dough to prevent sticking.
  • Check Oven Temperature: An oven thermometer can help ensure your rolls bake at the right temperature.
  • Keep the Rolls Covered: During the second rise, keep the rolls covered to prevent them from drying out.
  • Experiment with Flavors: Don’t hesitate to add herbs or spices to the dough for a personal touch.
  • Perfect Timing: Keep an eye on the rolls as they bake to achieve that beautiful golden color without overbaking.

Common Mistakes and Troubleshooting

Even the best cooks make mistakes. Here are some common pitfalls to avoid:

  • Too Hot or Cold Yeast: If the milk is too hot, it can kill the yeast. Ensure it’s warm to the touch, about 110°F.
  • Underproofing: If the rolls don’t rise enough, they’ll be dense. Always let them double in size.
  • Overkneading: Kneading too long can make the rolls tough. Stop once the dough passes the windowpane test.
  • Skipping the Egg Wash: This step adds a beautiful finish to your rolls. Don’t skip it!

Delicious Variations

Feel free to get creative with these variations on the classic recipe:

  • Herb-Infused Rolls: Add a teaspoon of dried Italian herbs to the dough for extra flavor.
  • Cheesy Garlic Rolls: Mix in shredded mozzarella for a gooey, cheesy center.
  • Sweet Dinner Rolls: Replace garlic with cinnamon and sugar for a sweet twist.
  • Spicy Rolls: Incorporate crushed red pepper flakes into the dough for a kick.

Storage and Make-Ahead Instructions

To keep your rolls fresh:

  • Storing Leftovers: Place cooled rolls in an airtight container at room temperature for up to 2 days.
  • Freezing: Wrap the rolls tightly in foil and freeze for up to 3 months. To reheat, wrap in foil and warm in a 350°F oven for about 10 minutes.
  • Make-Ahead Option: Prepare the dough and shape it into balls, then refrigerate before the second rise. Allow it to come to room temperature before baking.

Frequently Asked Questions (FAQs)

Let’s address some common questions regarding these pull-apart rolls:

  • Can I make these rolls ahead of time? Yes, you can prepare the dough and refrigerate it overnight. Allow it to come to room temperature before baking.
  • What pairs well with Garlic Parmesan Rolls? They pair beautifully with soups, salads, or as a side to any main dish.
  • How do I store leftover rolls? Place them in an airtight container at room temperature for up to 2 days.
  • Can I freeze the rolls? Yes, wrap them tightly and freeze. Reheat in a 350°F oven to serve.
  • Why are my rolls dense? This could be due to underproofing or not kneading the dough enough.
  • How do I know when the rolls are done baking? They should be golden brown on top and sound hollow when tapped.
  • Can I use all-purpose flour instead of bread flour? Yes, but the texture may be slightly different.
  • What if my dough doesn’t rise? It could be due to inactive yeast. Ensure your yeast is fresh and your liquids are the right temperature.

Nutritional Tips and Dietary Adaptations

For those watching their diets, here are some adjustments:

  • Gluten-Free Option: Use a gluten-free all-purpose flour blend, ensuring it contains a binding agent like xanthan gum.
  • Lower Calorie: Substitute some of the butter with applesauce for a lower-calorie option.
  • Plant-Based: Use plant-based milk and vegan butter to make the recipe dairy-free.
  • Reduce Sodium: Cut back on salt in the dough if you’re watching sodium intake.

Equipment Recommendations

Here’s what you’ll need to get started:

  • Stand Mixer: Ideal for kneading dough, but you can knead by hand as well.
  • Measuring Cups and Spoons: Accurate measurements are key to baking success.
  • Oven Thermometer: Ensures your oven is at the correct temperature for baking.
  • Baking Pan: A 9-inch square or round baking pan works well for these rolls.
  • Parchment Paper: Helps with easy removal of the rolls from the pan.

Serving Suggestions

These rolls can be served in many delightful ways:

  • Warm from the Oven: Serve immediately after baking for the best flavor and texture.
  • With Dipping Sauces: Pair with marinara or a garlic herb dip for added flavor.
  • As a Side: Perfect alongside soups, stews, or salads.
  • With Compound Butter: Brush with extra garlic herb butter right before serving for an irresistible finish.

Conclusion: A Recipe for Togetherness

As you embark on this culinary journey of making Garlic Parmesan Pull-Apart Rolls, remember that cooking is about more than just the food—it’s about the love and memories shared with those around you. Whether it’s a cozy family dinner or a festive gathering, these rolls are sure to be a highlight on your table. So gather your loved ones, roll up your sleeves, and enjoy the process of creating something beautiful together. Happy baking!

Garlic Parmesan Pull-Apart Rolls

Prep Time 30 minutes
Cook Time 20 minutes
Total Time 50 minutes
Servings 9 pieces
Calories 250
Soft, buttery rolls infused with garlic and Parmesan, perfect for sharing. These pull-apart rolls are easy to make and irresistibly delicious.

Ingredients

Dough

  • 1/3 cup whole milk
  • 2 tablespoons bread flour
  • 1/3 cup whole milk (additional for tangzhong)
  • 1 1/2 teaspoons active dry yeast
  • 2 1/3 cups bread flour
  • 2 large eggs (divided)
  • 1 teaspoon kosher salt
  • 4 teaspoons sugar
  • 3 tablespoons unsalted butter (at room temperature, cut into pieces)

For greasing

  • Neutral oil (for greasing)

Topping

  • A pinch flaky salt (for topping)
  • 1/4 cup unsalted butter (at room temperature)
  • 1/2 teaspoon garlic powder
  • 1 tablespoon fresh parsley (minced)
  • 2 tablespoons grated Parmigiano-Reggiano cheese (plus more for topping)

Instructions 

  • Prepare tangzhong by whisking milk and flour, then cook until thickened; cool.
  • Activate yeast by warming milk, whisking yeast, and waiting until foamy.
  • Mix flour, eggs, salt, sugar, butter, cooled tangzhong, and yeast in a mixer; knead until smooth and elastic.
  • Let dough rise until doubled, then divide into nine portions, shape into balls, and place in a greased pan.
  • Proof the shaped dough until doubled, then brush with egg wash, sprinkle with flaky salt, and bake for 20 minutes until golden.
  • Make garlic butter by mixing butter, garlic powder, parsley, and Parmesan; brush over hot rolls before serving.

Notes

For best results, ensure proper proofing times and do not skip kneading to develop gluten structure.
Calories: 250kcal
Cost: $15
Course: bread
Cuisine: American
Keyword: Bread, garlic, parmesan